Documentation Index
Fetch the complete documentation index at: https://fieldpulse.mintlify.app/llms.txt
Use this file to discover all available pages before exploring further.
Intercom Sync Report — 2026-04-17
Generated by sync-from-intercom.ts
Summary
| Bucket | Count |
|---|---|
| Updated | 51 |
| Protected (diff only) | 33 |
| New articles | 56 |
| Deleted/unpublished | 6 |
| Unchanged | 282 |
Updated Articles
FieldPulse API
- Module: API
- File:
fieldpulse-api.mdx - Intercom URL: https://help.fieldpulse.com/en/articles/9402194-fieldpulse-api
- Last modified: 2026-04-06
Index: fieldpulse-api.mdx
===================================================================
--- fieldpulse-api.mdx existing
+++ fieldpulse-api.mdx intercom
@@ -1,50 +0,0 @@
-<Info>
- **Looking for API documentation?** Our full interactive API reference has moved to the [API Reference](/api-reference) tab. You can browse all endpoints, test requests with the built-in playground, and view code examples in curl, Python, and JavaScript.
-</Info>
-
-APIs, or Application Programming Interfaces, allow different software applications to communicate and share information with each other. This is helpful for displaying one app's data in another application, or having certain actions in one application trigger a response in another.
-
-## Getting Started
-
-To begin using the FieldPulse API:
-
-1. **Get an API key** — Contact us at [support@fieldpulse.com](mailto:support@fieldpulse.com) or use the chat feature in the bottom right corner of your screen.
-2. **Explore the endpoints** — Visit the [API Reference](/api-reference) tab for interactive documentation of all 106 endpoints across 25 resource groups.
-3. **Authenticate** — Include your API key in the `x-api-key` header with every request.
-
-_(**Note:** We will notify all API users if any breaking changes are going to be made. Additionally, we only offer webhooks for job statuses at this time.)_
-
----
-
-## API Endpoint & Function Overview
-
-| | |
-| --- | --- |
-| **Endpoint** | **Actions** |
-| **Assets & Asset Categories** | Create, update, delete, and retrieve |
-| **Contracts** | Retrieve |
-| **Customers** | Create, update, delete, and retrieve |
-| **Custom Fields** | Create, update, delete, and retrieve |
-| **Estimates** | Create, update, delete, and retrieve |
-| **Invoices** | Create, update, delete, and retrieve |
-| **Jobs** | Create, update, delete, and retrieve |
-| **Lead Source** | Retrieve |
-| **Locations** | Create, update, delete, and retrieve |
-| **Material Lists** | Create, update, delete, and retrieve |
-| **Payments** | Create, update, delete, and retrieve |
-| **Pipeline Status** | Retrieve |
-| **Projects** | Create, update, delete, and retrieve |
-| **Purchase Orders** | Create, update, delete, and retrieve |
-| **Subtasks** | Create, update, delete, and retrieve |
-| **Tags** | Create, update, delete, and retrieve |
-| **Teams** | Retrieve |
-| **Timesheets** | Create, update, delete, and retrieve |
-| **Comments** | Create, update, delete, and retrieve |
-| **Users** | Retrieve |
-| **Vendors** | Retrieve |
-
----
-
-**Have additional questions?**
-
-_Contact us at [support@fieldpulse.com](mailto:support@fieldpulse.com) or use the chat feature in the bottom right corner of your screen._
\ No newline at end of file
Adding Labor to Estimates & Invoices
- Module: Invoices/Estimates
- File:
adding-labor-to-estimates-invoices.mdx - Intercom URL: https://help.fieldpulse.com/en/articles/6542489-adding-labor-to-estimates-invoices
- Last modified: 2026-03-19
Index: adding-labor-to-estimates-invoices.mdx
===================================================================
--- adding-labor-to-estimates-invoices.mdx existing
+++ adding-labor-to-estimates-invoices.mdx intercom
@@ -1,53 +0,0 @@
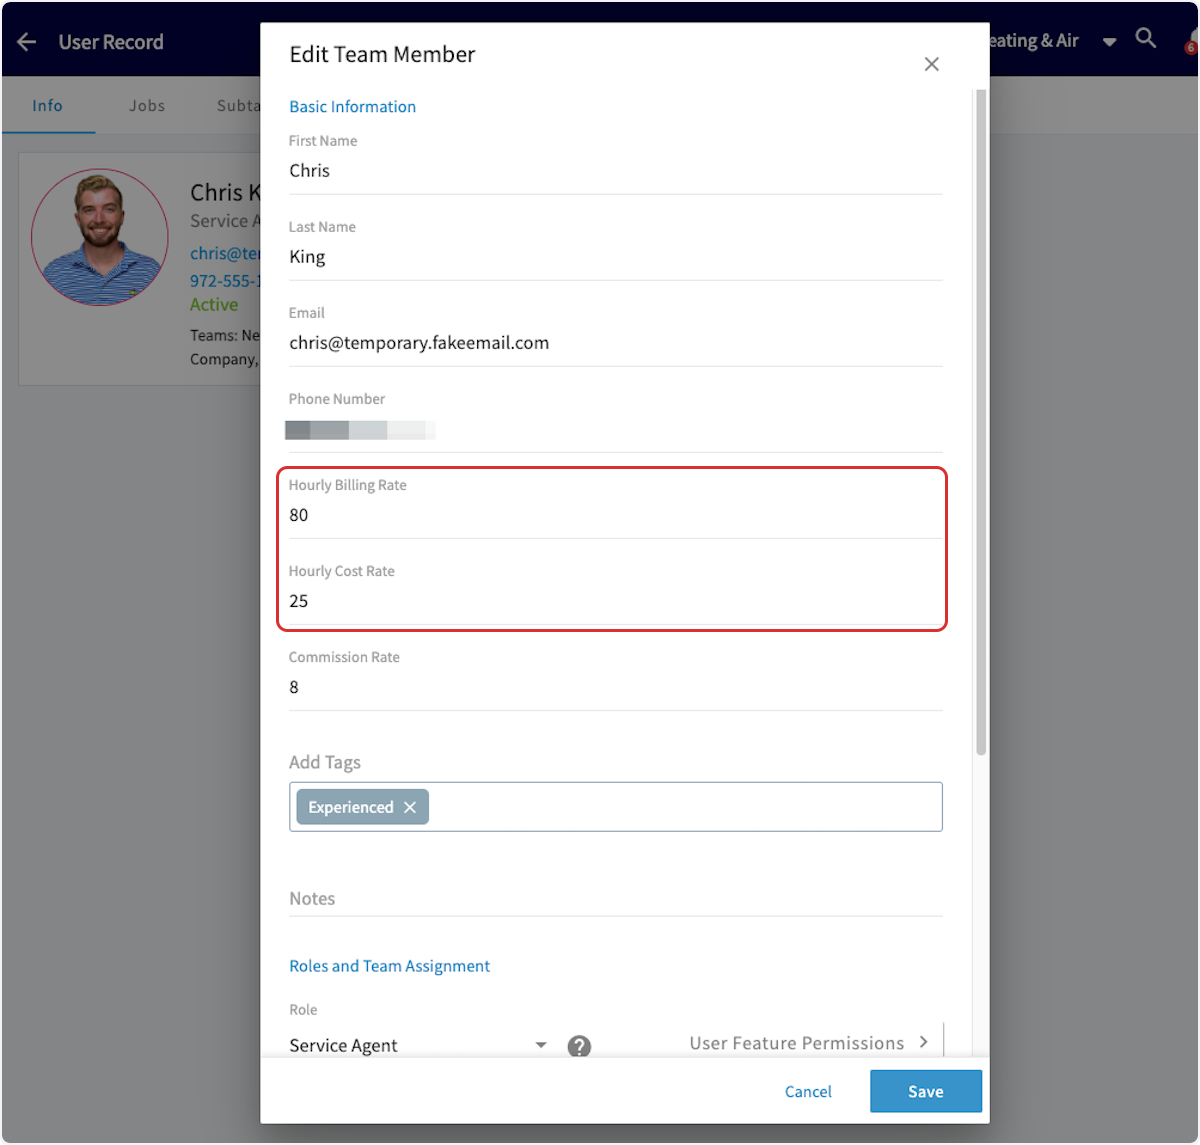
-Before you get started, be sure that your team members have **Hourly Billing Rate** and **Hourly Cost Rate** set up in _Company Settings_. As a reminder, **Hourly Billing Rate** is the rate you charge your customers per hour for a technician, whereas **Hourly Cost Rate** is the rate per hour that this technician costs your business. To learn more, [Adding New Users](/core-platform/user-management/adding-new-users).
-
-
-
----
-
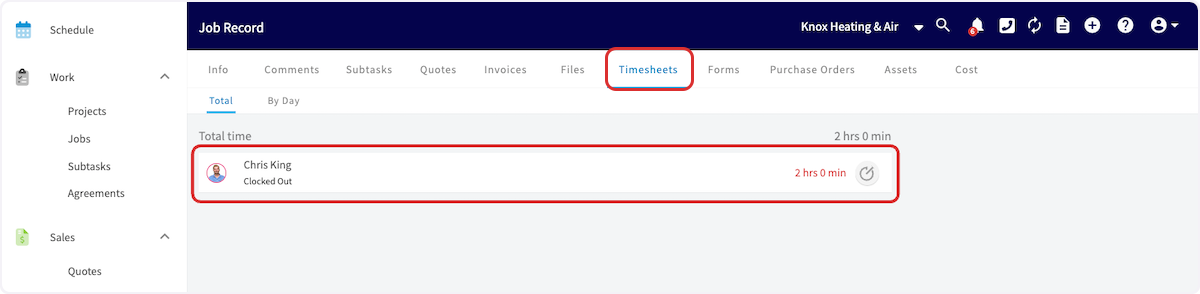
-When utilizing _Job Timesheets_, your team member will record the time spent on the job by clocking in and out. After the job has been completed, you can now create your invoice and insert the associated timesheets.
-
-
-
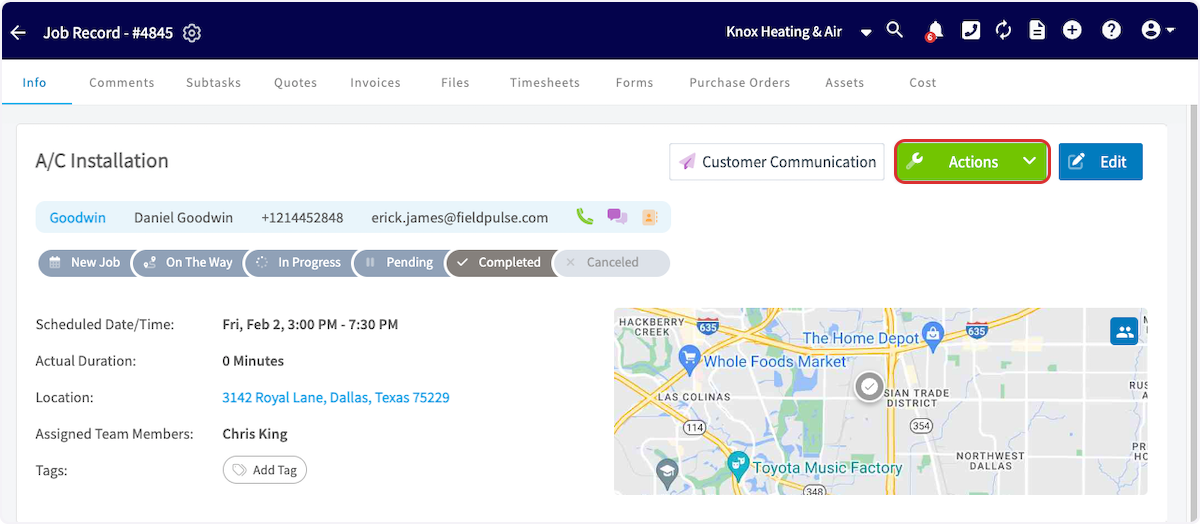
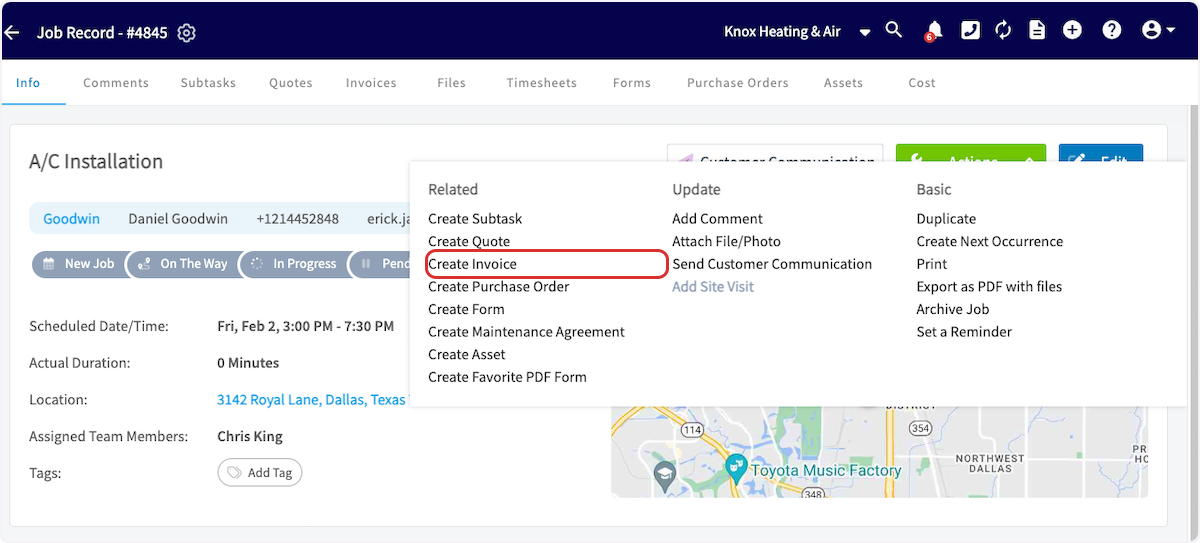
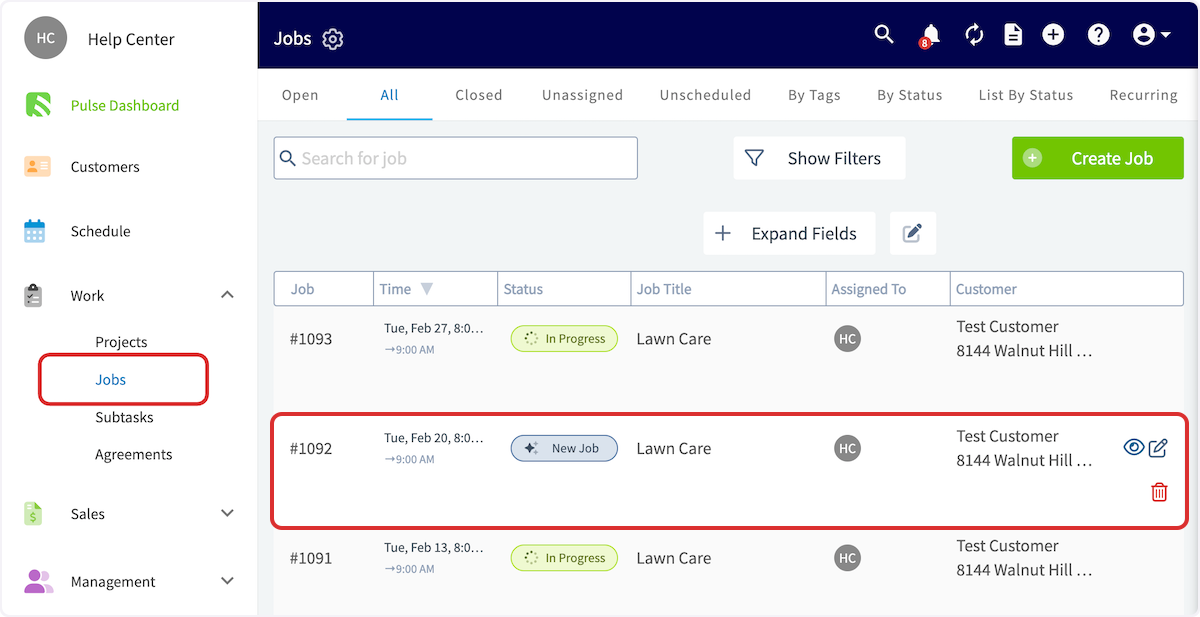
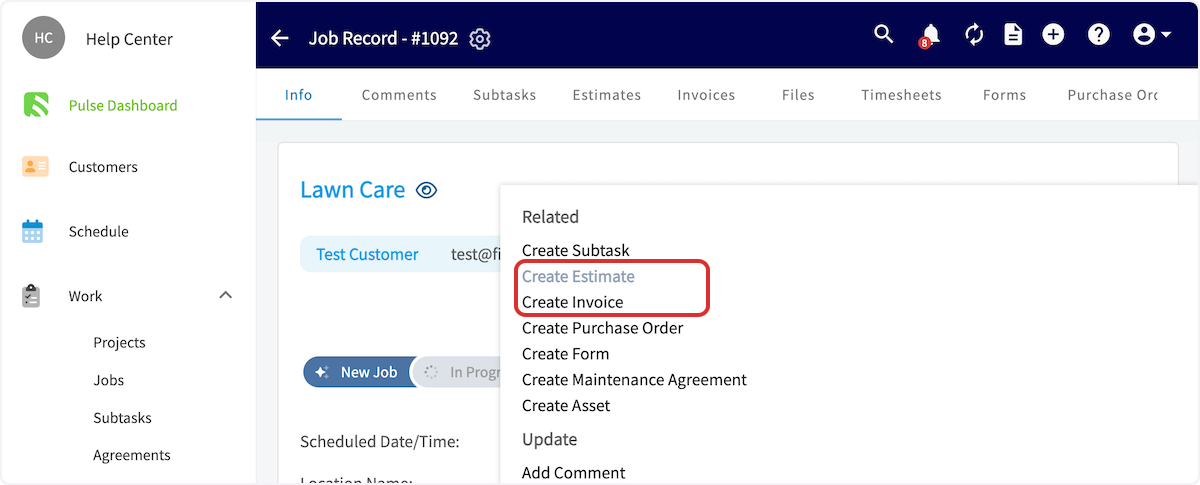
-Create an invoice and link the job, or select _Actions_ on the Job Record then click _Create Invoice_.
-
-
-
-
-
-When you're ready to add your timesheets, select _Add Item_ and add your Labor line item.
-
-🚀 **FieldPulse Pro Tip:** Make sure this line item is marked as _"Service - Labor"._ Selecting this automatically categorizes any costs associated with this item as Labor in your job costing calculations. For existing service items, you can manually update their item type.
-
-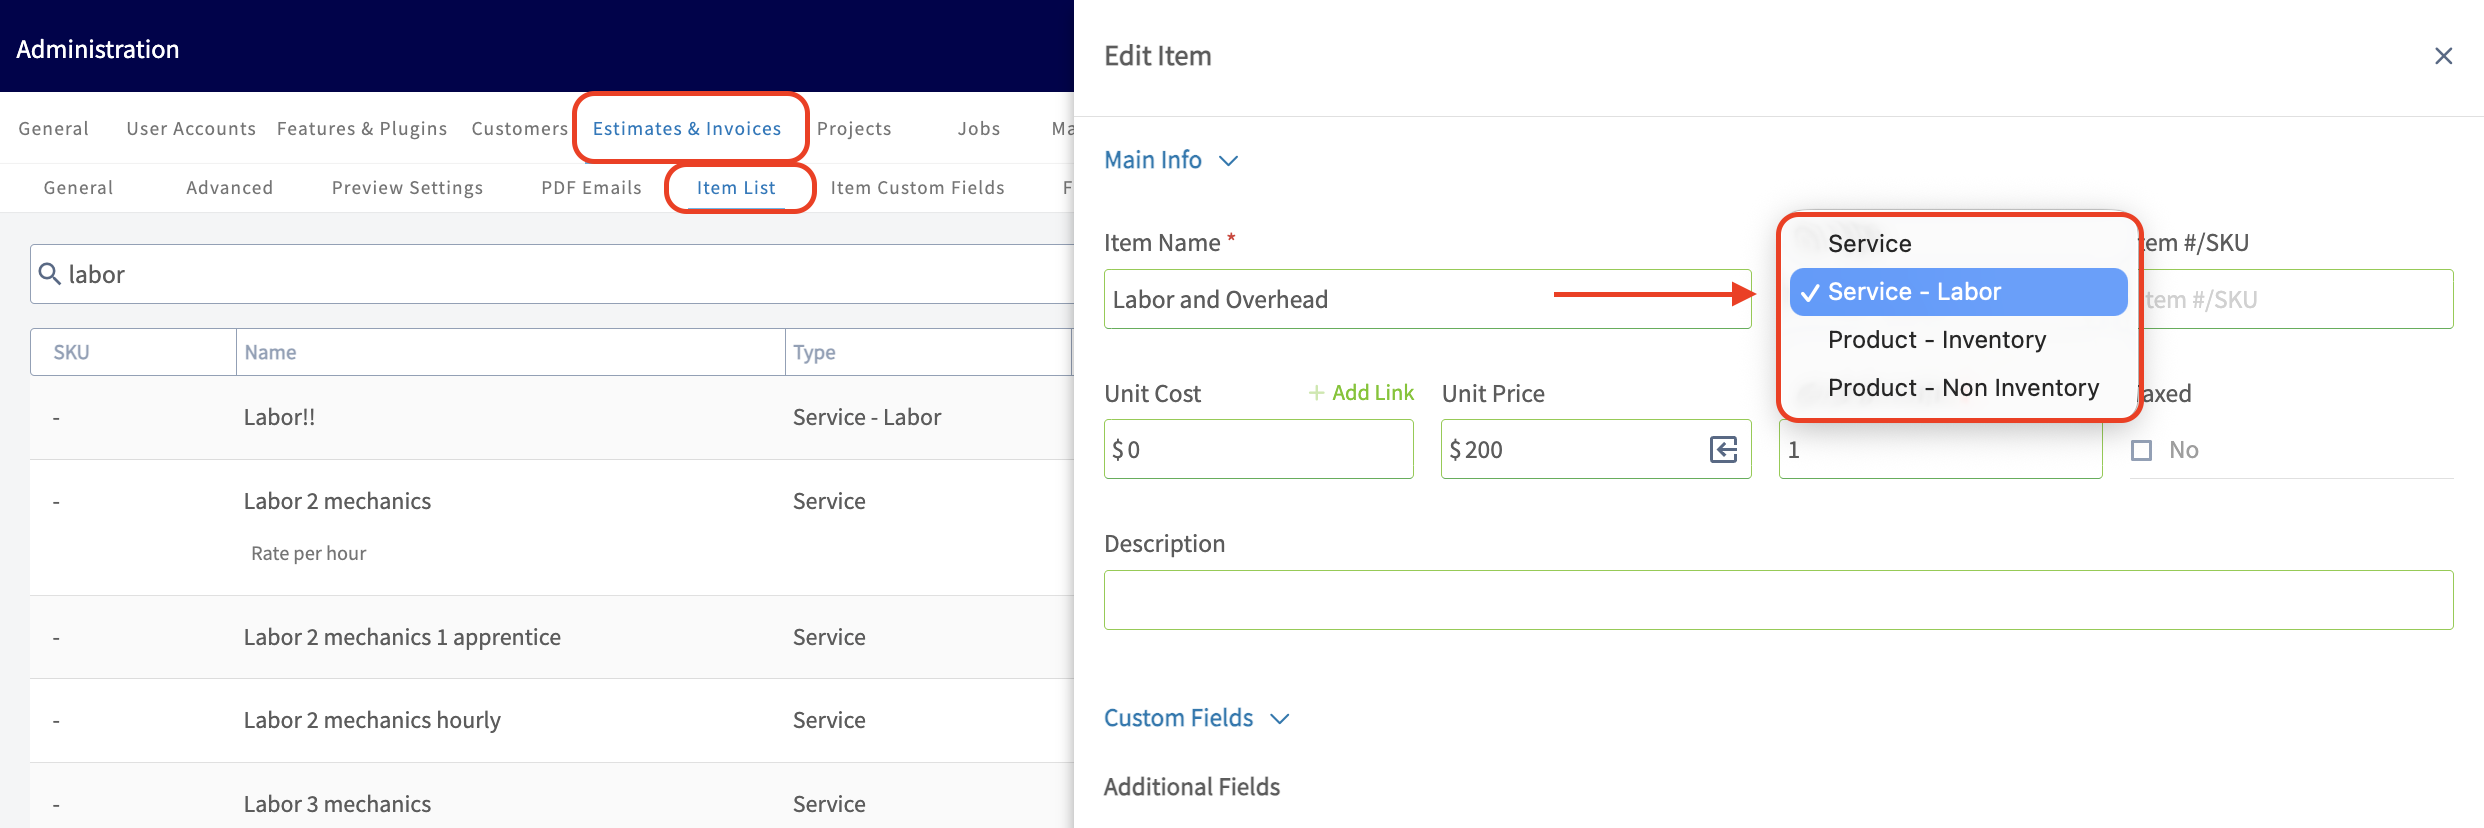
-
-Click the arrow/box icon in the quantity field. You can now select how the quantity of this line item is measured. To base the labor time on your timesheets, select _Total Job Timesheets Clocked_. You can then specify whether to include the _hourly cost rate_ and/or the _hourly billing rate_ on your invoice record. Remember that your customer won't see the _hourly cost rate_.
-
-Once you've made your selections, click _Insert Quantity_, then add the item to your invoice.
-
-
-
-You'll notice the _Unit Price_ will reflect the _Hourly Billing Rate_(ex. $80 per hour) of the technician that worked the job and the _Quantity_ (ex. 2 hours) will pull directly from the total clocked in hours on the job in order to automatically apply the proper price (ex. $160).
-
-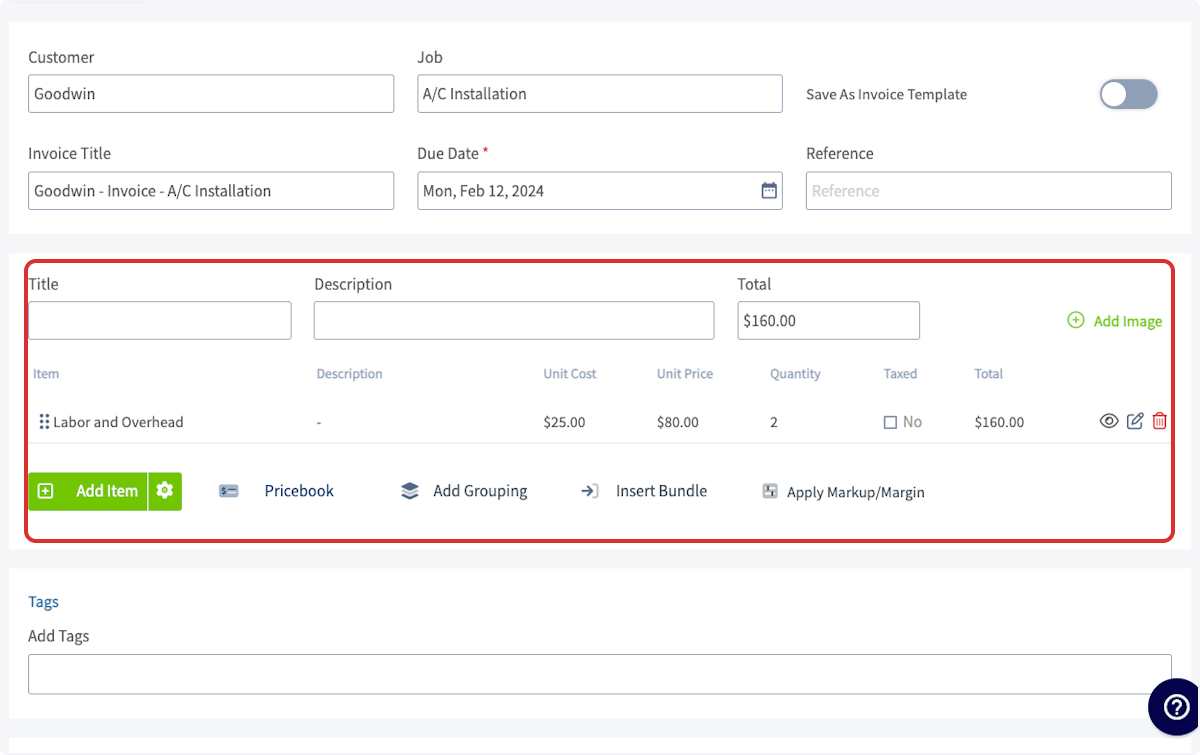
-
----
-
-## Video Tutorial
-
-<Frame caption="Adding Labor to Estimates & Invoices">
- <iframe
- src="https://www.loom.com/embed/f22cf3dcf2cc4ea78d34ee81243d9ea5?hide_owner=true&hide_share=true"
- title="Video: Adding Labor to Estimates & Invoices"
- className="w-full rounded-lg"
- style={{aspectRatio: "16/9", border: "none"}}
- loading="lazy"
- allow="fullscreen"
- allowFullScreen
- />
-</Frame>
-
----
-
-**Have additional questions?**
-
-_Contact us at [support@fieldpulse.com](mailto:support@fieldpulse.com) or use the chat feature in the bottom right corner of your screen._
\ No newline at end of file
Estimates & Invoices: Quick Start
- Module: Invoices/Estimates
- File:
estimates-invoices.mdx - Intercom URL: https://help.fieldpulse.com/en/articles/6001927-estimates-invoices-quick-start
- Last modified: 2026-04-15
Index: estimates-invoices.mdx
===================================================================
--- estimates-invoices.mdx existing
+++ estimates-invoices.mdx intercom
@@ -1,65 +0,0 @@
-Once you've added customers, scheduled and set up some jobs, you're now ready to create your first estimate or invoice! Regardless of the record type, you will follow the same process.
-
-You can create an estimate or invoice multiple ways. The most common methods include:
-
-1. From a Customer Record.
-
-2. From the _Estimates_ or _Invoices_ tab in the left-side menu.
-
-3. From a Job Record.
-
----
-
-## From a Customer Record
-
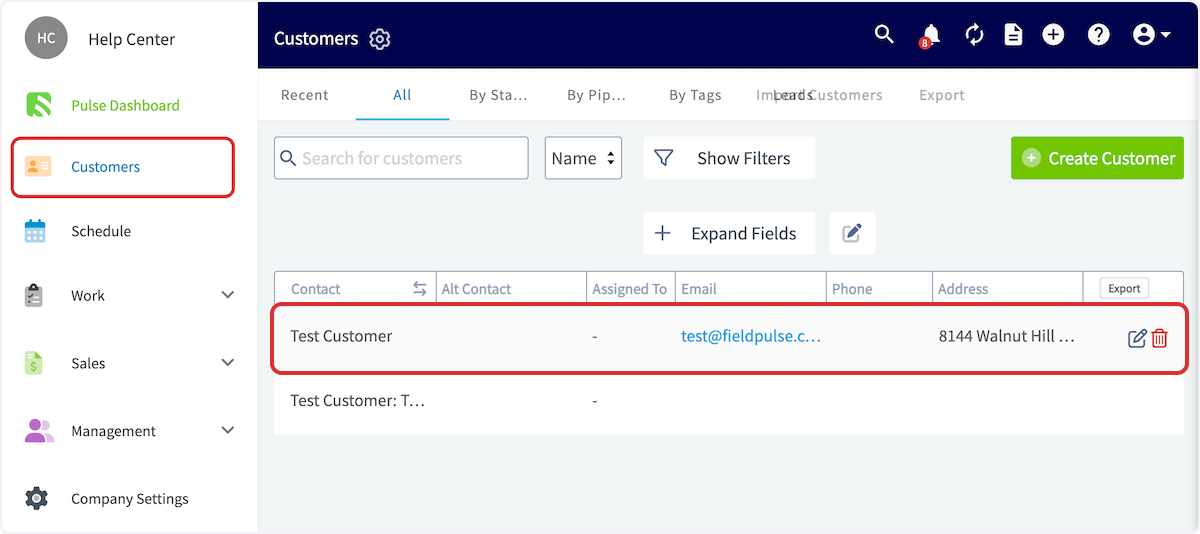
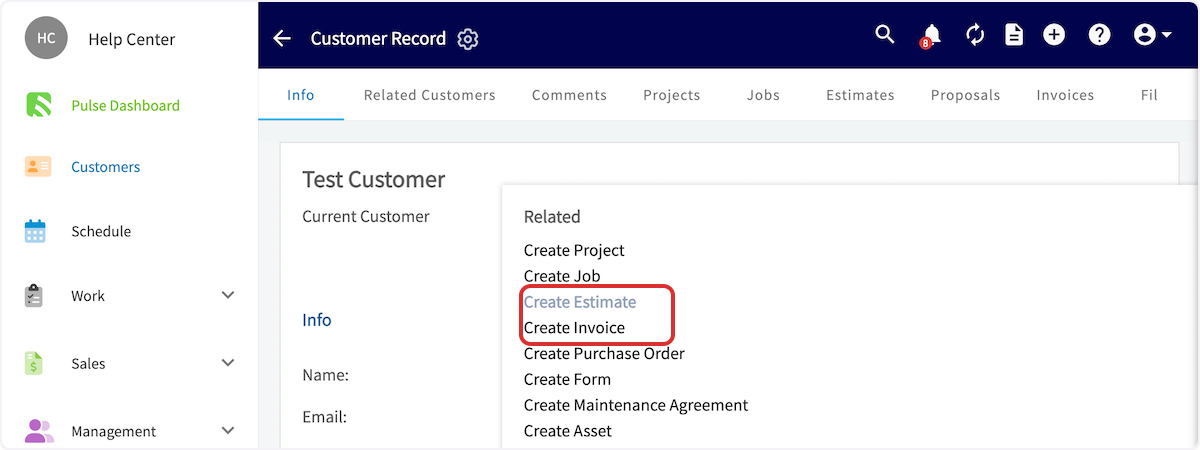
-From the left-side menu, click on the _Customers_ tab. Then you can search for and click on the customer you'd like to create the estimate/invoice for. From the _Actions_ drop down, select _Create Estimate_ or _Create Invoice_.
-
-
-
-
-
-## From the Estimates or Invoices Tabs
-
-On the left-side menu, click on either _Estimates_ or _Invoices_. Then select _Create Estimate/Invoice_.
-
-
-
-## From a Job Record
-
-From the left-side menu, click on the _Jobs_ tab. Then you can search for and click on the job you'd like to create the estimate/invoice for. From the _Actions_ drop down, select _Create Estimate_ or _Create Invoice_.
-
-
-
-
-
----
-
-## Video Tutorial
-
-<Frame caption="Estimates & Invoices">
- <iframe
- src="https://www.loom.com/embed/236b6b97b00a48f2902770f550a2adb5?hide_owner=true&hide_share=true"
- title="Video: Estimates & Invoices"
- className="w-full rounded-lg"
- style={{aspectRatio: "16/9", border: "none"}}
- loading="lazy"
- allow="fullscreen"
- allowFullScreen
- />
-</Frame>
-
----
-
-## To learn more about estimates and invoices, visit the ['How To' Articles](/core-platform/general-ui-ux) in the Help Center
-
----
-
-**Have additional questions?**
-
-_Contact us at [support@fieldpulse.com](mailto:support@fieldpulse.com) or use the chat feature in the bottom right corner of your screen._
-
----
-
-<Note>
-This article also relates to: [Customer](/core-platform/customers)
-</Note>
\ No newline at end of file
Pre-Sync: QuickBooks Online
- Module: QuickBooks Online
- File:
pre-sync-quickbooks-online.mdx - Intercom URL: https://help.fieldpulse.com/en/articles/9307787-pre-sync-quickbooks-online
- Last modified: 2026-03-09
Index: pre-sync-quickbooks-online.mdx
===================================================================
--- pre-sync-quickbooks-online.mdx existing
+++ pre-sync-quickbooks-online.mdx intercom
@@ -1,112 +0,0 @@
-Customers, line items, estimates, invoices and payments created or edited in FieldPulse will be automatically created or edited in QuickBooks. Any customers, line items, estimates, invoices and payments created or edited in QuickBooks will be automatically created or edited in FieldPulse.
-
-Once you've connected FieldPulse with your QuickBooks account, all of your existing QuickBooks data will be automatically imported into your FieldPulse account. _( **Note:** QuickBooks Online integration is only available for customers in the United States, Canada, and Australia.)_
-
-## Which QuickBooks Online plans sync with FieldPulse?
-
-QuickBooks Online Essentials, Plus, and Advanced plans will sync successfully. We recommend using Plus or Advanced, as the Essentials plan does not allow for inventory tracking. Those using the Essentials plan will only be able to use Service and Product Non-Inventory line items in FieldPulse.
-
-## How long will the sync take?
-
-| | |
-| --- | --- |
-| **Data Amount** | **Timeframe** |
-| 0-5,000 | 24-48 hours |
-| 5,000-10,000 | 48-72 hours |
-| 10,000-20,000 | 1 week |
-| 20,000-50,000 | 2 weeks |
-
-## What will sync?
-
-| | | |
-| --- | --- | --- |
-| **Customers** | Primary Contact<br />- Full Name<br /> <br />- Company Name<br /> <br />- Phone<br /> <br />- Email<br /> <br />Notes | Service Address<br />Billing Address<br />- Address Line 1<br /> <br />- Address Line 2<br /> <br />- City, State, Zip Code |
-| **Line Items** | Item Name<br />Description<br />SKU/Item #<br />Unit Cost/Price | Quantities<br />Related Sales/Purchase Accounts<br />Total Inventory<br />Tax/Non Tax |
-| **Estimates** | Estimate Date<br />Expiration Date<br />Line Items | Estimate Notes<br />Business Class |
-| **Invoices** | Invoice Date<br />Expiration Date<br />Line Items<br />Internal Notes | Invoice Notes<br />Business Class<br />Related Payments<br />message on statement |
-| **Payments** | Payment Method<br />- Cash<br /> <br />- Check<br /> <br />- Card<br /> <br />- Bank Transfer<br /> <br />- Other | Payment Total<br />Payment Notes |
-
-## What won't sync?
-
-| | |
-| --- | --- |
-| **Customers** | Additional Contacts<br />Additional Locations<br />Custom Fields<br />Tags<br />Files |
-| **Line Items** | Tags<br />UPC Barcode<br />Links |
-| **Estimates** | Un-Selected Estimate Options |
-| **Invoicing** | Groupings<br />Custom Fields<br />Contracts<br />'Shipping' and 'Deposit' fields if they contain values<br />\*Surcharges become unavailable after integrating with QuickBooks |
-| **Payments** | Journal Entries<br />Refunds<br />Voiding Payments<br />Credits (unless they are applied to an Invoice) |
-| **Other** | QB Receipts<br />Groupings<br />FieldPulse Jobs and Projects |
-
-Purchase orders can be synced. The sync will push newly created and updated purchase orders between FieldPulse and QuickBooks Online. [Purchase Order Sync Quickbooks Online](/accounting/quickbooks-online/purchase-order-sync-quickbooks-online) to learn more about our purchase order sync. Reach out to us via [support@fieldpulse.com](mailto:support@fieldpulse.com) or use the chat in the bottom right corner if you want to enable this sync.
-
-Timesheets can be synced if you use QuickBooks Time. FieldPulse clock-in and clock-out dates/times will sync as well as the timesheet duration. _( **Note:** This is a one-way sync from FieldPulse Timesheets to QuickBooks Time.)_ Reach out to us via [support@fieldpulse.com](mailto:support@fieldpulse.com) or use the chat in the bottom right corner if you want to enable this sync.
-
-QuickBooks Online projects sync to FieldPulse as related customers.
-
-- If you joined FieldPulse before 7/16/2024 and would like to disable the sync of QuickBooks Online projects to FieldPulse, reach out to us via [support@fieldpulse.com](mailto:support@fieldpulse.com) or use the chat in the bottom right corner. _( **Note:** If the project sync is disabled, the estimates or invoices within that project will also not sync.)_
-
-- If you joined FieldPulse after 7/16/24, the QuickBooks Online project sync is disabled in your account. Reach out to us via [support@fieldpulse.com](mailto:support@fieldpulse.com) or use the chat in the bottom right corner if you want to enable this sync.
-
----
-
-## Before Syncing
-
-## Be sure to turn off the QuickBooks Online _Automatically apply credits_ setting
-
-To do so:
-
-1. Click on the _Gear Icon_.
-
-2. Choose _Accounts and Settings_.
-
-3. Select _Advanced_ and click the _Automation_ section.
-
-4. Disable _Automatically apply credits._
-
-5. Click _Save_ and _Done_.
-
-- If you utilize Customer Communications within FieldPulse:
-
- - Turn off your Automatic Triggers linked to Estimate and Invoice records.
-
- 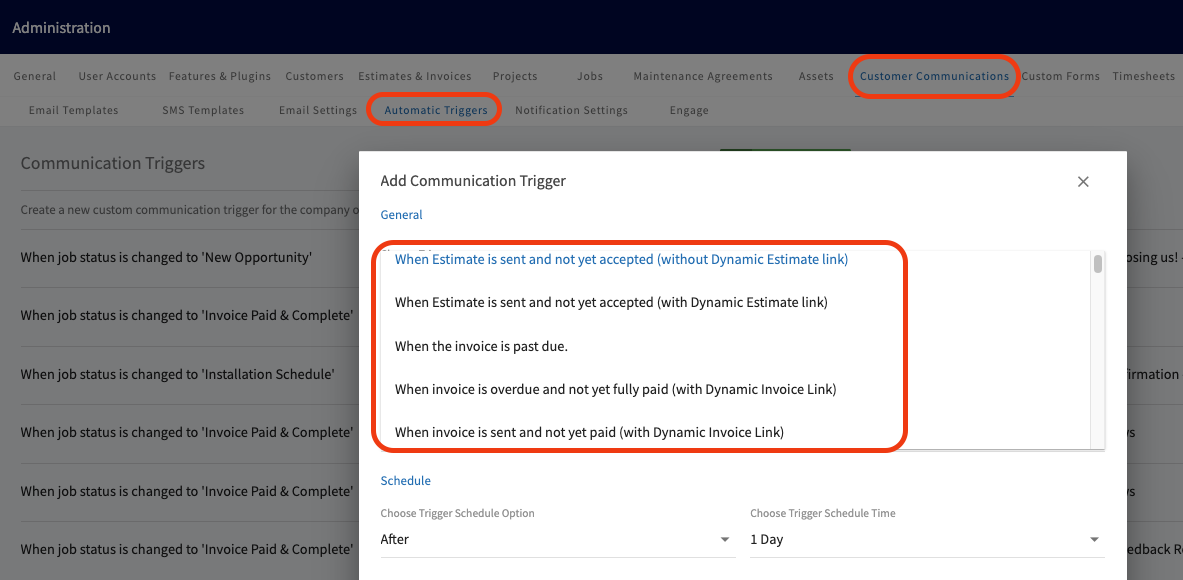
-
- - Disable Notification Settings to prevent customers from receiving updates about all Estimate and Invoice records.
-
-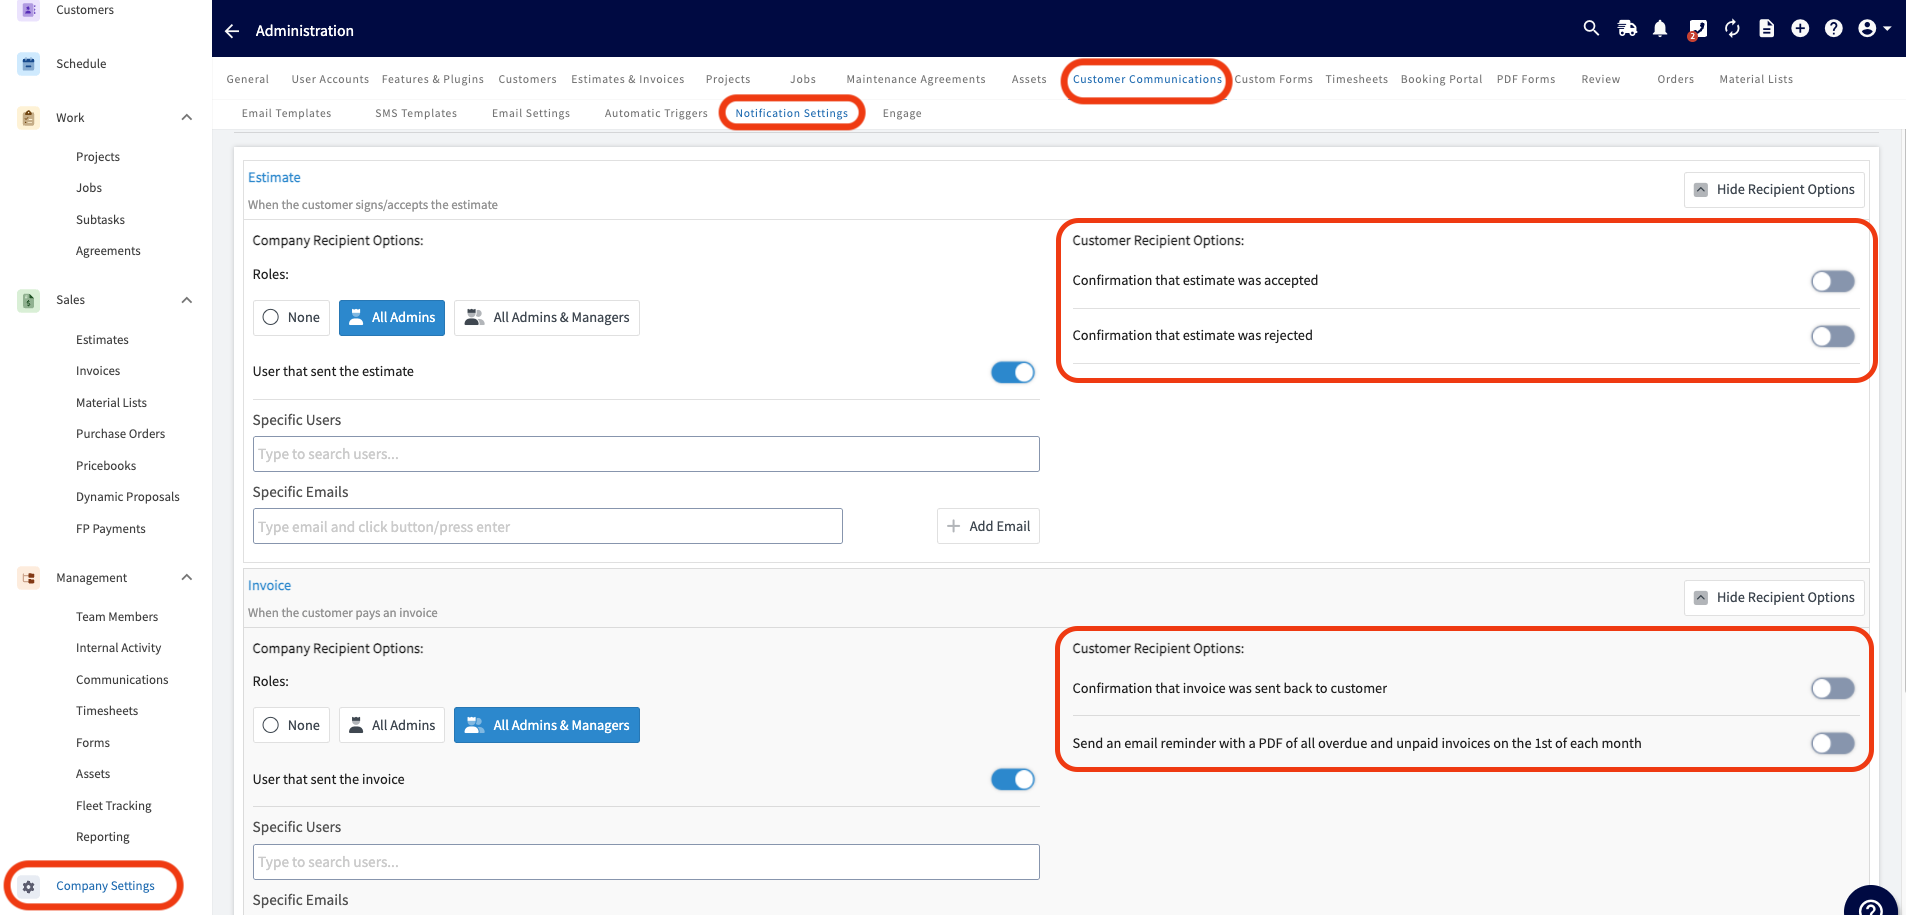
-
----
-
-## Please Note
-
-- Custom Transaction numbers
-
- - If turned on in QuickBooks, invoice numbers will follow the FieldPulse numbering sequence.
-
- - If turned off, invoice numbers will follow whatever numbering is setup in QuickBooks.
-
-- FieldPulse uses QuickBooks “Shipping Address” as our service address. If only “Billing Address” is filled in in QuickBooks, no address will display on the customer record in FieldPulse.
-
-- Enable Discounts in your QuickBooks account in order to use discounts on FieldPulse estimates and invoices.
-
----
-
-## Do not sync if
-
-- You currently have your QuickBooks synced with another FSM system.
-
-- You have been using QuickBooks and FieldPulse simultaneously and duplicating efforts (creating estimates/invoices in QuickBooks and FieldPulse prior to syncing).
-
-- You are using projects in QuickBooks. Contact us to learn more.
-
-- You do not have a quantity and price in QuickBooks for every line item - the line item will come over as $0 in FieldPulse.
-
-- You do not have Tax Rate set up in QuickBooks, as FieldPulse pulls tax rates from QuickBooks.
-
-_If any of these apply to you, please reach out to [support@fieldpulse.com](mailto:support@fieldpulse.com) for assistance._
-
----
-
-**Have additional questions?**
-
-_Contact us at [support@fieldpulse.com](mailto:support@fieldpulse.com) or use the chat feature in the bottom right corner of your screen._
\ No newline at end of file
Sync: QuickBooks Online
- Module: QuickBooks Online
- File:
sync-quickbooks-online.mdx - Intercom URL: https://help.fieldpulse.com/en/articles/482397-sync-quickbooks-online
- Last modified: 2026-03-09
Index: sync-quickbooks-online.mdx
===================================================================
--- sync-quickbooks-online.mdx existing
+++ sync-quickbooks-online.mdx intercom
@@ -1,49 +1,1 @@
-## 1\. Request access to sync with QuickBooks
-
-To connect to QuickBooks Online, you will first need to request access by contacting us at [support@fieldpulse.com](mailto:support@fieldpulse.com) or using the chat feature in the bottom right corner of your screen.
-
-## 2\. Turn on the integration in _Company Settings._
-
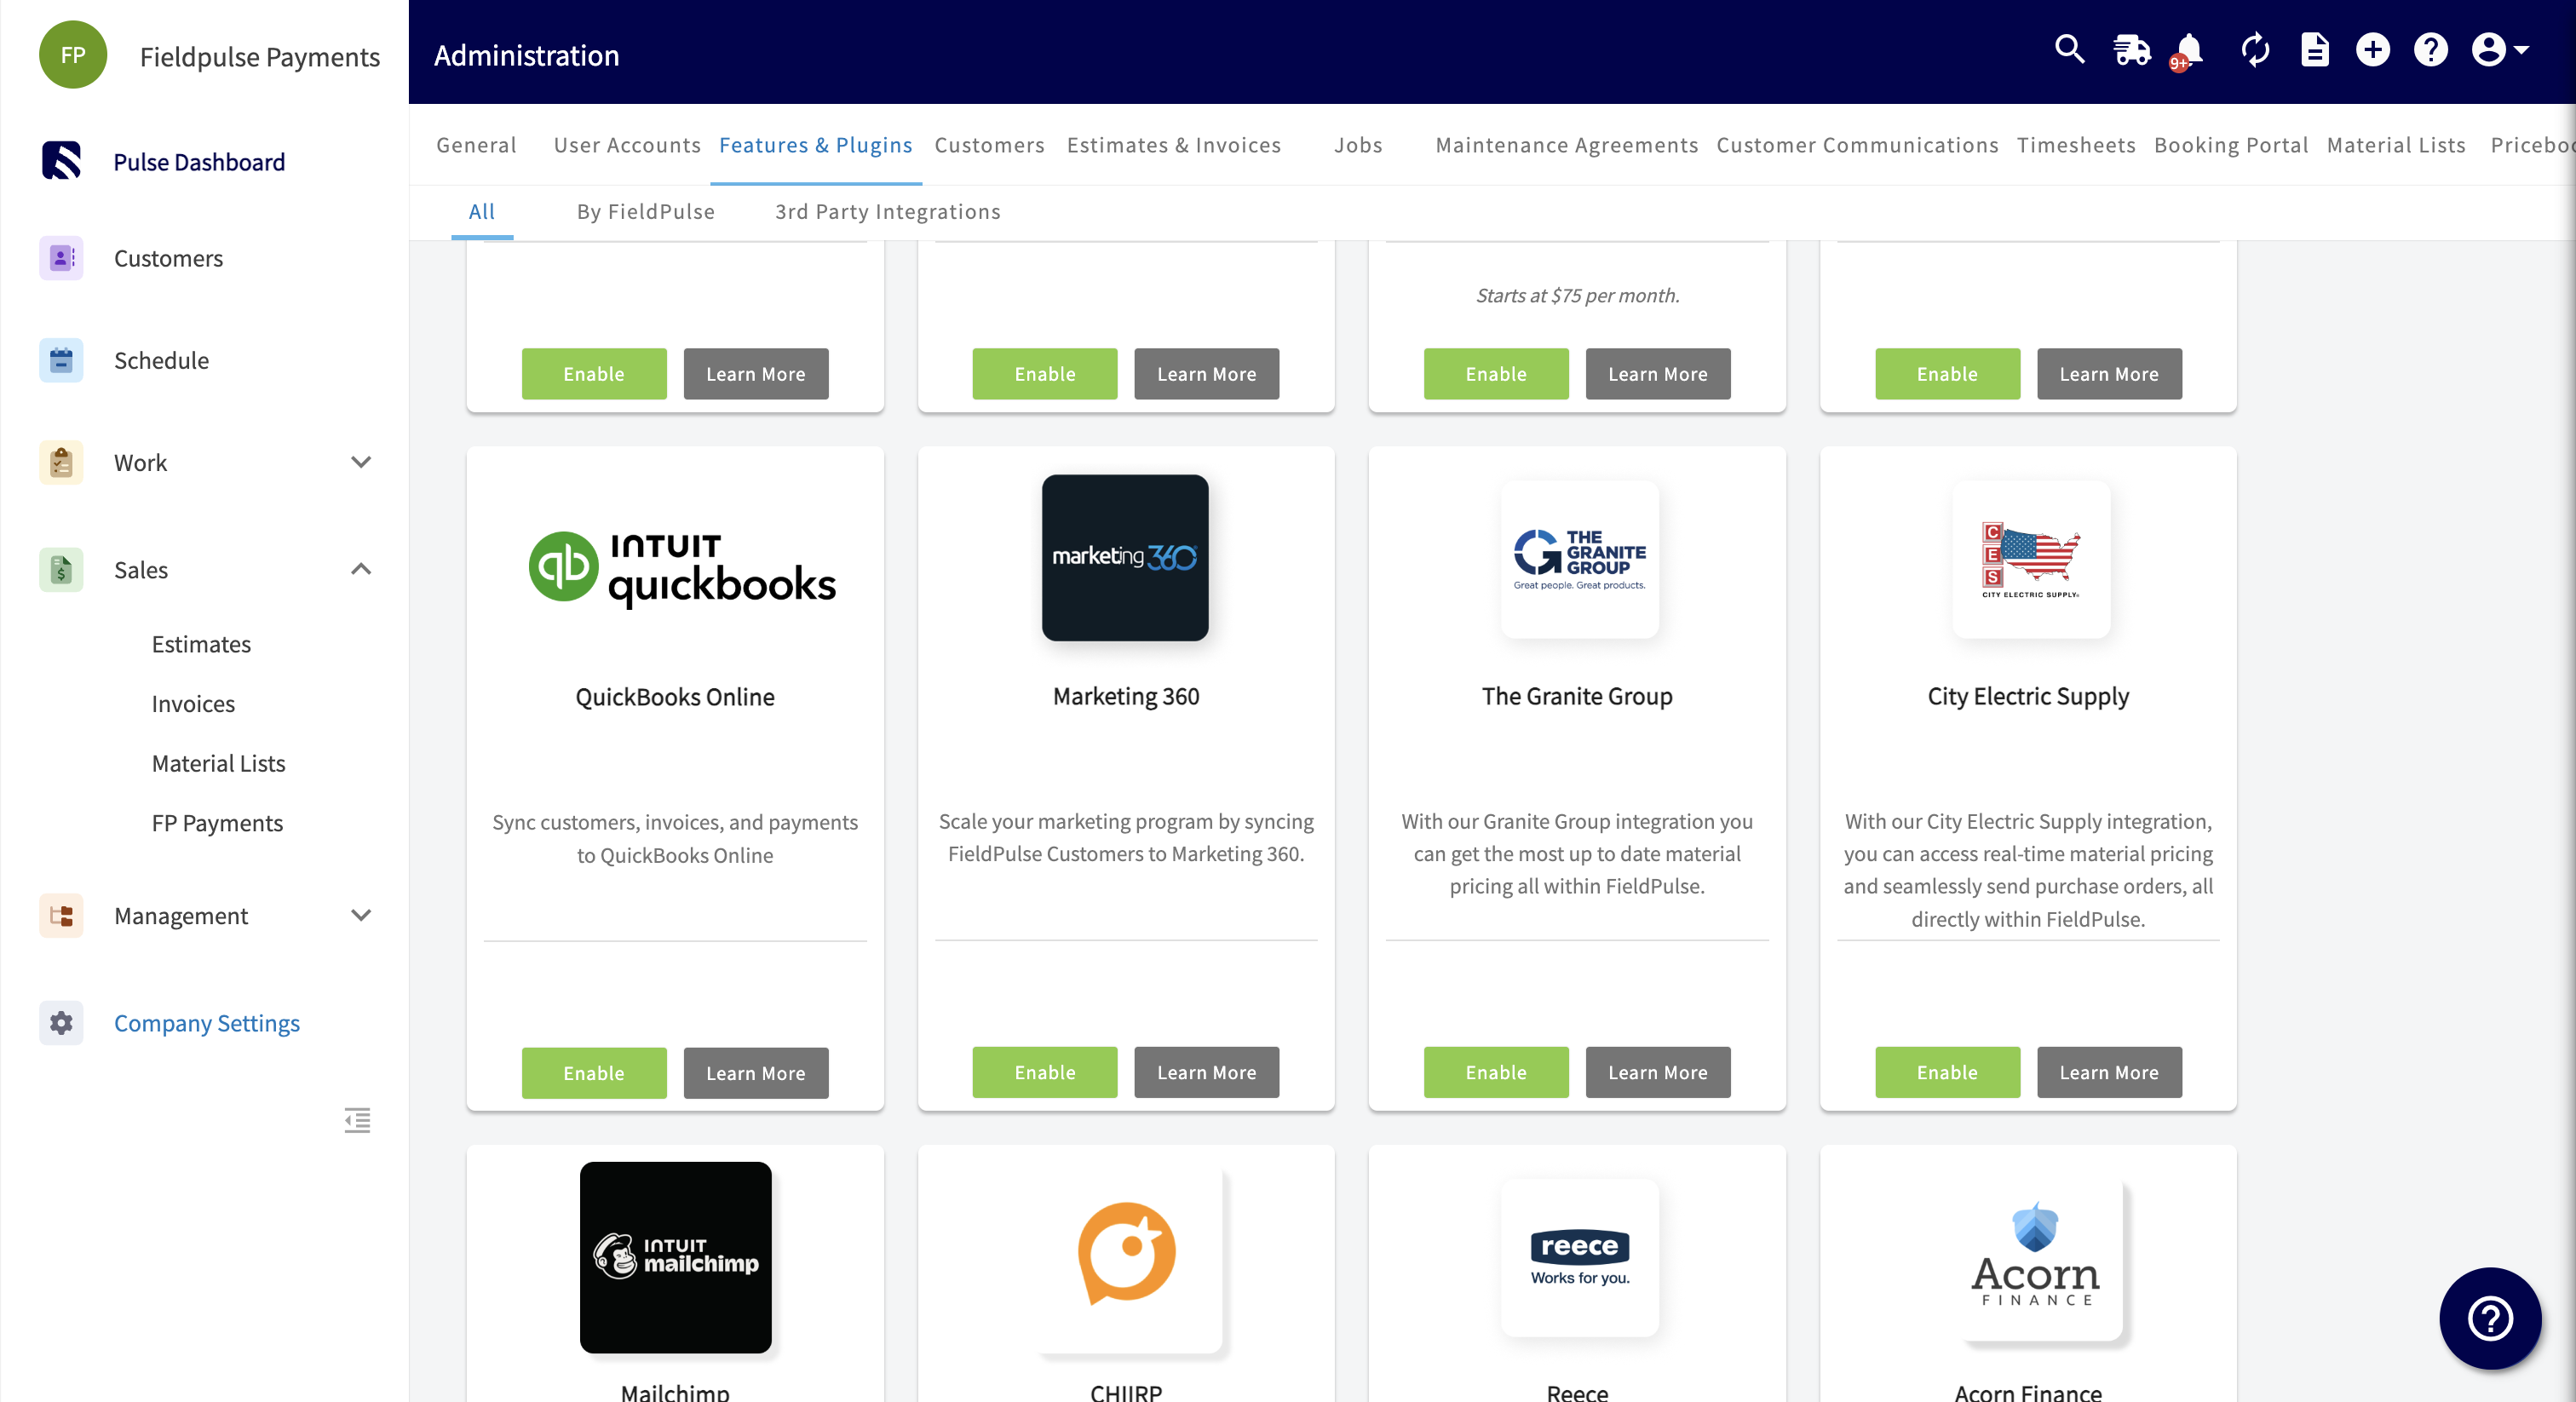
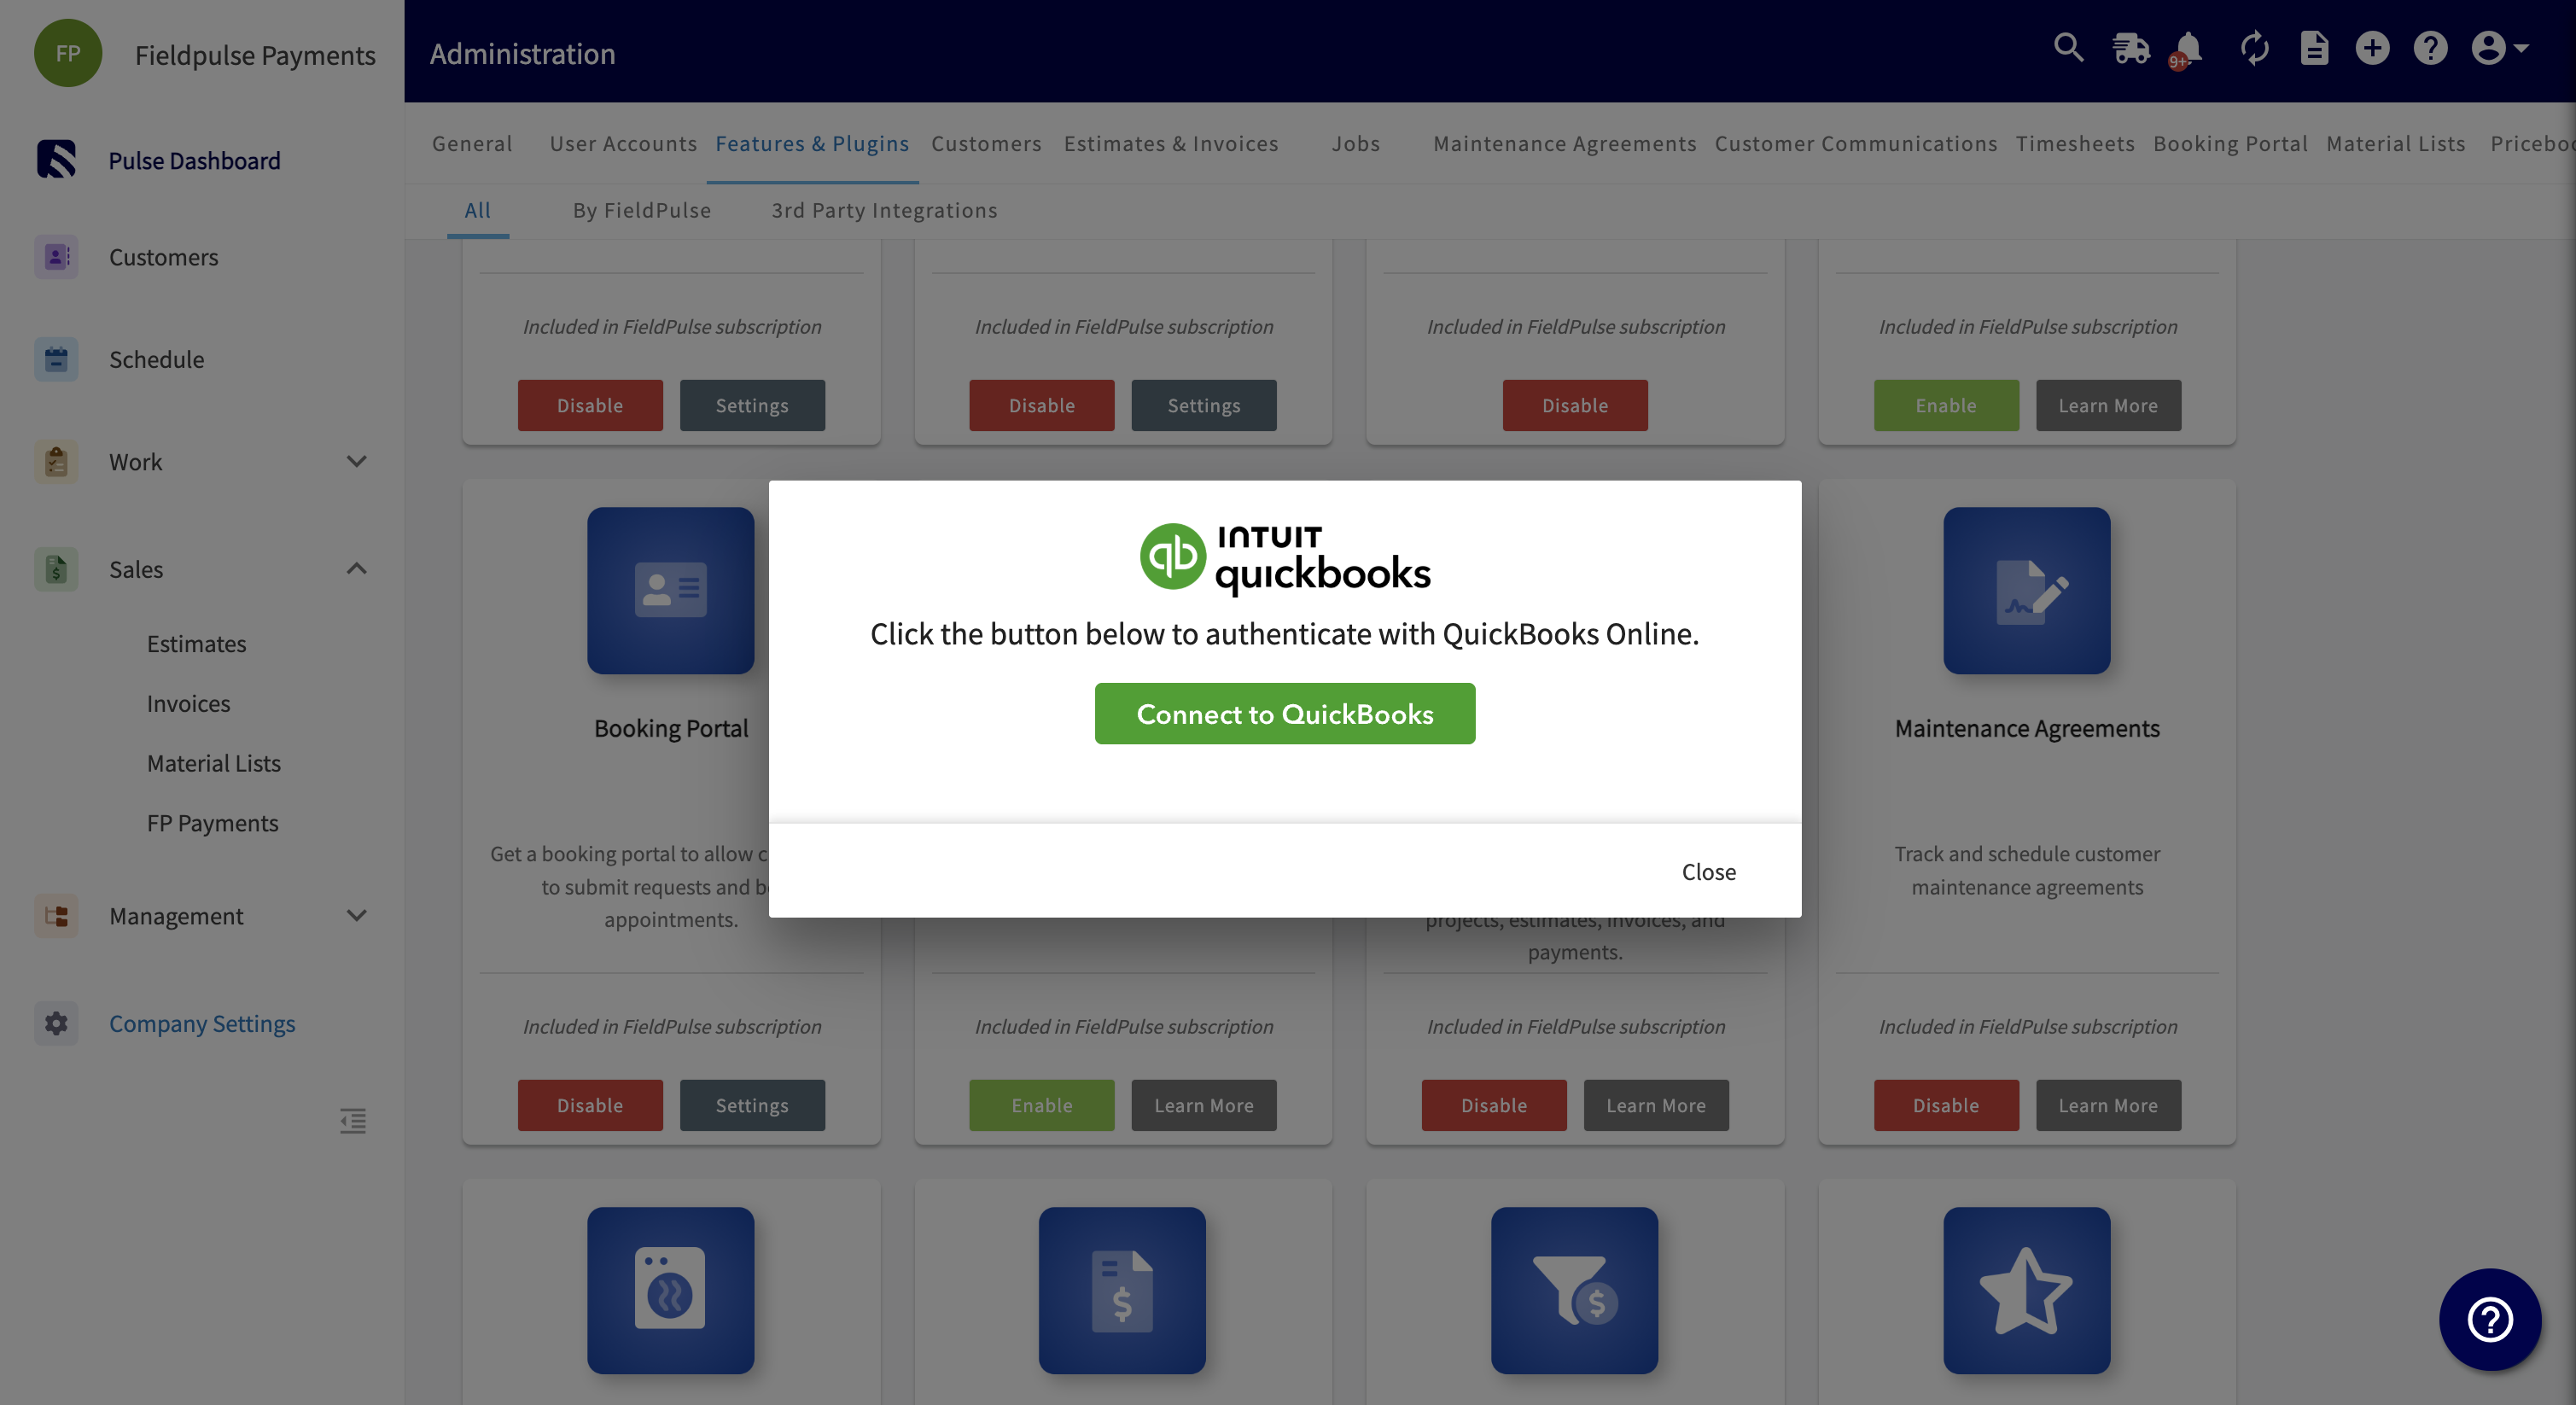
-Once FieldPulse has enabled you to connect to QuickBooks, go to _Company Settings_. Find the _Features & Plugins_ tab and navigate until you find the QuickBooks Online tile. Click _Connect to QuickBooks_.
-
-
-
-
-
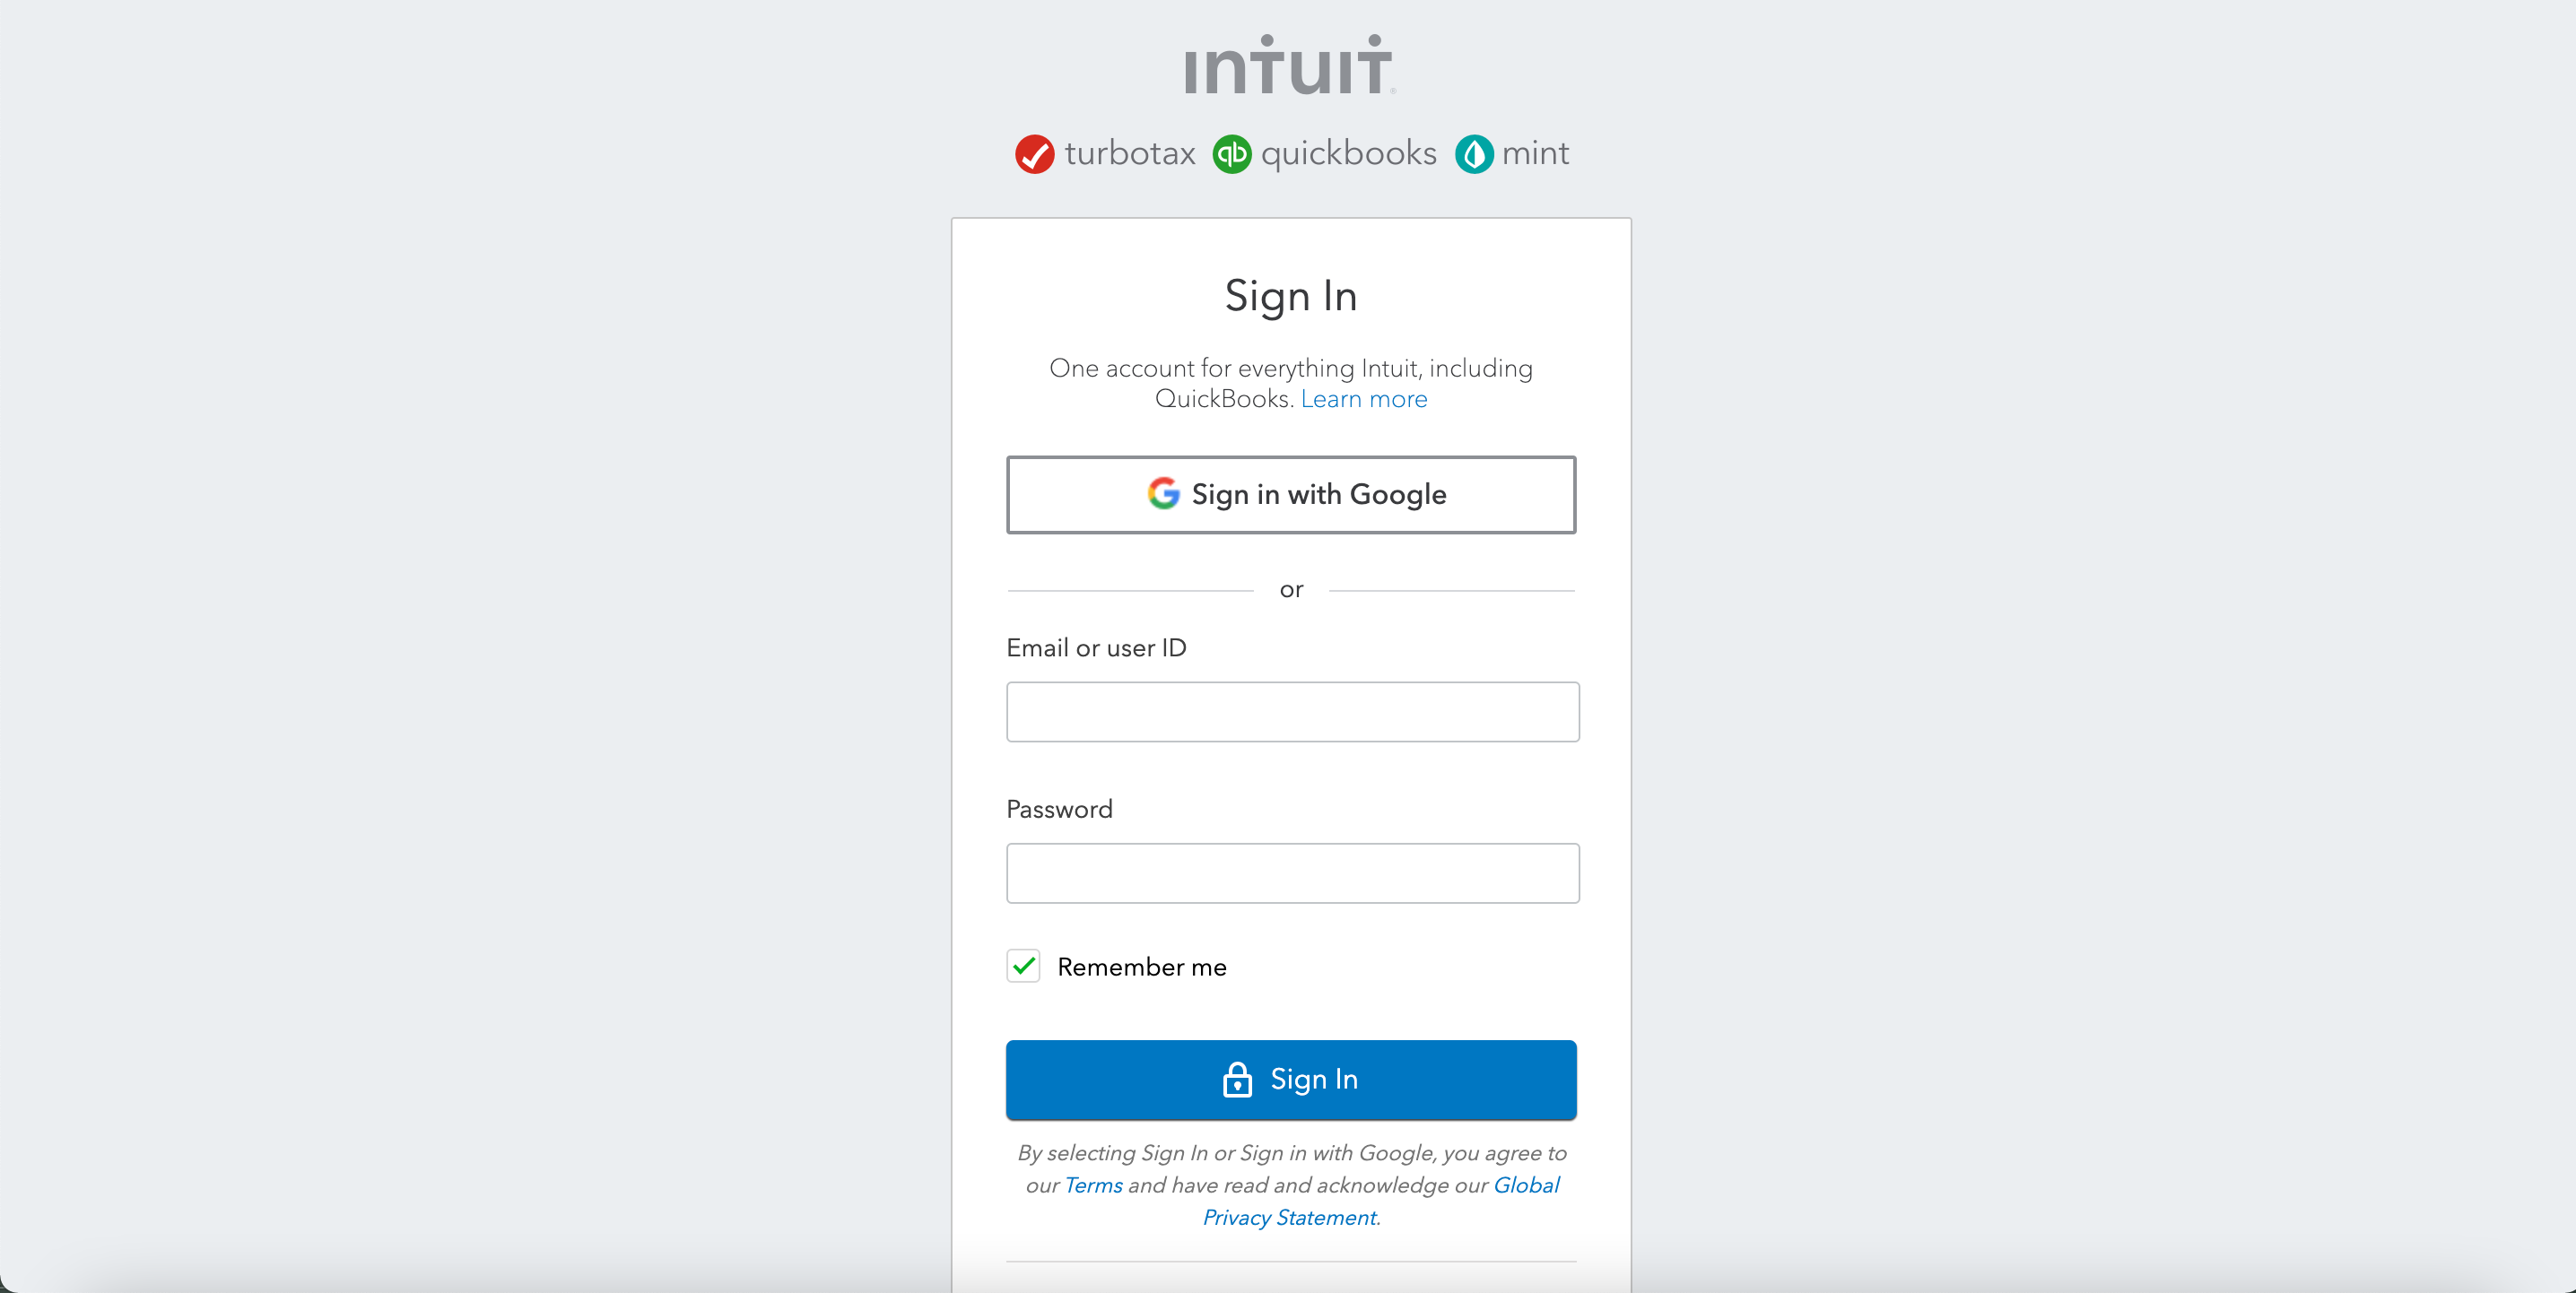
-## 3\. Enter your login information for your QuickBooks Online account and follow any on-screen instructions
-
-
-
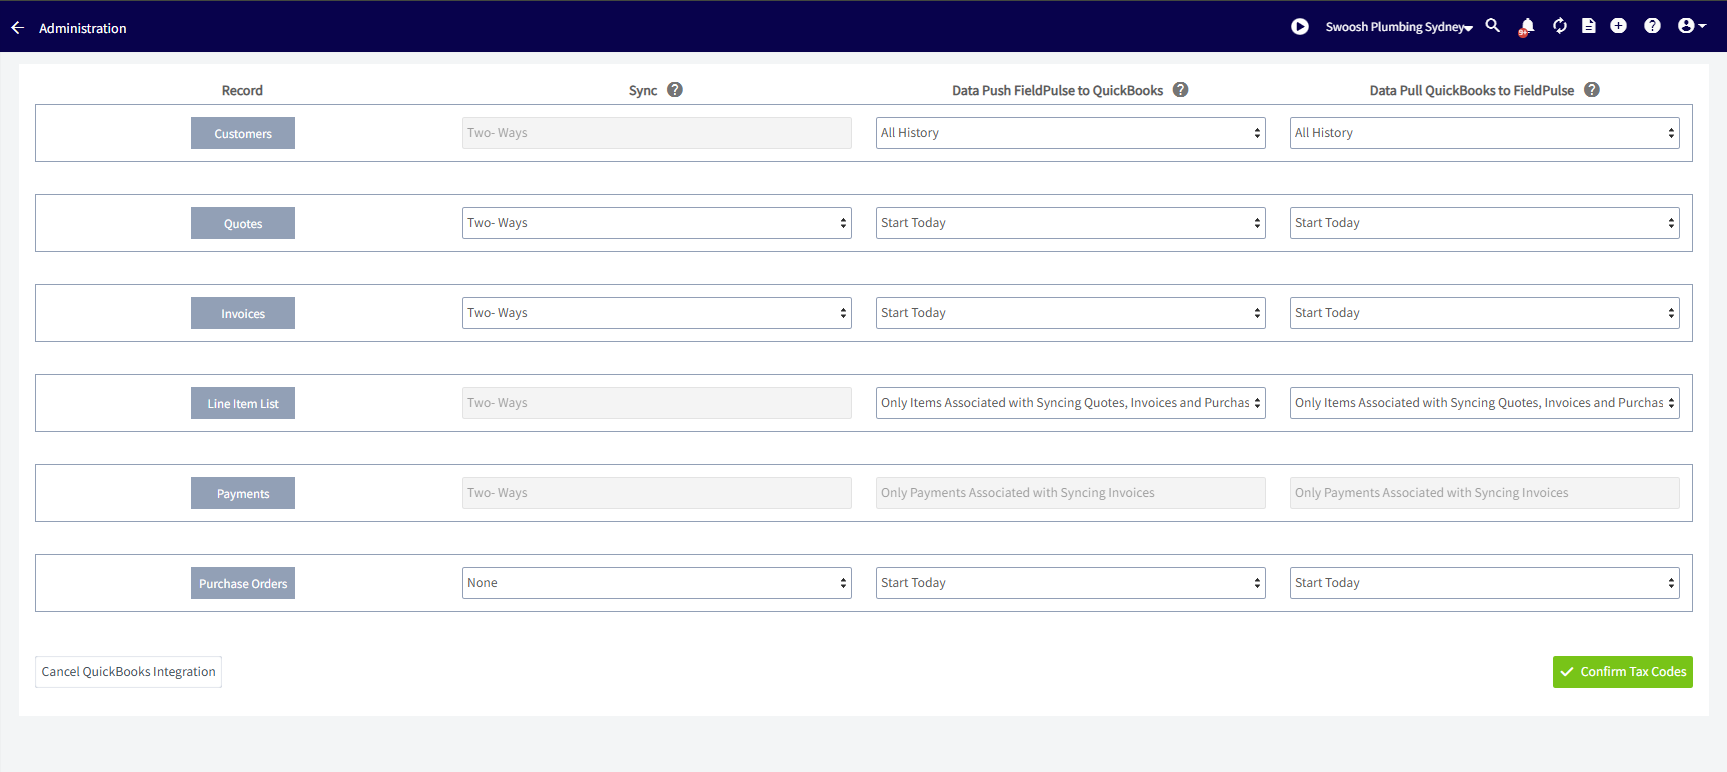
-## 4\. Select the time period and all the entities you would like to sync between FieldPulse and QuickBooks
-
-
-
-_( **Note:** In order to sync invoices, your customers, line items, and payments must also sync)_
-
-## 5\. Next you will be prompted to select your default tax rate from a list of tax rates FieldPulse gets from QuickBooks
-
-
-
-## 6\. Next you will select your default sales account (this refers to items you sell)
-
-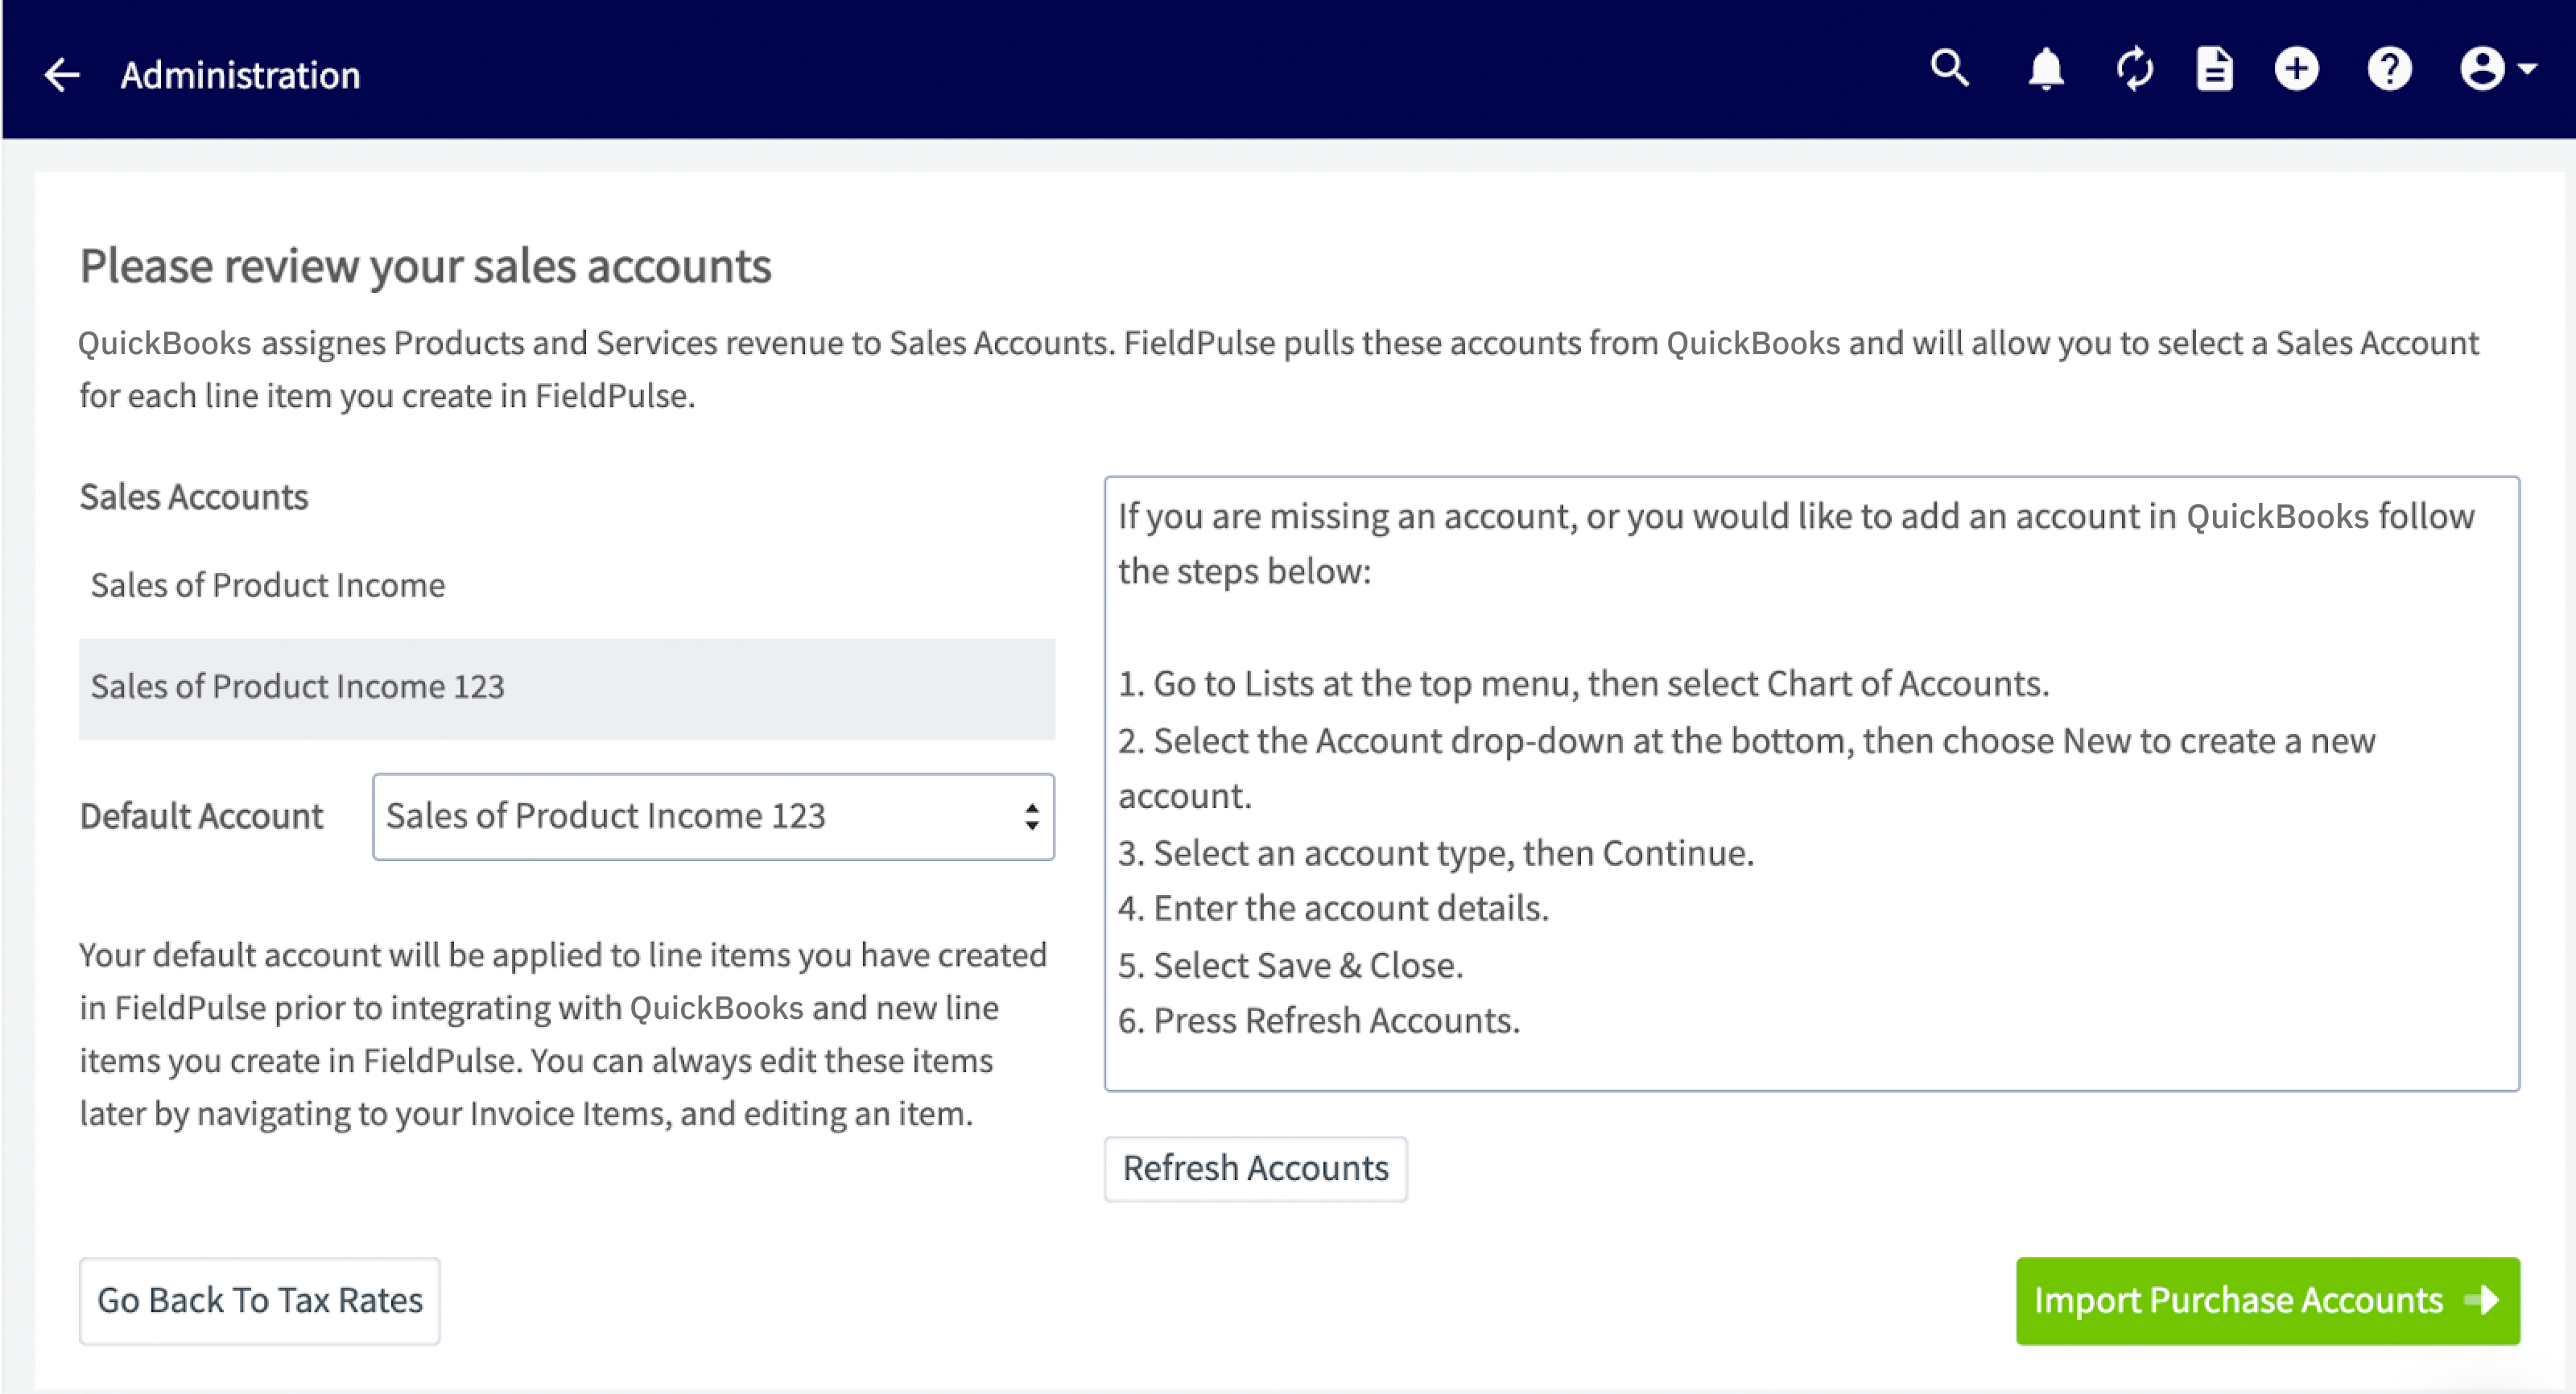
-
-## 7\. Next you will select your default purchase account (this refers to items you purchase)
-
-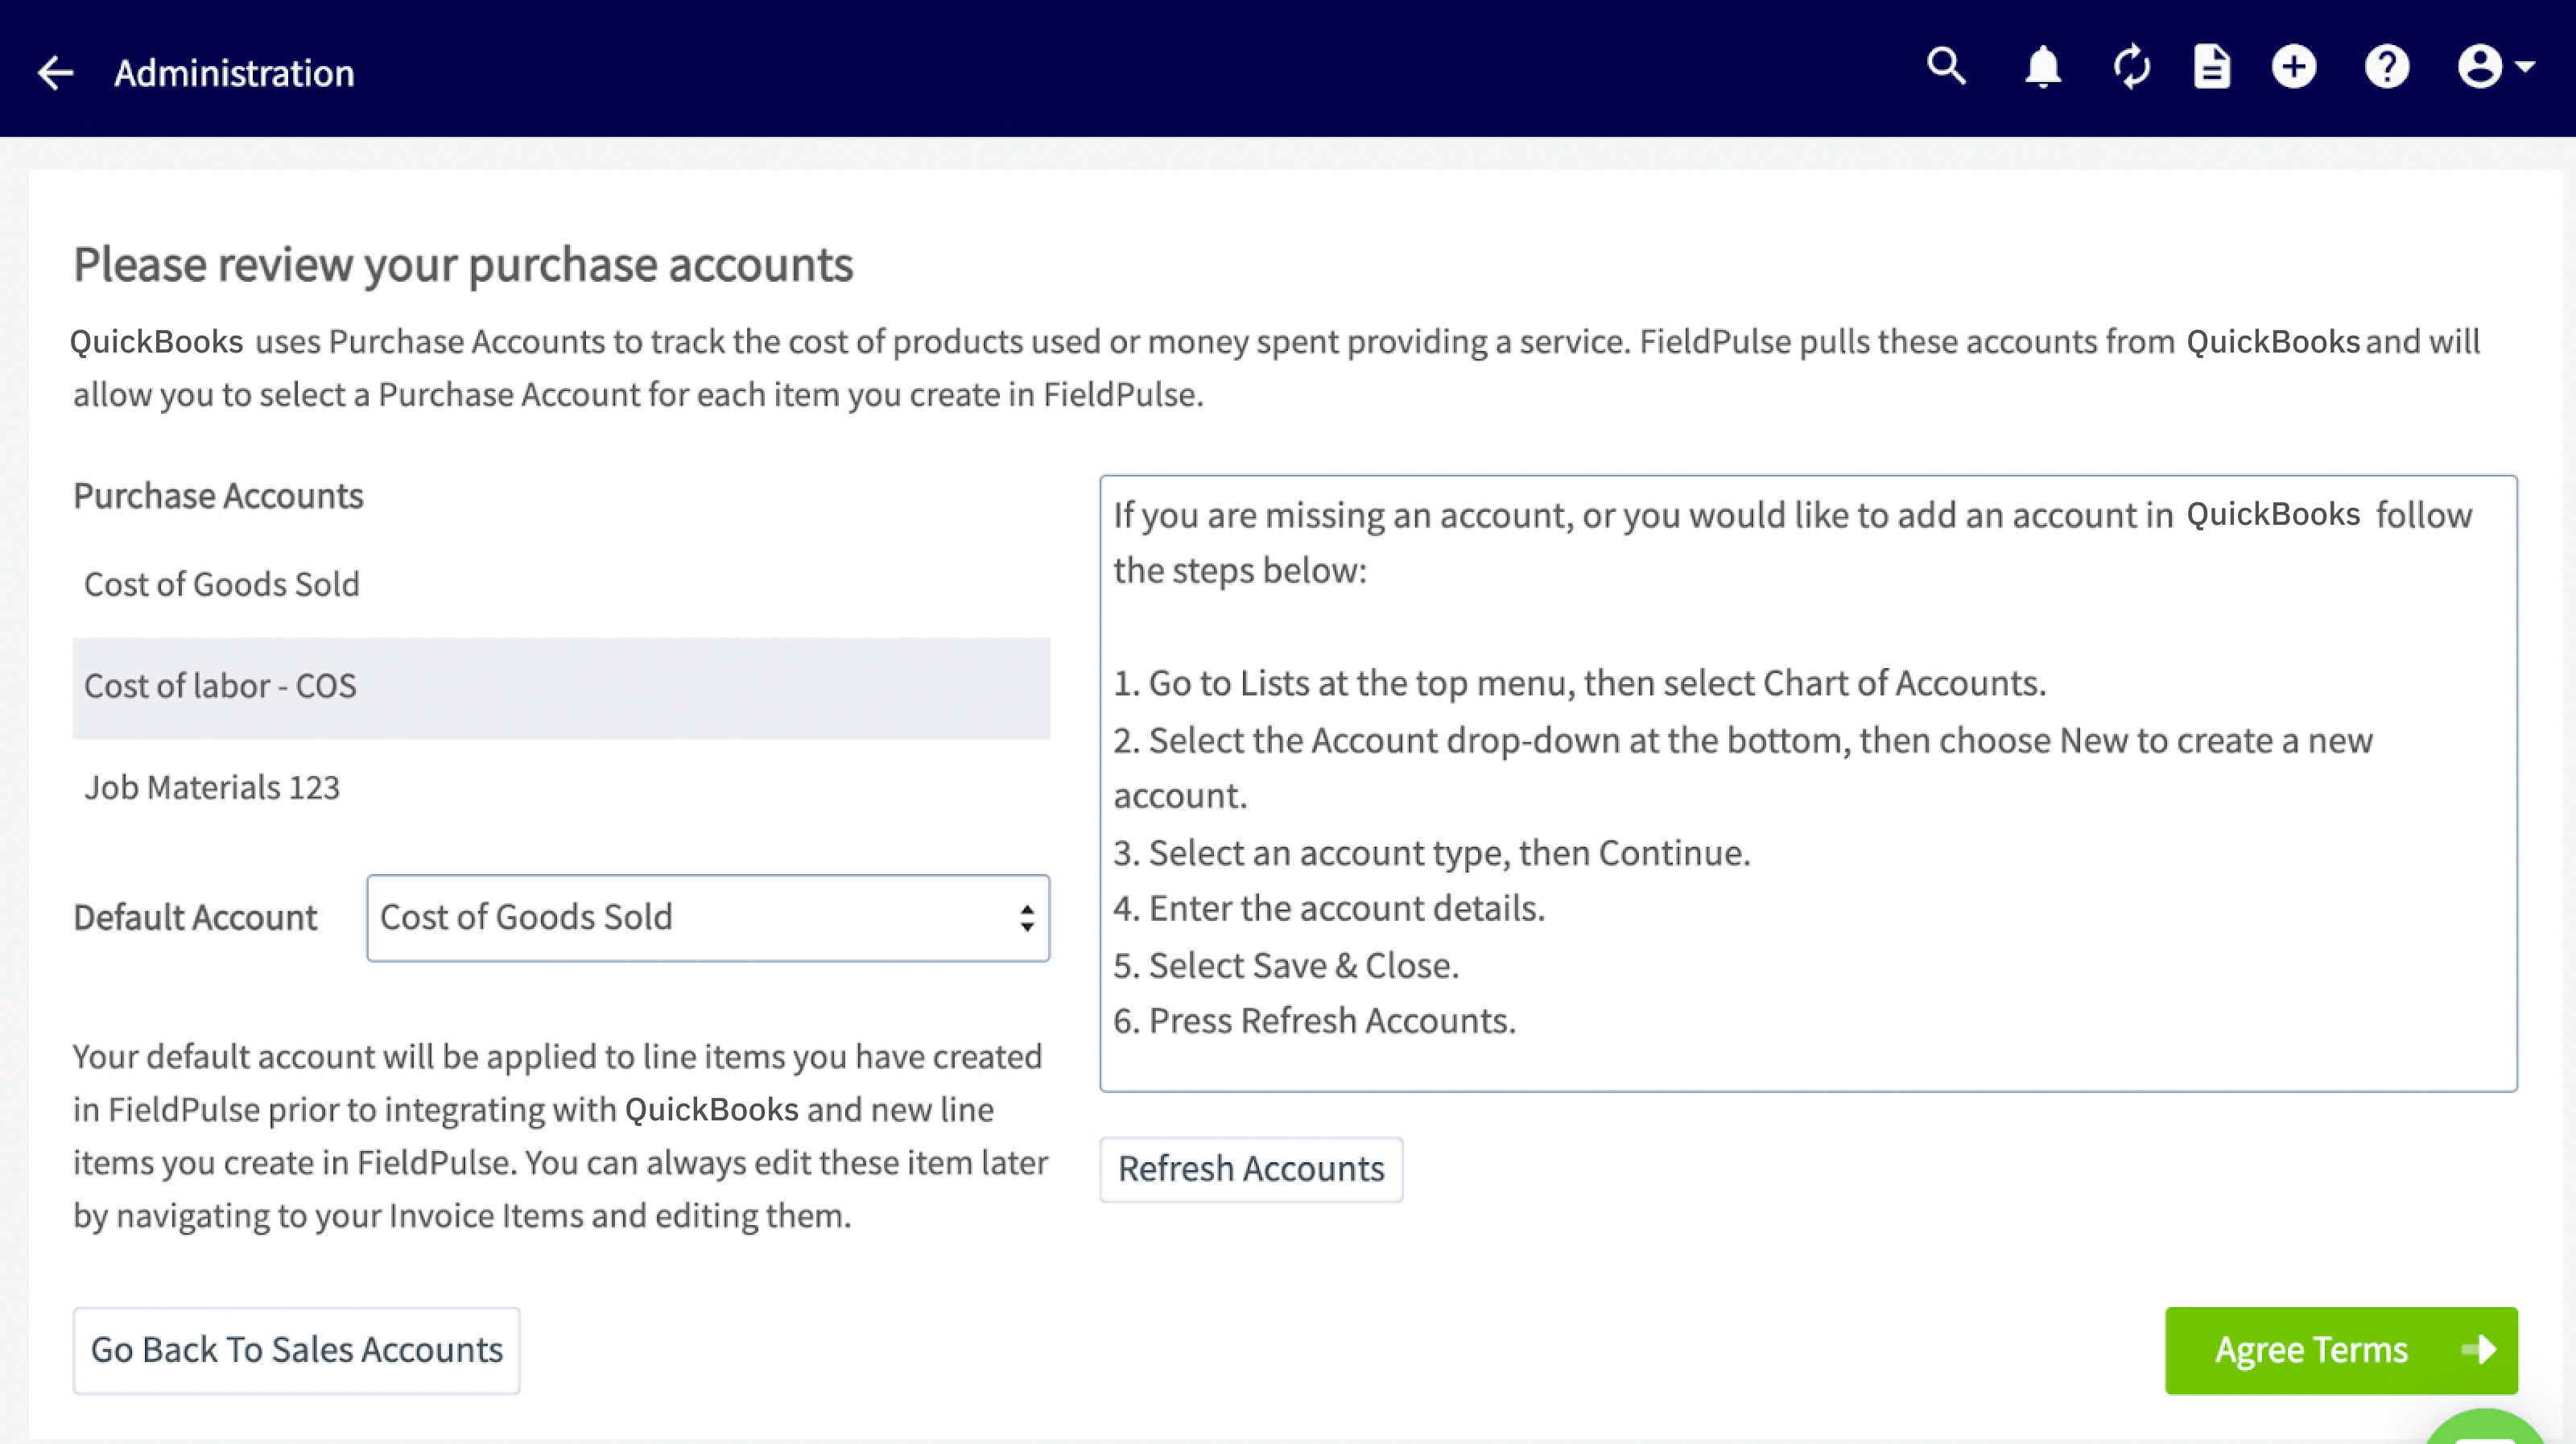
-
-## 8\. Agree to the QuickBooks Integration Terms & Conditions
-
-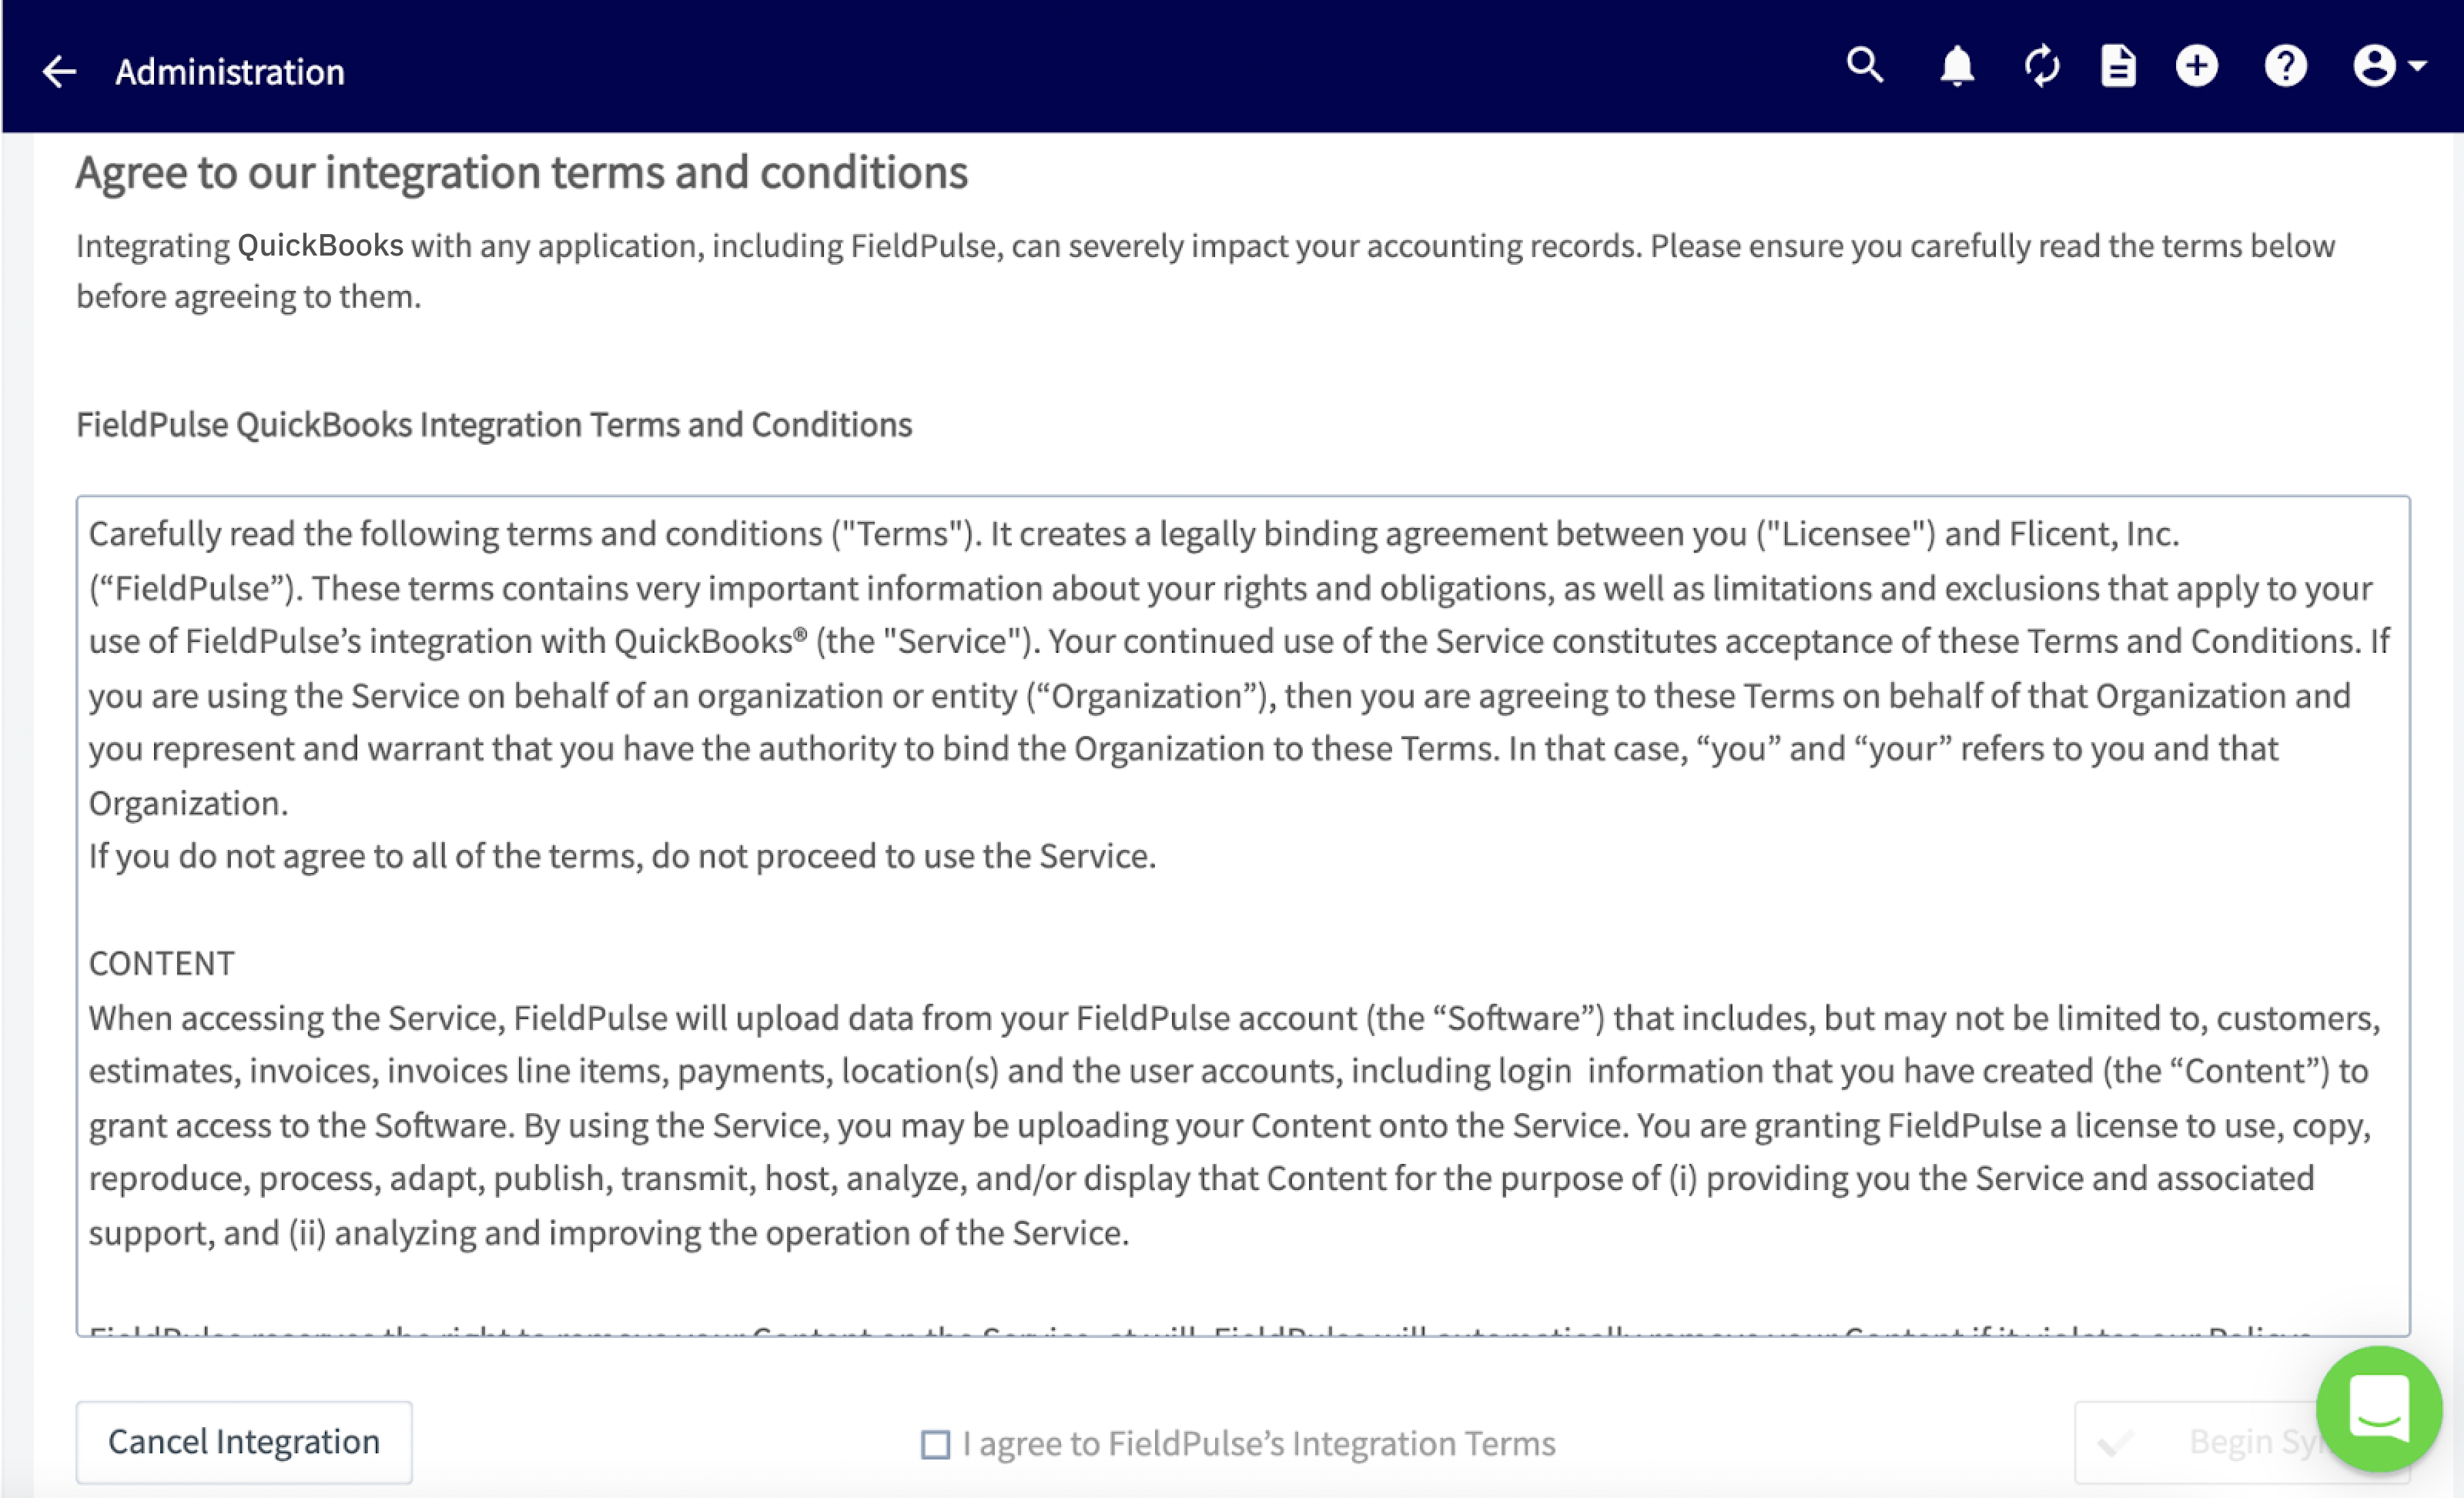
-
-## 9\. Finally you will reach this page, which shows that the syncing process has started. You should begin see these items populate in your FieldPulse account
-
-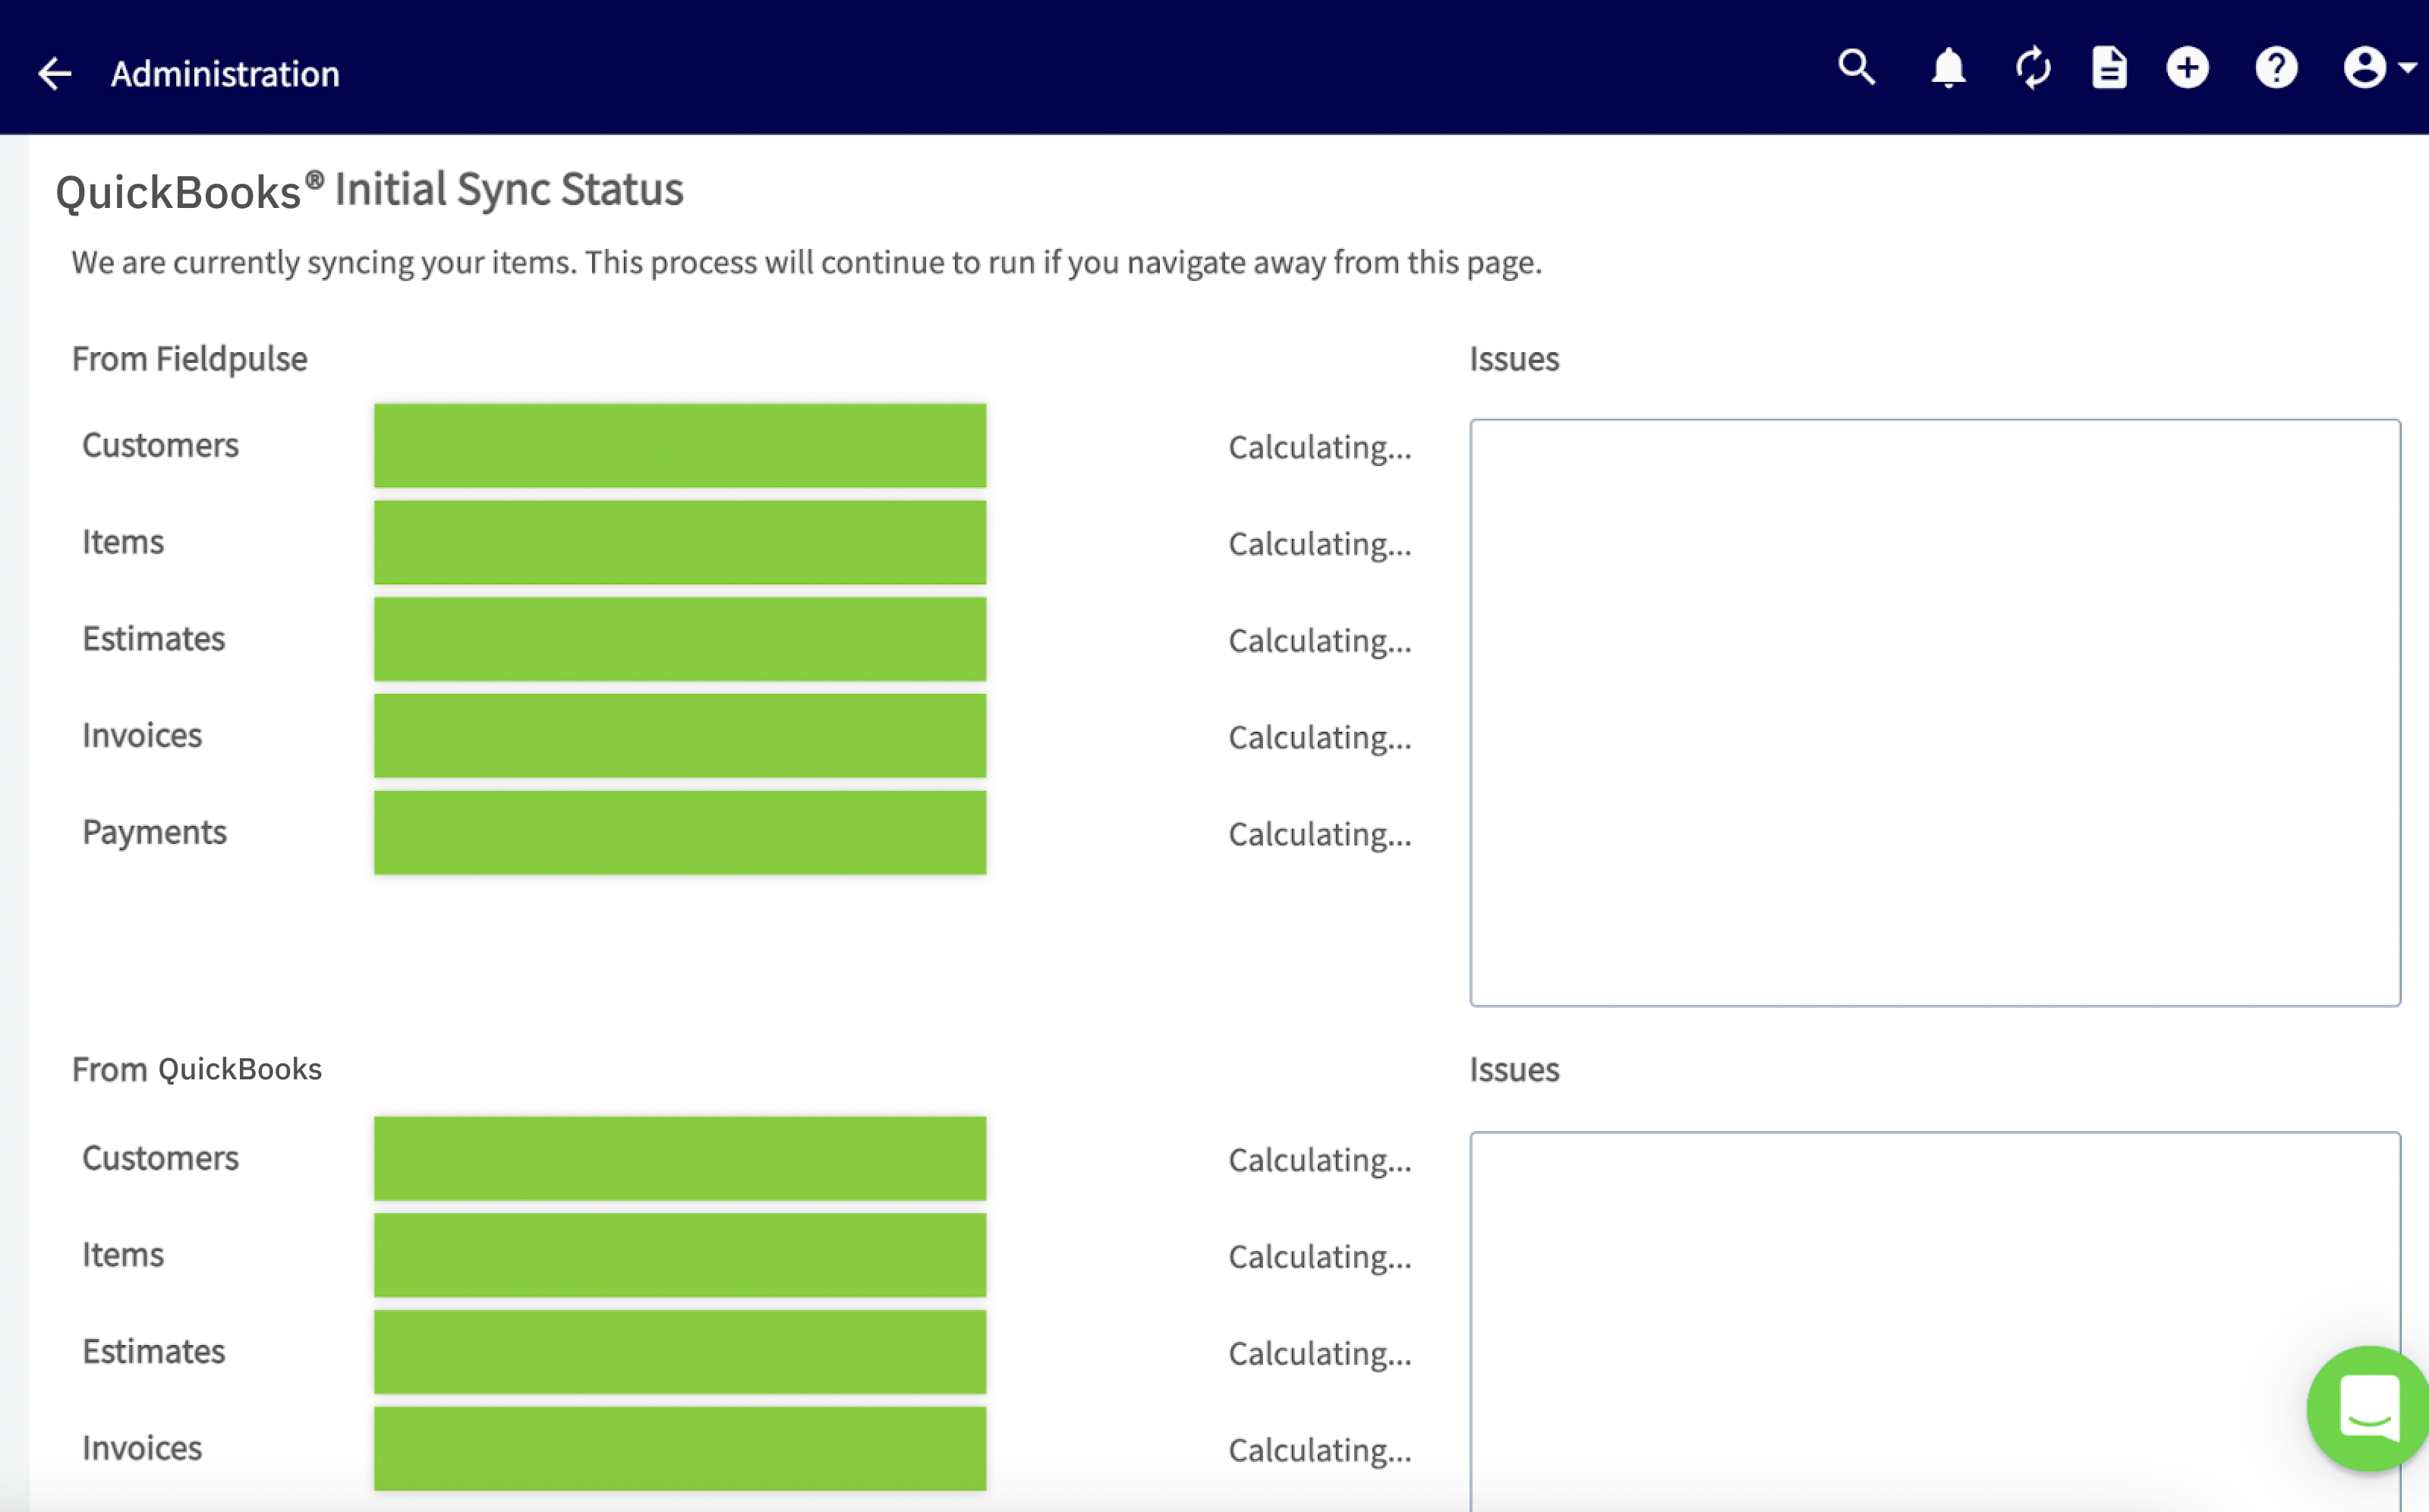
-
-_( **Note:** If you have a large number of items coming over, please be patient. This can take some time. You can exit out of this page and operate as normal and check back on the status at any time.)_
-
----
-
-**Have additional questions?**
-
-_Contact us at [support@fieldpulse.com](mailto:support@fieldpulse.com) or use the chat feature in the bottom right corner of your screen._
\ No newline at end of file
+## 1\. Request access to sync with QuickBooks.
\ No newline at end of file
Post-Sync: QuickBooks Online
- Module: QuickBooks Online
- File:
post-sync-quickbooks-online.mdx - Intercom URL: https://help.fieldpulse.com/en/articles/9307808-post-sync-quickbooks-online
- Last modified: 2026-03-25
Index: post-sync-quickbooks-online.mdx
===================================================================
--- post-sync-quickbooks-online.mdx existing
+++ post-sync-quickbooks-online.mdx intercom
@@ -1,194 +1,1 @@
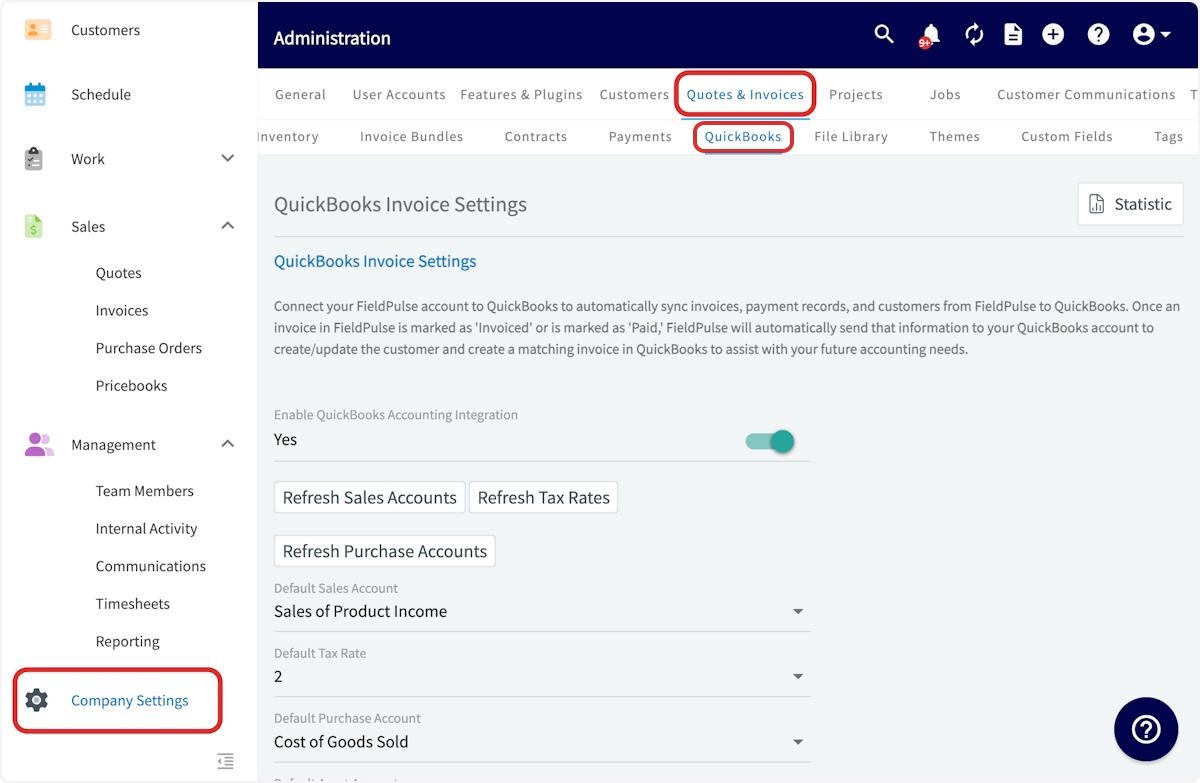
-## Sync Settings
-
-All options can be changed at any time on individual invoices and items or by navigating to _Company Settings_ \> _Estimate & Invoices_ tab > _QuickBooks_ subtab.
-
-
-
-
-
-### The order in which you sync your items on this page matters
-
-You must sync your items in this order: Customers, Invoices, Line Items, Sync Classes.
-
-
-
----
-
-## Default Tax Rate Setting
-
-There is a toggle that now enhances your control over tax rates when creating Estimates and Invoices.
-
-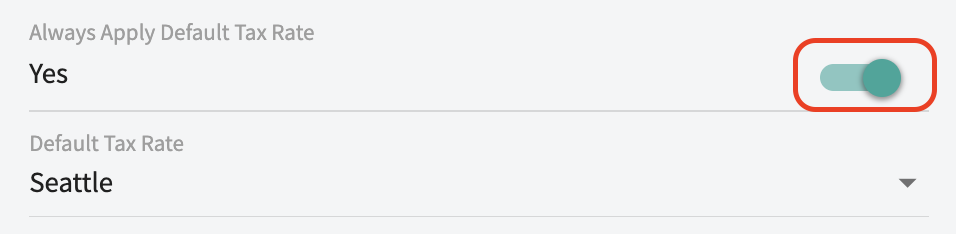
-
-When this toggle is **ON**, all newly created Estimates and Invoices will automatically apply the selected default tax rate. Please note that this setting only impacts records created **after** it has been enabled.
-
-### **QuickBooks Online Tax Handling Logic**
-
-The behavior of your tax rates will vary depending on the configuration of your FieldPulse AutoTax, QuickBooks Online AutoTax, and the Always Apply Default Tax Rate setting.
-
-**Here’s how it works when creating a new Estimate/Invoice:**
-
-| | | | |
-| --- | --- | --- | --- |
-| **Always Apply Default Tax Rate** | **FieldPulse AutoTax** | **QuickBooks Online AutoTax** | **Behavior** |
-| OFF | OFF | OFF | Applies the default tax rate. |
-| OFF | ON | ON | Applies automatic tax. Displays FieldPulse’s auto-calculated rate (“ZipTax”) until sync; replaces with QuickBooks Online’s auto-tax code once synced. (Current behavior — unchanged) |
-| OFF | OFF | ON | Applies automatic tax. Displays the default tax code until synced, then replaces with QuickBooks Online auto-tax code. |
-| ON | ON | OFF | Applies QuickBooks Online's custom rate matching FieldPulse's AutoTax rate (if available); if no match, uses the default tax rate. |
-
----
-
-## Customers
-
-A synced customer will display the QuickBooks logo on the customer record.
-
-
-
-If a customer needs to be manually synced you can do so by clicking _Sync with QuickBooks_ in the customer record.
-
-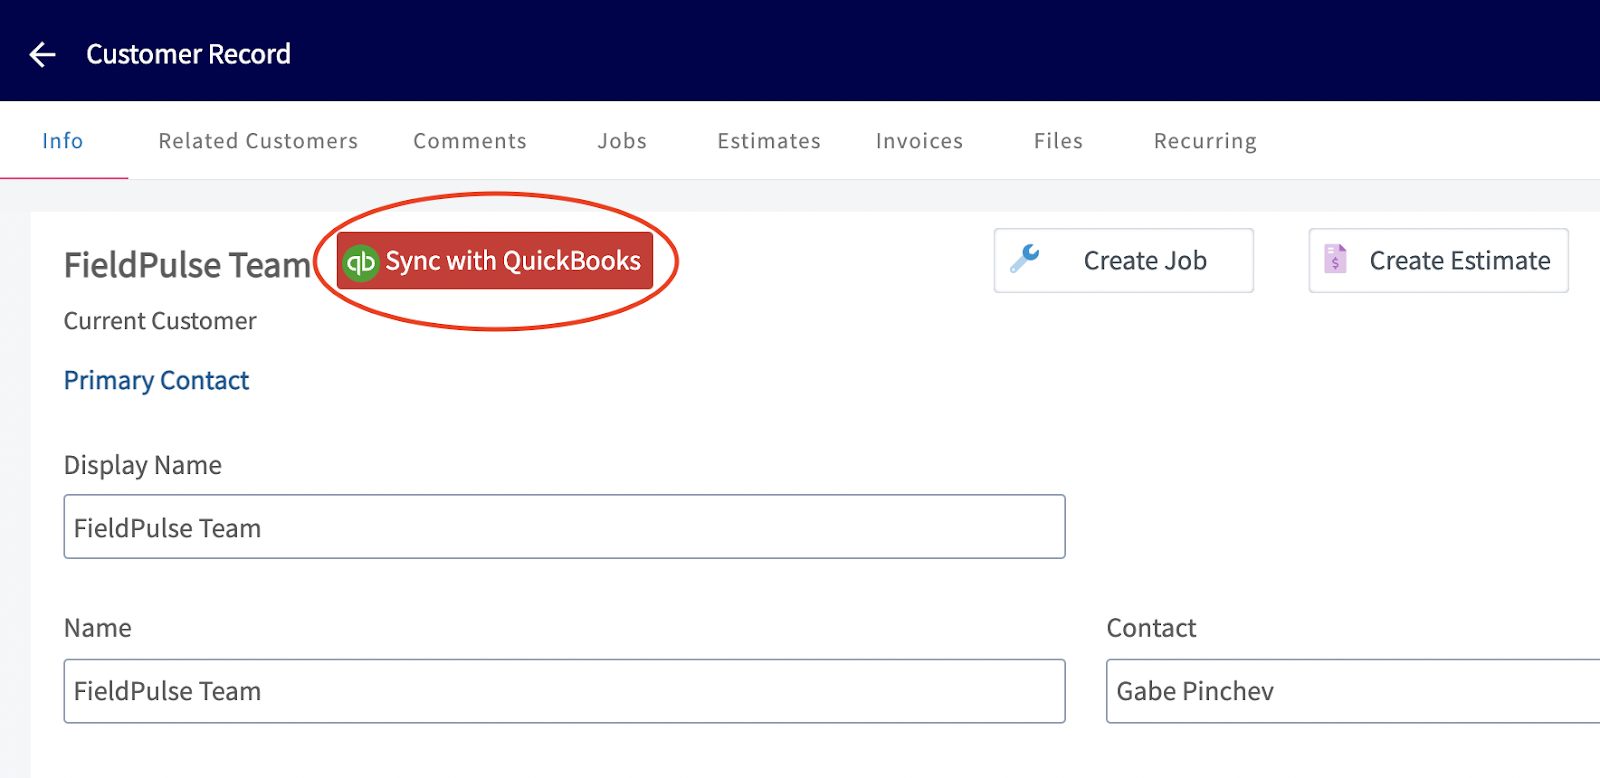
-
----
-
-## Invoices
-
-An invoice that has been synced will display _Open in QuickBooks_, which will take you directly to that invoice in QuickBooks when clicked.
-
-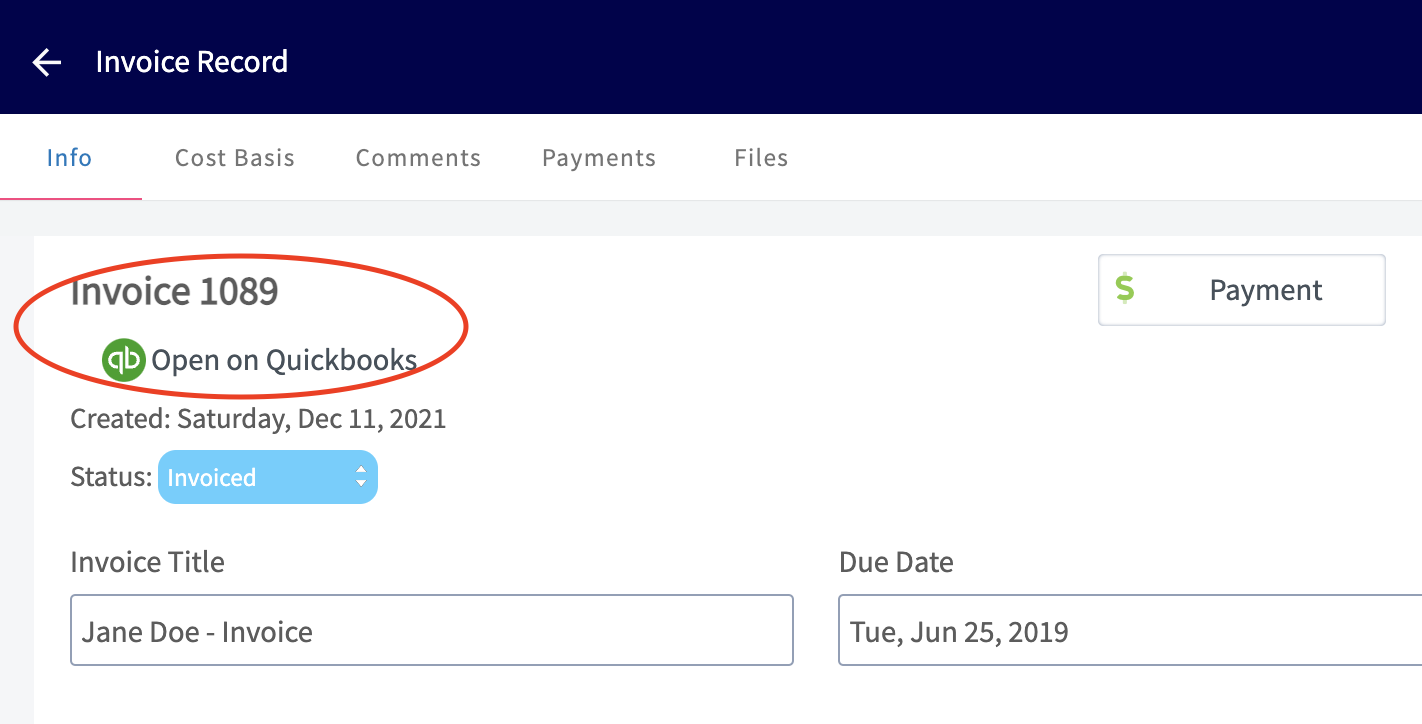
-
-_( **Note:** Invoices begin syncing to QuickBooks once they've reached the 'Invoiced' status to indicate that they are awaiting payment. The attached customer, invoice items, and tax rate will also be synced in FieldPulse.)_
-
-Records (customers, invoices, etc.) that are deleted/archived in FieldPulse will also be deleted in QuickBooks.
-
----
-
-## Sales & Purchase Accounts
-
-When creating a line item in FieldPulse, you can select which sales and purchase accounts under which to house the line item in QuickBooks. If you opt not to select a sales or purchase account, it will default to the sales and purchase accounts selected during the initial sync.
-
-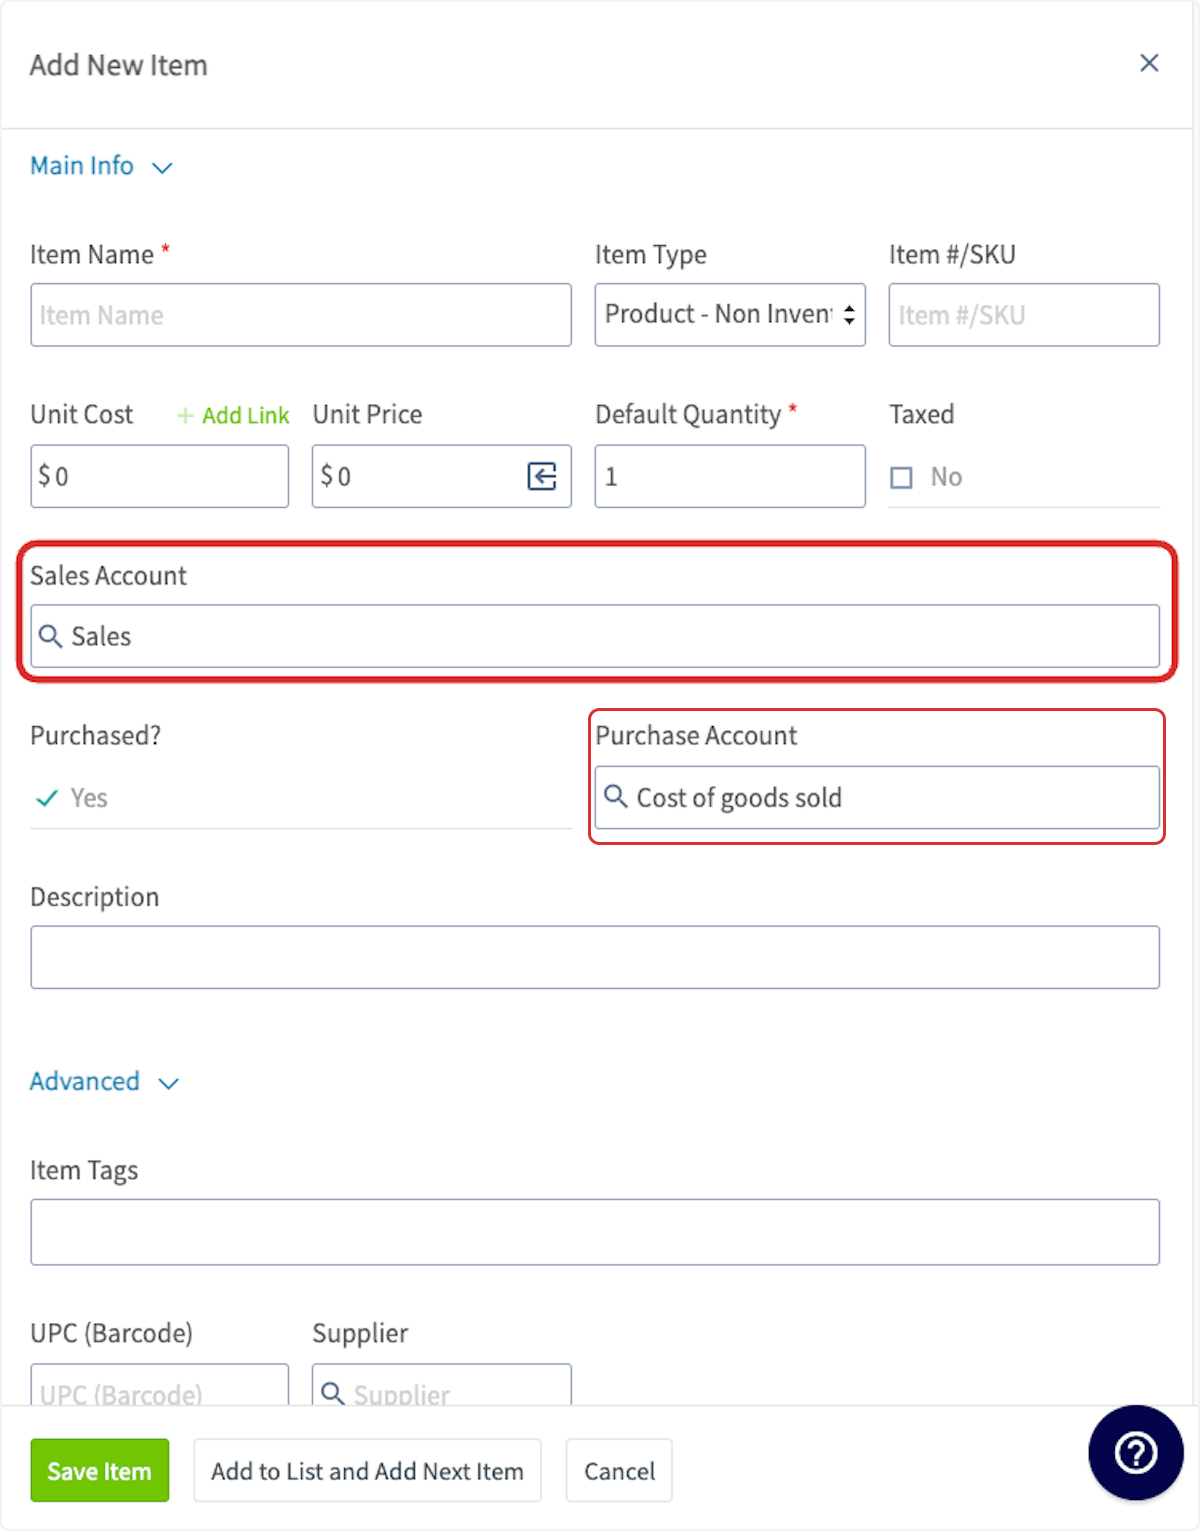
-
----
-
-## Business Classes
-
-Business classes are a way to categorize invoices. New business classes must be created in QuickBooks and can be adjusted there as well. When creating an invoice in FieldPulse, you can select which business class to assign.
-
-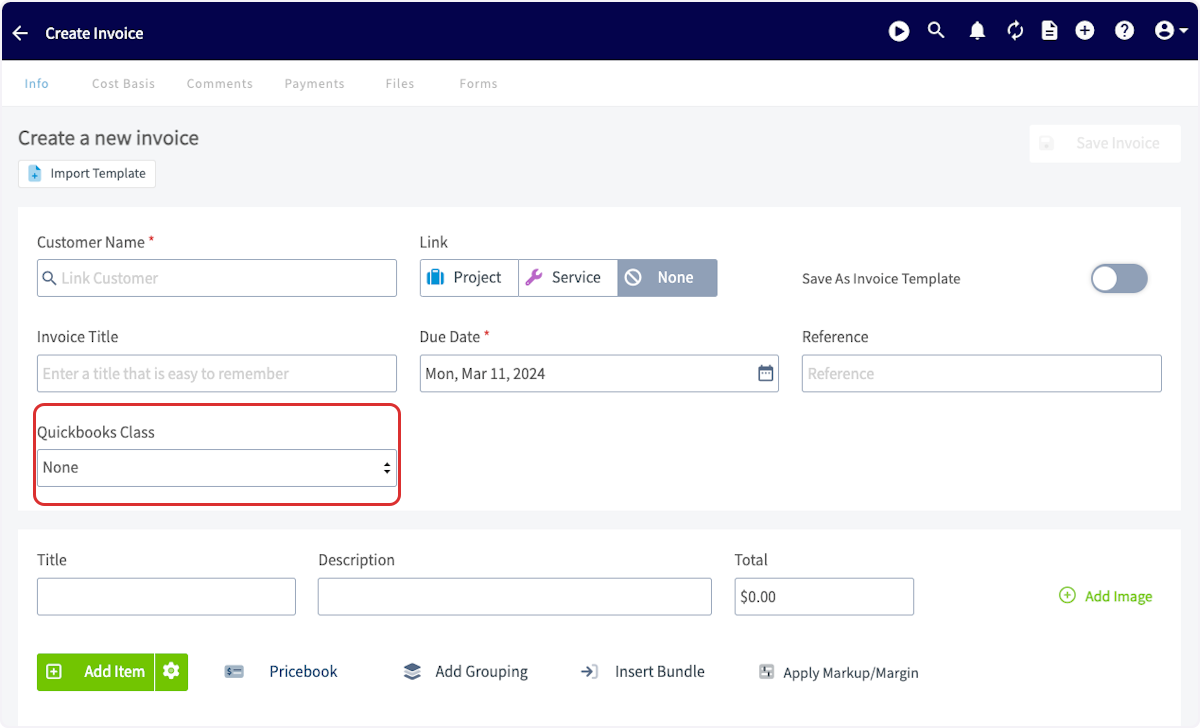
-
----
-
-## Projects
-
-QuickBooks Online projects sync to FieldPulse as related customers. If you joined FieldPulse before 7/16/2024 and would like to disable the sync of QuickBooks Online projects to FieldPulse, reach out to us via [support@fieldpulse.com](mailto:support@fieldpulse.com) or use the chat in the bottom right corner.
-
-_( **Note:** If the project sync is disabled, the estimates or invoices within that project will also not sync.)_ If you joined FieldPulse after 7/16/24, the QuickBooks Online project sync is disabled in your account. Reach out to us via [support@fieldpulse.com](mailto:support@fieldpulse.com) or use the chat in the bottom right corner if you want to
-
-enable this sync.
-
----
-
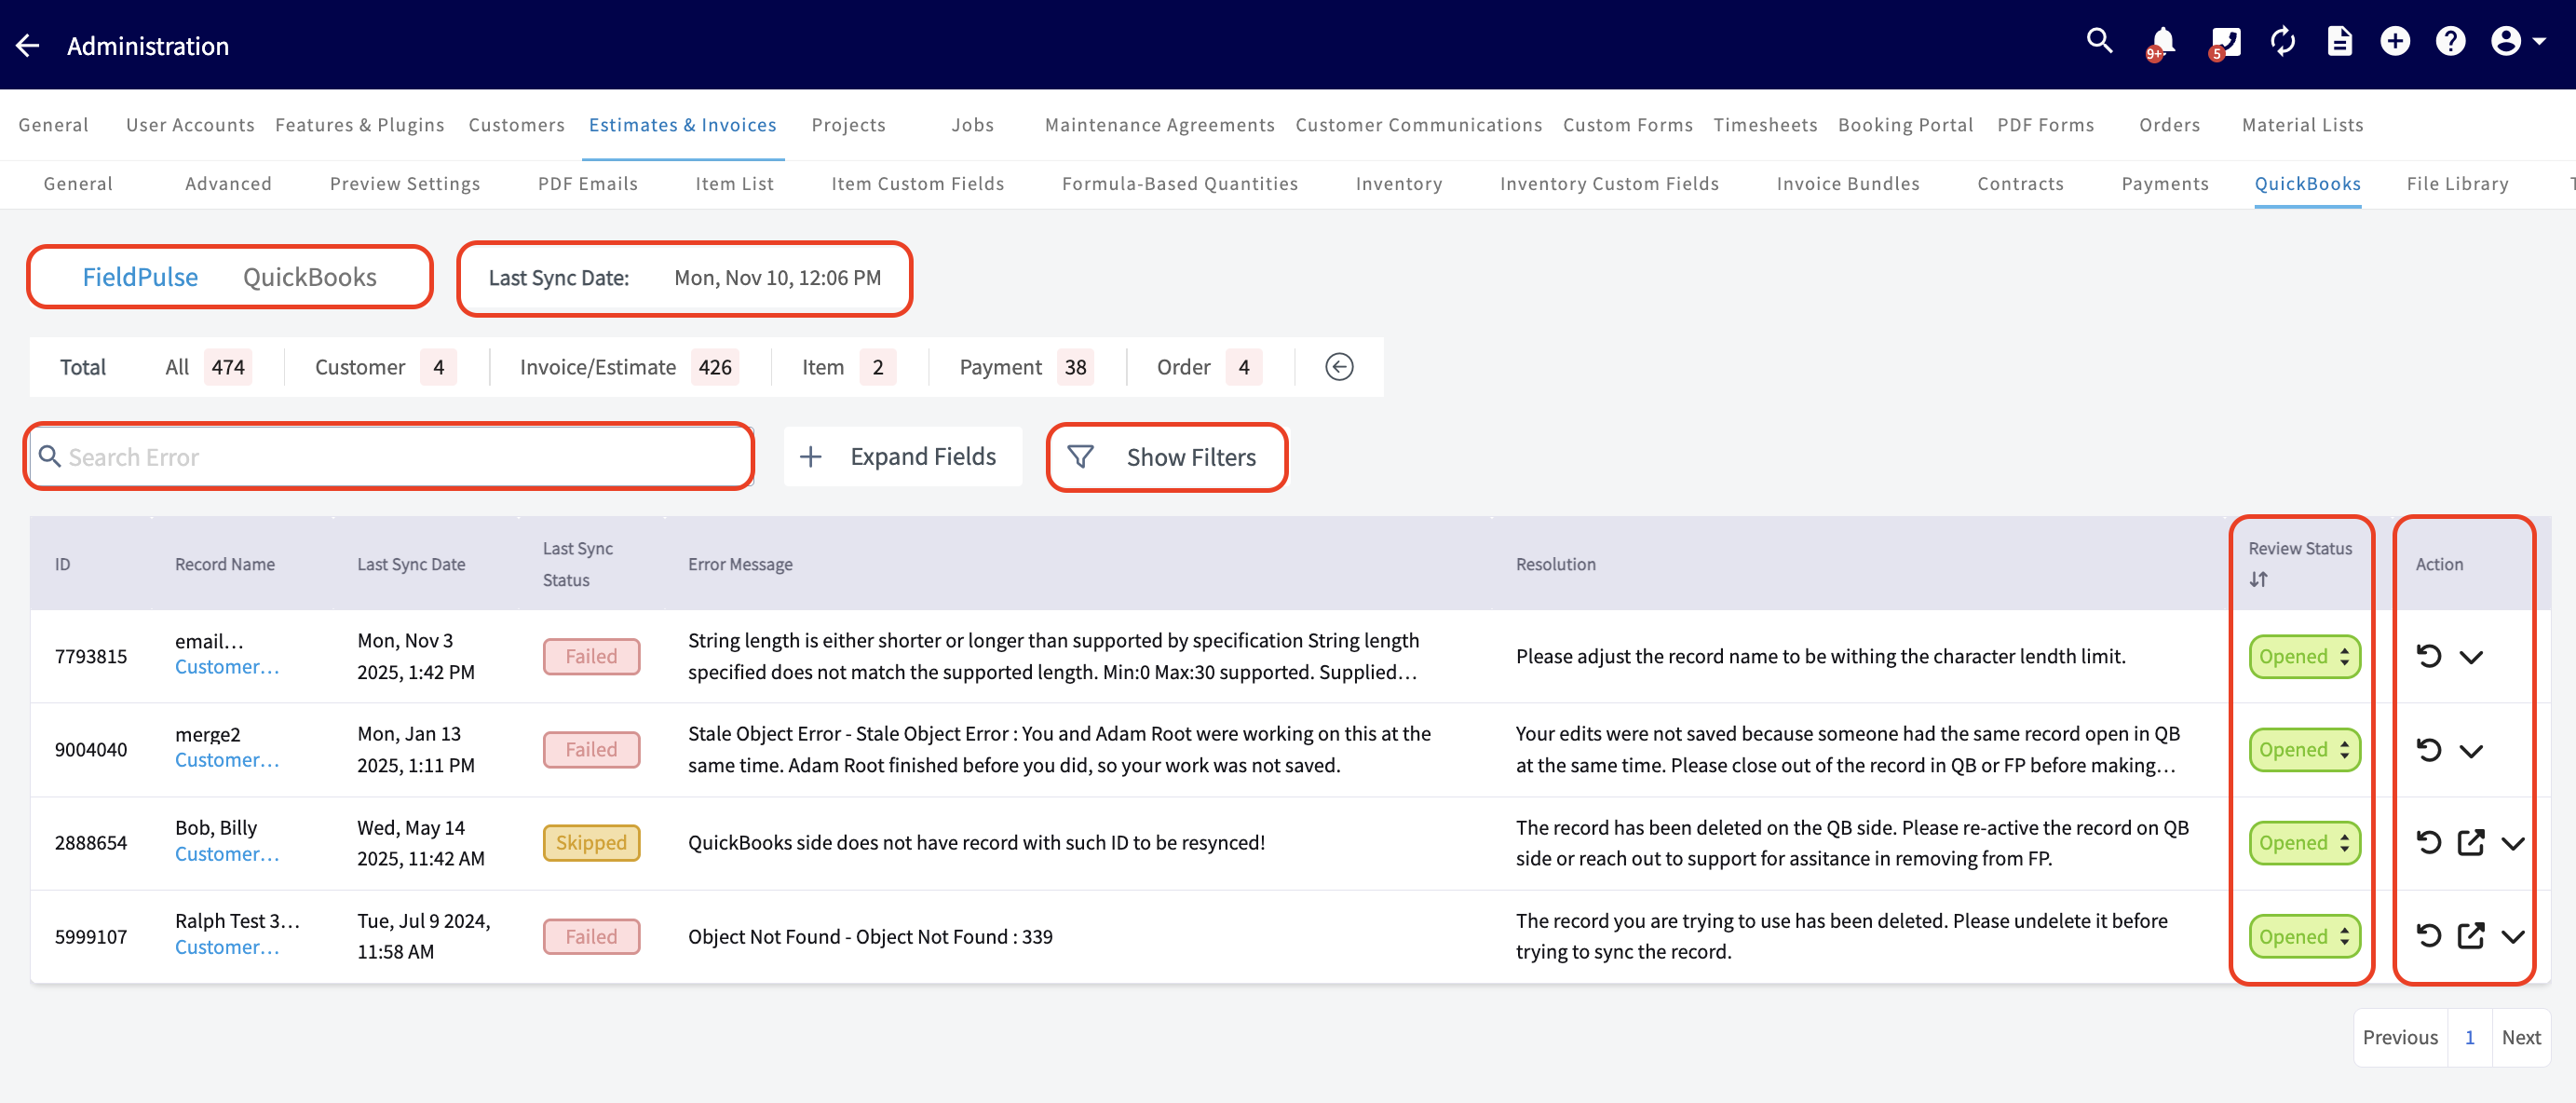
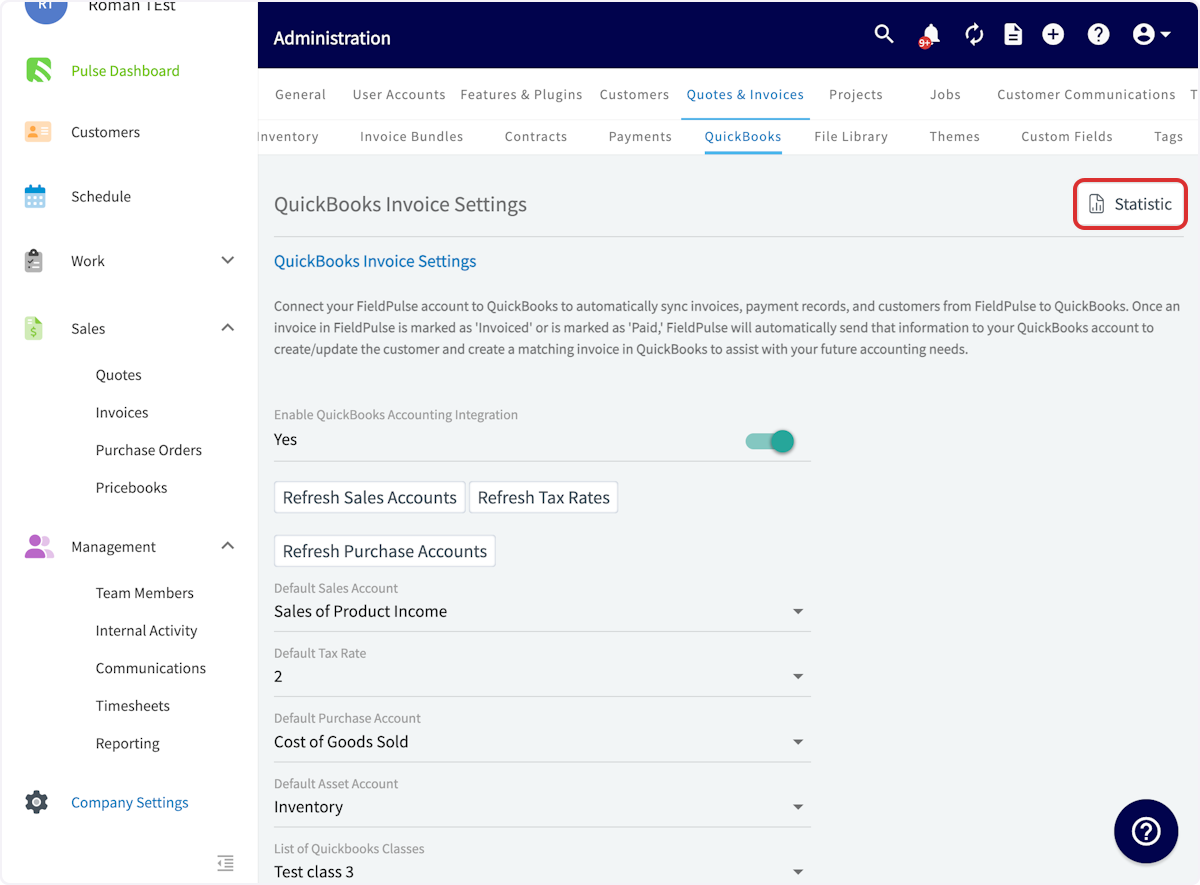
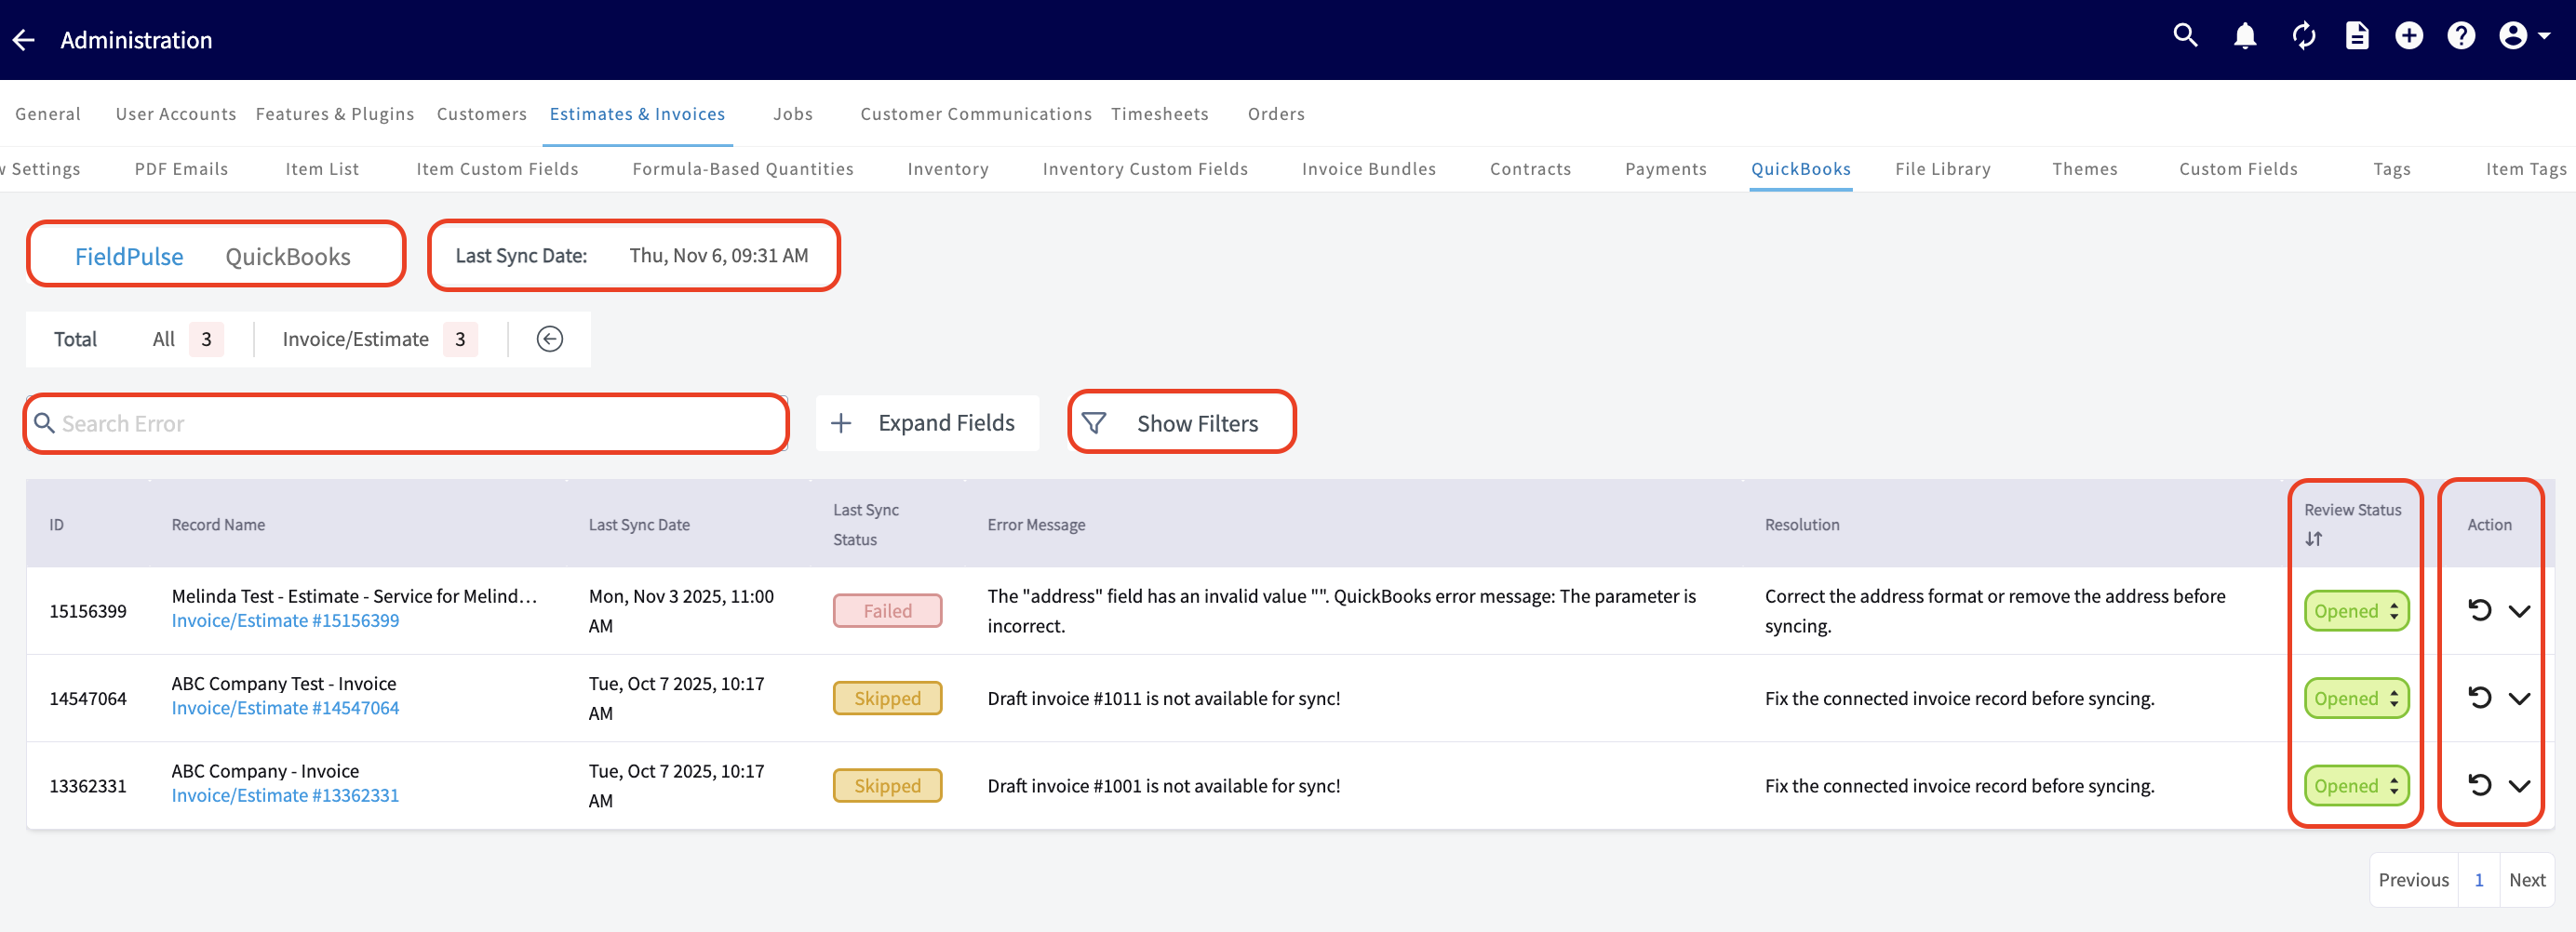
-## Sync Management
-
-To understand which records have not synced, select _QuickBooks Online_ _Statistic_.
-
-
-
-### Here, you can view the following
-
-- **Date and Time:** See when your most recent sync occurred.
-
-- **Unsuccessful Records:** Identify exactly which records haven’t synced and the reasons why.
-
-- **Search Functionality:** Search among your records.
-
-- **Review Status Column:** Close and filter out resolved errors.
-
-Switch between FieldPulse and QuickBooks on this page to locate where the sync issue is. Once you have identified which records failed to sync, click on the record details to navigate to that record. Correct the errors and re-sync them.
-
-
-
-### Error Messages
-
-Use this table to better understand the _Statistic_ page error messages, QuickBooks Online error messages, and the necessary actions to resolve the error and sync the affected records.
-
-| | |
-| --- | --- |
-| **Error Message** | **Necessary Action** |
-| "Not a valid product or service name. Names must have at least one character and cannot include tabs, newlines or ':'." | Item name has invalid characters that QuickBooks Online does not allow. Please remove the invalid character(s) from the item name. |
-| "The action could not be completed because another user was creating, editing or deleting a transaction with inventory products at exactly the same time. Please try again in 30 min. If the issue persists, please contact Customer Support." | Someone has the same record open in QuickBooks Online and it is preventing updates from FieldPulse to sync. Please close the record in QuickBooks Online. |
-| "You can't change a Category into another item type." | This Item exists as a Category in QuickBooks Online and therefore cannot be used on an estimate or invoice. Please replace this item with a product or service type item. |
-| "Enter a transaction amount that is 0 or greater." | The invoice amount cannot be less than 0. |
-| "The discount amount can't be greater than the subtotal" | The invoice amount cannot be less than 0. |
-| "This name is being used by another vendor. Please use a different name. You can merge names only when their type (customer, vendor or employee) matches." | Customers and vendors must have unique display names. |
-| "This transaction is matched to a downloaded transaction. If you want to change the account, you need to unmatch the transaction first." | The transaction can only be edited from the QuickBooks Online side. |
-| "You can’t create or modify a transaction with a date that comes before you started tracking quantity on hand for the following: MISC material." | You started tracking inventory after the invoice was invoiced. Inventory tracking start date must be changed in QuickBooks Online to be before the invoiced date or invoiced date must be after the inventory tracking start date. |
-| "Account Period Closed, Cannot Update Through Services API - The account period has closed and the account books cannot be updated through through the QuickBooks Online Services API. Please use the QuickBooks Online website to make these changes." | The accounting period is locked in QuickBooks Online. The record can only be updated from the QuickBooks Online side. |
-| "Deposited Transaction cannot be changed", "This transaction has been deposited. If you want to change or delete it, you must edit the deposit it appears on and remove it first" | The transaction can only be edited from the QuickBooks Online side. |
-| "Description-only Item can not be synced to QuickBooks!" | This message can be ignored as this is a non syncing item type. |
-| "Draft invoice # is not available for sync!" | Draft invoices cannot be synced from FieldPulse to QuickBooks Online. Invoices will sync once they are finalized. |
-| "Invalid Customer", "The customer you have specified has been deleted. You cannot create or edit a transaction with a deleted customer." | This customer is archived and must be reactived to sync related records. |
-| "Invalid Email Address format - Email Address does not conform to the syntax rules of RFC 822. Supplied value:#" | The email format on the customer record is invalid. |
-| "An item in this transaction is set up as a category instead of a product or service." | The invoice contains a line item that is a Category in QuickBooks Online. The item should be replaced on the invoice as a product or service type item. |
-| "Item # sync failed!" | The item on the invoice is not synced. The item must be synced before the invoice can sync. Please navigate to the item and try re-syncing it. |
-| "QuickBooks side does not have record with such ID to be re-synced!" | The record has been deleted on the QuickBooks Online side. |
-| "Related Customer # sync failed!" | The Customer associated with this invoice is not synced. They must be synced prior to syncing this invoice record. |
-| "Related Invoice # sync failed!" | The Invoice associated with this payment is not synced. It must be synced prior to syncing this payment record. |
-| "Related Parent Customer # sync failed!" | The parent customer must be synced before trying to sync the related child customer. |
-| "There is no income account associated with the item." or "There is no income account associated with the item #. Is it marked for sale, and has an income account associated with it?" | Ensure that a sales account is selected on this item and then re-sync the item. |
-
----
-
-## Troubleshooting
-
-Sometimes, records do not sync between FieldPulse and QuickBooks Online. Review the issues and potential causes below to troubleshoot and resolve your sync.
-
-### A customer may not sync because
-
-1. Email address is missing or formatted incorrectly.
-
-2. The customer name is a duplicate of another customer.
-
-3. The email address or phone number exceeds 31 characters, or the notes exceed 4000 characters.
-
-4. Your customer is archived in QuickBooks Online.
-
-5. Your customer name uses “:”.
-
-6. Your customer is the child of a parent customer that is not synced.
-
-### A line item may not sync because
-
-1. Fields are incorrect or missing (item name, item price, SKU, etc.).
-
-2. The item name exceeds 100 characters or your SKU exceeds 30 characters.
-
-3. The item name is a duplicate of another line item.
-
-4. The item is not marked as a product or service in QuickBooks Online.
-
-5. The related sales and/or purchase account is not active in QuickBooks Online.
-
-6. Your line item is categorized as “Product - Inventory,” but your QuickBooks Online subscription doesn’t support inventory tracking.
-
-### An invoice may not sync because
-
-1. The Customer is not synced.
-
-2. A line item is not synced.
-
-3. Your notes exceed 4000 characters.
-
-4. Estimate/invoice is in a closed accounting period in QuickBooks Online.
-
-### A payment may not sync because
-
-1. There is an archived payment on the invoice already synced to QuickBooks Online.
-
-2. The related invoice is not synced.
-
----
-
-**Have additional questions?**
-
-_Contact us at [support@fieldpulse.com](mailto:support@fieldpulse.com) or use the chat feature in the bottom right corner of your screen._
\ No newline at end of file
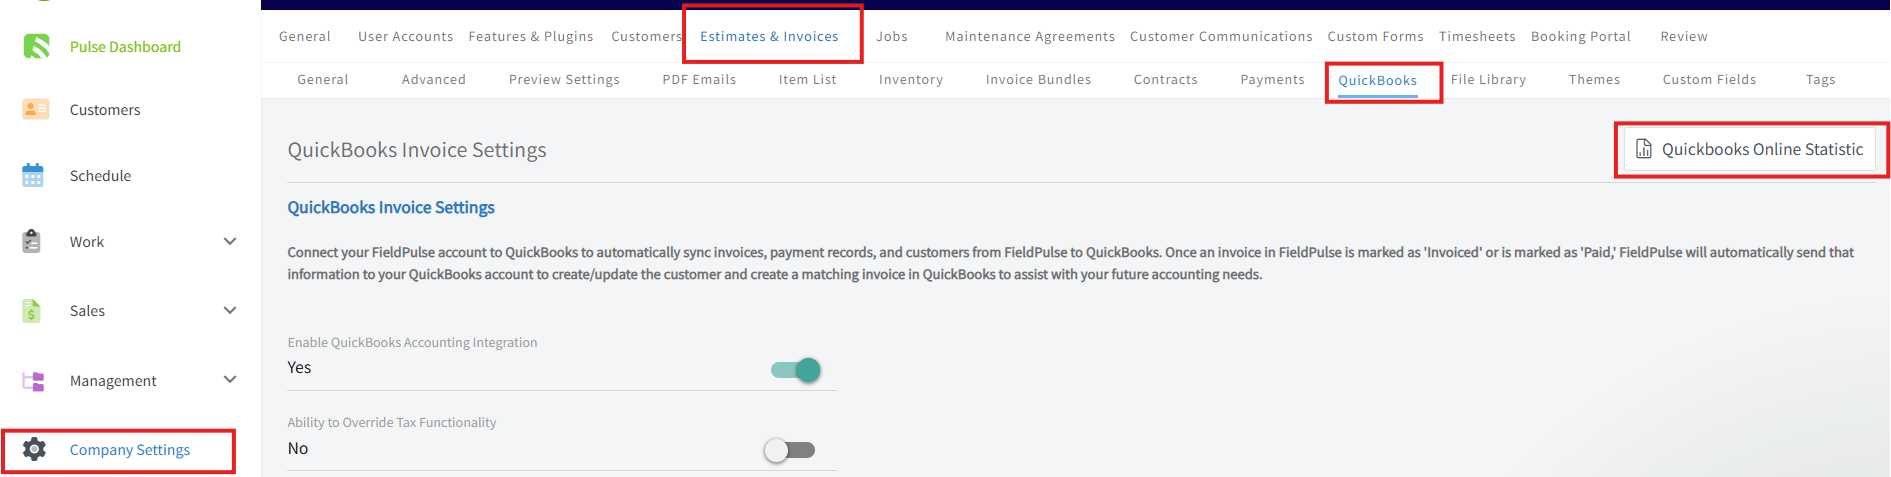
+# Sync Settings
\ No newline at end of file
Can I have my Estimate and Invoice numbers automatically come from QuickBooks Online?
- Module: QuickBooks Online
- File:
can-i-have-my-estimate-and-invoice-numbers-automatically-come-from-quickbooks-online.mdx - Intercom URL: https://help.fieldpulse.com/en/articles/12277136-can-i-have-my-estimate-and-invoice-numbers-automatically-come-from-quickbooks-online
- Last modified: 2026-03-09
Index: can-i-have-my-estimate-and-invoice-numbers-automatically-come-from-quickbooks-online.mdx
===================================================================
--- can-i-have-my-estimate-and-invoice-numbers-automatically-come-from-quickbooks-online.mdx existing
+++ can-i-have-my-estimate-and-invoice-numbers-automatically-come-from-quickbooks-online.mdx intercom
@@ -1,21 +0,0 @@
-Yes, you can. To ensure your invoice and estimate numbers sync directly from QuickBooks Online (QBO) to FieldPulse, you need to disable Custom Transaction Numbersin your QBO settings.
-
----
-
-## How to Disable Custom Transaction Numbers in QBO
-
-To set this up, you'll need to go into your QuickBooks Online account:
-
-- Log in to QuickBooks Online.
-
-- Navigate to your company's settings.
-
-- Find the option for _Custom Transaction Numbers_ and make sure it is turned off.
-
-When this setting is off, QuickBooks will automatically assign the next number in its sequence to new estimates and invoices. FieldPulse will then sync and use this same numbering.
-
----
-
-**Have additional questions?**
-
-_Contact us at [support@fieldpulse.com](mailto:support@fieldpulse.com) or use the chat feature in the bottom right corner of your screen._
\ No newline at end of file
QuickBooks Online Errors
- Module: QuickBooks Online
- File:
quickbooks-online-errors.mdx - Intercom URL: https://help.fieldpulse.com/en/articles/11534311-quickbooks-online-errors
- Last modified: 2026-03-09
Index: quickbooks-online-errors.mdx
===================================================================
--- quickbooks-online-errors.mdx existing
+++ quickbooks-online-errors.mdx intercom
@@ -1,113 +1,1 @@
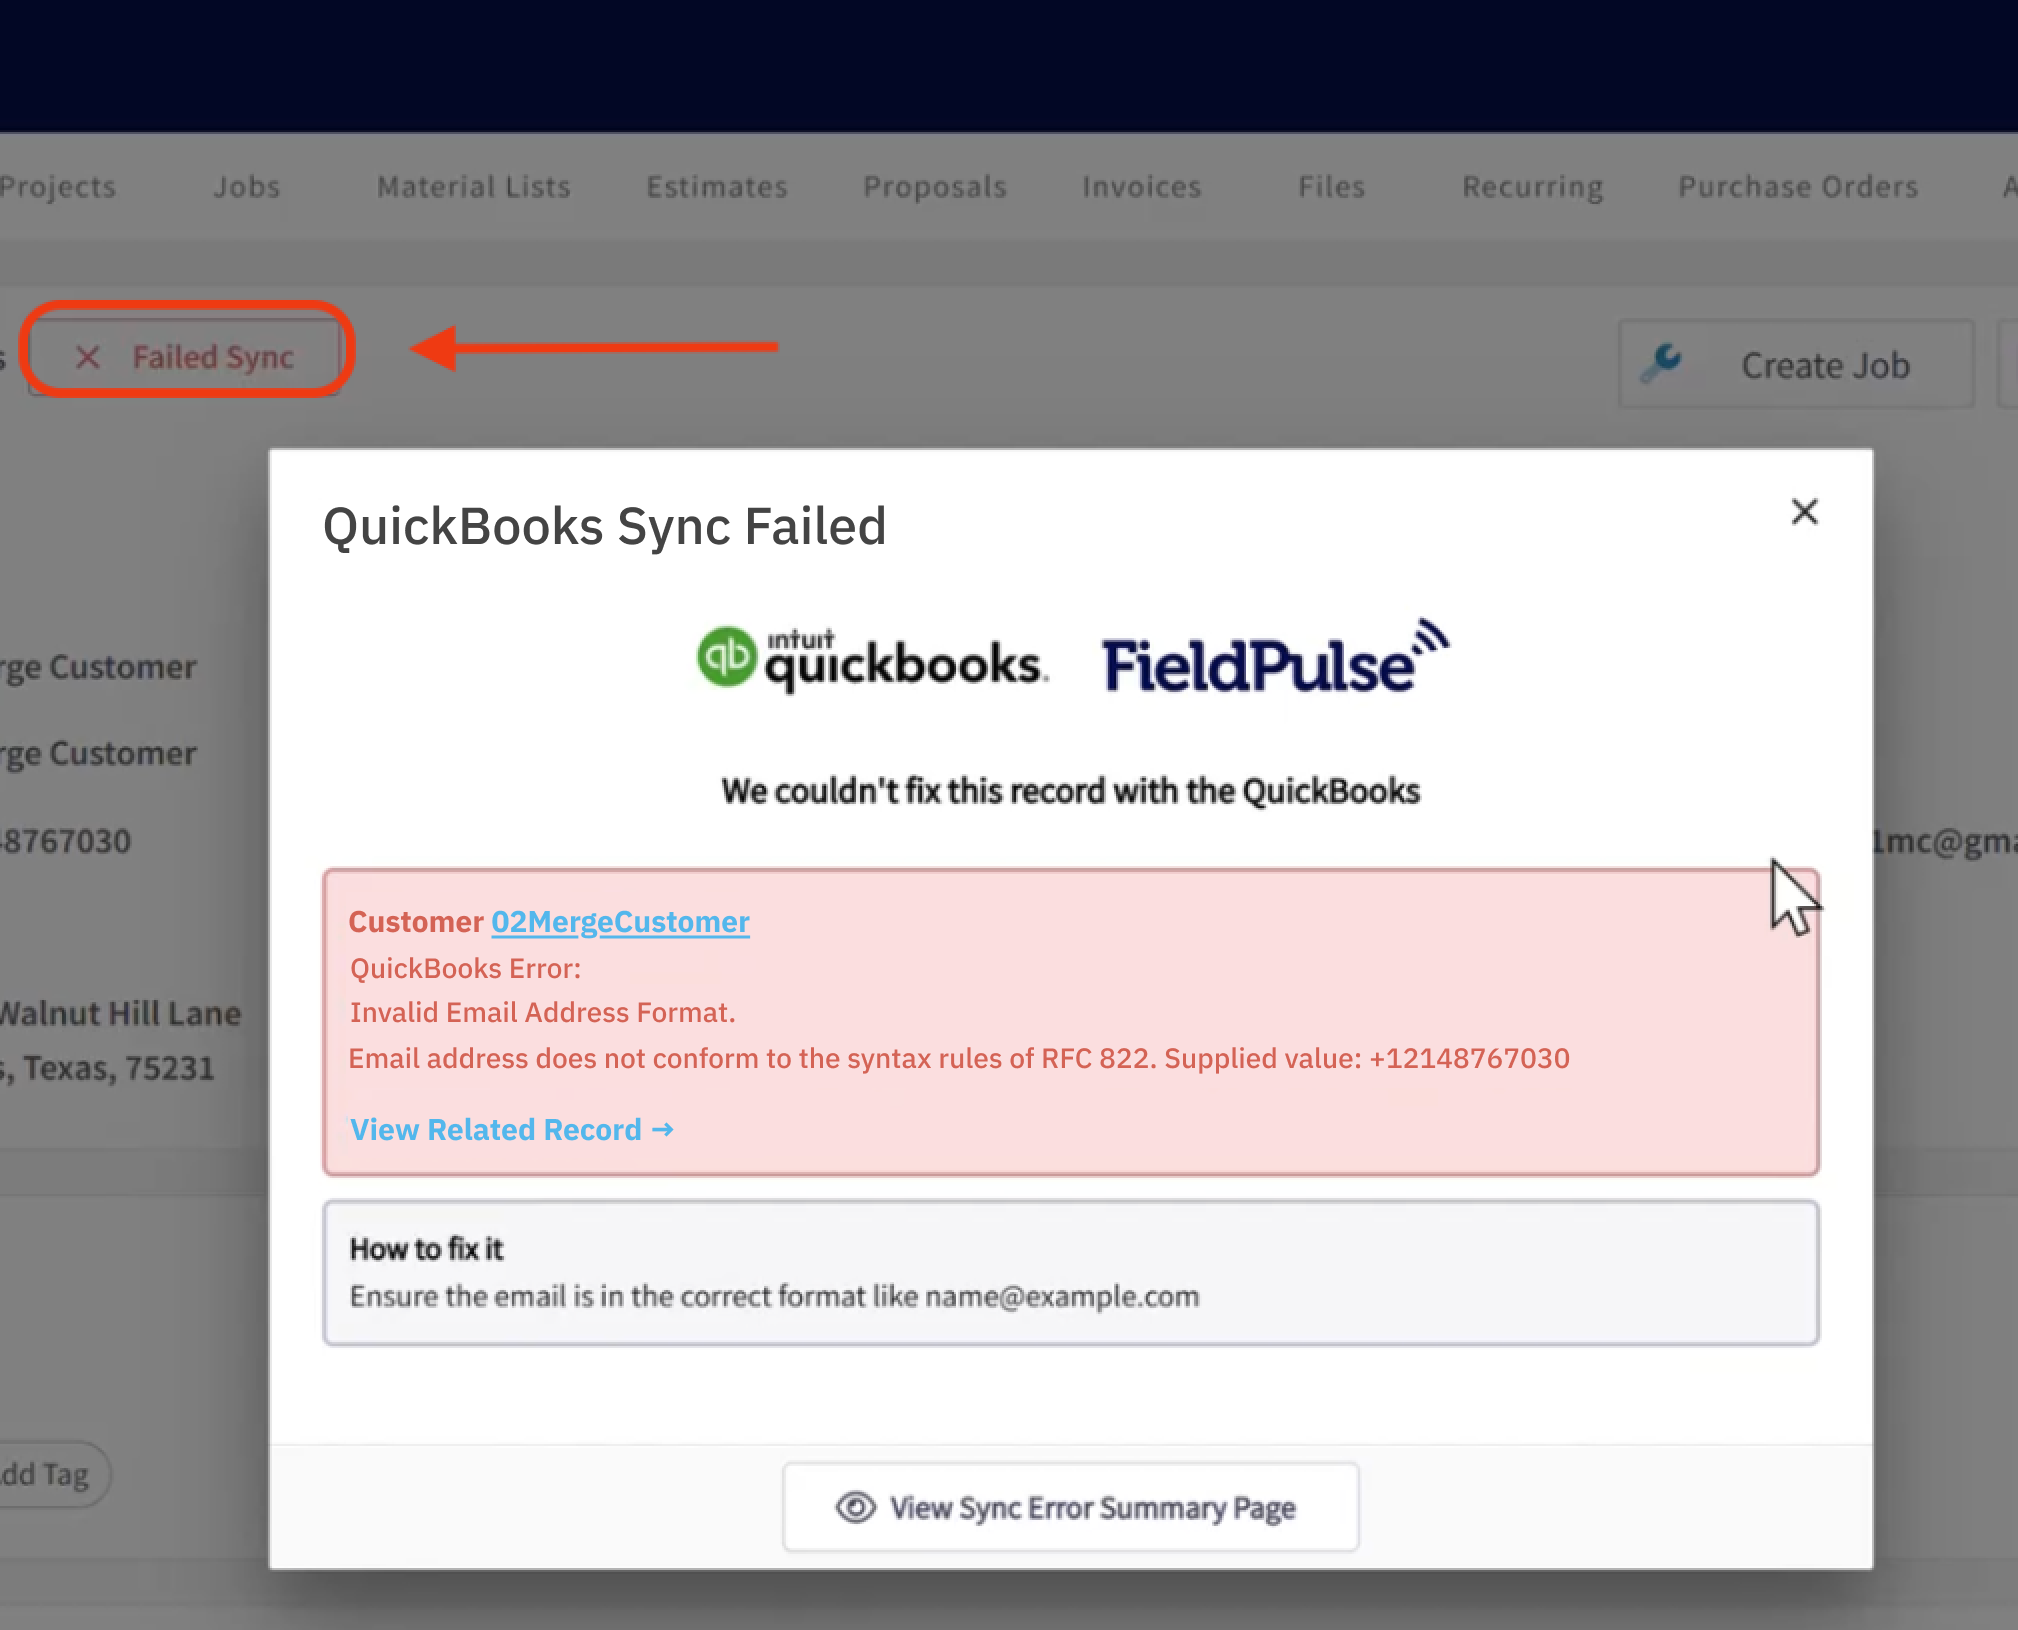
-## Understanding and Resolving Sync Errors In-App
-
-For any record that fails to sync with QuickBooks Online—including customers, invoices, and payments—you can use the in-app troubleshooting tool to quickly identify and fix the issue.
-
-Clicking the _Failed Sync_ button next to the record will take you to a dedicated page where all sync errors for that record are listed.
-
-
-
----
-
-## Comprehensive QuickBooks Error Reference
-
-Here is a complete list of QuickBooks errors along with their resolutions.
-
-| | |
-| --- | --- |
-| ## Error Message from QuickBooks Online | ## Necessary Action |
-| "A project must be a sub-customer billed to its parent." | Edit the project (related customer) and link it to its parent customer. |
-| "Cost estimate is not assigned to a valid project." | Open the estimate and select a valid project (related customer) before saving. |
-| "Make sure all your transactions have a GST/HST rate before you save." | Edit each line item in the estimate/invoice and ensure it has a GST/HST rate selected then save item. |
-| "Not a valid product or service name. Names must have at least one character and cannot include tabs, newlines or ':'." | Use a simple name with no symbols like ':' or extra spaces or returns. |
-| "The action could not be completed because another user was creating, editing or deleting a transaction with inventory products at exactly the same time. Please try again in 30 min. If the issue persists, please contact Customer Support." | Someone has the same record open in QuickBooks Online and it is preventing updates from FieldPulse to sync. Please close the record in QuickBooks Online before making any new updates. |
-| "This customer cannot be deleted because it is used on a recurring template." | The recurring invoice must be archived first before archiving the customer record. |
-| "When you create an item, if Track Quantity on Hand is turned on, the item must be of type Inventory." | Change the item type to 'Inventory' to allow quantity tracking. |
-| "You can’t change a bundle to another product or service type." | This item exists as a bundle in QuickBooks Online and the item type can not be changed. |
-| "You can't use **#** because **#** already exists. To make this change, you'll need to give one of the **#** a new, unique name." | Edit the name or number of the record to ensure it is unique. |
-| "A project cannot contain sub-customers." | You cannot link a related customer to a project (related customer). Please link the customer to the appropriate parent customer record. |
-| "An unexpected error occurred while accessing or saving your data. Please wait a few minutes and try again. If the problem persists, contact customer support." | Syncing is in progress -please wait a few minutes and try again. If the error persists please reach out to support. |
-| "Another customer is already using this name and it cannot be merged because this customer has sub-customers." | A customer with related customers linked to it cannot be merged. You must reallocate the customers first before merging. |
-| "Another user is currently accessing this company. Please try again." | Someone is making edits to the same record at the same time. Please close out of the record before making new edits. |
-| "Enter a transaction amount that is 0 or greater." | The estimate or invoice total cannot be less than 0. Please adjust the item amounts or add additional items. |
-| "Enter a transaction amount to continue." | The estimate or invoice cannot be empty. Please add additional items. |
-| "Initial quantity on hand for an inventory item is required." | When creating an inventory item please set the initial inventory amount. |
-| "Looks like you tried using an invalid or incorrect tax classification code. Try again with a different code." | Select a different tax rate from the options present and ensure that it is valid. |
-| "Not a valid product or service name. Names must have at least one character and cannot include tabs, newlines or ':'." | Use a simple name with no symbols like ':' or extra spaces or returns. |
-| "Please make the parent customer active first. Then you can make this sub-customer active." | You must make the parent customer active before making any related customers active. |
-| "Please make the parent product or service active first. Then you can make this sub-product or service active." | You must make the parent item active before making any related items active. |
-| "Select a date that's after the last transaction for this item." | The invoiced date must be after the item created date. Please adjust the invoiced date or edit the item date in QuickBooks Online. |
-| "Something this action required is no longer available. Another user may have deleted it. Please refresh your screen to see the current information." | The item/record you are using may have been archived by another user. Please make the item/record active again before using, use a different item, or create a new item/record. |
-| "The account associated with this product or service has been deleted. Please undelete first or pick another one." | The sales or purchase account associated with this product or service has been deleted. Please undelete first or pick another one. |
-| "The discount amount can't be greater than the subtotal." | The invoice amount cannot be less than 0. |
-| "This customer cannot be deleted because it has one or more projects." | A customer with an active project in QuickBooks Online or a related customer cannot be archived. |
-| "This customer cannot be deleted because it has sub customers and non-zero balance." | A customer that has a related customer with open invoices cannot be archived. |
-| "This name is being used by another vendor. Please use a different name. You can merge names only when their type (customer, vendor or employee) matches." | Customers and venders must have unique display names. Please use a different name. |
-| "This needs to be active because it's the default product or service for sales." | You cannot delete this item/account because it is used as a default account in QuickBooks Online. |
-| "This transaction is matched to a downloaded transaction. If you want to change the account, you need to unmatch the transaction first." | The record cannot be edited from the FieldPulse side and must be edited from QuickBooks Online. |
-| "We're sorry, we can't save the sales tax you're trying to set up right now. Please try again later." | There is an error with the tax being applied to the line items. You must remove the items from the record and add them again to correct the tax. |
-| "Were sorry, QuickBooks encountered an error while calculating tax. Try reselecting the tax rate or reentering the product/service item and saving the form again." | There is an error with the tax being applied to the line items. You must remove the items from the record and add them again to correct the tax. |
-| "When you create an item, if Track Quantity on Hand is turned off, the item cannot be of type Inventory." | You cannot have an inventory item without tracking the inventory amounts. Please select the item type product - non-inventory. |
-| "You are not allowed to modify the quantity of an inactive inventory item." | You cannot edit the inventory amount of a deactivated item. Please make the item active first. |
-| "You can’t create or modify a transaction with a date that comes before you started tracking quantity on hand for the following: MISC material." | This means you started tracking inventory after the invoice was invoiced. Inventory tracking start date must be changed in QuickBooks Online to be before the invoiced date or invoiced date must be after the inventory tracking start date. |
-| "You can’t delete or void this transaction because it was created before you started tracking quantity on hand for the following: **#**" | This means you started tracking inventory after the invoice was invoiced. Inventory tracking start date must be changed in QuickBooks Online to be before the invoiced date or invoiced date must be after the inventory tracking start date. |
-| "You must enter the email address for this customer in order to email statements." | Please add the email address to the customer record. |
-| "You must set a transaction amount." | The invoice amount cannot be blank or less than 0. |
-| "You need to activate this item before updating the quantity." | You cannot update the inventory of a deactivated item. Please make the item active first. |
-| "Account Period Closed - The account period has closed. Txn Date= **#** is before book closing date= **#**" | The accounting period has been closed in QuickBooks Online. FieldPulse cannot sync any updates to QuickBooks Online for this date range. Please unlock the accounting period if you wish to make updates to these records in FieldPulse. Or you must make these changes in QuickBooks Online. |
-| "Account Period Closed, Cannot Update Through Services API - The account period has closed and the account books cannot be updated through through the QuickBooks Online Services API. Please use the QuickBooks Online website to make these changes." | The accounting period has been closed in QuickBooks Online. FieldPulse cannot sync any updates to QuickBooks Online for this date range. Please unlock the accounting period if you wish to make updates to these records in FieldPulse. Or you must make these changes in QuickBooks Online. |
-| "Authorization Failure", "AuthorizationFailure: --11014-You do not have access to use QuickBooks Online. statusCode: 401" | The account does not have permission to access QuickBooks Online. Please ensure the account you used to connect QuickBooks Online to FieldPulse is active and has admin permissions. |
-| "Authorization Failure", "AuthorizationFailure: Unknown Error during Authentication, statusCode: 500" | FieldPulse and QuickBooks Online have become disconnected. You will need to disable QuickBooks Online and enable again. |
-| "Cannot Change Who Customer Bills With Error", "Cannot Change Who Customer Bills With Error : You cannot change who this customer bills with because there are invoices for the parent that include charges for this customer, or there are payments from the parent that pay off invoices for this customer. Delete all payments or invoices to this customer's parent which link to this customer." | You cannot unlink the parent-child relationship because there are payments on the parent customer applied to invoices for the related customer in QuickBooks Online. Delete all payments or invoices to this customer's parent which link to this customer in QuickBooks Online. |
-| "Cannot Delete Object", "Cannot Delete Object : You can't make this customer inactive because it has sub customers." | You cannot archive the parent customer if it has active related customers. Please archive the child customers first. |
-| "Delete Customer Has Unbilled Expenses Error", "Cannot delete Customer. : This customer cannot be deleted because there are unbilled charges for this customer." | Please remove these charges or close them out in QuickBooks Online before archiving the customer. |
-| "Delete List Has Balance Error", "The entity you are trying to delete has an open balance. : This customer can't be deleted because it has a non-zero balance." | Please remove any open invoices or close them out in QuickBooks Online before archiving the customer. |
-| "Deposited Transaction cannot be changed", "This transaction has been deposited. If you want to change or delete it, you must edit the deposit it appears on and remove it first" | The payment has already been deposited in QuickBooks Online. To edit it, you must do so in QuickBooks Online. |
-| "Duplicate Name Exists Error - The name supplied already exists. : Another **entity** is already using this name. Please use a different name." | You cannot have two customers or vendors with the same display name. Please choose a different name or add an abbreviation on the end of the display name. |
-| "Duplicate Name Exists Error - The name supplied already exists. : Another Product name already exists is already using this name. Please use a different name." | You cannot have two items with the same name. Please choose a different name or add an abbreviation on the end of the name. |
-| "Duplicate Name Exists Error", "The name supplied already exists. : **#**" | You cannot have two items with the same name. Please choose a different name or add an abbreviation on the end of the name. |
-| "Feature Not Supported Error", "Feature Not Supported Error : We're sorry. This feature is not included in your QuickBooks Online **\#** subscription." | You do not have this feature enabled in QuickBooks Online. You may be trying to create inventory items in FieldPulse, but do not have the capability to use inventory in QuickBooks Online and therefore these items will not sync. |
-| "Invalid account type used", "Invalid account type: For an inventory product, the expense account must have Account Type: 'Cost of Goods Sold' and Detail Type: 'Supplies and Materials.'" | Please check your chart of accounts in QuickBooks Online and ensure you are using the appropriate expense/sales account. For a product-inventory item, the expense/purchase account must have Account Type: 'Cost of Goods Sold' and Detail Type: 'Supplies and Materials'. |
-| "Invalid account type used", "Invalid account type: For an inventory product, the income account must have Account Type: 'Income' and Detail Type: 'Sales of Product Income.'" | Please check your chart of accounts in QuickBooks Online and ensure you are using the appropriate expense/sales account. For a product-inventory item, the income/sales account must have Account Type: 'Income' and <br />Detail Type: 'Sales of Product Income'. |
-| "Invalid Company Status", "Subscription period has ended or canceled or there was a billing problem : Unexpected user error. ( -10601 )" | Your QuickBooks Online account subscription has ended or been canceled. Please correct in QuickBooks Online. |
-| "Invalid Company Status", "Subscription period has ended or canceled or there was a billing problem : Your trial or subscription may have ended, or there may be a billing problem. To check the status of your subscription, go to your android device and tap Play Store icon. In the menu tap My Apps > Subscriptions > QuickBooks Online." | Your QuickBooks Online account subscription has ended or been canceled. Please correct in QuickBooks Online. |
-| "Invalid Customer - The customer you have specified has been deleted. You cannot create or edit a transaction with a deleted client/customer." | Please make sure that the customer associated with the record you are trying to sync is active before trying to sync any related records. Unarchive the customer in QuickBooks Online or FieldPulse and allow it to resync before attempting to sync any related records. |
-| "Invalid Email Address format - Email Address does not conform to the syntax rules of RFC 822. Supplied value: **#**" | Ensure the email is in the correct format. For example, " [name@example.com](mailto:name@example.com)" |
-| "Invalid ID", "Id should be a valid number. Supplied value: **#**" | Please reach out to support if you see this error. |
-| "Invalid Reference Id - Invalid Reference Id : **#**" | You're trying to use a reference (like an account, item, or customer ID) that is either inactive, deleted, or no longer valid within the system. Please make sure the related record is active and synced before trying to sync other related records. |
-| "Invalid Reference Id - Invalid Reference Id : Class assigned to this transaction has been deleted. Before you can modify this transaction, you must restore **#**" | Please the record in QuickBooks Online and ensure the record you are trying to use is active in QuickBooks Online. |
-| "Invalid Reference Id - Invalid Reference Id : This account has been deleted." | Please check your chart of accounts in QuickBooks Online and ensure the account you are trying to use is active in QuickBooks Online. |
-| "Invalid Reference Id", "Invalid Reference Id : An item in this transaction is set up as a category instead of a product or service." | This Item exists as a category in QuickBooks Online and therefore cannot be used on an estimate or invoice. Please replace this item with a product or service type item. |
-| "Invalid Reference Id", "Invalid Reference Id : Categories cannot be used in transactions." | This Item exists as a category in QuickBooks Online and therefore cannot be used on an estimate or invoice. Please replace this item with a product or service type item. |
-| "Invalid Reference Id", "Invalid Reference Id : Customer assigned to this transaction has been deleted. Before you can modify this transaction, you must restore **#**" | Please make the customer associated with the record you are trying to sync is active first before trying to sync any related records. Unarchive the customer in QuickBooks Online or FieldPulse and allow it to resync before attempting to sync any related records. |
-| "Invalid Reference Id", "Invalid Reference Id : Product/Service assigned to this transaction has been deleted. Before you can modify this transaction, you must restore **#**" | Please make the item associated with the record you are trying to sync is active first before trying to sync any related records. Unarchive the item in QuickBooks Online or FieldPulse and allow it to resync before attempting to sync any related records. |
-| "Invalid Type - Invalid Type : Item of type Inventory cannot be changed to Service item type" | An inventory item cannot be changed to another item type. You must create a new item. |
-| "Invalid Type", "Invalid Type : Item of type Inventory cannot be changed to Non-inventory item type" | An inventory item cannot be changed to another item type. You must create a new item. |
-| "Item # sync failed!" | The item on the invoice is not synced. The item must be synced before the invoice can sync. Please navigate to the item and try resyncing it. |
-| "Item is a category!" | This Item exists as a category in QuickBooks Online and therefore cannot be used on an estimate or invoice. Please replace this item with a product or service type item. |
-| "No name provided", "Title, GivenName, MiddleName, FamilyName, DisplayName, Suffix - one of these must be non-empty." | The name field cannot be empty. Please fill in one of the required fields. |
-| "Number out of range", "The number is not within supported range. Min: **#** Max: **#** supported. Supplied value: **#**" | Please adjust the record name to be within the character length limit. |
-| "Object Not Found - Object Not Found : Another user has deleted this transaction." | The record you are trying to use has been deleted. Please undelete it before trying to sync the record. |
-| "Object Not Found", "Object Not Found : Something you're trying to use has been made inactive. Check the fields with accounts, customers, items, vendors or employees." | The record you are trying to use has been deleted. Please undelete it before trying to sync the record. |
-| "Parent Cannot Be Child", "Parent Cannot Be Child : This item cant be a sub-item of itself." | You cannot link a customer to itself. Please link to a different customer. |
-| "Project records sync disabled" | This records exists as a project in QuickBooks Online and you currently have the option to sync projects disabled. If you would like to sync projects please reach out to support to enable the QuickBooks Online project sync |
-| "QuickBooks side does not have record with such ID to be resynced!" | The record has been deleted in QuickBooks Online. Please re-active the record in QuickBooks Online or reach out to support for assistance in removing from FieldPulse. |
-| "Related Class **#** sync failed!" | The class you are trying to use is not synced. Please ensure that the class is active in QuickBooks Online or create a new class. |
-| "Related Customer **#** sync failed!" | The Customer associated with this invoice is not synced and must be synced before syncing this invoice record. Please navigate to the related customer and click sync with QuickBooks. |
-| "Related Invoice **#** sync failed!" | The Invoice associated with this payment is not synced and must be synced before syncing this payment record. Please navigate to the invoice and click sync with QuickBooks. |
-| "Related Parent Customer **#** sync failed!" | The parent customer must be synced before trying to sync the related child customer. Please navigate to the parent customer record and click sync with QuickBooks. |
-| "Related Project records sync disabled" | This records exists as a project in QuickBooks Online and you currently have the option to sync projects disabled. If you would like to sync projects please reach out to support to enable the QuickBooks Online project sync. |
-| "Required param missing, need to supply the required value for the API", "Required parameter **#** is missing in the request" | Please reach out to support if you see this error. |
-| "Stale Object Error - Stale Object Error : You and **another user** were working on this at the same time. **Another user** finished before you did, so your work was not saved." | Your edits were not saved because someone had the same record open in QuickBooks Online at the same time. Please close out of the record in QuickBooks Online or FieldPulse before making further edits. |
-| "String length is either shorter or longer than supported by specification - String length specified does not match the supported length. Min: **#** Max: **#** supported. Supplied length: **#**" | Please adjust the record name to be within the character length limit. |
-| "There is a duplicated records in FieldPulse database!" | You have a duplicate record with the same name in FieldPulse. Please change the name of one of these duplicate records before trying to sync this record. |
-| "There is a multiply entities by this criteria" | You have a duplicate record with the same name in FieldPulse. Please change the name of one of these duplicate records before trying to sync this record. |
-| "There is a multiply records in QuickBooks!" | You have a duplicate record with the same name in FieldPulse. Please change the name of one of these duplicate records before trying to sync this record. |
-| "There is already synced record present in FieldPulse database related to another instance on QuickBooks Online side", "Record id: **\#**(name = **#**)" | You have a duplicate record with the same name in FieldPulse. Please change the name of one of these duplicate records before trying to sync this record. |
-| "There is no income account associated with the item.", "There is no income account associated with the item **#**. Is it marked for sale, and has an income account associated with it?" | The item is missing the income/sales account. Please navigate to the item in the item list and then select a sales account and save. |
-| "Transaction date is prior to start date for inventory item - Transactions with inventory (QOH) products cant be dated earlier than the Inventory Start Date for the product" | This means you started tracking inventory after the invoice was invoiced. Inventory tracking start date must be changed in QuickBooks Online to be before the invoiced date or the invoiced date must be after the inventory tracking start date. |
-
----
-
-**Have additional questions?**
-
-_Contact us at [support@fieldpulse.com](mailto:support@fieldpulse.com) or use the chat feature in the bottom right corner of your screen._
\ No newline at end of file
+# Understanding and Resolving Sync Errors In-App
\ No newline at end of file
QuickBooks Time (Formerly TSheets)
- Module: QuickBooks Online
- File:
quickbooks-time-formerly-tsheets.mdx - Intercom URL: https://help.fieldpulse.com/en/articles/9745384-quickbooks-time-formerly-tsheets
- Last modified: 2026-03-11
Index: quickbooks-time-formerly-tsheets.mdx
===================================================================
--- quickbooks-time-formerly-tsheets.mdx existing
+++ quickbooks-time-formerly-tsheets.mdx intercom
@@ -1,77 +1,3 @@
-## QuickBooks Time
+# QuickBooks Time
-
-
-[QuickBooks Time](https://quickbooks.intuit.com/time-tracking/#) is a powerful tool for tracking employee hours, managing payroll, and maintaining accurate job costs. It can operate independently or integrate seamlessly with QuickBooks and is **available in the U.S., Canada, Australia,** and **New Zealand.**
-
----
-
-## How it Works
-
-### Overview
-
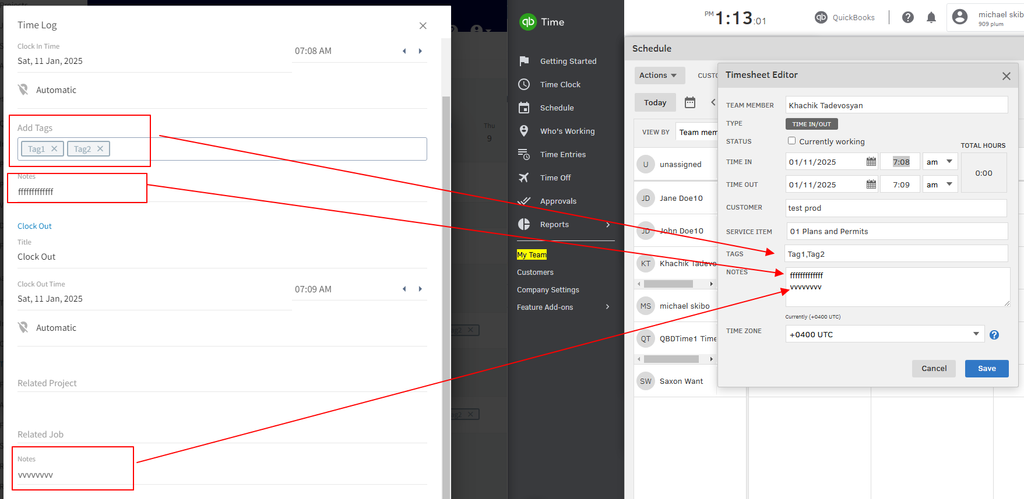
-The integration between QuickBooks Time and FieldPulse enables seamless data synchronization, with **FieldPulse pushing clock-in and clock-out dates, times, tags and notes directly into QuickBooks Time**.
-
-This **sync occurs** automatically whenever **a timesheet is created or updated in FieldPulse**. If a timesheet is **edited in FieldPulse, the changes will be reflected in QuickBooks Time**. Similarly, if a **timesheet is deleted in FieldPulse, it will also be deleted in QuickBooks Time**, ensuring both platforms remain aligned.
-
-
-
-**Please Note:** Timesheet overlaps **will not** sync to QuickBooks Time. In FieldPulse, users can log time using either \*general timesheets\* or \*job-based timesheets\*, **but not both** when syncing with QuickBooks Time.
-
-For example, if a user clocks into a general timesheet from 8 AM to 5 PM, then also logs time against individual jobs throughout the day, this will create overlapping entries. QuickBooks Time does not accept overlapping timesheets, which WILL result in syncing errors and failed overtime calculations.
-
-#### ⭐FieldPulse Pro Tip
-
-Choose either FieldPulse for job-based or general timesheets — not both — if syncing to QuickBooks Time.
-
-Alternatively, disconnect FieldPulse from QuickBooks Time and use the QuickBooks Time mobile app as a standalone time clock for payroll purposes.
-
-#### What does not sync between FieldPulse and QuickBooks Time?
-
-The following do not sync: timesheet locations and related job/project information. Additionally, while the total duration is not synced directly, QuickBooks Time will automatically calculate it based on the clock-in and clock-out times provided.
-
----
-
-## How to Get Started with the QuickBooks Time and FieldPulse Integration
-
-1. **Contact Support**
-
-Reach out to our chat support team or your Customer Success Manager to request integration setup.
-
-1. **Receive Your Integration Link**
-
-Our team will generate a customized integration link and share it with you.
-
-1. **Authenticate Your Account**
-
-Open the integration link and enter your QuickBooks Time credentials to authenticate the connection.
-
-1. **Inform Us of User Mapping Needs (If Applicable)**
-
-If specific user mapping is required, notify the FieldPulse team before proceeding.
-
-1. **Connection Setup by Developers**
-
-Our developers will set up the connection between QuickBooks Time (TSheets) and FieldPulse.
-
- _Note:_ This process may take several days, depending on workload.
-
-1. **Confirmation**
-
-Once the setup is complete, you’ll be notified, and the integration will be ready to use!
-
----
-
-## FAQs
-
-**Q: Does syncing records between FieldPulse and QuickBooks Time work with QuickBooks Time's overtime functionality?**
-
-A: Yes, the integration supports QuickBooks Time’s overtime functionality. When clock-in and clock-out times are synced from FieldPulse to QuickBooks Time, QuickBooks Time automatically applies its built-in overtime rules. These rules are managed within QuickBooks Time, ensuring accurate calculations for employee overtime based on your configured policies.
-
-
-
----
-
-**Have additional questions?**
-
-_Contact us at [support@fieldpulse.com](mailto:support@fieldpulse.com) or use the chat feature in the bottom right corner of your screen._
\ No newline at end of file
+
\ No newline at end of file
Post-Sync: QuickBooks Desktop
- Module: QuickBooks Desktop
- File:
post-sync-quickbooks-desktop.mdx - Intercom URL: https://help.fieldpulse.com/en/articles/9307872-post-sync-quickbooks-desktop
- Last modified: 2026-03-09
Index: post-sync-quickbooks-desktop.mdx
===================================================================
--- post-sync-quickbooks-desktop.mdx existing
+++ post-sync-quickbooks-desktop.mdx intercom
@@ -1,103 +1,5 @@
-## Reminder
+<Note>
+### Reminder:
-### FieldPulse only integrates with QuickBooks Desktop 2024 and newer
-
-Sometimes, you may also encounter a record that has not properly synced between FieldPulse and QuickBooks. To better understand what has not synced as well as why, navigate to _Company Settings_, then select _Estimates & Invoices_ and _QuickBooks_.
-
-
-
-To understand which records have not synced, select _Statistic_.
-
-
-
-## **Here, you can view the following:**
-
-- **Date and Time:** See when your most recent sync occurred.
-
-- **Unsuccessful Records:** Identify exactly which records haven’t synced and the reasons why.
-
-- **Search Functionality:** Search among your records.
-
-- **Review Status Column:** Close and filter out resolved errors.
-
-Switch between FieldPulse and QuickBooks on this page to locate where the sync issue is. Once you have identified which records failed to sync, click on the record details to navigate to that record. Correct the errors and re-sync them.
-
-
-
-## **Error Messages:**
-
-Use this table to better understand the _Statistic_ page error messages, QuickBooks Desktop error messages, and the necessary actions to resolve the error and sync the affected records.
-
-| | |
-| --- | --- |
-| **Error Message** | **Necessary Action** |
-| "Error connecting to QuickBooks - close any modal dialog in QuickBooks." | Close any dialog boxes in QuickBooks Desktop. |
-| "The name "Example Name" of the list element is already in use." | Change the customer's display name to be a unique name, or archive the customer with the identical name. |
-| "BillAddress\_Addr1/ShipAddress\_Addr1 length is more than allowed (41)" | Decrease the address length to 41 characters or less. |
-| "Credit memo saved as payment can not be synced to QBD" | Credit memos cannot be applied in FieldPulse, so they will not sync over from QuickBooks Desktop. |
-| "Line Item Name/Customer Name length is more than allowed (31)" | Decrease the field length to 31 characters or less. |
-| "Draft invoice #1234 is not available for sync" | Draft invoices do not sync to QuickBooks Desktop. To enable draft invoice syncing, contact us at [support@fieldpulse.com](mailto:support@fieldpulse.com) or via the chat. |
-| "Name value has non-ASCII characters" | Remove non-ASCII characters from name. |
-| "Related customer is archived in FieldPulse" | Restore customer to FieldPulse to sync related estimate/invoice. |
-| "A Payment for \[Customer\] could not be synced as it does not have any associated invoices." | Please create an invoice to link to this payment and try to sync again. |
-| "There was an error when modifying a Customers list, element “80000754-1529488483”. QuickBooks error message: Unknown Error." | This occurs when you re-assign parents of a customer in FieldPulse, but the customer has transactions associated with them. QuickBooks does not allow a parent to be re-assigned if invoices or payments are linked to the customer job record. Revert the parent record in FieldPulse to match QuickBooks to resolve the sync conflicts. |
-
----
-
-## Troubleshooting
-
-Sometimes, records do not sync between FieldPulse and QuickBooks Desktop. Review the issues and potential causes below to troubleshoot and resolve your sync.
-
-## The sync has not run recently because
-
-Take a look at the _Last Sync Date_ field on the _Statistic_ page. If the date and time listed here indicate that the sync has not run recently, be sure your sleep settings are turned off on your device, and check that the web connector is running.
-
-## A customer may not sync because
-
-- The customer name is a duplicate of another customer.
-
-- The customer name includes non-ASCII characters.
-
-- The email address, phone number, or customer name exceeds 31 characters, or the notes exceed 4000 characters.
-
-- The customer is archived in QuickBooks Desktop.
-
-- The customer is the child of a parent customer that is not synced.
-
-## A line item may not sync because
-
-- Fields are incorrect or missing (item name, item price, SKU, etc.).
-
-- The item name exceeds 31 characters or your SKU exceeds 30 characters.
-
-- The item name is a duplicate of another line item.
-
-- The item name includes non-ASCII characters.
-
-- The item is not marked as a product or service in QuickBooks Desktop.
-
-- The related sales and/or purchase account is not active in QuickBooks Desktop.
-
-- Unit of measure is not enabled in QuickBooks Desktop, but is used in FieldPulse.
-
-## An invoice may not sync because
-
-- The Customer is archived or not synced.
-
-- A line item is archived or not synced.
-
-- Your notes exceed 4000 characters.
-
-- Estimate/invoice is in a closed accounting period in QuickBooks Desktop.
-
-## A payment may not sync because
-
-- There is an archived payment on the invoice already synced to QuickBooks Desktop.
-
-- The related invoice is not synced.
-
----
-
-**Have additional questions?**
-
-_Contact us at [support@fieldpulse.com](mailto:support@fieldpulse.com) or use the chat feature in the bottom right corner of your screen._
\ No newline at end of file
+### FieldPulse only integrates with QuickBooks Desktop 2024 and newer.
+</Note>
\ No newline at end of file
Is there a way to mark check payments on invoices and have them sync over to QuickBooks Desktop?
- Module: QuickBooks Desktop
- File:
is-there-a-way-to-mark-check-payments-on-invoices-and-have-them-sync-over-to-qbd.mdx - Intercom URL: https://help.fieldpulse.com/en/articles/11481824-is-there-a-way-to-mark-check-payments-on-invoices-and-have-them-sync-over-to-quickbooks-desktop
- Last modified: 2026-03-09
Index: is-there-a-way-to-mark-check-payments-on-invoices-and-have-them-sync-over-to-qbd.mdx
===================================================================
--- is-there-a-way-to-mark-check-payments-on-invoices-and-have-them-sync-over-to-qbd.mdx existing
+++ is-there-a-way-to-mark-check-payments-on-invoices-and-have-them-sync-over-to-qbd.mdx intercom
@@ -1,13 +0,0 @@
-No, it is best for you to mark it on QuickBooks Desktop (QBD). You can continue to add the check number in the notes section on the invoice/FieldPulse payments (if enabled) but just remember these notes won't transfer over to QBD.
-
----
-
-**Have additional questions?**
-
-_Contact us at [support@fieldpulse.com](mailto:support@fieldpulse.com) or use the chat feature in the bottom right corner of your screen._
-
----
-
-<Note>
-This article also relates to: [Invoices/Estimates](/core-platform/invoices-estimates), [Payments](/growth/payment)
-</Note>
\ No newline at end of file
QuickBooks Desktop Errors
- Module: QuickBooks Desktop
- File:
quickbooks-desktop-errors.mdx - Intercom URL: https://help.fieldpulse.com/en/articles/11972970-quickbooks-desktop-errors
- Last modified: 2026-03-09
Index: quickbooks-desktop-errors.mdx
===================================================================
--- quickbooks-desktop-errors.mdx existing
+++ quickbooks-desktop-errors.mdx intercom
@@ -1,107 +1,1 @@
-## Understanding and Resolving Sync Errors In-App
-
-For any record that fails to sync with QuickBooks Desktop—including customers, invoices, and payments—you can use the in-app troubleshooting tool to quickly identify and fix the issue.
-
-Clicking the _Failed Sync_ button next to the record will take you to a dedicated page where all sync errors for that record are listed.
-
-
-
----
-
-## Comprehensive QuickBooks Error Reference
-
-Here is a complete list of QuickBooks errors along with their resolutions.
-
-| | |
-| --- | --- |
-| ## **Error Message from QuickBooks Desktop** | ## **Necessary Action** |
-| "Account # sync failed!" | Check your entry or contact support if the problem continues. |
-| "Account Period Closed, Cannot Update Through Services API", "The account period has closed and the account books cannot be updated through through the QuickBooks Online Services API. Please use the QuickBooks Online website to make these changes." | Your books are closed for this period, so changes can’t be made through FieldPulse. To update this record, please log in to QuickBooks directly. |
-| "AltPhone length ( **#)** more than allowed (21)" | Shorten the alternate phone number to 21 characters or fewer. |
-| "An attempt was made to modify a Estimate with a date that is on or before the closing date of the company. If you are sure you really want to do this, please ask a user with Admin privileges to remove the password for editing transactions on or before to closing date (this setting is in the Accounting Company Preferences), then try again." | Change the estimate date to be after your company's closing date or ask your admin to adjust the settings in QuickBooks directly. |
-| "An attempt was made to modify a Invoice with a date that is on or before the closing date of the company. If you are sure you really want to do this, please ask a user with Admin privileges to remove the password for editing transactions on or before to closing date (this setting is in the Accounting Company Preferences), then try again." | Change the invoice date to be after your company's closing date or ask your admin to adjust the settings in QuickBooks directly. |
-| "An attempt was made to modify a ReceivePayment with a date that is on or before the closing date of the company. If you are sure you really want to do this, please ask a user with Admin privileges to remove the password for editing transactions on or before to closing date (this setting is in the Accounting Company Preferences), then try again." | Change the payment date to be after your company's closing date or ask your admin to adjust the settings in QuickBooks directly. |
-| "Assigned discount item not present!" | Ensure the discount item is active in QuickBooks or check if the discount has proper 'value or %'. |
-| "BillAddress\_Addr1 length ( **#**) more than allowed (41)" | Shorten billing address line 1 to 41 characters or fewer. |
-| "BillAddress\_Addr2 length ( **#**) more than allowed (41)" | Shorten billing address line 2 to 41 characters or fewer. |
-| "BillAddress\_PostalCode length ( **#)** more than allowed (13)" | Shorten billing postal code to 13 characters or fewer. |
-| "BillAddress\_State length ( **#**) more than allowed (21)" | Shorten billing state to 21 characters or fewer. |
-| "CompanyName value has non-ASCII characters" | Remove special characters from the company name. |
-| "Credit memo saved as payment can not be synced to QuickBooks Desktop" | Credit memos used as payments cannot be synced to QuickBooks. |
-| "CustomerRef required but missed!" | Link this entry to a customer before saving. |
-| "Delete Customer Has Unbilled Expenses Error", "Cannot delete Customer. : This customer cannot be deleted because there are unbilled charges for this customer." | You must clear all unbilled transactions before deleting the customer. |
-| "Desc length ( **#**) more than allowed (4095)" | Shorten the description text to 4095 characters or fewer. |
-| "Discount Account **#** sync failed!" | Fix the discount account setup before syncing. |
-| "Discount Item **\#** not synced yet!" | Make sure the discount item is synced before using it. |
-| "Duplicate Name Exists Error - The name supplied already exists. : Another customer, vendor or employee is already using this name. Please use a different name." | Use a unique name that's not already in use in QuickBooks. |
-| "Duplicate Name Exists Error", "The name supplied already exists. : null" | Use a unique name that's not already in use in QuickBooks. |
-| "Email length ( **#)** more than allowed (1023)" | Shorten the email address to 1023 characters or fewer. |
-| "Feature Not Supported Error", "Feature Not Supported Error : We're sorry. This feature is not included in your QuickBooks Online Simple Start subscription." | Upgrade your QuickBooks plan or remove the unsupported feature. |
-| "FirstName length ( **#**) more than allowed (25)" | Shorten the first name to 25 characters or fewer. |
-| "Income Account **#** sync failed!" | Resolve income account issues before syncing. |
-| "Insufficient permission level to perform this action." | Your QuickBooks user account needs higher access to complete this action. |
-| "Invalid Reference Id - Invalid Reference Id : Product/Service assigned to this transaction has been deleted. Before you can modify this transaction, you must restore #" | Restore or replace the deleted item to continue. |
-| "Invalid Reference Id - Invalid Reference Id : Product/Service assigned to this transaction has been deleted. Before you can modify this transaction, you must restore 'Item Name'" | Restore or replace the deleted item to continue. |
-| "Invalid Type", "Invalid Type : Item of type Inventory cannot be changed to Noninventory item type" | You cannot change an inventory item into a non-inventory item. |
-| "InvoiceLine required but missed!" | Add at least one line item to this invoice to proceed. |
-| "LastName length ( **#)** more than allowed (25)" | Shorten the last name to 25 characters or fewer. |
-| "LastName value has non-ASCII characters" | Remove special characters from the last name. |
-| "Memo length ( **#**) more than allowed (4095)" | Shorten the memo field to 4095 characters or fewer. |
-| "Name length ( **#**) more than allowed (31)" | Shorten the name field to 31 characters or fewer. |
-| "Name value has non-ASCII characters" | Remove special characters from the name field. |
-| "Notes length ( **#)** more than allowed (4095)" | Shorten the notes field to 4095 characters or fewer. |
-| "Object **#** specified in the request cannot be found. QuickBooks error message: Invalid argument. The specified record does not exist in the list." | The referenced record does not exist in QuickBooks. Please reach out to support if the error persists. |
-| "Object **#** specified in the request cannot be found. " | The referenced record does not exist in QuickBooks. Please reach out to support if the error persists. |
-| "Parent Cannot Be Child - Parent Cannot Be Child : This item cant be a sub-item of itself." | You cannot make an item a sub-item of itself. |
-| "Parent Customer **#** sync failed!" | Resolve sync issues with the parent customer before retrying. |
-| "Pending sync from FieldPulse to QuickBooks Desktop" | This record is waiting to sync. No action needed unless it stalls. |
-| "Phone length ( **#**) more than allowed (21)" | Shorten the phone number to 21 characters or fewer. |
-| "Related Class **#** sync failed!" | Fix the related class in QuickBooks before syncing. |
-| "Related Customer **\#** sync failed!" | Fix the customer reference before syncing. |
-| "Related Invoice RefNumber: **#** sync failed!" | Fix the connected invoice record before syncing. |
-| "Related Item **\#** not synced yet" | Make sure the item is synced before using it. |
-| "Related Payment Method **\#** sync failed!" | Fix the payment method before syncing. |
-| "Related TaxRate **\#** sync failed!" | Fix the tax rate setup before syncing. |
-| "Required param missing, need to supply the required value for the API - Required parameter ExpenseAccountRef or IncomeAccountRef is missing in the request" | Add the missing account reference to continue. |
-| "Sales Tax Code **#** sync failed!" | Fix the sales tax code before syncing. |
-| "SalesOrPurchase required but missed!" | Add the missing account reference to continue. |
-| "ShipAddress\_Addr1 length ( **#**) more than allowed (41)" | Shorten shipping address line 1 to 41 characters or fewer. |
-| "ShipAddress\_Addr2 length ( **#**) more than allowed (41)" | Shorten shipping address line 2 to 41 characters or fewer. |
-| "ShipAddress\_PostalCode length ( **#**) more than allowed (13)" | Shorten shipping postal code to 13 characters or fewer. |
-| "ShipAddress\_State length ( **#**) more than allowed (21)" | Shorten shipping state to 21 characters or fewer. |
-| "SOPAccount **#** sync failed!" | Add the missing account reference to continue. |
-| "The \\"address\\" field has an invalid value #. QuickBooks error message: The parameter is incorrect. " | Correct the address format or remove the address before syncing. |
-| "The given object ID **#** in the field **#** is invalid. " | The referenced record does not exist in QuickBooks. Please reach out to support if the error persists. |
-| "The name **#** of the list element is already in use." | Choose a different name; a record with this name already exists. |
-| "The provided edit sequence **#** is out-of-date. " | Reload the latest version of the record and try again. |
-| "The string **#** in the field \\"FirstName\\" is too long." | Shorten the first name to fit the character limit. |
-| "The string **#** in the field \\"Name\\" is too long." | Shorten the name to fit the character limit. |
-| "The string **#** in the field \\"Phone\\" is too long." | Shorten the phone number to fit the character limit. |
-| "There is a duplicated records in FieldPulse database!", "Matched records ids: **#, #, # ...**" | Correct duplicates from FieldPulse before syncing. |
-| "There is already synced record present in FieldPulse database related to another instance on QuickBooks Desktop side", "Record id: **#** (name = #)" | Correct duplicates from FieldPulse before syncing. |
-| "There is an invalid reference to a parent **#** in the Customers list. " | Fix the customer hierarchy setup before syncing. |
-| "There is an invalid reference to QuickBooks Account # in the Item Non-Inventory. QuickBooks error message: Invalid argument. The specified record does not exist in the list." | Restore or replace the deleted item to continue. |
-| "There is an invalid reference to QuickBooks Item Sales Tax **#** in the Invoice. QuickBooks error message: Transaction Sales Tax is currently disabled by preferences." | Turn on Sales Tax in QuickBooks before syncing. |
-| "There is an invalid reference to QuickBooks Post Account **\#** in the ItemInventory. QuickBooks error message: To change the posting account, you must switch to single-user mode." | Switch to single-user mode in QuickBooks to make this change. |
-| "There is no correct Tax Code available to be assigned to this item" | Assign a valid tax code to this item. |
-| "There is no OtherExpense/CostOfGoodSold account can be assigned to this item" | Assign a proper expense or Cost of Goods Sold account to this item. |
-| "There is OtherExpense account can be assigned to this item" | Please assign valid expense account. |
-| "There was an error when modifying a Estimate. QuickBooks error message: You may not create or edit a transaction dated on or before the dividing date." | Update the estimate date or closing period settings in QuickBooks. |
-| "There was an error when modifying a Invoice. QuickBooks error message: The Transaction Sales Tax field cannot be left blank, even for non-taxable customers and sales which have no taxable items, so non-taxable sales will be correct for this district." | Assign a sales tax code to this invoice. |
-| "There was an error when modifying a Invoice. QuickBooks error message: You may not create or edit a transaction dated on or before the dividing date." | Update the invoice date or closing period settings in QuickBooks. |
-| "There was an error when modifying a ItemNonInventory. Cannot use SalesOrPurchaseMod aggregate when the item is reimbursable. " | This item is reimbursable and cannot be edited this way. |
-| "There was an error when modifying a ItemService. Cannot use SalesOrPurchaseMod aggregate when the item is reimbursable. " | This item is reimbursable and cannot be edited this way. |
-| "There was an error when saving a Estimate. QuickBooks error message: The transaction is empty." | Add line items to this estimate before saving. |
-| "There was an error when saving a Estimate. QuickBooks error message: The Transaction Sales Tax field cannot be left blank, even for non-taxable customers and sales which have no taxable items, so non-taxable sales will be correct for this district." | Assign a tax code to the estimate before saving. |
-| "There was an error when saving a Invoice. QuickBooks error message: The transaction is empty." | Add line items to this invoice before saving. |
-| "There was an error when saving a Invoice. QuickBooks error message: The Transaction Sales Tax field cannot be left blank, even for non-taxable customers and sales which have no taxable items, so non-taxable sales will be correct for this district." | Assign a tax code to the invoice before saving. |
-| "There was an error when saving a Invoice. QuickBooks error message: You may not create or edit a transaction dated on or before the dividing date." | Update the invoice date or closing period settings in QuickBooks. |
-| "There was an error when saving a ReceivePayment. QuickBooks error message: The transaction is empty." | Please specify a payment amount before saving. |
-| "This feature is not enabled or not available in this version of QuickBooks." | Upgrade your QuickBooks plan or remove the unsupported feature. |
-| "There was an error when modifying a Customers list, element "\[QuickBooks Desktop ID\]". QuickBooks error message: Cannot merge list elements." | Check that there is not another customer with the same name and that all fields are filled out correctly. Then try updating again. |
-
----
-
-**Have additional questions?**
-
-_Contact us at [support@fieldpulse.com](mailto:support@fieldpulse.com) or use the chat feature in the bottom right corner of your screen._
\ No newline at end of file
+# Understanding and Resolving Sync Errors In-App
\ No newline at end of file
Card Fee Recovery
- Module: FP Payments (Fintech)
- File:
card-fee-recovery.mdx - Intercom URL: https://help.fieldpulse.com/en/articles/12363504-card-fee-recovery
- Last modified: 2026-03-03
Index: card-fee-recovery.mdx
===================================================================
--- card-fee-recovery.mdx existing
+++ card-fee-recovery.mdx intercom
@@ -1,71 +1,1 @@
-## What is Card Fee Recovery?
-
-Card fee recovery is a transparent method that allows you to recover card processing fees by adjusting your pricing structure. Instead of imposing a surcharge, you can set a flat fee or percentage that is communicated upfront to your customers.
-
-Card fee recovery emphasizes transparency by clearly displaying the costs associated with card payments on invoices. This practice ensures that your customers understand what they are paying for, eliminating hidden fees and fostering a more honest transaction environment.
-
-One of the standout features of this card fee recovery solution is its seamless integration with FieldPulse and QuickBooks. Designed specifically for your existing workflows, this solution requires no manual adjustments, workarounds, or tedious editing. You can activate it in seconds and watch it integrate effortlessly into your current invoicing and accounting processes, making it easier than ever to manage your transactions.
-
----
-
-## How to Initiate Card Fee Recovery
-
-To begin using Card Fee Recovery, follow these steps:
-
-1. **Enable FieldPulse Payments**:
-
- - Navigate to _Company Settings_.
-
- - Select _Features & Plugins_.
-
- - On the _FieldPulse Payments_ tile click _Enable_.
-
- - If you are currently using _[FieldPulse Payments Legacy](/growth/fp-payments/fieldpulse-payments-legacy)_, select _Upgrade_.
-
-2. **Express Your Interest**:
-
- - After enabling, reach out to us at **[payments@fieldpulse.com](mailto:payments@fieldpulse.com)** to express your interest in implementing Card Fee Recovery.
-
----
-
-## FAQs
-
-**What do I need to enable Card Fee Recovery?**
-
-You must have [FieldPulse Payments](/growth/fp-payments/fieldpulse-payments) enabled to utilize this feature.
-
-**Is Card Fee Recovery available outside the US?**
-
-Currently, Card Fee Recovery is only available in the United States.
-
-**How will this look on an invoice?**
-
-When you enable Card Fee Recovery, each line item on an invoice will be increased by the fee rate you pass on to your customers, which is typically **3%**. The total of these adjusted line items will then be calculated, and tax will be applied to that subtotal.
-
-Your customer will see two different totals on the same invoice, whether presented via email, text, or in person:
-
-- **Total Card Price**: This shows the sum of all line items plus tax, reflecting the higher price when paying with a credit card.
-
-- **Total ACH or Cash Price**: This displays the sum of the base price of all line items (without the passed-on fees) plus tax, offering a discounted option for ACH or cash payments.
-
-Customers can then choose their preferred payment method, opting for either the higher card price or the discounted ACH/cash price.
-
-**How should I communicate this to my customers?**
-
-It is best to quote prices directly from the _Invoice Preview_ page. You can choose one of the following methods:
-
-- Quote customers on the Total ACH/Cash price of your items by saying “our cash price for this job would be $100”.
-
-- Quote customers on the higher Total Card Price by saying “our total price for this job is $103, but you can get a discount if you choose to pay with ACH or cash”.
-
-**Can Card Fee Recovery be turned off for specific records?**
-
-Yes! To do so, uncheck the box that says _Display Card Fee Recovery_ on the estimate or invoice display settings.
-
-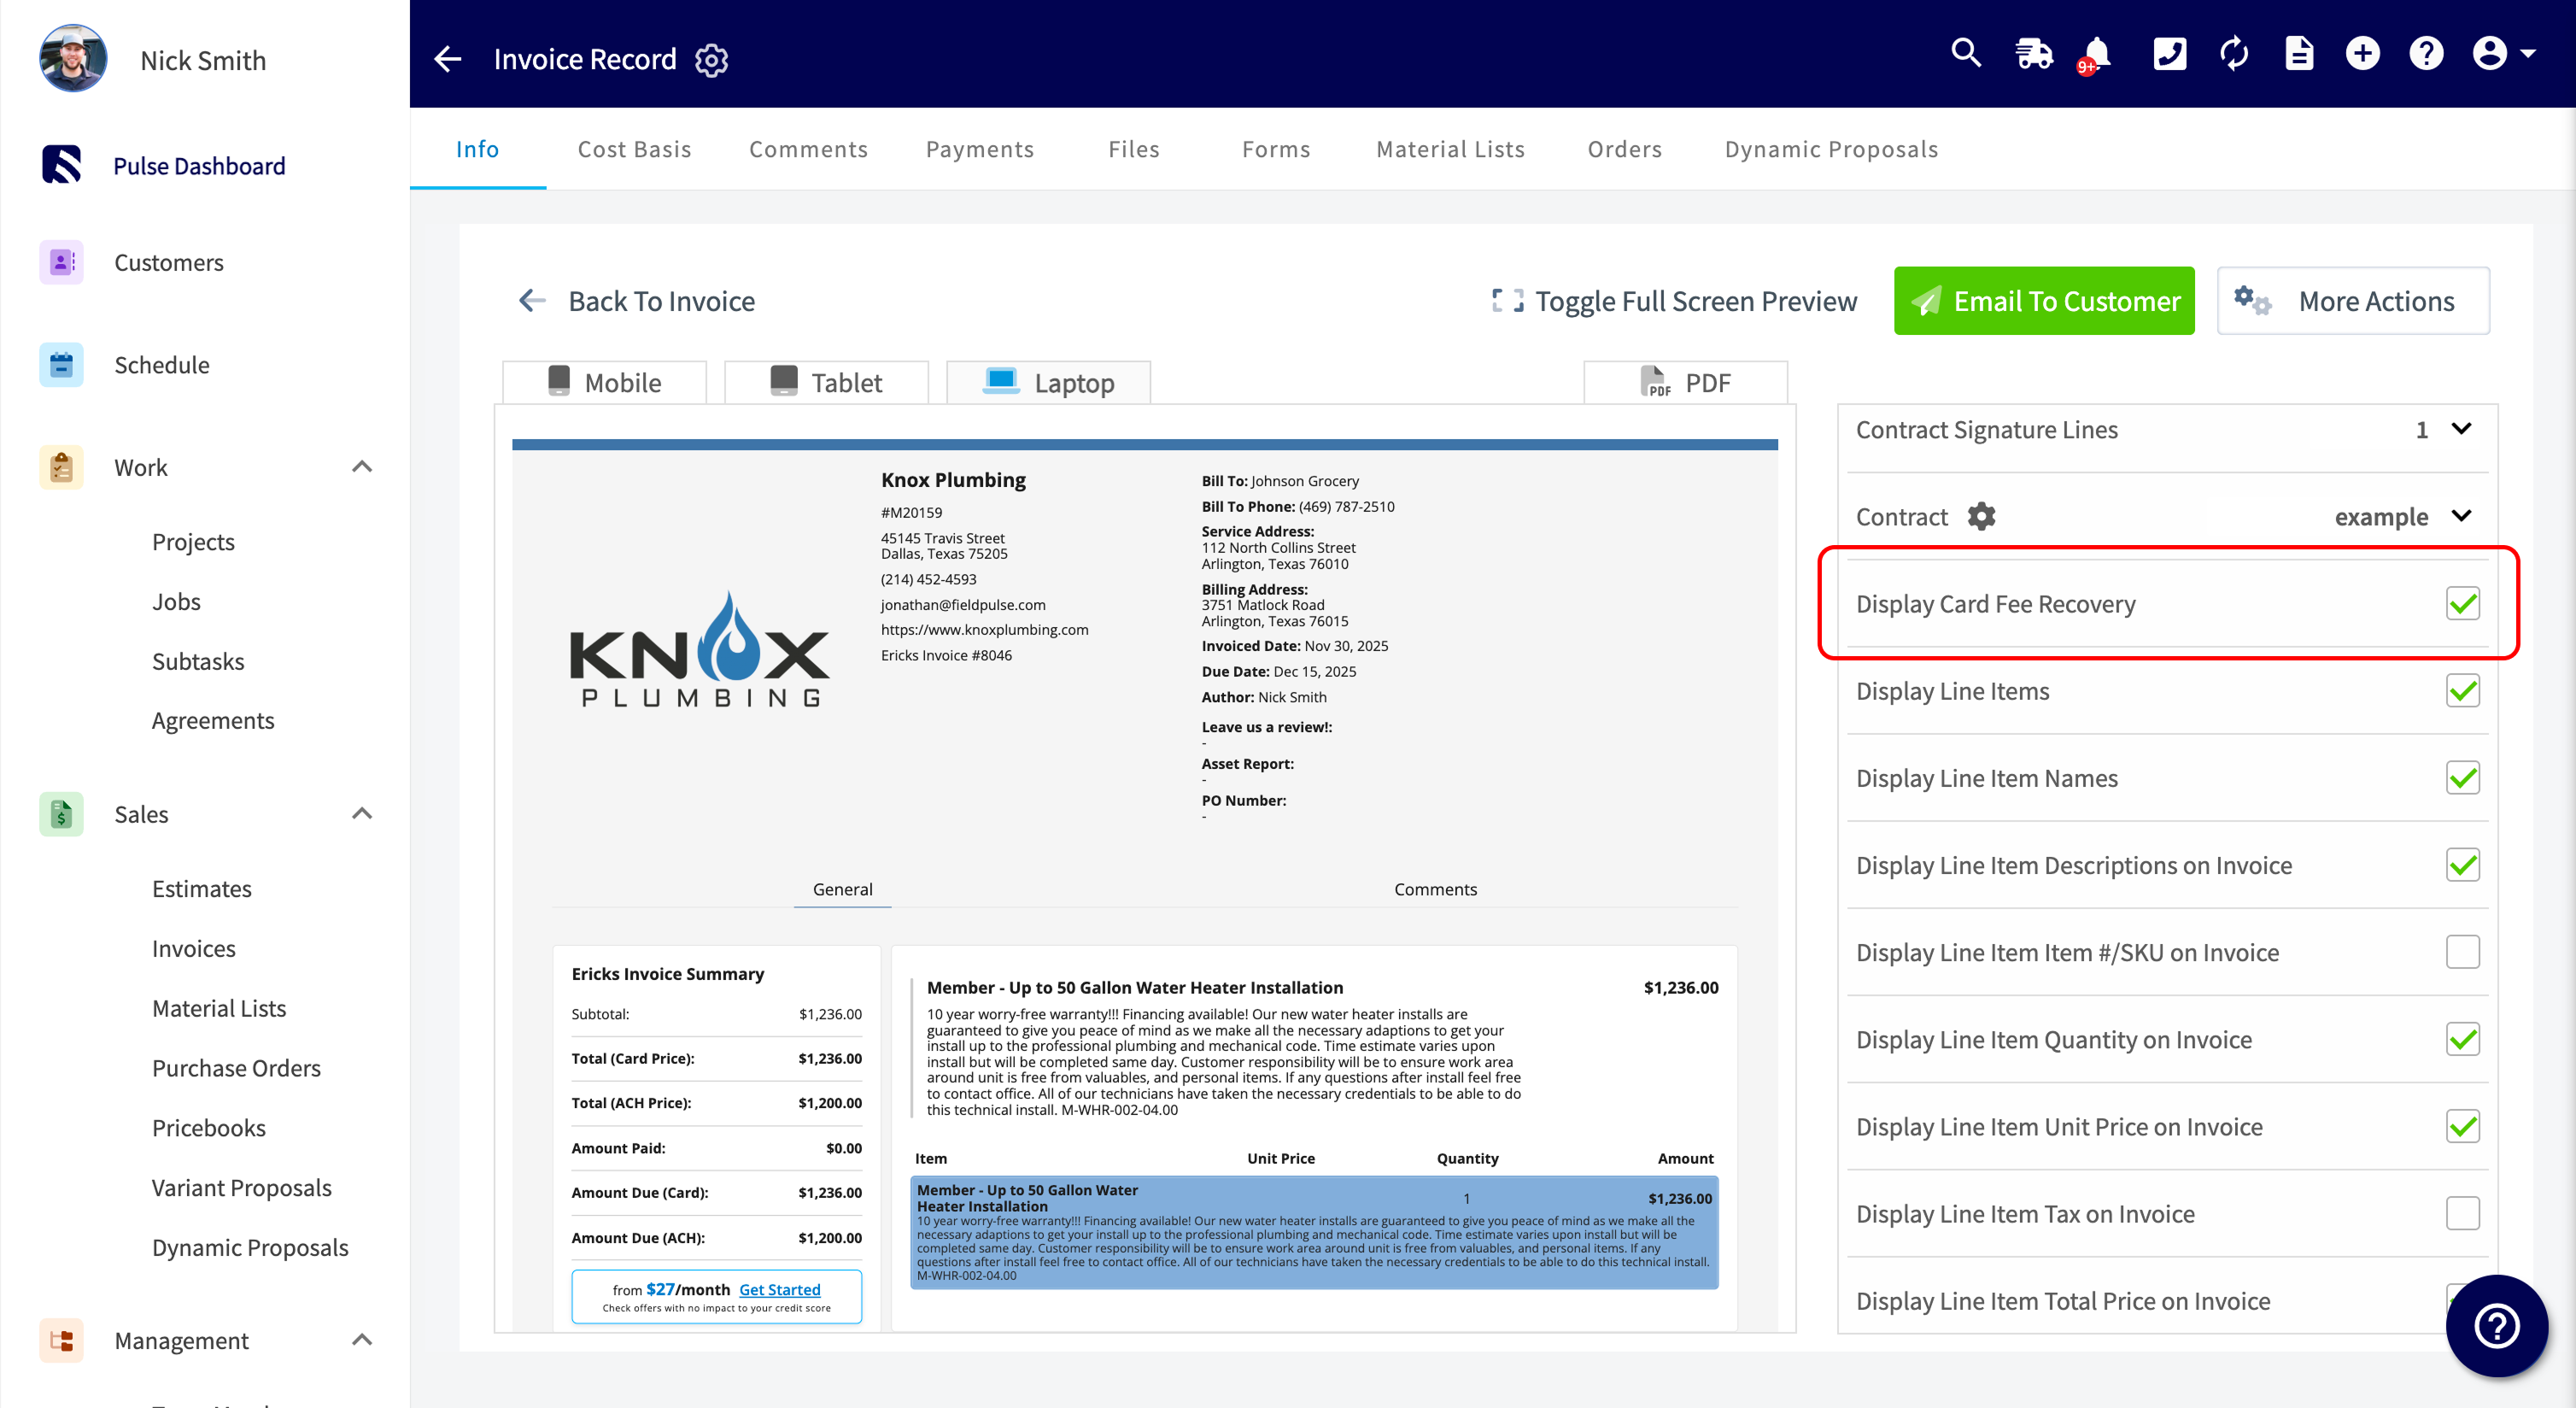
-
----
-
-**Have additional questions?**
-
-_Contact us at [support@fieldpulse.com](mailto:support@fieldpulse.com) or use the chat feature in the bottom right corner of your screen._
\ No newline at end of file
+# What is Card Fee Recovery?
\ No newline at end of file
Saving a Card on File
- Module: FP Payments (Fintech)
- File:
saving-a-card-on-file.mdx - Intercom URL: https://help.fieldpulse.com/en/articles/8945615-saving-a-card-on-file
- Last modified: 2026-03-12
Index: saving-a-card-on-file.mdx
===================================================================
--- saving-a-card-on-file.mdx existing
+++ saving-a-card-on-file.mdx intercom
@@ -1,67 +0,0 @@
-You can now securely store your customer's credit card information in FieldPulse! When storing the card, the credit card number will be tokenized to protect your customer's information. _( **Note:** You must have [FieldPulse Payments](/growth/fp-payments/fieldpulse-payments) enabled.)_
-
----
-
-## Adding a Card When Accepting Payment
-
-To add a card on file when accepting payment, begin by selecting the _Payment_ button.
-
-
-
-Next, add the credit card details and toggle on _Save Card Details_. You will then be prompted to confirm that you have obtained consent from the customer to store their card information. After checking this box, you can charge the card.
-
-Your transaction will now be processed, and the card details will be stored on the customer's record for future transactions.
-
-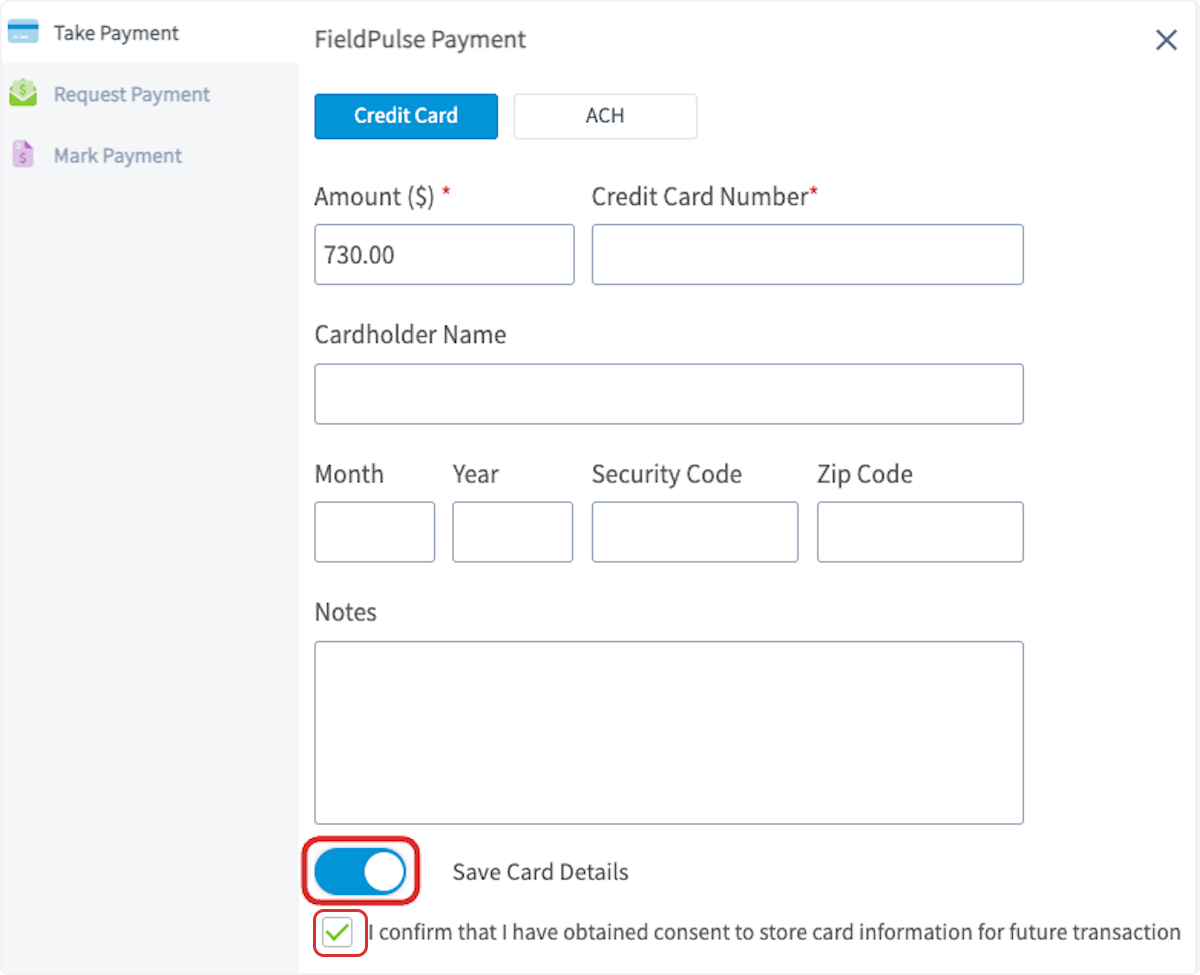
-
----
-
-## Charging a Card on File
-
-To charge a card on file, select _Payment_, then _Charge Card on File_.
-
-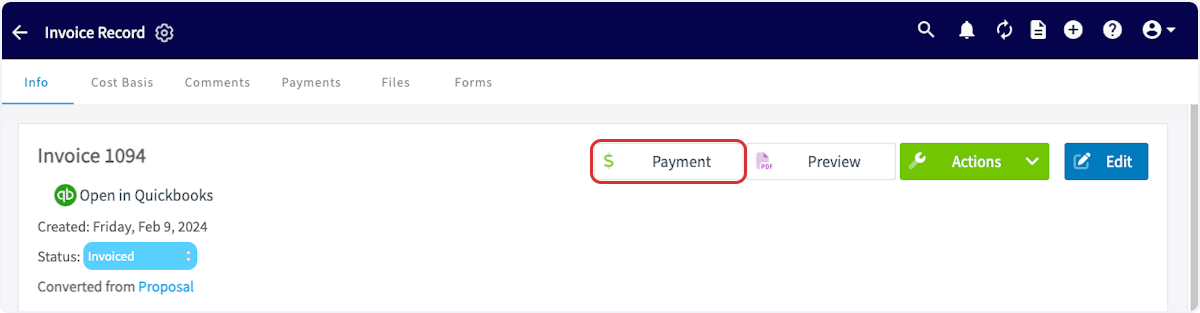
-
-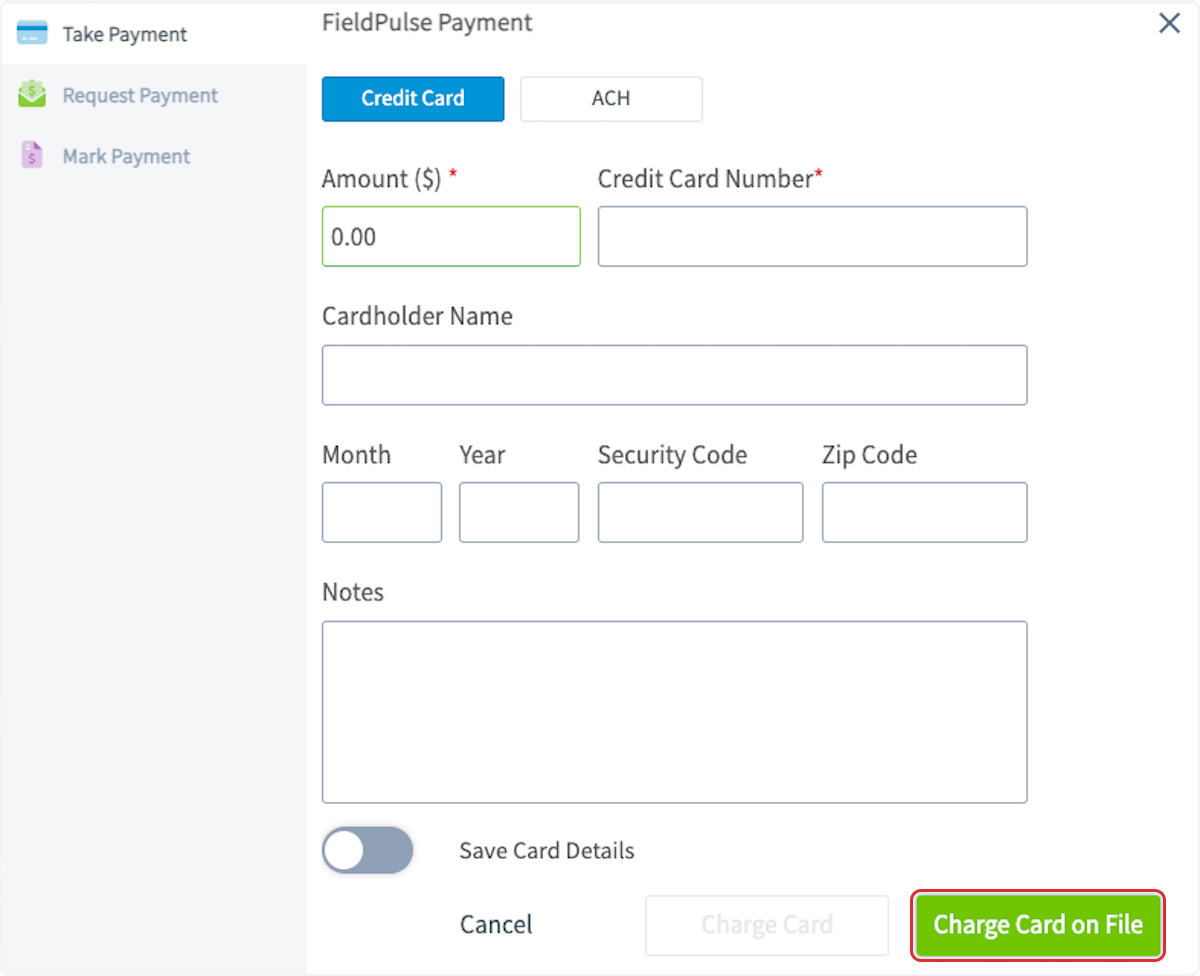
-
-The card details will be auto-populated. Note that the credit card number is tokenized to protect your customer's information. You can now charge this card or select _Add New Card_ to add another card on file for this customer.
-
-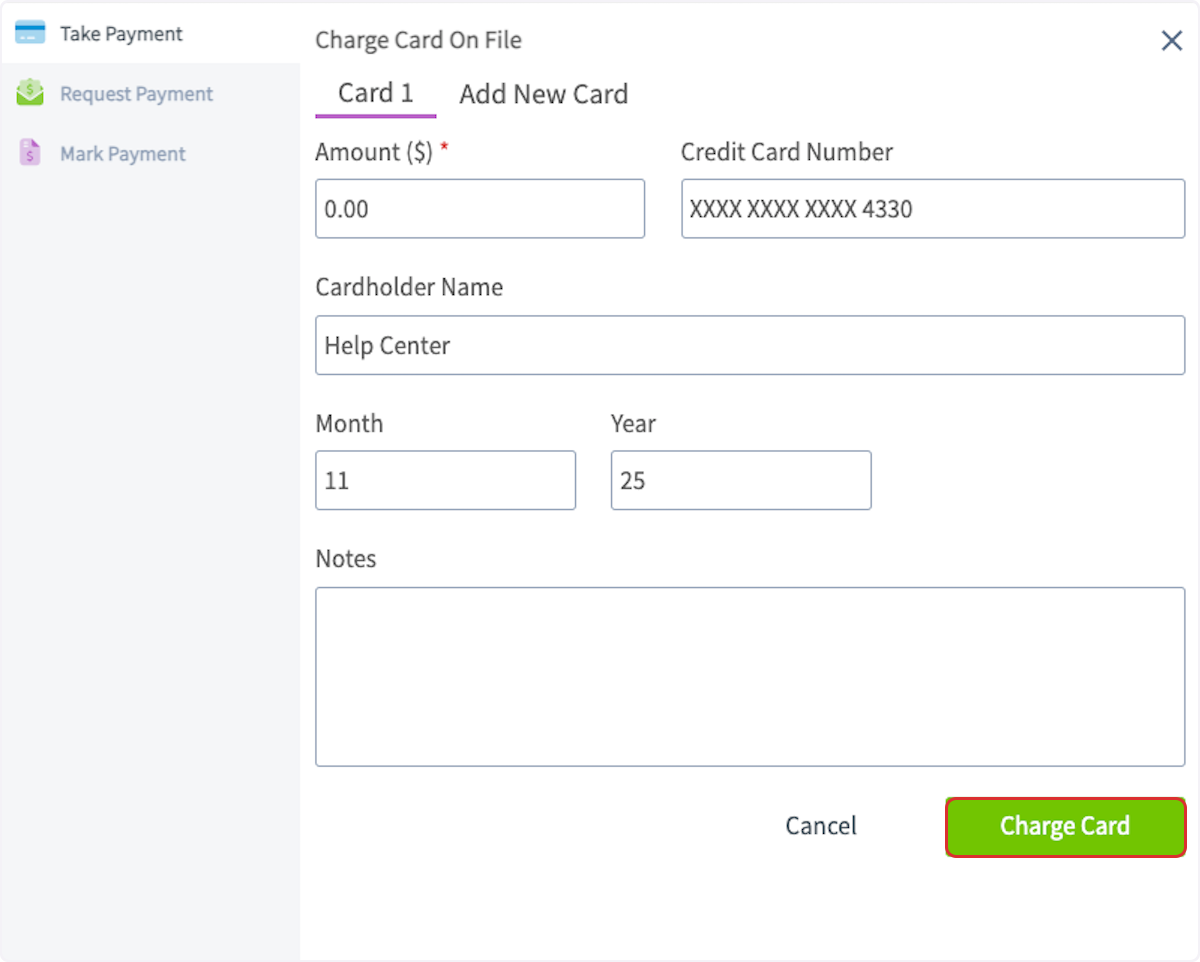
-
----
-
-## Adding a Card to a Customer Record
-
-To add a credit card on file, navigate to the customer record and select the plus sign next to _Card on File_. You can then add a credit card to be securely stored for future use.
-
-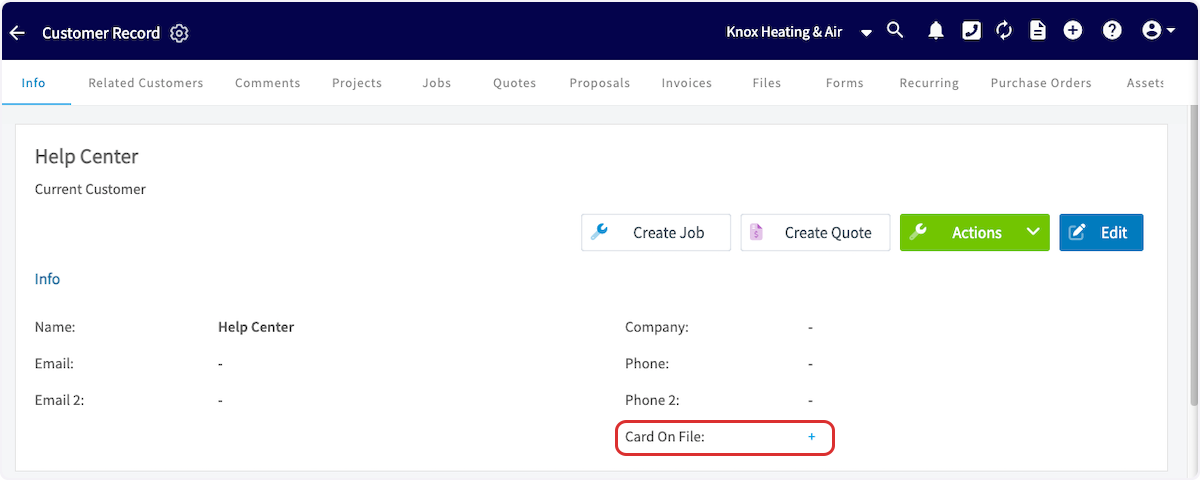
-
----
-
-## Mobile App
-
-Users can now save cards on file in the mobile app, in addition to the web app. Save multiple cards on a customer profile by going directly to the customer's profile or at the time of collecting payment. If there are multiple cards on file, the FieldPulse user can select which one to charge.
-
-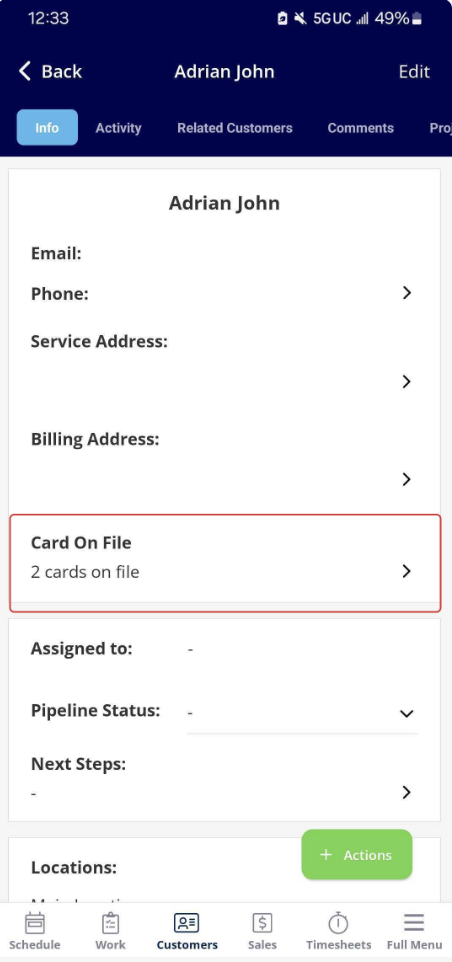
-
----
-
-## Video Tutorial
-
-<Frame caption="Saving a Card on File">
- <iframe
- src="https://www.loom.com/embed/d1bc564ec2dc47bd89d6a5a344653329?hide_owner=true&hide_share=true"
- title="Video: Saving a Card on File"
- className="w-full rounded-lg"
- style={{aspectRatio: "16/9", border: "none"}}
- loading="lazy"
- allow="fullscreen"
- allowFullScreen
- />
-</Frame>
-
----
-
-**Have additional questions?**
-
-_Contact us at [support@fieldpulse.com](mailto:support@fieldpulse.com) or use the chat feature in the bottom right corner of your screen._
\ No newline at end of file
Collecting Payments: 3 General Methods
- Module: FP Payments (Fintech)
- File:
collecting-payments.mdx - Intercom URL: https://help.fieldpulse.com/en/articles/8883773-collecting-payments-3-general-methods
- Last modified: 2026-03-30
Index: collecting-payments.mdx
===================================================================
--- collecting-payments.mdx existing
+++ collecting-payments.mdx intercom
@@ -1,105 +0,0 @@
-Want to collect and track customer payments directly in FieldPulse? **FieldPulse Payments** makes the process seamless and saves you from making yet another account!
-
-**You can accept payments in 3 ways:**
-
-- Emailing an online payment request via web app or mobile app
-
-- Processing the payment on the mobile app
-
-- Processing the payment on the web app
-
----
-
-## Enabling FieldPulse Payments
-
-To enable FieldPulse Payments, email us at [support@fieldpulse.com](mailto:support@fieldpulse.com) or use the chat feature in the bottom right corner of your screen.
-
----
-
-## Processing a Payment
-
-To process a payment, go to the invoice record that you are looking to collect payment on and click on _Payment_.
-
-
-
-From here, a window will pop up - select _Take Payment_.
-
-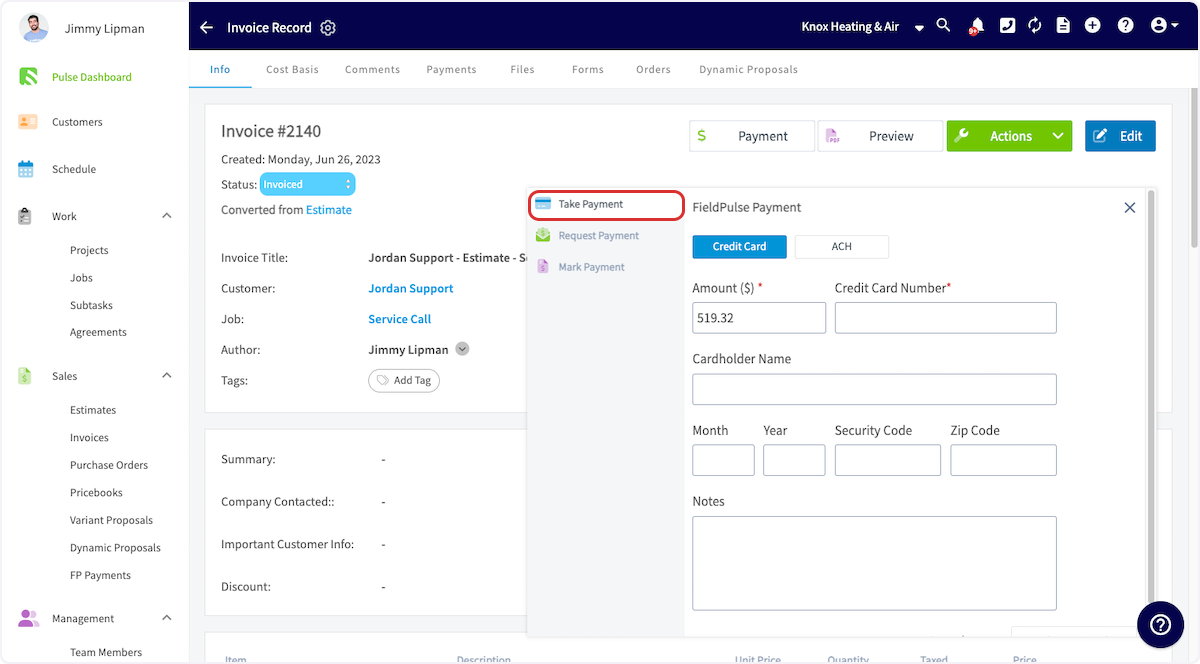
-
-Once the card details have been entered, the _Charge Card_ button in the lower right-hand corner will become available. Once you click, the payment will be collected. Then you will see the status of the invoice marked as _Paid_ or _Partially Paid_ depending on the amount you collected. This will also create a payment record under the invoice - to view your payment history select Payments from the top of the invoice record.
-
----
-
-## Emailing a Payment Request
-
-Here's how to email an online payment request to the customer along with their FieldPulse estimate or invoice. This provides them with the ability to pay online with their debit/credit card or ACH.
-
-### Method 1
-
-Select or create the estimate/invoice that you would like to take payment on. Select _Preview_ to generate the estimate/invoice for you.
-
-
-
-Once the estimate/invoice PDF has been generated, select _Email to Customer_.
-
-
-
-This will display a window where you can adjust the email message and toggle on the _Include Payment Request_. You will now be able to enter the payment request amount.
-
-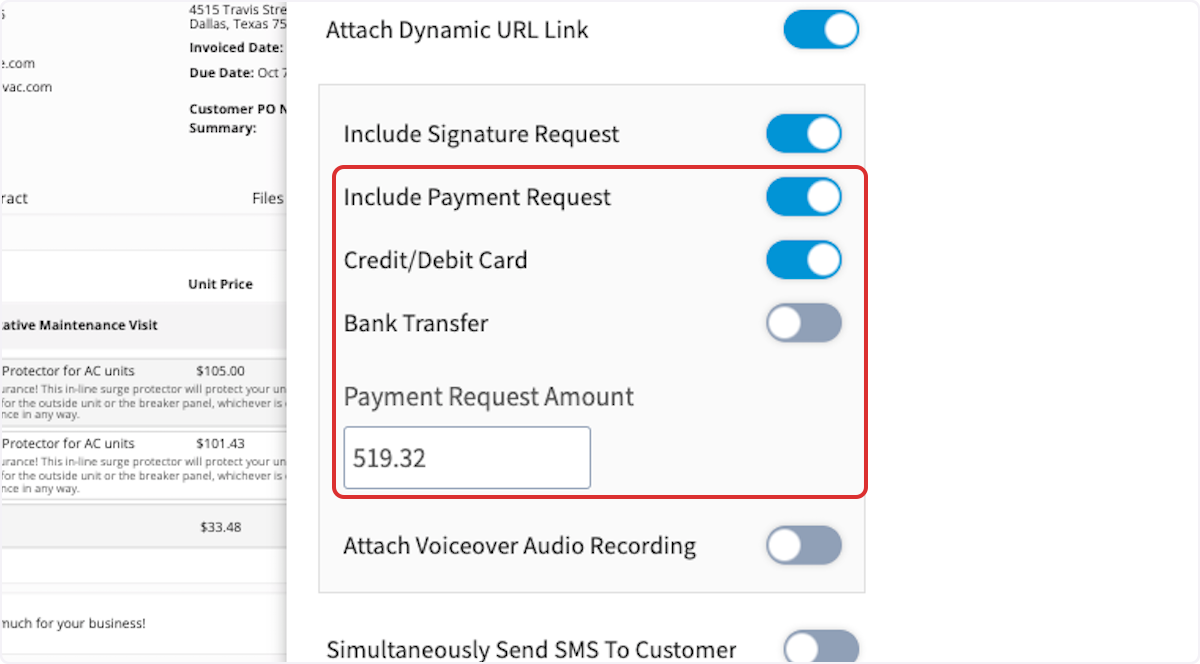
-
-If you are collecting payment on an estimate, you can request a specific dollar amount or percentage of the total estimate amount.
-
-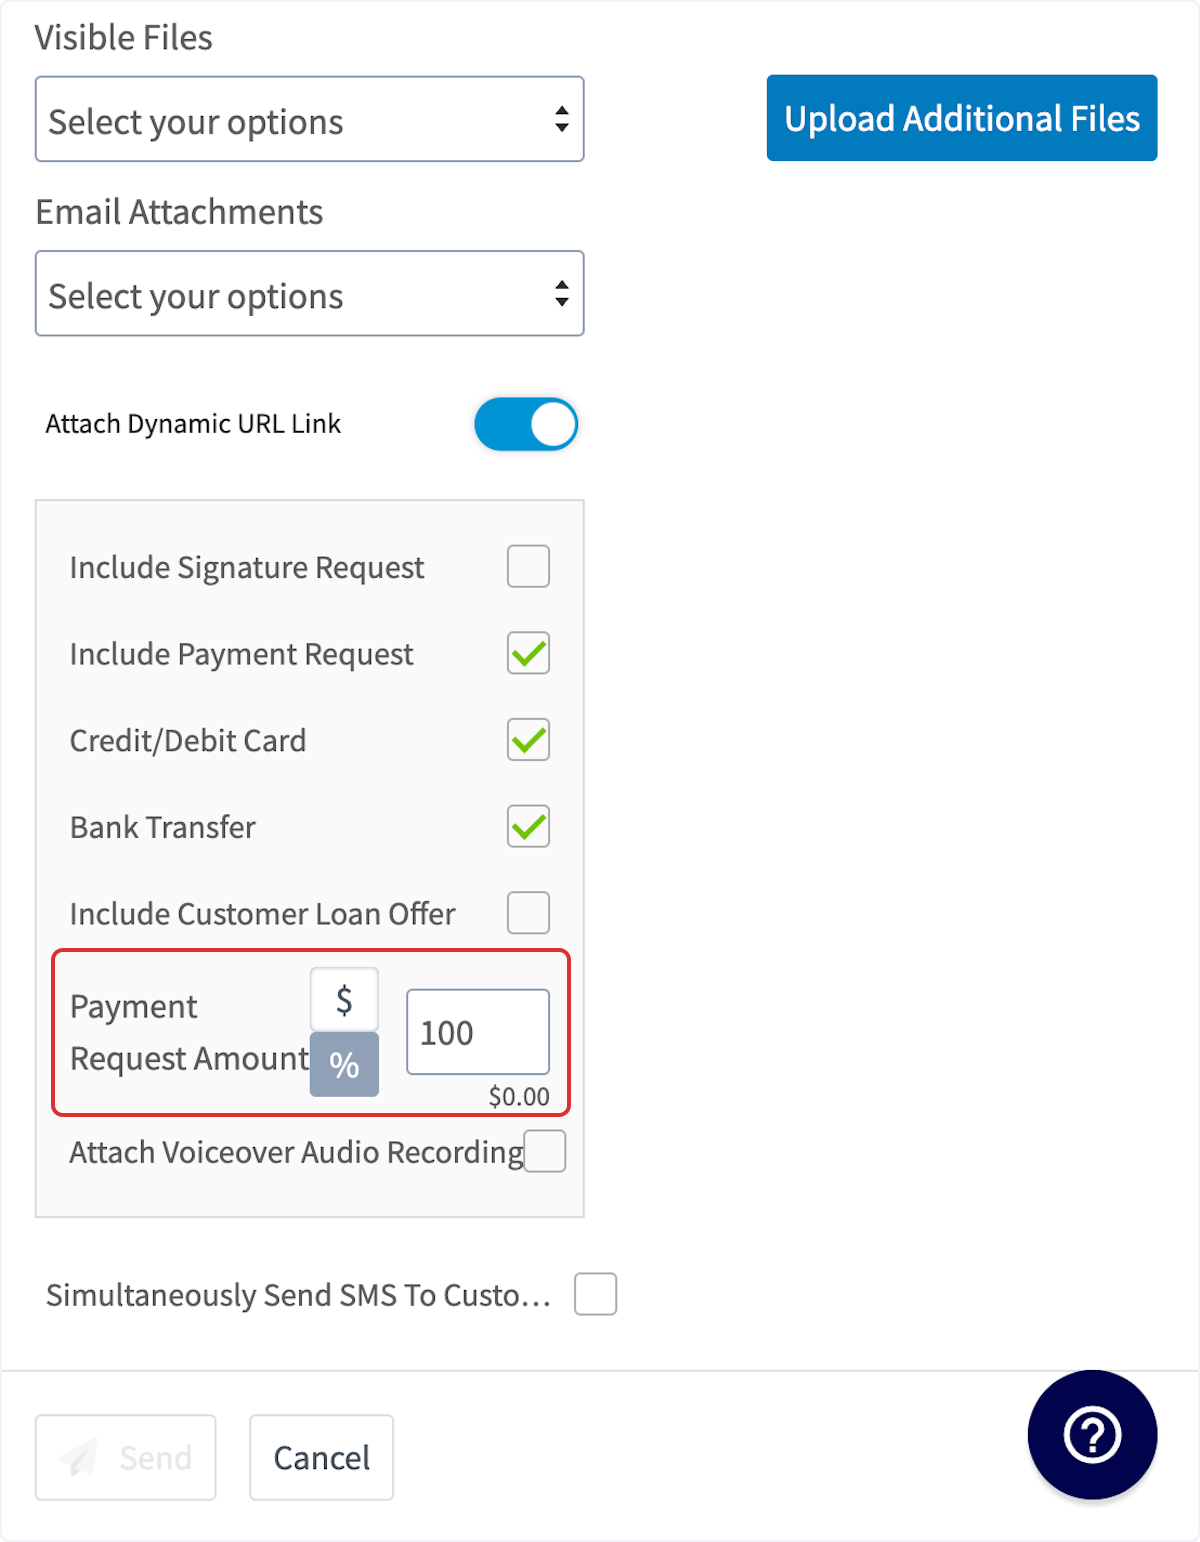
-
-You can now send the estimate/invoice and payment request to your customer. Once the payment has been processed, the status of the invoice record in FieldPulse will now say _Paid_. You can view the payment history under _Payments_ as well.
-
-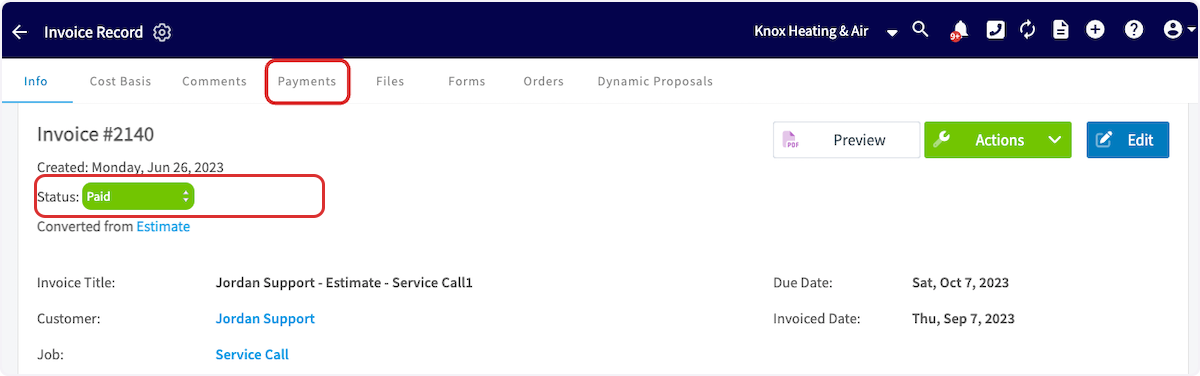
-
-#### Method 2
-
-Another way to request payment by email is to return to the invoice record. Select the _Payment_ button and choose _Request Payment_.
-
-
-
-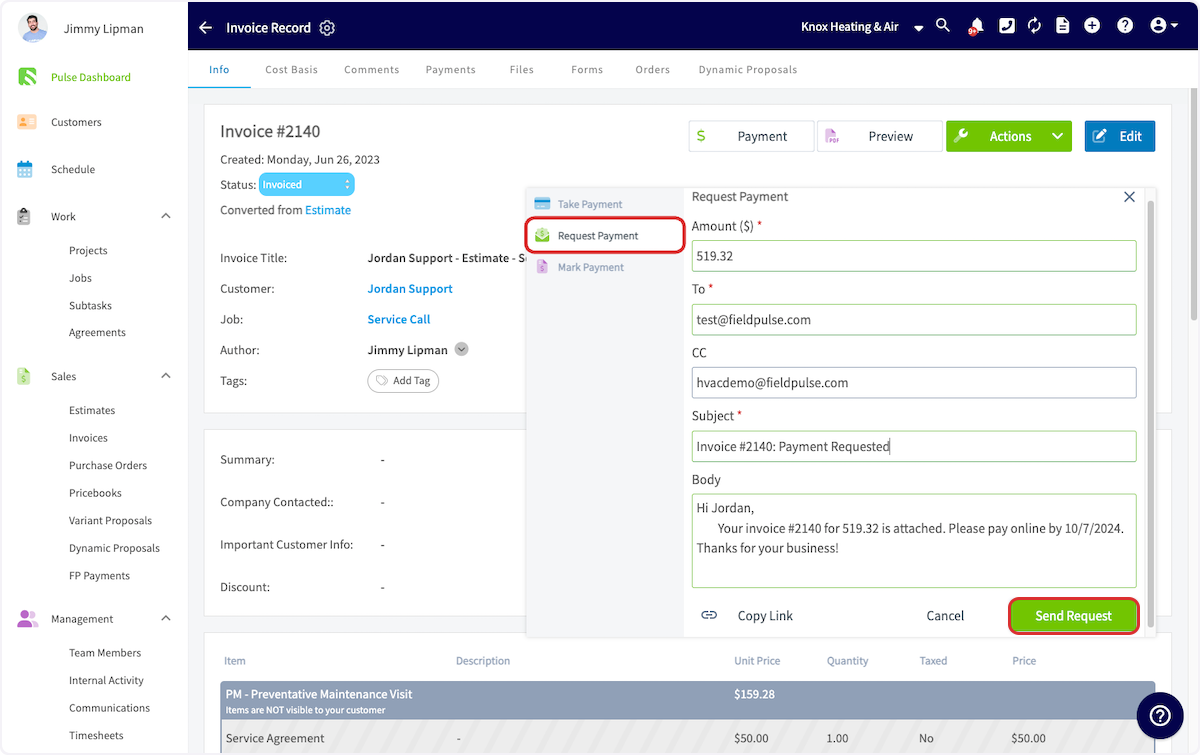
-
-Now that the payment link has been inserted, you can email the invoice and payment request out to your customer.
-
-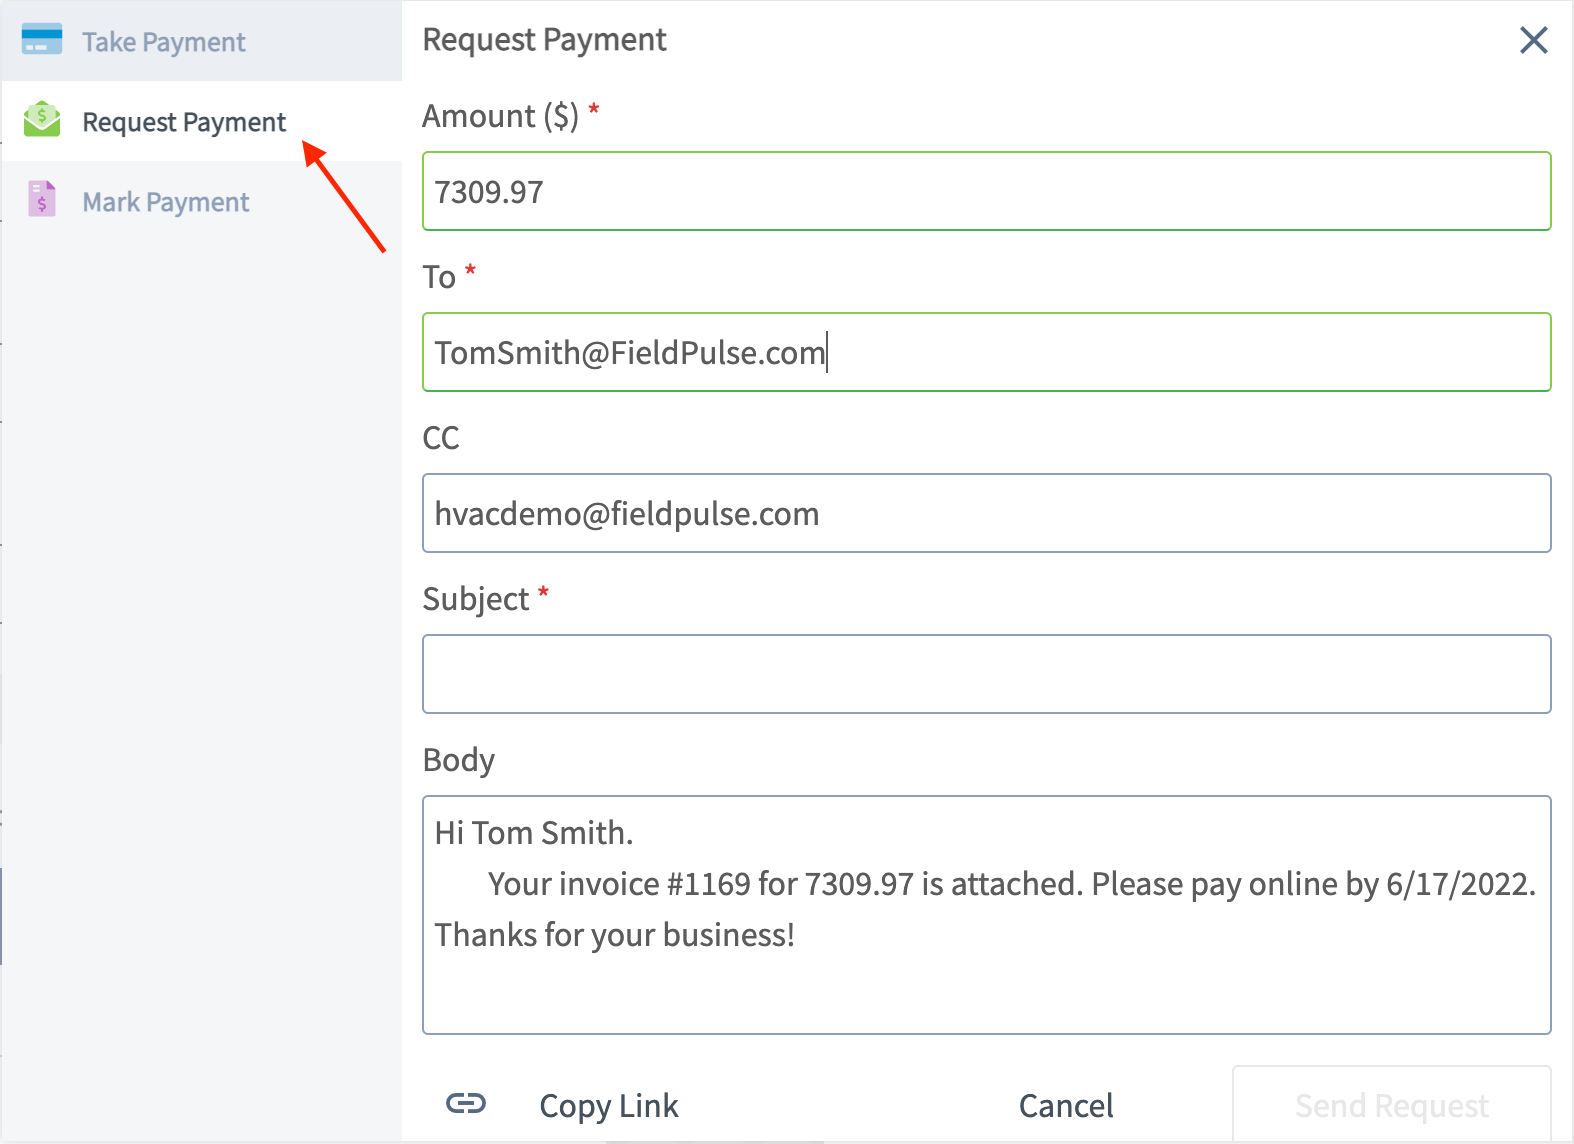
-
-Once you send the email, your customer will receive an email similar to the example shown below. By clicking Pay Invoice By Credit Card, your customer will be able to enter their credit/debit card information or set up a bank transfer.
-
-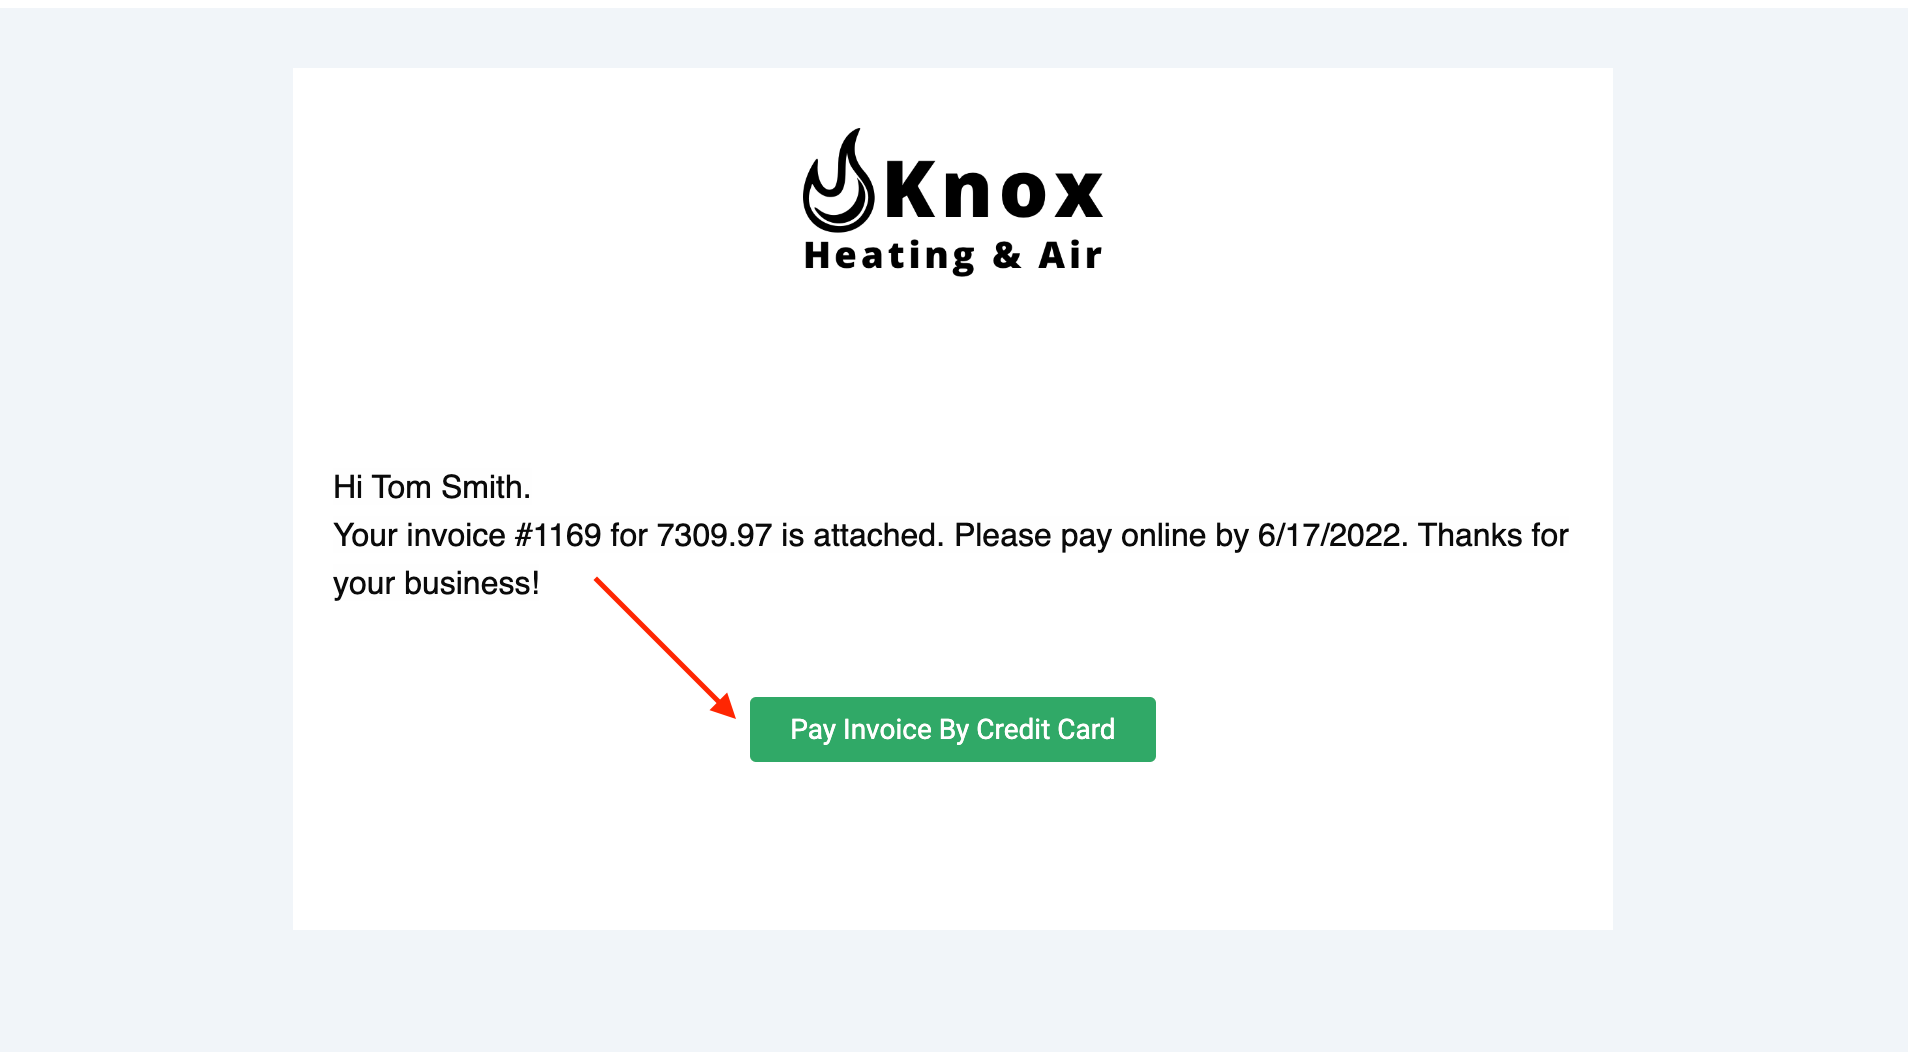
-
-Once the payment has been processed, the status of the invoice record in FieldPulse will now say _Paid_. You can view the payment history under _Payments_ as well.
-
-
-
----
-
-## Video Tutorial
-
-<Frame caption="FieldPulse Payments">
- <iframe
- src="https://www.loom.com/embed/08d9c620301e4b2893b2251b7ebb2baf?hide_owner=true&hide_share=true"
- title="Video: FieldPulse Payments"
- className="w-full rounded-lg"
- style={{aspectRatio: "16/9", border: "none"}}
- loading="lazy"
- allow="fullscreen"
- allowFullScreen
- />
-</Frame>
-
----
-
-**Have additional questions?**
-
-_Contact us at [support@fieldpulse.com](mailto:support@fieldpulse.com) or use the chat feature in the bottom right corner of your screen._
-
----
-
-<Note>
-This article also relates to: [Payments](/growth/payment)
-</Note>
\ No newline at end of file
Material Lists
- Module: Material List
- File:
material-lists.mdx - Intercom URL: https://help.fieldpulse.com/en/articles/11083170-material-lists
- Last modified: 2026-04-09
Index: material-lists.mdx
===================================================================
--- material-lists.mdx existing
+++ material-lists.mdx intercom
@@ -1,163 +1,1 @@
-## **What are Material Lists?**
-
-Material lists are a way to keep track of what materials you need for a job and what you actually used. Material lists help you **stay organized** and **ensure you are prepared** to complete jobs and projects of all sizes.
-
-Material lists can vary in detail depending on your needs. They can include items that will be directly incorporated into the estimate or invoice, or you can choose to create a more comprehensive list that details every aspect of the job/project. For example, you might list primary materials such as pipes, fittings, and fixtures, but you can also include tools like wrenches, pipe cutters, and plungers. Additionally, consider adding consumables such as Teflon tape, sealants, and joint compounds, as well as any specialized equipment needed for the installation, like pipe inspection cameras or drain snakes. The level of detail is entirely up to you!
-
-### Here’s how they work
-
-- When you visit a job site, you can make a list of all the materials you’ll need to get the work done. This helps you know exactly what to buy. Or an alternative to this is your company creating an estimate first. The technician can then fill out the material list based on the materials needed to complete the work or for what they actually used during the job.
-
-- After you create the list, a colleague can check it. This list can then be used to create an estimate (a rough cost of the job) or an invoice (the final bill).
-
-- You can choose to include some or all of the materials from your list in the estimate or invoice so the customer knows exactly what they’re paying for.
-
----
-
-## How to Enable Material Lists
-
-Start by clicking on _Company Settings_ from the menu on the left hand side of your screenand selecting _Features & Plugins._ Navigate to _Material Lists_ and select _Enable_.
-
-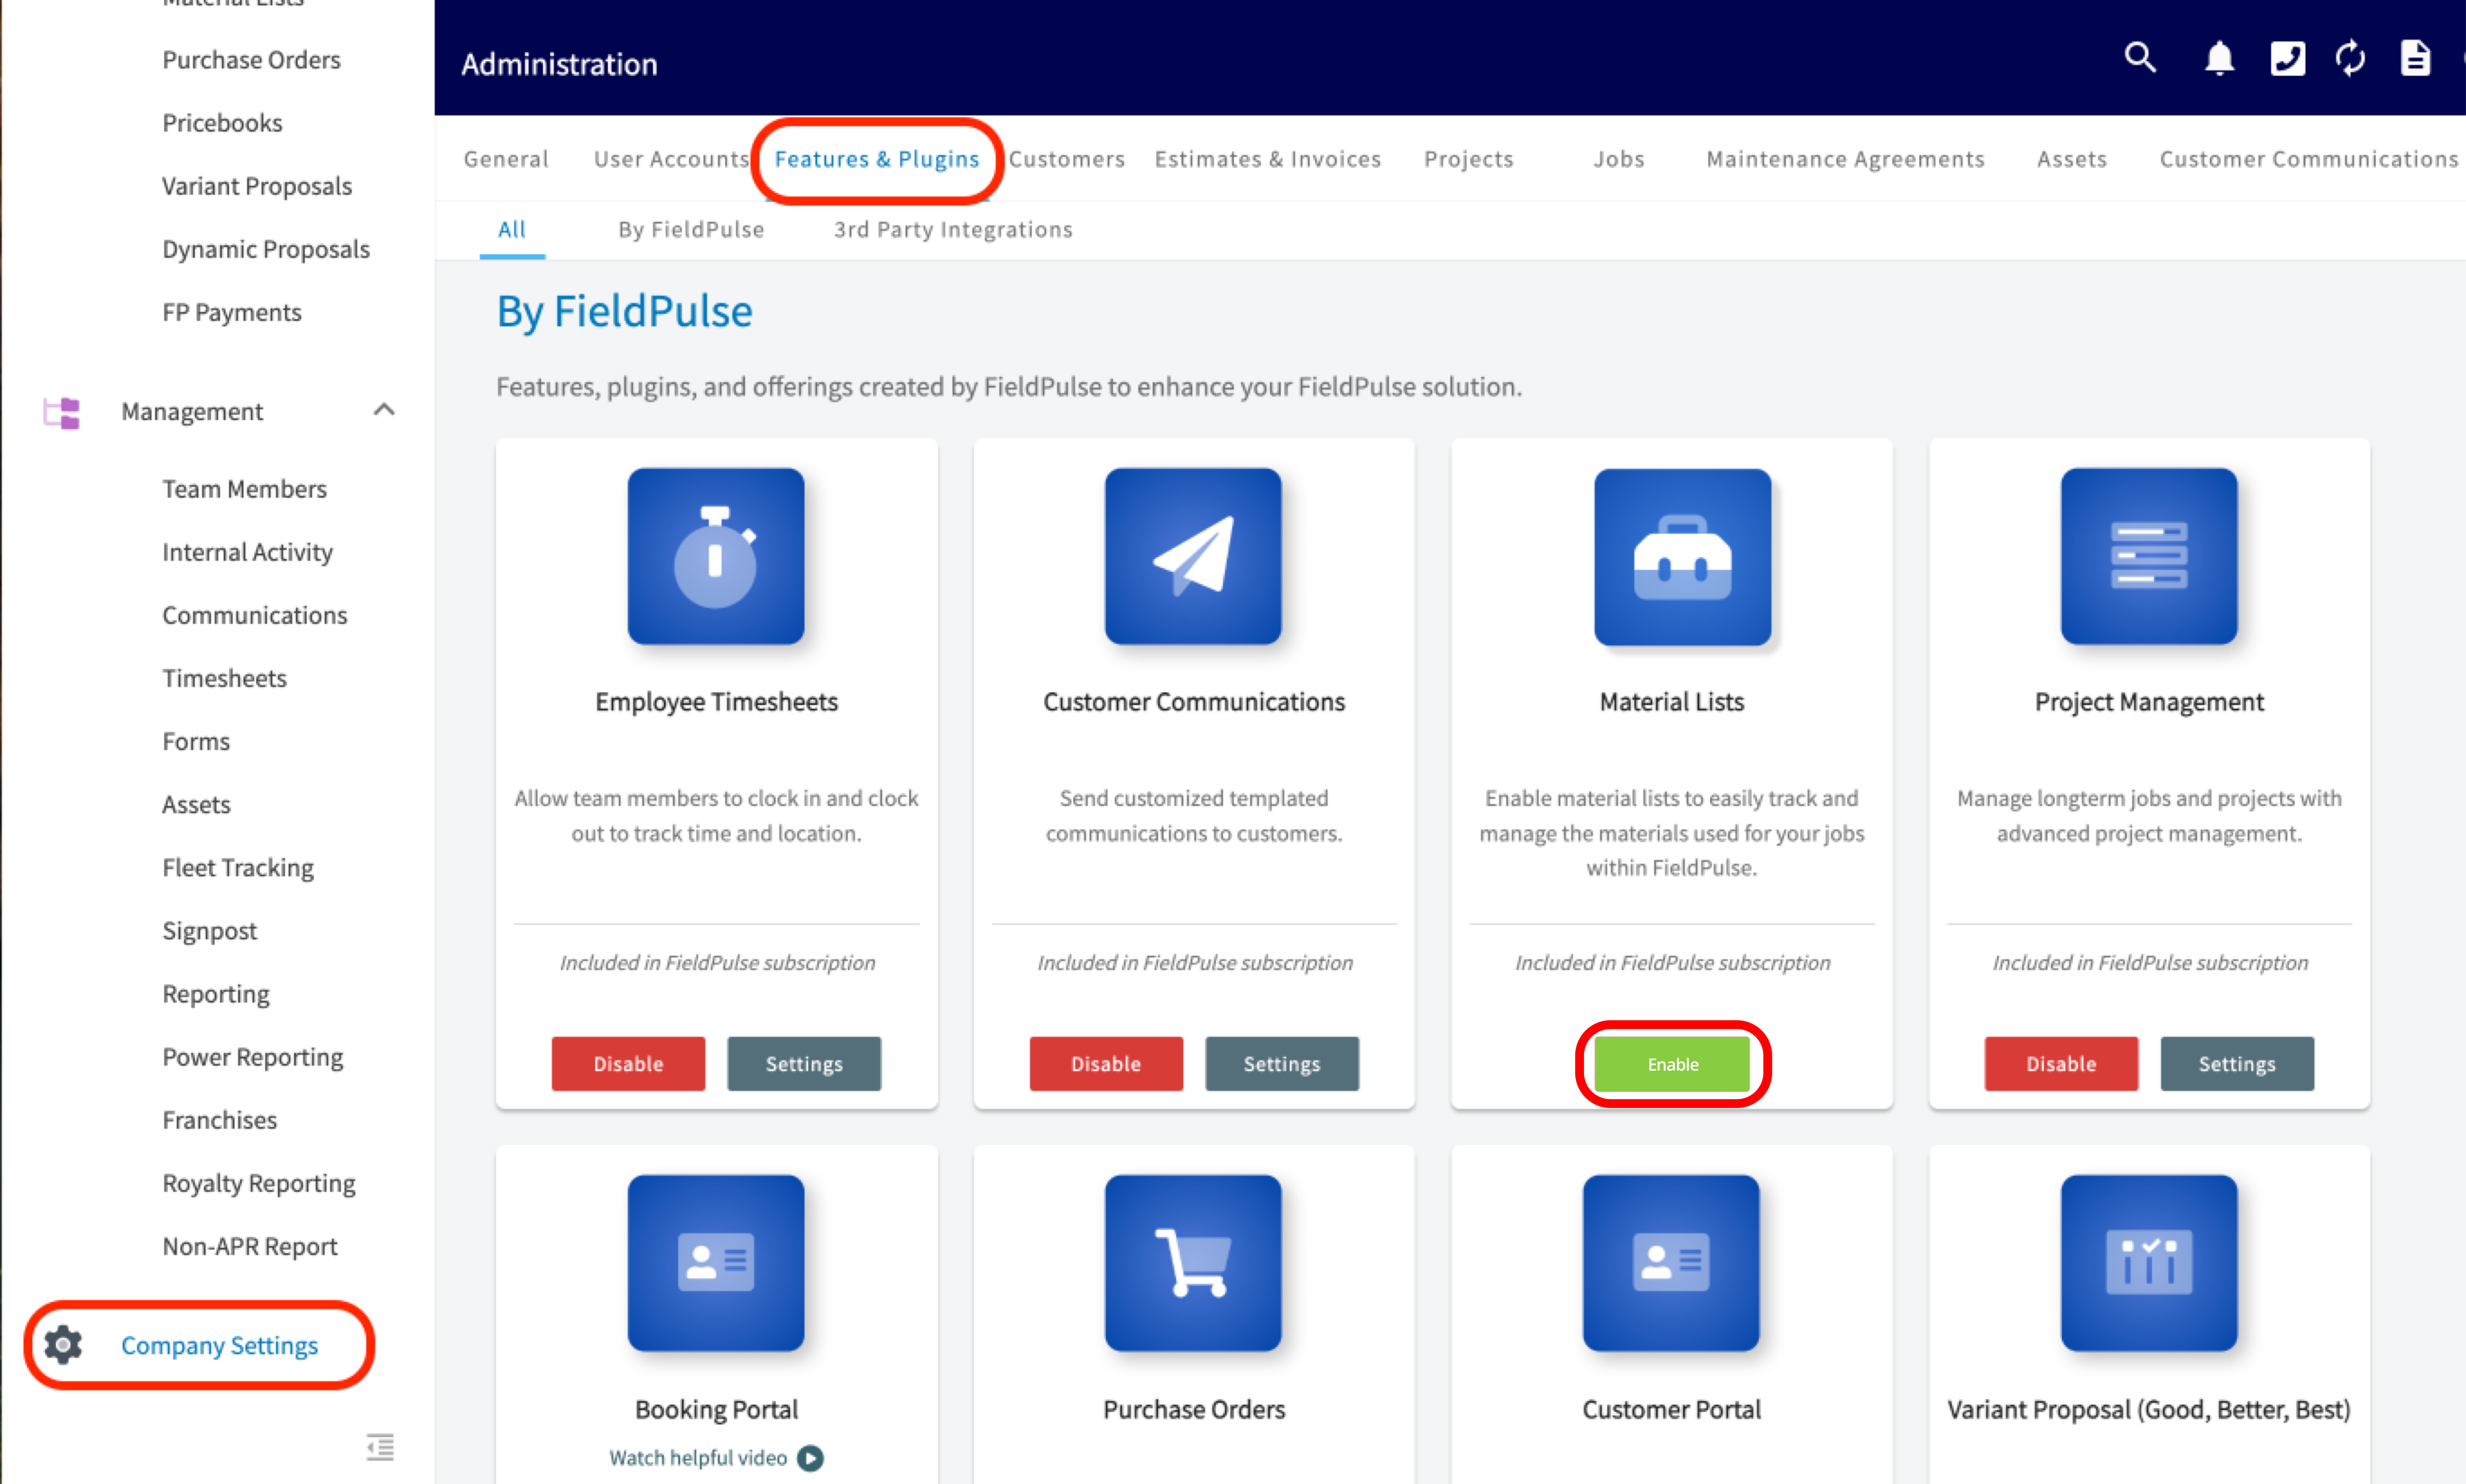
-
----
-
-## Material List Templates
-
-When creating a material list, you can always save it as a template by toggling on the button that says _Save as Material List Template_. By doing this, it will save you time and allow you to **insert these templates on to any job, project, purchase order, estimate, or invoice record**.
-
-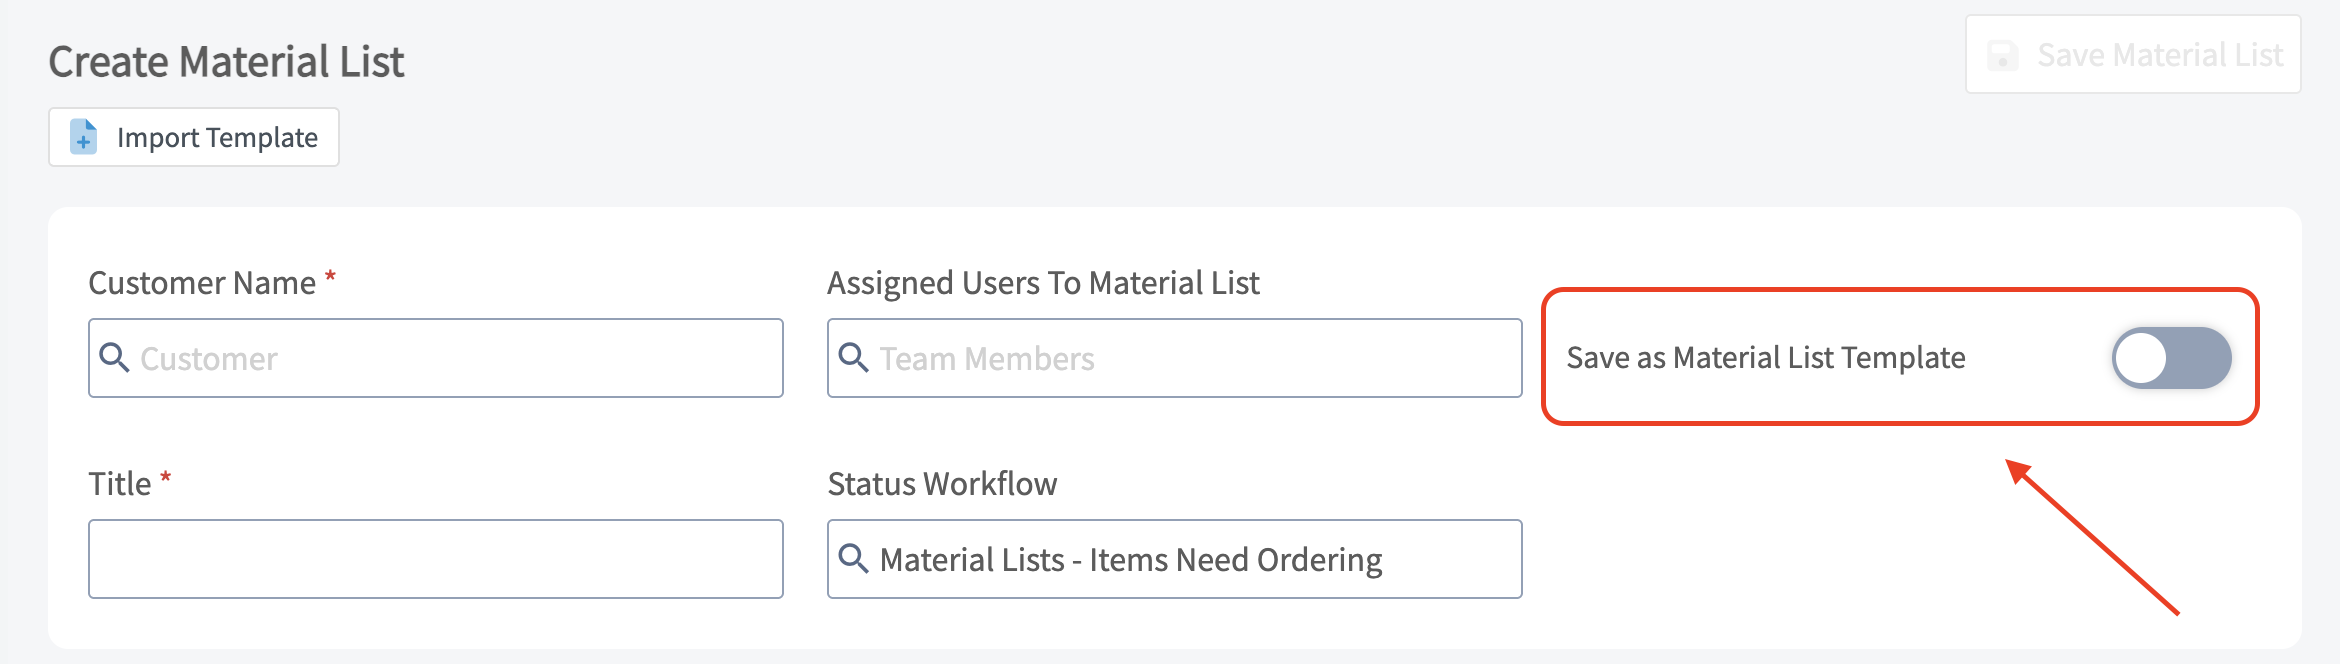
-
-To add a material list template to a job record for example, you would first navigate to the job record you wish to attach the material list to. Once on this job record, for this example it is _Job Record #2264_, you would then click into the subtab at the top for _Material Lists._
-
-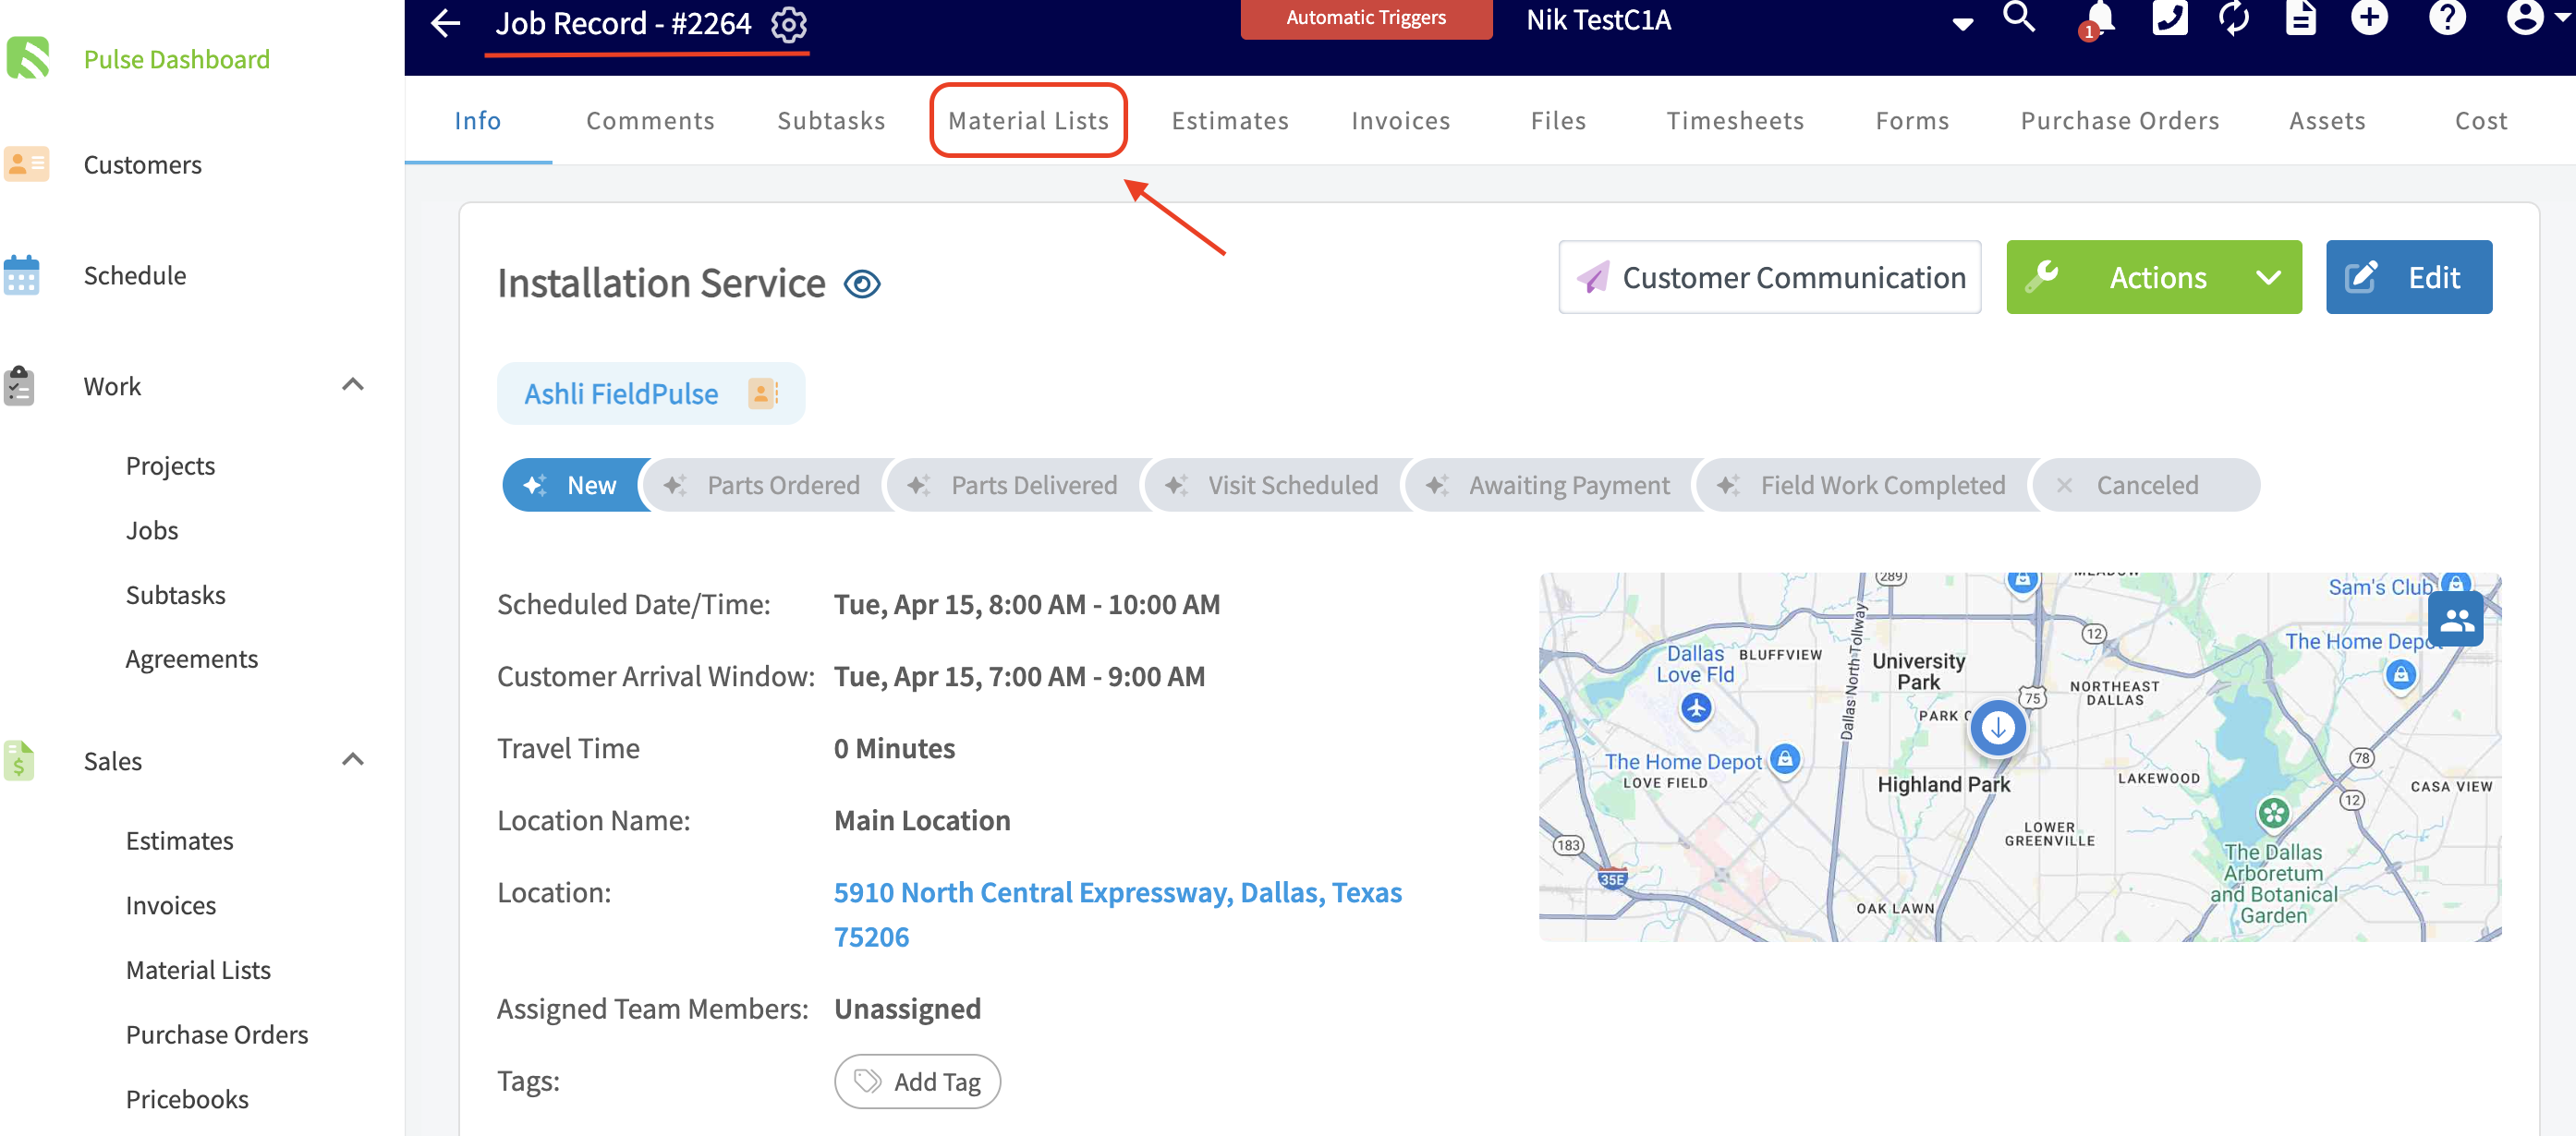
-
-When on the _Material Lists_ tab, proceed to click the green _Create Material List_ button to attach one of your material list templates to this specific job record.
-
-
-
-After selecting the _Create Material List_ button, click on the _Import Template_ button near the top left of the screen.
-
-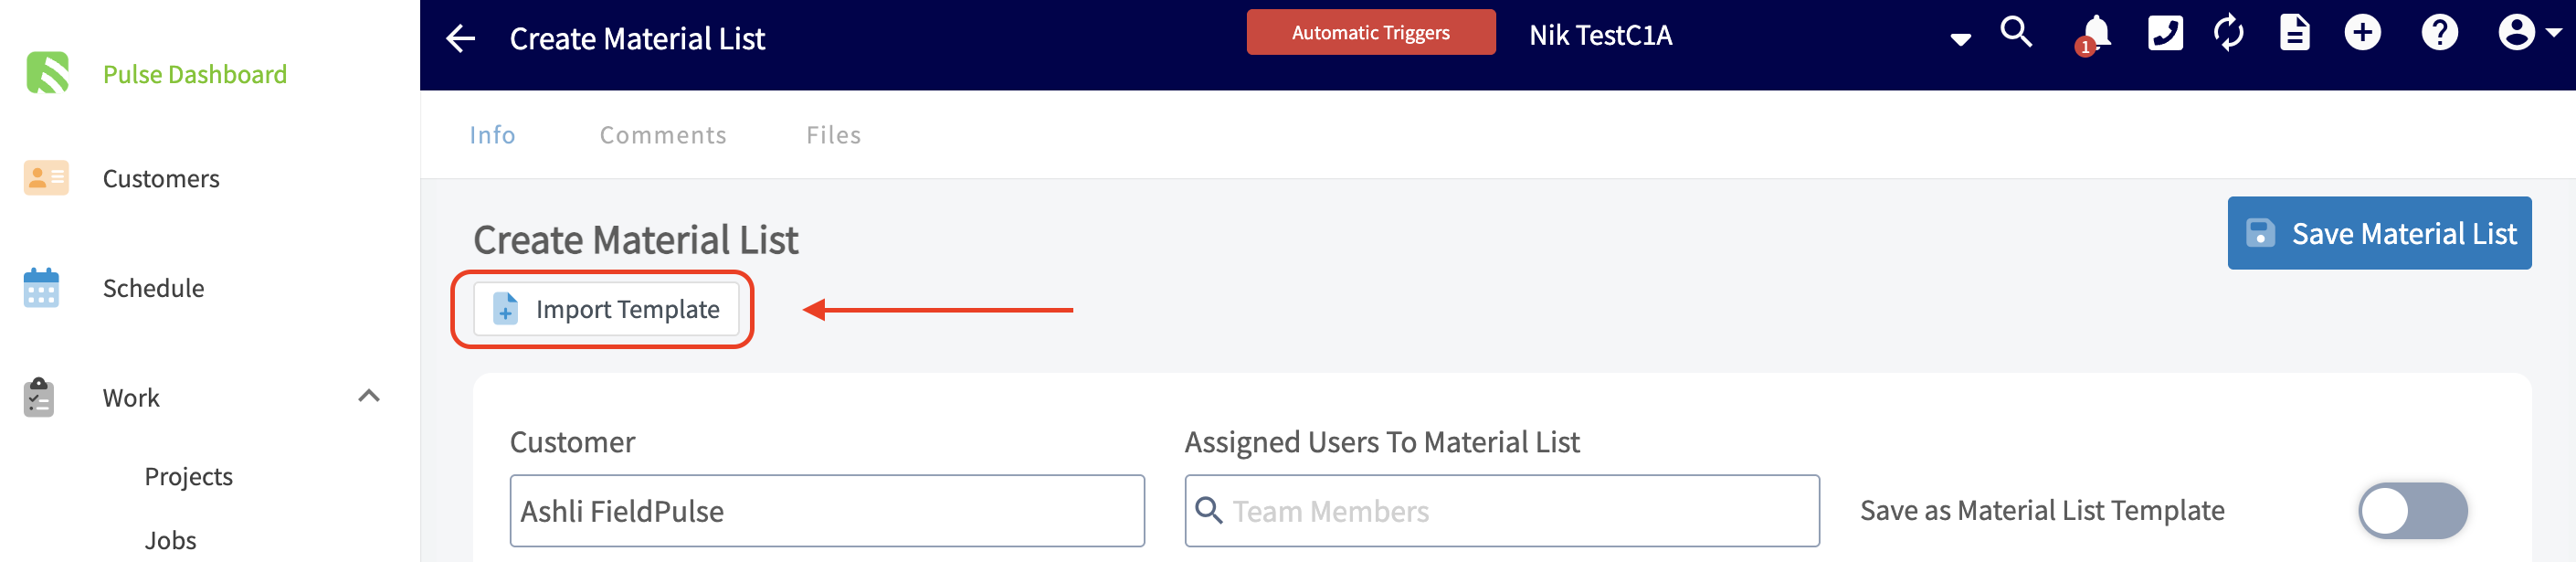
-
-Choose the material list template you wish to add to this job record from the drop down menu, make any changes/additions, then ensure you press the blue _Save_ button.
-
----
-
-## Creating a Material List
-
-To get started, click on the _Material Lists_ tab in the left side menu. Once on the _Material Lists_ page, click the green _Create Material List_ button.
-
-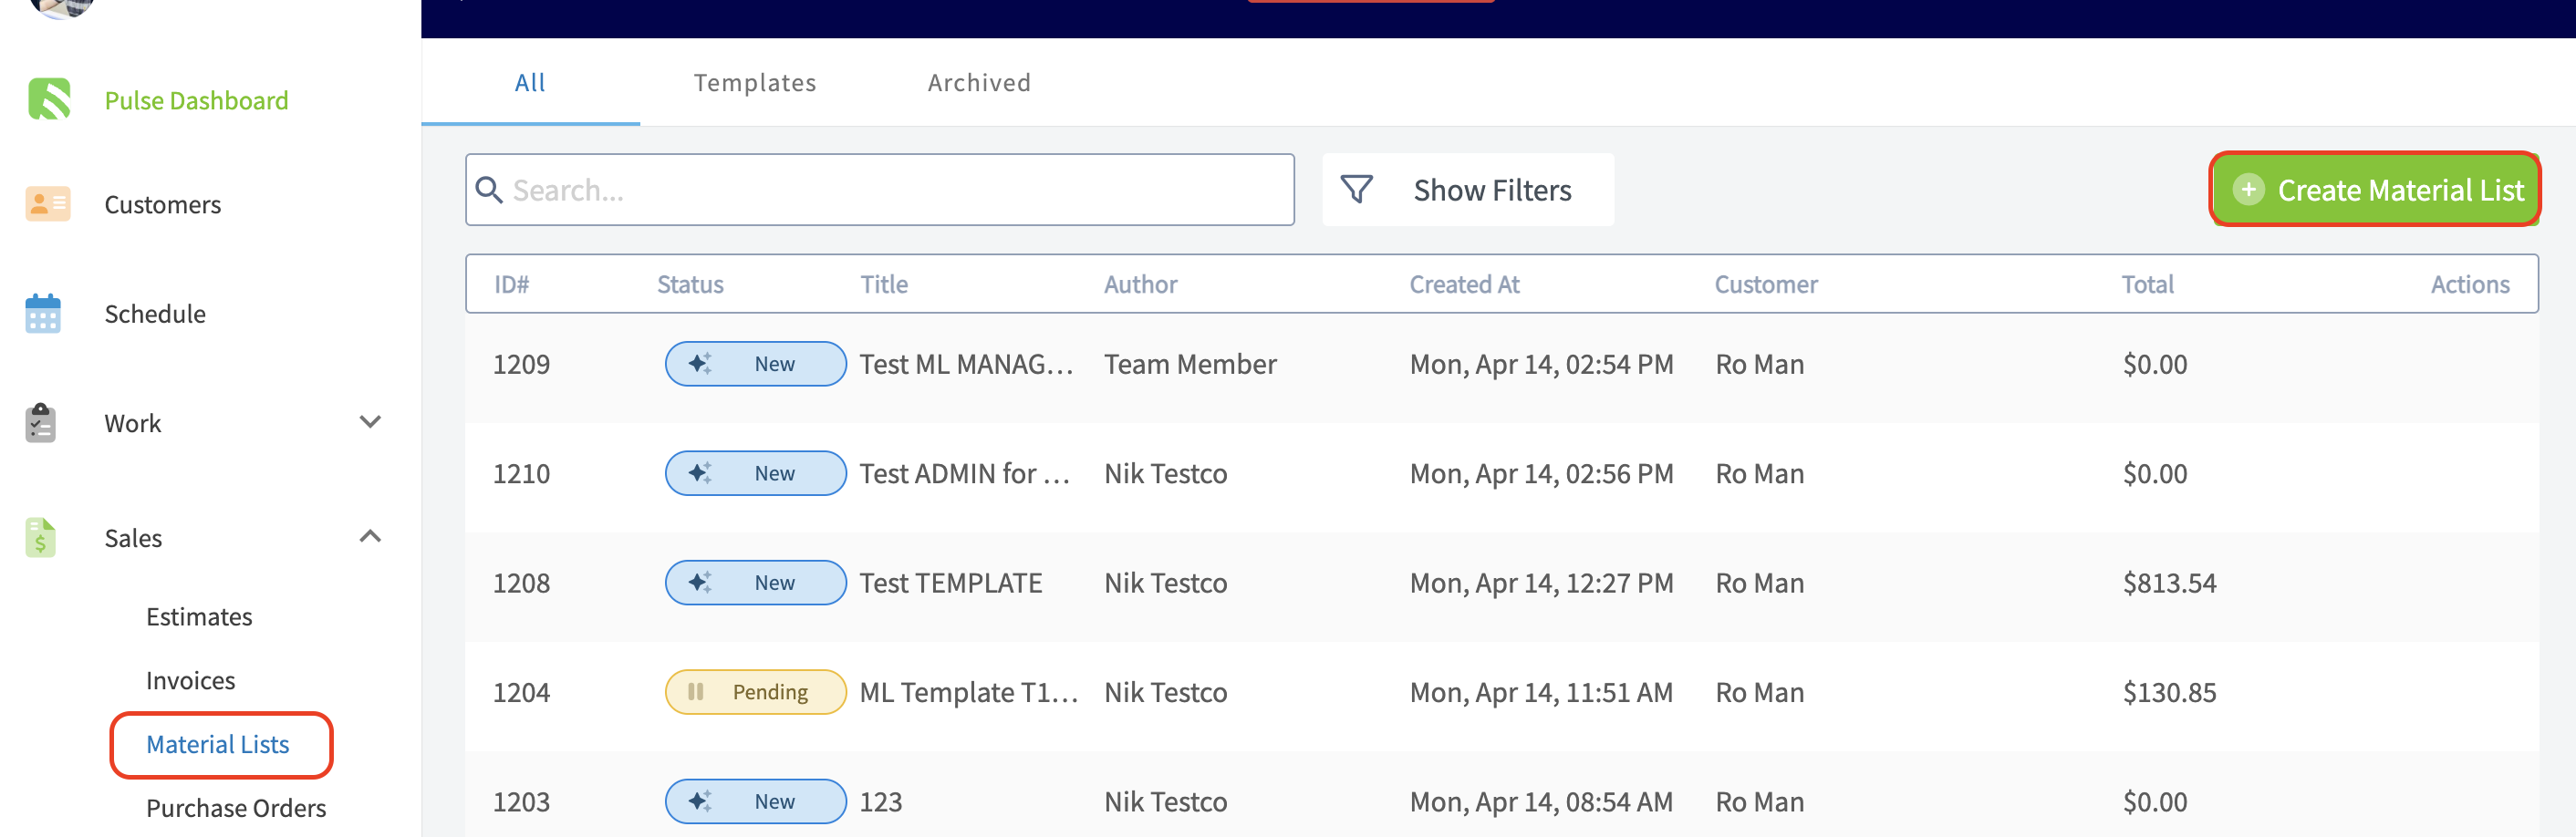
-
-If you have created Material List Templates, you can quickly insert them by selecting _Import Template_ (see info above).
-
-Now, you'll need to link a customer to the material list. You can select an existing customer, or create a new customer.
-
-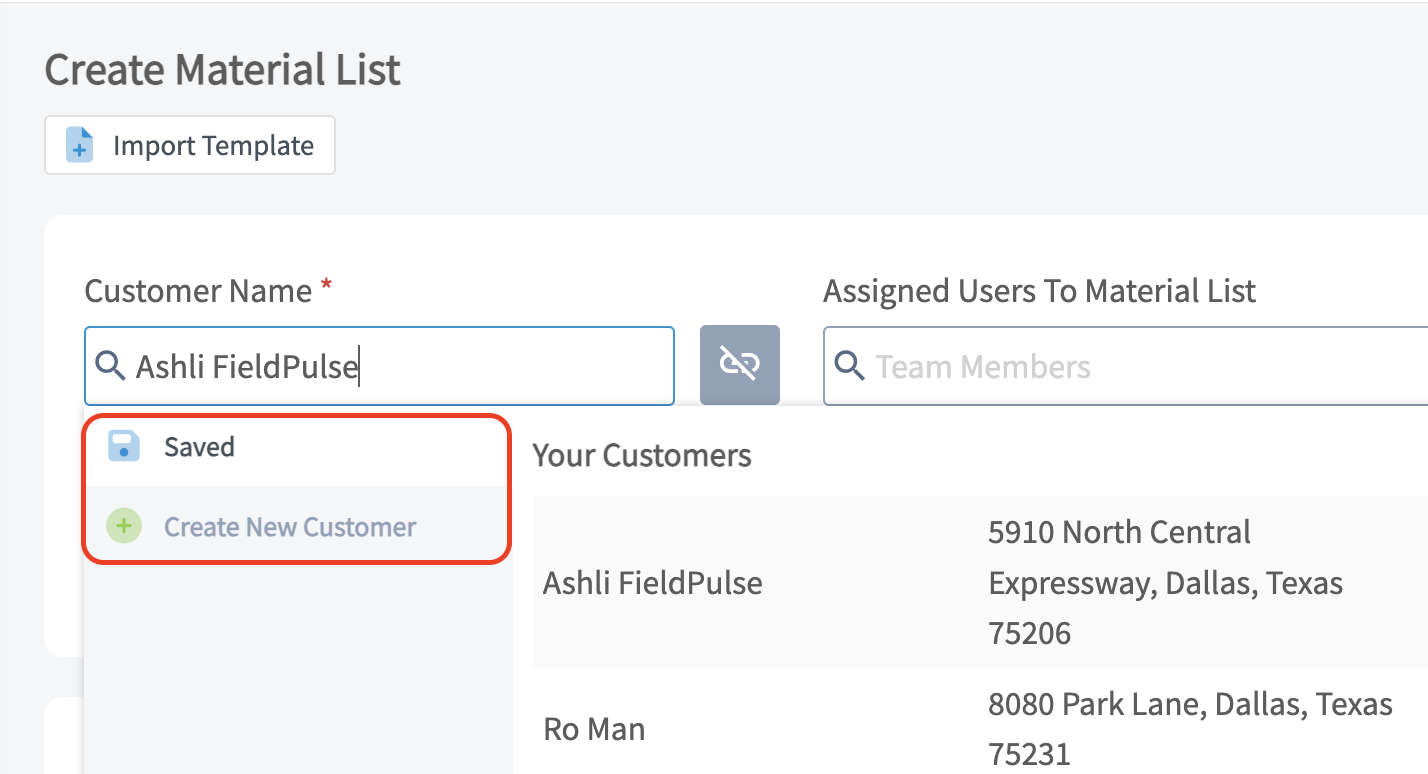
-
-You can assign individual users **or** teams to your material list by clicking into the field and choosing from the drop down menu.
-
-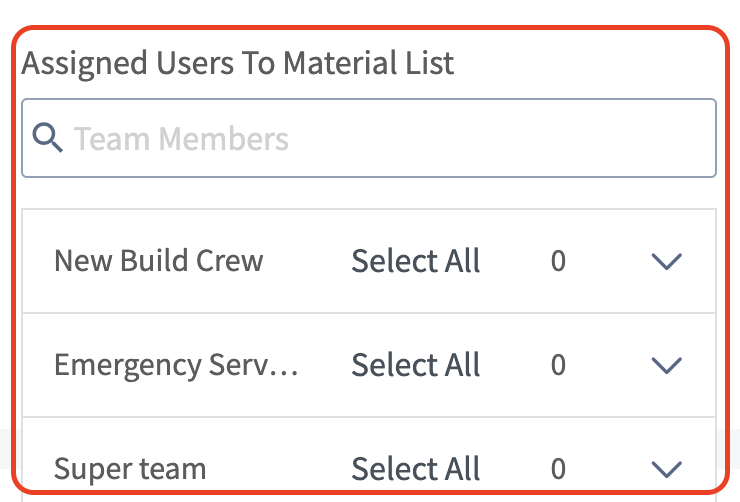
-
-Give your material list a unique title. You can then select a specific status workflow that will apply to this material list. If you have many workflows created, once you click into that field you will see a drop down menu of options (as shown below). To learn more about custom status workflows, [Custom Status Workflows](/core-platform/jobs/custom-status-workflows).
-
-
-
-### Adding Existing Line Items
-
-The magic begins when you add your line items! Here you will add all of the items that will make up your material list. Our material lists do support groupings. You can also select the green _Add Item_ button and an additional tab will automatically open towards the right hand side of your screen.
-
-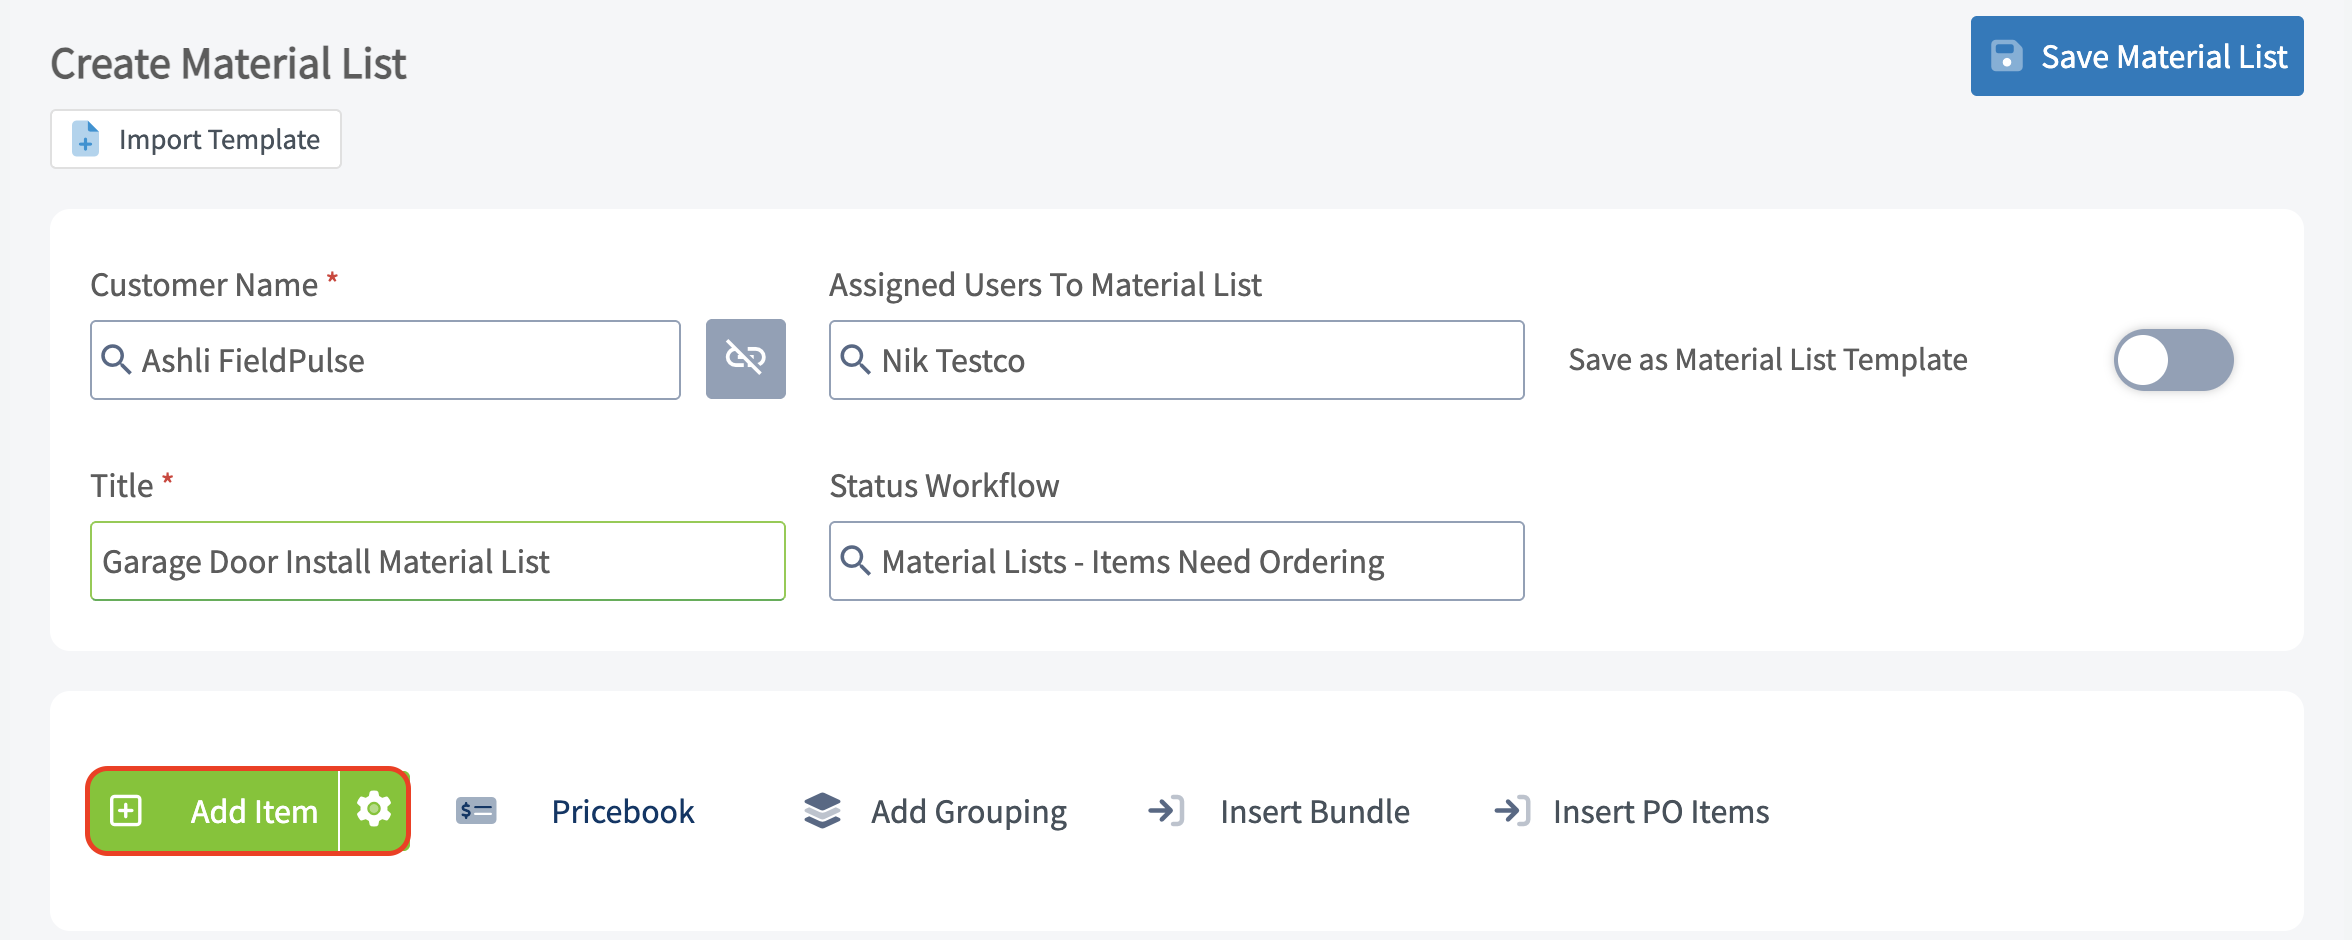
-
-If you have already spent the time to add all of your potential line items in _Company Settings_ you can easily search for them here.
-
-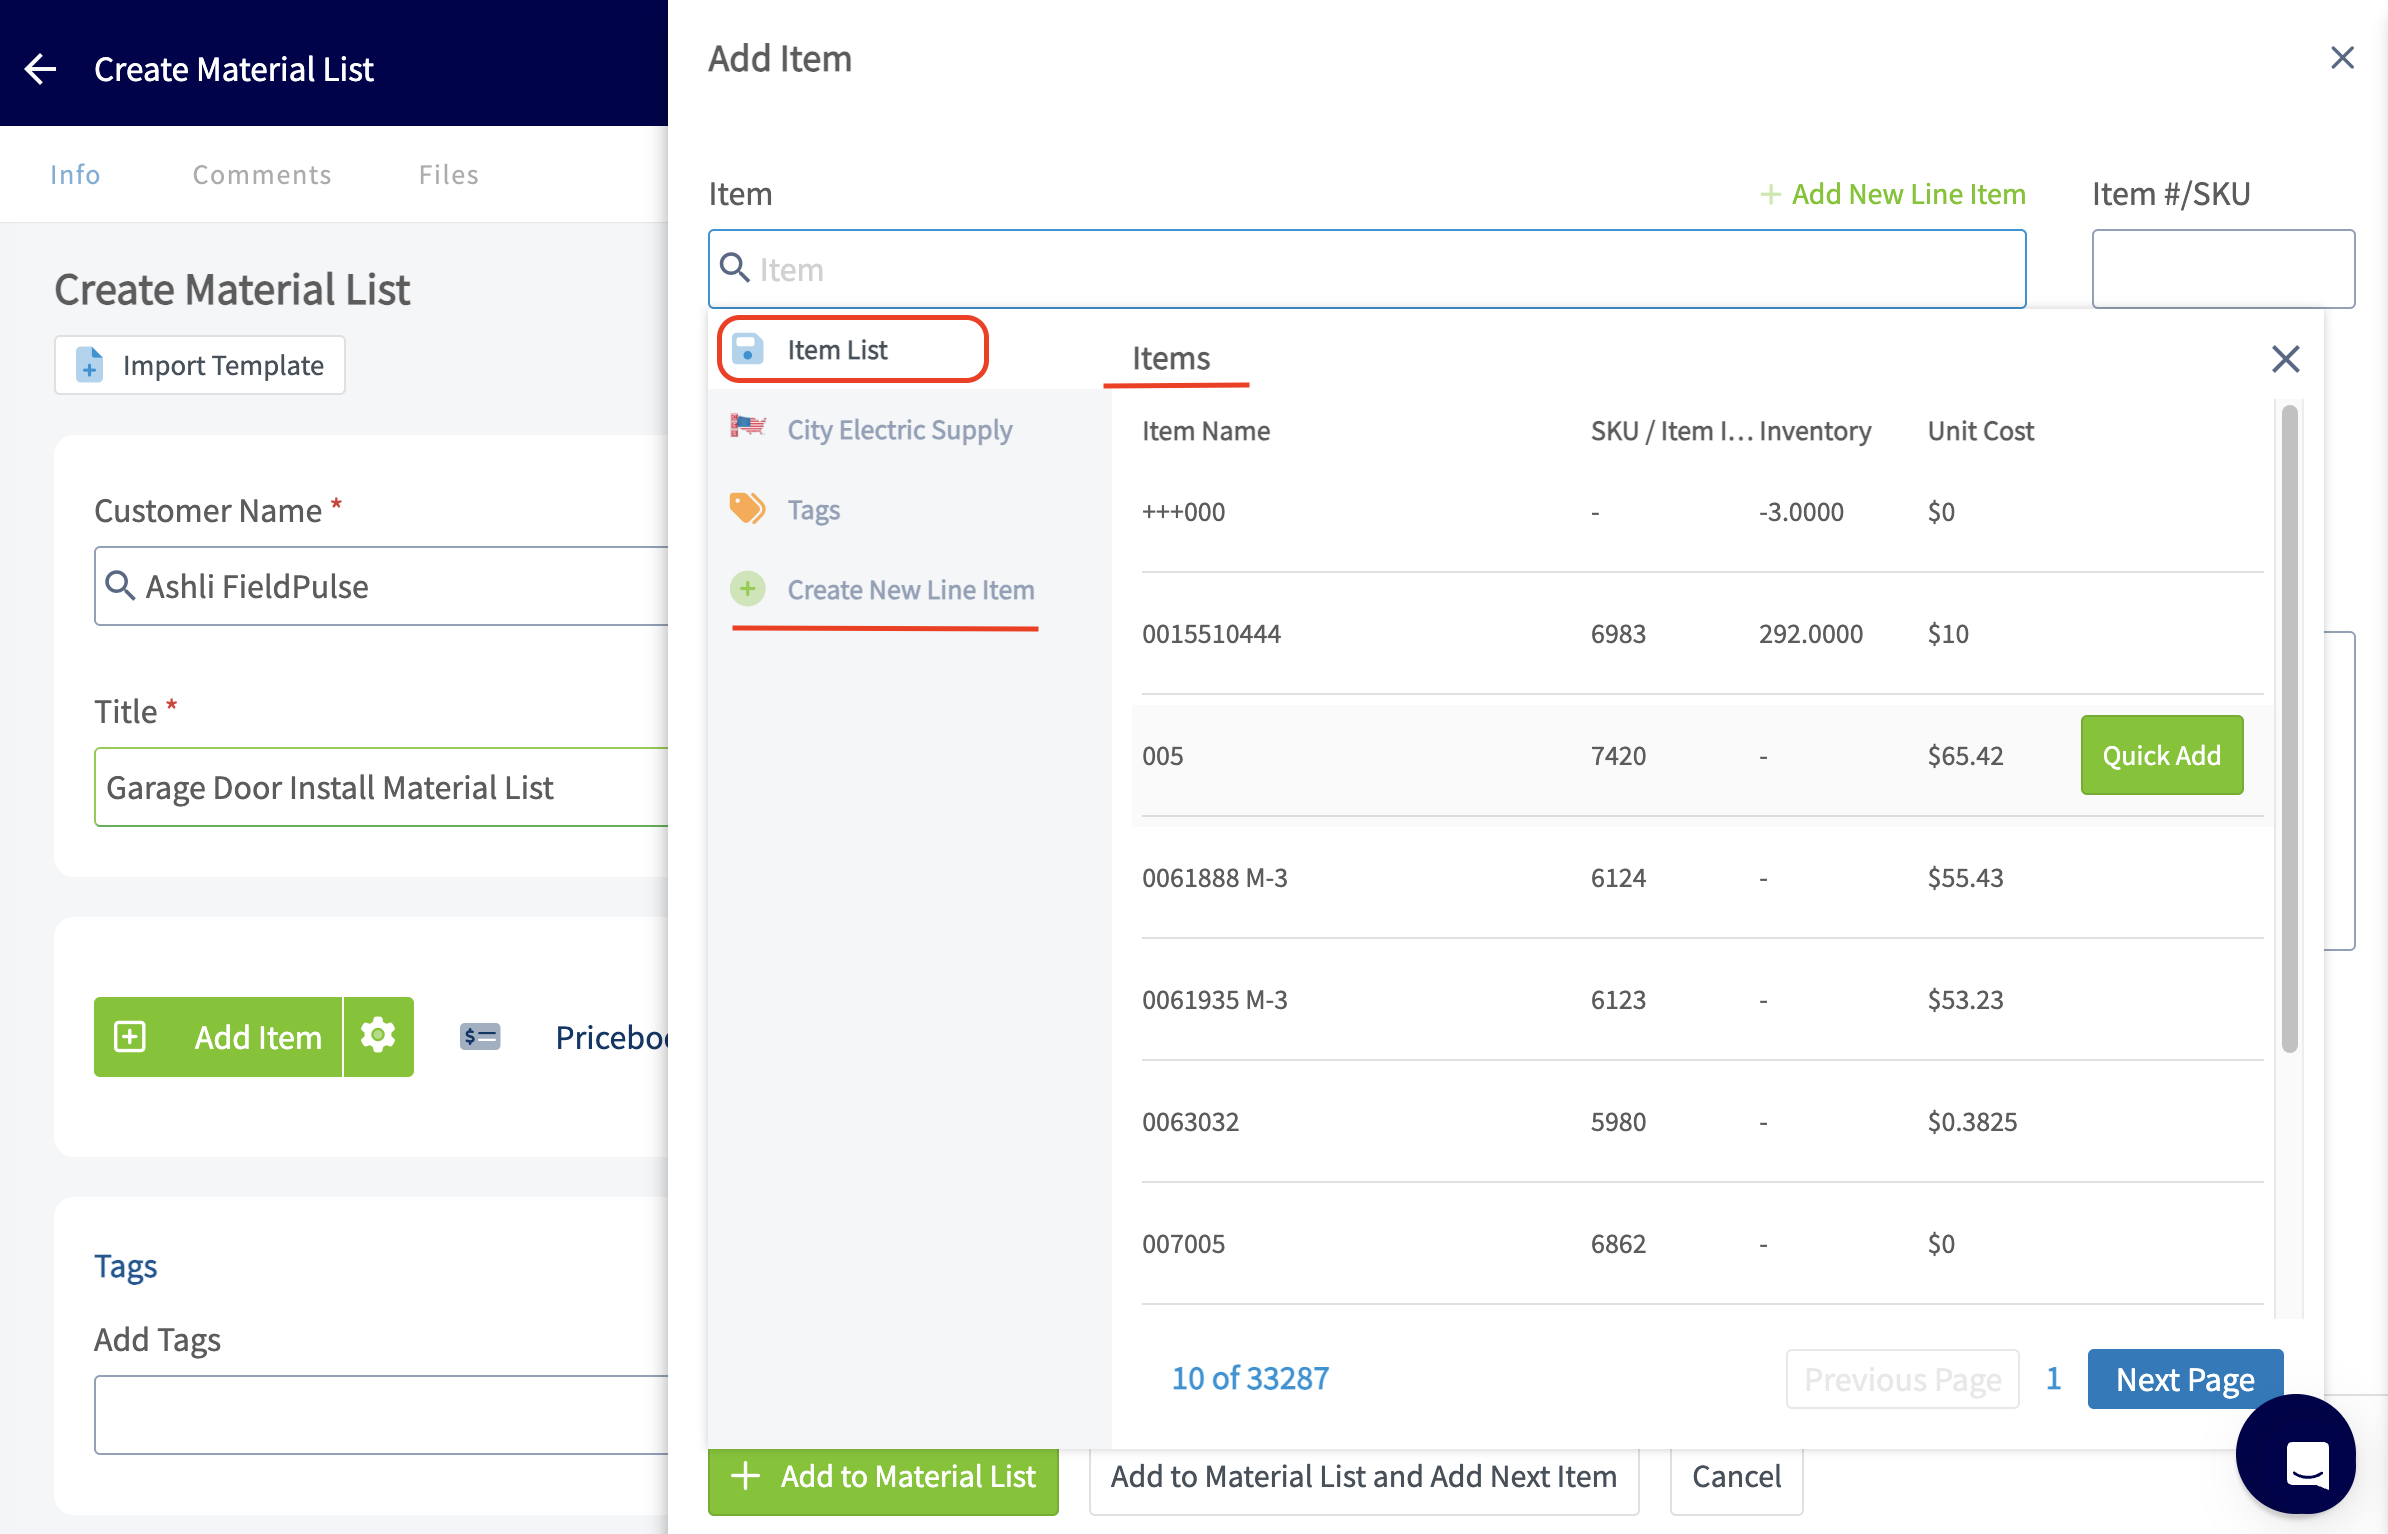
-
-Click on the line item you want to add and you will then need to select _Add to Material List and Add Next Item_ if you have additional line items to include or _Add to Material List_ if this is your last line item.
-
-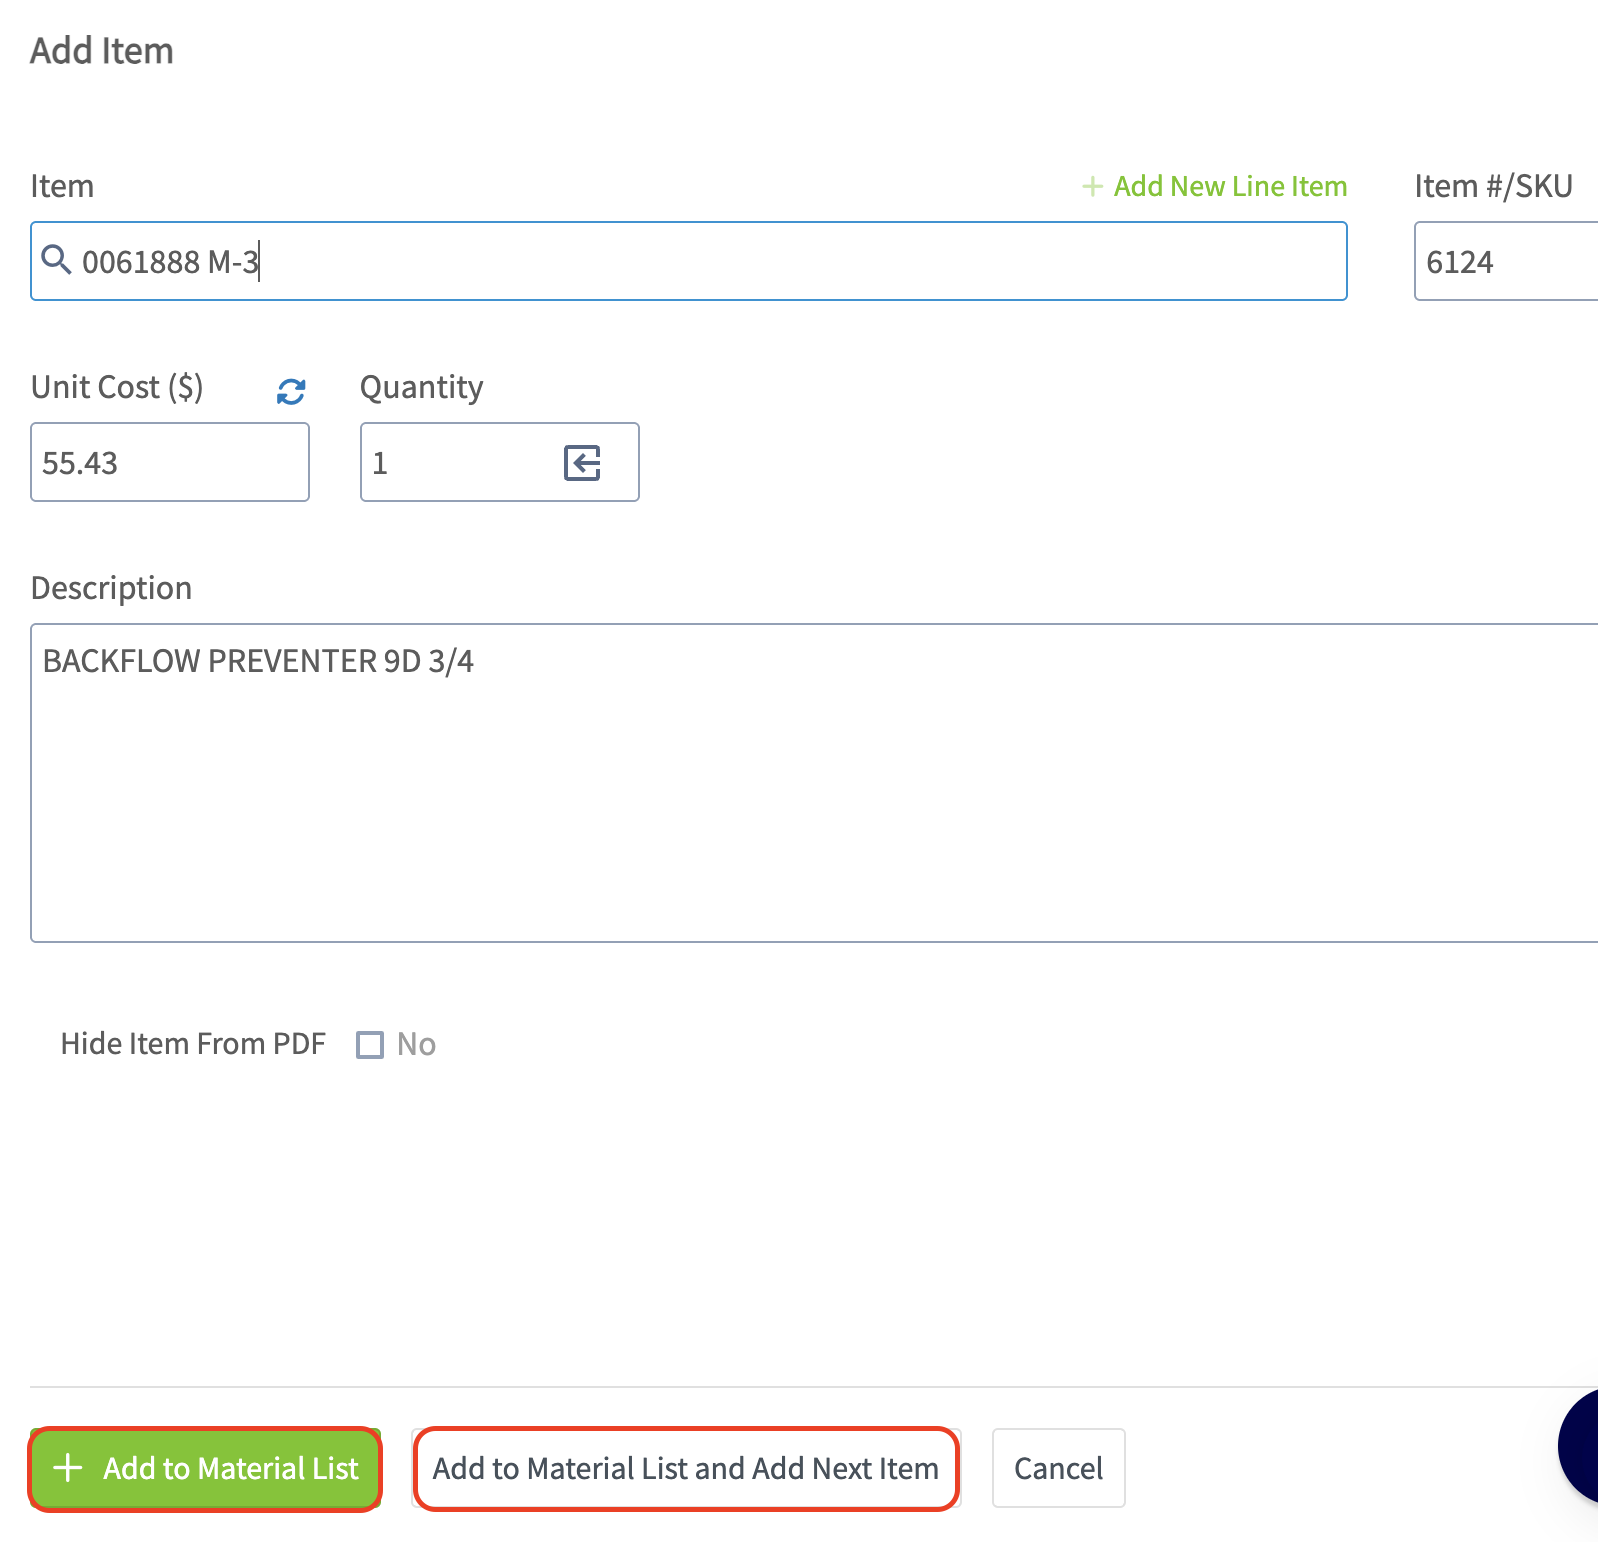
-
-#### Creating/Adding a New Line Item
-
-To learn how to create or add a new line item, [Creating An Estimate](/core-platform/invoices-estimates/creating-an-estimate).
-
-#### Adding Tags
-
-Now, you can add tags if needed. Tags can be used to filter or run a specific report by the tag you have created.You can use this field to search for existing tags or create a new one, just be sure to press _Enter_ after typing a new tag.
-
-
-
-#### Adding Notes
-
-Enter any notes relevant to the material list in the _Internal Notes_ or _Transfer Notes_ field. Any notes entered in the _Transfer Notes_ field will carry over to any other related records that this material list is attached/linked to. You can also attach any important files as well. Be sure to press the blue _Save Material List_ button when you are finished.
-
-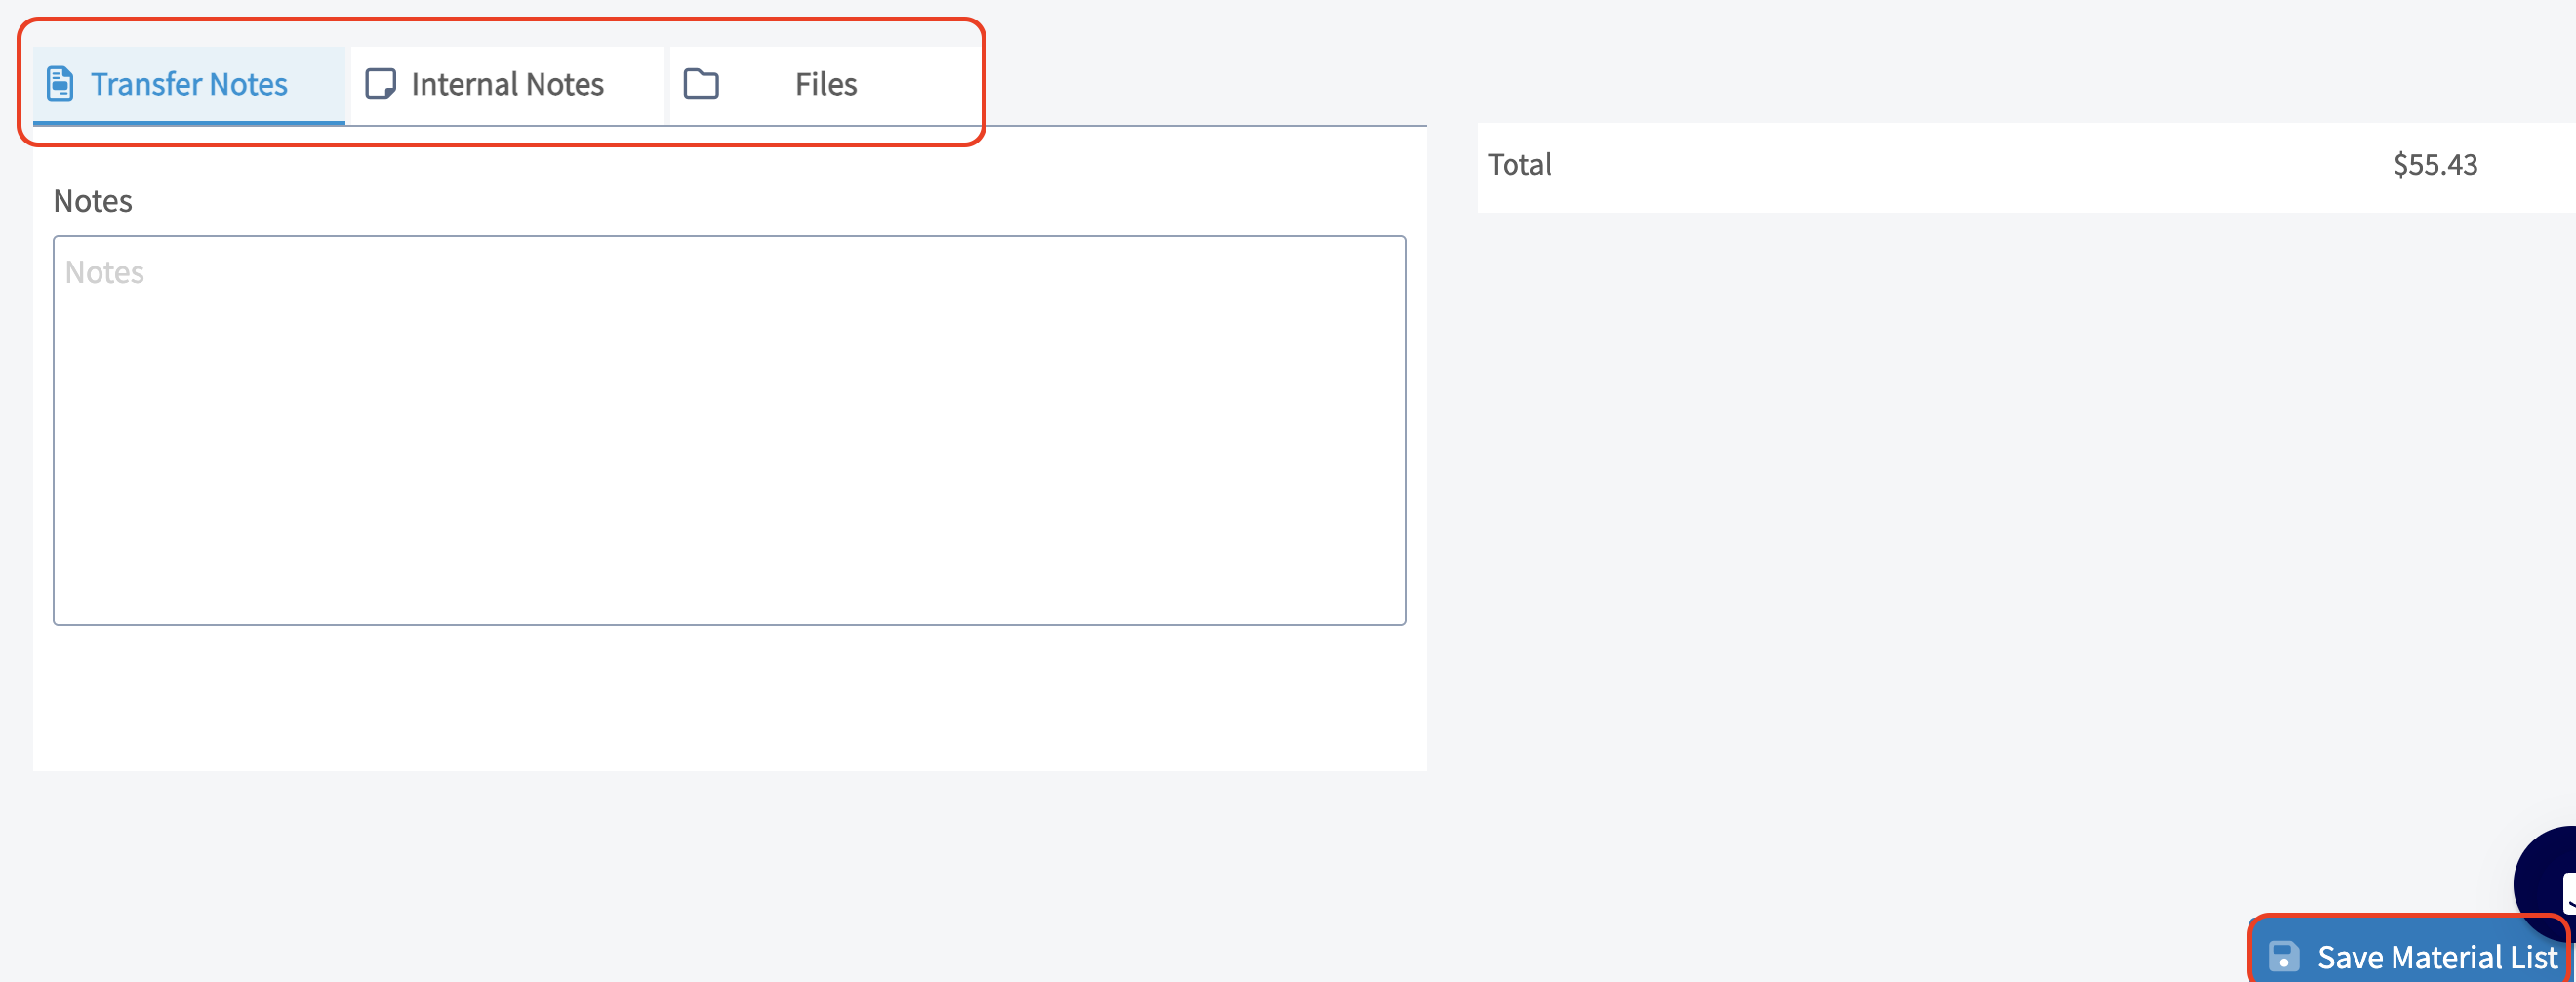
-
----
-
-## Viewing a Material List
-
-### Adding Material List Items to a New Record
-
-When on the material list, you have the option to quickly add items from your material list to a **new record**. You can choose from one of the one of the following records for these materials to be added to: _Estimate, Invoice, Purchase Order, Material List, Job_.
-
-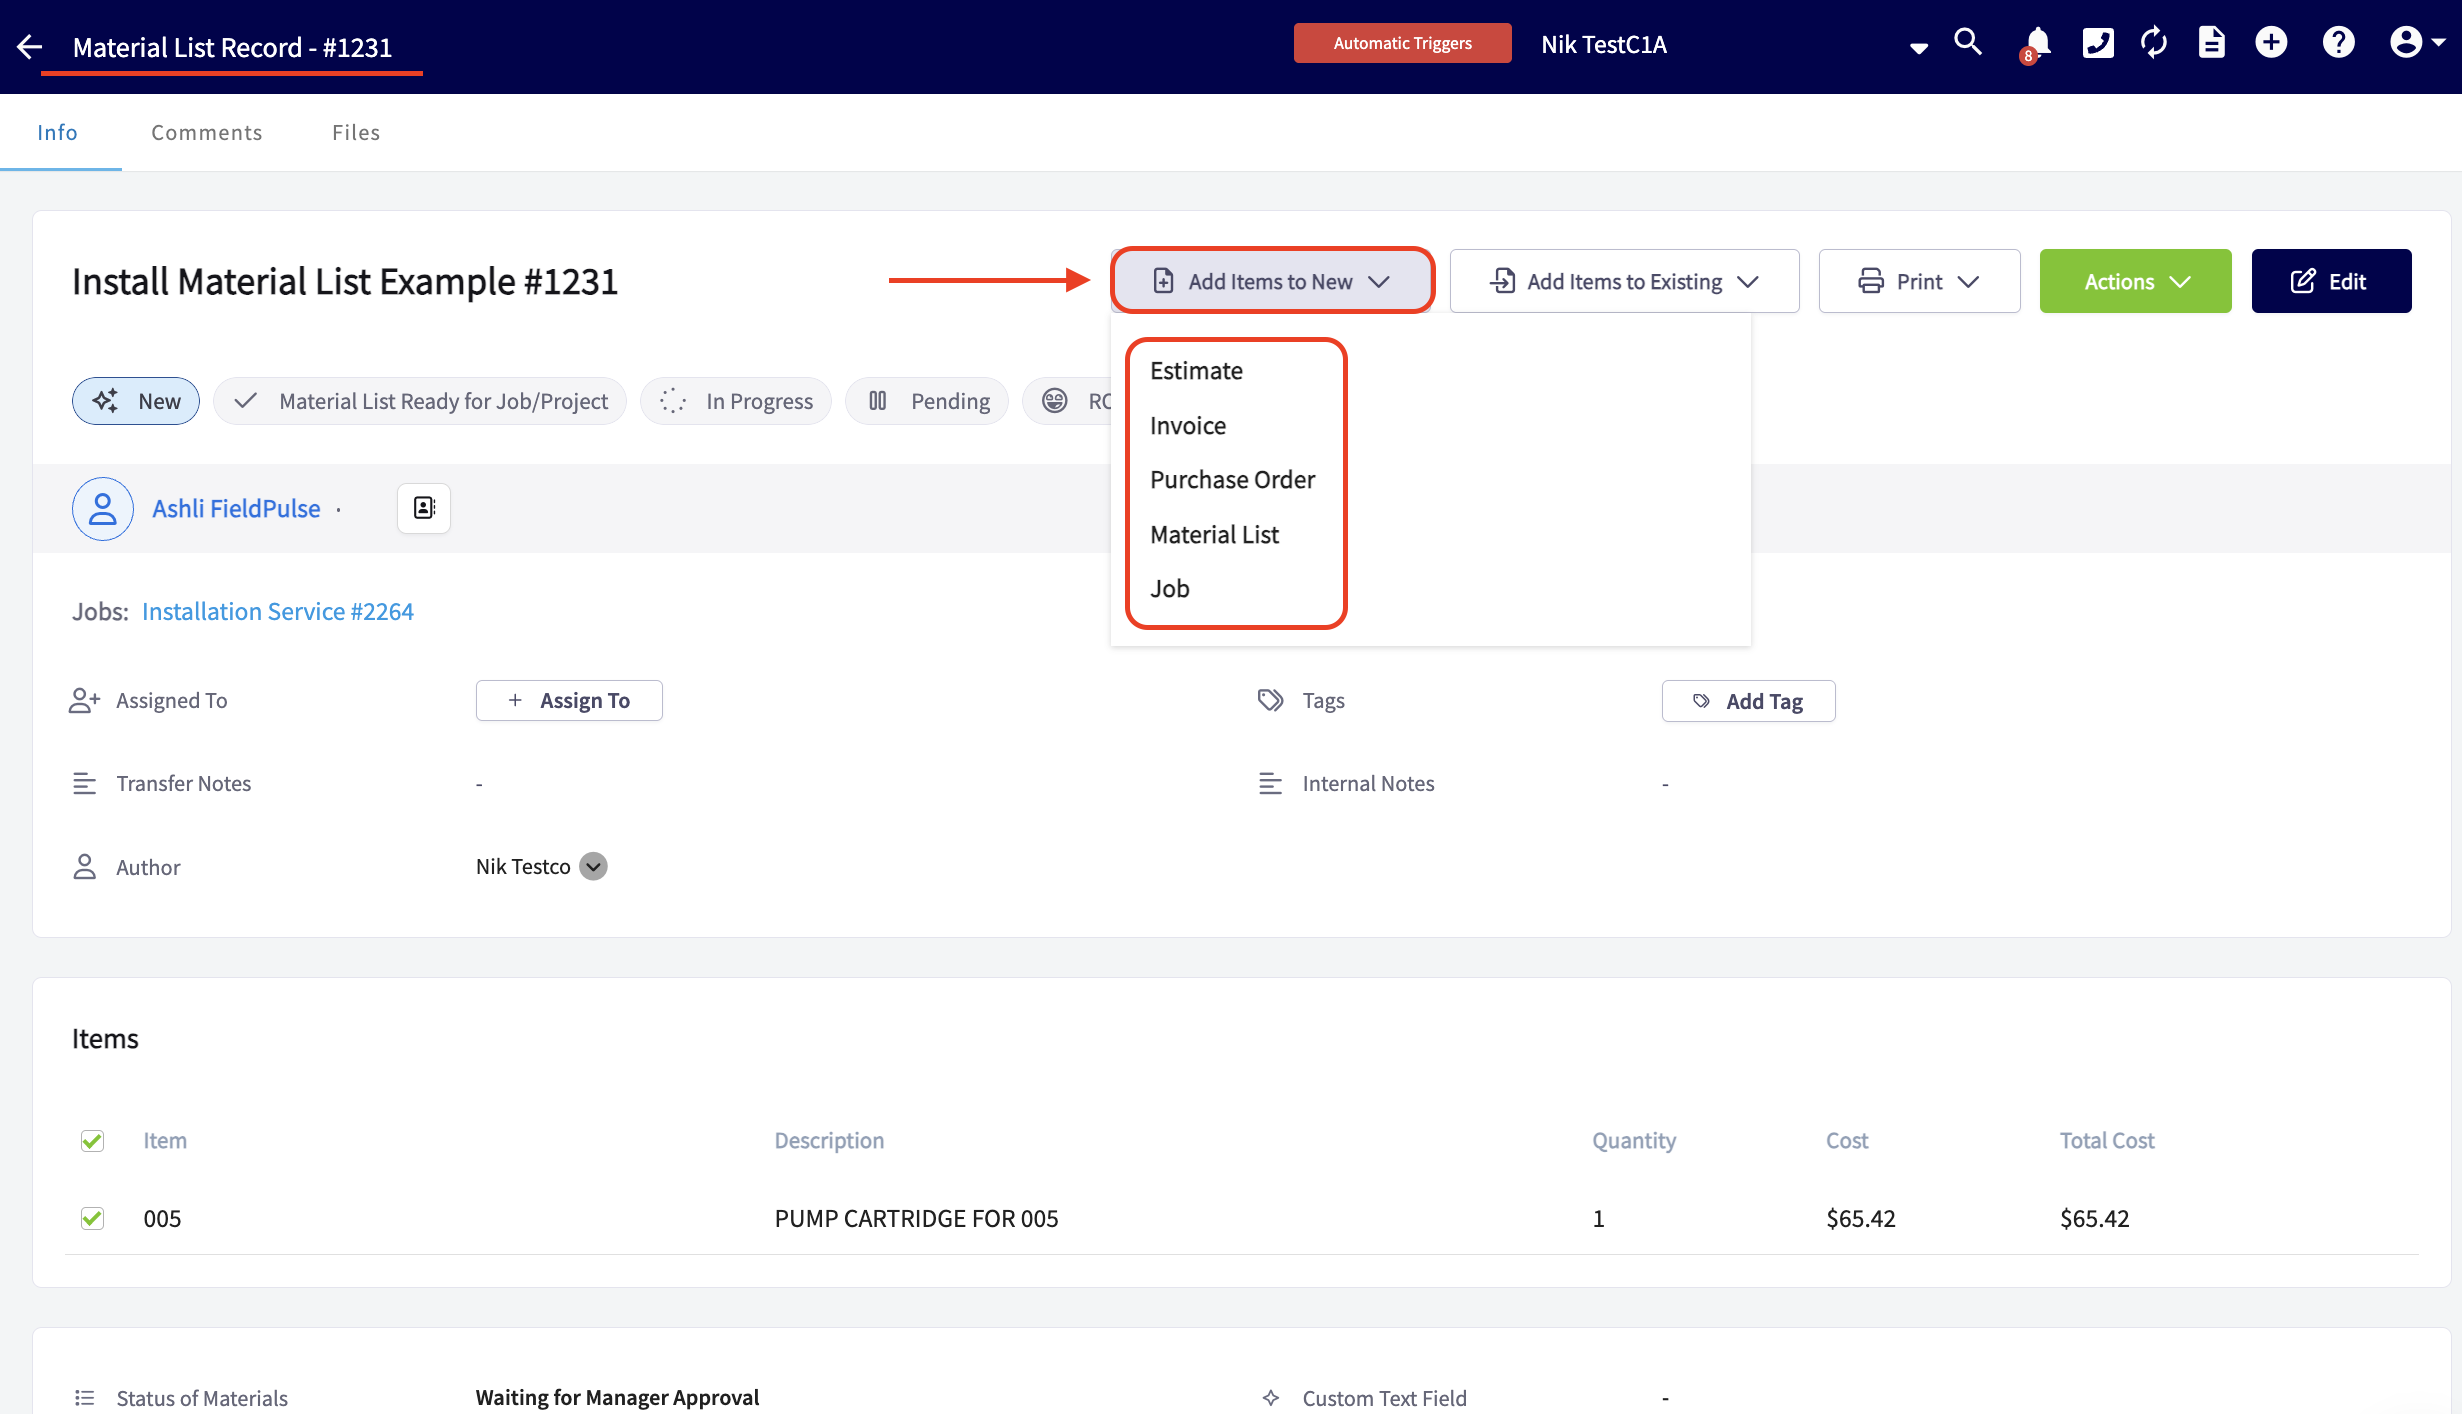
-
-You can transfer all items or just a select few from your material list to a new record. By default, all items are selected, so be sure to uncheck any specific items, tools, or materials that you do not want to carry over into the new record.
-
-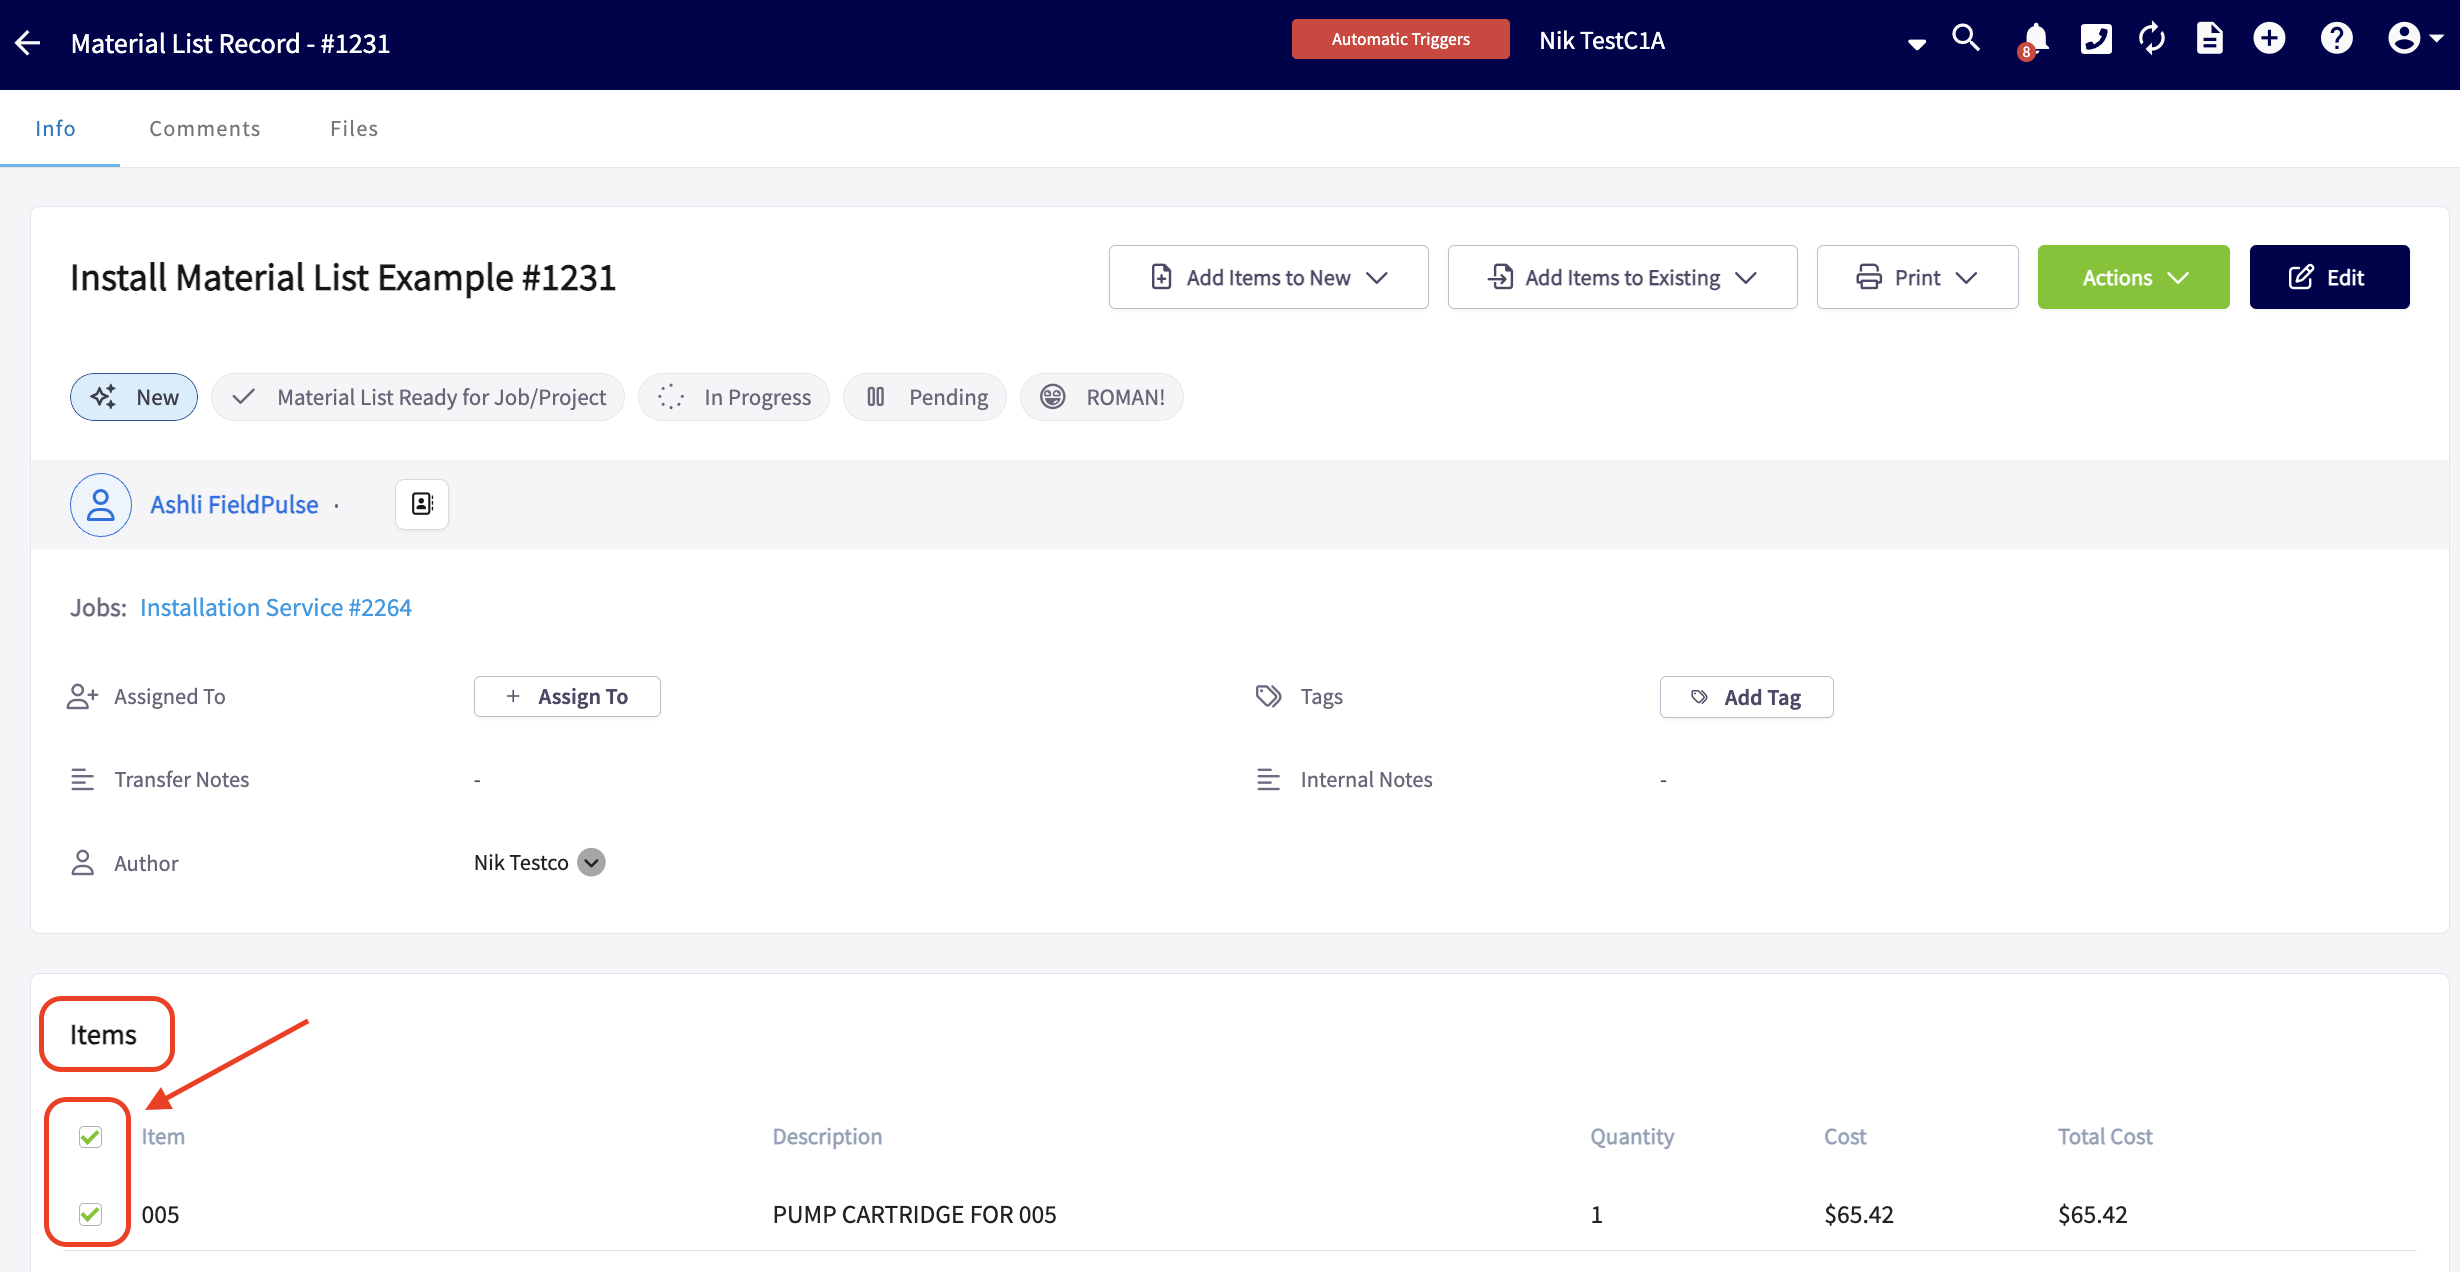
-
-### Adding Material List Items to an Existing Record
-
-When on the material list, you also have the option to quickly add items from your material list to an **existing record**. You can choose from one of the one of the following records for these materials to be added to: _Estimate, Invoice, Purchase Order, Job_.
-
-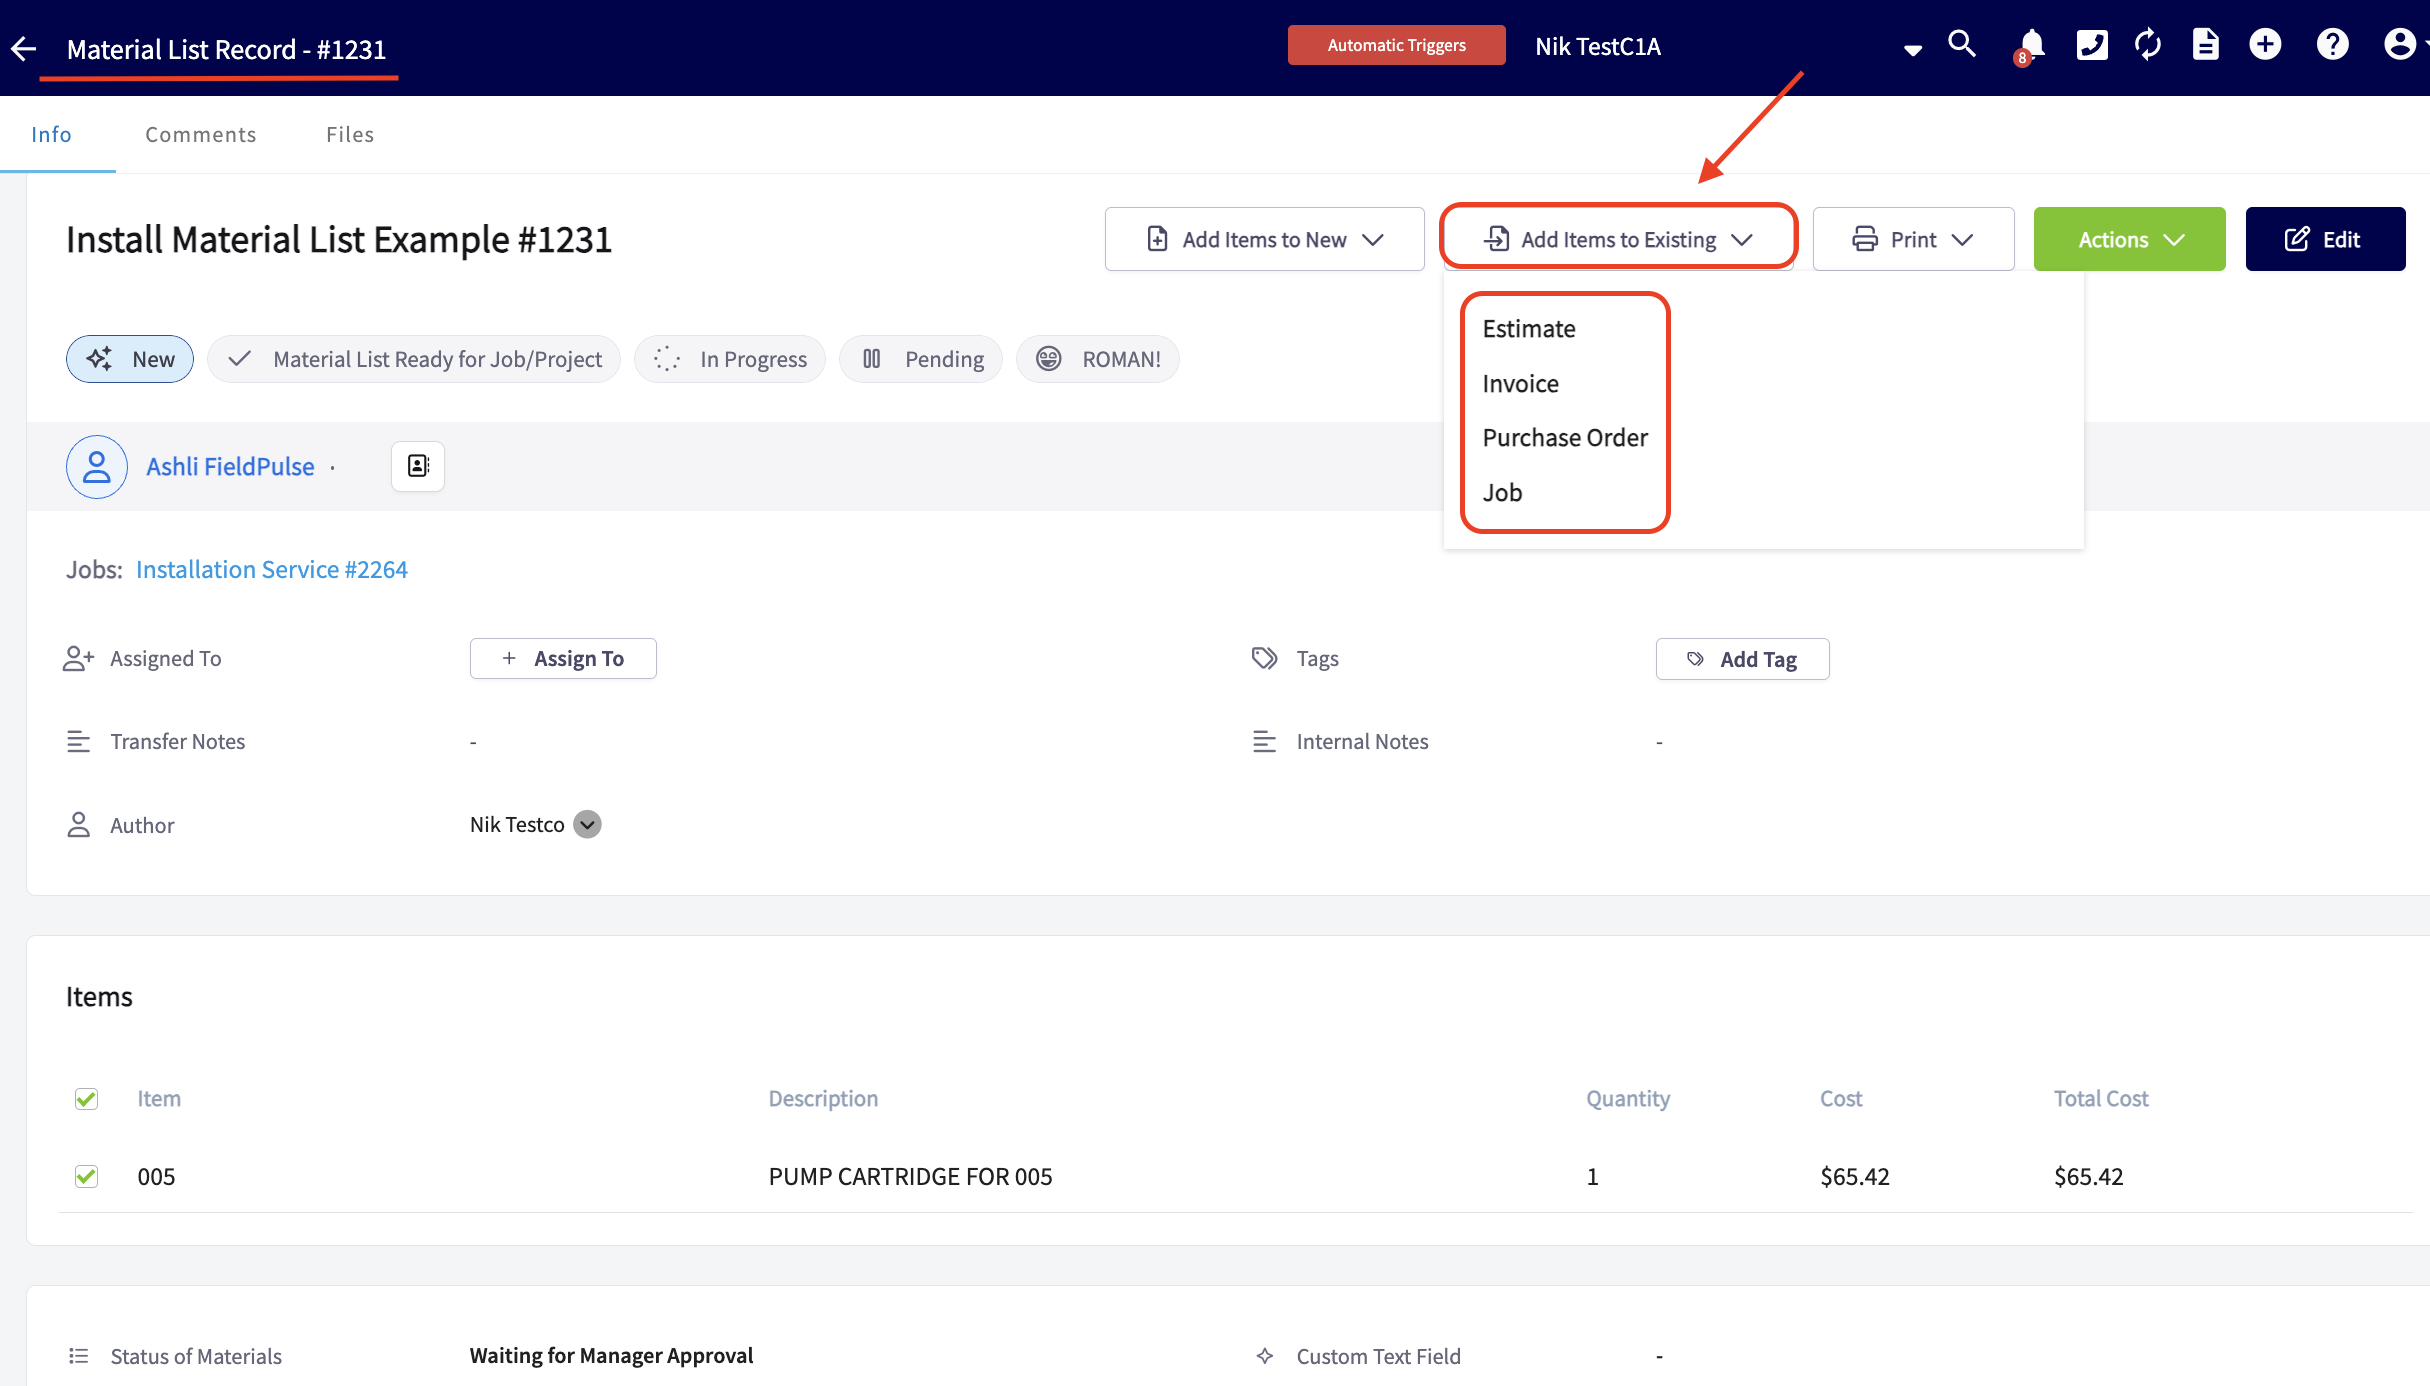
-
-When transferring material list items to an existing record, you'll find a search bar that makes it easy to locate the record you need. By clicking into the search bar, our system will automatically display some of the most recent record types you've created for this customer.
-
-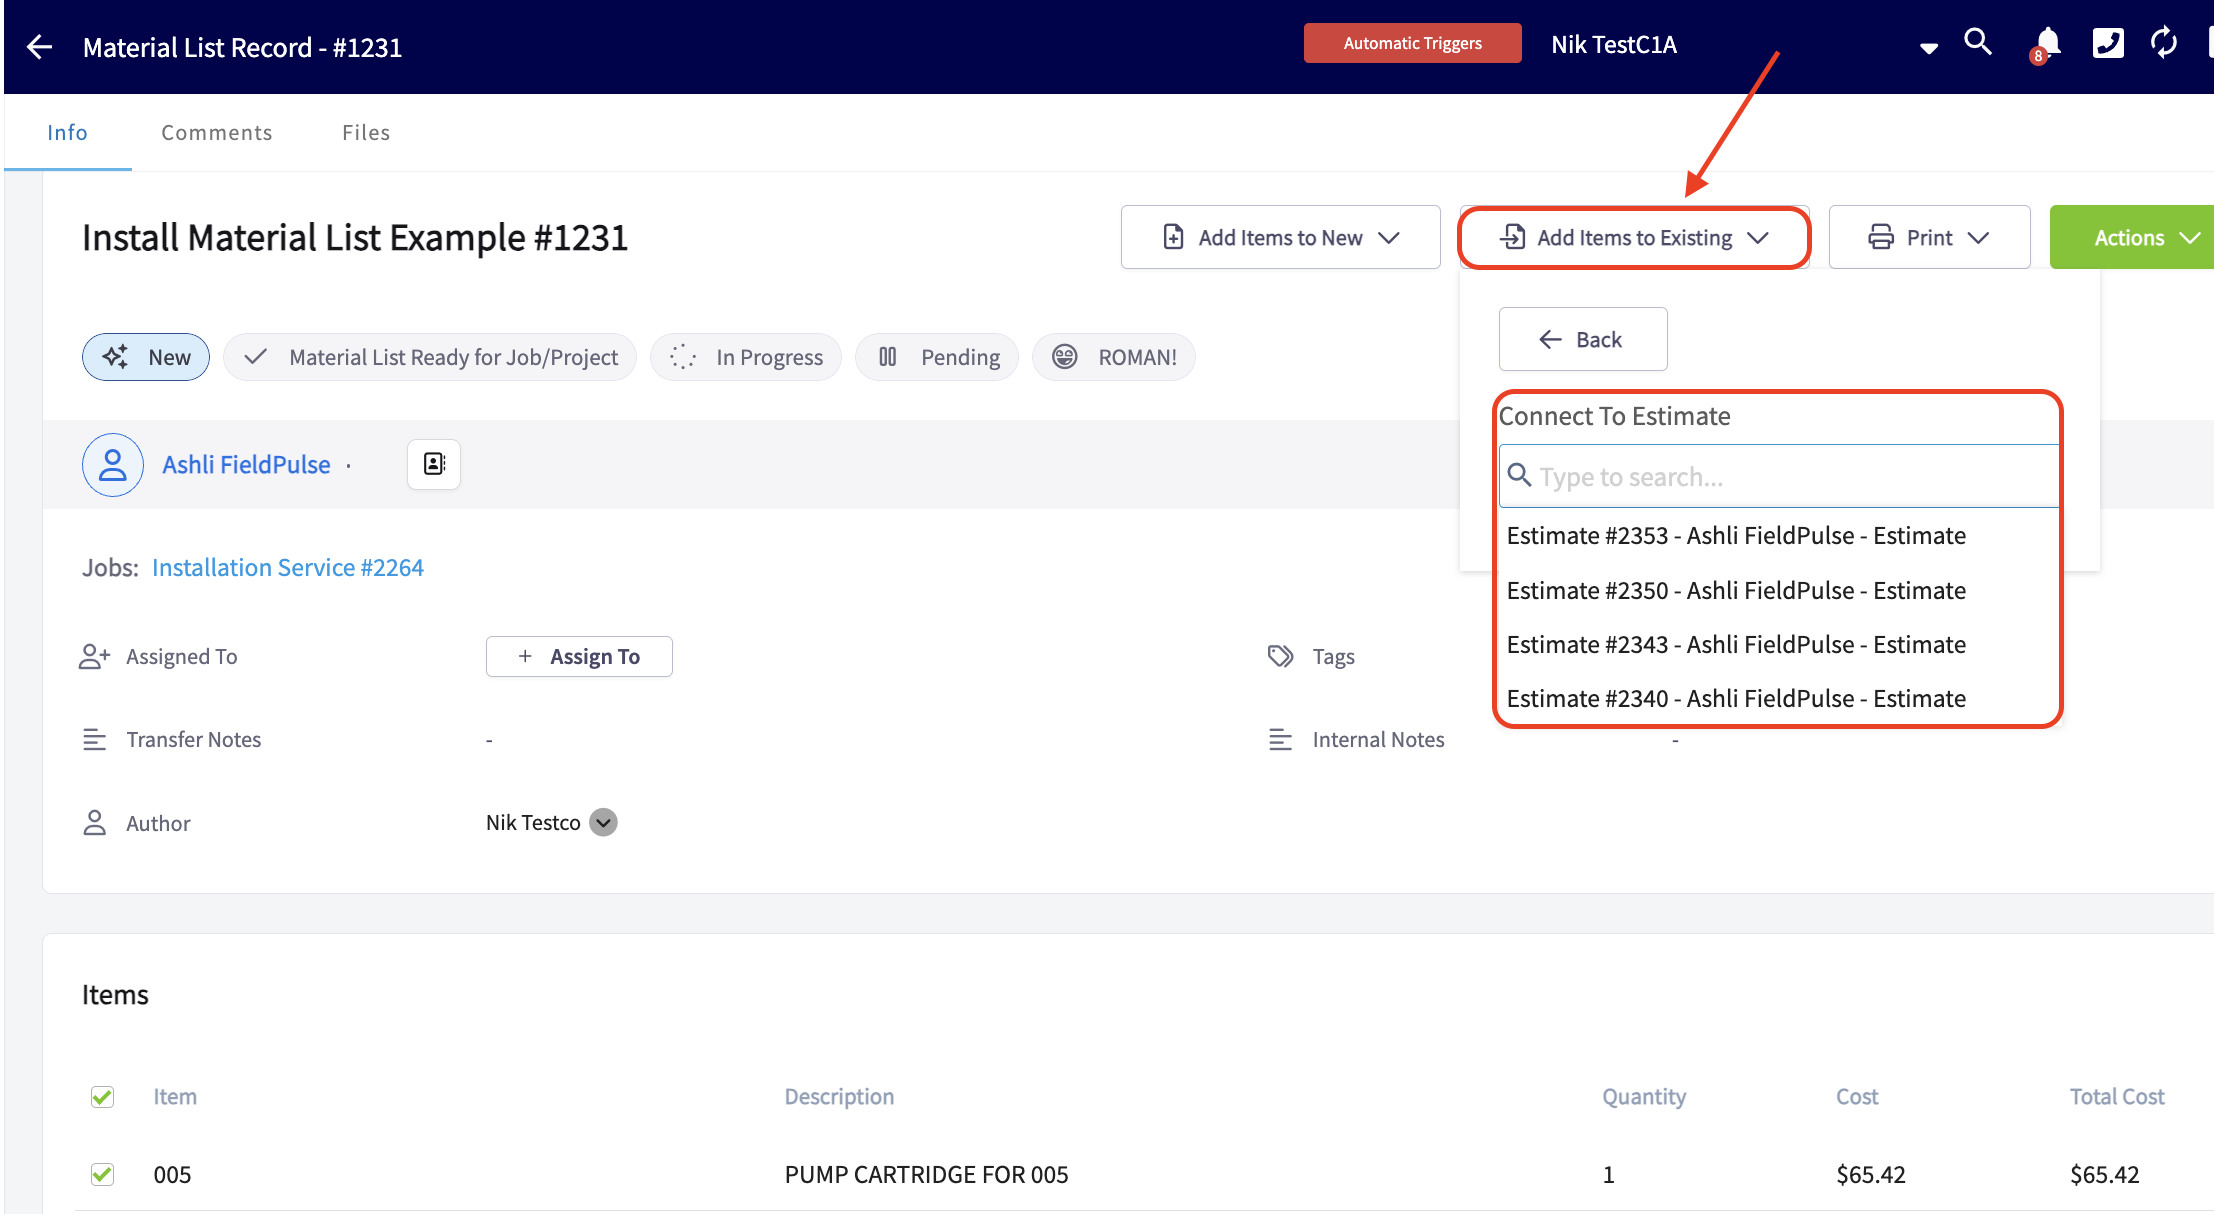
-
-As mentioned above, you can pull over all items or just a select few from your material list to an existing record.
-
-### Links to Associated Records
-
-Any records associated with this material list will be displayed here, and you can click on the blue hyperlinks to view the detailed information for each record.
-
-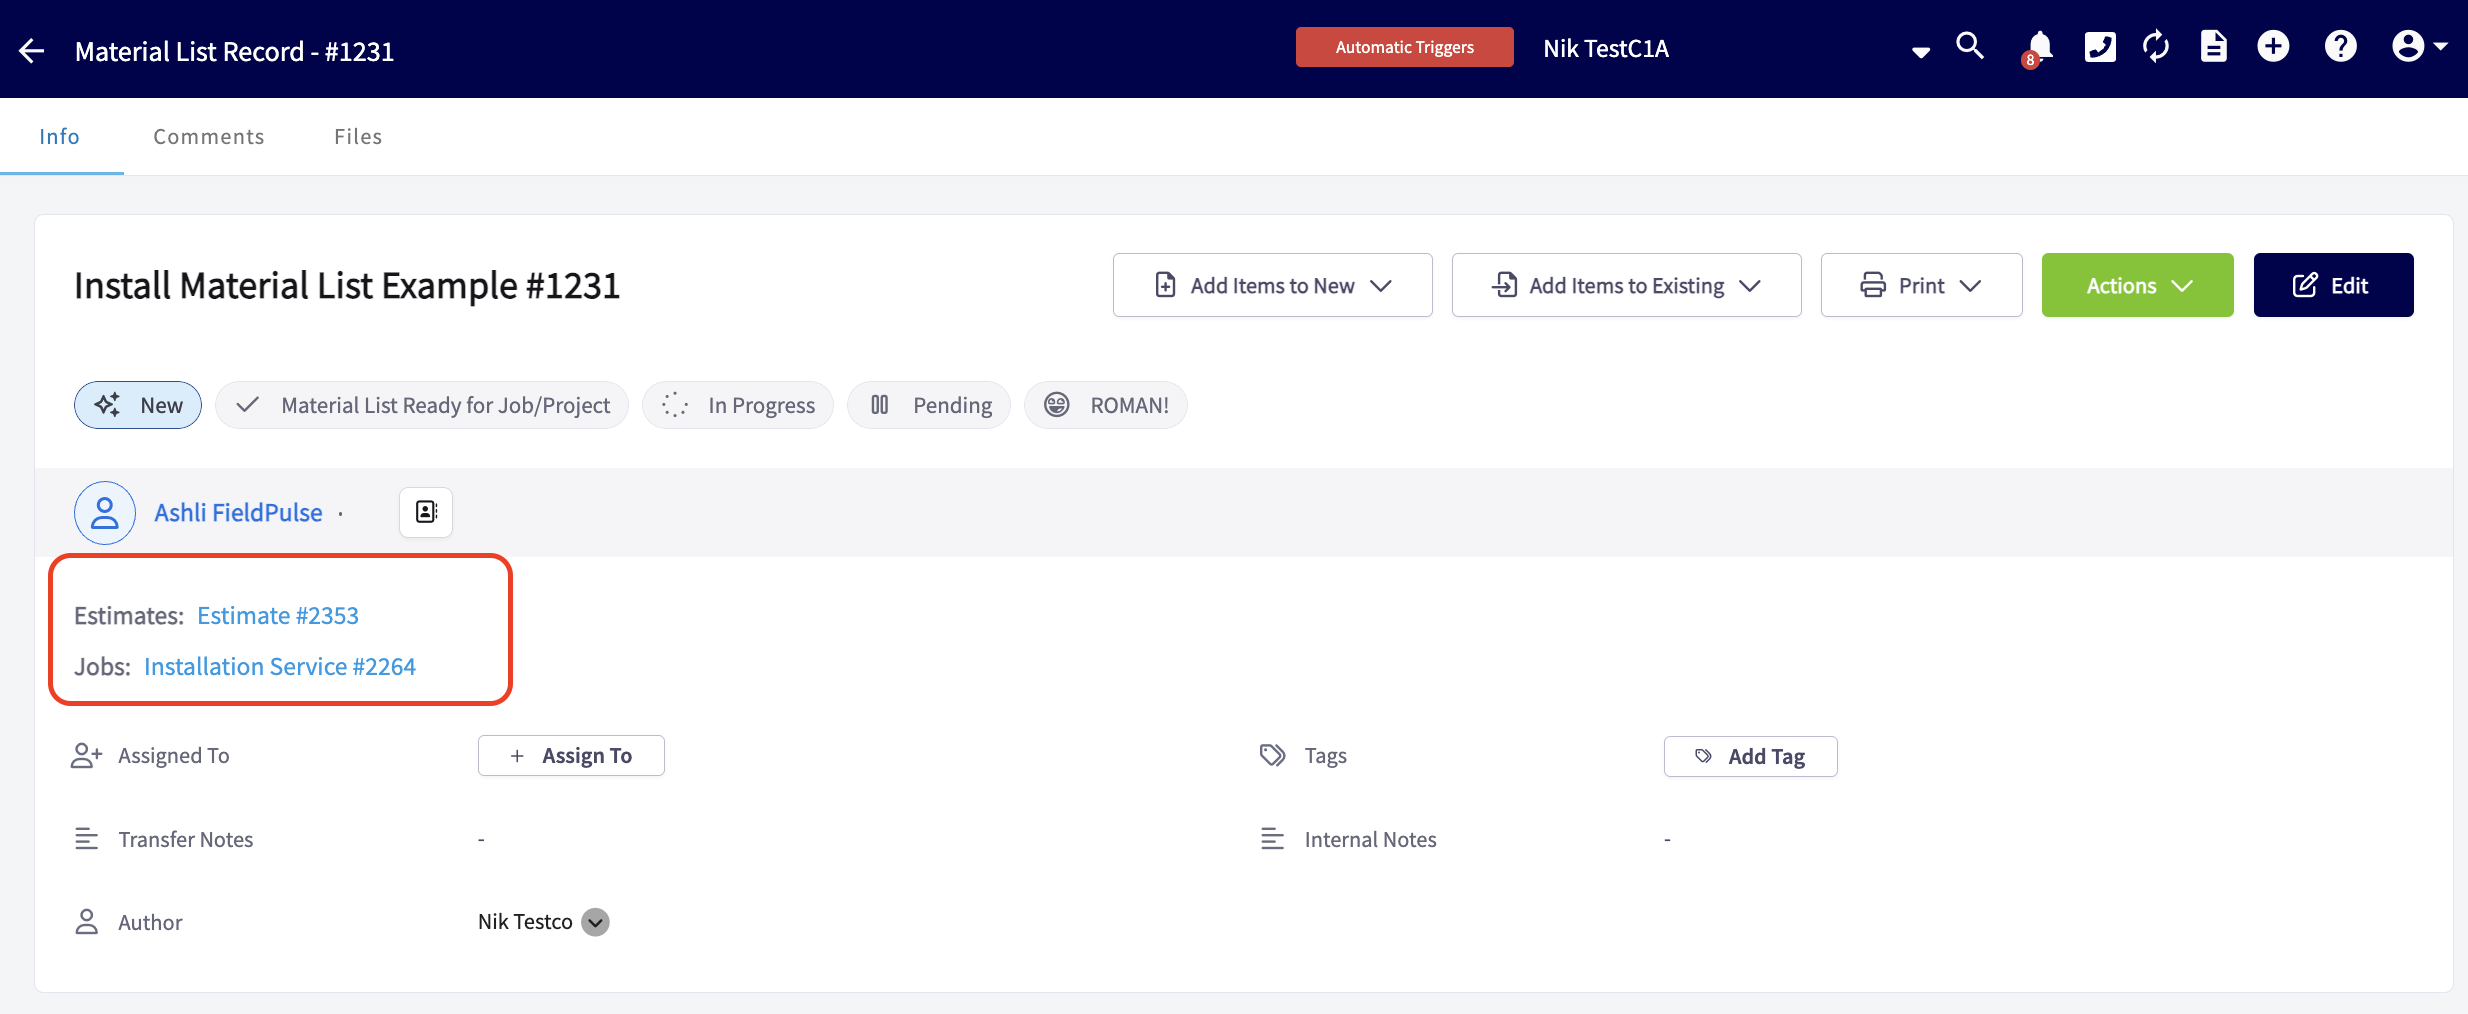
-
-### Printing Material Lists
-
-Do you prefer to print your material lists before loading up your vehicles for a successful day on the job? You can absolutely do that! Our printing options allow you to **generate clean, neat, and organized material lists**, ensuring you have everything you need at a glance. You can choose to print your lists **with or without** cost details, making it easy to **stay prepared and efficient** for the day ahead.
-
-### Print view with costs
-
-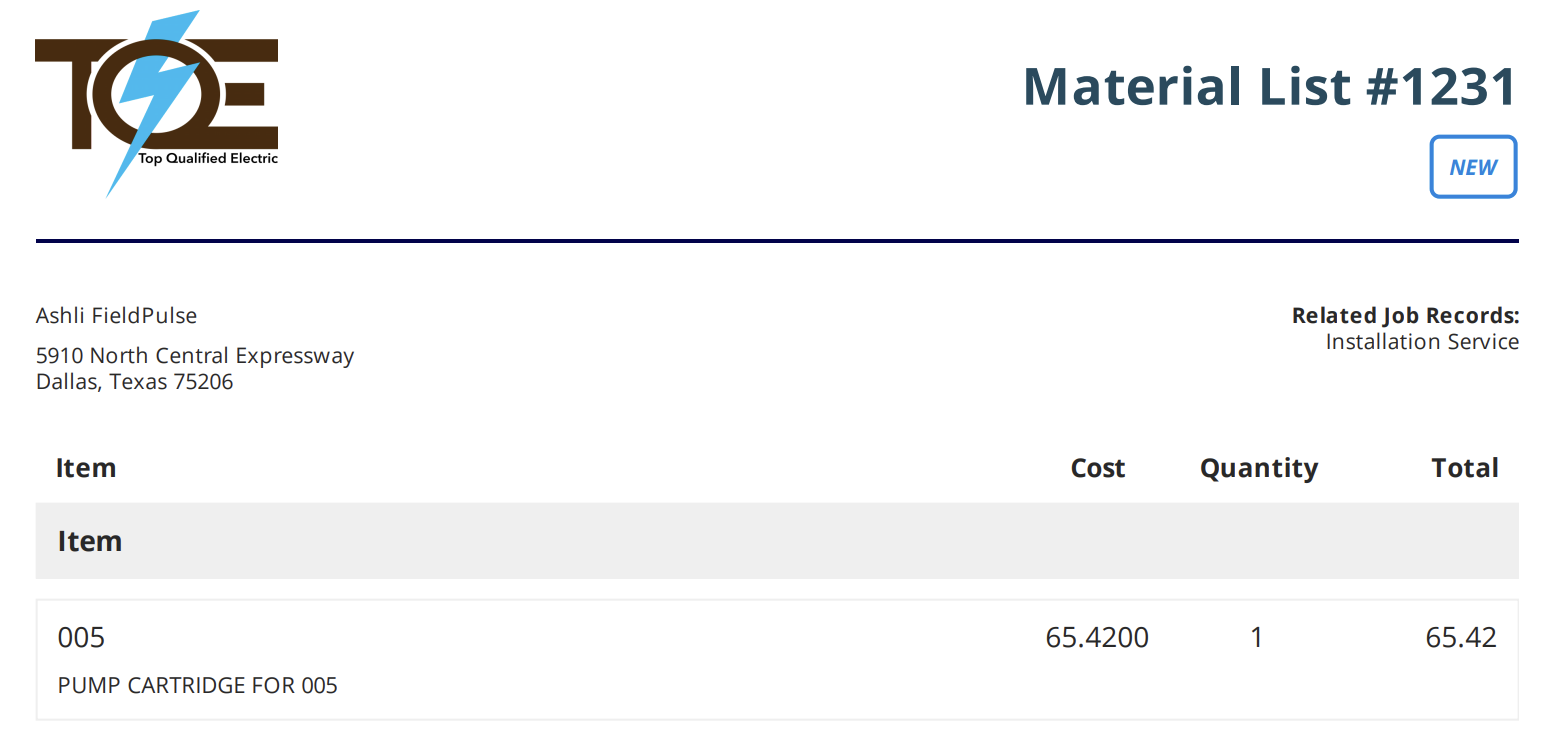
-
-### Print view without costs
-
-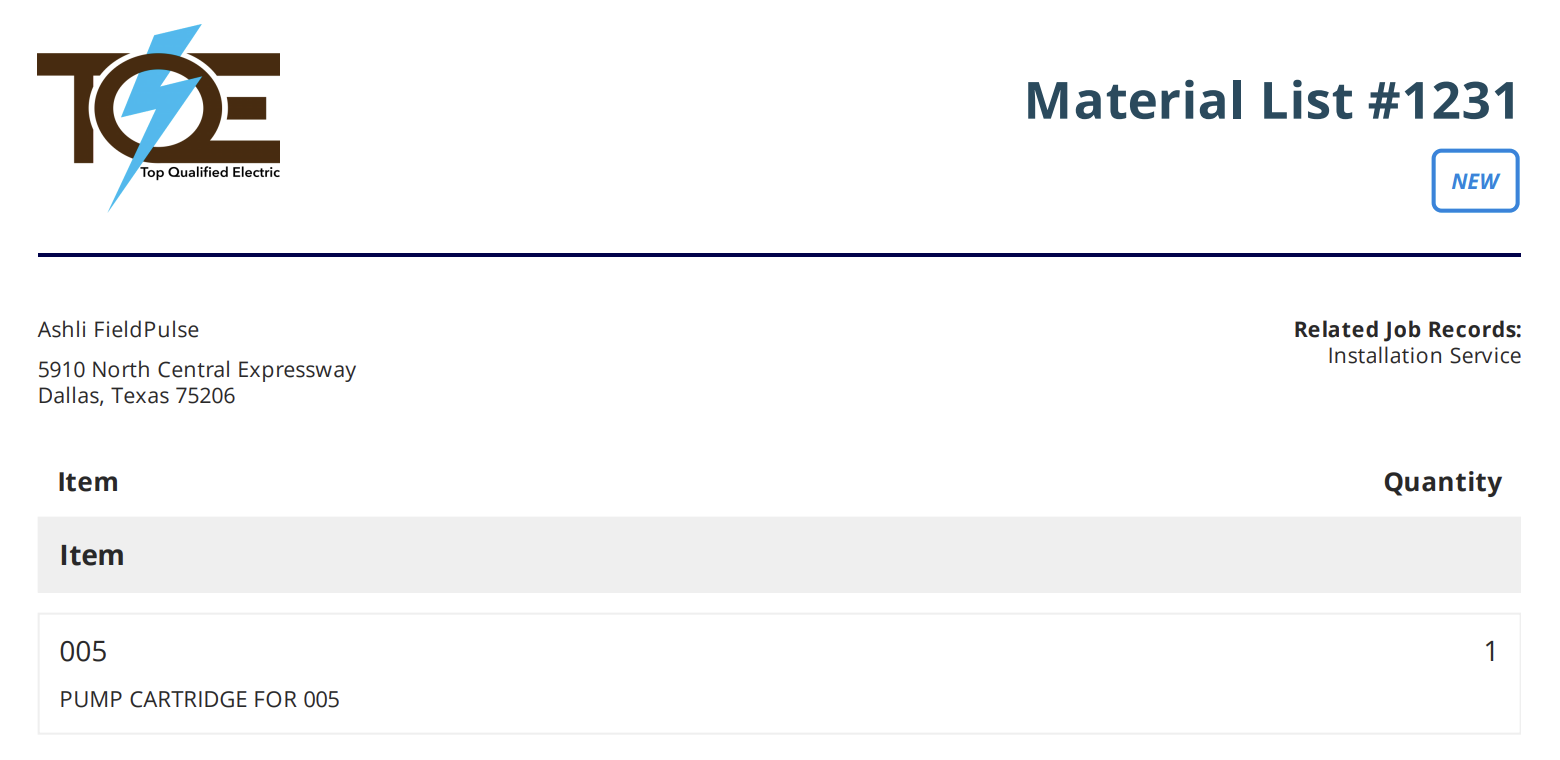
-
----
-
-## Permissions
-
-You can turn material lists on or off per user. To do so, navigate to _Company Settings_ from the menu on the left hand side of your screenand select _User Accounts._ Navigate to the _Users_ tab and select the first user you'd like to turn material lists on for. Make changes to the two permissions available for material lists then ensure you press the _Save_ button.
-
-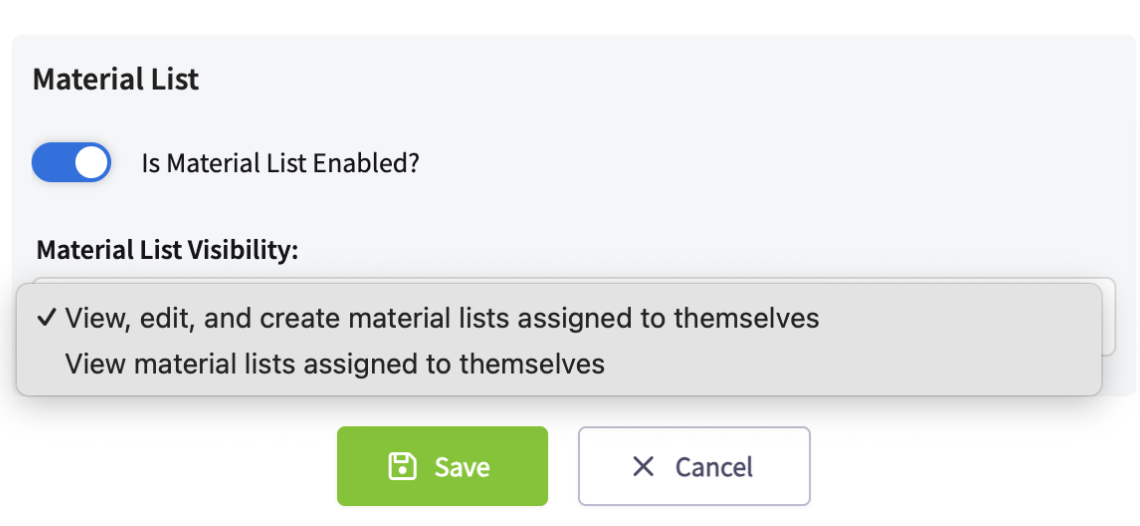
-
-You can also control which users see the cost and/or price of line items on any estimates or invoices they create.
-
-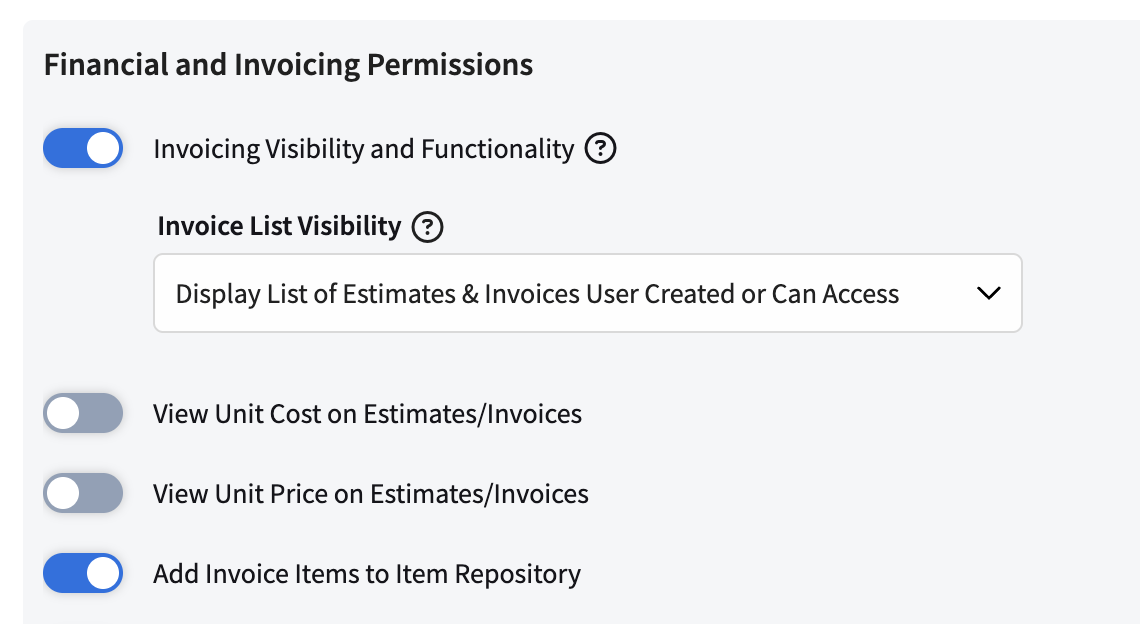
-
-### Note: This process will need to be repeated for every user within your FieldPulse account
-
----
-
-#### To view/learn about material lists on the mobile app, [Material Lists Mobile App](/core-platform/material-list/material-lists-mobile-app)
-
----
-
-**Have additional questions?**
-
-_Contact us at [support@fieldpulse.com](mailto:support@fieldpulse.com) or use the chat feature in the bottom right corner of your screen._
\ No newline at end of file
+# **What are Material Lists?**
\ No newline at end of file
Angi Integration
- Module: Other Integrations
- File:
angi-integration.mdx - Intercom URL: https://help.fieldpulse.com/en/articles/12624369-angi-integration
- Last modified: 2026-03-19
Index: angi-integration.mdx
===================================================================
--- angi-integration.mdx existing
+++ angi-integration.mdx intercom
@@ -1,79 +0,0 @@
-FieldPulse has teamed up with Angi to seamlessly send your leads directly into your FieldPulse account!
-
-This integration allows for a streamlined process to manage your leads effectively. By connecting your accounts, you can eliminate manual data entry, saving time and increasing workflow efficiency.
-
-**Note:** To use this integration, you must have an account with Angi.
-
----
-
-## Where to Find Your Angi Service Provider ID
-
-To connect your Angi account to FieldPulse, you will need your Angi Service Provider ID (SP ID).
-
-### **To find your Angi SP ID:**
-
-- Log in to your [Angi account](https://id.angi.com/realms/ads-user/protocol/openid-connect/auth?client_id=platform-gateway&scope=openid&response_type=code&redirect_uri=https%3A%2F%2Foffice.angi.com%2Fapp%2Flogin%2Foidc%2Fcallback&state=no1i5AW2F6oZ268gzbRgqw).
-
-
-
-- You can find your SP ID directly after "ID:" at the top of the drop-down menu.
-
-
-
----
-
-## How to Enable the Angi Integration in FIeldPulse
-
-**To enable your integration with Angi:**
-
-1. Navigate to _Company Settings_ \> _Features & Plugins_ in FieldPulse.
-
-2. Locate the Angi tile and click _Enable_.
-
-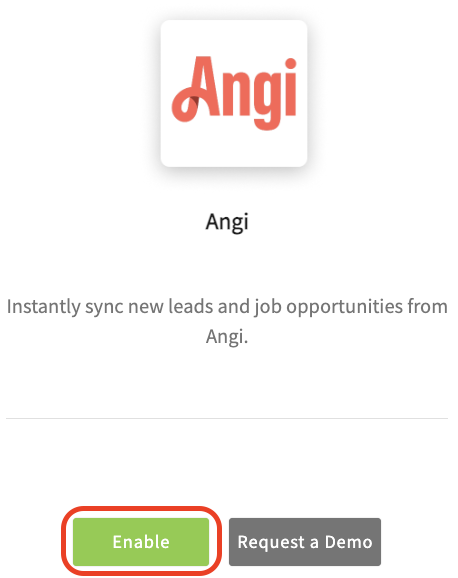
-
-1. Fill out the fields in the pop-up window that appears.
-
-2. Enter your Angi Service Provider ID (SP ID) into the designated text box.
-
-3. Select a default Job template. This template will be used for all leads from Angi. If you do not select a template, the system will create an unscheduled Job by default.
-
-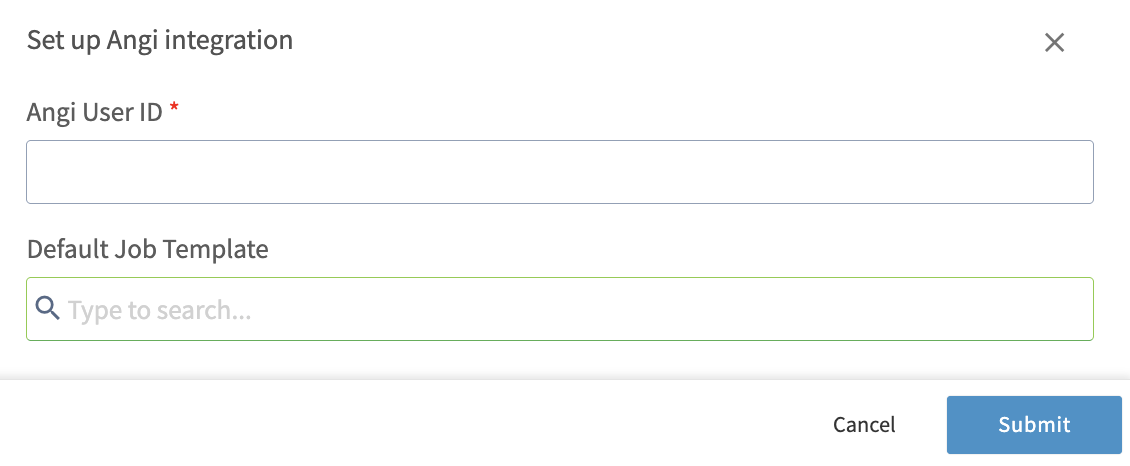
-
-**Note:** The Angi integration can take 2-3 business days to successfully connect.
-
----
-
-## How the Integration Works
-
-Once the integration has been successfully activated, all new leads from Angi will be created as both a Customer and Job Record simultaneously in FieldPulse.
-
-### Angi → Customer Record in FieldPulse
-
-- FieldPulse will verify whether the lead from Angi already exists as a customer in our system by checking their email address. If the customer does not exist, a new Customer Record will be automatically created and assigned to the founding Admin user within the company's FieldPulse account.
-
-- The system will also default the _Lead Source_ field on the Customer Record to indicate Angi.
-
-- The system will also add a Tag for Angi to your Customer Records.
-
-- All information collected in Angi, including appointment details and interview questions and answers will be added to the Notes section of this record.
-
-
-
-### Angi → Job Record in FieldPulse
-
-- If you selected a default Job template, as mentioned in step three above, FieldPulse will automatically create a Job for this lead/customer using that template. If no default template was selected, our system will automatically create an unscheduled and unassigned Job Record.
-
-- The system will add a Tag for Angi to your Job Records.
-
-- The automatically created Job Record will follow the Default Custom Status Workflow for unassigned and unscheduled jobs. However, if a different Custom Status Workflow is defined on your selected Job template, the Job Record will follow that template's Custom Status Workflow instead.
-
-- All information collected in Angi, including appointment details and interview questions and answers will be added to the Notes section of this record.
-
-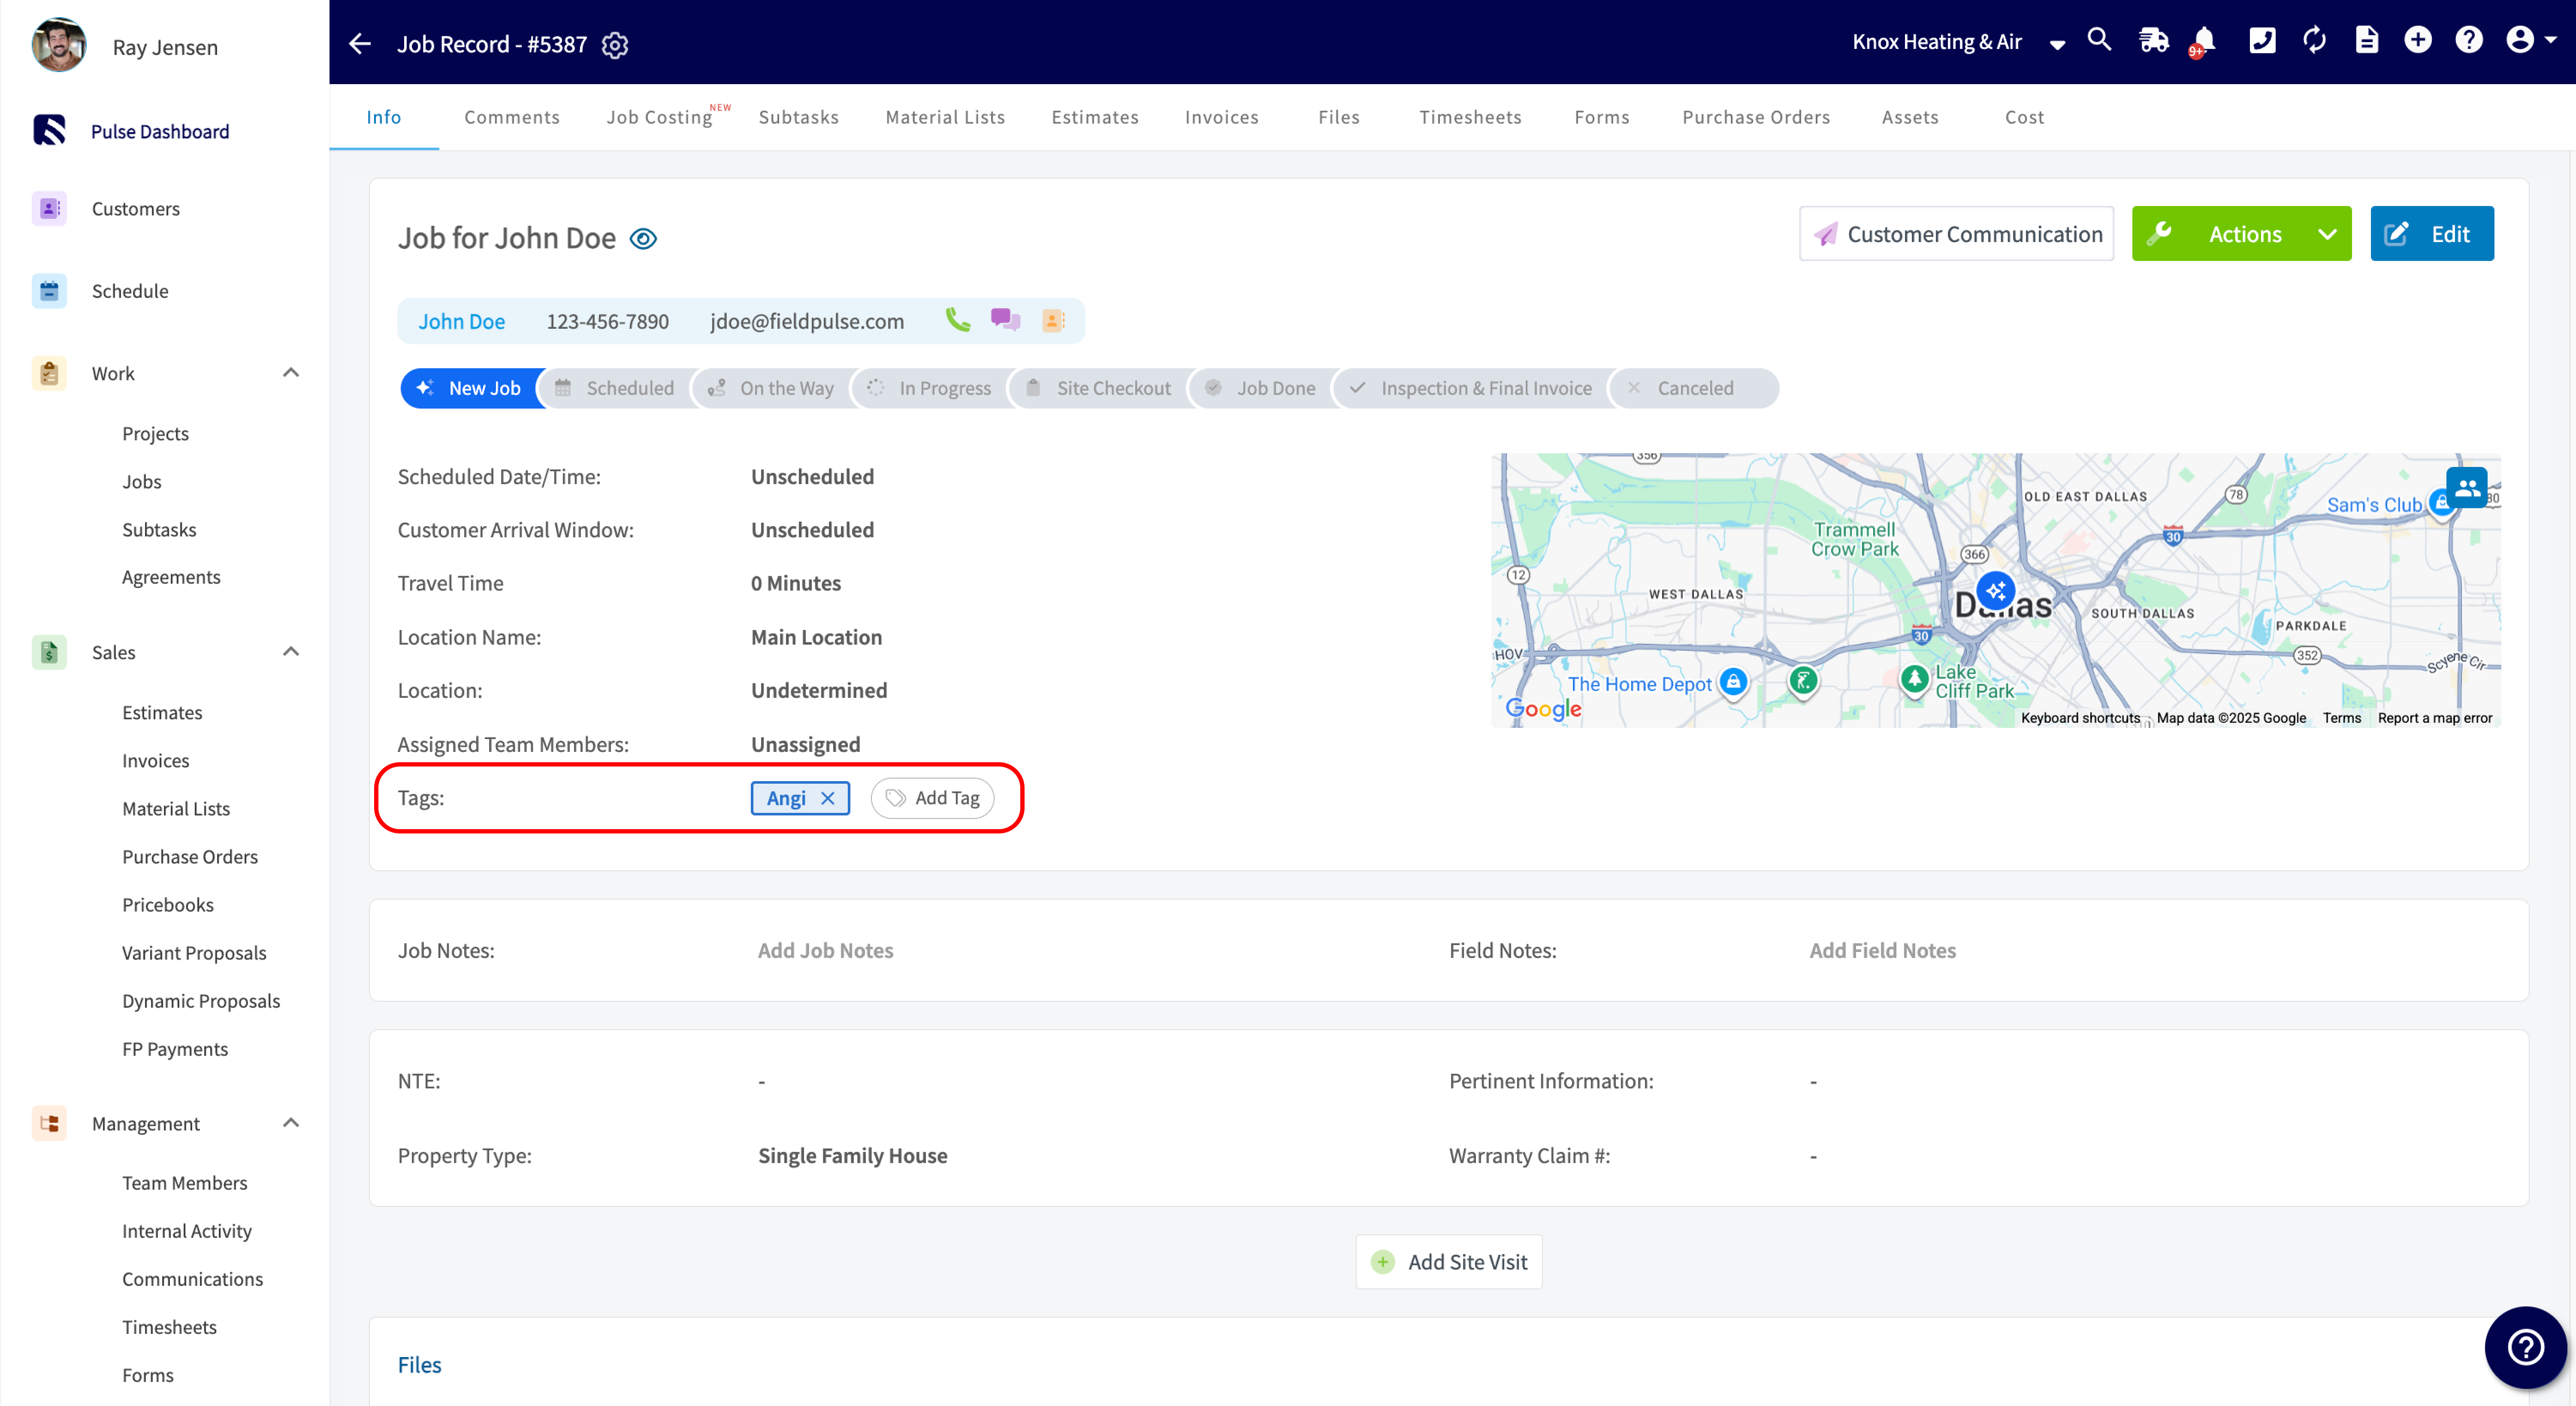
-
----
-
-**Have additional questions?**
-
-_Contact us at [support@fieldpulse.com](mailto:support@fieldpulse.com) or use the chat feature in the bottom right corner of your screen._
\ No newline at end of file
Trinity Warranty
- Module: Other Integrations
- File:
trinity-warranty.mdx - Intercom URL: https://help.fieldpulse.com/en/articles/6005345-trinity-warranty
- Last modified: 2026-04-15
Index: trinity-warranty.mdx
===================================================================
--- trinity-warranty.mdx existing
+++ trinity-warranty.mdx intercom
@@ -1,63 +0,0 @@
-Trinity Warranty provides extended warranty agreements to Plumbing and HVAC service businesses. These agreements extend customers’ warranties to protect expensive equipment once the manufacturer’s warranty expires preventing unexpected and costly repairs. Both residential and commercial equipment are covered, including heating and cooling equipment, water heaters, generators, water treatment products, and more.
-
-
-
----
-
-## **Features**
-
-- Flexible pricing, coverage, and reimbursement rates
-
-- Keep customers retention rates high for up to 10 years
-
-- Covers all major brands with 100% coverage, no deductible
-
-- Total coverage on labor and equipment parts for 1, 2, 3, 5, or 10 years post installation
-
-- Get flexible pricing and coverage with $75, $100, and $125/hour labor rates.
-
-- Keep money flowing year round, evening out seasonality
-
-Turn one-off service calls into long-term customers and profit by offering customers extended warranties once manufacturers’ warranties expire. With warranty service agreements, you’ll be customers’ point of contact when equipment needs repairs and maintenance.
-
-
-
-This helps you to build long-term relationships with customers so you have the opportunity to upsell services, get referrals, and keep customers happier by reducing complaints about out-of-warranty repairs.
-
-Enjoy an easy online registration and enrollment process for customers with all major brands of HVAC and plumbing equipment covered including residential and commercial equipment. Prices are competitive, there are no deductibles or pre-approvals for claims.
-
-And best of all? Trinity Warranties’ extended warranties are backed by multiple “A” rated national insurance carriers to protect customers and offer them peace of mind that will carry over to how customers view your business.
-
----
-
-## Learn More
-
-To learn more about Trinity Warranty, click here.
-
----
-
-## FAQs
-
-**What are the coverage options?**
-
-Trinity Warranty’s extended home warranty agreements provide plumbing and HVAC businesses with total coverage on labor for 1, 2, 3, 5, or 10 years post installation.
-
-**What brands are covered?**
-
-Agreements can be purchased for all major brands.
-
-**What do the agreements cover?**
-
-Equipment, parts, and labor are covered.
-
-**What is the deductible?**
-
-There is no deductible!
-
----
-
-**Have additional questions?**
-
-_Contact us at [support@fieldpulse.com](mailto:support@fieldpulse.com) or use the chat feature in the bottom right corner of your screen._
-
----
\ No newline at end of file
Pulse Fleet Tracking
- Module: Other Integrations
- File:
pulse-fleet-tracking.mdx - Intercom URL: https://help.fieldpulse.com/en/articles/8215341-pulse-fleet-tracking
- Last modified: 2026-04-01
Index: pulse-fleet-tracking.mdx
===================================================================
--- pulse-fleet-tracking.mdx existing
+++ pulse-fleet-tracking.mdx intercom
@@ -1,143 +0,0 @@
-Our Fleet Tracking system is simple, cost-effective, and can handle fleets of any size. With live GPS tracking, you'll have eyes on your drivers in real-time, making safety a breeze and protecting your valuable gear.
-
-Azuga Fleet Safety Overview - YouTube
-
-Azuga GPS Fleet Tracking and Dash Cams
-
-541 subscribers
-
-[Azuga Fleet Safety Overview](https://www.youtube.com/watch?v=8q7xDY6nxzc)
-
-Azuga GPS Fleet Tracking and Dash Cams
-
-Search
-
-Info
-
-Shopping
-
-Tap to unmute
-
-If playback doesn't begin shortly, try restarting your device.
-
-You're signed out
-
-Videos you watch may be added to the TV's watch history and influence TV recommendations. To avoid this, cancel and sign in to YouTube on your computer.
-
-CancelConfirm
-
-Share
-
-Include playlist
-
-An error occurred while retrieving sharing information. Please try again later.
-
-Watch later
-
-Share
-
-Watch on
-
-0:00
-
-/
-
-•Live
-
-•
-
-## Cost Savings
-
-With our detailed reporting, you can optimize vehicle efficiency and cut operating costs. Easily track events such as hard braking, speeding, and more.
-
-
-
- **Safety**
-
-Our Driver Rewards Program will improve your team's safety by reducing accidents, increasing productivity, and saving you money.
-
- **Protect High-Value Equipment**
-
-Employ our asset tracking system and say goodbye to theft and unauthorized use, and hello to simplified billing and real-time visibility of your gear and drivers.
-
-
-
- **Employ AI-Powered Smart Detection**
-
-With crystal-clear evidence of road events and driver behavior, keep track of distracted driving and keep your business running smoothly.
-
----
-
-## Video Tutorial
-
-<Frame caption="Pulse Fleet Tracking">
- <iframe
- src="https://www.loom.com/embed/767aa2be34d64948b8b39ce0d915e9eb?hide_owner=true&hide_share=true"
- title="Video: Pulse Fleet Tracking"
- className="w-full rounded-lg"
- style={{aspectRatio: "16/9", border: "none"}}
- loading="lazy"
- allow="fullscreen"
- allowFullScreen
- />
-</Frame>
-
----
-
-## Offerings
-
-## Azuga GPS Flex Plan
-
-\- GPS Datalogger (Hardware)
-
-\- Azuga Fleet Subscription (Software)
-
-\- Includes GPS Tracking, Maintenance Module, Driver Scoring, Engine Diagnostics, Speed Alerts
-
-### Azuga GPS & Surfsight AI Dashcam Flex Plan
-
-\- GPS Datalogger (Hardware)
-
-\- Azuga AI Dashcam (Hardware)
-
-\- AI video telematics, Cloud DVR, 10 minutes live stream
-
----
-
-## Enabling Azuga Fleet Tracking
-
-To get started with fleet tracking, contact us at [support@fieldpulse.com](mailto:support@fieldpulse.com) or use the chat feature in the bottom right corner of your screen.
-
----
-
-## FAQs
-
-**Where is Pulse Fleet Tracking available?**
-
-Fleet Tracking is available in the US, Canada, and Australia.
-
-**How does it integrate with FieldPulse?**
-
-Your vehicles will appear on the FieldPulse schedule map view. You can also access your full dashboard by selecting Fleet Tracking on the left-side menu.
-
-**How often does it update?**
-
-GPS tracking is updated at 1 minute intervals.
-
-**Is there geo-fencing?**
-
-Yes, you can create geofences for different zones such as head office, client location, and home. Every time a vehicle enters or exits a geofence, it is logged in the application. While creating a geofence, you can also set alerts that inform you when a vehicle enters/exits that geofence.
-
-**Can I get vehicle maintenance reminders?**
-
-Yes, you can set up alerts to inform you when the next service is due for vehicles/assets.
-
-**How can I monitor speeding?**
-
-You can set up speeding alerts and pull reports. Using speeding reports, you can get details such as the maximum speed attained by your vehicle, location at which speeding, and the date/time of the speeding.
-
----
-
-**Have additional questions?**
-
-_Contact us at [support@fieldpulse.com](mailto:support@fieldpulse.com) or use the chat feature in the bottom right corner of your screen._
\ No newline at end of file
Estimate Reports
- Module: Reporting
- File:
estimate-reports.mdx - Intercom URL: https://help.fieldpulse.com/en/articles/9449672-estimate-reports
- Last modified: 2026-03-09
Index: estimate-reports.mdx
===================================================================
--- estimate-reports.mdx existing
+++ estimate-reports.mdx intercom
@@ -1,346 +0,0 @@
-Use the _Estimates_ tab to create reports based on estimate data including invoice conversions, payment status, related jobs, and more. Some common estimate reports include estimates by status, estimate conversion rate, and estimates by location.
-
----
-
-## Create a Estimate Report
-
-<Frame caption="Create a Estimate Report">
- <iframe
- src="https://www.loom.com/embed/437e2f91c48142ee959051d74cc1a458?hide_owner=true&hide_share=true"
- title="Video: Create a Estimate Report"
- className="w-full rounded-lg"
- style={{aspectRatio: "16/9", border: "none"}}
- loading="lazy"
- allow="fullscreen"
- allowFullScreen
- />
-</Frame>
-### Date Range
-
-Begin by selecting date type you'd like to use to generate the report.
-
-
-
-- **Created Date:** When the estimate was created
-
-- **Invoiced Date:** When the estimate was sent to the customer
-
-- **Due Date:** When the estimate was due
-
-- **First Payment Date:** When the customer made their first payment on the estimate
-
-- **Last Payment Date:** When the customer made their last payment on the estimate
-
-- **Accepted Date:** When the estimate was accepted by the customer
-
-Then, select the start date range for which you’d like to report on. Click on the calendar icon to select a date range and click _Load Data_.
-
-
-
-- **Today:** From 12:00 AM to the current time
-
-- **Yesterday:** Previous day from 12:00 AM to 11:59 PM
-
-- **This Week:** From Monday through Sunday of the current week
-
-- **Last Week:** Previous week
-
-- **Last 7 Days:** Previous seven days, including today
-
-- **This Month:** From the first of the current month to the current day
-
-- **Last Month:** Entire month before the current month
-
-- **Last 30 Days:** Previous 30 days, including today
-
-- **Custom:** Use the calendar to select start and end dates
-
-### Columns
-
-
-
-Select the columns to include in your report by clicking _Columns_. The estimate report includes these columns by default:
-
-- **#ID:** Estimate number
-
-- **Customer:** Customer linked to the estimate
-
-- **Estimate Title:** Estimate title
-
-- **Parent Job:** Job linked to the estimate
-
-- **Status:** Estimate status
-
-- **Estimate Creator:** Author of the estimate
-
-- **Created Date:** Date and time the estimate was created in FieldPulse
-
-- **Invoiced Date:** Date and time the estimate was sent to the customer
-
-- **Expiration Date:** Date and time the estimate expires
-
-- **Accepted Date:** Date and time the estimate was accepted by the customer
-
-- **Estimate Total:** Total dollar amount on estimate
-
-- **QuickBooks Class:** If you sync with QuickBooks, the class will be displayed here.
-
-- **Pre-Tax Subtotal:** Total dollar amount on estimate before tax
-
-- **Cost Basis:** Total costs associated with the estimate
-
-- **Profit Margin:** Estimate profit in dollars
-
-- **Profit Margin Percentage:** Estimate profit margin percentage
-
-- **Converted:** Whether the estimate has been converted to an invoice or not
-
-- **Payment Status:** Status of payment on estimate or converted invoice
-
-- **Related Invoices:** Record numbers for invoices linked to the estimate
-
-- **Estimate Notes:** Notes on estimate
-
-- **Internal Notes:** Internal notes on estimate
-
-- **Tags:** Tags on estimate
-
-- **Tax Rate:** Tax rate percentage on estimate
-
-- **Tax:** Dollar amount of tax on estimate
-
-- **Commission Method:** Method for commission on estimate
-
-- **Commission %:** Commission rate percentage
-
-- **Commission:** Dollar amount of commission on estimate
-
-- **Related Project:** Project linked to the estimate
-
-- **Location:** Service location on the estimate
-
-- **QB Originated:** Yes or No indicating if the record originated in QuickBooks.
-
-- **Custom Fields:** User-created fields related to the estimate
-
-- **Customer**
-
- - **Custom Fields:** User-created fields related to the customer record
-
- - **Customer Lead Source:** Lead source on the customer record
-
- - **Customer Phone:** Customer’s primary phone number
-
- - **Customer Email:** Customer’s primary email address
-
- - **Customer Phone 2:** Customer’s secondary phone number
-
- - **Customer Email 2:** Customer’s secondary email address
-
- - **Customer Assigned To:** User assigned to customer record
-
- - **Customer Pipeline Status:** Customer’s custom sales pipeline status
-
- - **Customer Next Steps:** Next steps listed on custom sales pipeline
-
- - **Customer Notes:** Notes on customer record
-
- - **Customer Job Notes:** Job notes on customer record (automatically inserted onto job records)
-
- - **Customer Created Date:** Date and time the customer was added to FieldPulse
-
- - **Customer Tags:** Tags attached to the customer record
-
- - **Parent Customer:** Group and analyze data by the Parent Customer
-
-- **Job**
-
- - **Custom Fields:** User-created fields related to the job record
-
- - **Notes:** Notes on job record
-
- - **Field Notes:** Notes left by assigned user(s) on the job
-
- - **Tags:** Tags attached to the job record
-
- - **Assigned Team Members:** Users assigned to the job
-
-### Filters
-
-
-
-Before running the report, set filters to narrow your results. From the _Filters_ icon, select how you want to filter the report:
-
-- **Company:** select company
-
-- **#ID:** filter by contents
-
-- **Customer:** filter by contents
-
-- **Estimate Title:** filter by contents
-
-- **Parent Job:** filter by contents
-
-- **Status:** select status
-
-- **Estimate Creator:** filter by contents
-
-- **Created Date:** filter by date
-
-- **Invoiced Date:** filter by date
-
-- **Expiration Date:** filter by date
-
-- **Accepted Date:** filter by date
-
-- **Estimate Total:** filter by contents
-
-- **Pre-Tax Subtotal:** filter by contents
-
-- **Cost Basis:** filter by contents
-
-- **Profit Margin:** filter by contents
-
-- **Profit Margin Percentage:** filter by contents
-
-- **Payment Status:** select status
-
-- **Related Invoices:** filter by contents
-
-- **Estimate Notes:** filter by contents
-
-- **Internal Notes:** filter by contents
-
-- **Tags:** select tag
-
-- **Tax Rate:** filter by contents
-
-- **Tax:** filter by contents
-
-- **Commission Method:** select method
-
-- **Commission %:** filter by contents
-
-- **Commission:** filter by contents
-
-- **Related Project:** select project
-
-- **Location:** filter by contents
-
-- **Custom Fields:** select custom field
-
-- **Customer**
-
- - **Customer Phone:** select phone number
-
- - **Customer Email:** select email address
-
- - **Customer Phone 2:** select phone number
-
- - **Customer Email 2:** select email address
-
- - **Customer Assigned To:** filter by contents
-
- - **Customer Lead Source:** select lead source
-
- - **Customer Pipeline Status:** select status
-
- - **Customer Next Steps:** filter by contents
-
- - **Customer Notes:** filter by contents
-
- - **Customer Job Notes:** filter by contents
-
- - **Customer Created Date:** filter by contents
-
- - **Customer Tags:** filter by contents
-
-- **Job**
-
- - **Status:** select status
-
- - **Notes:** filter by contents
-
- - **Field Notes:** filter by contents
-
- - **Tags:** filter by contents
-
- - **Assigned Team Members:** filter by contents
-
-When filtering by contents, you will need to choose an operator and then enter values to filter the data. Use the table below to learn more about each operator.
-
-| | | | |
-| --- | --- | --- | --- |
-| **Operator** | **Retrieves Data** | **Example** | **Data Retrieved** |
-| Equals | Equal to a specified value | Created By - Equals Tom Gause | For all records created by Tom Gause only |
-| Not Equal | Different from a specified value | Tag - Not Equal to HVAC | For all records except those using the HVAC tag |
-| Less Than | Lower than a specified value | #ID - Less than 1144 | For all records below #1144 |
-| Less Than or Equal To | Lower than or equal to a specified value | Job Date/Time - Less than or equal to 12/13/2023 | For jobs scheduled before or on 12/13/2023 |
-| Greater Than | Greater than a specified value | Job Duration - Greater than 60 minutes | For jobs in the In Progress status type for over 60 minutes |
-| Greater Than or Equal To | Greater than or equal to a specified value | Job Date/Time - Greater than or equal to 1/1/2024 | For jobs scheduled on or after 1/1/2024 |
-| In Range | Including and between two specified values | #ID - Between 1225 and 1236 | For all estimate records with #IDs between 1225 and 1236 |
-| Starts With | Begins with a specified value | Title - Annual | For all job records beginning with Annual |
-| Ends With | Ends with a specified value | Location - TX | For all job locations ending with TX |
-| Blank | No values are in the field | Subtitle | For all job records with blank subtitles |
-| Not Blank | Values in the field | Notes | For all job records with values in the notes field |
-
----
-
-## Common Estimate Reports
-
-<Frame caption="Common Estimate Reports">
- <iframe
- src="https://www.loom.com/embed/2e706377cd684f968ab3c42981832732?hide_owner=true&hide_share=true"
- title="Video: Common Estimate Reports"
- className="w-full rounded-lg"
- style={{aspectRatio: "16/9", border: "none"}}
- loading="lazy"
- allow="fullscreen"
- allowFullScreen
- />
-</Frame>
-### Estimates by Status
-
-Use this report to view how many estimates are sent/accepted/rejected and the total dollar amount in each status.
-
-**Columns:** Customize to your needs, but must include _Status_ and _Estimate Total_
-
-**Group by:** _Status_
-
-### Estimate Conversion Rate
-
-Use this report to view the percentage of estimates converted to invoices by each member of your team.
-
-- Select _Quick Reports_
-
-- Primary Field = _Conversion Rate_
-
-- Group by = _Created By_
-
-- Click _Configure Pivot Table_
-
-### Estimates by Location
-
-Use this report to view estimate data by city or zip code to inform your business decisions.
-
-**By Tags:**
-
-**Columns:** Customize to your needs, but must include _Tags_
-
-**Group by:** _Tags_
-
-**By Location:**
-
-**Columns:** Customize to your needs, but must include _Location_
-
-**Filter:** _Location_
-
-- contains \[Zip Code\] or \[City\]
-
-- does not contain \[Zip Code\] or \[City\]
-
----
-
-**Have additional questions?**
-
-_Contact us at [support@fieldpulse.com](mailto:support@fieldpulse.com) or use the chat feature in the bottom right corner of your screen._
\ No newline at end of file
Invoice Reports
- Module: Reporting
- File:
invoice-reports.mdx - Intercom URL: https://help.fieldpulse.com/en/articles/9450917-invoice-reports
- Last modified: 2026-03-09
Index: invoice-reports.mdx
===================================================================
--- invoice-reports.mdx existing
+++ invoice-reports.mdx intercom
@@ -1,344 +0,0 @@
-Use the _Invoices_ tab to create reports based on invoice data including due date, invoice creator, profit margin, and more. Some common invoice reports include overdue invoices and commission by team member.
-
----
-
-## Create an Invoice Report
-
-<Frame caption="Create an Invoice Report">
- <iframe
- src="https://www.loom.com/embed/437e2f91c48142ee959051d74cc1a458?hide_owner=true&hide_share=true"
- title="Video: Create an Invoice Report"
- className="w-full rounded-lg"
- style={{aspectRatio: "16/9", border: "none"}}
- loading="lazy"
- allow="fullscreen"
- allowFullScreen
- />
-</Frame>
-### Date Range
-
-Begin by selecting date type you'd like to use to generate the report.
-
-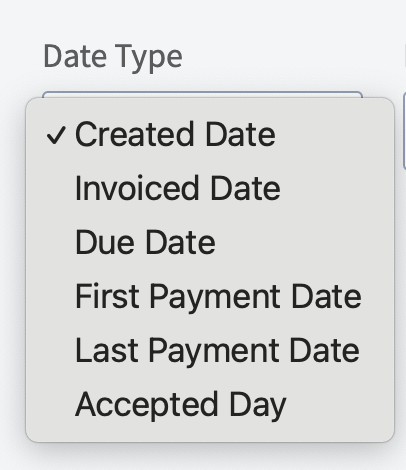
-
-- **Created Date:** When the invoice was created
-
-- **Invoiced Date:** When the invoice was sent to the customer
-
-- **Due Date:** When the invoice was due
-
-- **First Payment Date:** When the customer made their first payment on the invoice
-
-- **Last Payment Date:** When the customer made their last payment on the invoice
-
-Then, select the start date range for which you’d like to report on. Click on the calendar icon to select a date range and click _Load Data_.
-
-
-
-- **Today:** From 12:00 AM to the current time
-
-- **Yesterday:** Previous day from 12:00 AM to 11:59 PM
-
-- **This Week:** From Monday through Sunday of the current week
-
-- **Last Week:** Previous week
-
-- **Last 7 Days:** Previous seven days, including today
-
-- **This Month:** From the first of the current month to the current day
-
-- **Last Month:** Entire month before the current month
-
-- **Last 30 Days:** Previous 30 days, including today
-
-- **Custom:** Use the calendar to select start and end dates
-
-### Columns
-
-
-
-Select the columns to include in your report by clicking _Columns_. The invoice report includes these columns by default:
-
-- **#ID:** Invoice number
-
-- **Status:** Invoice status
-
-- **Customer:** Customer linked to the invoice
-
-- **Invoice Title:** Invoice title
-
-- **Parent Job:** Job linked to the invoice
-
-- **Related Estimates:** Record numbers for estimates linked to the invoice
-
-- **Pre-Tax Subtotal:** Total dollar amount on invoice before tax
-
-- **Invoice Total:** Total dollar amount on invoice
-
-- **QuickBooks Class:** If you sync with QuickBooks, the class will be displayed here.
-
-- **Cost Basis:** Total costs associated with the invoice
-
-- **Profit Margin:** Invoice profit in dollars
-
-- **Profit Margin Percentage:** Invoice profit margin percentage
-
-- **Amount Paid:** Dollar amount paid on invoice
-
-- **Amount Due:** Dollar amount outstanding on invoice
-
-- **Invoiced Date:** Date and time the invoice was sent to the customer
-
-- **Due Date:** Date and time the invoice is due
-
-- **Created Date:** Date and time the invoice was created
-
-- **Invoice Notes:** Notes on invoice
-
-- **Internal Notes:** Internal notes on invoice
-
-- **Tags:** Tags on invoice
-
-- **Total Product Price:** Break down your invoice total by products
-
-- **Total Service Price:** Break down your invoice total by services
-
-- **Tax Rate:** Tax rate percentage on invoice
-
-- **Tax:** Dollar amount of tax on invoice
-
-- **Invoice Creator:** Author of the invoice
-
-- **Commission Method:** Method for commission on invoice
-
-- **Commission %:** Commission rate percentage
-
-- **Commission:** Dollar amount of commission on invoice
-
-- **First Payment Date:** Date of first customer payment on invoice
-
-- **Last Payment Date:** Date of last customer payment on invoice
-
-- **Related Project:** Project linked to the invoice
-
-- **Location:** Service location on the invoice
-
-- **QB Originated:** Yes or No indicating if the record originated in QuickBooks.
-
-- **Custom Fields:** User-created fields related to the invoice
-
-- **Customer**
-
- - **Custom Fields:** User-created fields related to the customer record
-
- - **Customer Phone:** Customer’s primary phone number
-
- - **Customer Email:** Customer’s primary email address
-
- - **Customer Phone 2:** Customer’s secondary phone number
-
- - **Customer Email 2:** Customer’s secondary email address
-
- - **Customer Assigned To:** User assigned to customer record
-
- - **Customer Lead Source:** Lead source on the customer record
-
- - **Customer Pipeline Status:** Customer’s custom sales pipeline status
-
- - **Customer Next Steps:** Next steps listed on custom sales pipeline
-
- - **Customer Notes:** Notes on customer record
-
- - **Customer Job Notes:** Job notes on customer record (automatically inserted onto job records)
-
- - **Customer Created Date:** Date and time the customer was added to FieldPulse
-
- - **Customer Tags:** Tags attached to the customer record
-
- - **Parent Customer:** Group and analyze data by the Parent Customer
-
-- **Job**
-
- - **Custom Fields:** User-created fields related to the job record
-
- - **Status:** Status of linked job
-
- - **Notes:** Notes on job record
-
- - **Field Notes:** Notes left by assigned user(s) on the job
-
- - **Tags:** Tags attached to the job record
-
- - **Assigned Team Members:** Users assigned to the job
-
-### Filters
-
-
-
-Before running the report, set filters to narrow your results. From the _Filters_ icon, select how you want to filter the report:
-
-- **#ID:** filter by contents
-
-- **Status:** select status
-
-- **Customer:** filter by contents
-
-- **Invoice Title:** filter by contents
-
-- **Parent Job:** filter by contents
-
-- **Parent Job Status:** filter by contents
-
-- **Related Estimates:** filter by contents
-
-- **Invoice Total:** filter by contents
-
-- **Pre-Tax Subtotal:** filter by contents
-
-- **Cost Basis:** filter by contents
-
-- **Profit Margin:** filter by contents
-
-- **Profit Margin Percentage:** filter by contents
-
-- **Amount Paid:** filter by contents
-
-- **Amount Due:** filter by contents
-
-- **Invoiced Date:** filter by date
-
-- **Due Date:** filter by date
-
-- **Created Date:** filter by date
-
-- **Invoice Notes:** filter by contents
-
-- **Internal Notes:** filter by contents
-
-- **Tags:** select tag
-
-- **Tax Rate:** filter by contents
-
-- **Tax:** filter by contents
-
-- **Invoice Creator:** filter by contents
-
-- **Commission Method:** select method
-
-- **Commission %:** filter by contents
-
-- **Commission:** filter by contents
-
-- **First Payment Date:** filter by date
-
-- **Last Payment Date:** filter by date
-
-- **Related Project:** select project
-
-- **Related Project Status:** select status
-
-- **Location:** filter by contents
-
-- **Custom Fields:** select custom field
-
-- **Customer**
-
- - **Customer Phone:** select phone number
-
- - **Customer Email:** select email address
-
- - **Customer Phone 2:** select phone number
-
- - **Customer Email 2:** select email address
-
- - **Customer Assigned To:** filter by contents
-
- - **Customer Lead Source:** select lead source
-
- - **Customer Pipeline Status:** select status
-
- - **Customer Next Steps:** filter by contents
-
- - **Customer Notes:** filter by contents
-
- - **Customer Job Notes:** filter by contents
-
- - **Customer Created Date:** filter by contents
-
- - **Customer Tags:** filter by contents
-
-- **Job**
-
- - **Status:** select status
-
- - **Notes:** filter by contents
-
- - **Field Notes:** filter by contents
-
- - **Tags:** filter by contents
-
- - **Assigned Team Members:** filter by contents
-
-When filtering by contents, you will need to choose an operator and then enter values to filter the data. Use the table below to learn more about each operator.
-
-| | | | |
-| --- | --- | --- | --- |
-| **Operator** | **Retrieves Data** | **Example** | **Data Retrieved** |
-| Equals | Equal to a specified value | Created By - Equals Tom Gause | For all records created by Tom Gause only |
-| Not Equal | Different from a specified value | Tag - Not Equal to HVAC | For all records except those using the HVAC tag |
-| Less Than | Lower than a specified value | #ID - Less than 1144 | For all records below #1144 |
-| Less Than or Equal To | Lower than or equal to a specified value | Job Date/Time - Less than or equal to 12/13/2023 | For jobs scheduled before or on 12/13/2023 |
-| Greater Than | Greater than a specified value | Job Duration - Greater than 60 minutes | For jobs in the In Progress status type for over 60 minutes |
-| Greater Than or Equal To | Greater than or equal to a specified value | Job Date/Time - Greater than or equal to 1/1/2024 | For jobs scheduled on or after 1/1/2024 |
-| In Range | Including and between two specified values | #ID - Between 1225 and 1236 | For all estimate records with #IDs between 1225 and 1236 |
-| Starts With | Begins with a specified value | Title - Annual | For all job records beginning with Annual |
-| Ends With | Ends with a specified value | Location - TX | For all job locations ending with TX |
-| Blank | No values are in the field | Subtitle | For all job records with blank subtitles |
-| Not Blank | Values in the field | Notes | For all job records with values in the notes field |
-
----
-
-## Common Invoice Reports
-
-<Frame caption="Common Invoice Reports">
- <iframe
- src="https://www.loom.com/embed/773ba15879f647349a96847f3bf1b362?hide_owner=true&hide_share=true"
- title="Video: Common Invoice Reports"
- className="w-full rounded-lg"
- style={{aspectRatio: "16/9", border: "none"}}
- loading="lazy"
- allow="fullscreen"
- allowFullScreen
- />
-</Frame>
-### Overdue Invoices
-
-Use this report to view all overdue invoices.
-
-**Columns:** Customize to your needs, but must include _Status_ and _Due Date_
-
-**Filters:** Status = _Partially Paid_ or _Invoiced_, and Due Date = _Overdue_
-
-### Commission by Team Member
-
-Use this report to view how much commission you need to pay each team member.
-
-**Columns:** Customize to your needs, but must include _Invoice Creator_ and _Commission_. _( **Note:** We recommend to also include Commission Method and Commission %.)_
-
-**Filters:** Status = _Invoiced_ or _Paid_ _( **Note:** this will depend on when you pay commission in your sales process)_
-
-**Group by:** _Invoice Creator_
-
-### Invoice Cost Basis & Profit Margin
-
-Use this report to better understand your cost basis and profit margin. Take the report to the next level by pulling the same report with estimates and comparing your predicted vs. actual cost basis and profit margin.
-
-**Columns:** Customize to your needs, but must include _Cost Basis_ and _Profit Margin_.
-
-**Filters:** Status = _Invoiced_ or _Paid_
-
----
-
-**Have additional questions?**
-
-_Contact us at [support@fieldpulse.com](mailto:support@fieldpulse.com) or use the chat feature in the bottom right corner of your screen._
\ No newline at end of file
Payment Reports
- Module: Reporting
- File:
payment-reports.mdx - Intercom URL: https://help.fieldpulse.com/en/articles/9455948-payment-reports
- Last modified: 2026-03-09
Index: payment-reports.mdx
===================================================================
--- payment-reports.mdx existing
+++ payment-reports.mdx intercom
@@ -1,246 +0,0 @@
-Use the _Payments_ tab to create reports based on payment data including payment method, payment date/time, related invoice record, and more. Some common payment reports include payments by method, by team member, and by customer.
-
----
-
-## Create a Payment Report
-
-<Frame caption="Create a Payment Report">
- <iframe
- src="https://www.loom.com/embed/437e2f91c48142ee959051d74cc1a458?hide_owner=true&hide_share=true"
- title="Video: Create a Payment Report"
- className="w-full rounded-lg"
- style={{aspectRatio: "16/9", border: "none"}}
- loading="lazy"
- allow="fullscreen"
- allowFullScreen
- />
-</Frame>
-### Date Range
-
-Begin by selecting the start date range for which you’d like to report on. Click on the calendar icon to select a date range and click _Load Data_.
-
-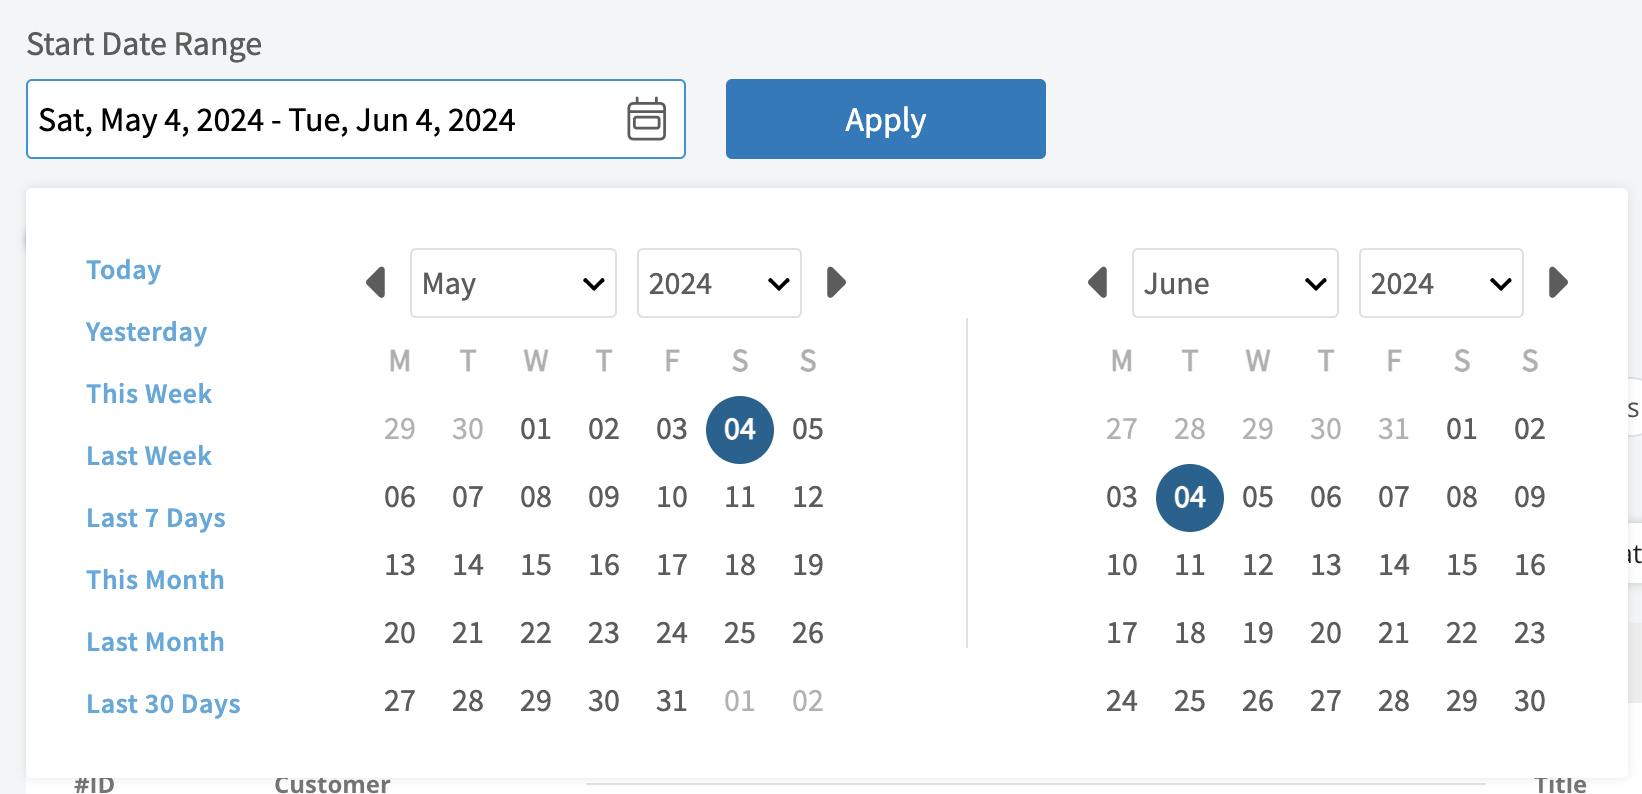
-
-- **Today:** From 12:00 AM to the current time
-
-- **Yesterday:** Previous day from 12:00 AM to 11:59 PM
-
-- **This Week:** From Monday through Sunday of the current week
-
-- **Last Week:** Previous week
-
-- **Last 7 Days:** Previous seven days, including today
-
-- **This Month:** From the first of the current month to the current day
-
-- **Last Month:** Entire month before the current month
-
-- **Last 30 Days:** Previous 30 days, including today
-
-- **Custom:** Use the calendar to select start and end dates
-
-### Columns
-
-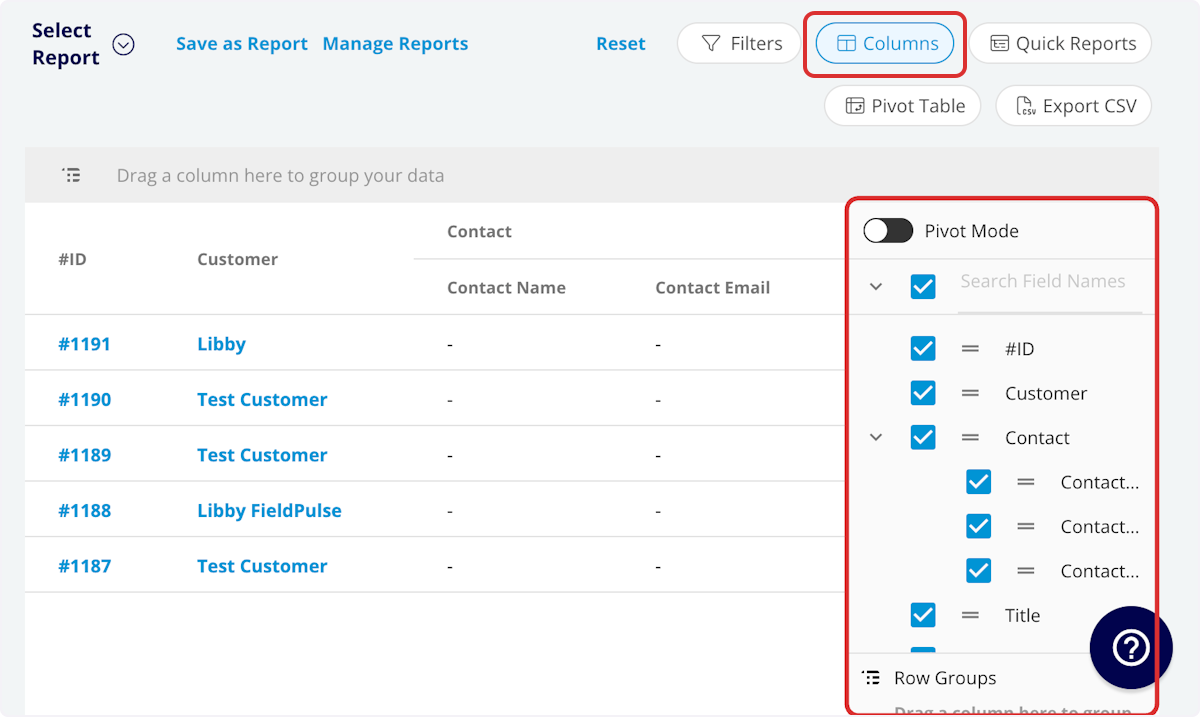
-
-Select the columns to include in your report by clicking _Columns_. The payment report includes these columns by default:
-
-- **#ID:** Payment number
-
-- **Amount:** Dollar amount of payment
-
-- **Method:** Payment method
-
-- **Customer:** Customer linked to the payment
-
-- **Created At:** Date and time the payment was created
-
-- **Created By:** Author of payment record
-
-- **Notes:** Notes on payment record
-
-- **Reference:** Payment reference ID
-
-- **Parent Job**
-
- - **Job Title:** Linked job record title
-
- - **Created By:** Job record author
-
- - **Assigned Team Members:** Team members assigned to the job
-
- - **Assigned Teams:** Teams assigned to the job
-
-- **Parent Invoice:** Related invoice record
-
-- **Refunds:** Dollar amount of refunds issued
-
-- **QB Originated:** Yes or No indicating if the record originated in QuickBooks.
-
-- **QuickBooks Class:** If you sync with QuickBooks, the class will be displayed here.
-
-- **Customer**
-
- - **Custom Fields:** User-created fields related to the customer record
-
- - **Customer Phone:** Customer’s primary phone number
-
- - **Customer Email:** Customer’s primary email address
-
- - **Customer Phone 2:** Customer’s secondary phone number
-
- - **Customer Email 2:** Customer’s secondary email address
-
- - **Customer Assigned To:** User assigned to customer record
-
- - **Customer Lead Source:** Lead source on the customer record
-
- - **Customer Pipeline Status:** Customer’s custom sales pipeline status
-
- - **Customer Next Steps:** Next steps listed on custom sales pipeline
-
- - **Customer Notes:** Notes on customer record
-
- - **Customer Job Notes:** Job notes on customer record (automatically inserted onto job records)
-
- - **Customer Created Date:** Date and time the customer was added to FieldPulse
-
- - **Customer Tags:** Tags attached to the customer record
-
-### Filters
-
-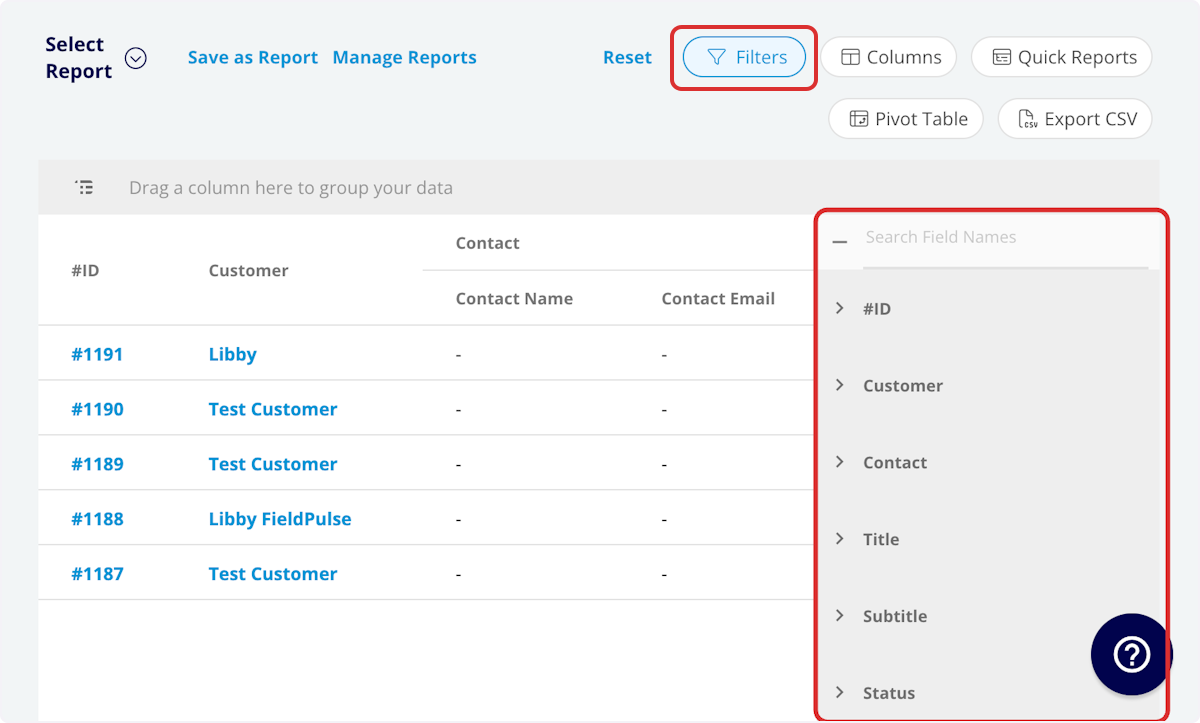
-
-Before running the report, set filters to narrow your results. From the _Filters_ icon, select how you want to filter the report:
-
-- **#ID:** filter by contents
-
-- **Method:** select method
-
-- **Customer:** filter by contents
-
-- **Created At:** filter by date
-
-- **Created By:** filter by contents
-
-- **Notes:** filter by contents
-
-- **Reference:** filter by contents
-
-- **Payment Recorded Date:** filter by date
-
-- **Parent Job**
-
- - **Job Title:** filter by contents
-
- - **Job Status:** filter by status
-
- - **Created By:** filter by contents
-
- - **Assigned Team Members:** filter by contents
-
- - **Assigned Teams:** filter by contents
-
-- **Parent Invoice**
-
- - **Parent Invoice Status:** filter by status
-
- - **Parent Invoice Total:** filter by contents
-
- - **Parent Invoice Tax Rate:** filter by contents
-
- - **Parent Invoice Tax Amount:** filter by contents
-
-- **Refunds:** filter by contents
-
-- **Customer**
-
- - **Customer Phone:** select phone number
-
- - **Customer Email:** select email address
-
- - **Customer Phone 2:** select phone number
-
- - **Customer Email 2:** select email address
-
- - **Customer Assigned To:** filter by contents
-
- - **Customer Lead Source:** select lead source
-
- - **Customer Pipeline Status:** select status
-
- - **Customer Next Steps:** filter by contents
-
- - **Customer Notes:** filter by contents
-
- - **Customer Job Notes:** filter by contents
-
- - **Customer Created Date:** filter by contents
-
- - **Customer Tags:** filter by contents
-
-- **Related Project**
-
- - **Related Project Status:** filter by status
-
-When filtering by contents, you will need to choose an operator and then enter values to filter the data. Use the table below to learn more about each operator.
-
-| | | | |
-| --- | --- | --- | --- |
-| **Operator** | **Retrieves Data** | **Example** | **Data Retrieved** |
-| Equals | Equal to a specified value | Created By - Equals Tom Gause | For all records created by Tom Gause only |
-| Not Equal | Different from a specified value | Tag - Not Equal to HVAC | For all records except those using the HVAC tag |
-| Less Than | Lower than a specified value | #ID - Less than 1144 | For all records below #1144 |
-| Less Than or Equal To | Lower than or equal to a specified value | Job Date/Time - Less than or equal to 12/13/2023 | For jobs scheduled before or on 12/13/2023 |
-| Greater Than | Greater than a specified value | Job Duration - Greater than 60 minutes | For jobs in the In Progress status type for over 60 minutes |
-| Greater Than or Equal To | Greater than or equal to a specified value | Job Date/Time - Greater than or equal to 1/1/2024 | For jobs scheduled on or after 1/1/2024 |
-| In Range | Including and between two specified values | #ID - Between 1225 and 1236 | For all estimate records with #IDs between 1225 and 1236 |
-| Starts With | Begins with a specified value | Title - Annual | For all job records beginning with Annual |
-| Ends With | Ends with a specified value | Location - TX | For all job locations ending with TX |
-| Blank | No values are in the field | Subtitle | For all job records with blank subtitles |
-| Not Blank | Values in the field | Notes | For all job records with values in the notes field |
-
----
-
-## Common Payment Reports
-
-<Frame caption="Common Payment Reports">
- <iframe
- src="https://www.loom.com/embed/5c0d8736c2fc4e10849f1c981446504c?hide_owner=true&hide_share=true"
- title="Video: Common Payment Reports"
- className="w-full rounded-lg"
- style={{aspectRatio: "16/9", border: "none"}}
- loading="lazy"
- allow="fullscreen"
- allowFullScreen
- />
-</Frame>
-### Payments by Method
-
-Use this report to view payments sorted by payment method.
-
-**Columns:** Customize to your needs, but must include _Method_
-
-**Group by:** _Method_
-
-### Payments by Team Member
-
-Use this report to view payments sorted by team member.
-
-**Columns:** Customize to your needs, but must include _Created By_
-
-**Group by:** _Created By_
-
-### Payments by Customer
-
-Use this report to view payments sorted by customer.
-
-**Columns:** Customize to your needs, but must include _Customer_
-
-**Group by:** _Customer_
-
----
-
-**Have additional questions?**
-
-_Contact us at [support@fieldpulse.com](mailto:support@fieldpulse.com) or use the chat feature in the bottom right corner of your screen._
\ No newline at end of file
How to Reset or Change Your Password
- Module: General UI/UX
- File:
how-can-i-reset-or-change-a-password.mdx - Intercom URL: https://help.fieldpulse.com/en/articles/9993625-how-to-reset-or-change-your-password
- Last modified: 2026-04-15
Index: how-can-i-reset-or-change-a-password.mdx
===================================================================
--- how-can-i-reset-or-change-a-password.mdx existing
+++ how-can-i-reset-or-change-a-password.mdx intercom
@@ -1,33 +1,1 @@
-## Forgotten Passwords
-
-If you've forgotten your password, click the _Forgot Password?_ button on the login page.
-
-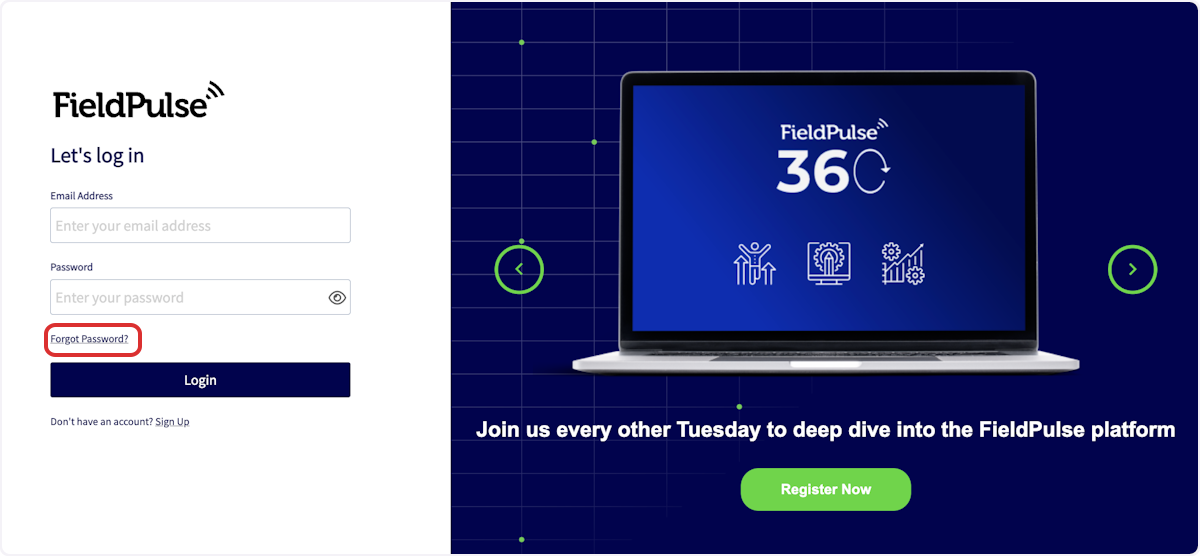
-
-You can then enter your sign-in email address, then press _Reset_. FieldPulse will email you a link to reset your password.
-
-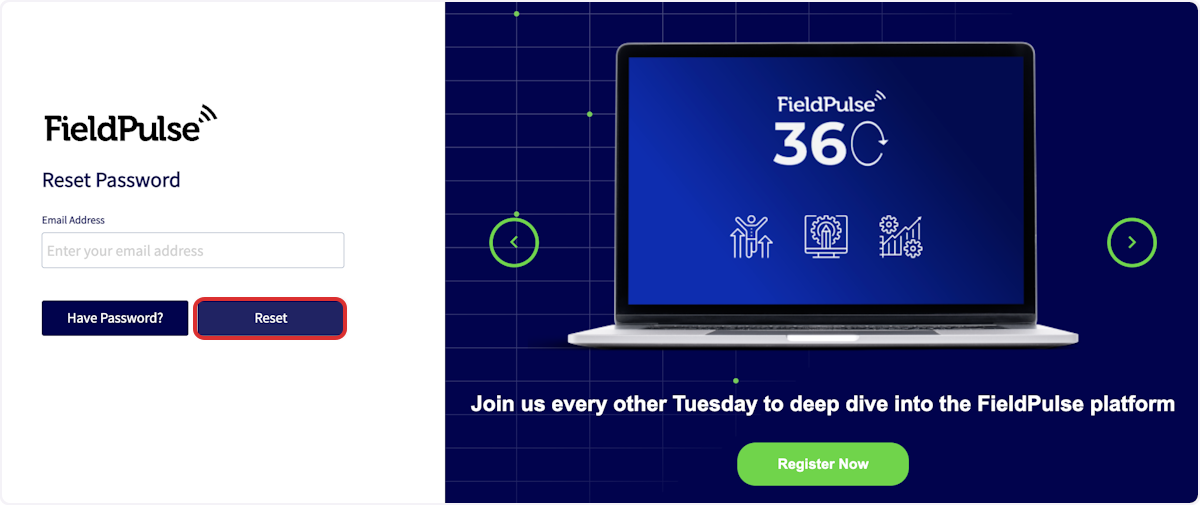
-
-## Changing Passwords
-
-As an administrator, you can change your password or the password of any of your users. To do so, navigate to _Company Settings_, then select _User Accounts_.
-
-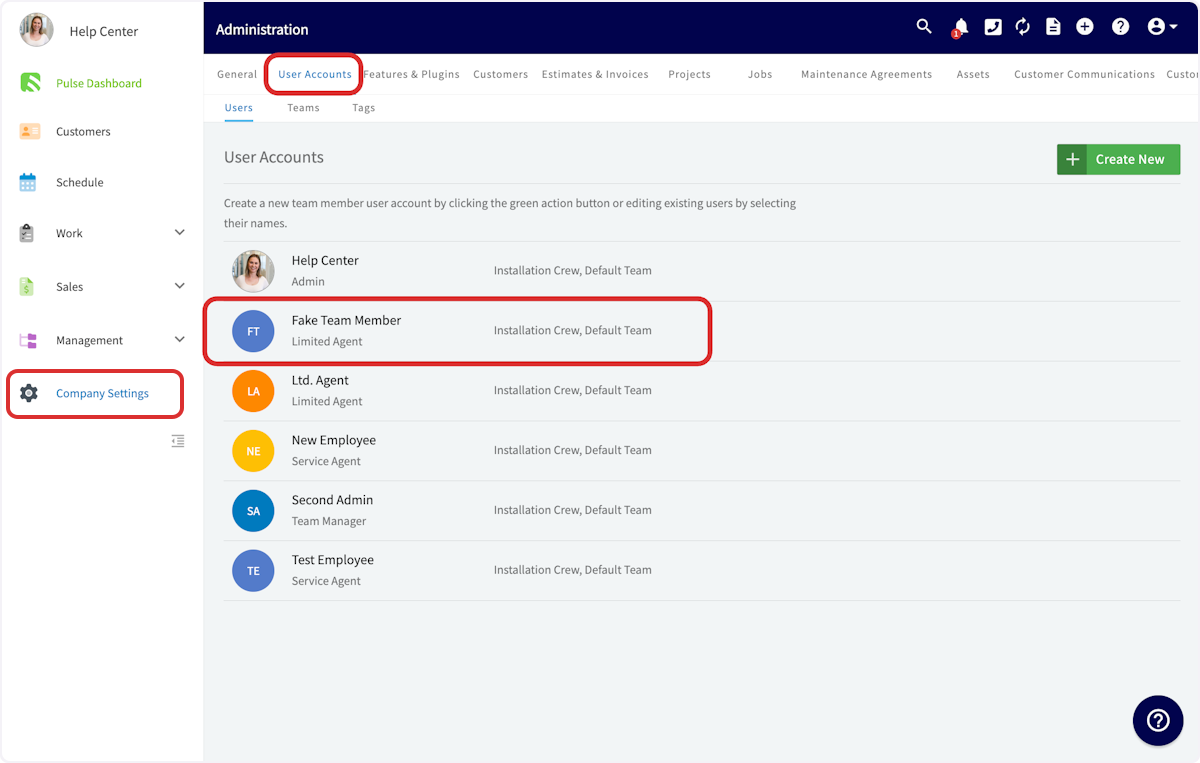
-
-Click on the user for whom you'd like to change the password and press _Edit_.
-
-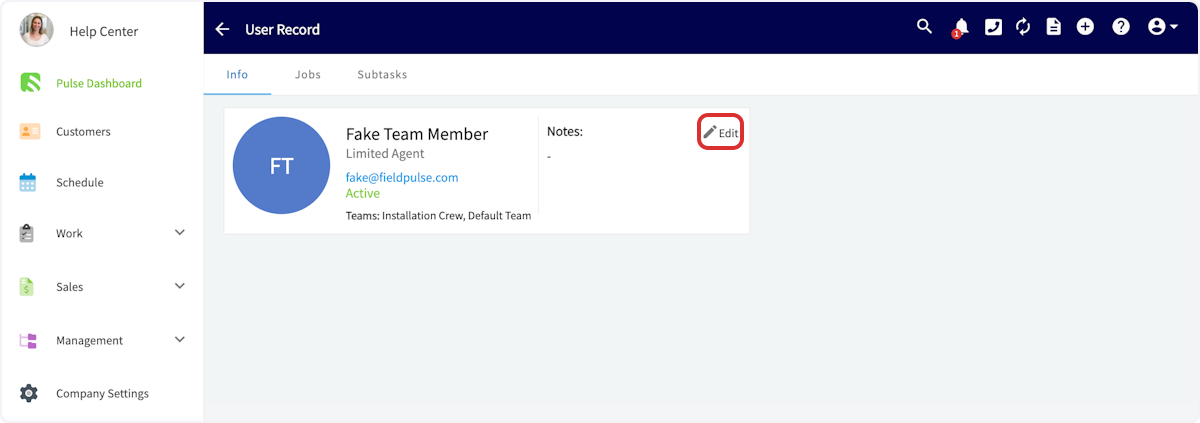
-
-Scroll down until you see _Change Password_. From here, you can enter a new password and click _Save_ to set the new password, or click _Send Password Reset Email_ to send a password reset request email to the user’s email address.
-
-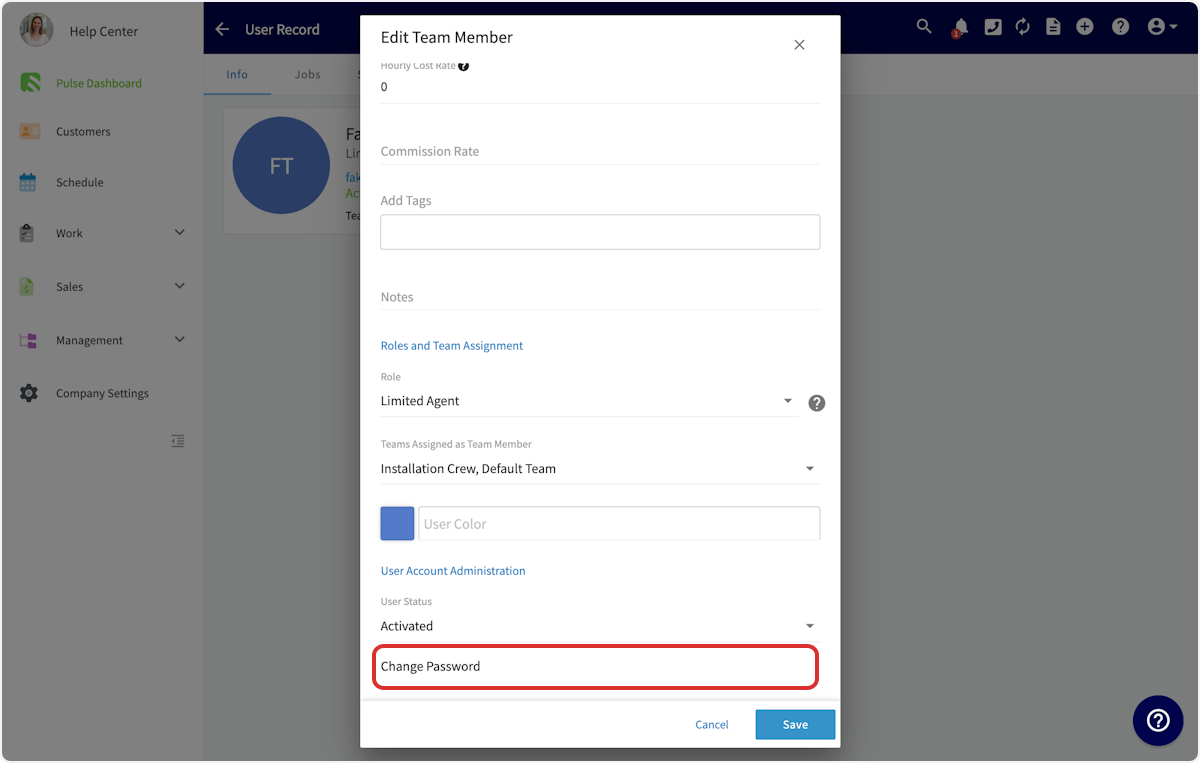
-
-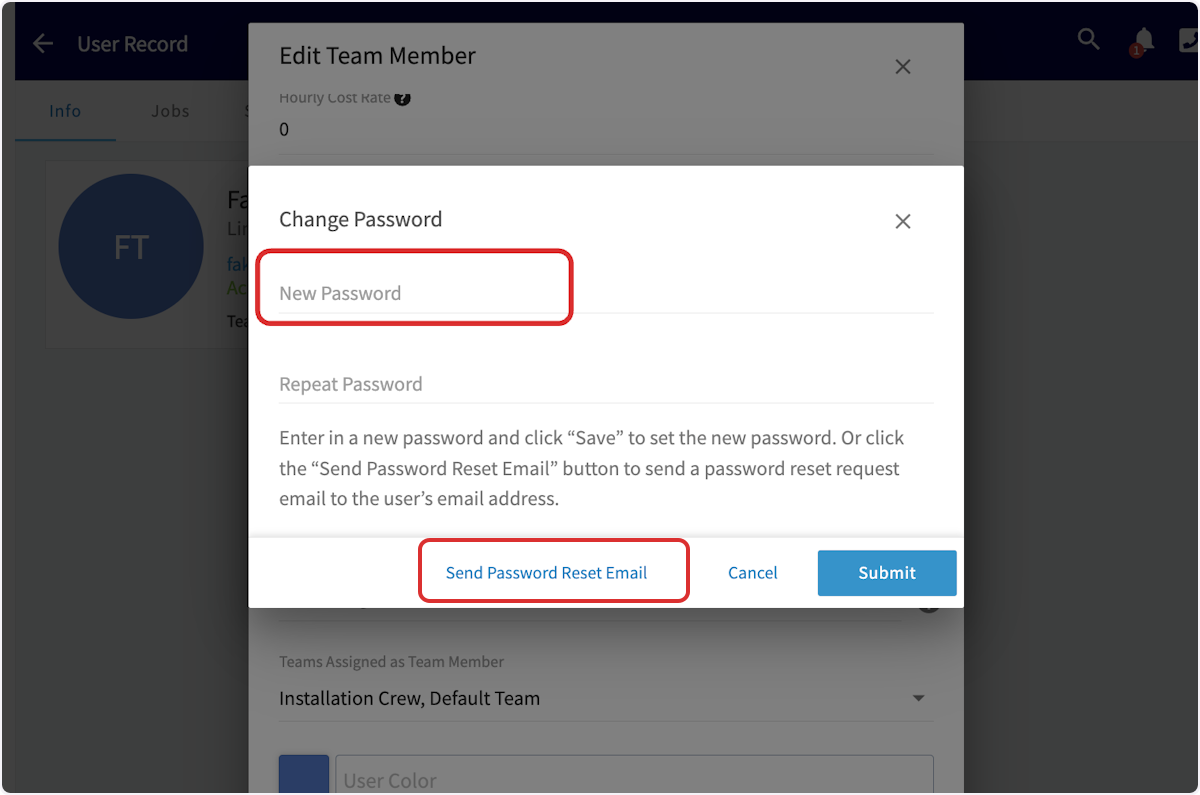
-
----
-
-**Have additional questions?**
-
-_Contact us at [support@fieldpulse.com](mailto:support@fieldpulse.com) or use the chat feature in the bottom right corner of your screen._
-
----
\ No newline at end of file
+# Forgotten Passwords
\ No newline at end of file
Features & Plugins Overview
- Module: General UI/UX
- File:
features-plugins.mdx - Intercom URL: https://help.fieldpulse.com/en/articles/12978046-features-plugins-overview
- Last modified: 2026-04-15
Index: features-plugins.mdx
===================================================================
--- features-plugins.mdx existing
+++ features-plugins.mdx intercom
@@ -1,15 +0,0 @@
-Now that you've set up your basic settings, it's time to take a deep dive into the features, plugins, and partners available for your business! You can view and enable features and plugins by navigating to _Company Settings_, then selecting _Features & Plugins_ from the top menu.
-
-[Click here to explore our Features & Add-Ons](/growth)
-
-[Click here to explore our Integrations & Partners](/integrations)
-
-[Click here to learn more about FieldPulse Payments](/growth/fp-payments)
-
----
-
-**Have additional questions?**
-
-_Contact us at [support@fieldpulse.com](mailto:support@fieldpulse.com) or use the chat feature in the bottom right corner of your screen._
-
----
\ No newline at end of file
Next Steps After Setup
- Module: General UI/UX
- File:
next-steps.mdx - Intercom URL: https://help.fieldpulse.com/en/articles/8931475-next-steps-after-setup
- Last modified: 2026-04-15
Index: next-steps.mdx
===================================================================
--- next-steps.mdx existing
+++ next-steps.mdx intercom
@@ -1,15 +1,1 @@
-## Congratulations on completing the steps to _Get Started with FieldPulse_
-
-By now, you have learned the basics of FieldPulse, customized your settings, and explored features & plugins that meet your business needs.
-
-## So what's next?
-
-We would recommend taking a deeper dive into our documentation. Explore the **FieldPulse Web and Mobile Apps**, and don't be afraid to lean on our support team via email or live chat as you learn. You can also join us monthly for **[FieldPulse360](/core-platform/customers/communications/fieldpulse360)**, our live training series designed exclusively for FieldPulse users. We would also love for you to join us for Ask a Pro, our webinar series featuring industry experts.
-
----
-
-**Have additional questions?**
-
-_Contact us at [support@fieldpulse.com](mailto:support@fieldpulse.com) or use the chat feature in the bottom right corner of your screen._
-
----
\ No newline at end of file
+## Congratulations on completing the steps to _Get Started with FieldPulse_!
\ No newline at end of file
How to Reach FieldPulse Support
- Module: General UI/UX
- File:
contact-us.mdx - Intercom URL: https://help.fieldpulse.com/en/articles/9117978-how-to-reach-fieldpulse-support
- Last modified: 2026-04-15
Index: contact-us.mdx
===================================================================
--- contact-us.mdx existing
+++ contact-us.mdx intercom
@@ -1,27 +1,1 @@
-## Email Support
-
-[Support@FieldPulse.com](mailto:Support@FieldPulse.com)
-
-## US Support
-
-Monday-Friday 7 AM - 6 PM CST
-
-**469-382-5668**
-
-**Live Chat:** Click this icon in the bottom right corner of the web app to start a conversation with our support team.
-
-## AUS Support
-
-Monday-Friday 8 AM - 5 PM AEST
-
-### +61 3 9917 5448
-
-**Live Chat:** Click this icon in the bottom right corner of the web app to start a conversation with our support team.
-
----
-
-**Have additional questions?**
-
-_Contact us at [support@fieldpulse.com](mailto:support@fieldpulse.com) or use the chat feature in the bottom right corner of your screen._
-
----
\ No newline at end of file
+# Email Support
\ No newline at end of file
Mobile App Overview - Limited Agents
- Module: General UI/UX
- File:
mobile-app-overview-limited-agents.mdx - Intercom URL: https://help.fieldpulse.com/en/articles/11841401-mobile-app-overview-limited-agents
- Last modified: 2026-04-17
Index: mobile-app-overview-limited-agents.mdx
===================================================================
--- mobile-app-overview-limited-agents.mdx existing
+++ mobile-app-overview-limited-agents.mdx intercom
@@ -1,149 +0,0 @@
-This article is your guide to navigating the FieldPulse Mobile App as a **Limited Agent**. You'll discover exactly what features and functionalities are available to you to help you excel in your role.
-
-To get started, simply download the **FieldPulse Mobile App** from your device's app store:
-
-- **iPhone or iPad users:** Download from the Apple App Store.
-
-- **Android phone or tablet users:** Download from the Google Play Store.
-
-Once downloaded, log in to FieldPulse using your provided credentials.
-
----
-
-## Your Access as a Limited Agent
-
-As a Limited Agent, your access within the mobile app is different from managers or full-service agents. If you find certain features or information unavailable, it's likely due to your specific permissions. Please reach out to your manager if you have any questions about your access.
-
-### **What You Can Do:**
-
-- **General App Use:**
-
- - Use the mobile app
-
- - Be assigned to a team
-
- - View your schedule
-
- - Use both general and job timesheets
-
- - Ability to add notes to timesheets
-
-- **Job Management:**
-
- - View customer names, locations, job details, dates, times, assigned team members, status, notes, and field notes on job records that you are assigned to
-
- - View job files
-
- - Upload files
-
-### **What You Cannot Do:**
-
-- **Change Job Status:** You are not permitted to update the status of a job.
-
-- **Access Web App**: You cannot use the computer-based version of FieldPulse.
-
-- **Schedule Customization**: You cannot customize your schedule view.
-
----
-
-## Mobile App Tour
-
-### Dashboard
-
-Once you log in, you will see your schedule. Here, you can view any jobs that are assigned to you.
-
-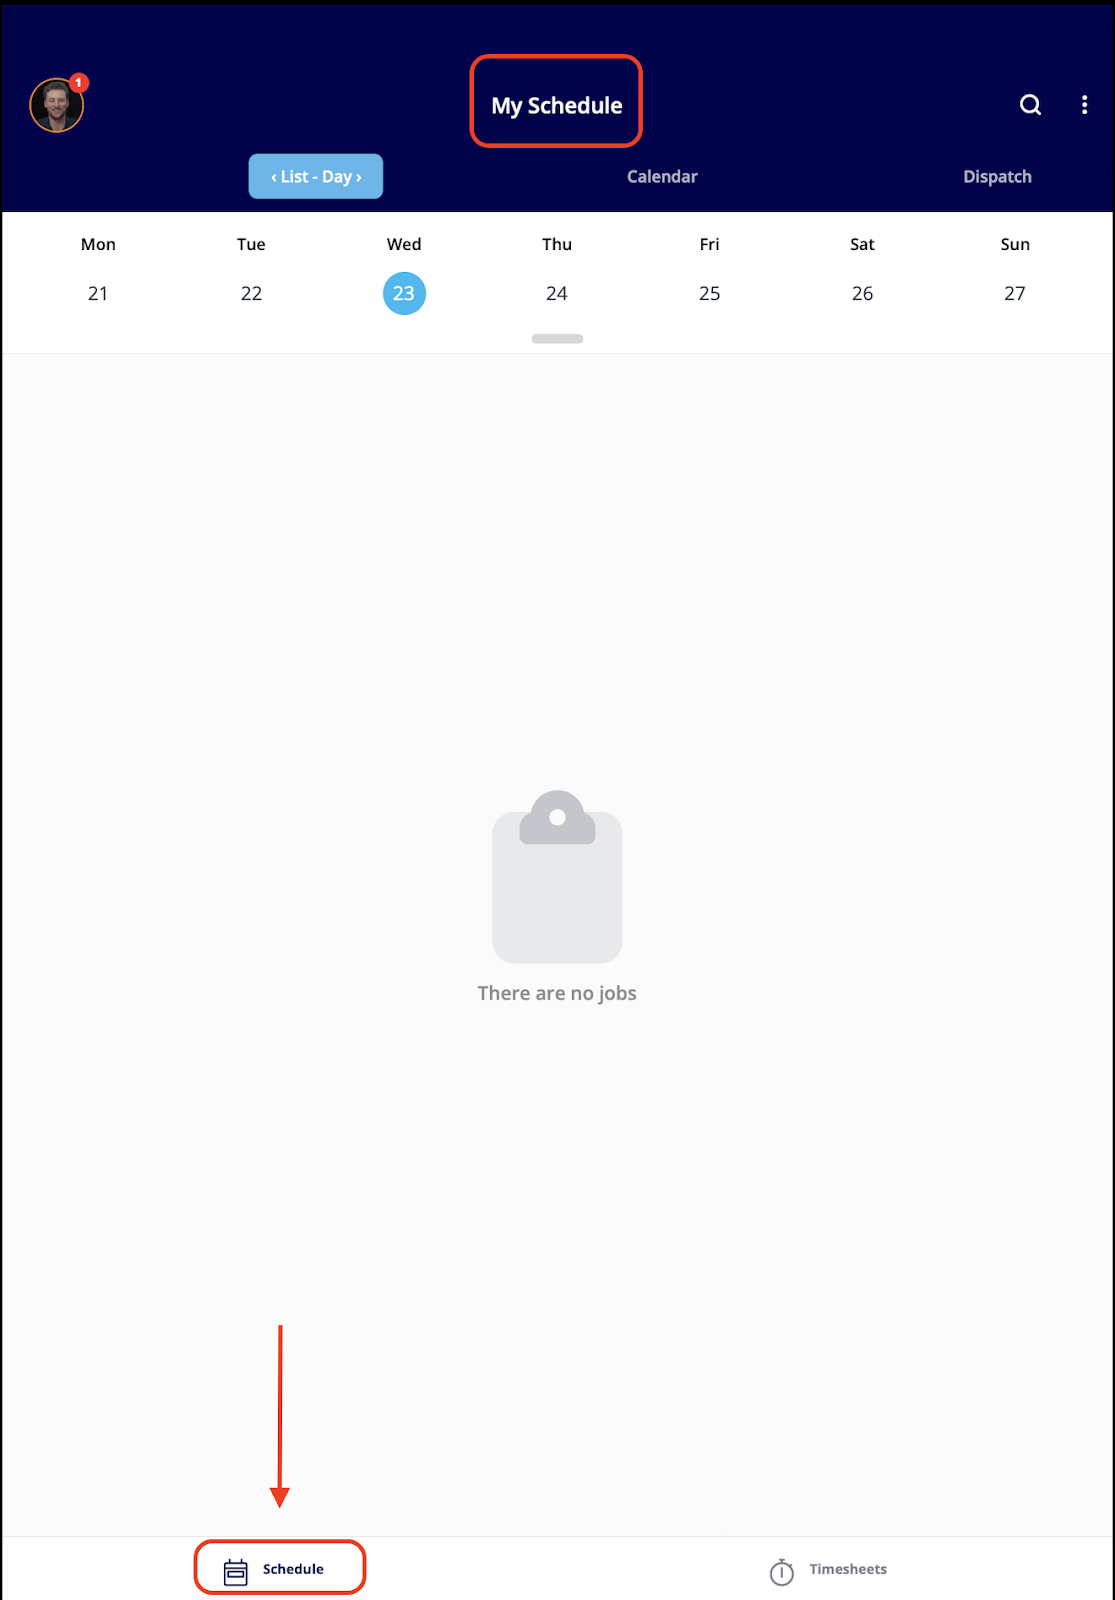
-
-There are several actions you can take from the “My Schedule” dashboard:
-
-1. You can edit your profile, view notifications/Reminders, change to offline Mode, or log out by clicking the round icon in the top left corner.
-
-2. You can see your jobs for the day.
-
-3. You can clock in and clock out.
-
-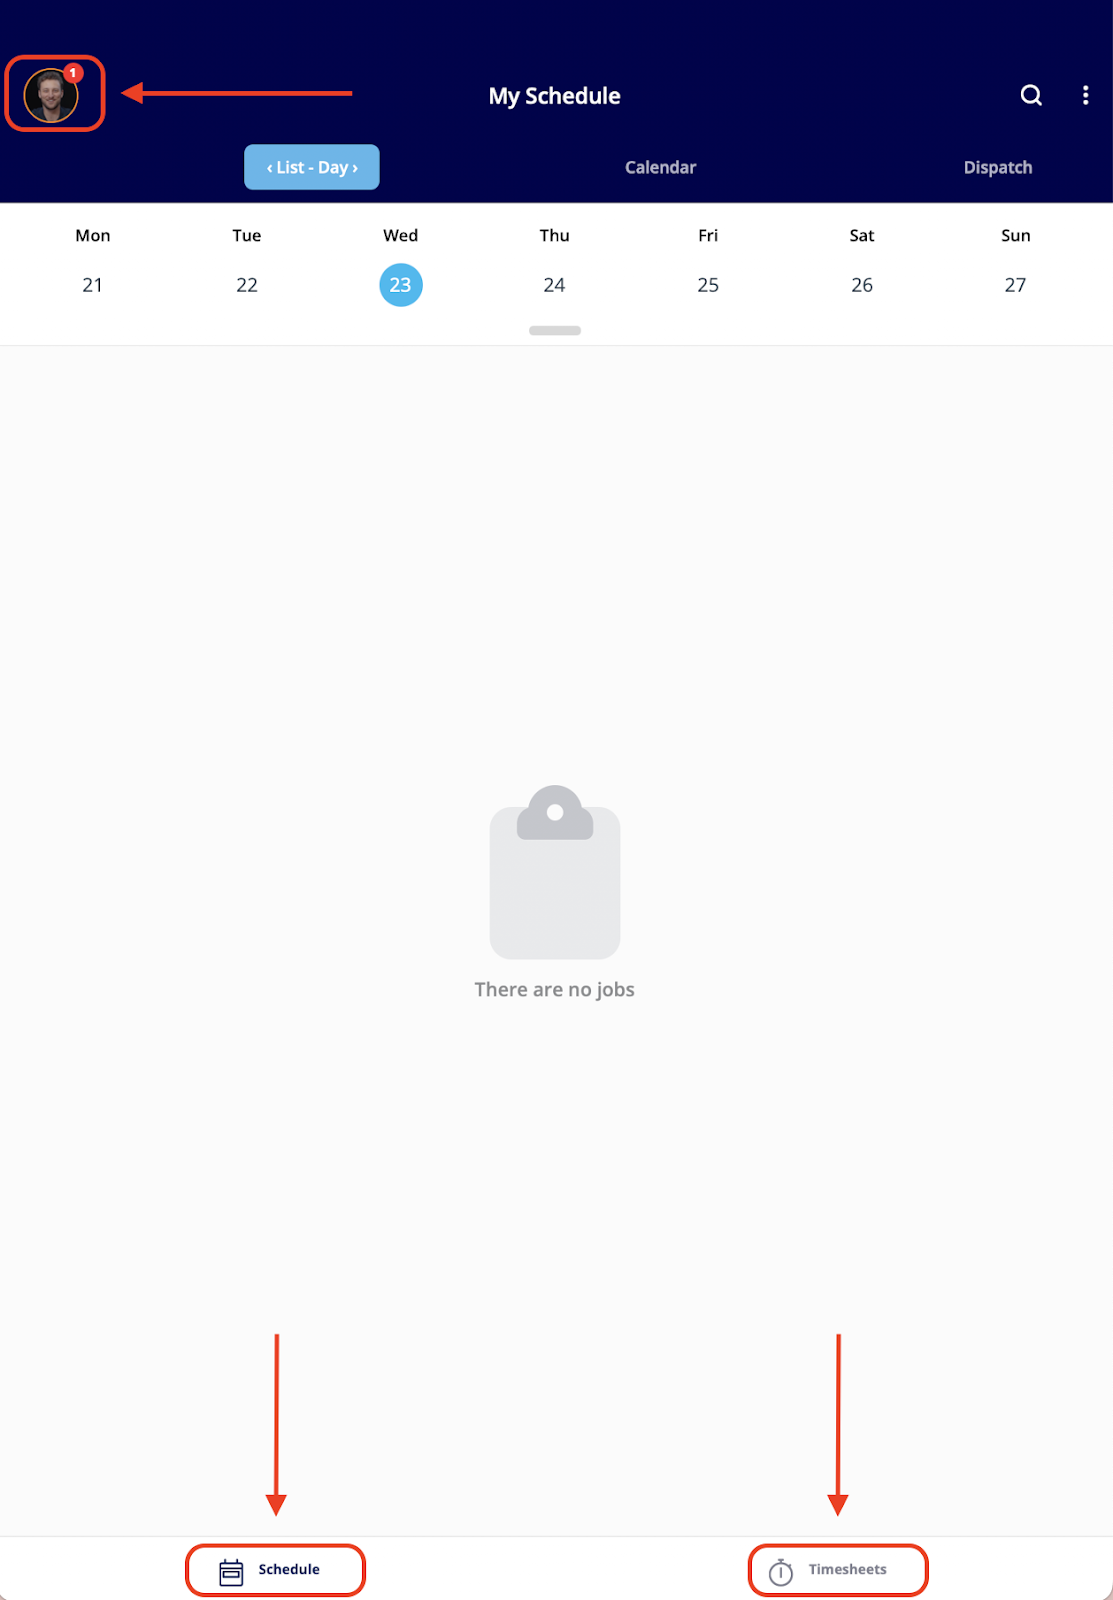
-
----
-
-## **Navigating Your Schedule**
-
-From the **Schedule** tab in the bottom left corner, you'll see a list of your assigned jobs. We offer **four different ways** to view your schedule.
-
-### **List View**
-
-- This view displays your assigned jobs in a clear, organized list. You can easily **sort your services by day, week, or month.** Tapping on any job will reveal it's full details, including customer information and options to clock in or our directly from that job.
-
-
-
-### **Calendar View**
-
-- The Calendar View presents your jobs in a **weekly calendar format.** Similar to the List View, you can tap on a job to access its details, customer information, and clock in/out options.
-
-
-
-### **Dispatch View**
-
-- The Dispatch View offers a visual way to see your schedule and job assignments throughout the week. It shows **a clear timeline of when you are out in the field on jobs.** You can easily tap on any listed job to access its full details, including customer information and options to clock in or out.
-
-
-
-### **Map View**
-
-- The Map View **plots your jobs directly on a map, offering a geographical overview.** From here, you can tap on a job to view its details, including customer information and clock in/out options directly from that job.
-
-
-
-If you want more information to display on the job tile for quick and easy viewing on the schedule, try **customizing your tile**. When on one of the schedule views mentioned above, click on the three dots in the upper right hand corner of your screen.
-
-
-
-Then click, **_Customize Job Tile_.**
-
-
-
-Select **_Custom Job Tile Layout_** then click on **_Select Fields to Display_.**
-
-
-
-Utilize the check boxes to select which information you wish to display on your job tiles moving forward. When you are done, ensure you press the green **_Save Fields_** button. When it redirects you back to the original screen ensure you press the green **_Save Settings_** button.
-
-
-
-
-
----
-
-## Timesheets
-
-Under the **_Timesheets_** tab, you'll find the functionality to clock in and out for the day. You can utilize **both** general and job-tracking timesheets. Here, you have the option to select _Day_ or _Week_ if you need to view or edit an entry.
-
-- **General Timesheets** are used to track your entire workday, logging your time from the moment you clock in until you clock out.
-
-- **Job Timesheets** are for tracking the time you spend completing a particular job or service.
-
-To review your past timesheets, simply select the specific day or week you wish to view.
-
-
-
----
-
-## Video Tutorial
-
-<Frame caption="Mobile App Overview - Limited Agents">
- <iframe
- src="https://www.loom.com/embed/5a3c5cad68b34927a20fe8d6c3c84b93?hide_owner=true&hide_share=true"
- title="Video: Mobile App Overview - Limited Agents"
- className="w-full rounded-lg"
- style={{aspectRatio: "16/9", border: "none"}}
- loading="lazy"
- allow="fullscreen"
- allowFullScreen
- />
-</Frame>
-
----
-
-**Have additional questions?**
-
-_Contact us at [support@fieldpulse.com](mailto:support@fieldpulse.com) or use the chat feature in the bottom right corner of your screen._
\ No newline at end of file
Can I export my data?
- Module: General UI/UX
- File:
can-i-export-my-data.mdx - Intercom URL: https://help.fieldpulse.com/en/articles/701979-can-i-export-my-data
- Last modified: 2026-03-13
Index: can-i-export-my-data.mdx
===================================================================
--- can-i-export-my-data.mdx existing
+++ can-i-export-my-data.mdx intercom
@@ -1,15 +0,0 @@
-Yes, you can easily export your customer, job, invoice, payment, and timesheet data with just a few clicks. Your custom field data will be included in your export as well.
-
-- For information on exporting customers click [Faq](/core-platform/customers/faq).
-
-- For information on exporting invoices click [Exporting Estimates Invoices](/core-platform/invoices-estimates/exporting-estimates-invoices).
-
-- For information on exporting reports click [Raw Data Reporting](/core-platform/reporting/raw-data-reporting).
-
----
-
-**Have additional questions?**
-
-_Contact us at [support@fieldpulse.com](mailto:support@fieldpulse.com) or use the chat feature in the bottom right corner of your screen._
-
----
\ No newline at end of file
How can I make a feedback request?
- Module: General UI/UX
- File:
how-can-i-make-a-feature-request.mdx - Intercom URL: https://help.fieldpulse.com/en/articles/9185328-how-can-i-make-a-feedback-request
- Last modified: 2026-03-04
Index: how-can-i-make-a-feature-request.mdx
===================================================================
--- how-can-i-make-a-feature-request.mdx existing
+++ how-can-i-make-a-feature-request.mdx intercom
@@ -1,11 +0,0 @@
-We'd love to hear from you! We encourage you to use our chat support to discuss your Feature Requests.Providing clear and thorough information, especially about your specific use case, is crucial. This information will help us ensure that any potential features align with your needs and expectations.
-
-Your FieldPulse contact will create a case on your behalf, allowing our product team to work directly with the information. You will receive email updates regarding any comments or status changes on your feature request. They might reach out to you for additional questions, examples from your past experiences, or feedback on product requirements and mock-ups.
-
----
-
-**Have additional questions?**
-
-_Contact us at [support@fieldpulse.com](mailto:support@fieldpulse.com) or use the chat feature in the bottom right corner of your screen._
-
----
\ No newline at end of file
Search & Filter
- Module: General UI/UX
- File:
search-filter.mdx - Intercom URL: https://help.fieldpulse.com/en/articles/9713301-search-filter
- Last modified: 2026-03-04
Index: search-filter.mdx
===================================================================
--- search-filter.mdx existing
+++ search-filter.mdx intercom
@@ -1,35 +0,0 @@
-Using filters to narrow your searches in FieldPulse makes it easy to find what you need. While the available filters vary between record types, we will overview the common filter qualities to best prepare you to utilize filters in your account!
-
----
-
-## Filtering
-
-To begin, select _Show Filters_.
-
-
-
-You can select the statuses and/or methods you'd like to include in your search. Additionally, search for and select fields like _Team Member_, _Tags_, and _Customer_.
-
-
-
-### Custom Fields
-
-To filter by custom fields, begin by selecting the custom field you'd like to use. Then, type the field contents you'd like to filter by under _Custom Field Value_. This will only show results that have these contents. When you're finished, press _Add Custom Field_. You can repeat this process with multiple custom fields until you're happy with the way you've filtered your search.
-
-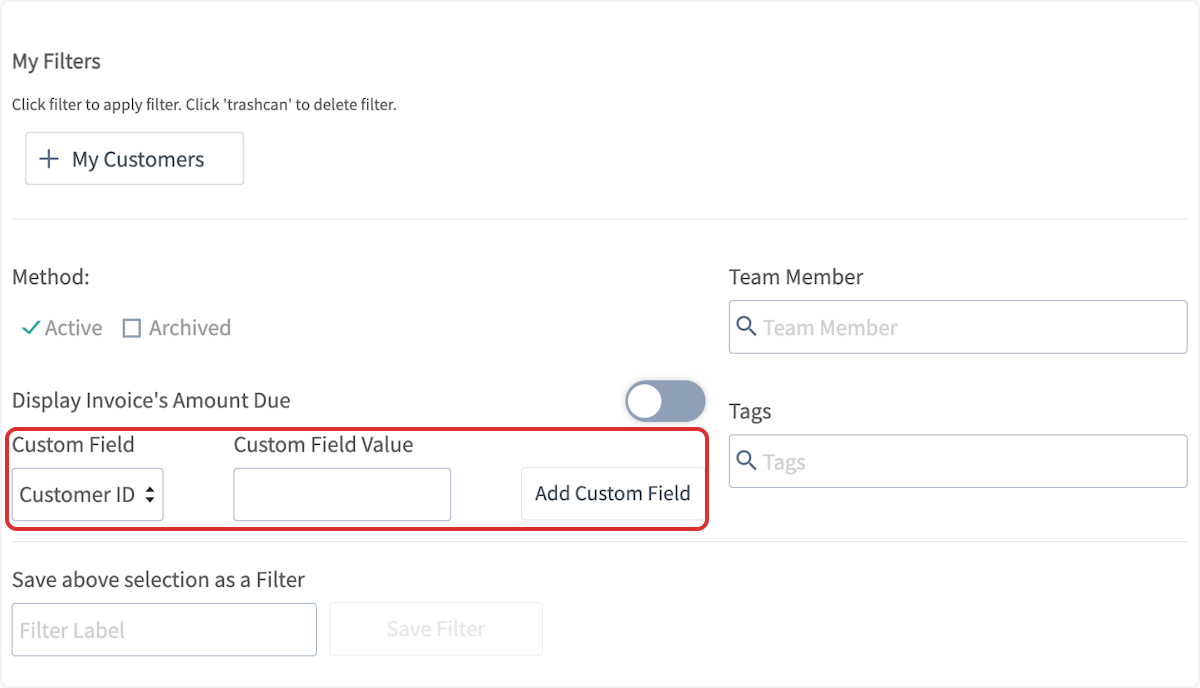
-
-### My Filters
-
-After filtering by a variety of fields, you can easily save your filter for future use. Name your filter under _Save above selection as Filter_, then press _Save Filter_.
-
-
-
-When you're ready to use one of your saved filters again, you can find it under _My Filters_.
-
-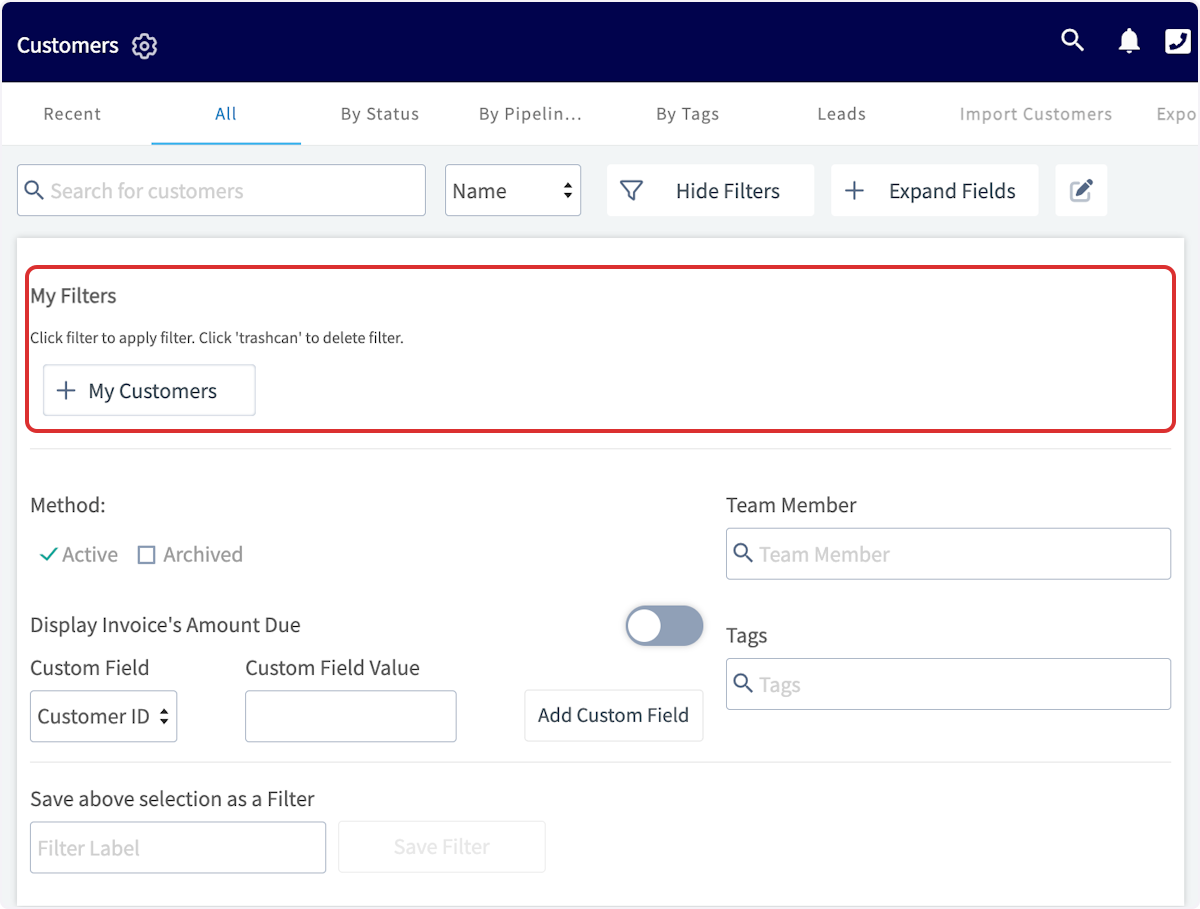
-
----
-
-**Have additional questions?**
-
-_Contact us at [support@fieldpulse.com](mailto:support@fieldpulse.com) or use the chat feature in the bottom right corner of your screen._
\ No newline at end of file
Offline Mode Overview
- Module: General UI/UX
- File:
offline-mode-overview.mdx - Intercom URL: https://help.fieldpulse.com/en/articles/4063488-offline-mode-overview
- Last modified: 2026-03-30
Index: offline-mode-overview.mdx
===================================================================
--- offline-mode-overview.mdx existing
+++ offline-mode-overview.mdx intercom
@@ -1,29 +0,0 @@
-If you lose internet connection while out in the field, you can continue using the FieldPulse mobile app in our Offline Mode. The FieldPulse app will automatically switch to Offline Mode when you're out of cell range or in Airplane Mode.
-
-Once you reconnect to the internet, the data you entered in offline mode will sync with the rest of your FieldPulse information.
-
-## Visit each article below to view what can be done in Offline Mode
-
-- [Customers, Jobs, & Projects](/core-platform/customers/communications/offline-mode)
-
-- [Custom Forms](/core-platform/general-ui-ux/custom-forms-offline-mode)
-
-- [Estimates & Invoices](/core-platform/general-ui-ux/estimates-invoices-offline-mode)
-
-<Frame caption="Offline Mode">
- <iframe
- src="https://www.loom.com/embed/99d66edf262040e7bbc410cf13468859?hide_owner=true&hide_share=true"
- title="Video: Offline Mode"
- className="w-full rounded-lg"
- style={{aspectRatio: "16/9", border: "none"}}
- loading="lazy"
- allow="fullscreen"
- allowFullScreen
- />
-</Frame>
-
----
-
-**Have additional questions?**
-
-_Contact us at [support@fieldpulse.com](mailto:support@fieldpulse.com) or use the chat feature in the bottom right corner of your screen._
\ No newline at end of file
Inventory Hubs
- Module: Item List/Inventory/Hubs
- File:
inventory-hubs.mdx - Intercom URL: https://help.fieldpulse.com/en/articles/8892679-inventory-hubs
- Last modified: 2026-03-10
Index: inventory-hubs.mdx
===================================================================
--- inventory-hubs.mdx existing
+++ inventory-hubs.mdx intercom
@@ -1,65 +0,0 @@
-In FieldPulse, a hub serves as a designated location where you store your inventory. This could be a workshop, truck, van, office, or warehouse. Your business might utilize a single hub or multiple hubs. Many companies establish hubs for each of their work trucks or vans, along with a central hub for their office or warehouse. This approach enables monitoring when a driver's vehicle requires additional stock.
-
-By tracking stock movements between the warehouse and hubs, you can strategically determine when to reorder supplies. Consider the flexibility to set up replenishment levels specific to the inventory at each hub. This allows you to maintain lower quantities in trucks for immediate use while storing bulk stock in the warehouse. You can then initiate replenishment orders when inventory levels reach predefined thresholds, ensuring seamless operations and avoiding stock-outs.
-
----
-
-## Setting Up Hubs
-
-Navigate to _Company Settings_, then select _Estimates & Invoices_. From here, select _Inventory_, then click on _Inventory Settings_.
-
-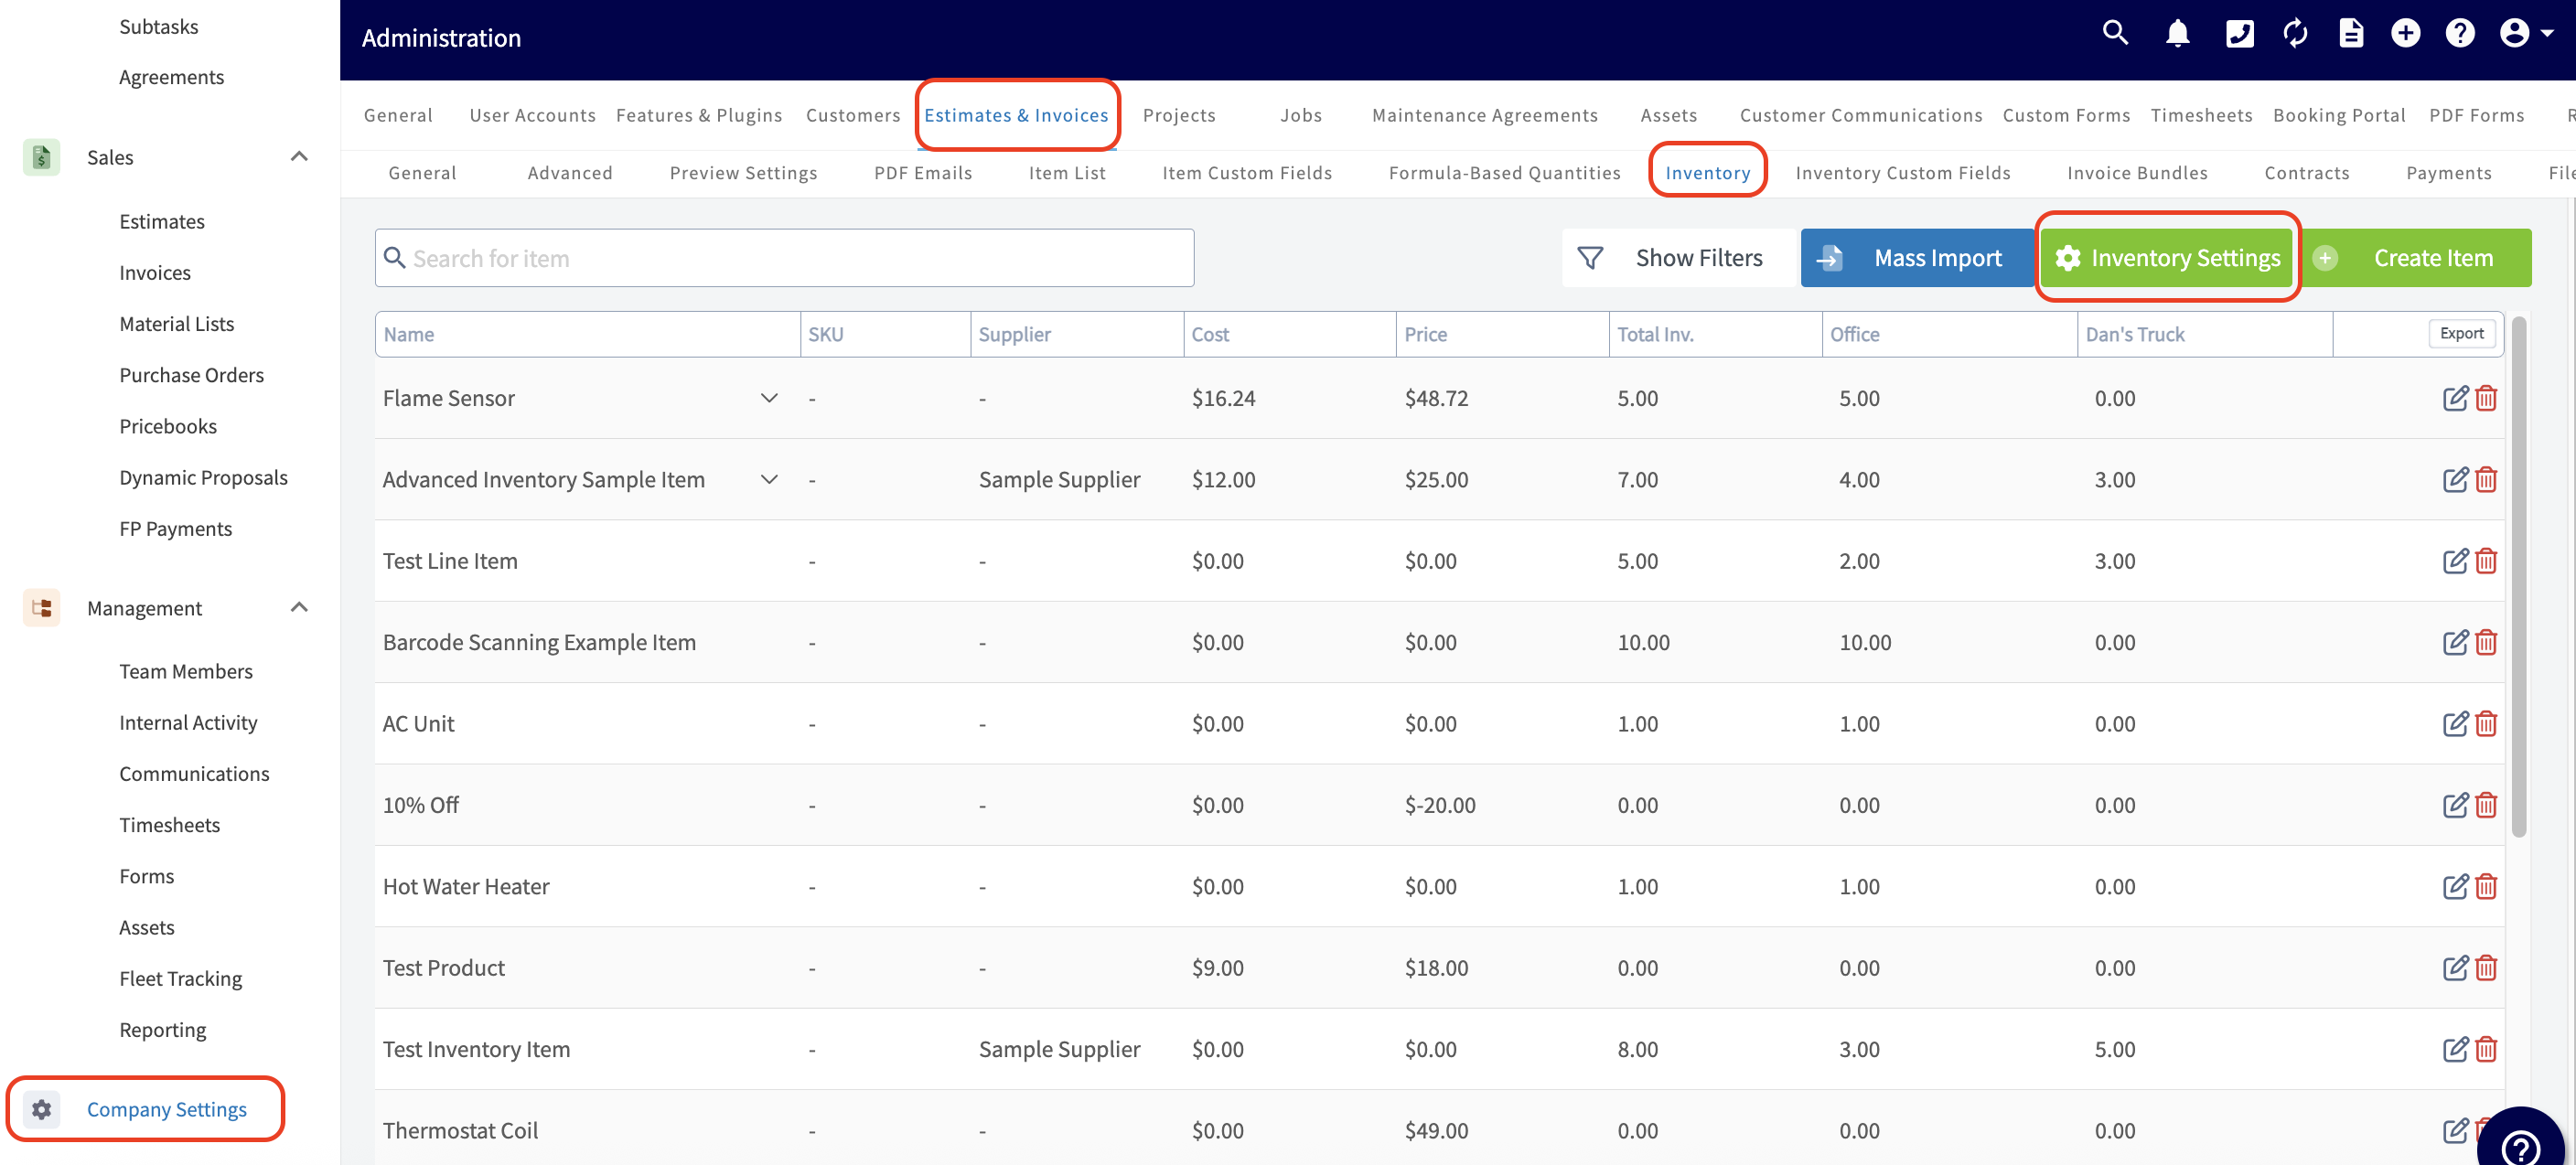
-
-Here, you can toggle on _Enable Multiple Inventory Hubs_ and then select _Add New Hub_.
-
-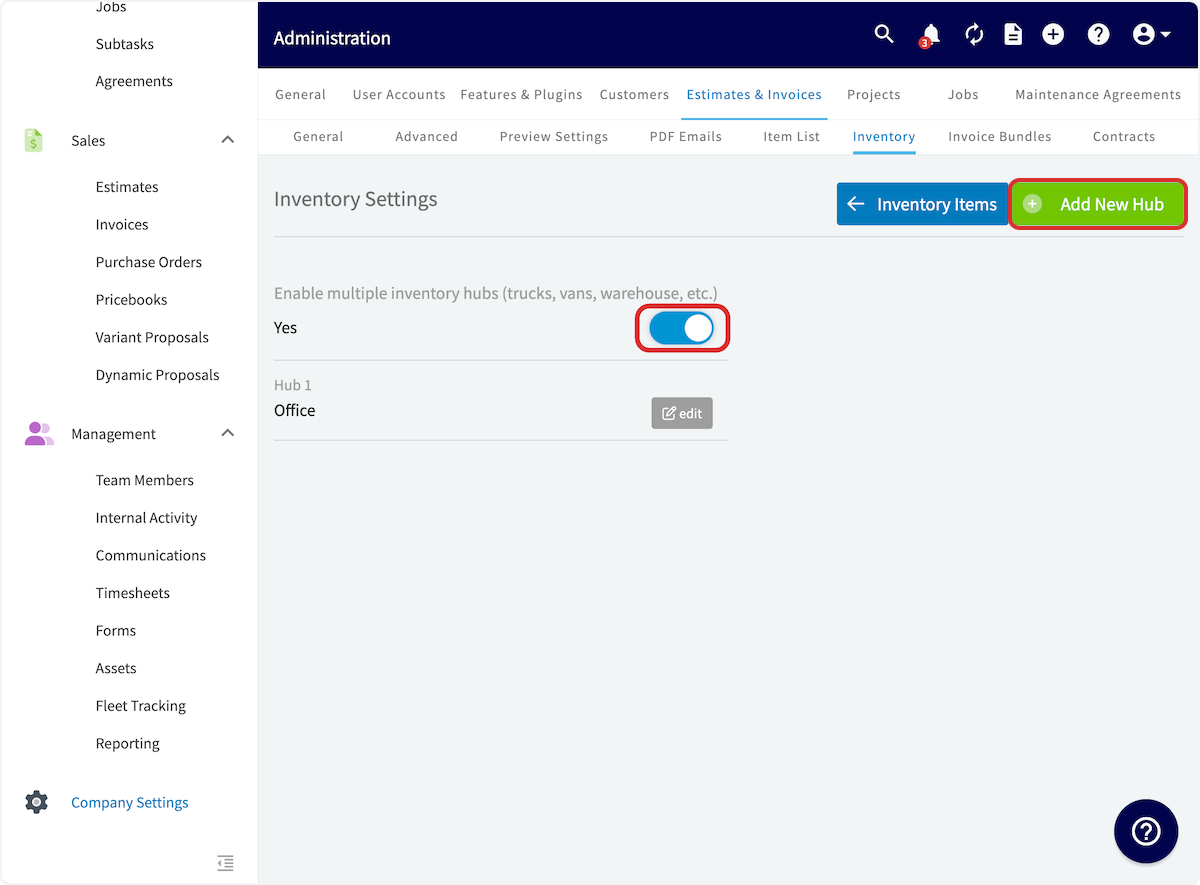
-
-Now, you can name your hub \[ex. Chris's Truck; South Dallas Warehouse\] as well as assign users to this hub. _( **Note:** A hub can have multiple team members assigned to it, but **each user can only be assigned to one hub**.)_
-
-Each user can only be assigned to one hub because [auto-replenishment](/core-platform/purchase-orders/purchase-orders) (if enabled) will deduct the line items used on invoices from their associated hub and create a [purchase order](/core-platform/purchase-orders/purchase-orders) when the inventory at that hub drops below the designated threshold.
-
-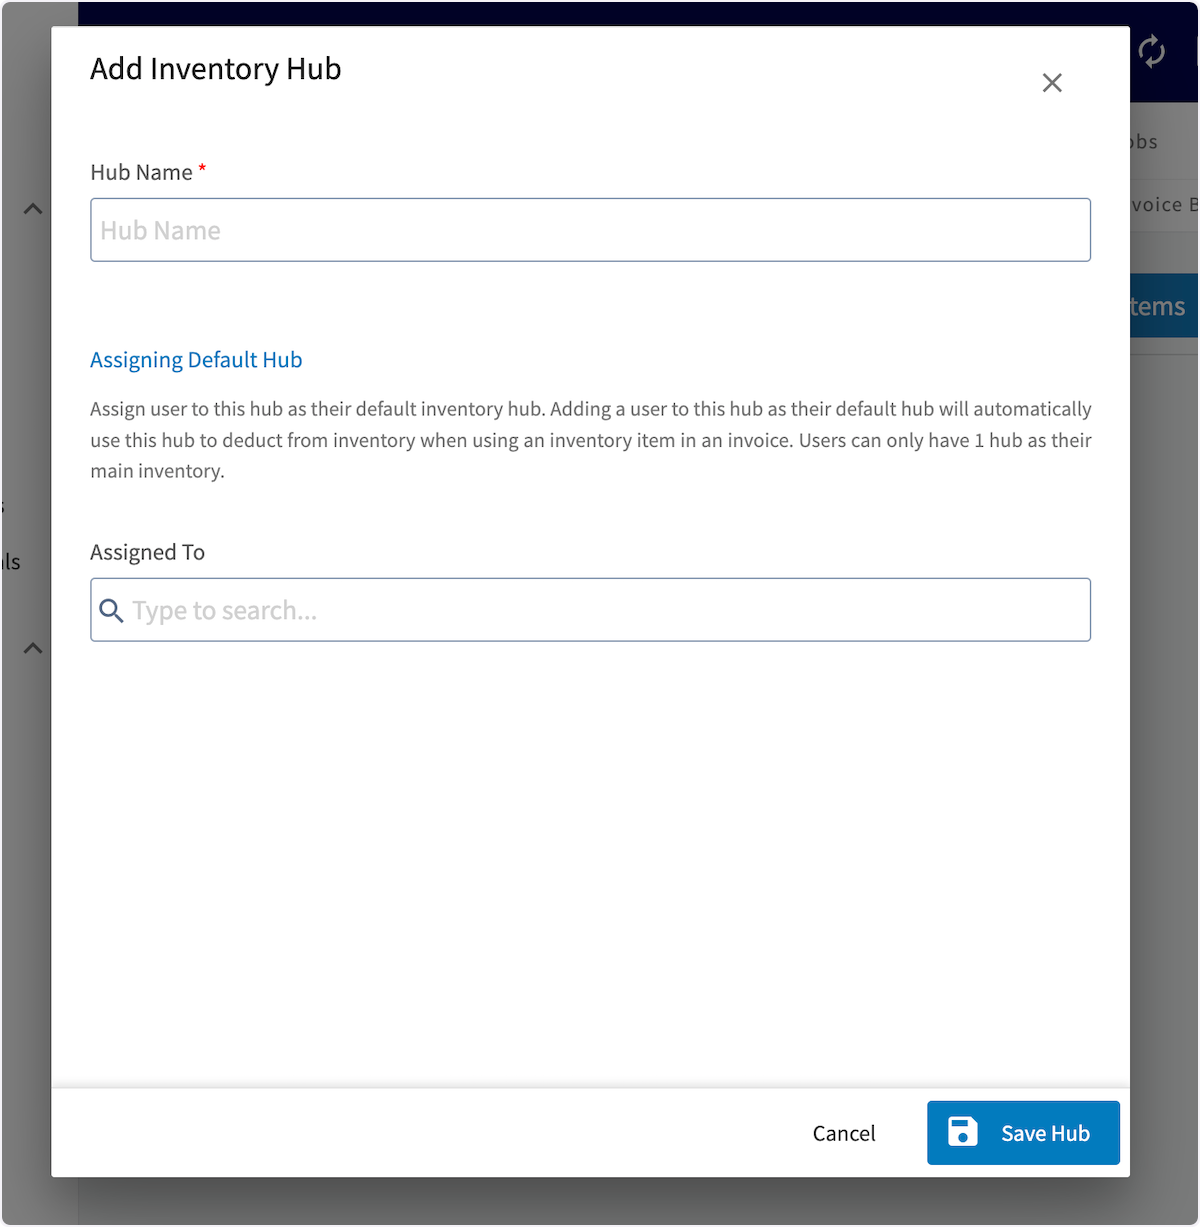
-
----
-
-## Adding Inventory to Hubs
-
-To add inventory to a hub, begin by navigating to _Invoices_ in the left-side menu, then selecting _Inventory_. Click the pencil icon to edit the line item you wish to update. You can also add inventory to hubs when creating a new line item.
-
-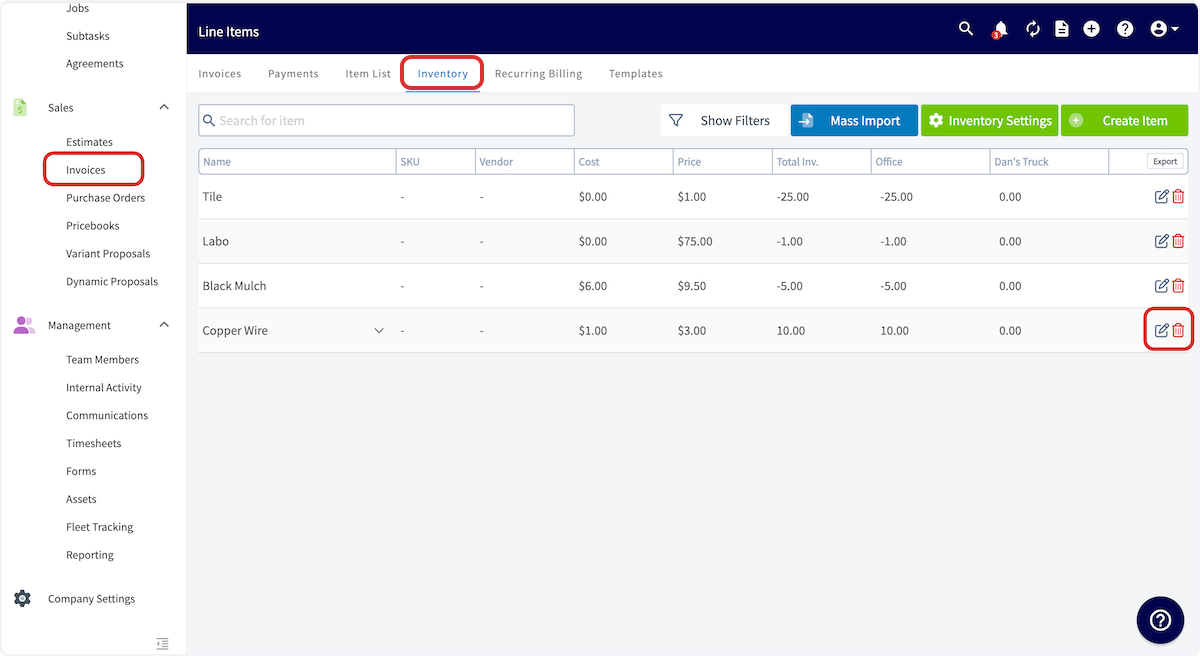
-
-You can select _Add Hub_ to add a new hub to store the line item.
-
-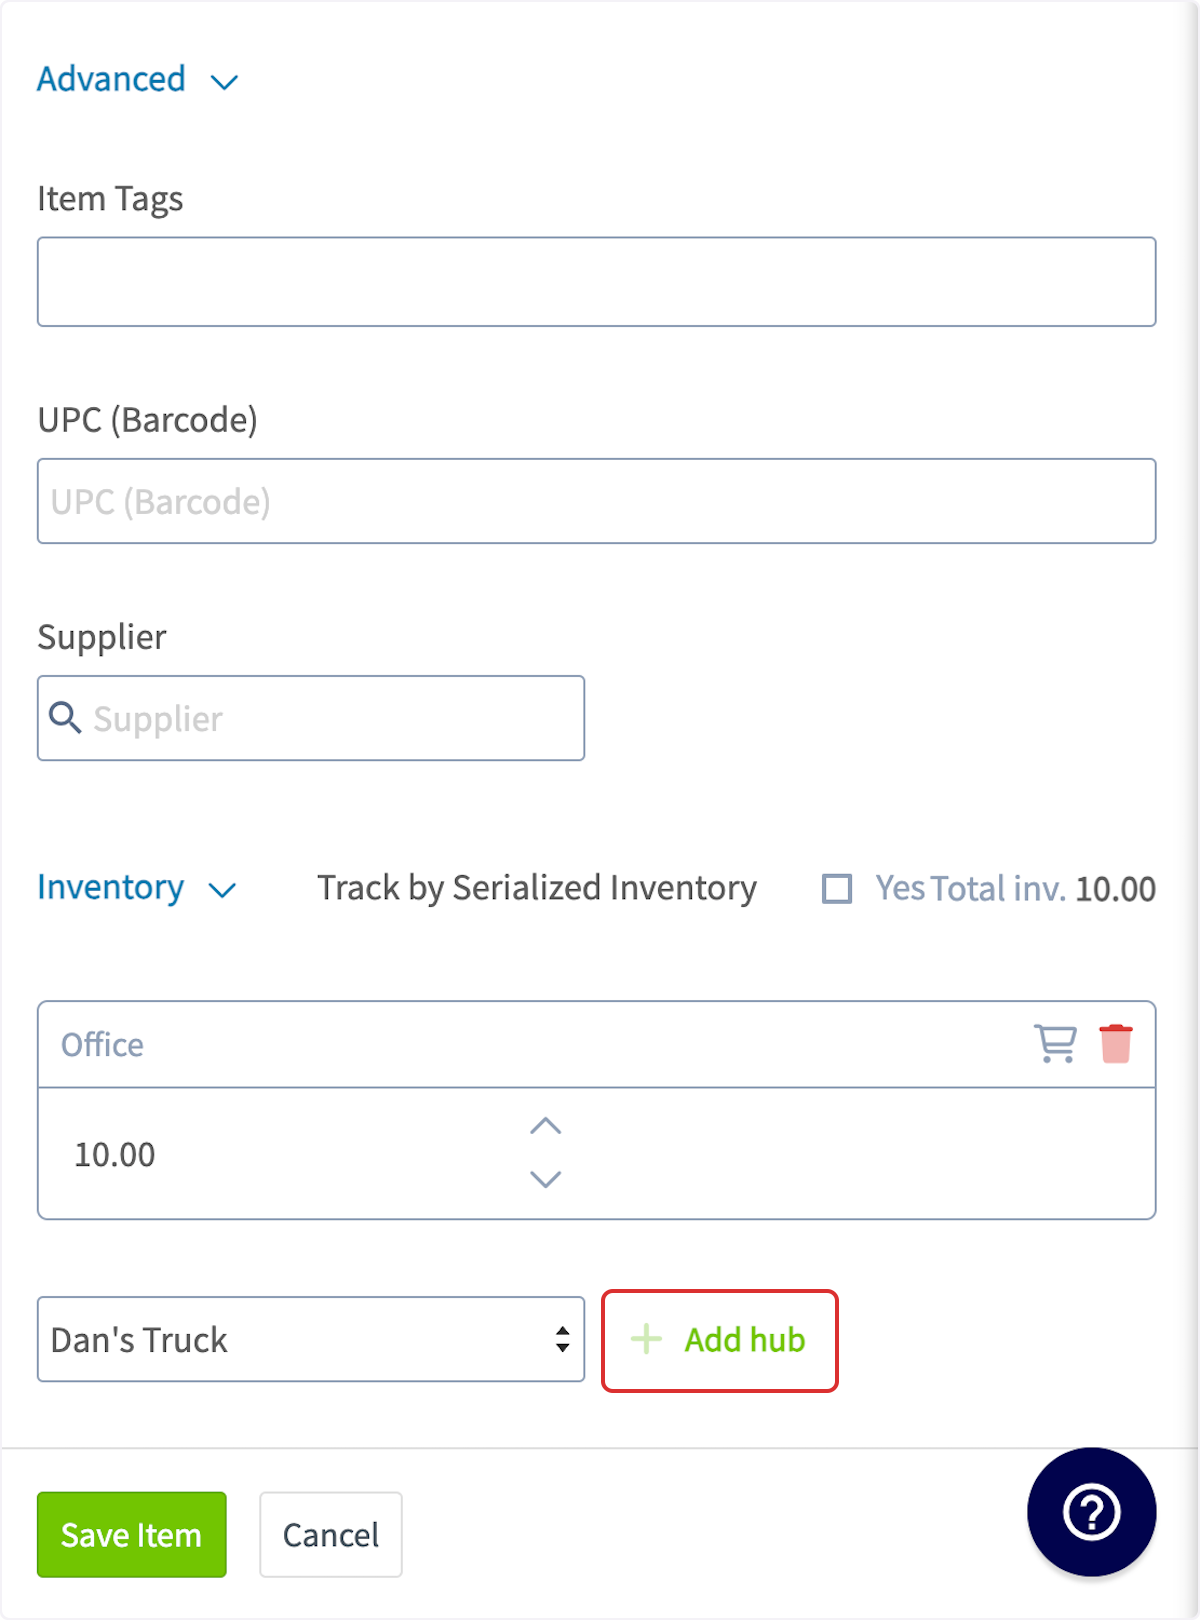
-
-You can also can use the up & down arrows to adjust stock within each hub or select the purple boxes icon to reallocate inventory between your hubs.
-
-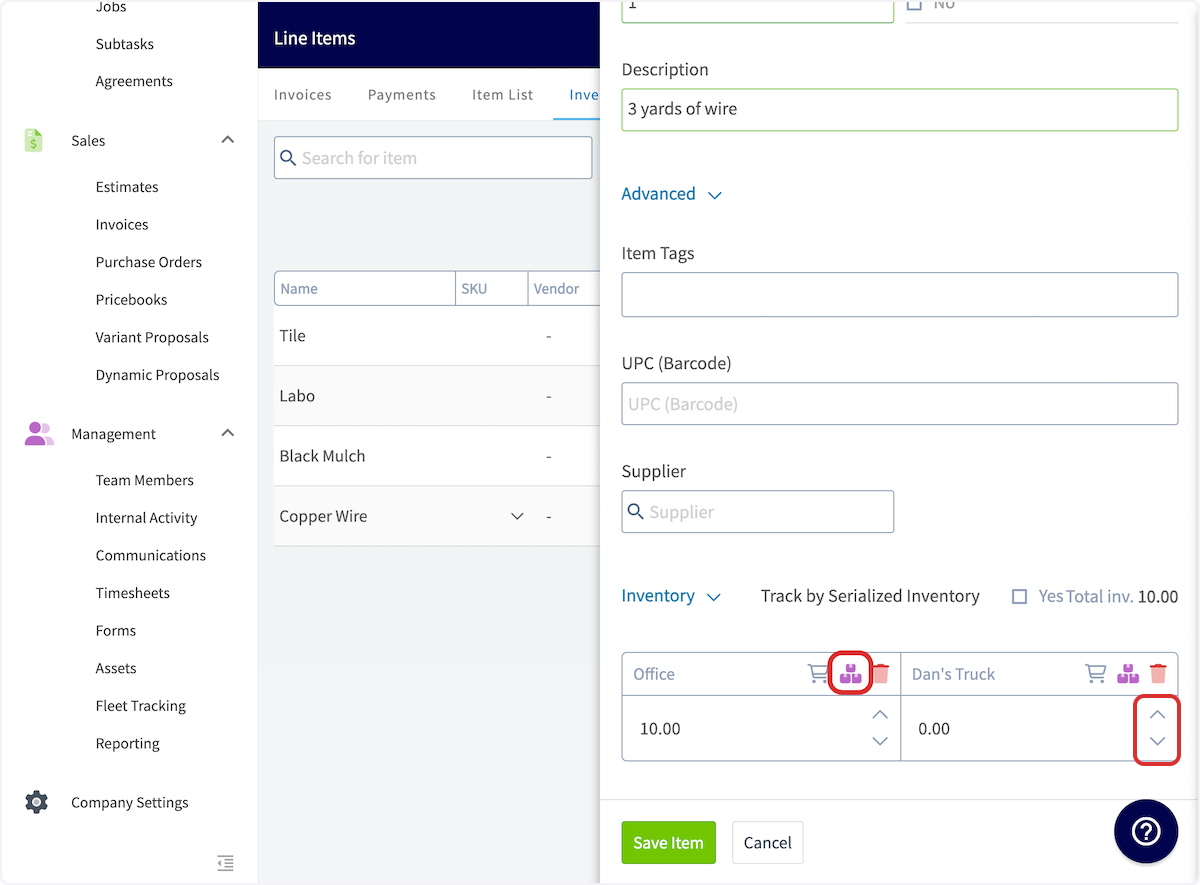
-
-To reallocate inventory between hubs, use the pop-up to adjust quantities between locations, then press _Save_.
-
-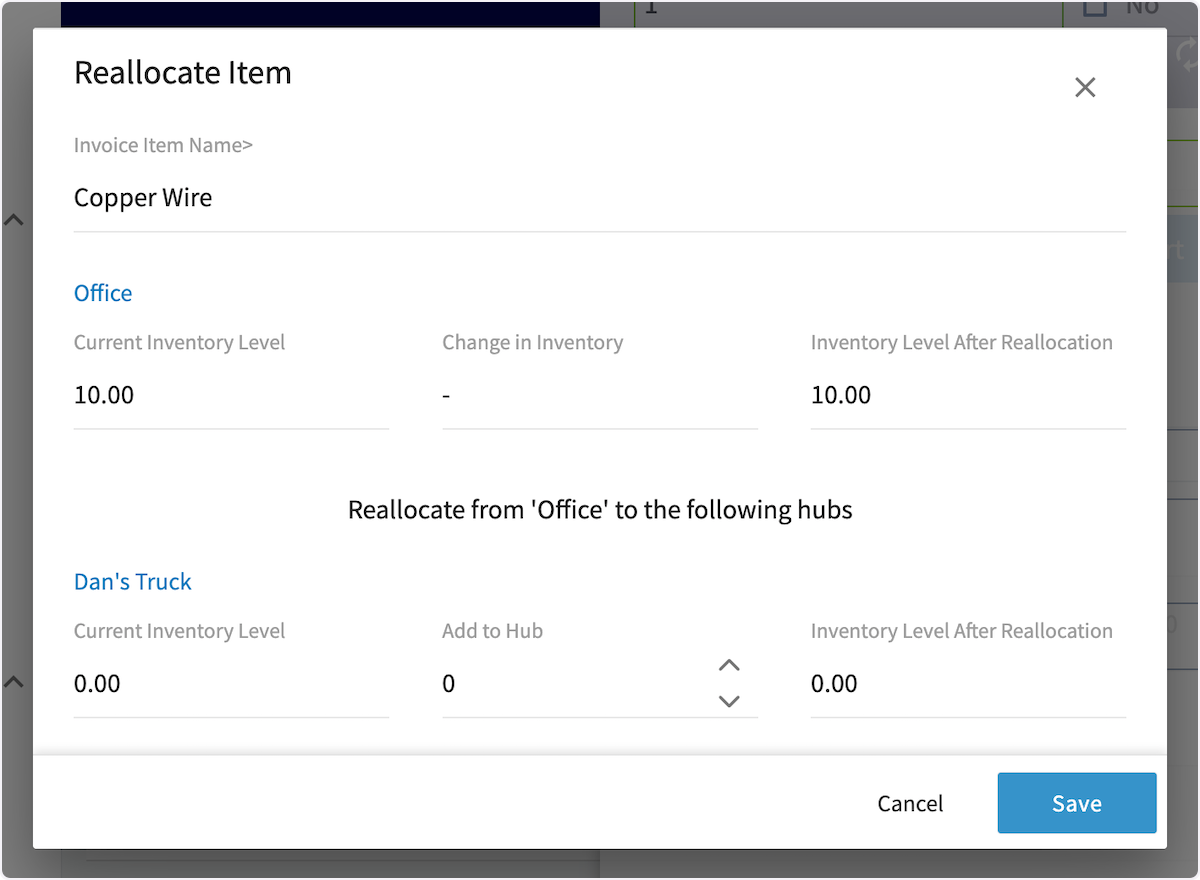
-
-After adding hubs and adjusting inventory, be sure to save the line item.
-
----
-
-## Video Tutorial
-
-<Frame caption="Inventory Hubs">
- <iframe
- src="https://www.loom.com/embed/f22f7abfb3af48dbbc1b1d19786c152c?hide_owner=true&hide_share=true"
- title="Video: Inventory Hubs"
- className="w-full rounded-lg"
- style={{aspectRatio: "16/9", border: "none"}}
- loading="lazy"
- allow="fullscreen"
- allowFullScreen
- />
-</Frame>
-
----
-
-**Have additional questions?**
-
-_Contact us at [support@fieldpulse.com](mailto:support@fieldpulse.com) or use the chat feature in the bottom right corner of your screen._
\ No newline at end of file
Barcode Scanning
- Module: Item List/Inventory/Hubs
- File:
barcode-scanning.mdx - Intercom URL: https://help.fieldpulse.com/en/articles/8909267-barcode-scanning
- Last modified: 2026-03-19
Index: barcode-scanning.mdx
===================================================================
--- barcode-scanning.mdx existing
+++ barcode-scanning.mdx intercom
@@ -1,73 +0,0 @@
-When creating estimates or invoices, use barcode scanning to swiftly add items and quickly retrieve relevant details like pricing, descriptions, and SKU numbers. This speeds up the invoicing process, minimizes mistakes, and enhances overall efficiency. Additionally, enhance your line item records by incorporating barcode digits, allowing for fast and accurate item list updates.
-
----
-
-## Barcode Scanning for Estimates & Invoices
-
-To utilize barcode scanning when adding items to estimates and invoices, begin by opening a new estimate or invoice in the mobile app. Scroll down and select _Add Line Item._
-
-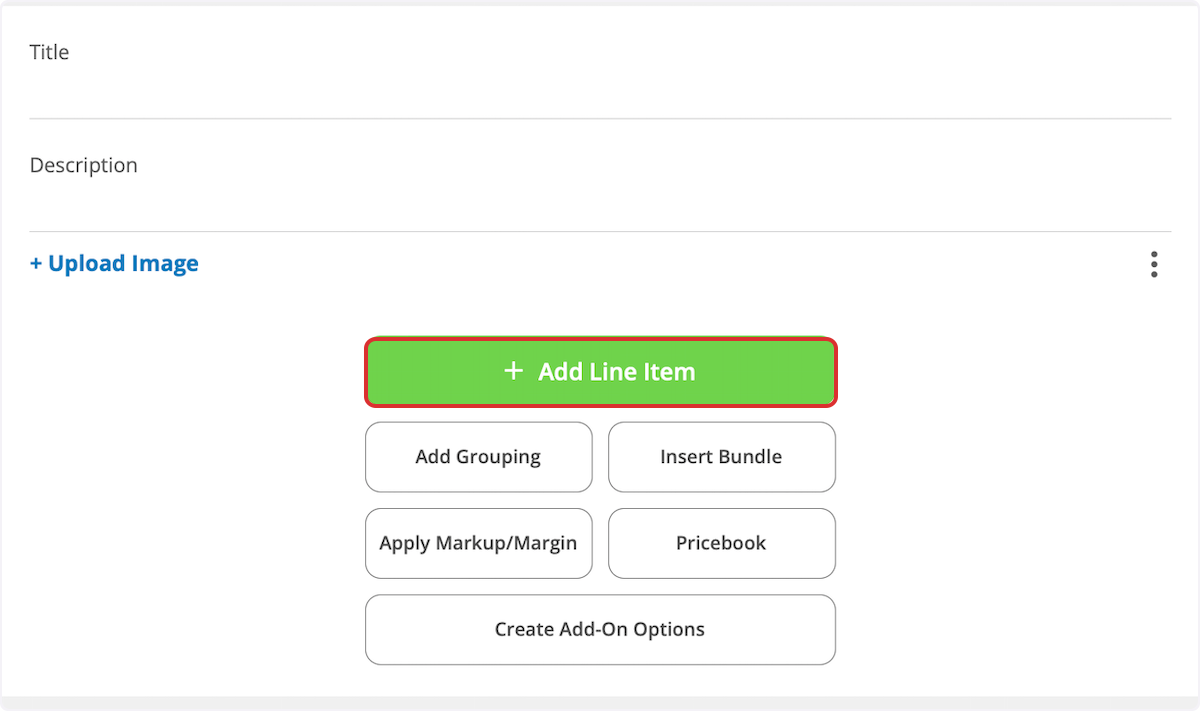
-
-Select the _Scan Barcode_ icon.
-
-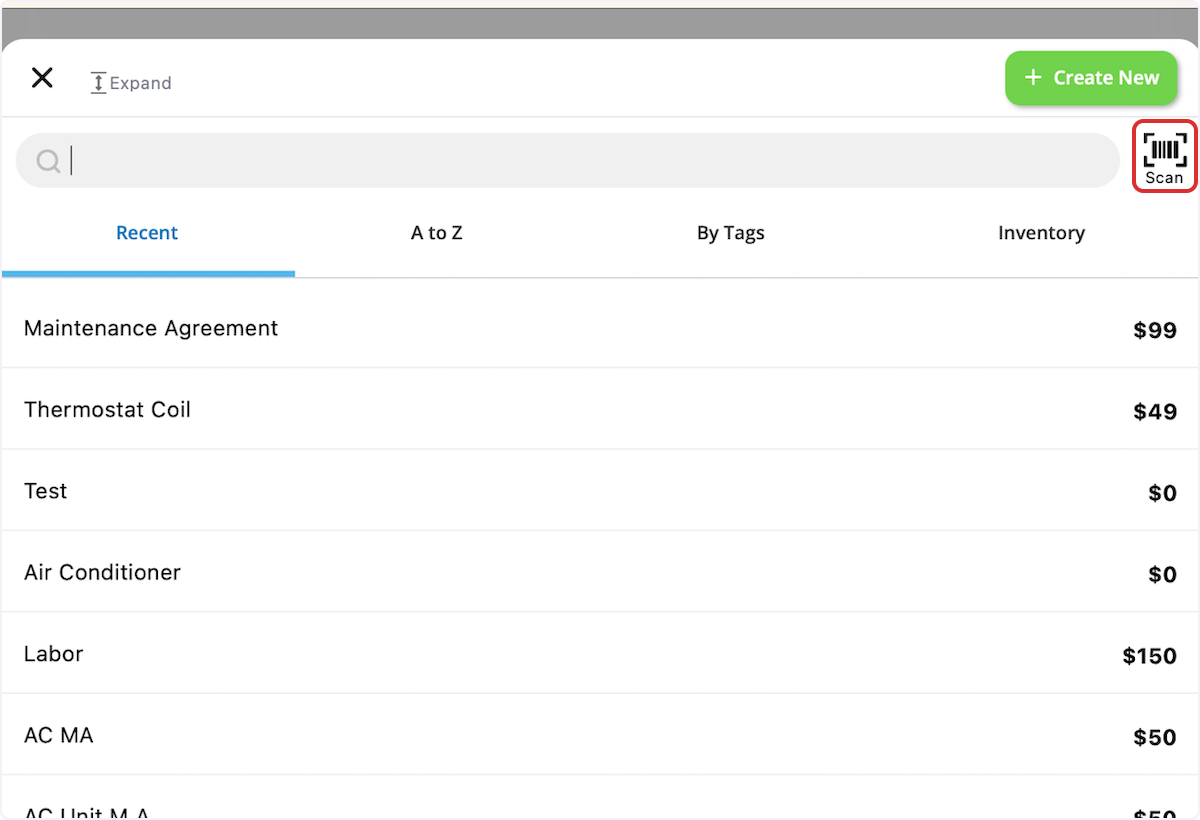
-
-Your device camera will now be used to scan the barcode. If the barcode does not exist in your system, it will read _No Results Found_. You can then select _Create New Item_.
-
-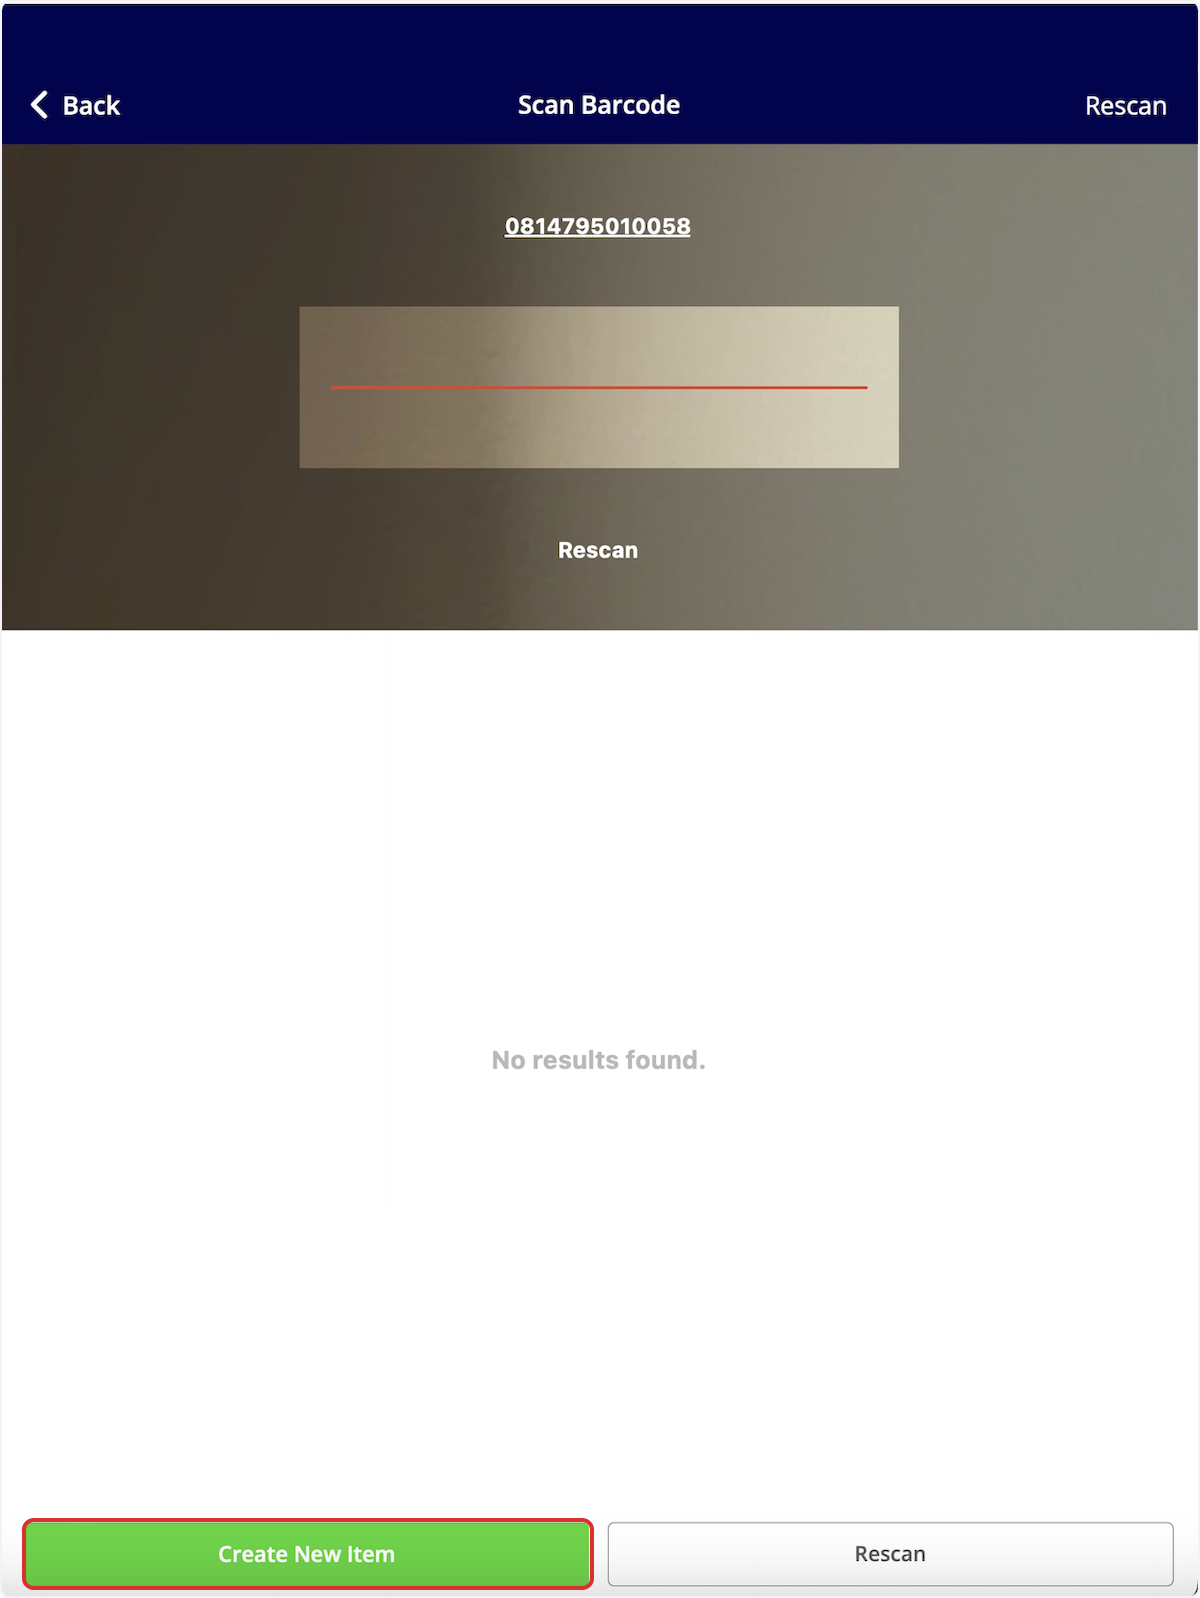
-
-Enter the item name, type, SKU (if applicable), unit cost, unit price, and description. Notice that the barcode you scanned has been auto-populated in the _UPC (Barcode)_ Field. When you're finished, save the item and select _Add Item_. This will save the item in your item list and add it to the current estimate or invoice.
-
-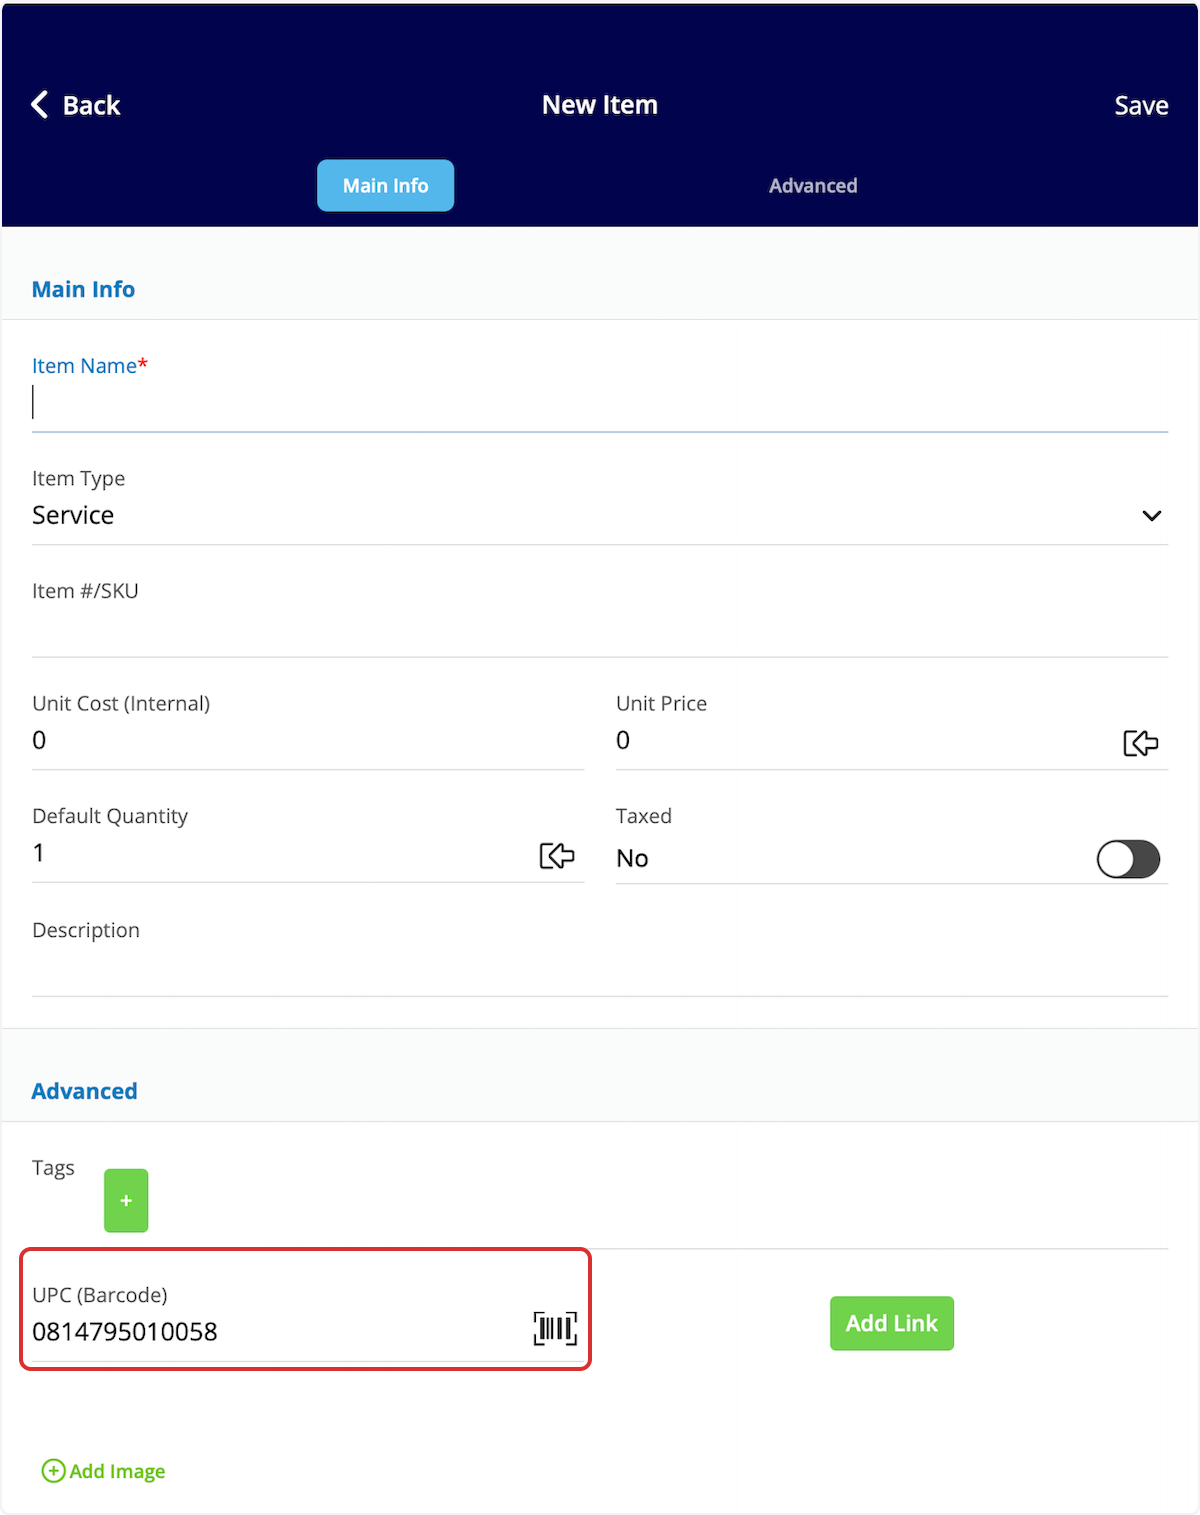
-
-If you search a barcode that is already in your system, you can see/adjust the details, as well as easily select the _Add Item_ button to include it in your estimate or invoice.
-
-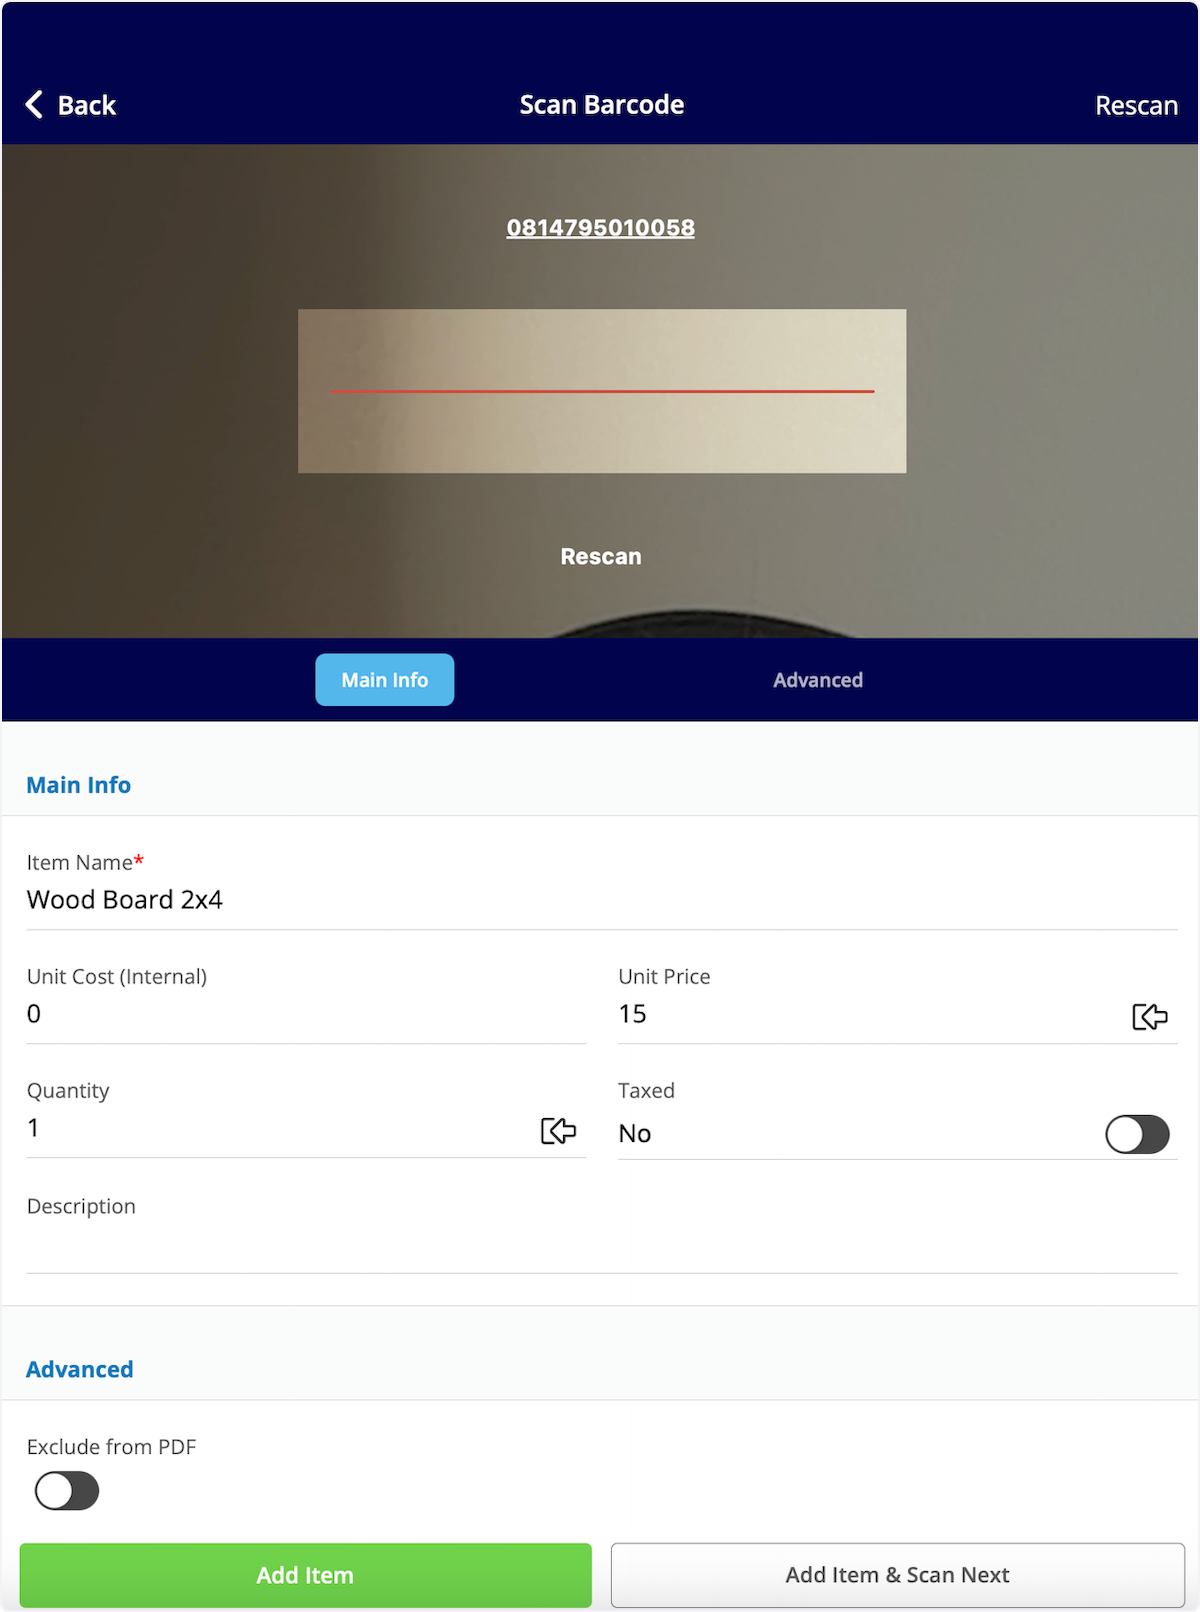
-
----
-
-## Barcode Scanning for Item List Management
-
-To easily update or add line items, use the barcode scanner. Our barcode scanner feature makes finding line items efficient and allows you to update your costs, pricing, inventory, and inventory location quickly.
-
-To get started, select _Full Menu_ then navigate to your _Item List_ in the mobile app. From here, select the _Scan Barcode_ icon.
-
-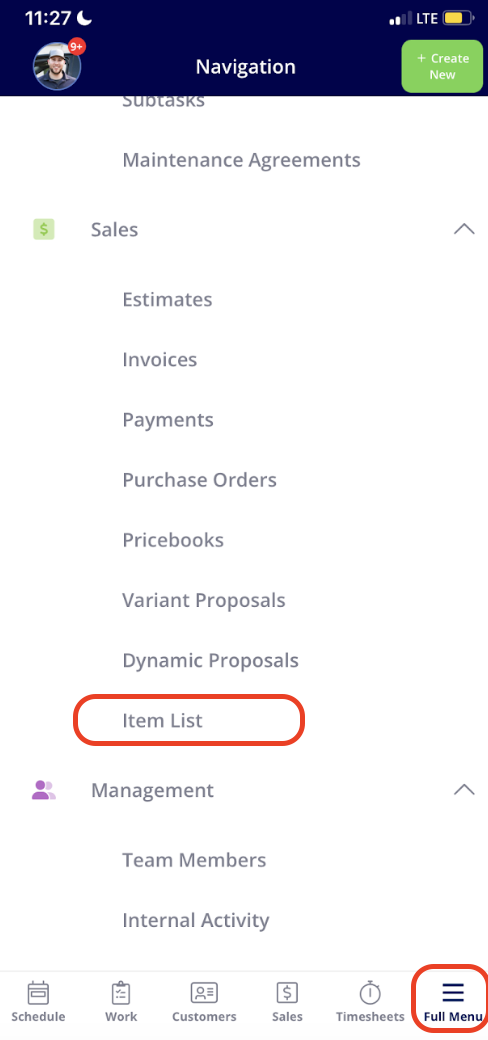
-
-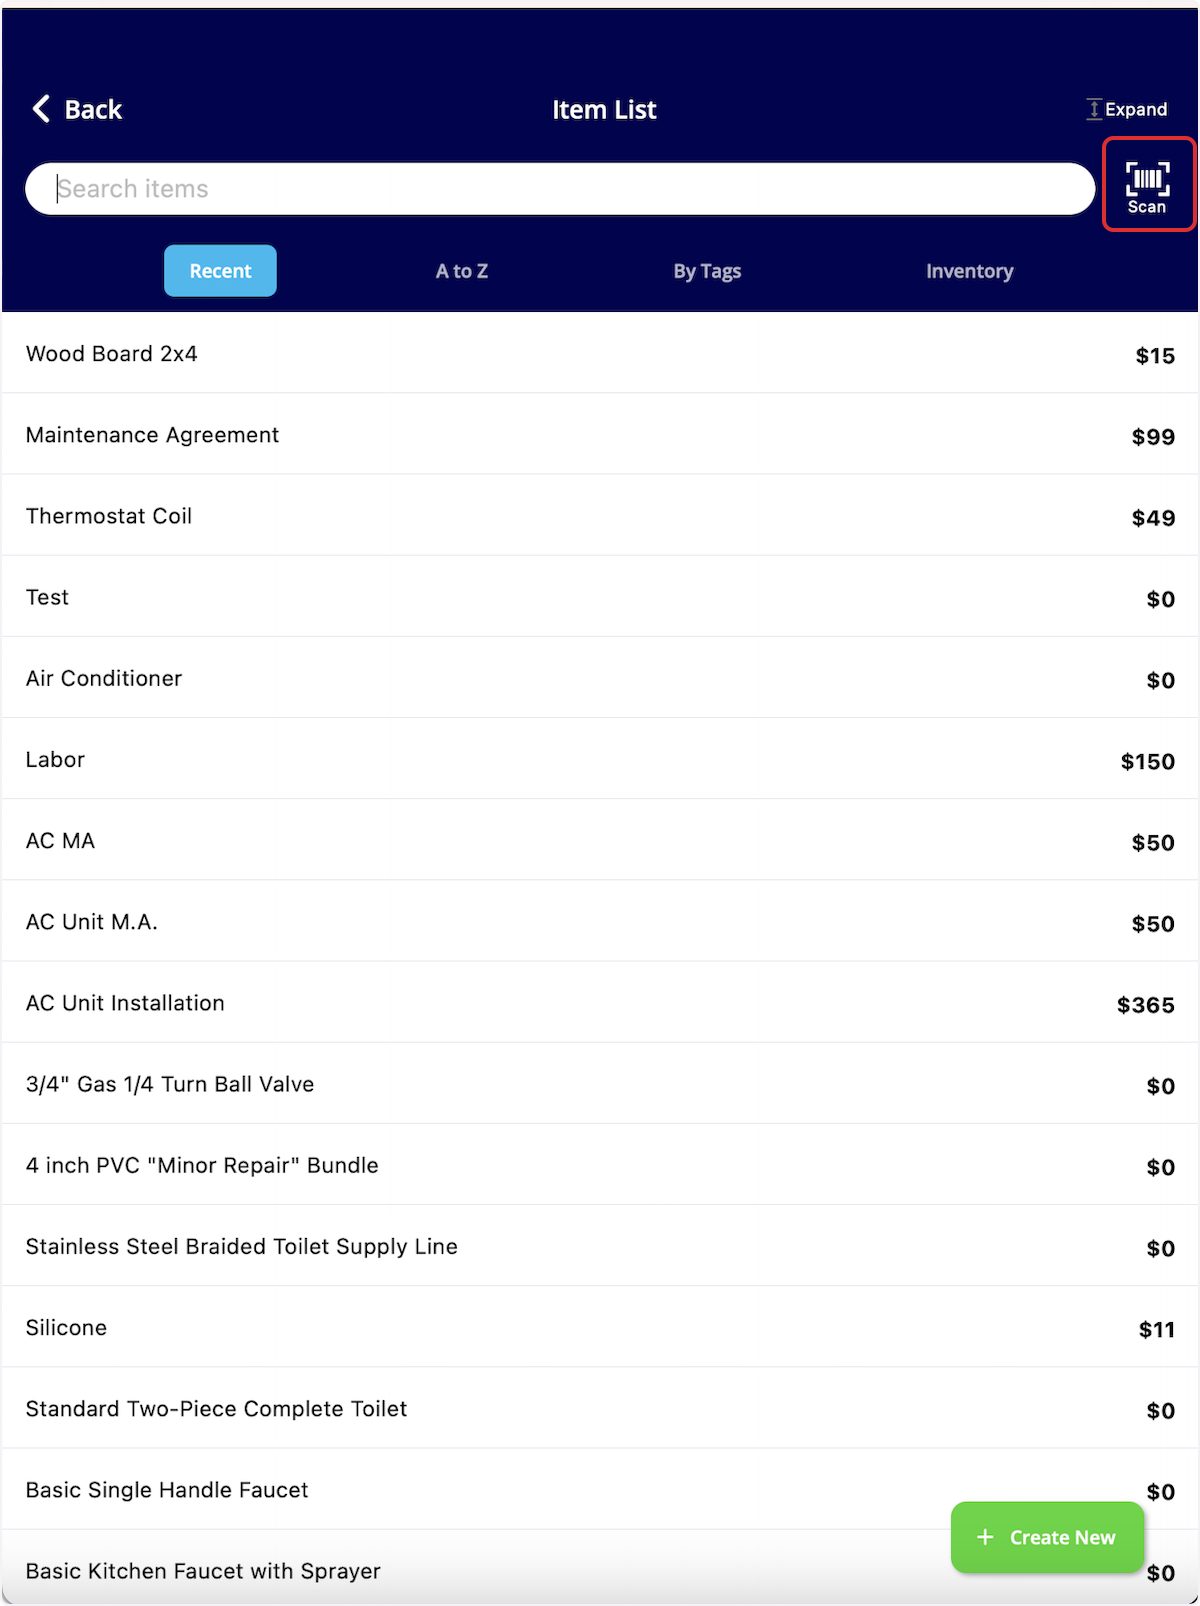
-
-Your device camera will now be used to scan the barcode. If the barcode does not exist in your system, it will read _No Results Found_. You can then select _Create New Item_.
-
-If you search a barcode that is already in your system, you can easily adjust the item name, cost, and price, as well as easily select the _Open Full Item_ button to update other details of this item such as inventory.
-
-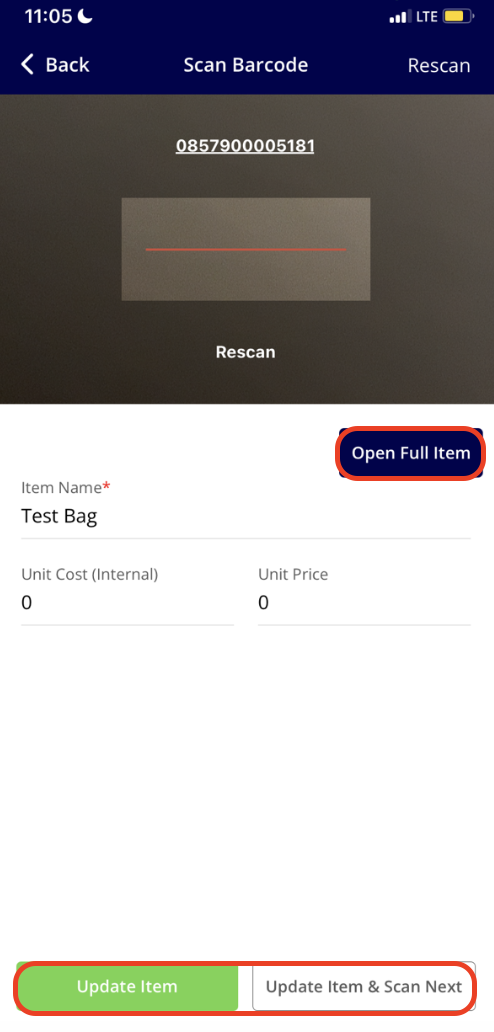
-
-When clicking on _Open Full Item_, you can make edits to the _Main Info_, _Advanced_, and _Pricing Options_ tabs.
-
-
-
-In the _Inventory_ section below, you can adjust the counts of each inventory hub.
-
-
-
----
-
-## Video Tutorial
-
-<Frame caption="Barcode Scanning">
- <iframe
- src="https://www.loom.com/embed/f05a2683e9434367962c75872230349c?hide_owner=true&hide_share=true"
- title="Video: Barcode Scanning"
- className="w-full rounded-lg"
- style={{aspectRatio: "16/9", border: "none"}}
- loading="lazy"
- allow="fullscreen"
- allowFullScreen
- />
-</Frame>
-
----
-
-**Have additional questions?**
-
-_Contact us at [support@fieldpulse.com](mailto:support@fieldpulse.com) or use the chat feature in the bottom right corner of your screen._
\ No newline at end of file
User Roles
- Module: User Management
- File:
user-roles.mdx - Intercom URL: https://help.fieldpulse.com/en/articles/1184690-user-roles
- Last modified: 2026-04-16
Index: user-roles.mdx
===================================================================
--- user-roles.mdx existing
+++ user-roles.mdx intercom
@@ -1,201 +0,0 @@
-There are multiple user roles that you can assign to team members on FieldPulse depending on their role in your business. Each user role comes with different permissions and capabilities within FieldPulse. As an administrator, you can customize what each user will have access to.
-
----
-
-## **Administrator**
-
-Administrators have full access to the FieldPulse account. This role is best assigned to the company owner and the office manager. Their permissions include:
-
-- _Full account access_
-
-- _Update and change FieldPulse billing preferences_
-
-- _Create and edit customers_
-
-- _Create and edit jobs and subtasks_
-
-- _Create, edit, and send estimates and invoices_
-
-- _Create, edit, and send purchase orders_
-
-- _Create, edit, archive, and view assets_
-
-- _View and edit team schedules_
-
-- _View and edit all customers_
-
-- _View team member geolocation tags_
-
-- _Track, edit, and view team timesheets_
-
-- _Full reporting capabilities_
-
-### Not seeing the Admin role?
-
-When you go to add a new user, under the _Role_ drop down, you will select _Team Manager_. You will notice a field to the left appear that says _Assign as Company Admin_. You will toggle that on if you want to assign this user as an admin.
-
-
-
----
-
-## **Team Manager**
-
-Team Managers can create and assign work to their team members. Each Team Manager can be assigned to lead multiple teams. They do not have the ability to view _Company Settings_ or other teams' schedules. Their permissions include:
-
-- **Customers:**
-
- - _Create, edit, and view customer list_
-
- - View all customer communications
-
- - View inbound leads list
-
-- **Work:**
-
- - _Create, edit, and view jobs assigned to them and their team_
-
-- **Sales:**
-
- - _View item list and create line items_
-
- - _View, adjust, and/or count inventory items at other hubs_
-
- - _Create, edit, and view estimates and invoices_
-
- - _View unit cost and/or price on estimates and invoices_
-
- - _Create, edit, and send purchase orders_
-
- - _Create, edit, archive, and view assets_
-
- - _Use pricebook_
-
- - _Hide line items in groupings from the pricebook (mobile app only)_
-
- - _Make FieldPulse Payments and/or refunds_
-
-- **Other:**
-
- - _Use timesheets_
-
- - _View internal activity on records_
-
- - _Create and view notes (personal and company-wide)_
-
- - _Ability to use the reporting feature_
-
-The permissions listed below are standard for team managers but can be toggled on/off to meet your needs. To learn where to make these changes, visit the [Adding New Users article](/core-platform/user-management/adding-new-users).
-
-
-
-
-
----
-
-## **Service Agent**
-
-The Service Agent role is designed for technicians out in the field. Their permission settings can be adjusted as desired. Their permissions can include:
-
-- **Customers:**
-
- - _View assigned customer profiles_
-
- - _Call or SMS customers from native phone_
-
-- **Work:**
-
- - _Create jobs assigned to themselves_
-
- - _Open jobs assigned to other user from the customer profile_
-
- - _Create job reports_
-
- - _Create subtasks on assigned jobs_
-
- - _Edit subtasks created by other users_
-
- - _View subtasks not assigned to them on jobs_
-
- - _Create and view maintenance agreements_
-
-- **Sales:**
-
- - _View item list and create line items_
-
- - _View, adjust, and/or count inventory items at other hubs_
-
- - _Create, edit, and view the estimates and invoices for their assigned jobs_
-
- - _View unit cost and/or the price of items on estimates and invoices_
-
- - _Create, edit, and send purchase orders_
-
- - _Create, edit, archive, and view assets_
-
- - _Use pricebook_
-
- - _Hide line items in groupings from the pricebook (mobile app only)_
-
- - _Make FieldPulse Payments and/or refunds_
-
-- **Other:**
-
- - _Track time and timesheets_
-
- - _View internal activity on records_
-
- - _Create and view notes (personal and company-wide)_
-
-The permissions listed are standard for service agents but can be toggled on/off to meet your needs. To learn where to make these changes, visit the [Adding New Users article](/core-platform/user-management/adding-new-users).
-
-
-
-
-
-**_Ability to View Customer List Page_ Toggle**
-
-- **Functionality**: When this permission is enabled, Service Agents will see a **Customer List** tab in their sidebar.
-
-- **Visibility Control**: The customers displayed in this list are determined by the existing **_Customer List Visibility & Record Access_ Dropdown** setting in the User Feature Permissions. This ensures that agents only see customers they are permitted to view.
-
-- **Admin Control**: This feature gives Admin users greater control over what Service Agents can see, while maintaining tight visibility permissions.
-
----
-
-## **Limited Agent**
-
-The Limited Agent role is designed to see the work they are assigned via the mobile app only. This user can be assigned to a team. Their permissions can include:
-
-- _Upload files_
-
-- _Utilize both general and job timesheets_
-
-- _View customer name, location, job date/time, assigned team members, status, notes, field notes on job record, view job files_
-
- - Limited Agents can only see jobs they are directly assigned to. The schedule view for these users cannot be further customized.
-
- - If you as the business owner would like to restrict a Limited Agent’s visibility:
-
- - Do not assign the agent to the job until they are ready for them to view it.
-
- - Alternatively, consider upgrading the user to a Service Agent role to enable advanced schedule visibility controls.
-
-### Geostamp and Time Clock
-
-Limited agents can clock in and out, and a **geostamp** of their location will be captured, as long as the user has **location sharing enabled** for the FieldPulse app on their device.
-
-Location tracking is a standard feature of the time clock functionality. When any user, including a limited agent, clocks in or out, the system automatically captures a GPS stamp of their location. This helps verify where the user was when they started or ended their shift. The feature relies on the user's phone settings; if location services are disabled for the FieldPulse app, a geostamp will not be recorded.
-
----
-
-## **Assignment User**
-
-This user is designed to receive an email outlining the job details. This user does not have access to the FieldPulse app or the ability to use any of its functionality. Contractors are a great example of an Assignment User. Their permissions can include:
-
-- _Ability to be assigned to jobs, tasks, and subtasks_
-
----
-
-**Have additional questions?**
-
-_Contact us at [support@fieldpulse.com](mailto:support@fieldpulse.com) or use the chat feature in the bottom right corner of your screen._
\ No newline at end of file
Setting Up Google Single Sign On
- Module: User Management
- File:
google-single-sign-on.mdx - Intercom URL: https://help.fieldpulse.com/en/articles/10140217-setting-up-google-single-sign-on
- Last modified: 2026-04-15
Index: google-single-sign-on.mdx
===================================================================
--- google-single-sign-on.mdx existing
+++ google-single-sign-on.mdx intercom
@@ -1,19 +0,0 @@
-Google Single Sign On (SSO) simplifies the login process by allowing users to access FieldPulse securely with their existing Google credentials, reducing the need to remember multiple passwords.
-
----
-
-## Enabling Google SSO
-
-Navigate to _Company Settings_, then select _User Accounts_. Select the Sign in with Google tab, then toggle on Sign in with Google. You have the option to whitelist email domains. This restricts which email domains are allowed to sign into your accounts when using Google SSO. For example, if everyone at your company has an email address ending in @companyabc.com you would enter in companyabc.com as a whitelisted domain, and only users with this email domain can access your account.
-
-
-
-By default, Google SSO is optional for your users. If you want to require it for a user, navigate to _Company Settings_, then select _User Accounts,_ select a user and click _edit_, toggle on _Require to sign in with Google_.
-
-
-
----
-
-**Have additional questions?**
-
-_Contact us at [support@fieldpulse.com](mailto:support@fieldpulse.com) or use the chat feature in the bottom right corner of your screen._
\ No newline at end of file
Setting Up Two-Factor Authentication (2FA)
- Module: User Management
- File:
two-factor-authentication-2fa.mdx - Intercom URL: https://help.fieldpulse.com/en/articles/9197599-setting-up-two-factor-authentication-2fa
- Last modified: 2026-04-15
Index: two-factor-authentication-2fa.mdx
===================================================================
--- two-factor-authentication-2fa.mdx existing
+++ two-factor-authentication-2fa.mdx intercom
@@ -1,109 +0,0 @@
-Two-factor authentication (2FA) provides an added layer of security by requiring two forms of identification to access FieldPulse.
-
-**Starting January 8th 2025, Two-Factor Authentication (2FA) will be required for all users to enhance account security. Enable 2FA now to ensure uninterrupted access to your account.**
-
-## Benefits
-
-- **Extra Protection:** Adding a second check makes your account much safer, just like having two locks on your door.
-
-- **Keeping Up with the Rules**: This step helps us stay in line with new safety rules so that everyone's information stays private and secure.
-
-- **Peace of Mind:** With this update, you can worry less about the bad guys getting in, keeping your account and data smooth and secure.
-
----
-
-## Enabling Two-Factor Authentication
-
-Navigate to _Company Settings_, then select _User Accounts_. Select the _Two-Factor Authentication_ tab, then toggle on 2FA.
-
-You'll then need to specify how many days go by before automatically logging users out and having them go through 2FA again in the _Require Users to Login Using 2FA Every_ field.
-
-
-
-After 2FA is enabled and you press _Save_, you will be logged out. When logging back in, you will be required to set up 2FA with the Google Authenticator app.
-
-
-
----
-
-## Setting Up Two-Factor Authentication
-
-When a user logs in for the first time after two-factor authentication is turned on, a message with instructions on how to setup 2FA via Google Authenticator will appear. _(Note: Each of your team members will be required to go through this same process.)_
-
-Scan the QR code and follow the prompts or download the Google Authenticator app and type in the code.
-
-
-
-Notice that in step #4 pictured above, **after** your first log in utilizing an Authenticator app, you will then have the option to send yourself an SMS message (sent to the phone number associated on your FieldPulse profile user page) for future sign-ins.
-
-After setting up Google Authenticator, you will then enter the provided 6 digit code to login to FieldPulse.
-
-
-
-Lastly, FieldPulse will prompt you to download a file of recovery codes in case you lose your device.
-
----
-
-## Using Two-Factor Authentication
-
-If you have already connected FieldPulse to Google Authenticator, simply use the authenticator app to enter the 6-digit code and login to FieldPulse. After the initial sign-in using an Authenticator app, you will see a blue _here_ button on your screen during future sign-ins to allow you to text yourself a code to be entered. This option can save you time as you will no longer need to pull up a separate Authenticator application.
-
-
-
-After 3 unsuccessful login attempts, you will be prompted to enter a recovery code from the file of recovery codes provided to you when first setting up two-factor authentication. If you no longer have your recovery codes, contact an administrator on your account to reset your two-factor authentication.
-
----
-
-## Resetting Two-Factor Authentication
-
-If a team member has lost access to their device with the authenticator app, they should use their recovery codes. If these codes are lost, administrators can either reset a user’s 2FA or access and send them their recovery codes. Navigate to _Company Settings_, then select _User Accounts_. Click on the user that you'd like to reset, then click _Edit_. Scroll down to _2FA Recovery Codes_ or _Reset 2FA_.
-
-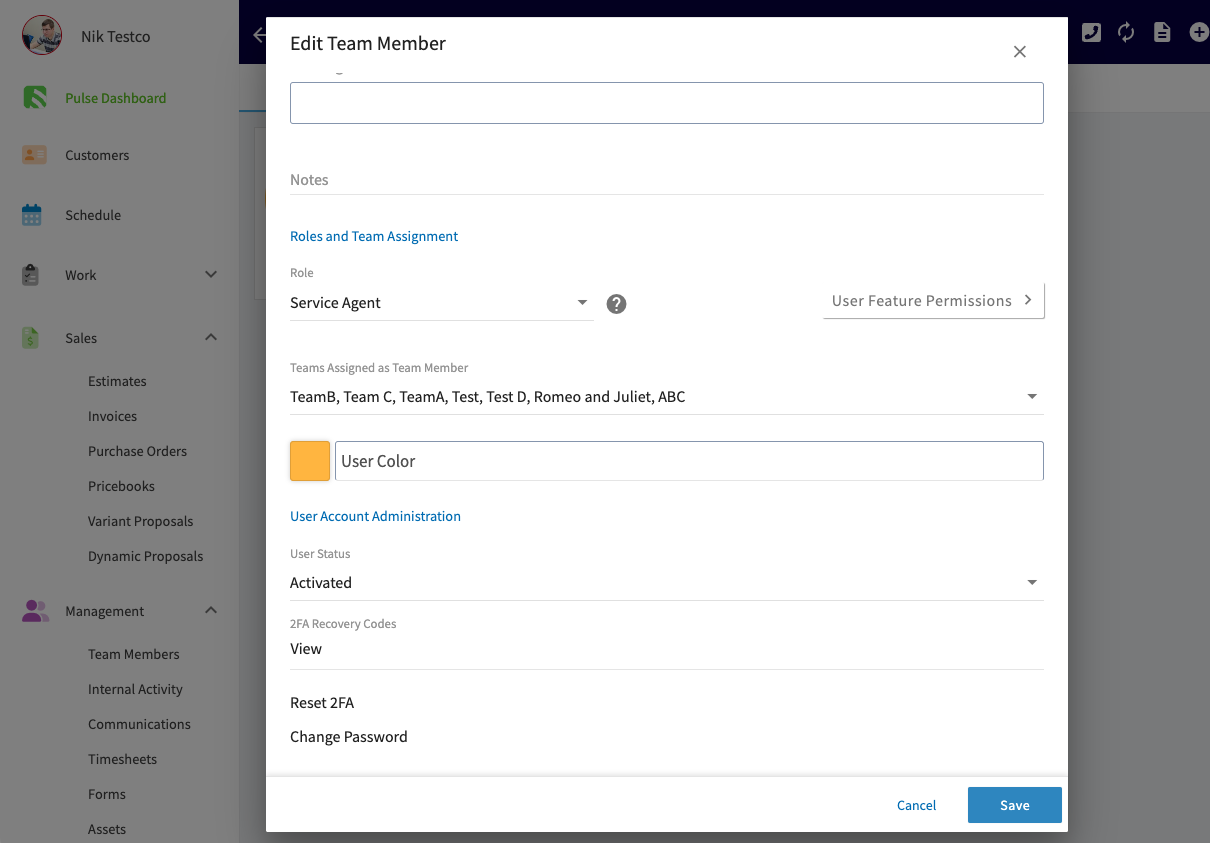
-
-Selecting either option will require you enter your own password for security purposes. Resetting a user's 2FA will invalidate any of their old recovery codes and require them to set up 2FA again.
-
----
-
-## **FAQs**
-
-**Can you require 2FA for specific users?**
-
-No, if turned on it will be required for **all** users in an account.
-
-**Can you require users to use 2FA every single time they log in?**
-
-Yes, when setting up 2FA select _Every Day_.
-
-**I lost my device that had the Google Authenticator app and can’t log in, now what?**
-
-If your device is lost, use your recovery codes. Each can only be used once.
-
-**I don’t have my recovery codes, now what?**
-
-If you don’t have access to the Authenticator app and have lost your recovery codes, you will have to contact your FieldPulse admin who can then access your recovery codes. If those codes have all been used, the admin can manually reset your 2FA profile from settings. After you’ve logged in using a recovery code, you will be prompted to set up 2FA again for this user.
-
-**Can I use any Authenticator app?**
-
-There are several free authenticator apps, but we recommend Google Authenticator.
-
----
-
-## Video Tutorial
-
-<Frame caption="Two-Factor Authentication">
- <iframe
- src="https://www.loom.com/embed/f827dcdbdc09442cbd7fa985e3769573?hide_owner=true&hide_share=true"
- title="Video: Two-Factor Authentication"
- className="w-full rounded-lg"
- style={{aspectRatio: "16/9", border: "none"}}
- loading="lazy"
- allow="fullscreen"
- allowFullScreen
- />
-</Frame>
-
----
-
-**Have additional questions?**
-
-_Contact us at [support@fieldpulse.com](mailto:support@fieldpulse.com) or use the chat feature in the bottom right corner of your screen._
\ No newline at end of file
Adding New Users
- Module: User Management
- File:
adding-new-users.mdx - Intercom URL: https://help.fieldpulse.com/en/articles/603606-adding-new-users
- Last modified: 2026-03-26
Index: adding-new-users.mdx
===================================================================
--- adding-new-users.mdx existing
+++ adding-new-users.mdx intercom
@@ -1,69 +0,0 @@
-Ready to expand your team? Add new users to your FieldPulse account. _( **Note:** Only the company administrators have the ability to create new user accounts.)_
-
-User accounts use the individual’s email address as their login ID, and a password can either be created by the admin or created by the user after creation. Each user needs a unique name, email, and password. Each user also must be designated as an Administrator, Team Manager, Service Agent, Limited Agent, or Assignment User. The different roles provide different levels of access to the application and company data.
-
----
-
-## **Creating User Accounts**
-
-To create a new user, navigate to _Company Settings_, then _User Accounts_, and select _Create New_.
-
-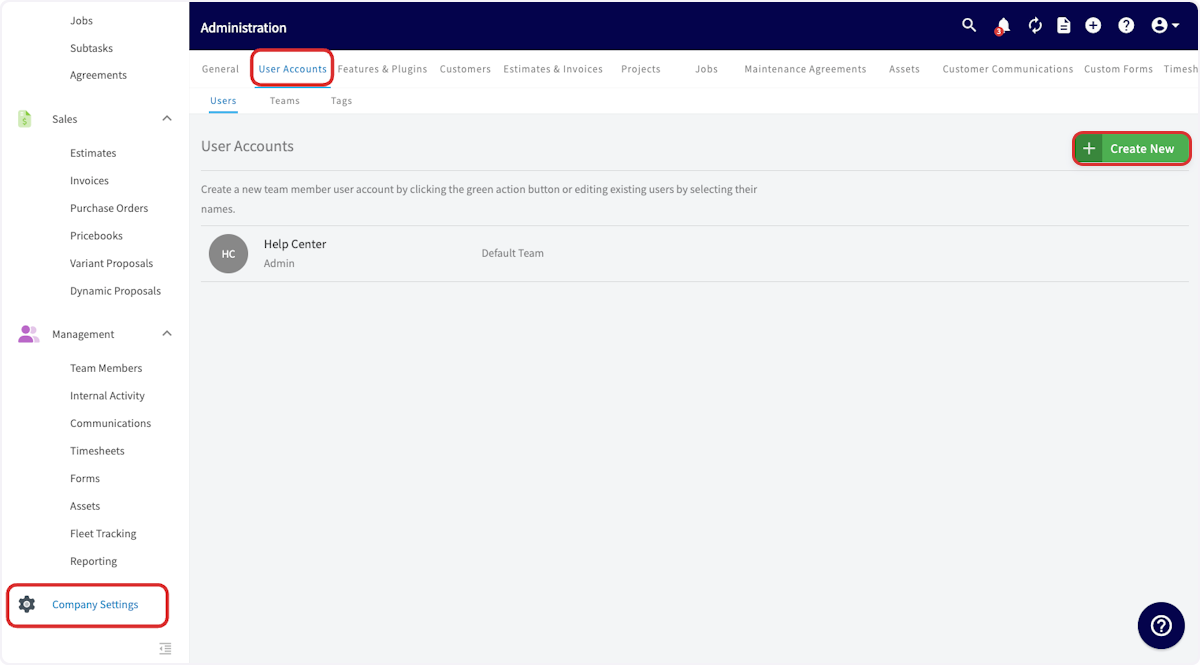
-
-Now you will need to fill out the basic information for the new user:
-
-- **First Name**, **Last Name**, and **Email** are required fields.
-
-- **Set Password** can be left blank, and will automatically send a password reset link to the new user's email address. If you prefer, you can set a standard password for the user.
-
-- **Notes** can include any details you'd like to include on this user. This could include availability, restrictions, license numbers, expiration dates, etc.
-
-- **Hourly Billing Rate** indicates how much your company charges the customer when this user works.
-
-- **Hourly Cost Rate** indicates the hourly cost to your company when this user works.
-
-- **[User Roles](/core-platform/user-management/user-roles)**
-
- - Team Manager (can enable as an Admin)
-
- - Service Agent
-
- - Limited Agent
-
- - Assignment User
-
-- **Teams Assigned as Team Member** indicates which teams this user will be part of. The user will automatically be included in the default team, but can be added to other teams as well. [Teams Team Member Structure](/core-platform/user-management/teams-team-member-structure) to learn more about teams.
-
-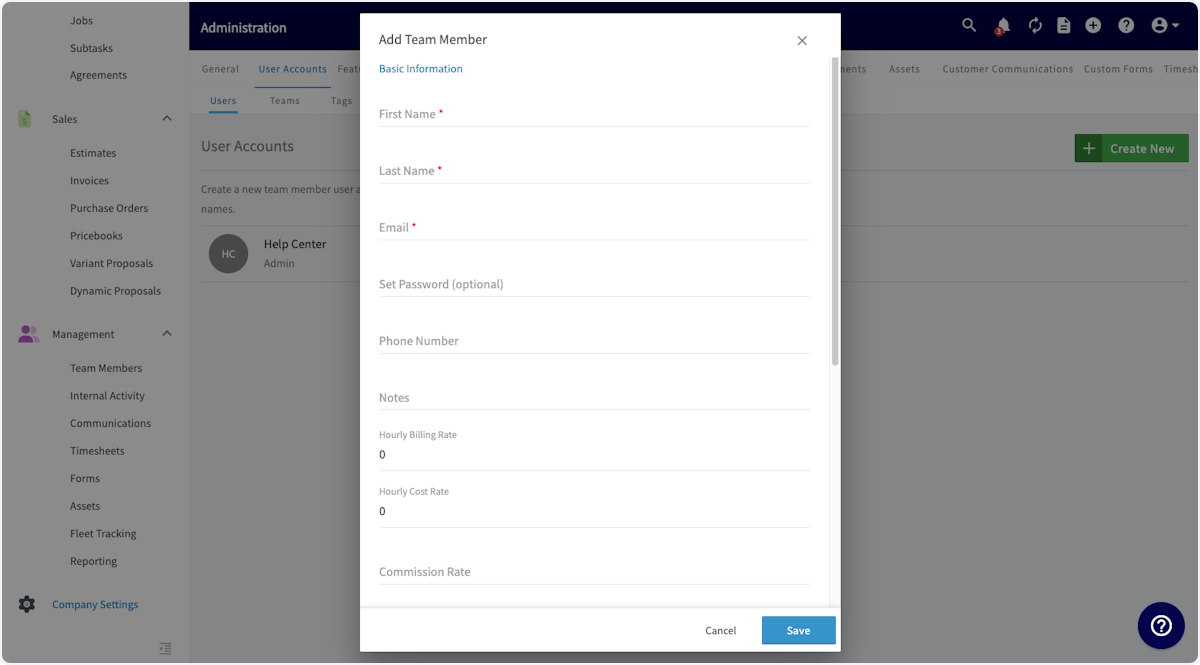
-
-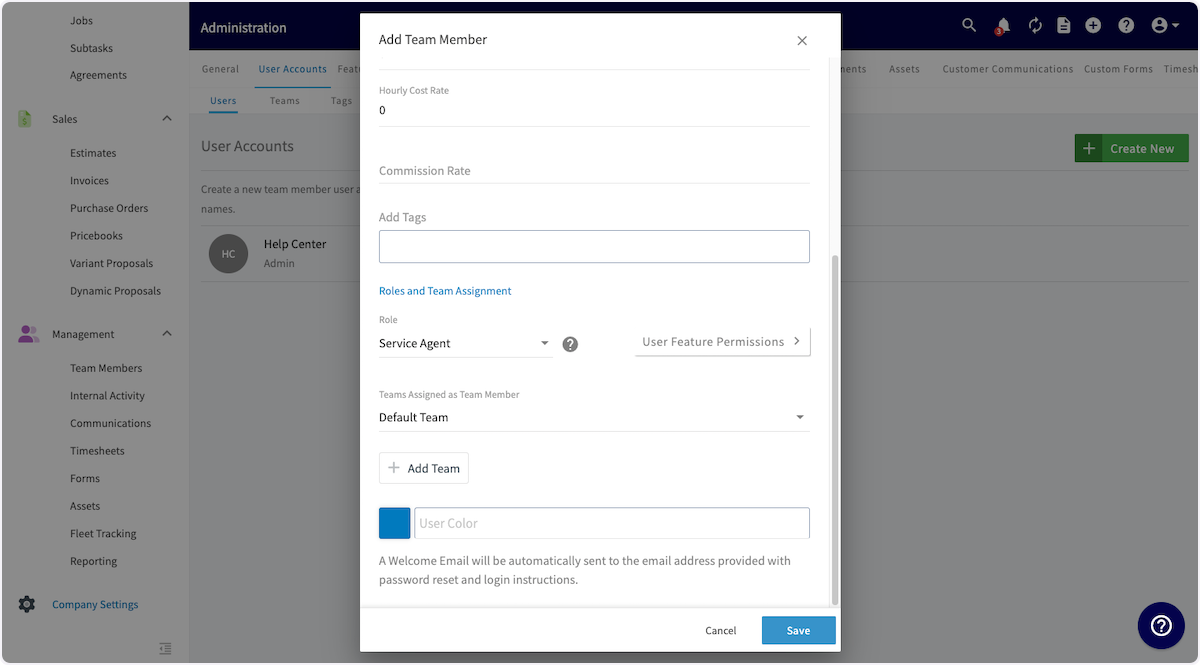
-
-You can also use the _User Feature Permissions_ button to further customize the permissions of the new user. [User Roles](/core-platform/user-management/user-roles) to learn more about user role permissions.
-
-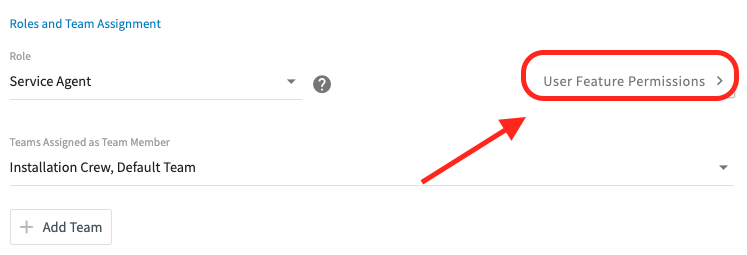
-
-Once the new user account is ready, click _Save_ to save the new account and an automatic welcome email will be sent to the email address for this new user to log into their account.
-
-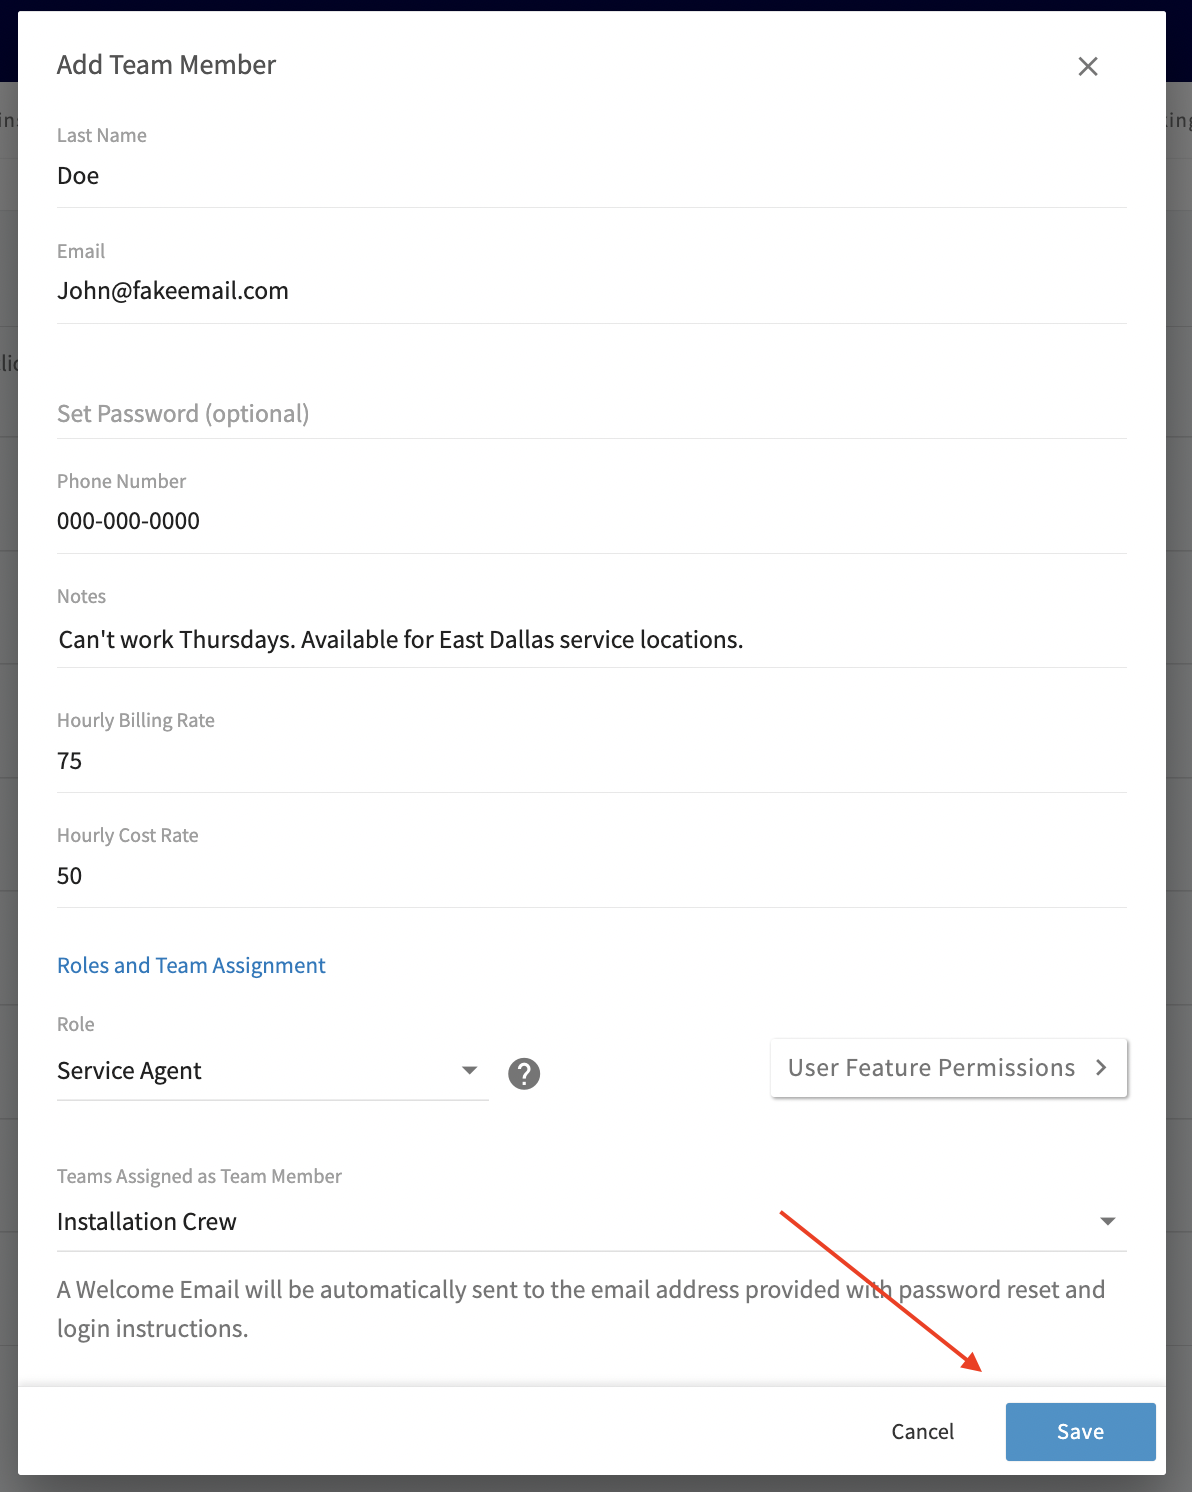
-
----
-
-## Video Tutorial
-
-<Frame caption="Adding New Users">
- <iframe
- src="https://www.loom.com/embed/83d65d97e38848109c03aae384b6714d?hide_owner=true&hide_share=true"
- title="Video: Adding New Users"
- className="w-full rounded-lg"
- style={{aspectRatio: "16/9", border: "none"}}
- loading="lazy"
- allow="fullscreen"
- allowFullScreen
- />
-</Frame>
-
----
-
-**Have additional questions?**
-
-_Contact us at [support@fieldpulse.com](mailto:support@fieldpulse.com) or use the chat feature in the bottom right corner of your screen._
\ No newline at end of file
Purchasing & Porting Phone Numbers
- Module: Engage
- File:
purchasing-porting-phone-numbers.mdx - Intercom URL: https://help.fieldpulse.com/en/articles/9077056-purchasing-porting-phone-numbers
- Last modified: 2026-04-08
Index: purchasing-porting-phone-numbers.mdx
===================================================================
--- purchasing-porting-phone-numbers.mdx existing
+++ purchasing-porting-phone-numbers.mdx intercom
@@ -1,75 +0,0 @@
-To add phone numbers to Engage, you can port in an existing phone number or purchase a new phone number.
-
----
-
-## Porting Process
-
-If you want to port existing phone number(s) from a prior service provider to Engage, contact us using the chat feature or email us at [Support@FieldPulse.com](mailto:Support@FieldPulse.com). We will then provide a Letter of Authorization (LOA) to facilitate the porting process. Your company is responsible for completing the LOA within a reasonable timeframe.
-
-
-
- _( **Note:** Porting phone numbers can take up to 30 days from when we receive your completed LOA.)_
-
-
-
- **What to know about the porting time:**
-
-- **Timeframe:** Porting can take up to **30 days**.
-
-- **Service:** Your number stays active with your old carrier until the port is finished. You can still make and receive calls and texts as normal, so service won't be disrupted.
-
-- **Switching Day:** There is a brief transition (minutes to a few hours) when the number switches to Engage. Calls may briefly fail during this rare window.
-
-- **Images (MMS):** Engage numbers support sending and receiving images.
-
-Please be sure to remove all call routing features (call forwarding, phone tree, sequential call ring, etc.) before requesting to port your phone number.
-
-1-800 numbers cannot be ported into FieldPulse without a specific request. Please contact our Customer Success team for more information on the process of porting 1-800 and toll-free numbers into Engage.
-
----
-
-## Purchasing Process
-
-If you'd like to purchase new phone number(s) for use in Engage, navigate to _Settings_ and select _Phone Numbers_. You can then click _Purchase Number_ to initiate the process.
-
-
-
-You should confirm your country and proceed to select your area code.
-
-
-
-Enter your area code and proceed to select a phone number.
-
-
-
-Once you select a phone number, click on it, then press _Reserve Number_. The number will now be added to your Engage account.
-
-
-
-If you don't like any of the three numbers that populate, you can close out and come back into the platform. Three new numbers will populate when you try again.
-
----
-
-## **FAQs**
-
-**Will my service be disrupted while my number is porting?**
-
-No. Your phone number typically remains active and fully usable on your current carrier (the porting-out carrier) until the port is completed. You can continue to make and receive calls and texts as normal, and no service disruption should occur.
-
-**What happens during the final transfer of the number?**
-
-There is usually a brief transition window (minutes to a few hours) during the final cutover (Port Handoff). During this rare period, the number may not be reachable from all networks, and some calls may temporarily fail or go to voicemail.
-
-**What is the status of my number once the port is complete?**
-
-After Port Completion, the number is fully owned and serviced by Engage (the new carrier). All calls and messages will be handled by the Engage network, and your old carrier will automatically deactivate the number.
-
-**How long does the porting process take?**
-
-Porting a phone number can take up to 30 days from when your completed Letter of Authorization (LOA) is received.
-
----
-
-**Have additional questions?**
-
-_Contact us at [support@fieldpulse.com](mailto:support@fieldpulse.com) or use the chat feature in the bottom right corner of your screen._
\ No newline at end of file
Is there a way to silence the incoming ringing on the web app when on an active call?
- Module: Engage
- File:
is-there-a-way-for-a-client-to-silence-the-incoming-ringing-on-the-web-app-when-they-aren-t-on-an-active-call.mdx - Intercom URL: https://help.fieldpulse.com/en/articles/12367386-is-there-a-way-to-silence-the-incoming-ringing-on-the-web-app-when-on-an-active-call
- Last modified: 2026-03-30
Index: is-there-a-way-for-a-client-to-silence-the-incoming-ringing-on-the-web-app-when-they-aren-t-on-an-active-call.mdx
===================================================================
--- is-there-a-way-for-a-client-to-silence-the-incoming-ringing-on-the-web-app-when-they-aren-t-on-an-active-call.mdx existing
+++ is-there-a-way-for-a-client-to-silence-the-incoming-ringing-on-the-web-app-when-they-aren-t-on-an-active-call.mdx intercom
@@ -1,23 +0,0 @@
-Yes, there is a way to silence the ringing without using Do Not Disturb. A user can click the **chevron icon** (a small downward arrow) on the Engage or main app screen to silence the ringing for incoming calls.
-
----
-
-## How to Silence Incoming Calls
-
-To quickly silence the incoming ring on the web app:
-
-1. Look for the Engage interface on your web app.
-
-2. Find the **chevron icon** (chevron pointing down) and click it.
-
-This action will mute the ringing sound for all incoming calls, allowing you to focus on other tasks, like a meeting on your computer, without being interrupted by the ringing sound.
-
-
-
----
-
-**Have additional questions?**
-
-_Contact us at [support@fieldpulse.com](mailto:support@fieldpulse.com) or use the chat feature in the bottom right corner of your screen._
-
----
\ No newline at end of file
Automatic Tax Rates & Tax Override
- Module: Tax Configuration
- File:
automatic-tax-rates-tax-override.mdx - Intercom URL: https://help.fieldpulse.com/en/articles/6418957-automatic-tax-rates-tax-override
- Last modified: 2026-03-09
Index: automatic-tax-rates-tax-override.mdx
===================================================================
--- automatic-tax-rates-tax-override.mdx existing
+++ automatic-tax-rates-tax-override.mdx intercom
@@ -1,45 +0,0 @@
-Do you service areas that have different tax codes? Are you tired of having to manually look up their tax rate and apply that to each individual estimate and invoice? If so, you are in luck with FieldPulse's Automatic Tax Rate function! This function will save you time and help reduce errors when crafting your estimates and invoices.
-
----
-
-## Enable Automatic Tax Rate
-
-To enable, go to _Company Settings_, _Features & Plugins_, then _Enable Automatic Tax Rates_.
-
-
-
----
-
-## What It Does
-
-When enabled, FieldPulse automatically applies the tax rate based on the location of the job or customer. _( **Note:** If the service and billing addresses differ, the automatic tax rate will be based on the **service address zip code**.)_
-
----
-
-## How It Works with QuickBooks Online
-
-To learn how to set up your individualized tax rate settings on our platform for QuickBooks Online, [Post Sync Quickbooks Online](/accounting/quickbooks-online/post-sync-quickbooks-online).
-
----
-
-## Best Practices
-
-✅ Set up your Custom Tax Rates in QBO _before_ using them in FieldPulse.
-
-
-
-
-
-✅ Use _Automatic Tax_ for the simplest and most accurate setup.
-
-
-
-
-
-✅ Regularly review your tax settings in QuickBooks Online.
-
----
-
-**Have additional questions?**
-
-_Contact us at [support@fieldpulse.com](mailto:support@fieldpulse.com) or use the chat feature in the bottom right corner of your screen._
\ No newline at end of file
A Comprehensive Guide to FieldPulse’s Commission Structures
- Module: Commission/Markups/Profitability
- File:
a-comprehensive-guide-to-fieldpulse-s-commission-structures.mdx - Intercom URL: https://help.fieldpulse.com/en/articles/12902206-a-comprehensive-guide-to-fieldpulse-s-commission-structures
- Last modified: 2026-03-03
Index: a-comprehensive-guide-to-fieldpulse-s-commission-structures.mdx
===================================================================
--- a-comprehensive-guide-to-fieldpulse-s-commission-structures.mdx existing
+++ a-comprehensive-guide-to-fieldpulse-s-commission-structures.mdx intercom
@@ -1,57 +0,0 @@
-FieldPulse offers several commission options to support a variety of business structures. Below is an overview of each commission type and when to use it.
-
-## [Company Default Commission](/core-platform/commission/invoice-level-commission)
-
-- This option is ideal for businesses where all team members receive the same commission rate. You can set a flat dollar amount per invoice, a percentage of gross sales, or a percentage of margin. Once configured in Company Settings, the commission recipient on an invoice will automatically receive this amount.
-
-**Note:** Ensure you toggle on the _Eligible for Commission_ option and select _Company Default Commission_ for each of your users.
-
-
-
-## [User-Specific Commission](/core-platform/commission/invoice-level-commission)
-
-- This option is perfect for businesses with varying commission rates for each team member. For example, senior staff may earn higher commissions, or managers may receive commissions while technicians earn hourly pay.
-
-- After enabling the _Commission_ toggle for each user, you can then set their specific rate (e.g., Bill earns 5% of invoice margin, while Peter earns a $40 flat commission per invoice).
-
-- It's important to note that you can set a company default commission, as mentioned above, and then override it for specific user profiles.
-
-## [Flat Rate Job Commission (Pricebook)](/core-platform/commission/flat-rate-job-commissions)
-
-- This option is best for businesses that pay commissions per _grouping_ or for _flat-rate jobs_ on an invoice. For example:
-
- - Shower upgrade → $50 commission
-
- - Water filter add-on → $30 commission
-
-- These amounts are added to the commission recipient for each flat-rate job included on an invoice.
-
-- **Important:** The system follows a ‘first commission wins’ rule. The first commission type added to the invoice will be the commission method for the entire invoice.
-
- - If a flat-rate job with a commission is added first, no company or user-level commissions will be generated on any subsequent items added.
-
- - Conversely, if the invoice is created using items or flat-rate jobs **without commission** first, then the company or user-level commission rules will apply. If you later add a flat-rate job that includes its own commission, it **won’t** add that flat-rate job’s commission value — it will simply contribute to the invoice total used for the company/user percentage-based commission calculations.
-
- - This design prevents double-dipping—only one commission method can apply per invoice.
-
-## Ad-Hoc Commission
-
-- This commission type is added manually at the invoice level, either by selecting a saved template or creating a new commission entry on the spot.
-
-- Ad-Hoc Commission is used when payouts vary from job to job, when special circumstances apply, or when there is flexibility needed outside of standard commission rules.
-
-- This is ideal for businesses that offer one-off incentives, custom deal structures, or occasional spiffs that do not fit within fixed company or user-level commission settings.
-
----
-
-## Important Note
-
-Commission amounts will be adjusted at the time of payment if card-fee recovery is enabled and the commission type is based on either a percentage of gross sales or margin.
-
-It’s best practice to report commissions **only on fully paid invoices**. This ensures the commission you pay your team matches the actual commission calculated in FieldPulse, preventing discrepancies and avoiding over- or under-payment.
-
----
-
-**Have additional questions?**
-
-_Contact us at [support@fieldpulse.com](mailto:support@fieldpulse.com) or use the chat feature in the bottom right corner of your screen._
\ No newline at end of file
Invoice-Level Commission
- Module: Commission/Markups/Profitability
- File:
invoice-level-commission.mdx - Intercom URL: https://help.fieldpulse.com/en/articles/1229248-invoice-level-commission
- Last modified: 2026-03-03
Index: invoice-level-commission.mdx
===================================================================
--- invoice-level-commission.mdx existing
+++ invoice-level-commission.mdx intercom
@@ -1,97 +0,0 @@
-Commissions can be tracked and automatically calculated on estimates and invoices. You can choose whether to calculate the commission using a percentage of gross sales, percentage of gross margin, or as a flat rate.
-
----
-
-## Enabling Commission Calculations
-
-To enable commission calculations, navigate to _Company Settings_ in the left-side menu and click _Estimates & Invoices_. Then click _Advanced_ in the sub header. On the _Advanced Invoice Settings_ page, toggle _Enable Commission Calculations_ on.
-
-Once this is turned on, **_new_** estimates/invoices will automatically calculate commissions based on the default settings.
-
-
-
-You will then set the default commission calculation method, either as a percentage of gross sales, a percentage of gross margin, or a flat dollar amount. You will then set the _Default Commission Rate_. When you've set up the commission structure, click _Save_.
-
-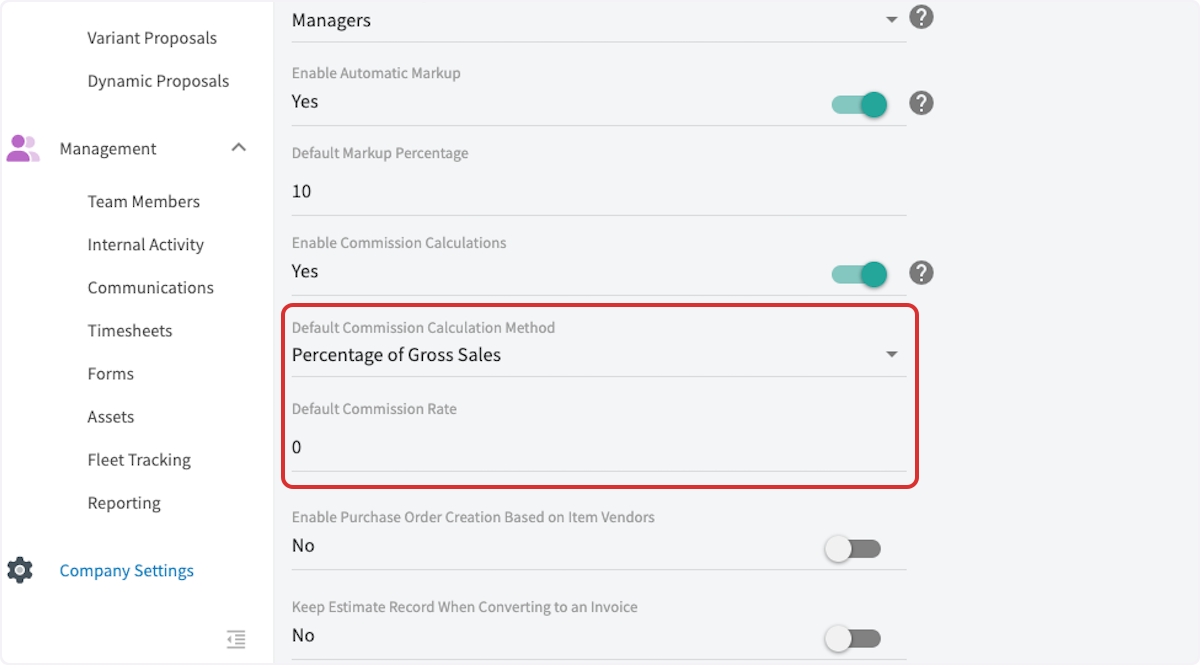
-
----
-
-## Viewing Commission Calculations
-
-Now that you have a default commission setup, navigate to an estimate/invoice and click on _Cost Basis_ in the header.
-
-On this page, you will see the automatically calculated commission. You can edit the system-generated values at any time or add new commission fields as needed.
-
-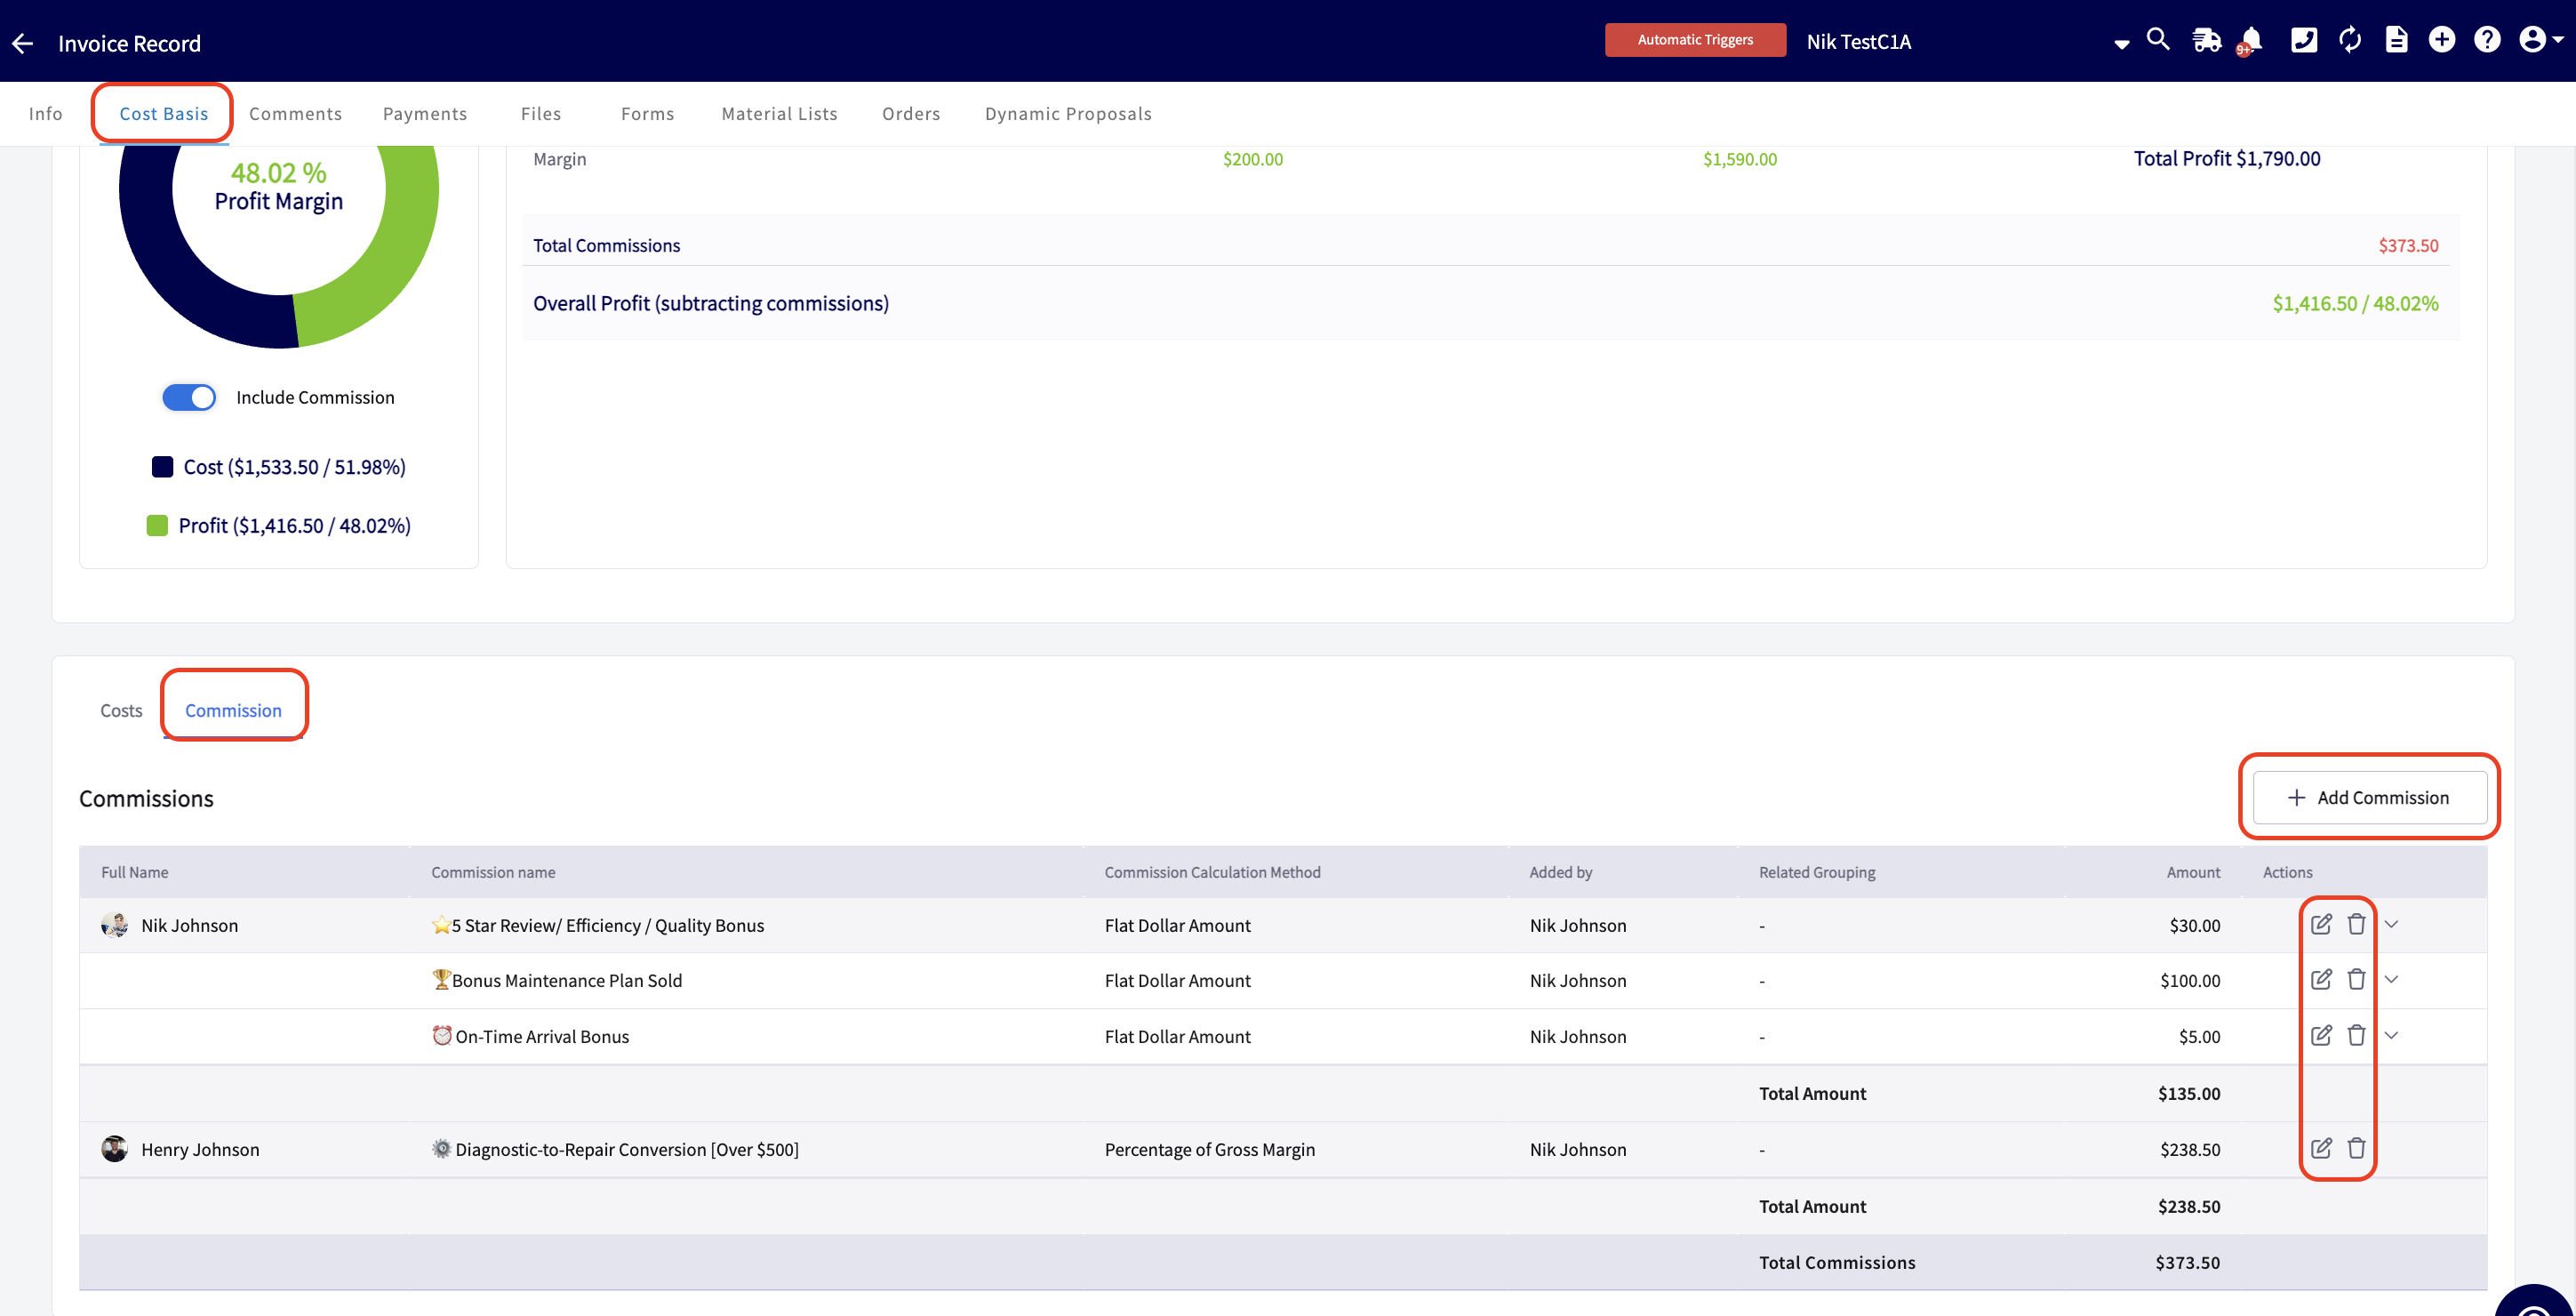
-
-Create Commission Templates to ensure consistency and save yourself time! To learn how, [Commission Templates](/core-platform/commission/commission-templates).
-
----
-
-## User Commission Rates
-
-You can also set commission rates for each of your team members in FieldPulse. Begin by navigating to _Company Settings_, then select _User Accounts_. Select the user for whom you'd like to add/adjust a commission rate then press _Edit_.
-
-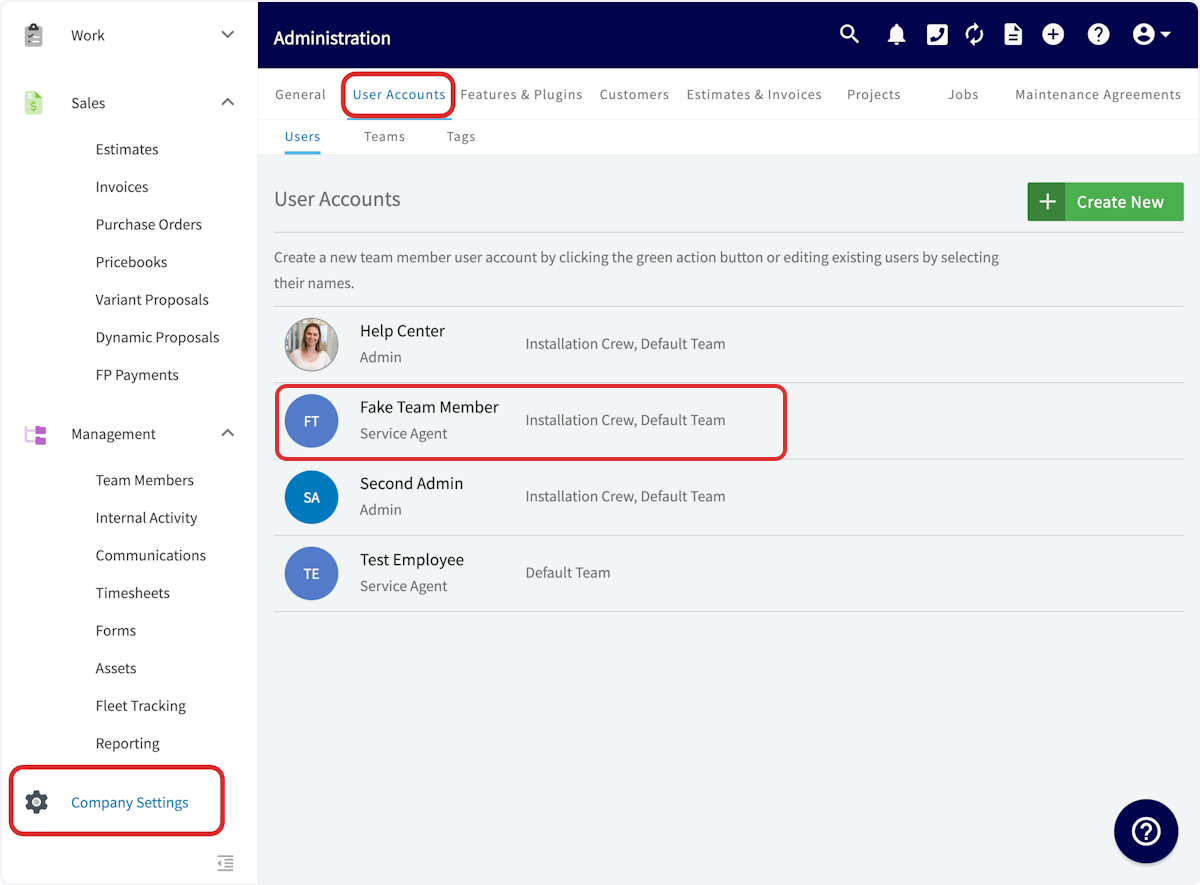
-
-Scroll down to toggle on the option for this employee to be eligible to earn commission. When this toggle is off, your employee will not be eligible for commission and they will not appear on the commission cost basis page, commission page, or the the commission report. **_Note: If this toggle was previously on, FieldPulse will retain the commission information on the cost basis page and report for this employee._**
-
-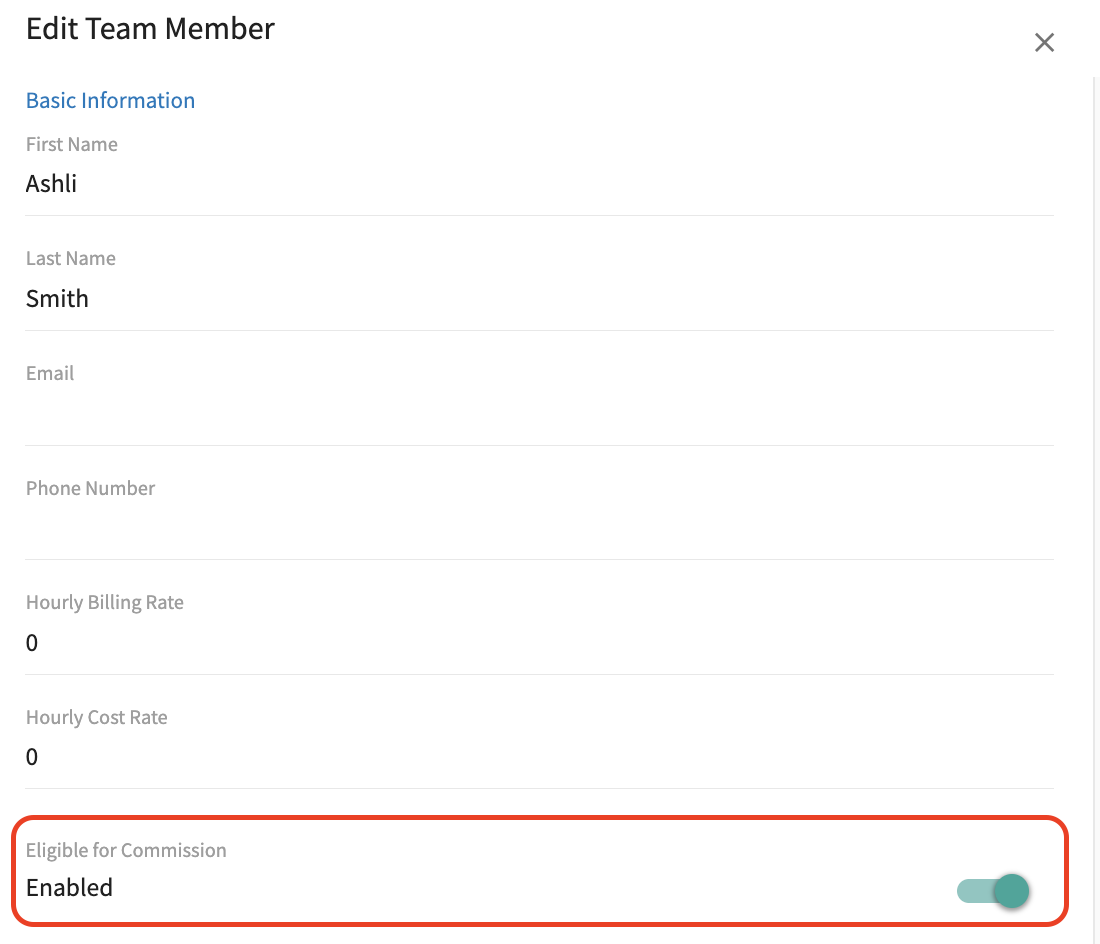
-
-You will now decide what this employees commission rate will be. You can choose between the following options:
-
-- **Company Default Commission Calculation Method:** The employee's commission calculation will follow the default method and rate that you set up within _Company Settings_ shown above.
-
-- **Custom User Specific Commission Calculation Method:** Selecting this will display **two additional fields**. This method allows for flexibility in how commissions are determined, taking into account specific criteria or performance metrics that may vary from one employee to another.
-
- - **User Specific Commission Calculation Method per Invoice:** The dropdown menu here includes the following options for commission calculation:
-
- - **Percentage of Gross Sales**: Calculate commission based on a percentage of total sales revenue.
-
- - **Percentage of Gross Margin**: Determine commission as a percentage of the profit margin after costs.
-
- - **Flat Dollar Amount**: Set a fixed dollar amount as the commission for each invoice.
-
- - **User Specific Commission Rate:** Enter a numeric value to set the commission rate for this employee.
-
-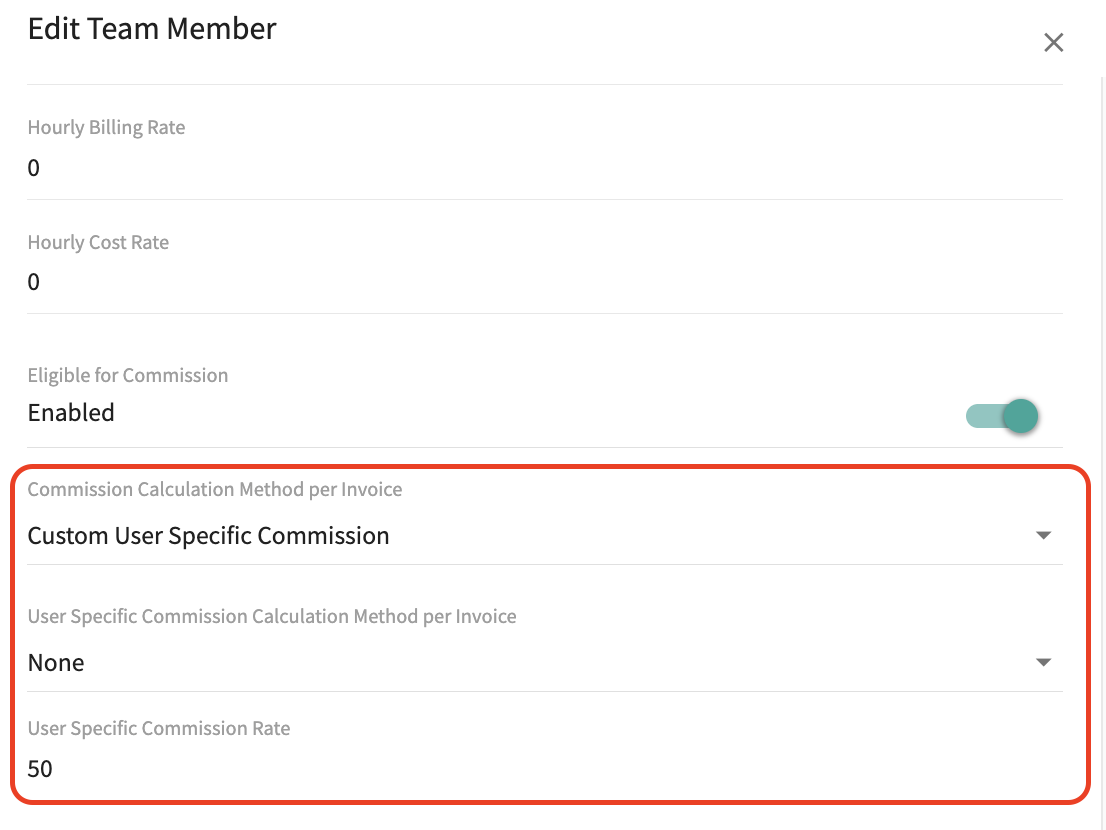
-
-### Be sure to press _Save_ after making changes
-
----
-
-## Commission Recipient on Estimates & Invoices
-
-Easily keep track of who is earning commissions on each invoice with the _Commission Recipient_ field, located below the _Author_ field. This field will default to the author, but you can edit it using the dropdown menu to select one of the employees eligible to earn commission.
-
-
-
----
-
-## Important Note
-
-Commission amounts will be adjusted at the time of payment if card-fee recovery is enabled and the commission type is based on either a percentage of gross sales or margin.
-
-It’s best practice to report commissions **only on fully paid invoices**. This ensures the commission you pay your team matches the actual commission calculated in FieldPulse, preventing discrepancies and avoiding over- or under-payment.
-
----
-
-## Video Tutorial
-
-<Frame caption="Automatic Commission Calculations">
- <iframe
- src="https://www.loom.com/embed/1bb981aa0dc8480483dec86e9a333cd4?hide_owner=true&hide_share=true"
- title="Video: Automatic Commission Calculations"
- className="w-full rounded-lg"
- style={{aspectRatio: "16/9", border: "none"}}
- loading="lazy"
- allow="fullscreen"
- allowFullScreen
- />
-</Frame>
-
----
-
-**Have additional questions?**
-
-_Contact us at [support@fieldpulse.com](mailto:support@fieldpulse.com) or use the chat feature in the bottom right corner of your screen._
\ No newline at end of file
Understanding Workflows in FieldPulse
- Module: Custom Status/Workflow
- File:
understanding-workflows-components-efficiency-and-variations.mdx - Intercom URL: https://help.fieldpulse.com/en/articles/11565723-understanding-workflows-in-fieldpulse
- Last modified: 2026-04-15
Index: understanding-workflows-components-efficiency-and-variations.mdx
===================================================================
--- understanding-workflows-components-efficiency-and-variations.mdx existing
+++ understanding-workflows-components-efficiency-and-variations.mdx intercom
@@ -1,210 +1,1 @@
-## What is a Workflow?
-
-Think about how your business operates. What services do you provide to generate revenue? Whether you focus on residential or commercial work, the concept of workflows is central to your operations.
-
-When we refer to workflows, we mean the series of steps your business takes to effectively acquire customers, deliver services, and collect payments. If your business offers multiple services, you can establish distinct workflows designed for **each** service.
-
-Workflows are crucial because studies indicate that businesses with optimized workflows can **increase their revenue by as much as 20%**. This increase is often attributed to **higher productivity**, **reduced downtime**, and the ability to **take on more services/jobs** due to streamlined, repeatable processes.
-
-To start building your Custom Status Workflows specifically for jobs in FieldPulse, [Custom Status](https://webapp.fieldpulse.com/administration/company/service/custom-status).
-
----
-
-## How Workflows Differ
-
-### **1\. Service Type:**
-
-The steps in your workflow will vary based on the type of service you are performing.
-
-- **Emergency Services:** These require quick responses, which often means fewer workflow steps/statuses.
-
-- **Installation Services:** The workflow steps/statuses are structured to focus on a systematic process for setup, ensuring all necessary tasks are completed efficiently.
-
-- **Standard Maintenance Services:** These workflows are designed to ensure thoroughness in general and preventative maintenance tasks while allowing for flexibility to adapt to varying service needs and unexpected repairs.
-
-### **2\. Business Size:**
-
-- **Smaller Businesses:**
-
- - Team members often wear multiple hats, which allows for a fast-paced work environment. While workflows may be shorter, it’s essential that they are clearly defined to ensure consistency and effectiveness in service delivery.
-
-- **Larger Businesses:**
-
- - These organizations typically utilize more granular workflows with clearly defined roles and responsibilities, reflecting their larger staff size.
-
- - They implement checks and balances, such as multiple approval stages for estimates and invoices, to ensure high-quality performance and accountability.
-
-### **3\. Goals:**
-
-Below are some potential business goals to reflect on, along with essential elements to weave into your workflows as you build them.
-
-- **Customer Satisfaction:**
-
- - Design workflows to enhance the customer experience.
-
- - Prioritize effective communication and timely service delivery.
-
- - Establish follow-up processes to ensure customer satisfaction.
-
-- **Increase Revenue:**
-
- - Create and test repeatable, templated workflows.
-
- - Enable faster job completion and consistency.
-
- - Allow for taking on more projects and increasing overall service capacity.
-
- - Implement upselling and cross-selling strategies, such as offering maintenance plans during service calls.
-
-- **Compliance & Safety:**
-
- - Incorporate steps to ensure compliance with safety standards and legal obligations.
-
- - Example: Electrical companies may include mandatory safety checks and documentation for every service.
-
- - Prioritizing compliance helps mitigate risks and protect the business's reputation.
-
-- **Operational Efficiency:**
-
- - Minimize delays and streamline processes.
-
- - Clearly define roles and responsibilities.
-
- - Use [Subtasks](/core-platform/jobs/subtasks) and [Custom Forms](/growth/custom-forms/custom-forms-streamline-your-workflow-and-save-time) to enhance efficiency.
-
- - Create record templates (Job, Estimate, and Invoice Records) for specific services to save time and money.
-
----
-
-## What Makes a Workflow Effective?
-
-| | |
-| --- | --- |
-| ### Clarity | Each step of your workflow is clearly defined with specific tasks and responsibilities assigned to individuals or teams. |
-| ### Ease of Use | Your workflow is straightforward and easy to follow, which will help you gain buy-in from your team members. Remember, repeatable workflows lead to repeatable success. |
-| ### Flexibility | Your workflow can adapt to changes or unexpected challenges without significant disruption. |
-| ### Opportunities for Communication | There are clear channels for communication among team members and customers, ensuring everyone is informed. |
-| ### Encourages Documentation | Important processes and decisions are documented, making it easy to track progress and ensure consistency. |
-
----
-
-## Key Pillars of a Field Service Workflow
-
-Below are **best practice recommendations for statuses/steps** that we encourage you to incorporate into your workflows. Each pillar addresses critical aspects of your operations, ensuring that you are well-equipped to meet customer needs and drive business success.
-
-
-
-### **1\. Customer Acquisition**
-
-- **Tracking Customer Lead Sources:** Are you monitoring how your customers find out about your business and services?
-
-- **Initial Contact Process:** What happens as soon as a customer calls requesting service? Does your response process change depending on the type of service the customer needs?
-
-### **2\. Team Scheduling**
-
-- **Service Assignment:** Are there instances where you would leave a service unscheduled or unassigned initially?
-
-- **Team vs. Individual Assignments:** Are you assigning services to an entire team or specific team members?
-
-- **Specialization Tracking:** Do your team members have specific areas of expertise? How are you tracking this to ensure the most qualified team member is assigned to each service?
-
-### **3\. Service Management**
-
-- **Pre-Departure Tasks:** What tasks do you want your technicians to complete before leaving the service site?
-
-- **Documentation Practices:** How and where are technicians documenting their activities on-site?
-
- - Are they using [Custom Forms](/growth/custom-forms/custom-forms-streamline-your-workflow-and-save-time), [Subtasks](/core-platform/jobs/subtasks), [Job Notes](/core-platform/jobs/completing-a-job-mobile-app), and/or [Comments](/core-platform/jobs/completing-a-job-mobile-app)?
-
-### **4\. Estimates/Invoices**
-
-- **Estimate Process:** When providing an estimate, is it a separate visit, or do you provide the estimate and begin work on the same day?
-
-- **Estimate Options:** Do you offer traditional estimates or "good, better, best" options?
-
-- **Signature Requirements:** Do you require a signature on an estimate before starting the service? Is this done in person or sent via email with a dynamic link?
-
-- **Pricebook Utilization:** Do you utilize a [pricebook](/core-platform/dynamic-proposals/pricebook) for consistency in your estimates?
-
-- **Template Use:** For services that have consistent materials and charges, can you utilize a template for estimates?
-
-### **5\. Collecting Payment**
-
-- **Payment Process:** What does the payment process look like for your business? Do you plan to collect payment on site? If so, have you checked out [FieldPulse Payments](/growth/fp-payments/fieldpulse-payments)?
-
-- **Financing Options:** Do you offer financing to your customers?
-
- - [Acorn Finance](/integrations/other/acorn-finance)
-
- - Wisetack Consumer Financing
-
-- **Follow-Up Procedures:** Do you have follow-up processes in place for invoices that are past due?
-
----
-
-## What Determines the Workflows I Need & Use?
-
-Several key factors influence the workflows you need and how they should be structured:
-
-### **1\. Nature of Services Offered:**
-
-- The specific services you provide will significantly impact your workflows. For instance, HVAC installation and maintenance may require different steps compared to plumbing repairs or electrical inspections. Understanding the unique requirements of each service will help you design tailored workflows.
-
-### **2\. Regulatory Compliance:**
-
-- Each trade has its own set of regulations and standards that must be adhered to. Your workflows should incorporate steps to ensure compliance with local, state, and federal regulations, including safety protocols and licensing requirements. This is crucial for maintaining legal and operational integrity.
-
-### **3\. Team Structure and Roles:**
-
-- The size and structure of your team will affect your workflows. Clearly defined roles and responsibilities help streamline processes and ensure accountability. This can vary based on the number of technicians, administrative staff, and support personnel you have, so it’s important to align workflows with your team’s capabilities.
-
-### **4\. Job Complexity and Determining Subtasks:**
-
-- The complexity of the jobs you undertake will influence your workflows. More complex projects may require additional steps for planning, coordination, and execution, while simpler tasks may have more straightforward workflows. Assessing job complexity will help you determine the necessary statuses and subtasks to include.
-
-### **5\. Communication Cadences with Customers:**
-
-- Timely communication is vital for quality service delivery. Consider how your workflows facilitate effective communication with customers, including follow-up processes to ensure satisfaction and address any concerns.
-
-### **6\. Inventory and Supply Chain Management:**
-
-- The availability of materials and equipment can impact your workflows. Ensuring that necessary supplies are on hand and managing inventory effectively can streamline operations and reduce delays, allowing for smoother service delivery. If supplies need to be ordered, your workflow can include a status/step for that.
-
-### **7\. Payment Processes:**
-
-- Understanding when and how you get paid is essential for your workflows. Consider how your payment processes are integrated into your workflows to ensure timely invoicing and collection, which is critical for maintaining cash flow. Best practice recommendation from our team, utilize [FieldPulse Payments](/growth/fp-payments/fieldpulse-payments).
-
----
-
-## Common Inefficiencies That We See Slow Down Workflows in FieldPulse
-
-Below are common inefficiencies that can disrupt workflows in FieldPulse. By being aware of these issues, you can make informed adjustments to your processes ahead of time, leading to increased productivity and a more seamless service experience for both your team and your customers.
-
-| | |
-| --- | --- |
-| # Inefficiency | # Solution |
-| Not organizing & segmenting your customers, services, estimates, and invoices. | - Utilize [Tags](/core-platform/jobs/custom-tags-for-jobs) for all record types in FieldPulse. |
-| Not tracking the time spent completing a service. | - Utilize the two [time tracking](/core-platform/jobs/custom-status-workflows) statuses when building your custom status workflows:<br /> <br /> <br /> <br /> <br /> <br /> - _Travel Time_<br /> <br /> - _In Progress_ |
-| Having no process in place for scheduling follow-up visits. | - Utilize [Site Visits](/core-platform/jobs/site-visits) or [Projects](/core-platform/projects/project-management-overview) to keep multiple visits to one location organized. |
-| Spending too much time on tedious tasks. | - Identify what is common/routine in the services you offer and consider the repetitive tasks that accompany them (e.g., similar line items added to estimates and invoices for routine HVAC installations). By creating templates for these processes, you can streamline operations, save time, and reduce manual effort. |
-| No ability to collect payment quickly in person or via email/text. | - Apply for [FieldPulse Payments](/growth/fp-payments/fieldpulse-payments) today to start collecting payments through our system! |
-| Not setting up automated customer communications. | - Setting up [automatic triggers](/core-platform/customers/communications/index) allows you to automate the email and SMS message sending process and ensure a consistent experience for all of your customers.<br /> <br /> <br /> <br /> <br /> <br /> - Create your email/text message templates, assign your triggers, then set and forget! |
-| Not asking your customers to leave reviews for your business and/or team members. | - Actively request reviews from satisfied customers in person or through follow-up emails and messages to enhance your reputation.<br /> <br /> <br /> <br /> <br /> <br /> - [Review Management](/core-platform/general-ui-ux/review-management)<br /> <br /> - [NiceJob](/integrations/other/nicejob)<br /> <br /> - [CHIIRP](/integrations/other/chiirp) |
-
----
-
-## Workflow FAQs
-
-### **What is the benefit of having a workflow?**
-
-Workflows contribute to a more organized, efficient, and productive work environment, ultimately driving business success. You don’t have to overhaul your operations overnight. Begin by identify your most common or most error-prone job types and build a repeatable workflow that supports consistency and clarity across your team. Having an established workflow will help your business **scale with confidence, not chaos**.
-
-#### Can I adapt a workflow once I am in it?
-
-Yes! FieldPulse is a flexible system designed to help your team navigate the challenges of a busy day in the field. If you arrive for a general repair and realize it is going to be a much larger job—resulting in another visit, a new estimate, and/or an additional invoice—you can easily make those adjustments within the system!
-
----
-
-**Have additional questions?**
-
-_Contact us at [support@fieldpulse.com](mailto:support@fieldpulse.com) or use the chat feature in the bottom right corner of your screen._
\ No newline at end of file
+# What is a Workflow?
\ No newline at end of file
Setting Up Workflow Foundations
- Module: Custom Status/Workflow
- File:
setting-up-workflow-foundations-in-fieldpulse.mdx - Intercom URL: https://help.fieldpulse.com/en/articles/12260142-setting-up-workflow-foundations
- Last modified: 2026-04-15
Index: setting-up-workflow-foundations-in-fieldpulse.mdx
===================================================================
--- setting-up-workflow-foundations-in-fieldpulse.mdx existing
+++ setting-up-workflow-foundations-in-fieldpulse.mdx intercom
@@ -1,213 +0,0 @@
-To set yourself up for success, please first review [this article](/core-platform/custom-status-workflow/understanding-workflows-components-efficiency-and-variations) where we dive deep into what a workflow is, what key steps/statuses a workflow needs, and what makes a workflow efficient.
-
-In this article, you will find Custom Status Workflows for the three main service types that we see businesses typically offer:
-
-- **Installation Services**
-
-- **Standard Service Calls** (maintenance, general/preventative work)
-
-- **Emergency Services**
-
-Feel free to replicate these workflows in your own FieldPulse account if your business offers any of the services listed above!
-
-To get started, navigate to _Company Settings_, _Jobs_ tab, then the _Custom Status_ subtab. Remember, these Custom Status Workflows are unique to the job/service record.
-
-If you're ready for more, you can build out Custom Status Workflows for your [Projects](/core-platform/projects/project-management-overview), [Material Lists](/core-platform/material-list/material-lists), and [Site Visits](/core-platform/jobs/site-visits).
-
-To learn the ins & outs of Custom Status Workflow set up, [Custom Status Workflows](/core-platform/jobs/custom-status-workflows).
-
----
-
-## Installation Service Custom Status Workflow
-
-
-
-### STATUS 1
-
-- **Status Name:** New Opportunity
-
-- **Type of Status:** New
-
-#### STATUS 2
-
-- **Status Name:** Installation Scheduled
-
-- **Type of Status:** Any
-
-#### STATUS 3
-
-- **Status Name:** On the Way
-
-- **Type of Status:** Travel Time
-
-#### STATUS 4
-
-- **Status Name:** Prep & Inspection
-
-- **Type of Status:** In Progress
-
-#### STATUS 5
-
-- **Status Name:** Install in Progress
-
-- **Type of Status:** In Progress
-
-#### STATUS 6
-
-- **Status Name:** Testing & Clean Up
-
-- **Type of Status:** In Progress
-
-#### STATUS 7
-
-- **Status Name:** Install Complete
-
-- **Type of Status:** Any
-
-#### STATUS 8
-
-- **Status Name:** Invoice Paid & Complete
-
-- **Type of Status:** Completed
-
-#### STATUS 9
-
-- **Status Name:** Paused
-
-- **Type of Status:** Pending
-
-#### STATUS 10
-
-- **Status Name:** Canceled
-
-- **Type of Status:** Canceled
-
----
-
-## Standard Service Call Custom Status Workflow
-
-
-
-### STATUS 1
-
-- **Status Name:** New Service
-
-- **Type of Status:** New
-
-#### STATUS 2
-
-- **Status Name:** Service Scheduled
-
-- **Type of Status:** Any
-
-#### STATUS 3
-
-- **Status Name:** Driving to Service Site
-
-- **Type of Status:** Travel Time
-
-#### STATUS 4
-
-- **Status Name:** Service in Progress
-
-- **Type of Status:** In Progress
-
-#### STATUS 5
-
-- **Status Name:** Service Go Back Needed/Required
-
-- **Type of Status:** In Progress
-
-#### STATUS 6
-
-- **Status Name:** Service Complete
-
-- **Type of Status:** Any
-
-#### STATUS 7
-
-- **Status Name:** Invoice Paid & Complete
-
-- **Type of Status:** Completed
-
-#### STATUS 8
-
-- **Status Name:** On Hold
-
-- **Type of Status:** Pending
-
-#### STATUS 9
-
-- **Status Name:** Canceled
-
-- **Type of Status:** Canceled
-
----
-
-## Emergency Service Custom Status Workflow
-
-
-
-### STATUS 1
-
-- **Status Name:** New
-
-- **Type of Status:** New
-
-#### STATUS 2
-
-- **Status Name:** Emergency Dispatch Scheduled
-
-- **Type of Status:** Any
-
-#### STATUS 3
-
-- **Status Name:** En Route
-
-- **Type of Status:** Travel Time
-
-#### STATUS 4
-
-- **Status Name:** On-Site
-
-- **Type of Status:** In Progress
-
-#### STATUS 5
-
-- **Status Name:** Service Complete
-
-- **Type of Status:** Any
-
-#### STATUS 6
-
-- **Status Name:** Invoice Paid & Complete
-
-- **Type of Status:** Completed
-
-#### STATUS 7
-
-- **Status Name:** Paused
-
-- **Type of Status:** Pending
-
-#### STATUS 8
-
-- **Status Name:** Canceled
-
-- **Type of Status:** Canceled
-
----
-
-## FieldPulse Pro Tips 🚀
-
-- Consider which team member(s) will be responsible for the action items associated with each status.
-
-- Would you like to design your workflows on a spreadsheet before building them out in the FieldPulse web app? [Copy?gid=1649040090#gid=1649040090](https://docs.google.com/spreadsheets/d/1T7Sw99CGnGWJ4VxKDgAUqFDhvQah_qpca6yQ6lfxv1Y/copy?gid=1649040090#gid=1649040090) to download a useful spreadsheet that can help you get started!
-
-- Run your business, your way! Preview the recording of our live session on setting up workflow foundations in FieldPulse by [clicking here](/core-platform/custom-status-workflow/fieldpulse360-setting-up-workflow-foundations-in-fieldpulse).
-
----
-
-**Have additional questions?**
-
-_Contact us at [support@fieldpulse.com](mailto:support@fieldpulse.com) or use the chat feature in the bottom right corner of your screen._
\ No newline at end of file
Dynamic Proposals
- Module: Dynamic Proposals
- File:
the-power-of-dynamic-proposals.mdx - Intercom URL: https://help.fieldpulse.com/en/articles/5918607-dynamic-proposals
- Last modified: 2026-04-15
Index: the-power-of-dynamic-proposals.mdx
===================================================================
--- the-power-of-dynamic-proposals.mdx existing
+++ the-power-of-dynamic-proposals.mdx intercom
@@ -1,93 +0,0 @@
-In today’s competitive business landscape, standing out from the crowd is essential! FieldPulse’s Dynamic Proposals feature transforms ordinary estimates into compelling, professional proposals that not only capture attention but also drive sales. This innovative tool is designed for a variety of industries, including construction, landscaping, HVAC, and home services, making it an invaluable asset for any business looking to enhance its proposal process.
-
-## What are Dynamic Proposals?
-
-FieldPulse’s Dynamic Proposals tool allows users to create comprehensive proposals that go beyond simple estimates. With features like cover pages, 'About Us' sections, information pages, multiple proposal offerings, photos, reviews, and case studies, businesses can present their services in a polished and engaging manner. This not only **saves time** but also helps to **grow revenue** by enabling users to bid on more jobs with ease.
-
----
-
-## Key Features
-
-1. **Online Document Builder**: Create visually appealing proposals using an intuitive editor that allows for easy customization.
-
-2. **Electronic Signatures**: Streamline the approval process with secure electronic signatures, making it easier for clients to sign off on proposals.
-
-3. **Contracts**: Generate contracts directly from proposals, ensuring a seamless transition from proposal to agreement.
-
-4. **Easy Conversion from Proposal to Invoice**: Simplify your billing process by converting proposals into invoices with just a few clicks.
-
-5. **Customizable Styling**: Choose from various styling options, including custom color palettes, embedded Yelp reviews, and photo insertion, to make your proposals truly unique.
-
-6. **Mobile and Desktop Previews**: Ensure your proposals look great on any device with the ability to preview them in both mobile and desktop formats.
-
-7. **Integrated within FieldPulse**: Quickly transfer customer, service, and product details from the FieldPulse platform, reducing the need for manual data entry.
-
-8. **Variant Proposals**: Offer clients multiple pricing options with 'Good, Better, Best' comparisons, allowing them to choose the best fit for their needs.
-
----
-
-## Who Can Benefit from Dynamic Proposals?
-
-1\. **Contractors and Construction Companies**
-
-Contractors can use Dynamic Proposals to showcase their past projects, client testimonials, and detailed service offerings. By presenting a professional image, they can instill confidence in potential clients and increase their chances of winning bids.
-
-2\. **Landscapers**
-
-Landscapers can highlight their design capabilities with before-and-after photos, case studies, and detailed descriptions of their services. This visual storytelling can help clients envision the potential transformation of their outdoor spaces.
-
-**3\. HVAC Technicians**
-
-HVAC professionals can create proposals that outline the benefits of different systems, include energy efficiency comparisons, and showcase customer reviews. This helps clients make informed decisions about their heating and cooling needs.
-
-4\. **Home Service Providers**
-
-From plumbing to electrical work and more, home service providers can leverage Dynamic Proposals to present a comprehensive overview of their services, including warranties, service guarantees, and customer satisfaction ratings.
-
----
-
-## With Dynamic Proposals You Can
-
-## 🕓 **Save Time**
-
-The online document builder and integration with FieldPulse’s CRM tools significantly reduce the time spent on proposal creation. This efficiency allows businesses to focus on what they do best—serving their clients.
-
-## 🛠️ **Enhance Professionalism**
-
-A well-crafted proposal reflects professionalism and attention to detail. By using Dynamic Proposals, businesses can elevate their brand image and differentiate themselves from competitors.
-
-## 💸 **Increase Revenue**
-
-With the ability to create multiple proposal offerings and easily convert proposals to invoices, businesses can bid on more jobs and close deals faster, ultimately driving revenue growth.
-
-## 🤩 **Improve Client Engagement**
-
-Dynamic Proposals allow for interactive elements, such as side-by-side product comparisons and embedded reviews, which can engage clients and facilitate decision-making.
-
----
-
-## Enabling Dynamic Proposal
-
-To enable Dynamic Proposal, navigate to _Company Settings > Features & Plugins_, then select _enable Dynamic Proposal_. You can also contact us at [support@fieldpulse.com](mailto:support@fieldpulse.com) or use the chat feature in the bottom right corner of your screen to get started.
-
----
-
-## Video Tutorial
-
-<Frame caption="The Power of Dynamic Proposals">
- <iframe
- src="https://www.loom.com/embed/3344b09029a2464ea9587efe91db13da?hide_owner=true&hide_share=true"
- title="Video: The Power of Dynamic Proposals"
- className="w-full rounded-lg"
- style={{aspectRatio: "16/9", border: "none"}}
- loading="lazy"
- allow="fullscreen"
- allowFullScreen
- />
-</Frame>
-
----
-
-**Have additional questions?**
-
-_Contact us at [support@fieldpulse.com](mailto:support@fieldpulse.com) or use the chat feature in the bottom right corner of your screen._
\ No newline at end of file
Purchase Orders
- Module: Purchase Orders
- File:
purchase-orders.mdx - Intercom URL: https://help.fieldpulse.com/en/articles/3854257-purchase-orders
- Last modified: 2026-03-17
Index: purchase-orders.mdx
===================================================================
--- purchase-orders.mdx existing
+++ purchase-orders.mdx intercom
@@ -1,181 +0,0 @@
-You can use the Purchase Order feature in FieldPulse to generate purchase orders for your suppliers and send them via email.
-
----
-
-## Enabling Purchase Orders
-
-To begin using Purchase Orders, you'll first need to enable it. Start by clicking on _Company Settings_ and selecting _Features & Plugins._ Navigate to _Purchase Orders_ and select _Enable_. Now you're ready to begin ordering and tracking materials from your suppliers!
-
-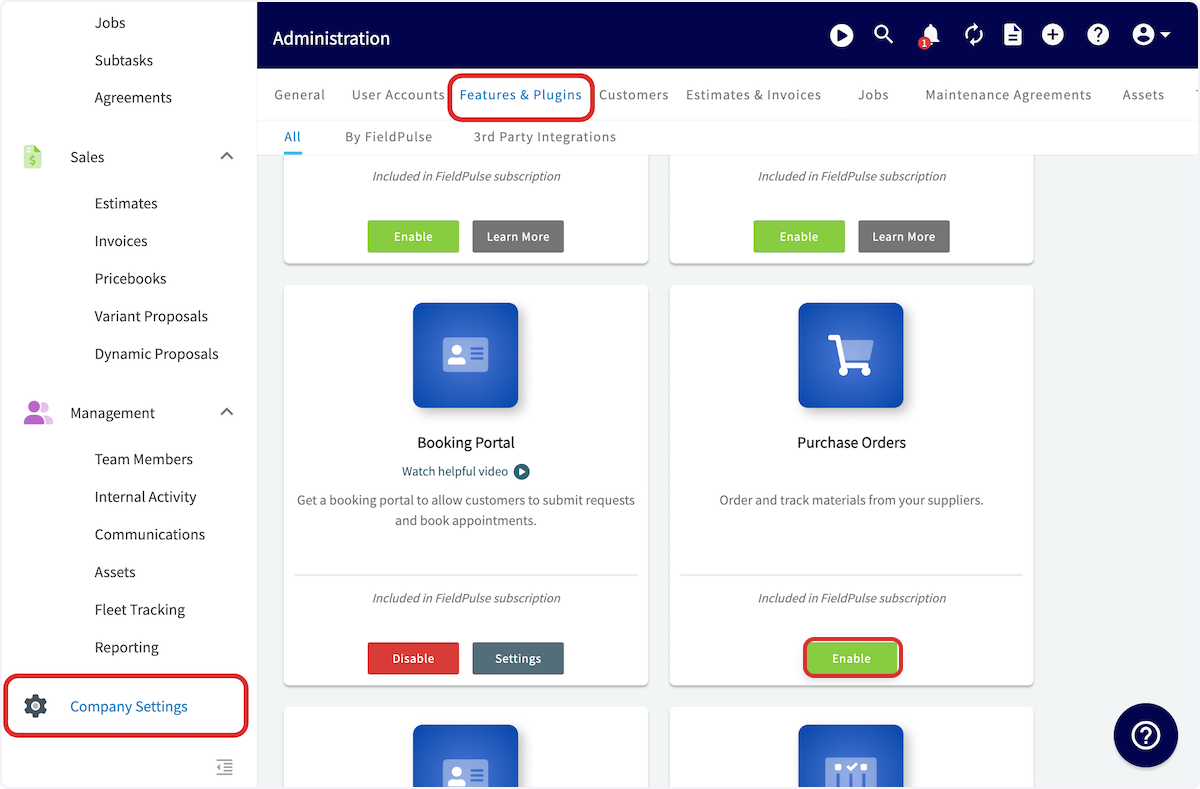
-
----
-
-## Creating a Purchase Order
-
-To get started, click on the _Purchase Orders_ tab in the left side menu. Once on the _Purchase Orders_ page, click the _Create Order_ button.
-
-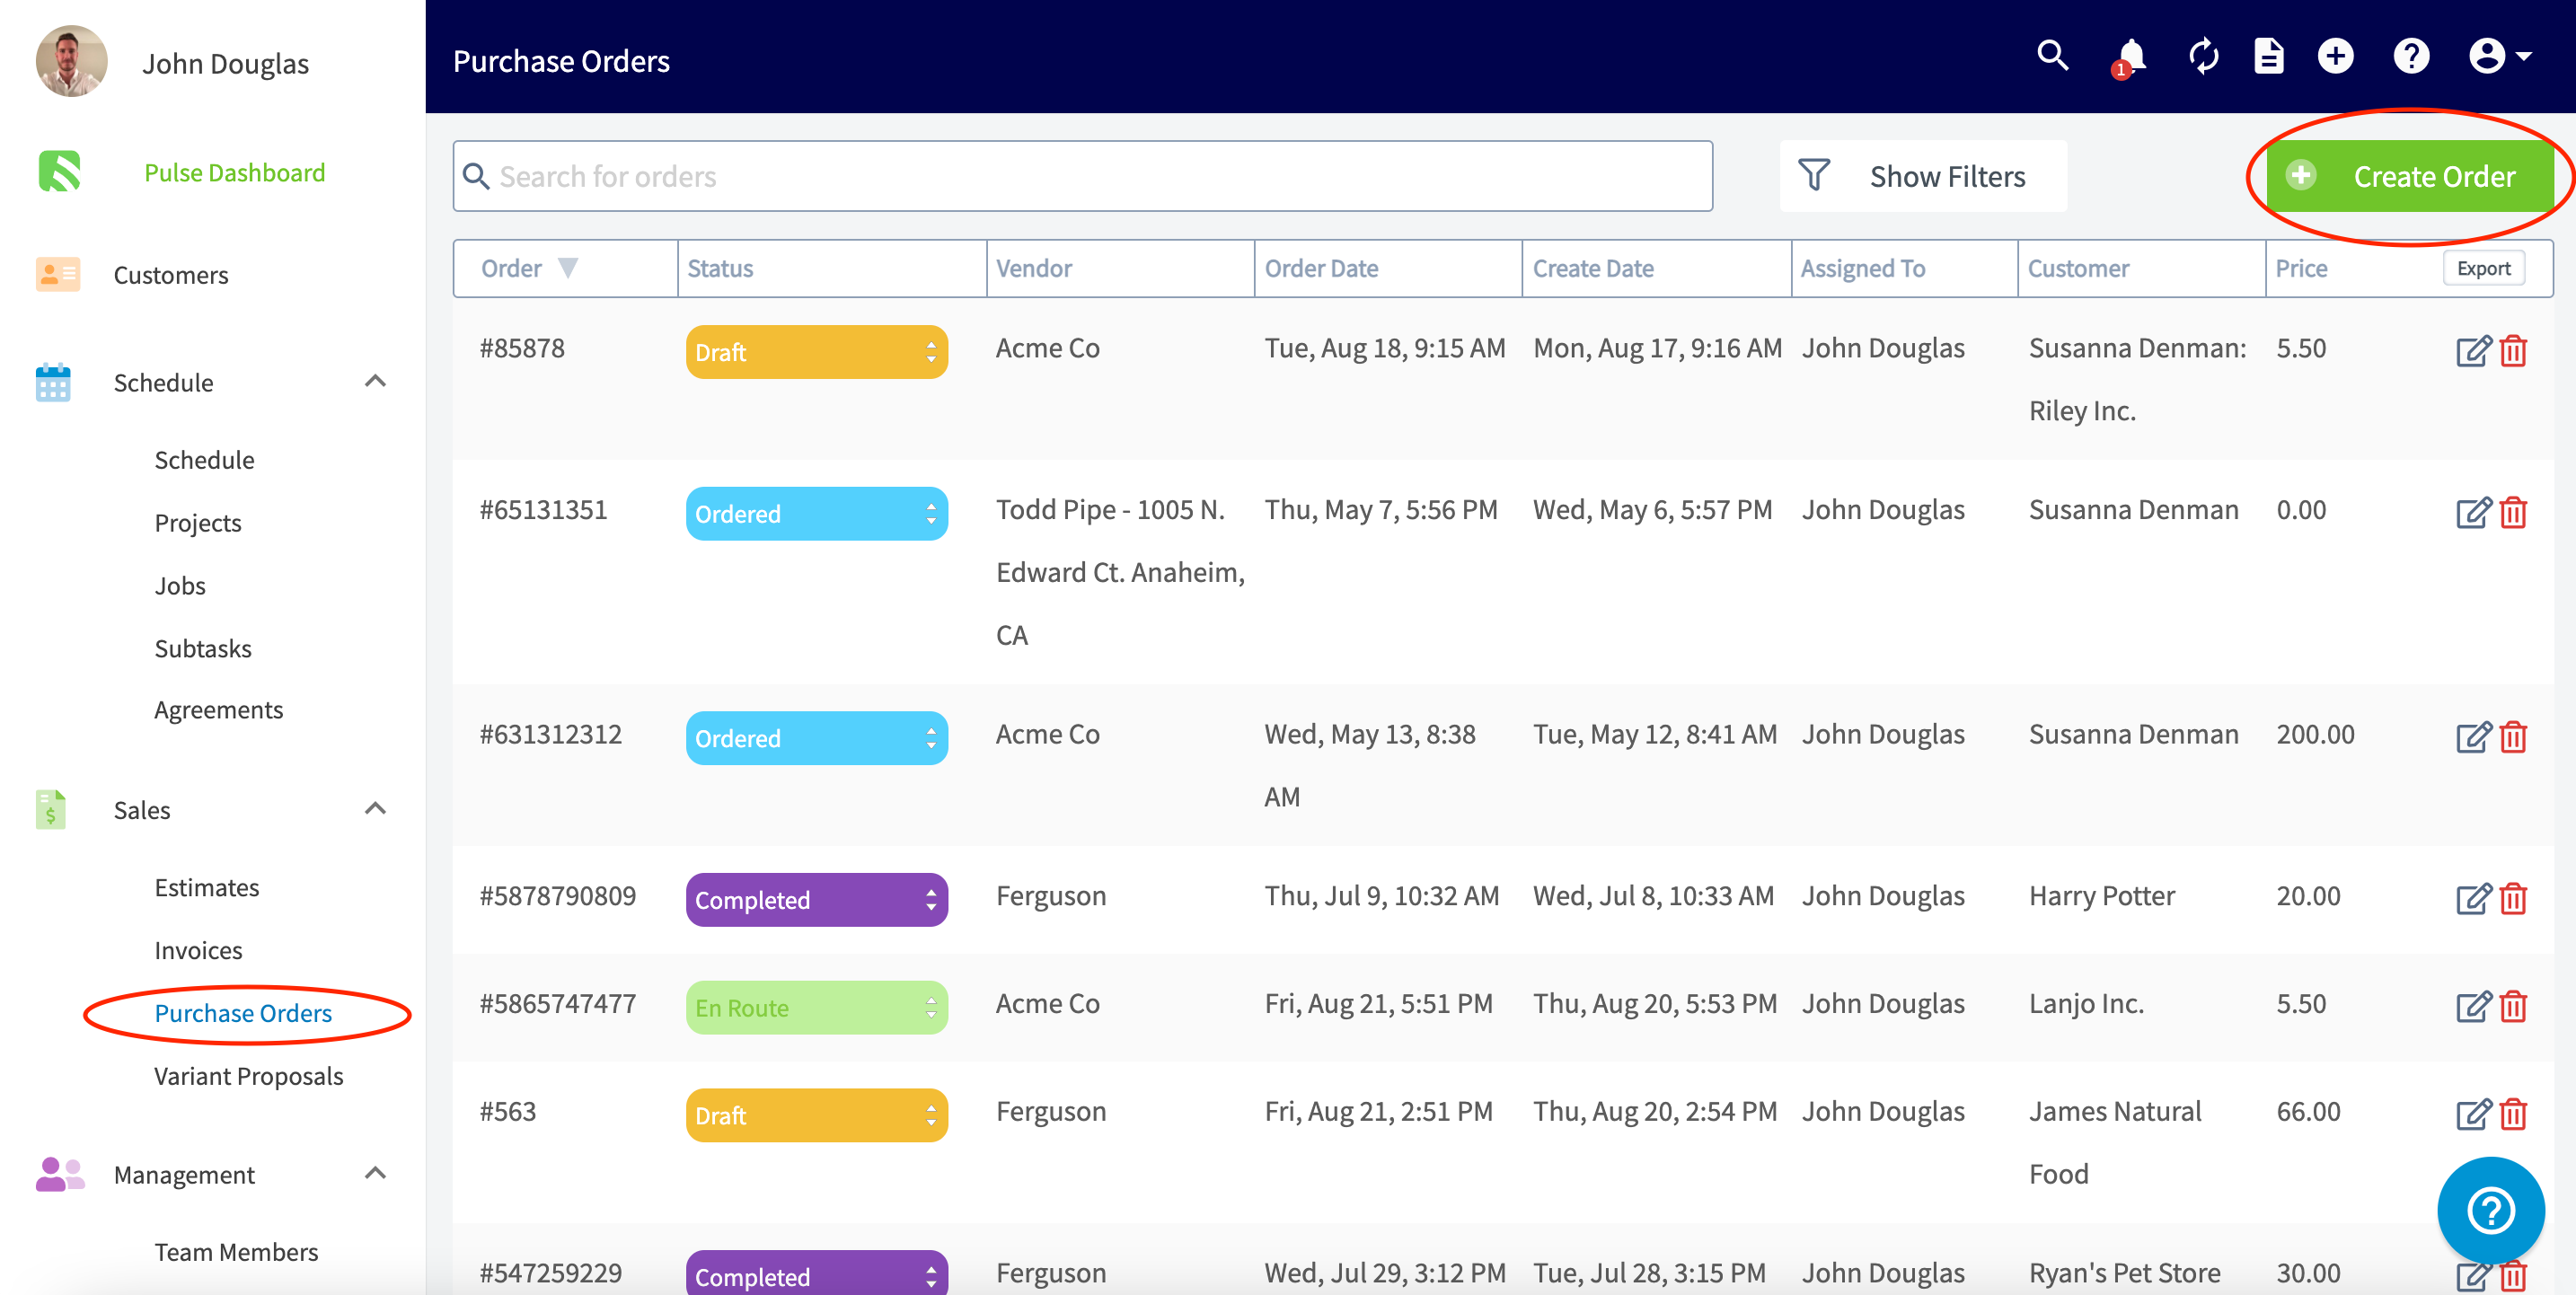
-
-On the next page you'll start by adding a supplier. Click in the supplier search box and you'll see a list of your saved suppliers. Identify the supplier you want to use and click _Select Supplier_.
-
-
-
-If the supplier you want to use does not already exist, create one by clicking _Create New Supplier_, add the supplier's name and email, then click _Create Supplier_.
-
-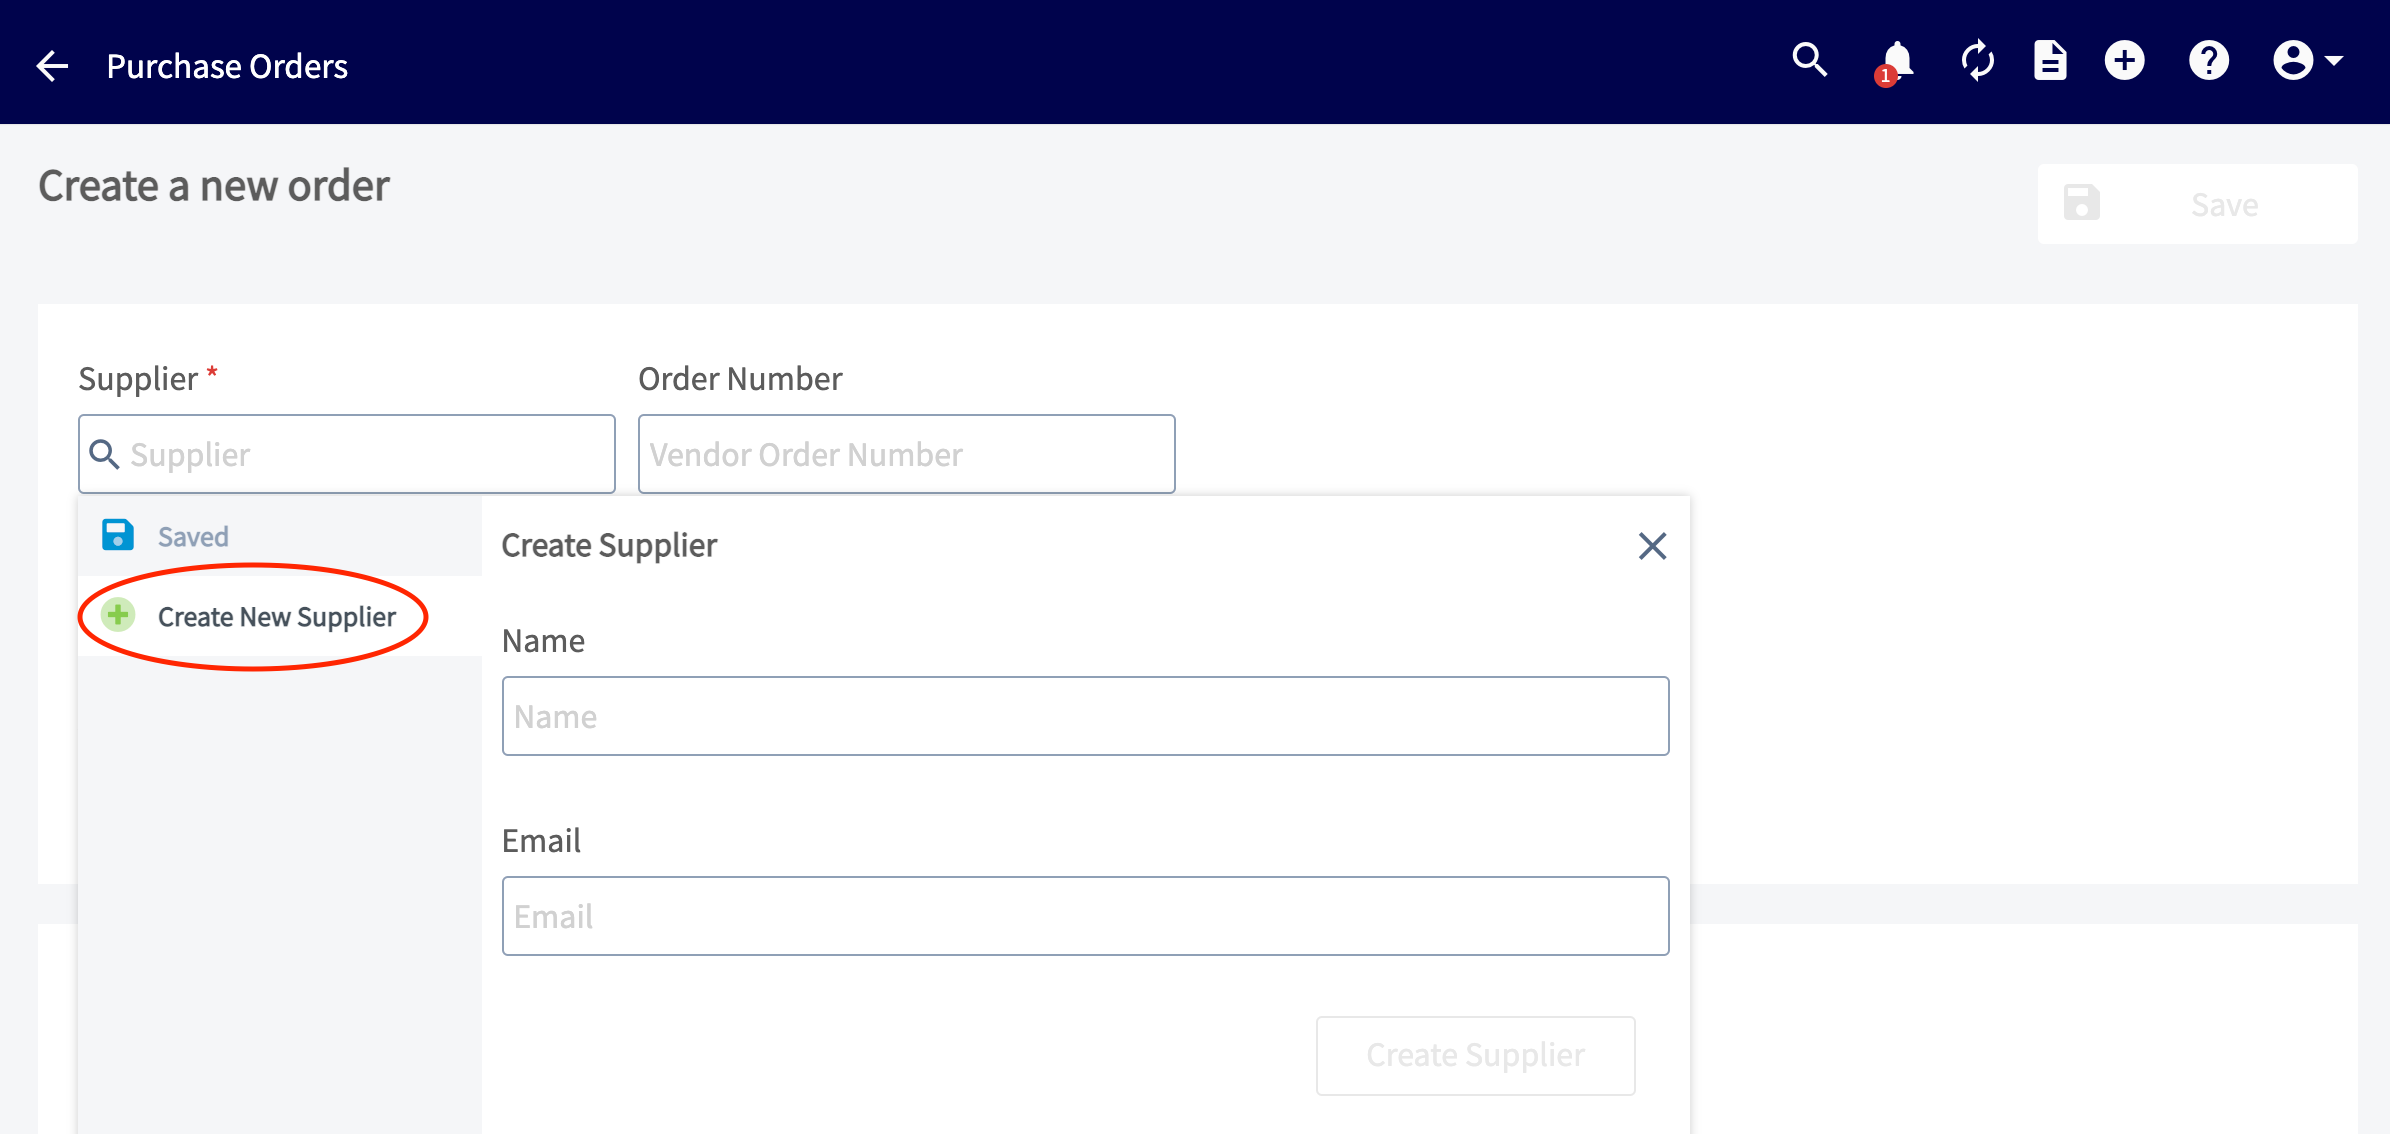
-
-Once you've added or selected the supplier, you'll enter the vendor order number, select pick-up or delivery, and enter the pick-up or delivery address.
-
-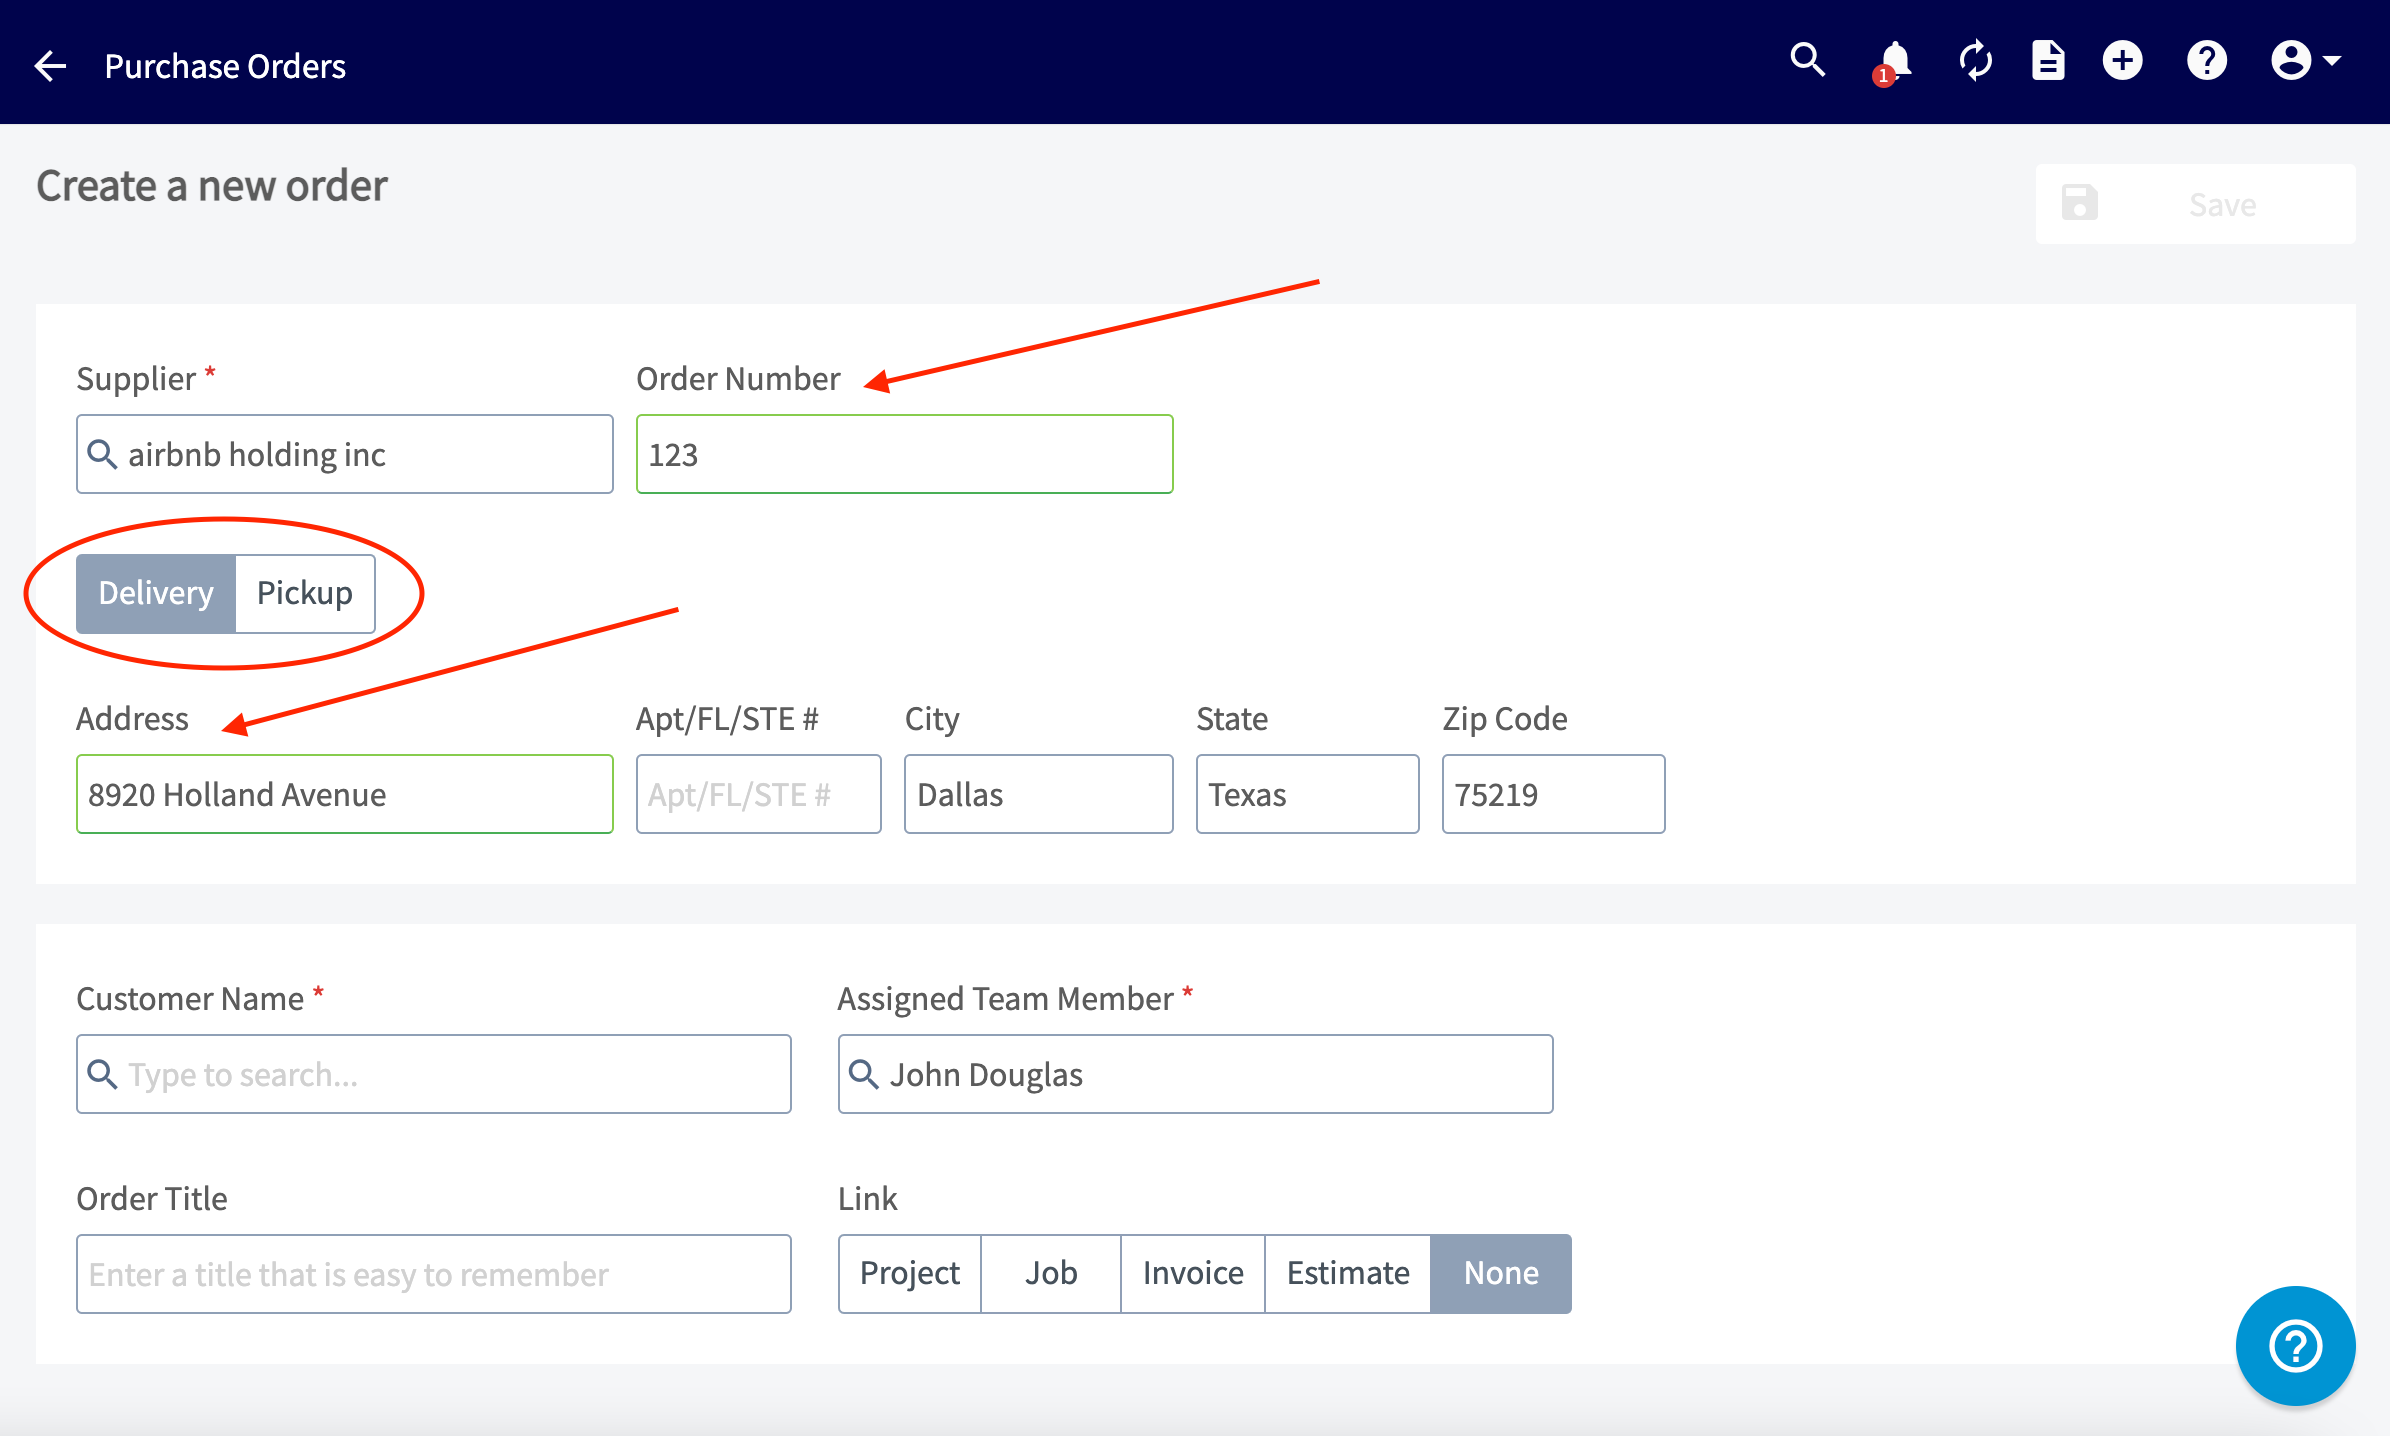
-
-Next you'll enter the customer name for the order. Click in the _Customer Name_ field and choose an existing customer or click _Create New Customer_ to build a new one.
-
-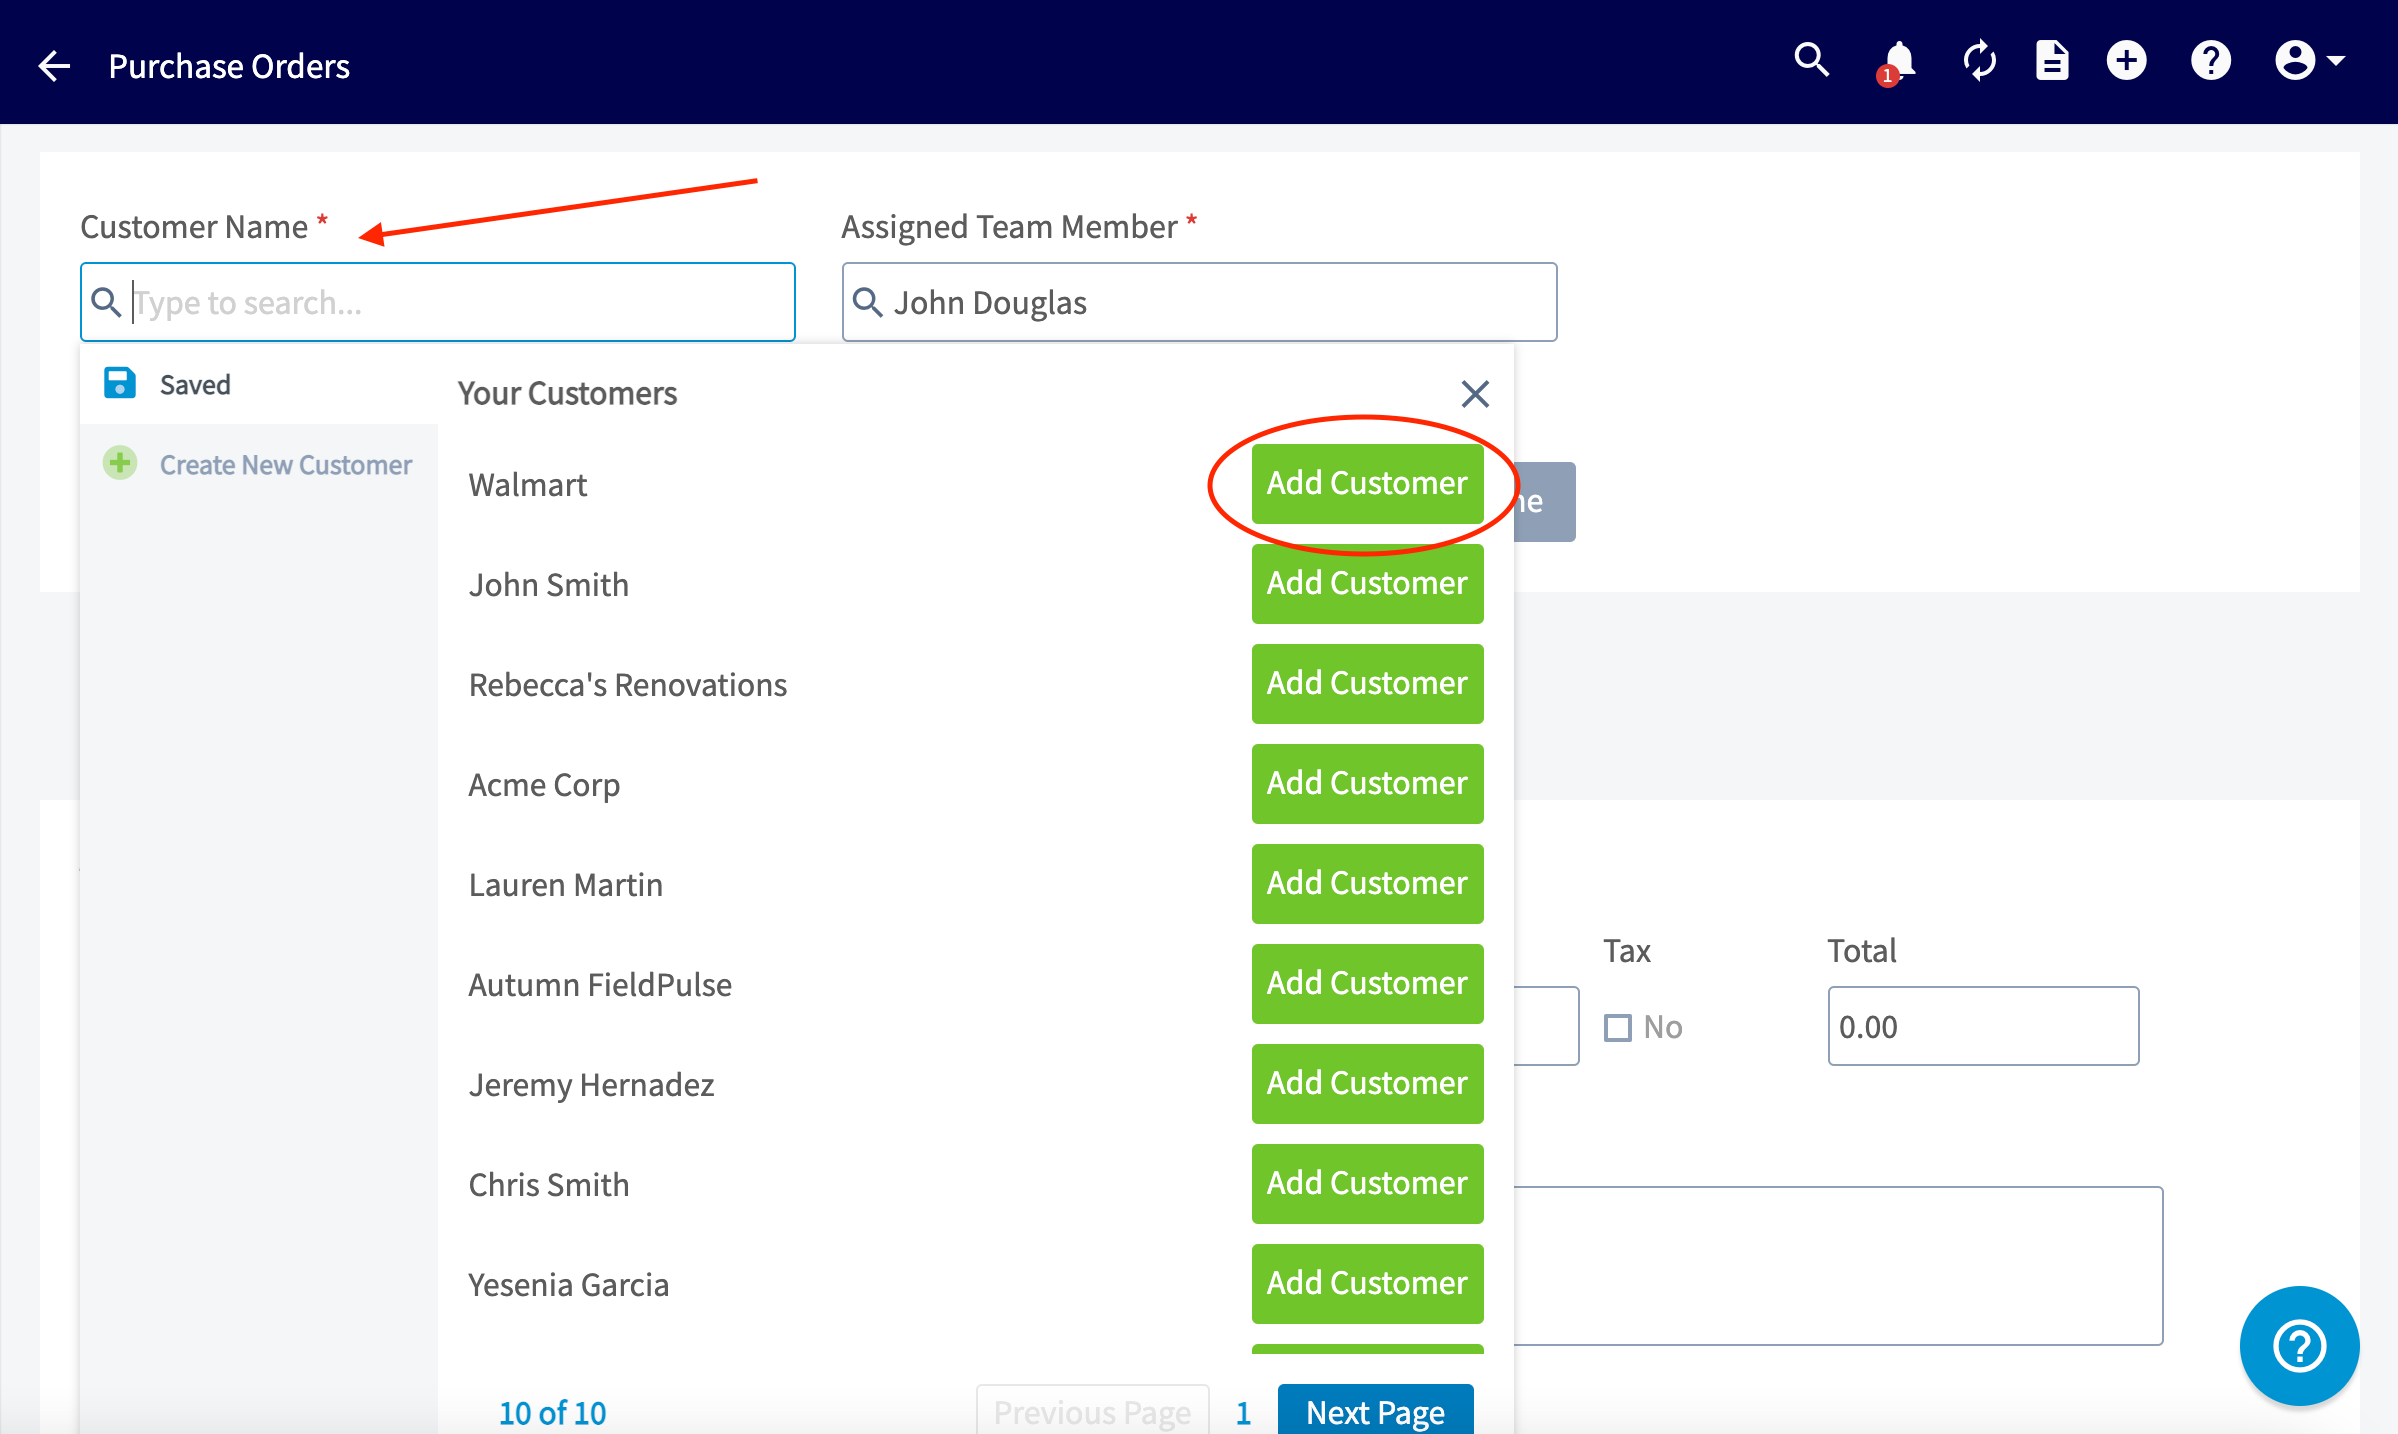
-
-Once you've added a customer, you will enter the Assigned Team Member _( **Note:** it will default to the Purchase Order creator)_ and order title. You can choose to link the purchase order to an existing Project, Job, Invoice, or Estimate, or create it as a standalone by selecting _None_.
-
-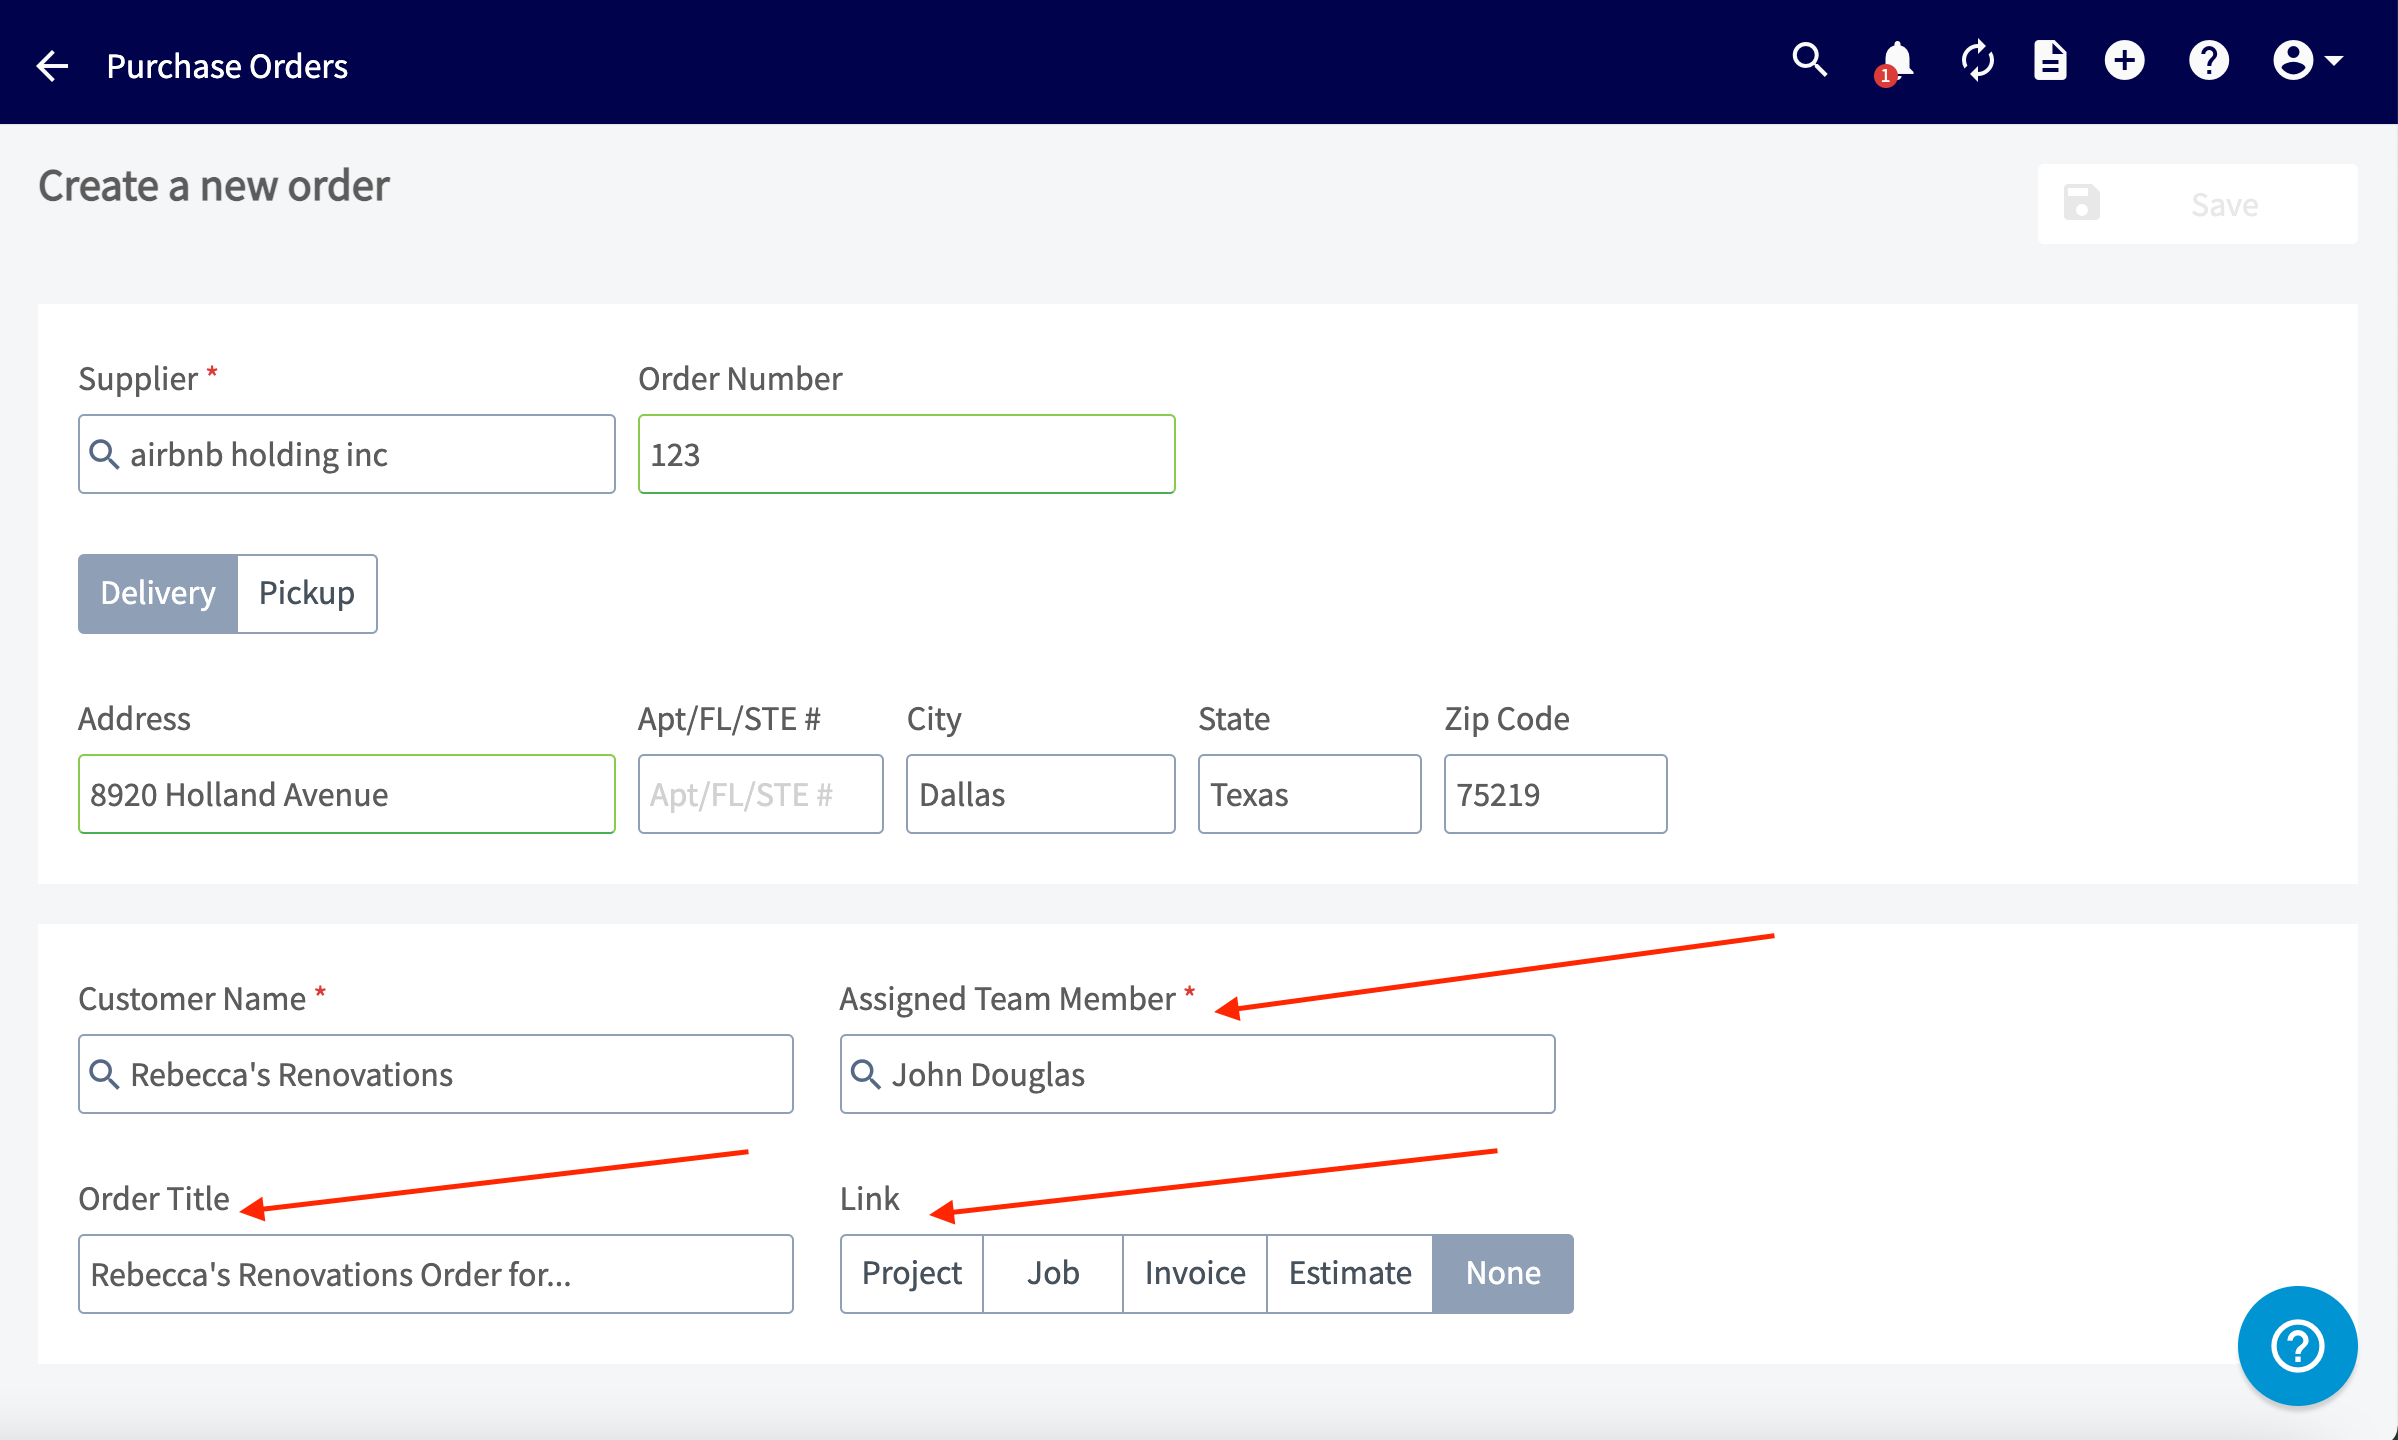
-
-Next we'll start adding items to the purchase order. To add existing invoice items to this purchase order, click the item search bar to add them. If you are adding an item that is not already in the system, click _Create New Line Item_.
-
-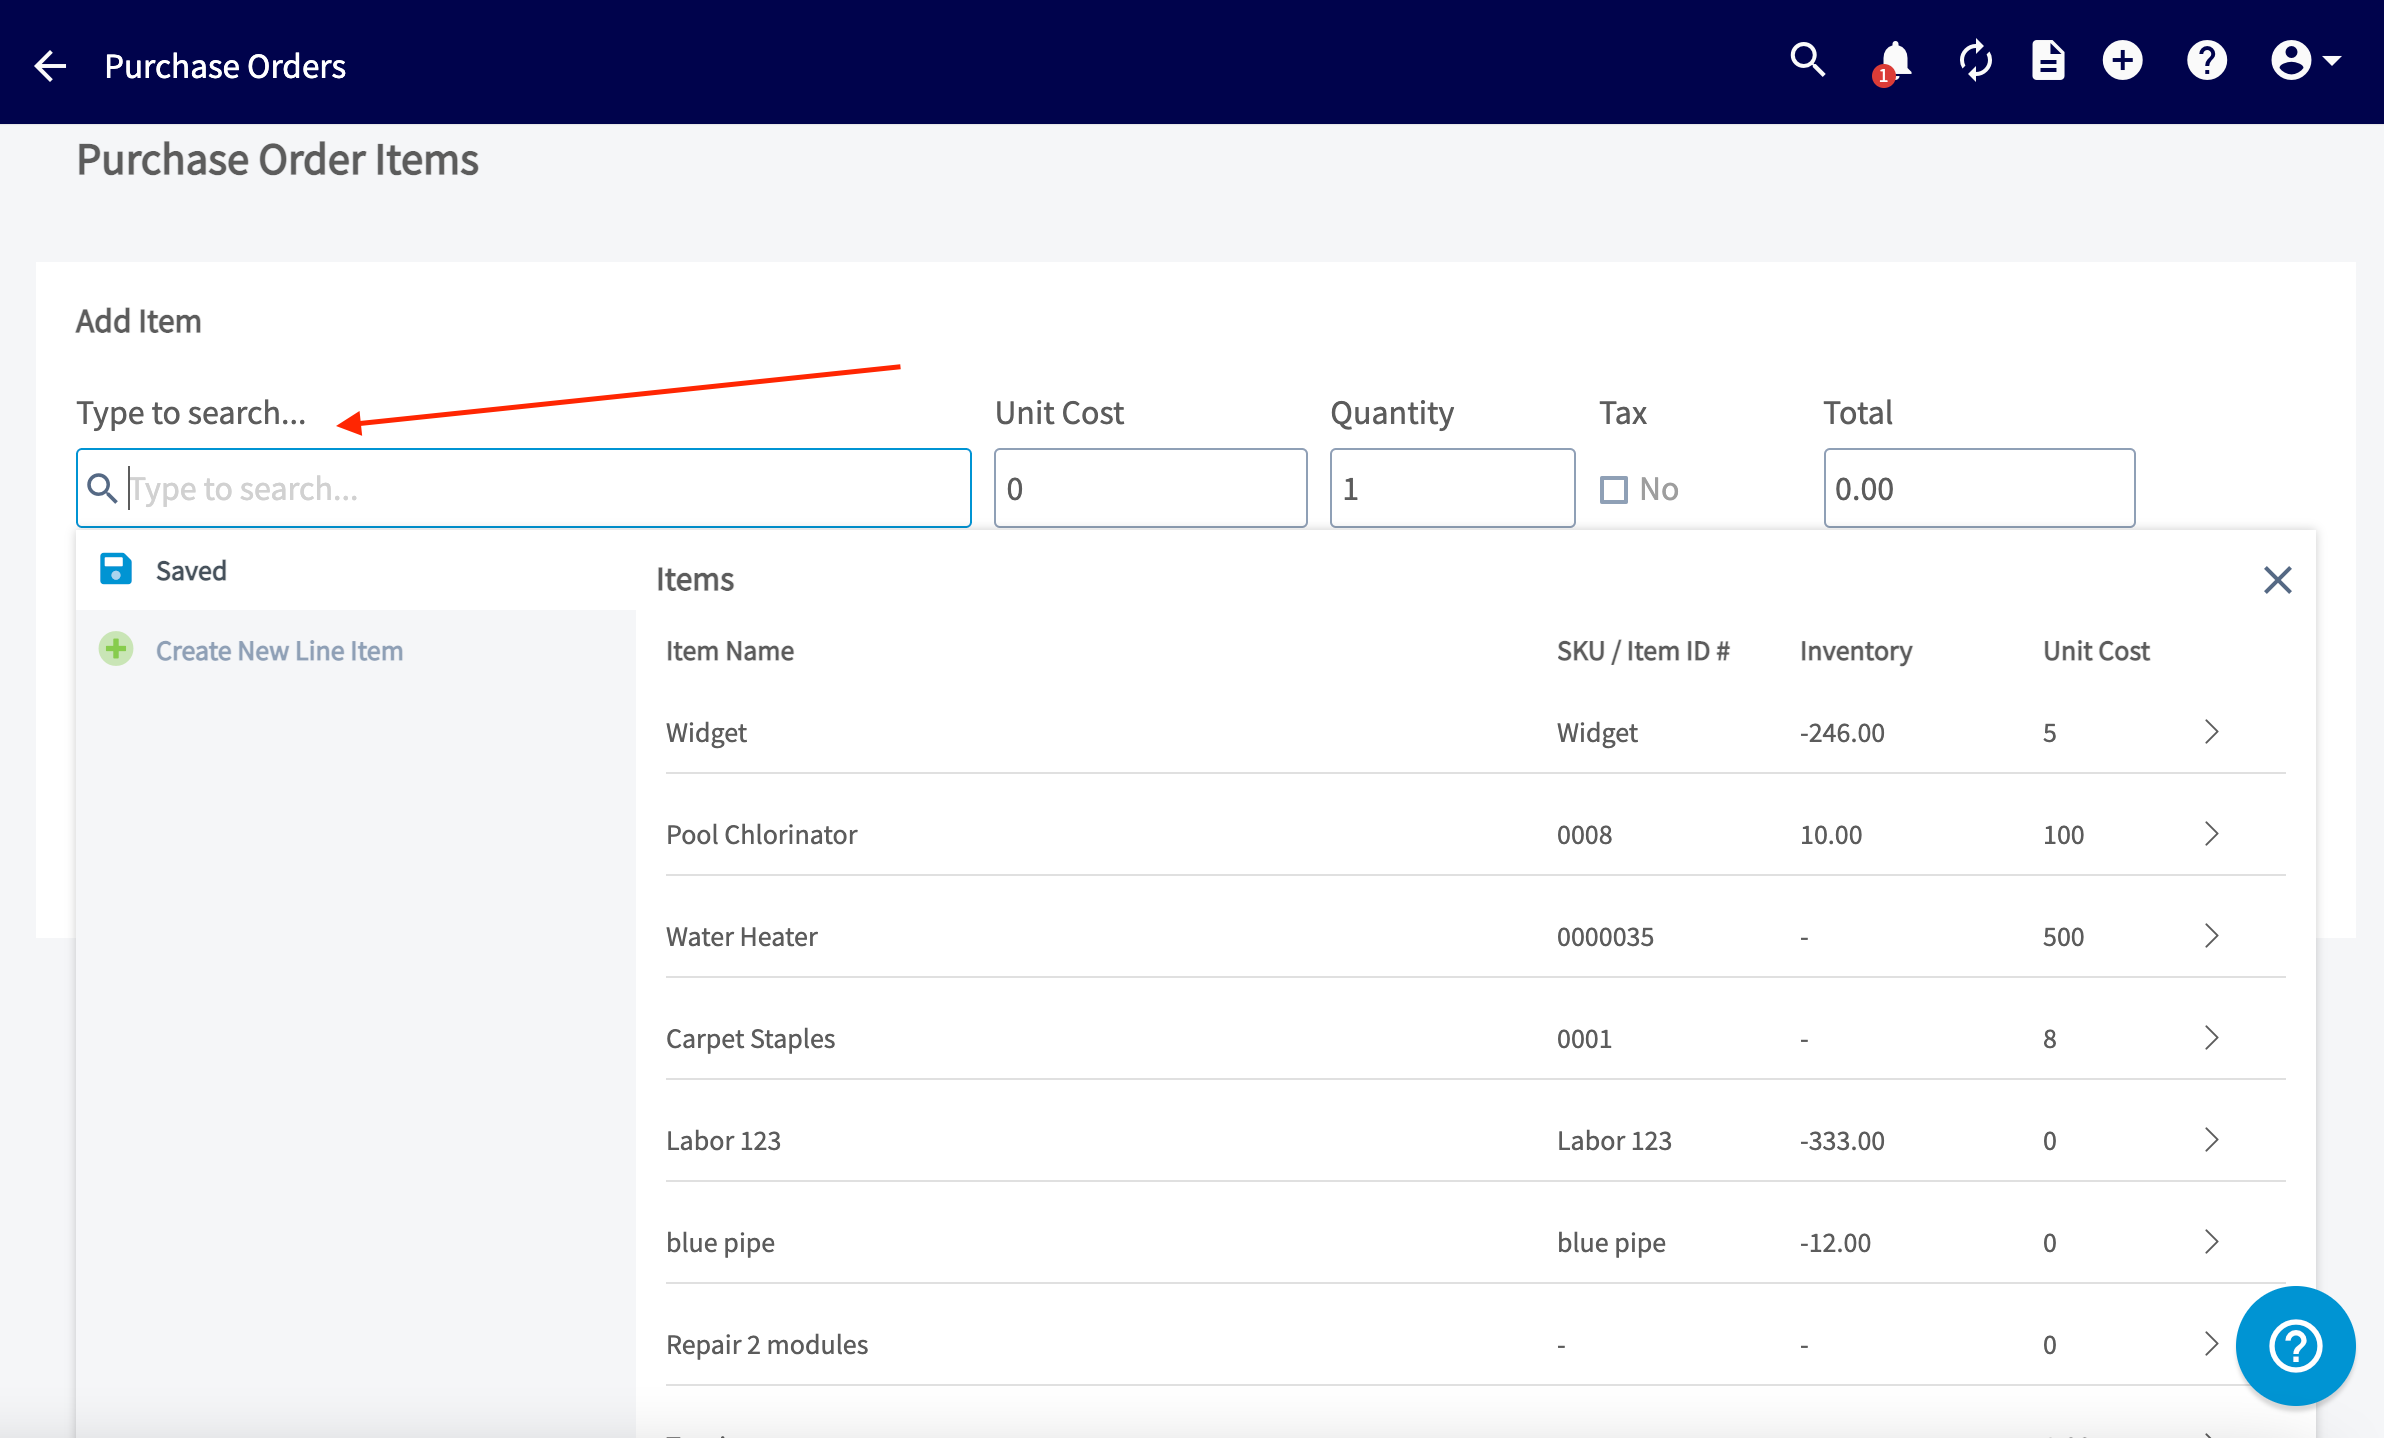
-
-Once you have added a line item, you can repeat the process for any additional items you want to add to your purchase order.
-
-You can type in a custom tag to add a new tag into the system. Click _Enter_ after each tag you'd like to use. You can also customize the color of your new tag! You can also select from a previously used tag in the tags list. Any tags you add will also appear alongside the purchase order details on the purchase order list view.
-
-Additionally complete any purchase order custom fields under _Additional Fields_. _( **Note:** To create or edit custom fields on purchase orders, navigate to Company Settings > Orders > Custom Fields.)_
-
-
-
-Lastly, you can enter instructions or notes at the bottom of the page.
-
-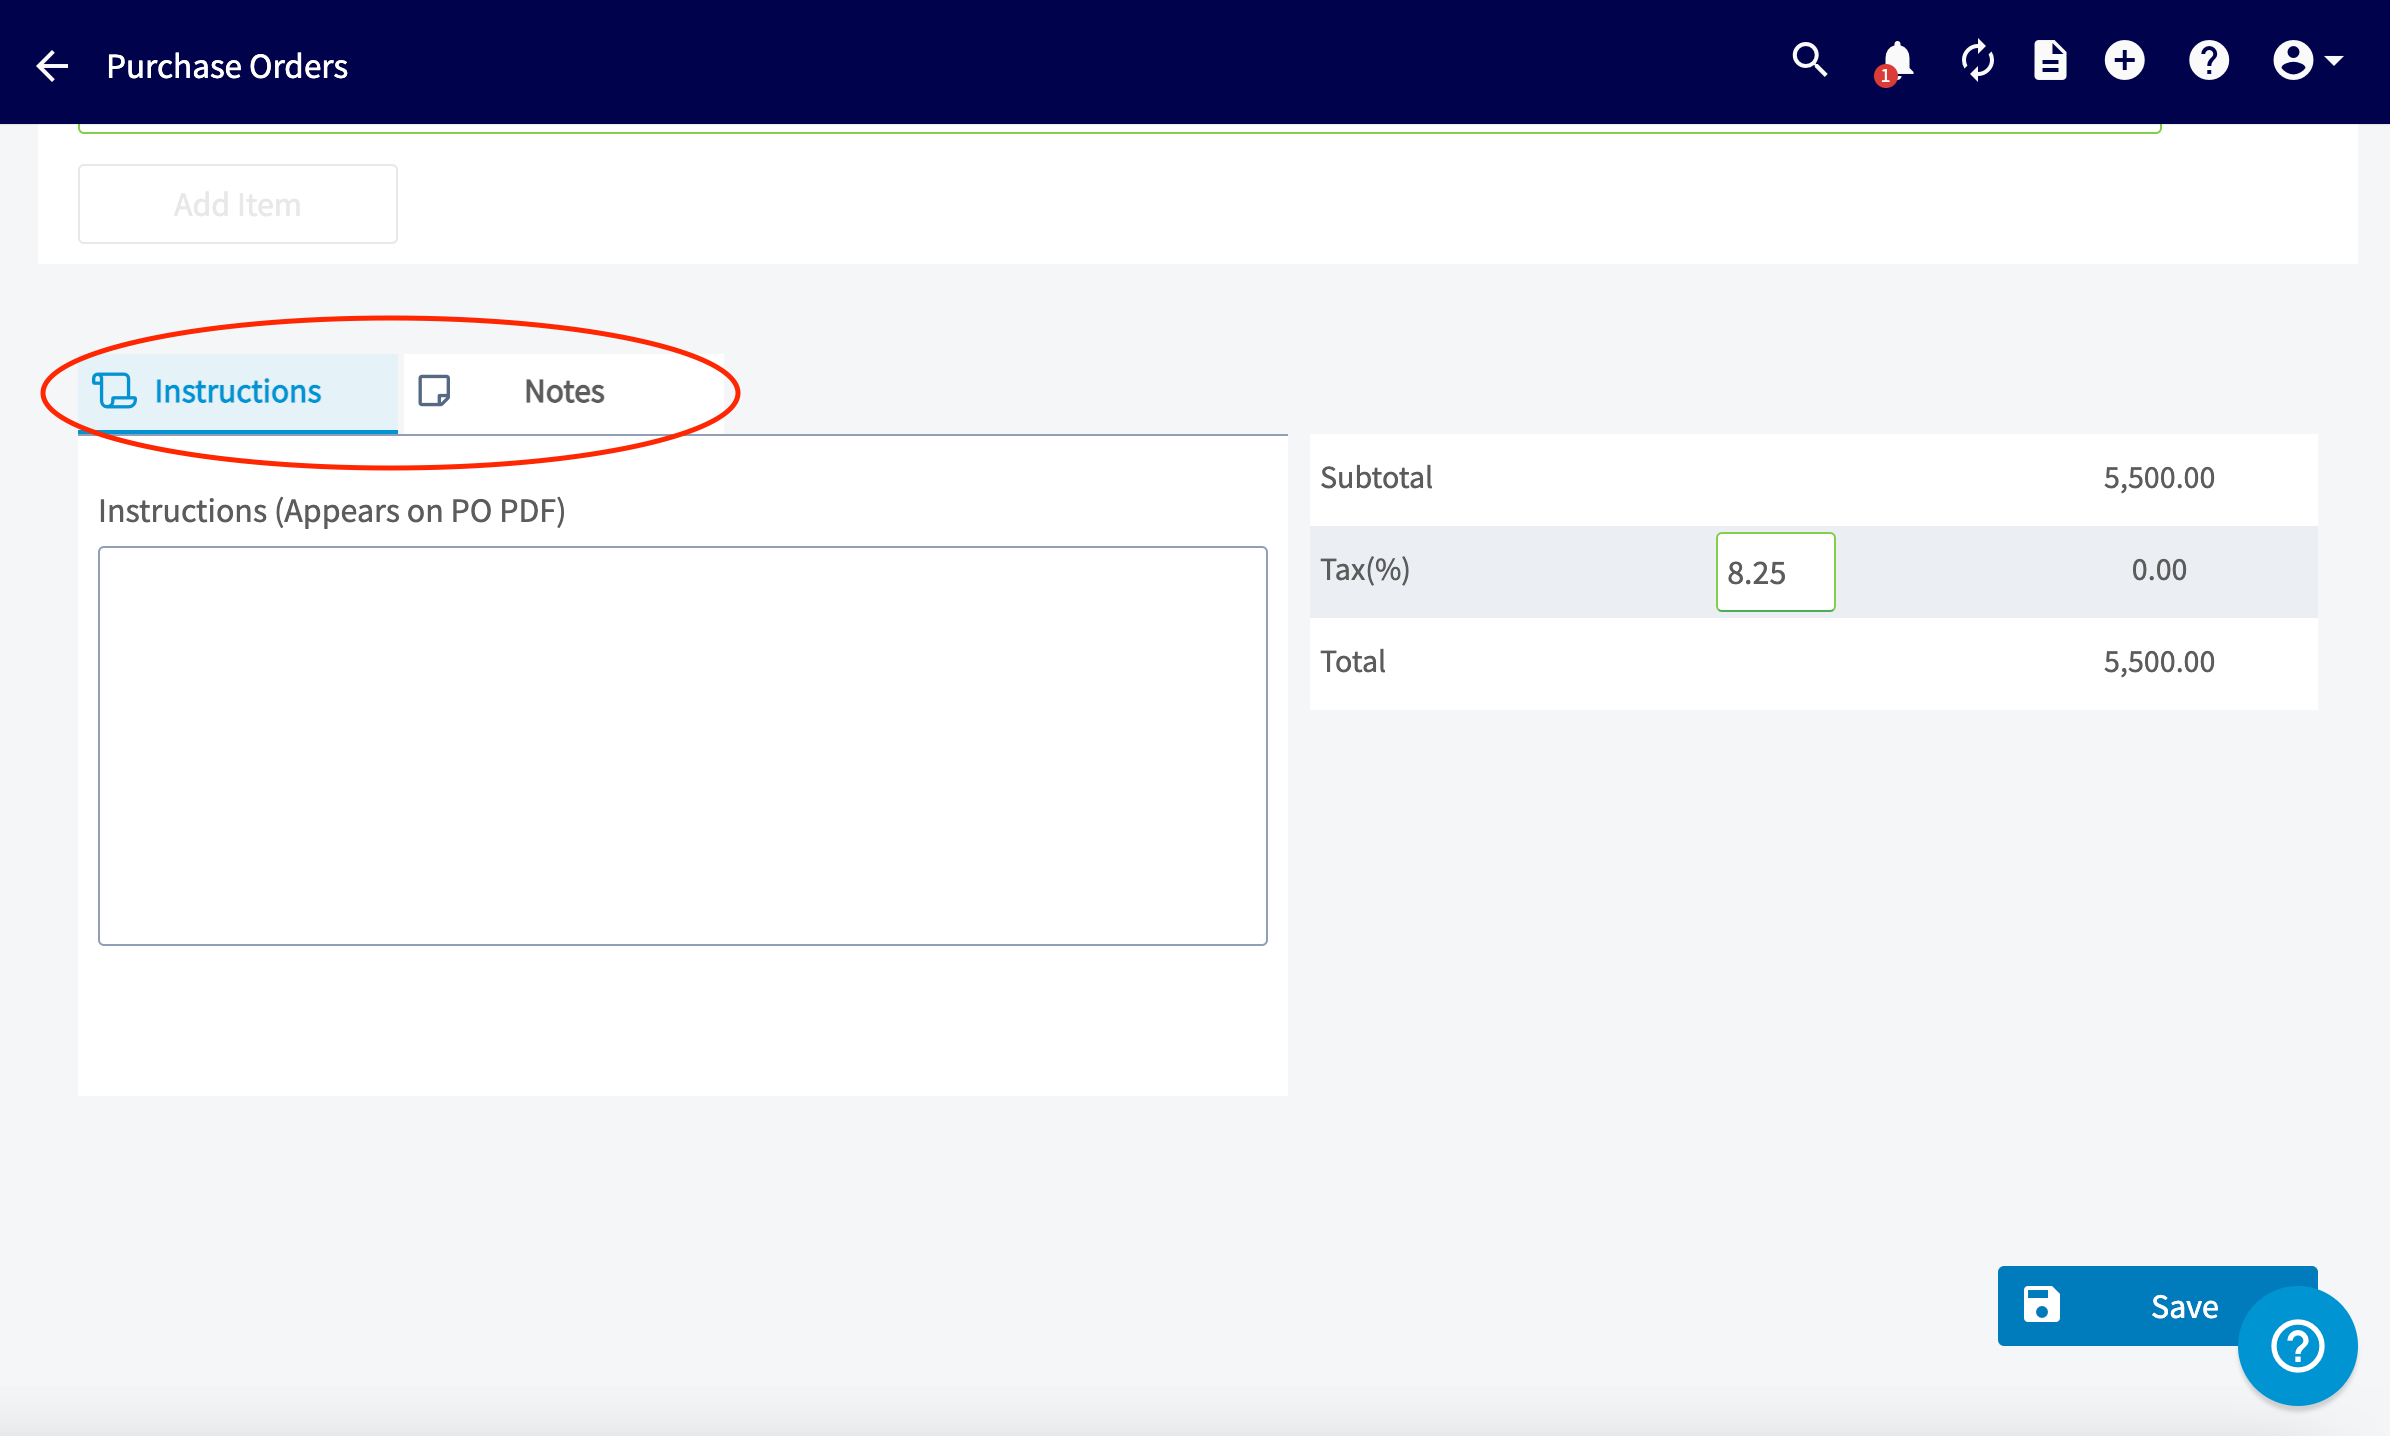
-
-Review the subtotal and total, and adjust the tax rate (if necessary) on the right hand side. If everything looks good, press _Save._
-
-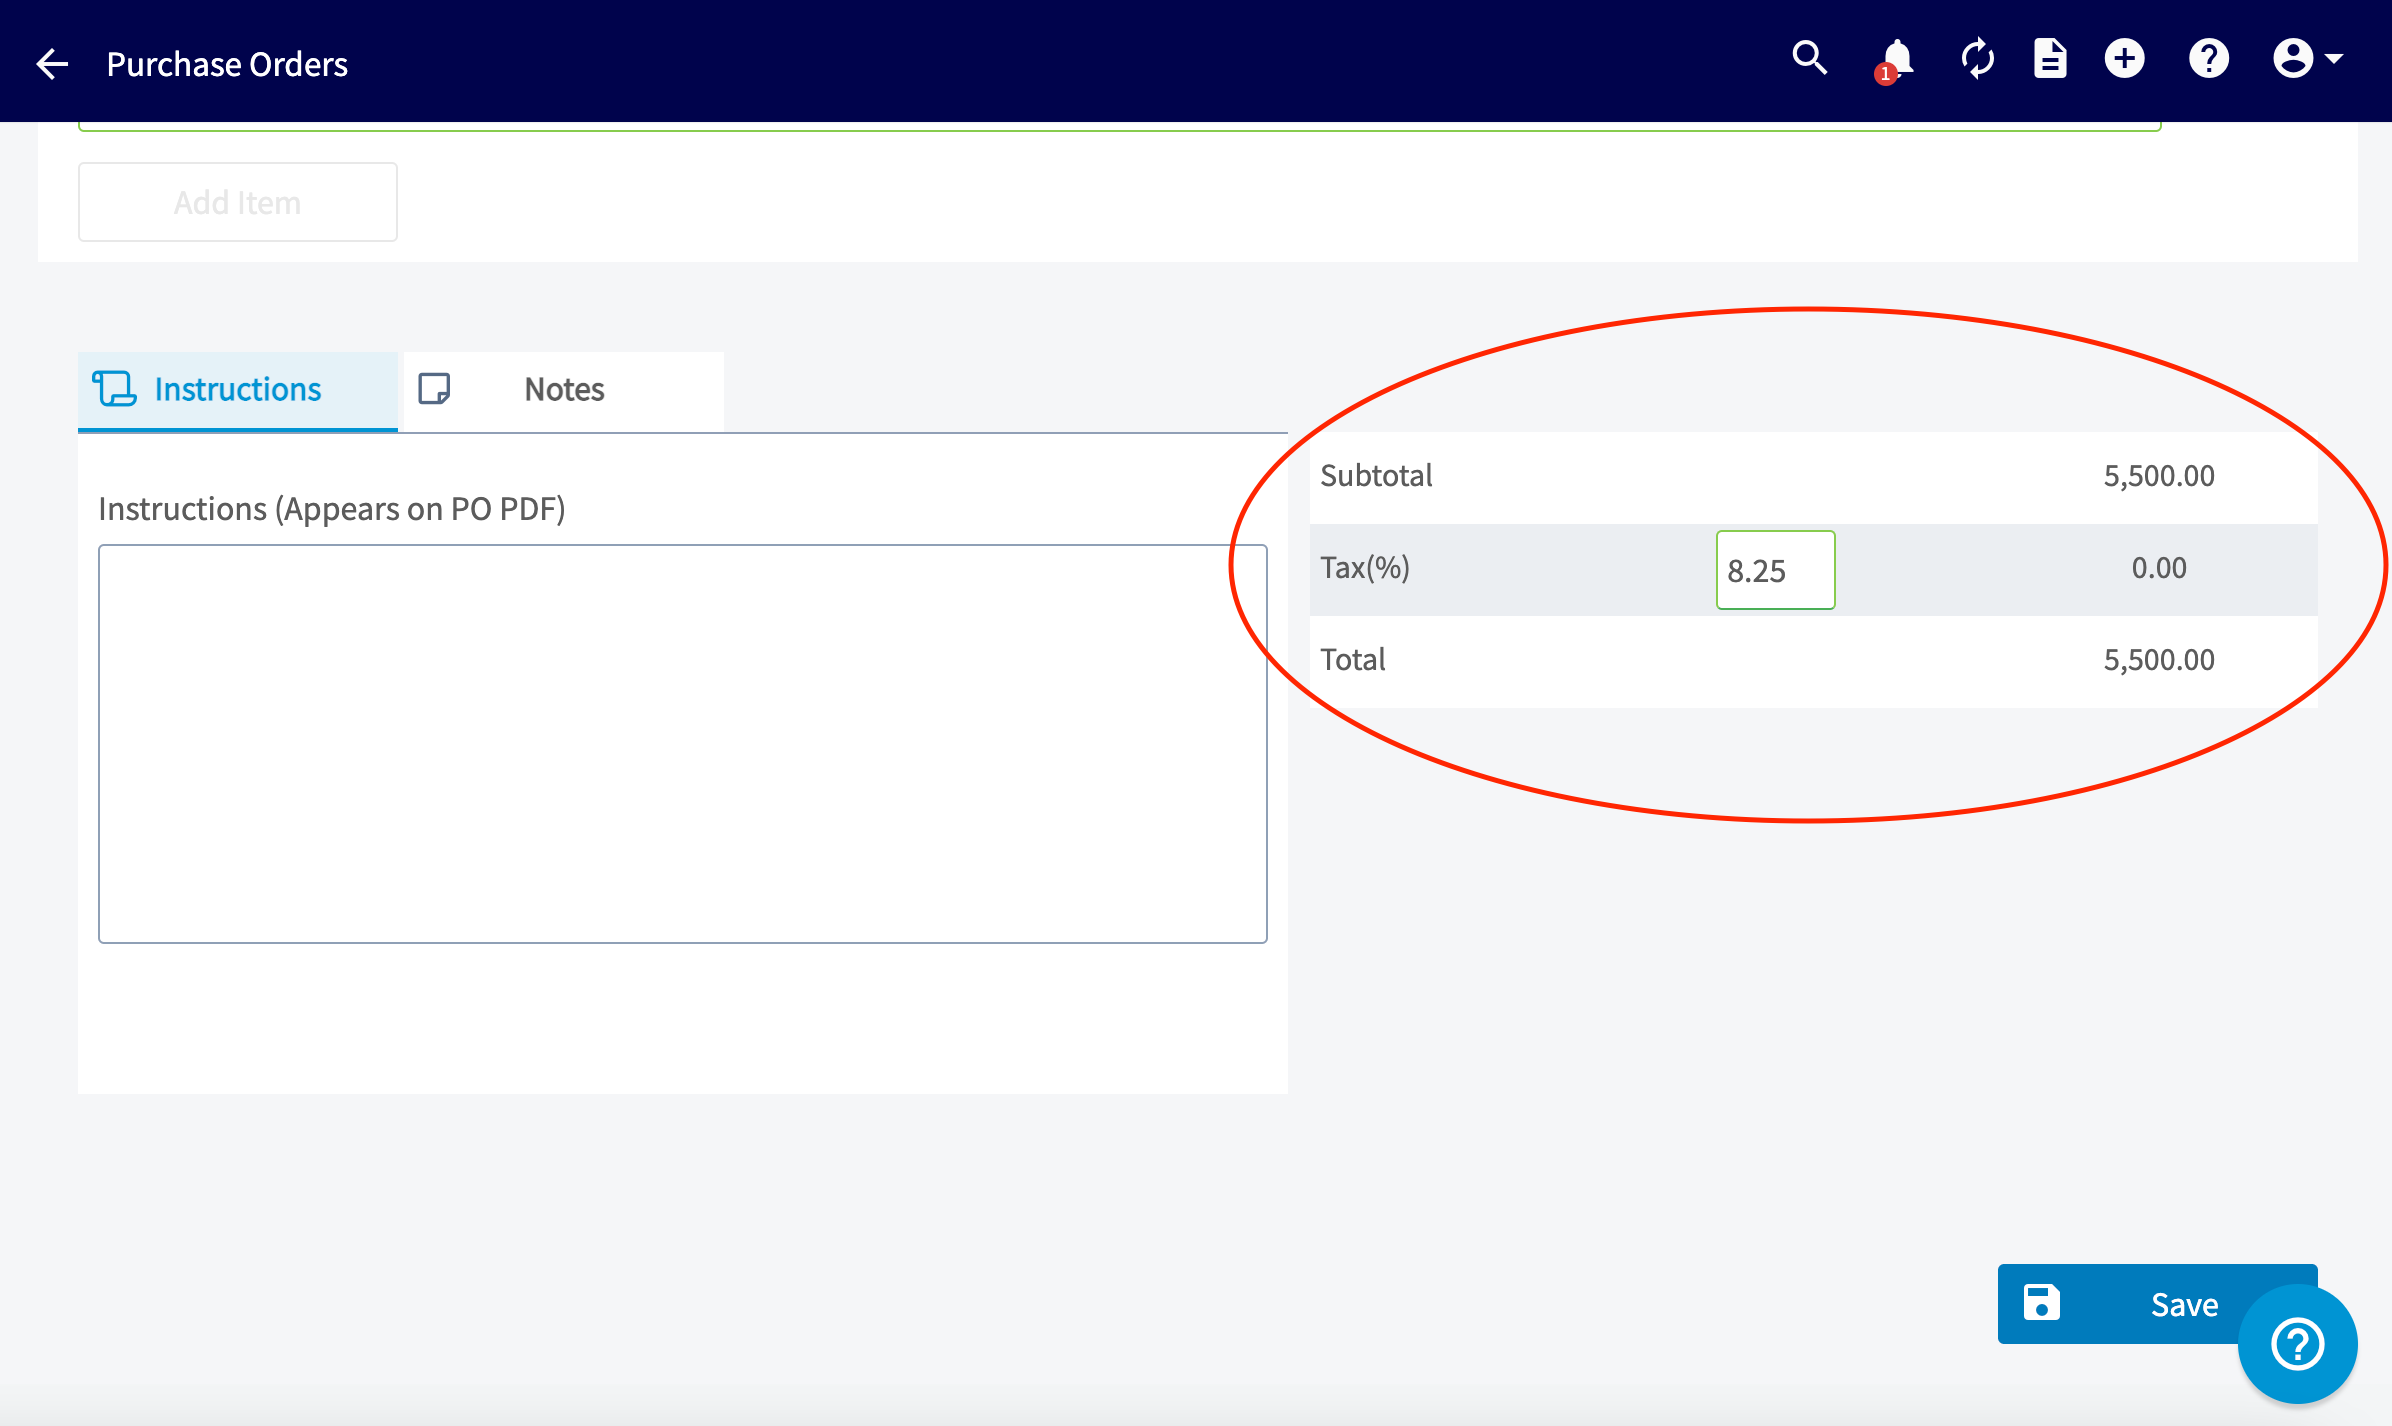
-
-On the next page you'll be able to review the details and edit the order. When you're ready to send the purchase order to your supplier, click _Send Email_.
-
-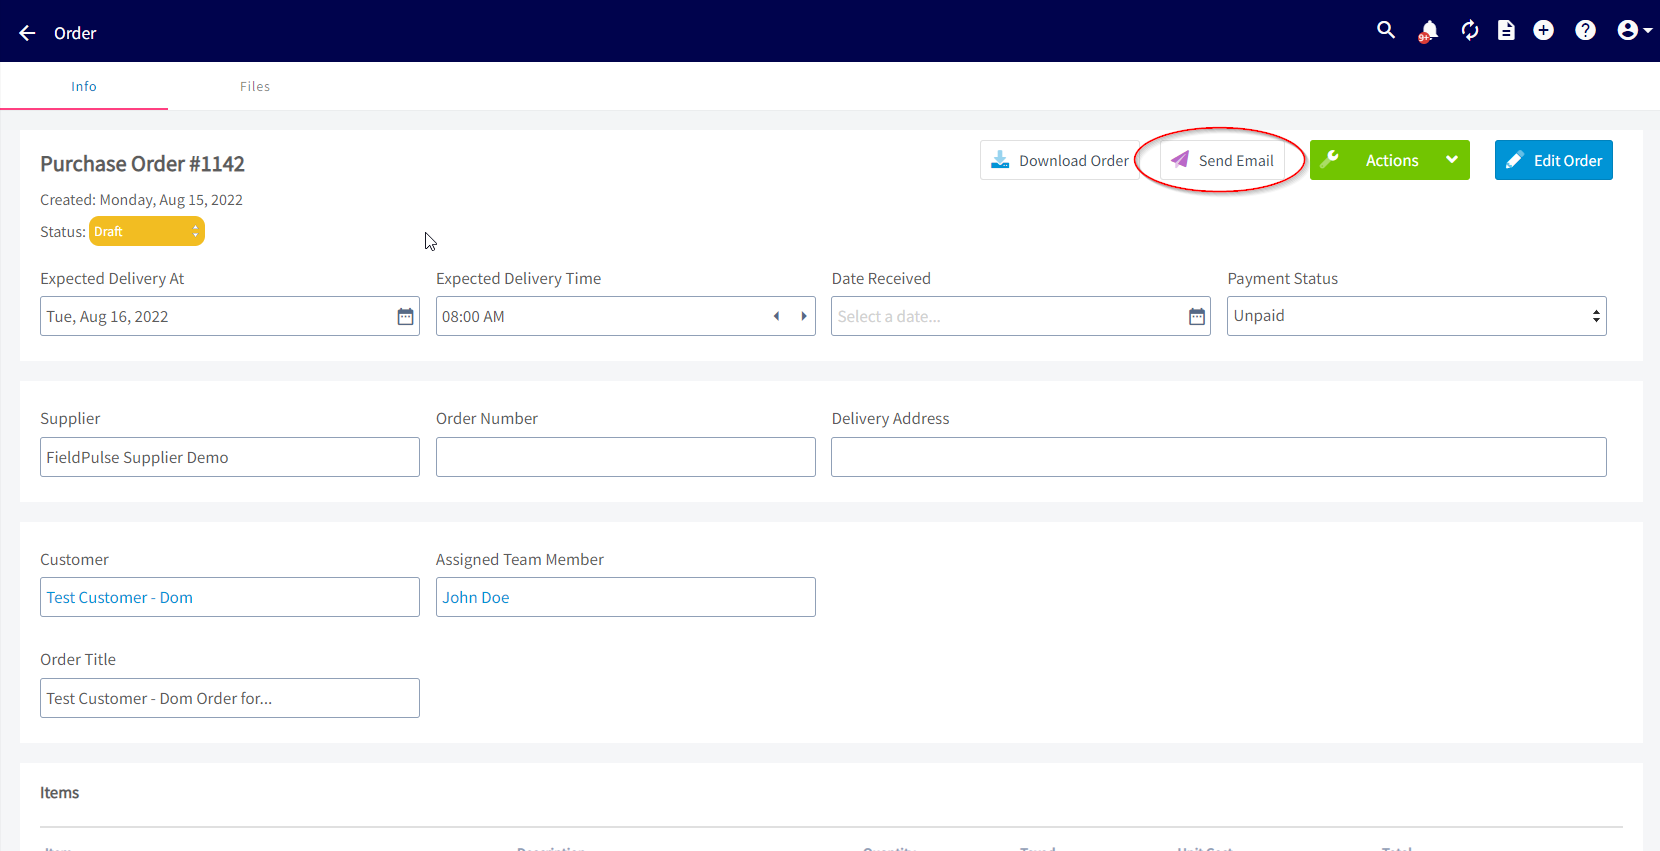
-
-Once the purchase order has been sent, you can save it as a PDF by clicking _Download Order_.
-
-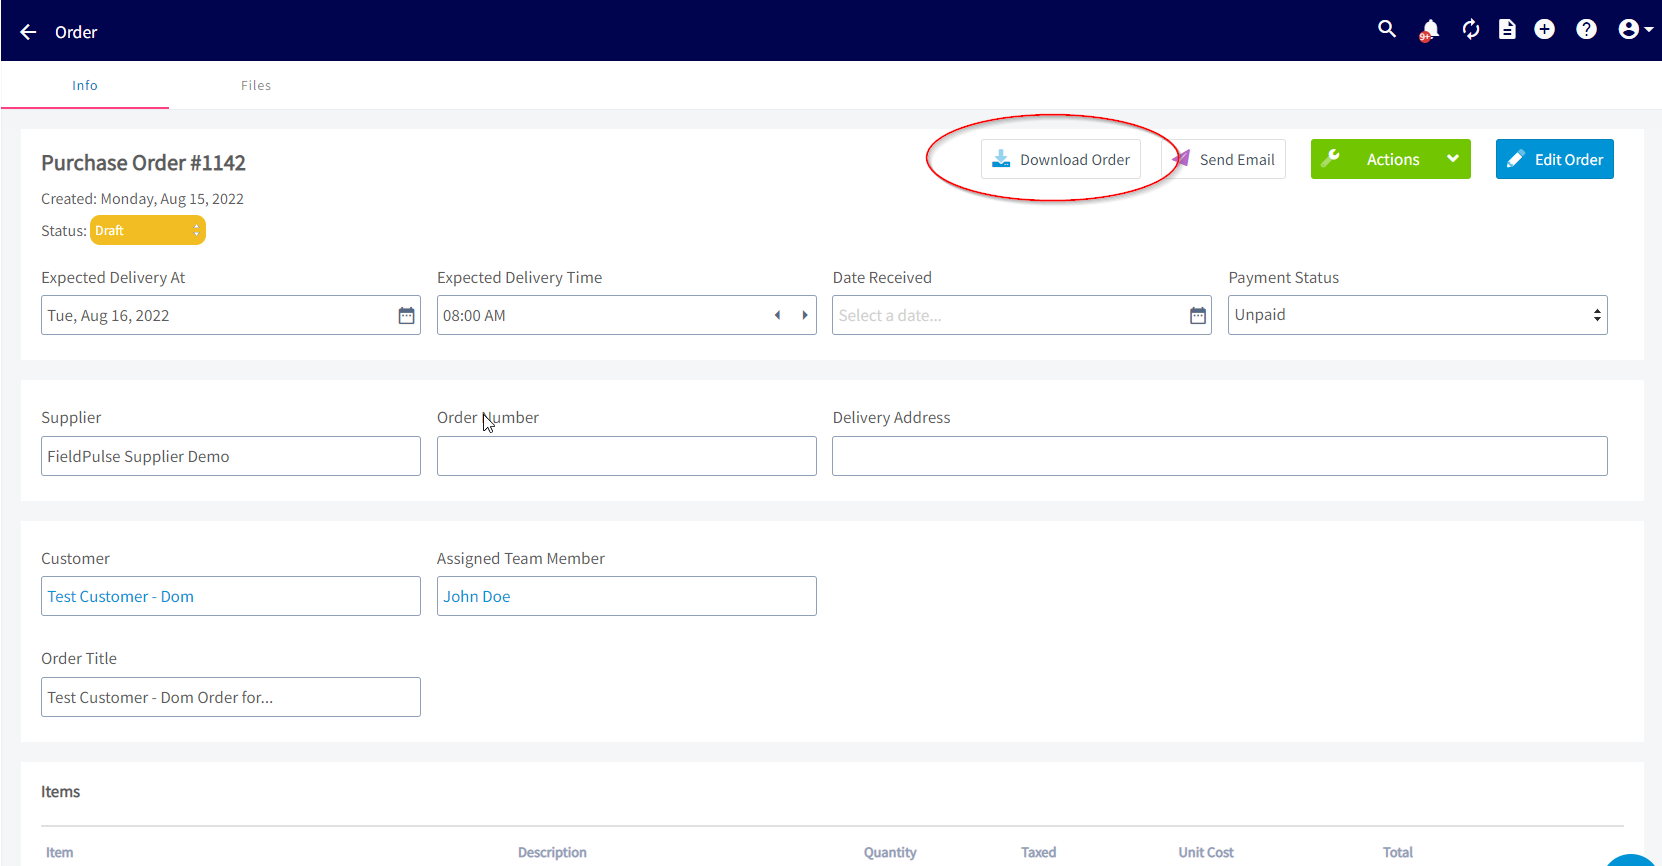
-
-This will open the PDF in your browser where you can download it to your computer.
-
-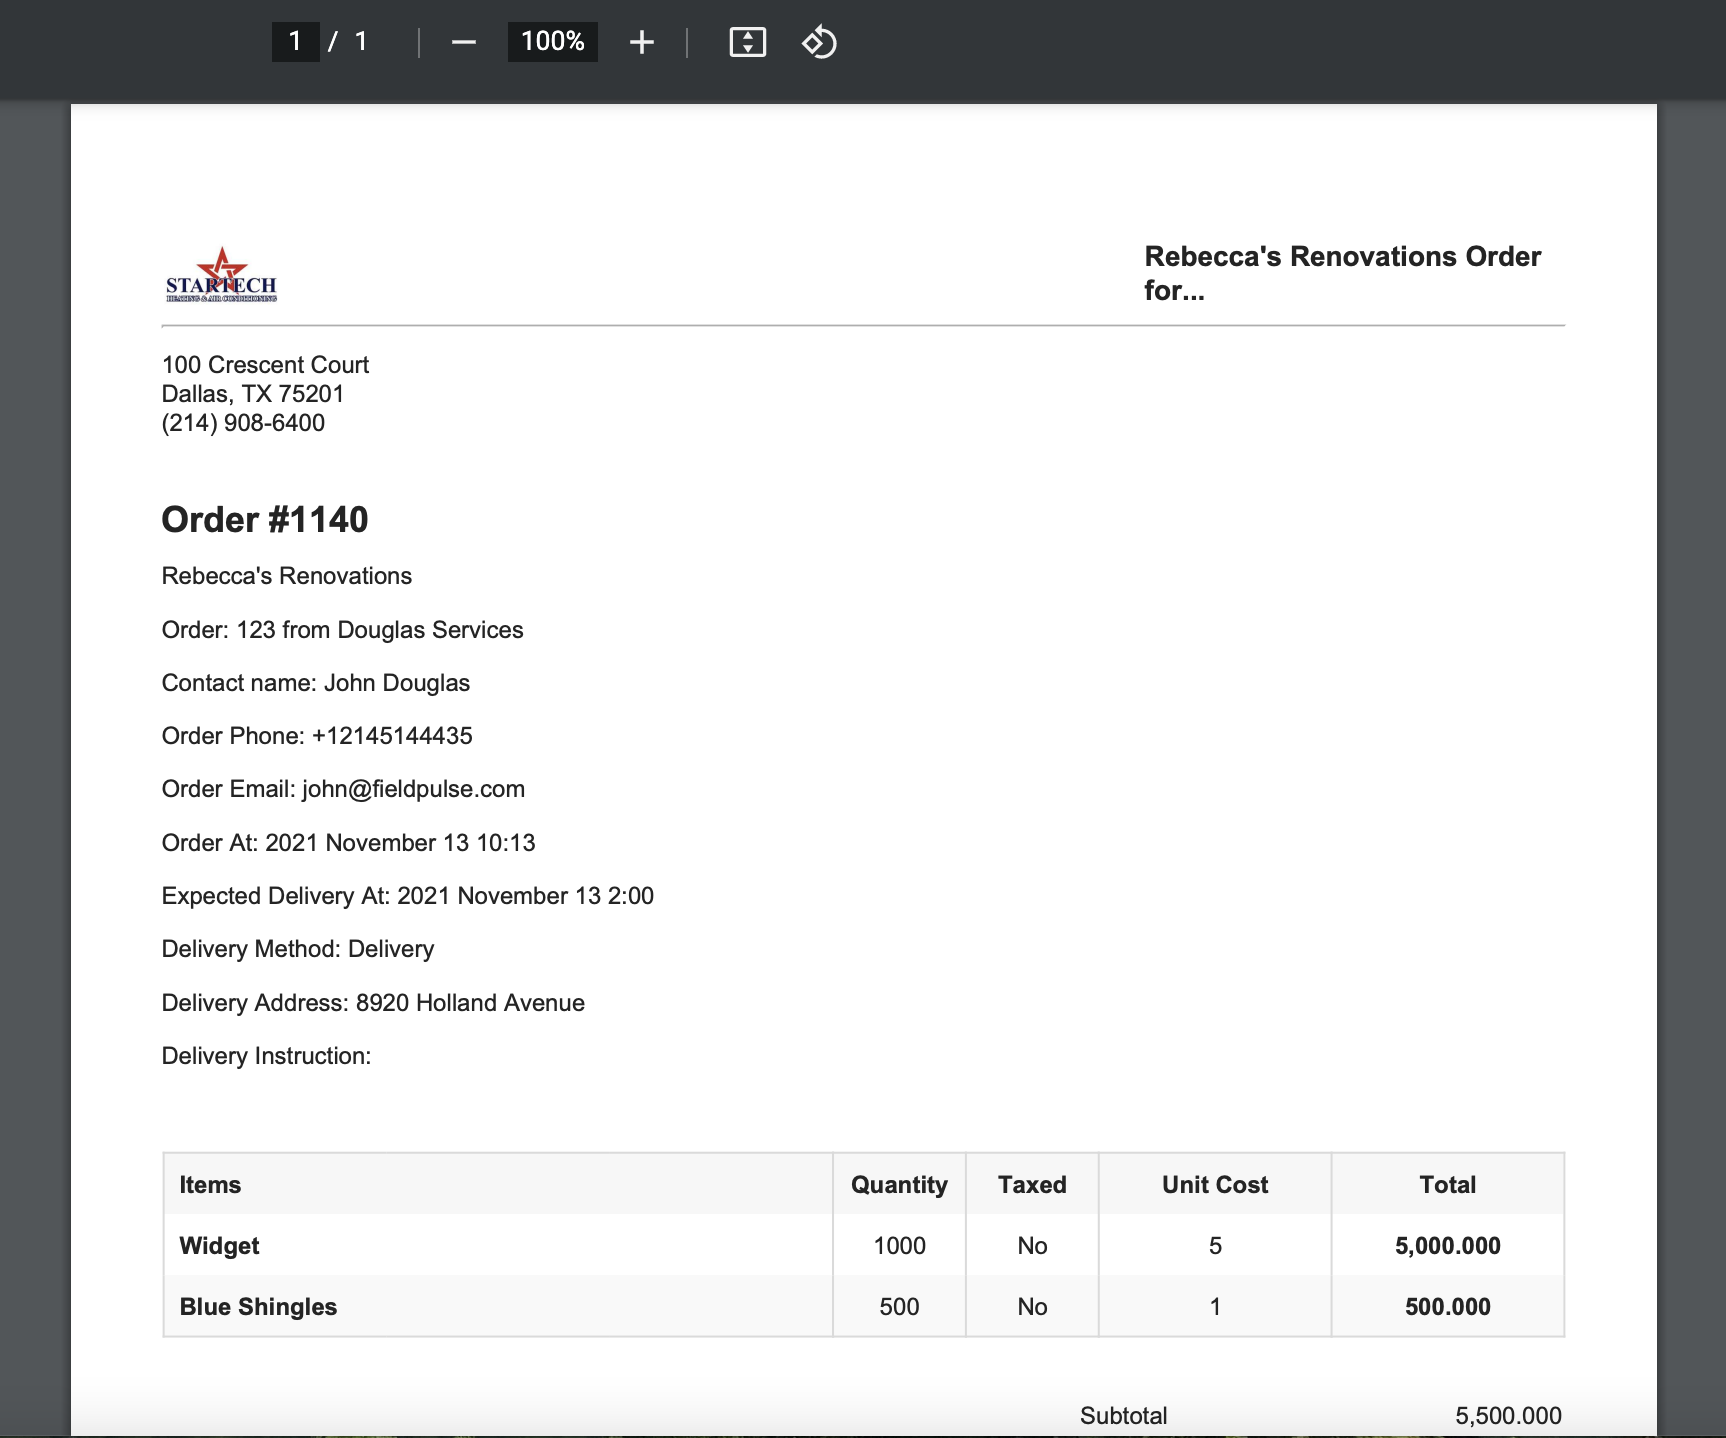
-
----
-
-## Creating Automatic Purchase Orders
-
-To automatically replenish items using purchase orders, begin by selecting _Invoices_ from the left-side menu and clicking on _Inventory_. Select the pencil icon next to the inventory item you want to set up automatic purchase orders for.
-
-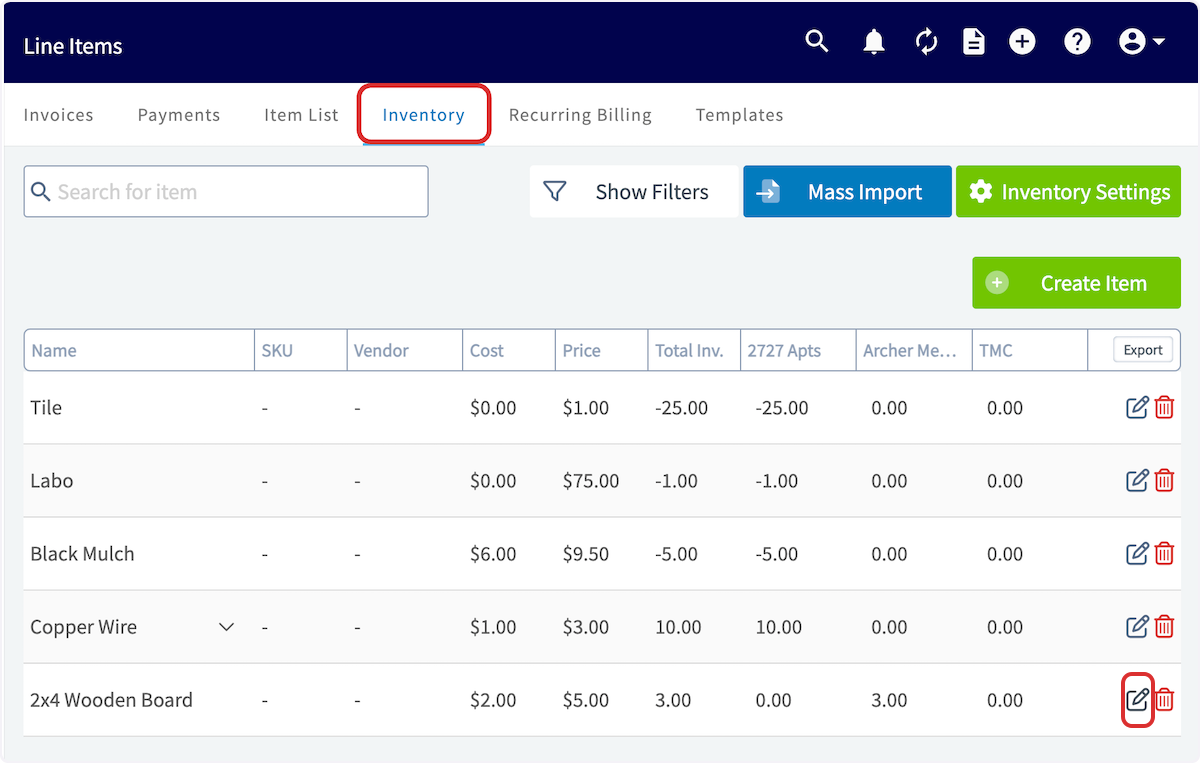
-
-To begin, click on _Supplier_. You can create a new supplier, or add an existing one.
-
-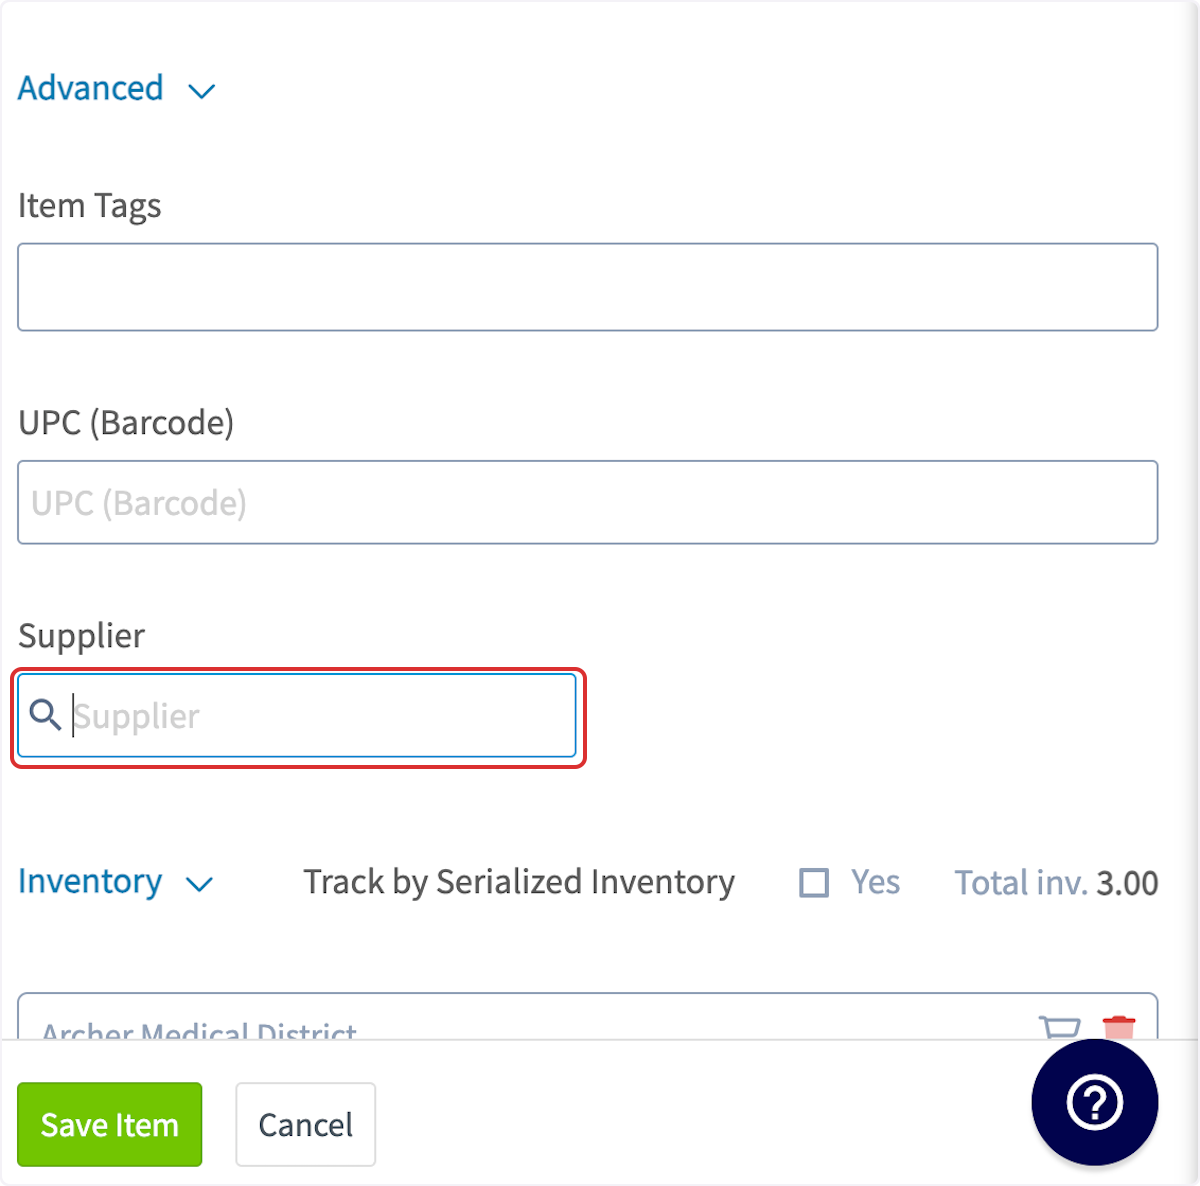
-
-Creating a new supplier looks like this:
-
-
-
-Selecting an existing supplier looks like this:
-
-
-
-After selecting your supplier, click on the shopping cart icon to enable automatic replenishment. _( **Note**: if you have multiple hubs, you will need to repeat this process for each hub.)_
-
-
-
-Toggle on the _Automatic Replenishment via Purchase Order_ button.
-
-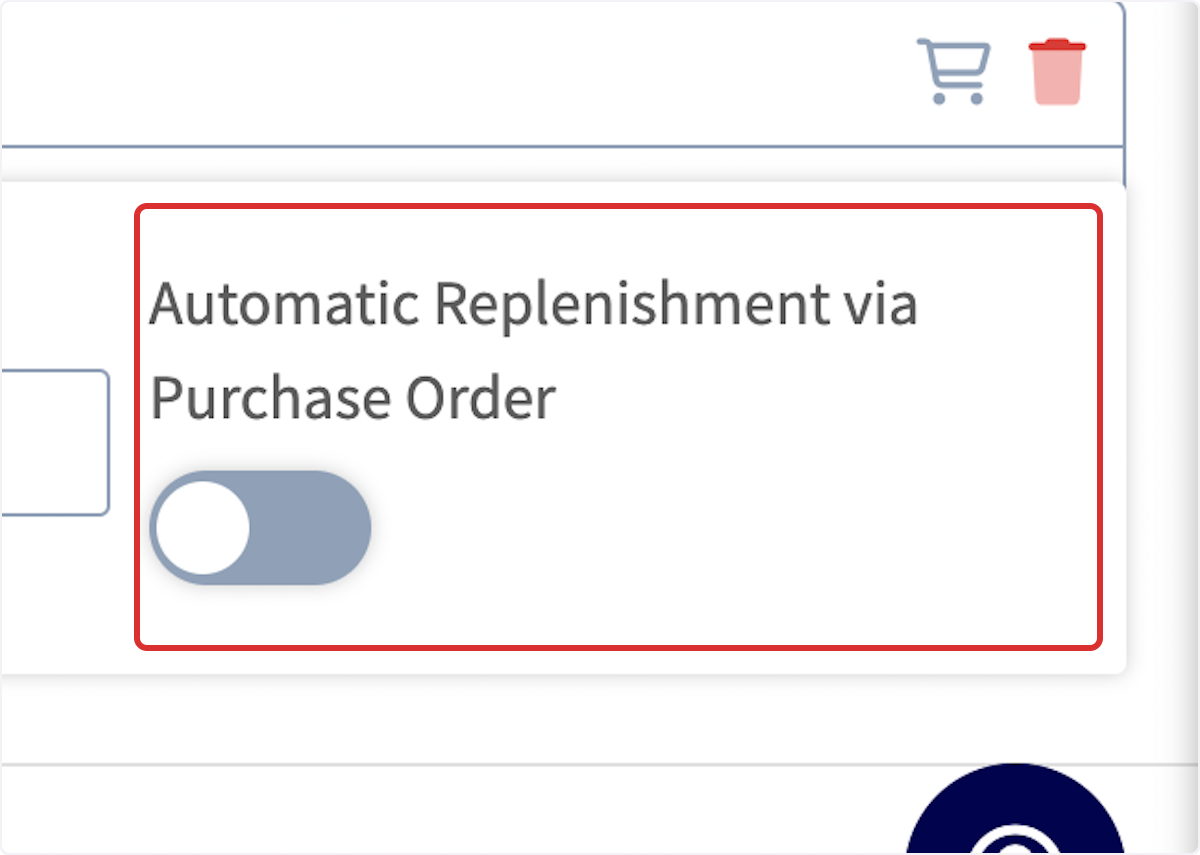
-
-It will now display your current level of inventory in that hub (or overall inventory if hubs are not enabled).
-
-**_Auto Re-order Level (Quantity On Hand)_**: When your _Inventory On Hand_ quantity reaches this number, an automatic replenishment purchase order will be initiated.
-
-**_Replenishment Level_**: Your automatic replenishment purchase order will be initiated to reach this new _Inventory On Hand_ quantity.
-
-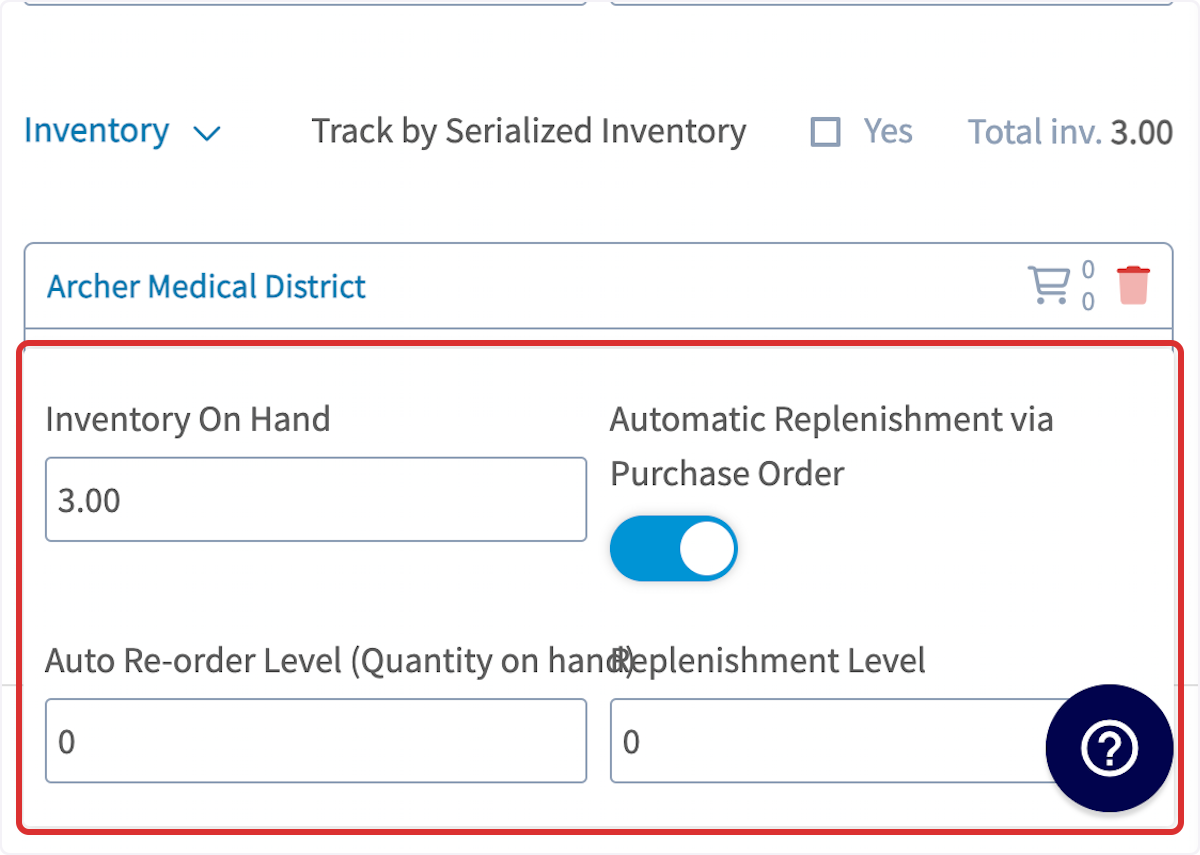
-
-Example
-
-**Inventory On Hand:** 4 Units
-
-**Auto Re-Order Level:** 5 Units
-
-**Replenishment Level:** 12 Units
-
-Because the **Auto Re-Order Level** is set at 5 units and the **Inventory On Hand** has fallen below 5 units, a Purchase Order will automatically be placed to achieve the **Replenishment Level** of 12 units.
-
-Your hub's inventory will auto-update once the purchase order status is marked as _Received_ or _Completed_.
-
-### Automatic Deduction
-
-Once an invoice status is _Invoiced_, the inventory listed on the invoice will automatically be deducted from the hub of the user who finalizes the invoice.
-
-### Auto Replenishment Order Notification
-
-When a Purchase Order (PO) is created through auto-replenishment, admins can now receive a real-time notification via:
-
-✅ Email
-
-✅ In-app notification
-
-✅ Optional push notification
-
-🔗 Email Enhancements: The email includes a direct link to view the newly created PO, so you can act quickly and efficiently.
-
-Set up via profile icon top right> my settings
-
-
-
-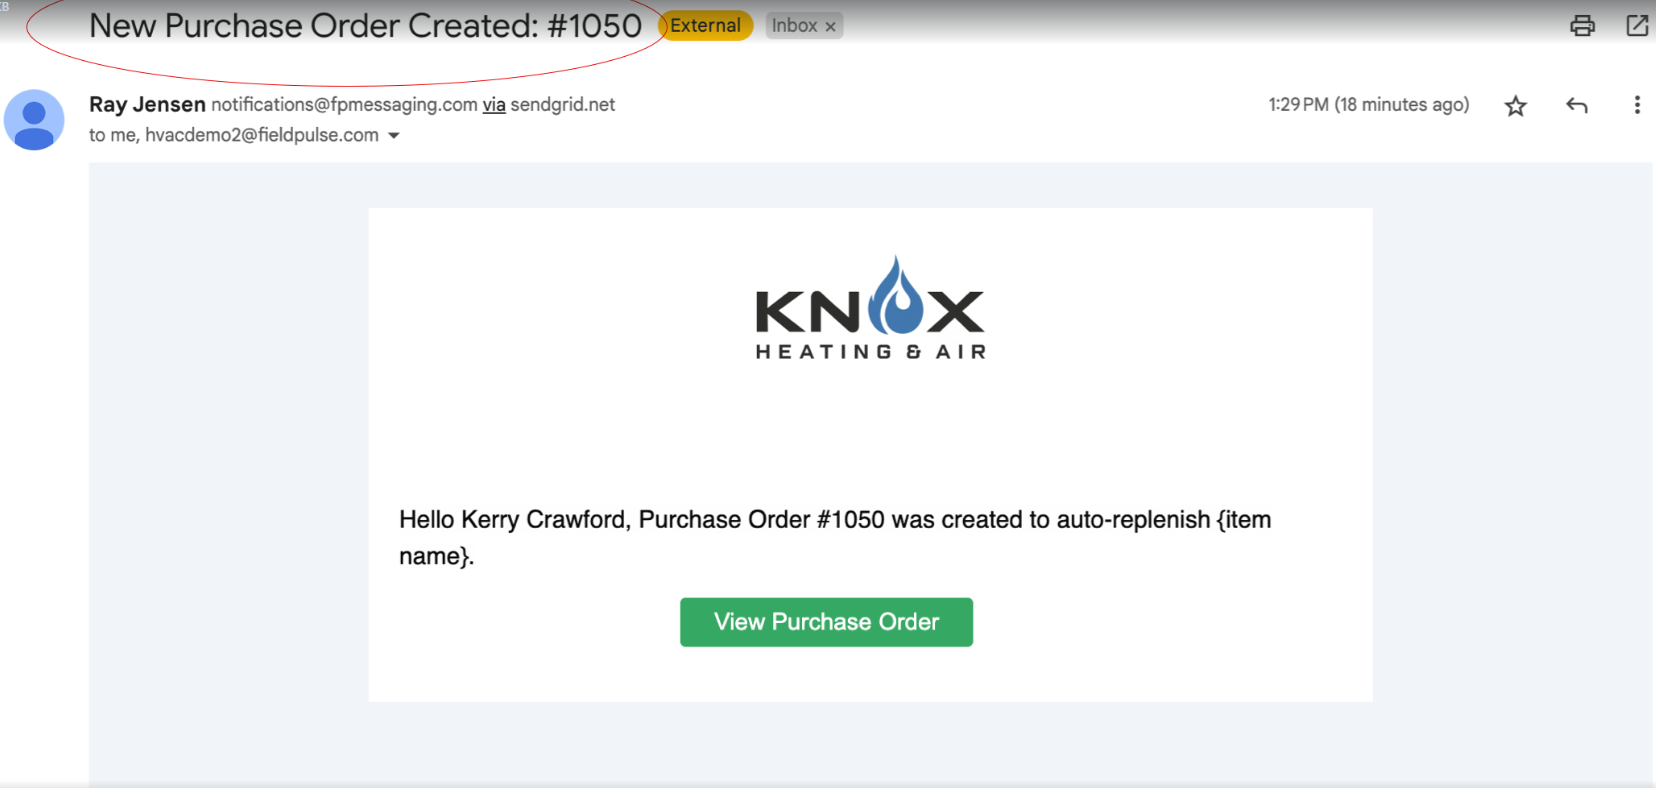
-
----
-
-### Combine your Purchase Orders \[& Reece Australia - Supplier Invoices\] seamlessly into a single estimate or invoice
-
-You can now pull in multiple purchase orders ( _and supplier invoices if your an Australia ReecemaX user)_ directly into your estimates and invoices!
-
-This feature allows you to bundle all your orders into a single, organized invoice to send to your customers. Here's how to try it out:
-
-1.While in Edit Mode on an estimate or invoice, select Insert PO Items.
-
-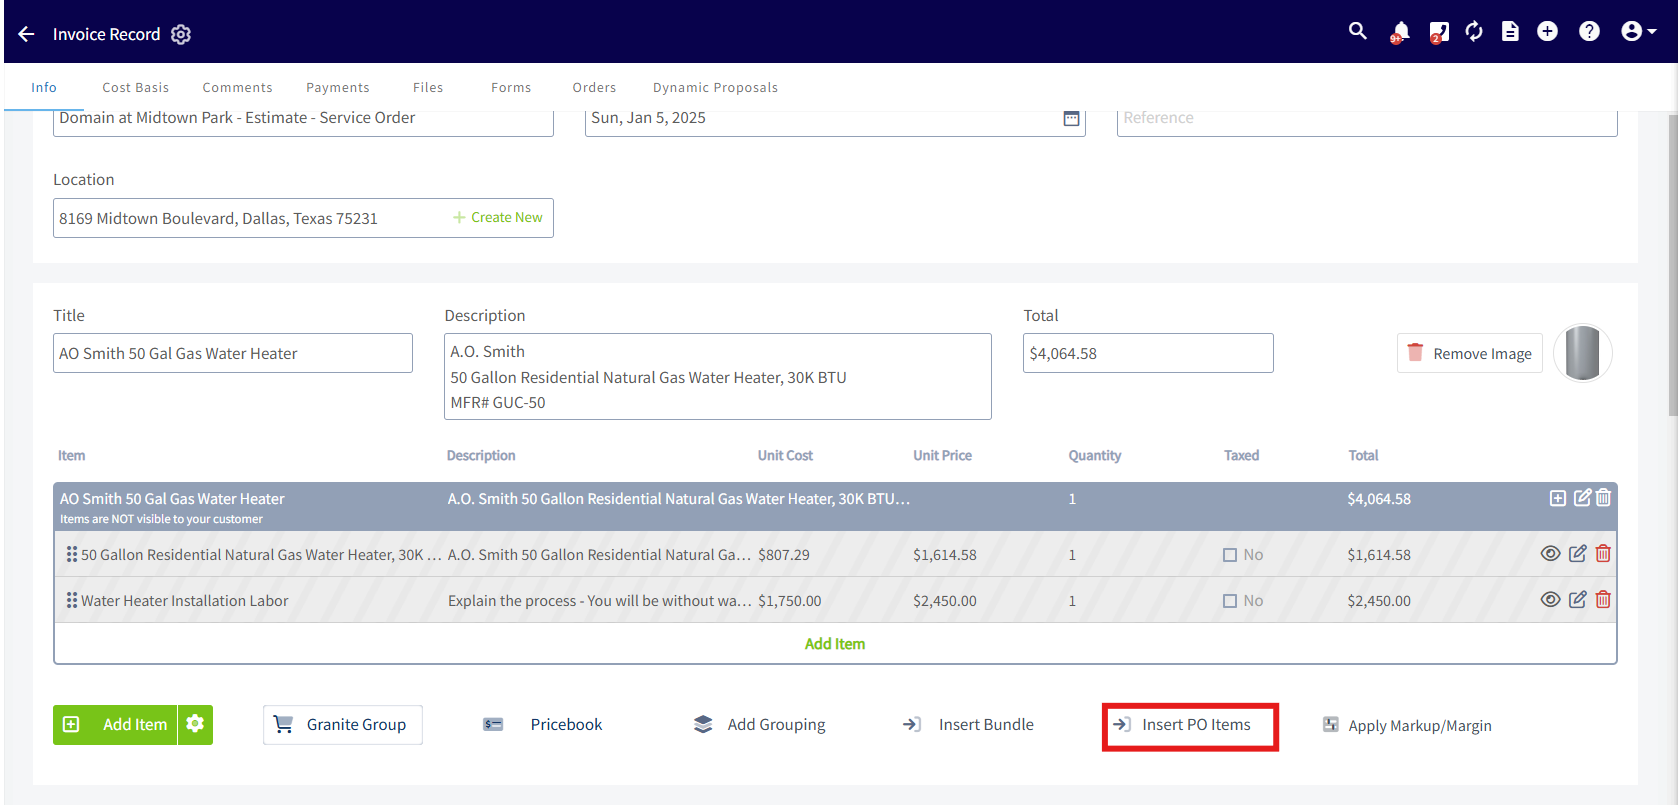
-
-2\. Search for your PO using any of these attributes: Connected Customer, PO Number, Order Title, Connected Estimate or Invoice Number/Title, Connected Job or Project Number/Title.
-
-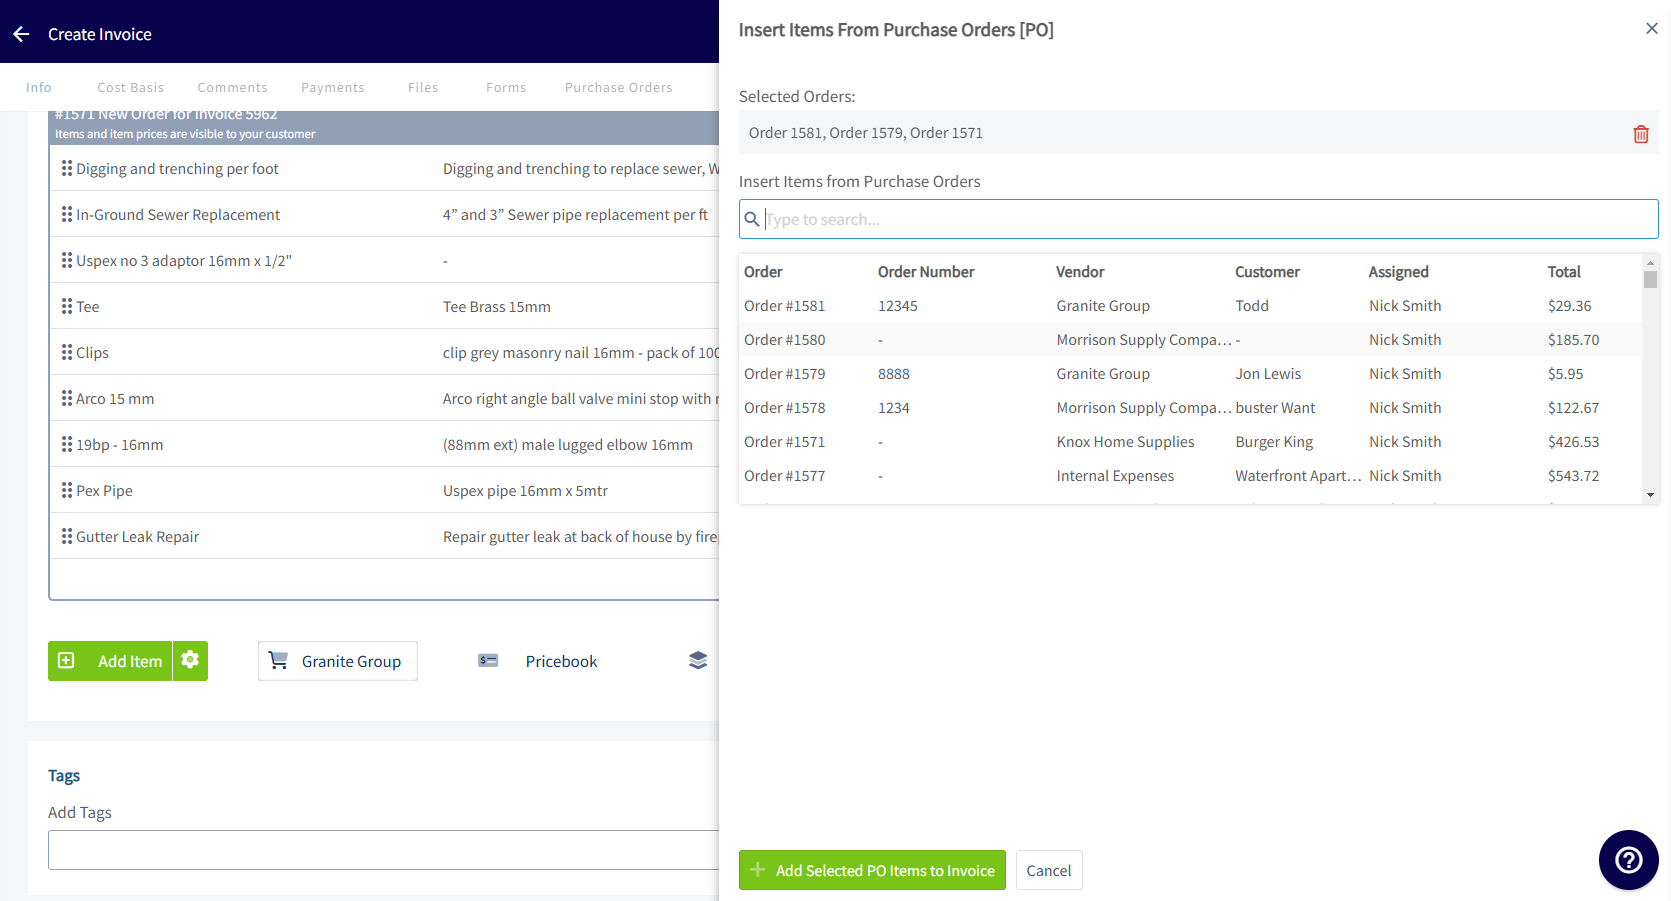
-
-3\. Select your PO, then choose your desired item layout: One big grouping, A grouping per PO, or Individual items.
-
-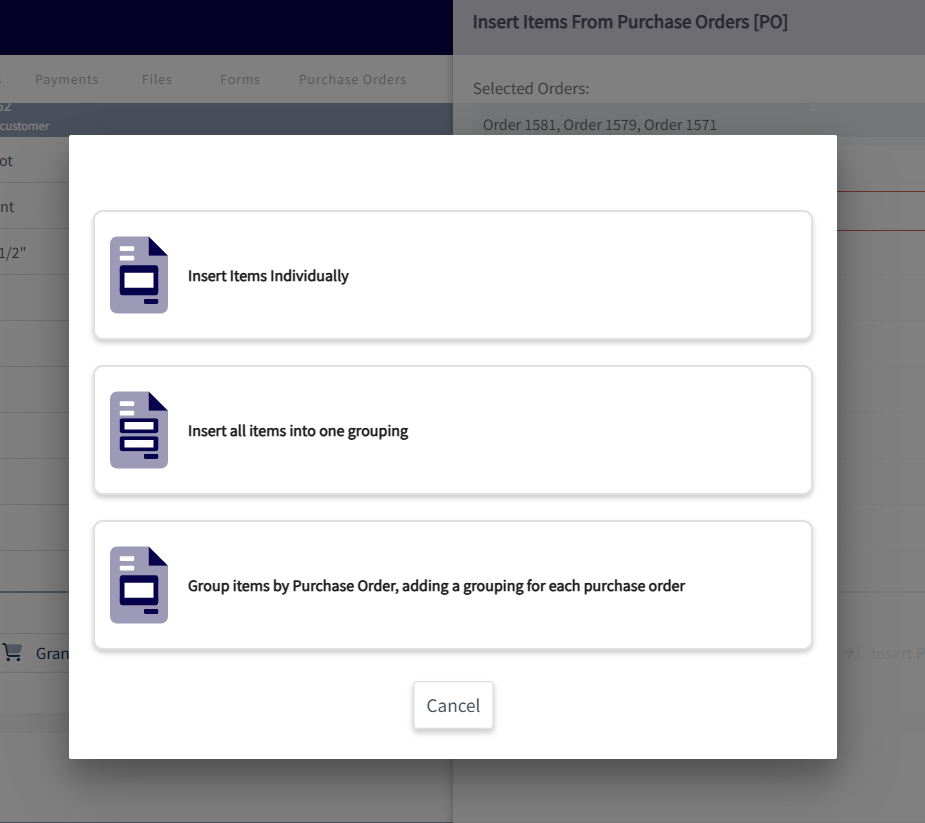
-
----
-
-## Video Tutorial
-
-<Frame caption="Purchase Orders">
- <iframe
- src="https://www.loom.com/embed/081b20f44507475da9217dc671851dd5?hide_owner=true&hide_share=true"
- title="Video: Purchase Orders"
- className="w-full rounded-lg"
- style={{aspectRatio: "16/9", border: "none"}}
- loading="lazy"
- allow="fullscreen"
- allowFullScreen
- />
-</Frame>
-
----
-
-**Have additional questions?**
-
-_Contact us at [support@fieldpulse.com](mailto:support@fieldpulse.com) or use the chat feature in the bottom right corner of your screen._
\ No newline at end of file
Assets
- Module: Assets
- File:
assets.mdx - Intercom URL: https://help.fieldpulse.com/en/articles/5725436-assets
- Last modified: 2026-03-27
Index: assets.mdx
===================================================================
--- assets.mdx existing
+++ assets.mdx intercom
@@ -1,207 +0,0 @@
-With our Asset Management feature, you’ll be able to track all of your information on customers’ assets for maintenance agreements. Record and store details like model name, installation date, warranty information, and more, as well as add photos, comments, and files for internal use.
-
-But it doesn’t stop at the customer. You can also use this feature to track the equipment used by your business with the same level of detail as customer assets, and manage it directly through the FieldPulse app.
-
-_( **Note:** Asset management is primarily handled by admin and team managers. Service agents cannot create, edit, or view assets, with the exception of creating an asset on an existing job record by selecting Actions > Create Asset.)_
-
----
-
-## Enabling Asset Management
-
-To begin using Asset Management, you'll first need to enable it. Start by clicking on _Company Settings_ and selecting _Features & Plugins._ Navigate to _Assets_ and select _Enable_. Now you're ready to begin creating and tracking your assets!
-
-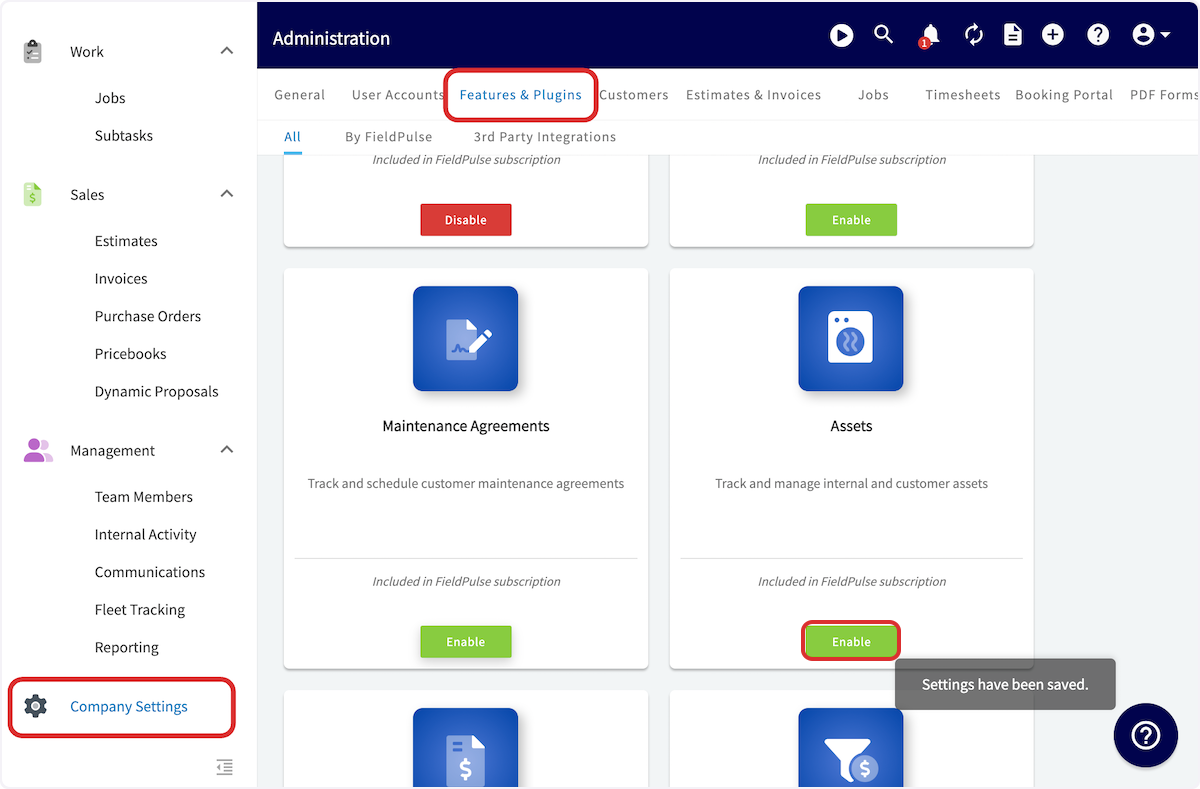
-
----
-
-## Creating an Asset
-
-To create an asset, click Assets on the left-side of your screen.
-
-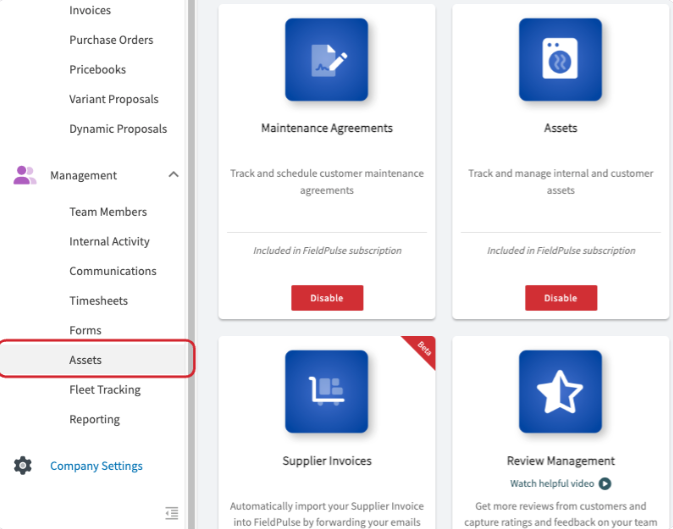
-
-Once in Assets, you can view your assets sorted into various categories at the top of the screen. Click _Create Asset_ to build a new asset.
-
-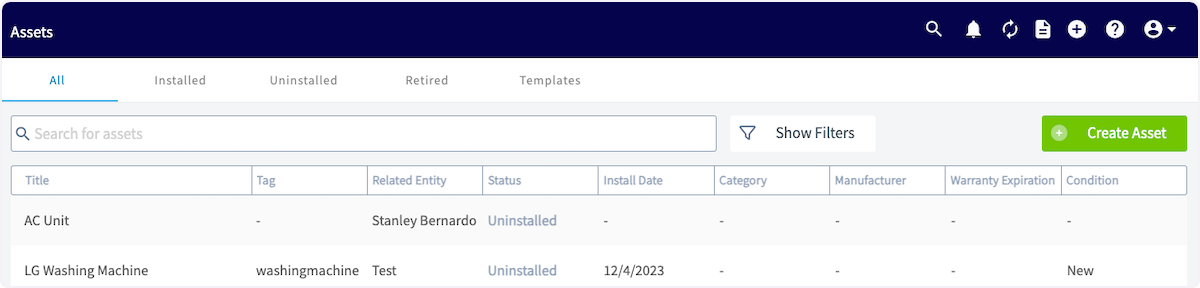
-
-First, add a title to the asset. You can select whether the asset is a _Customer Asset_ (will become a customer's property) or a _Company Asset_ (will be owned, used, and maintained by you). If it's a _Customer Asset_, you will be prompted to link a customer, which will also auto-populate their location as the location of the asset. You can also enter location coordinates in either Decimal Degrees (e.g., `34.0522, -118.2437`) or Degrees, Minutes, Seconds (e.g., `34°03'08"N, 118°14'37"W`) formats. The status of the asset can also be changed between _Uninstalled_, _Installed/In Use_, or _Retired_.
-
-Additionally, add asset tags to categorize/sort your assets easily. Search for and attach an existing maintenance agreement. Select your install date (if applicable) and type a location description (if necessary).
-
-If you expect to use a similar asset many times, toggle on _Save As Asset Template_ to make creating future assets more efficient! _( **Note**: To use a template in the future, select Import Template)._
-
-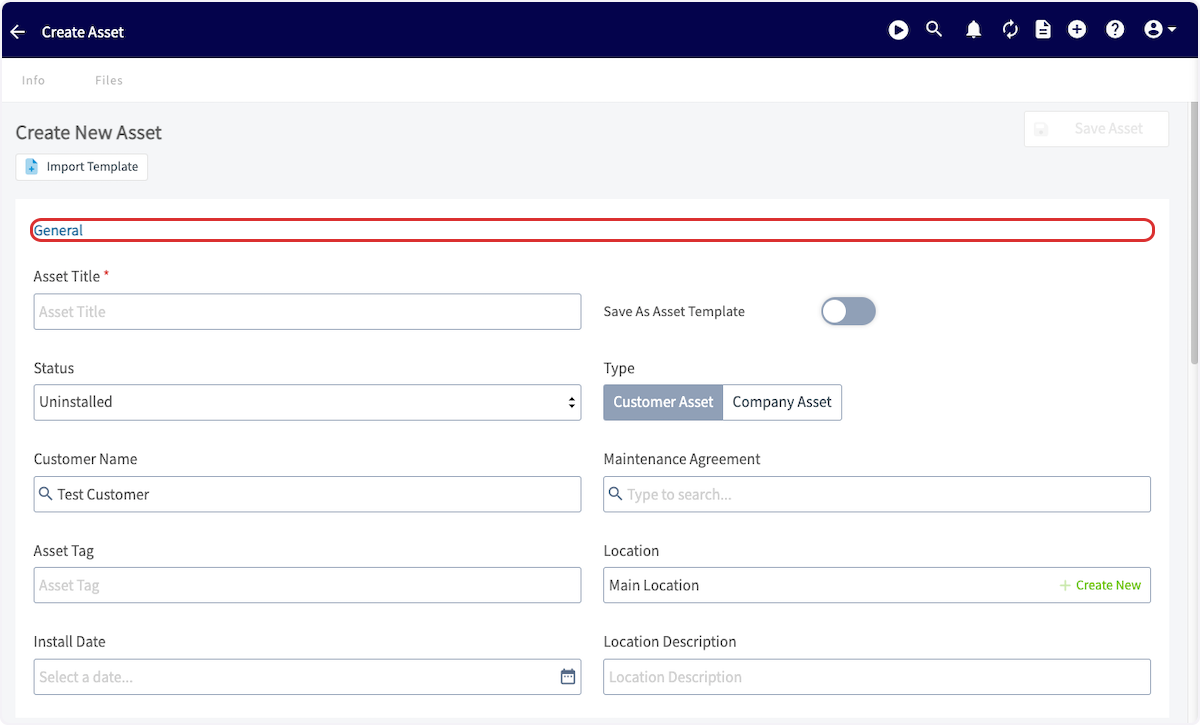
-
-Next, enter your equipment details. You can enter as many or as few details as you need!
-
-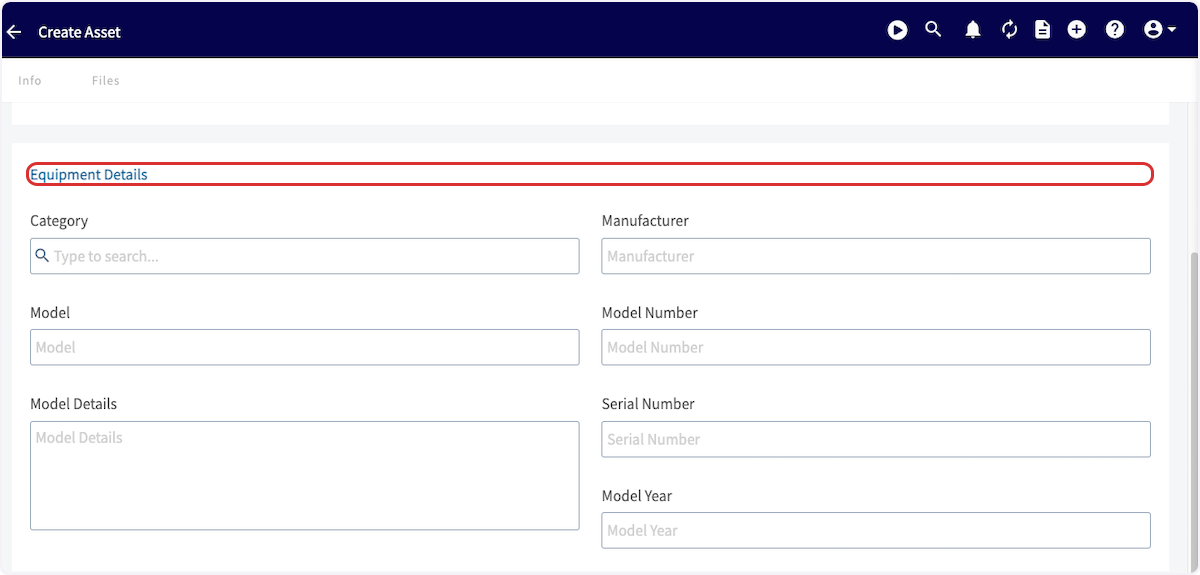
-
-Additionally, you can enter a warranty expiration date and the details of the warranty (if applicable). Briefly name and describe the condition of the asset as well.
-
-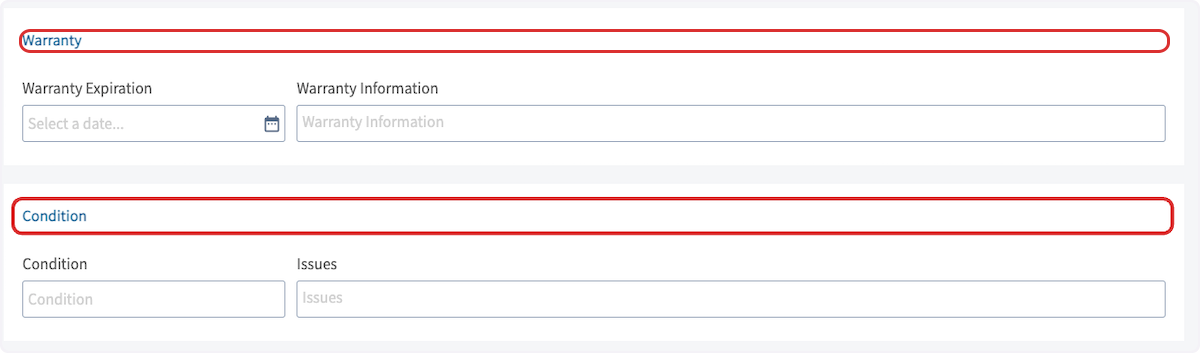
-
-Lastly, add notes and files to your assets as needed. Be sure to save your asset when finished.
-
-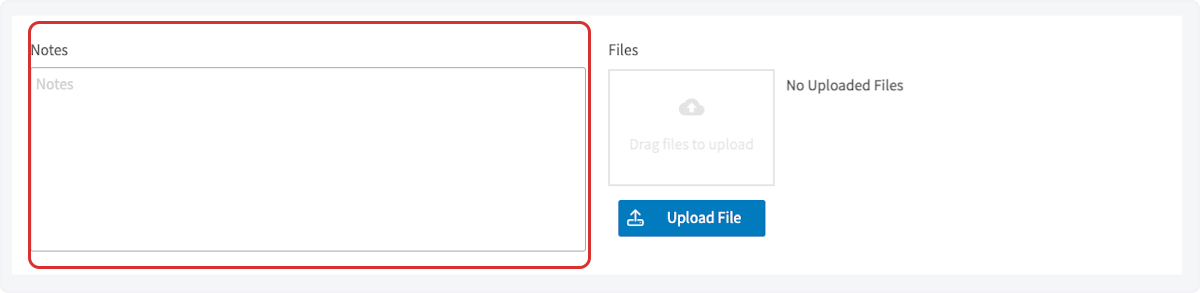
-
-After creating an asset, you will see the _Asset Record_. To provide updates on the asset, select _Add Update_ from the _Asset Record_.
-
-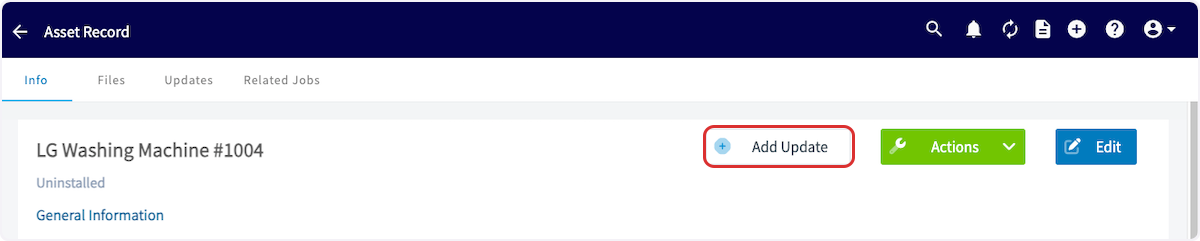
-
-In your asset update, you can link a related job, type an update, and attach additional files.
-
-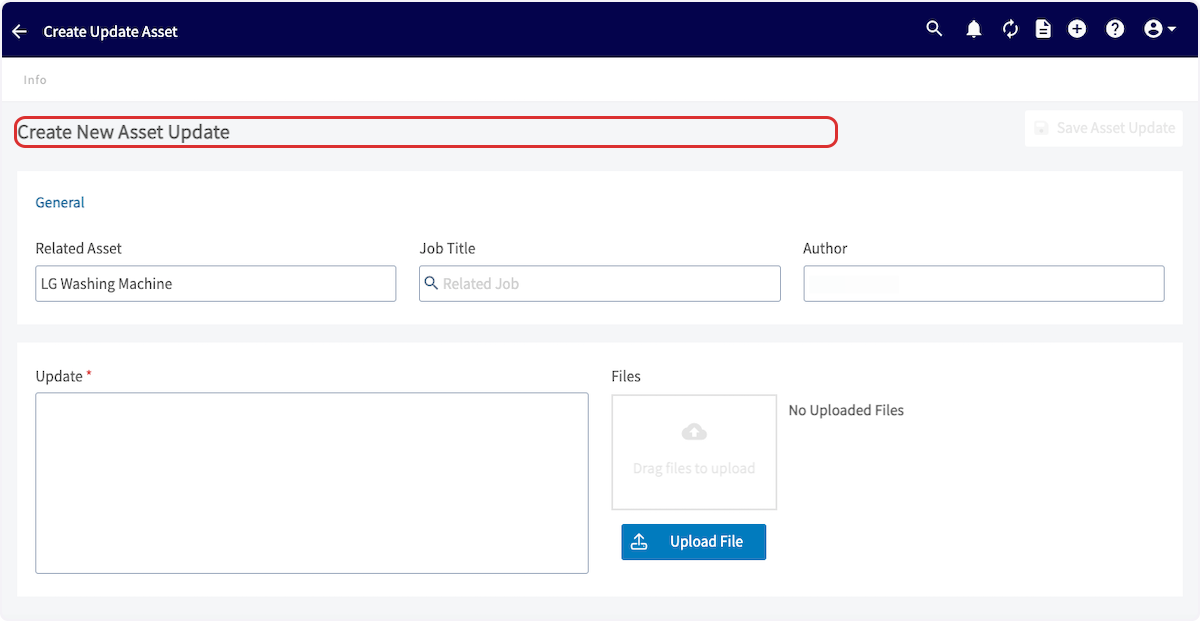
-
----
-
-## Asset Templates
-
-When creating a new asset, users can effortlessly insert pre-built templates. These templates act as a solid foundation, which users can easily modify details to ensure accuracy and relevance.
-
-To create an asset template, begin by navigating to _Assets_ in the left-side menu then clicking _Create Asset_.
-
-
-
-Before adding any information, toggle on _Save As Asset Template_.
-
-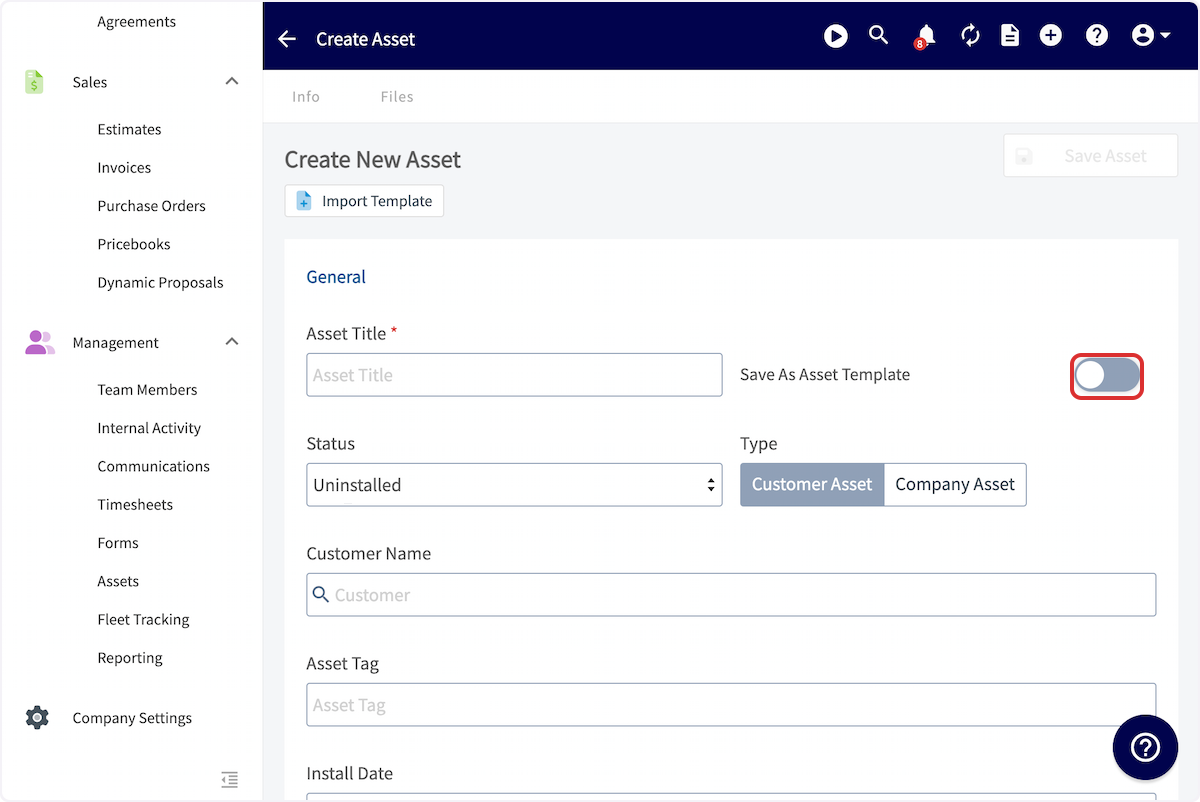
-
-You can now title your template.
-
-Enter all pertinent details, including condition details, warranty details, and notes. When you've customized your template, press _Save_.
-
-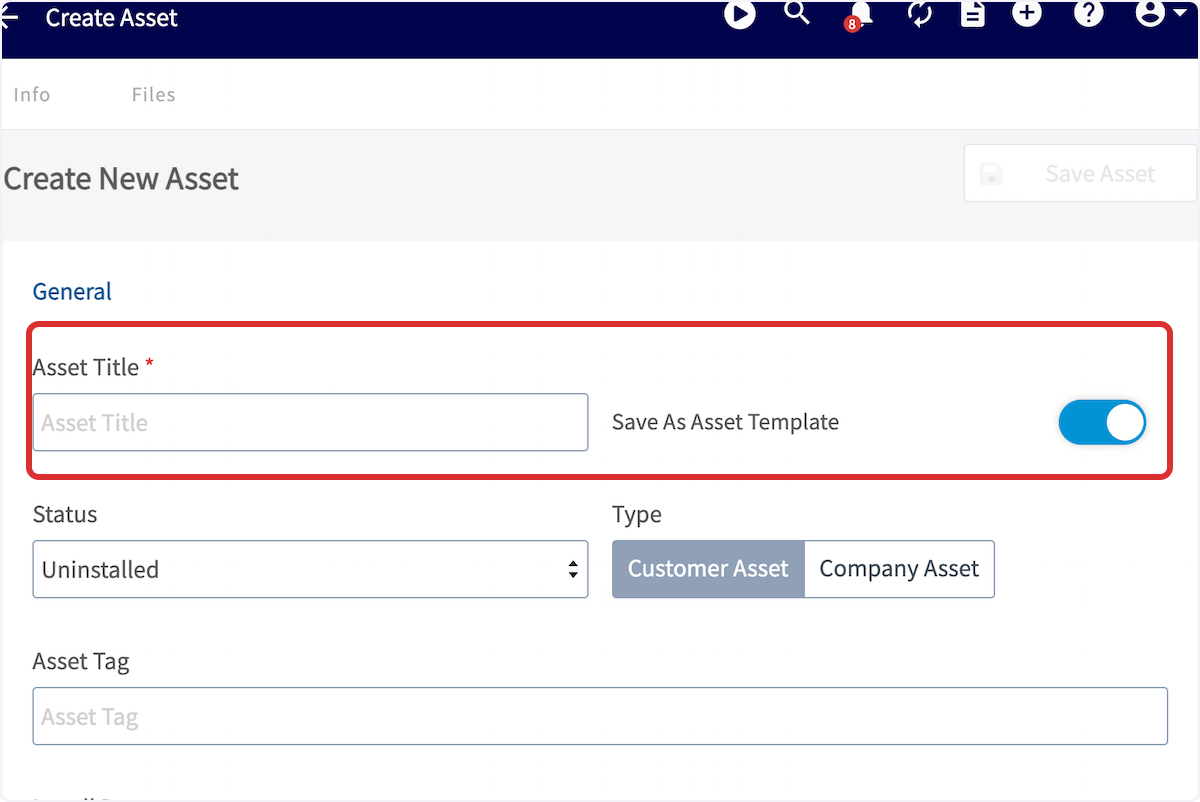
-
-To insert an asset template, begin by navigating to _Assets_ in the left-side menu then clicking _Create Asset_.
-
-
-
-Before entering any details, click _Import Template_ then select the applicable template.
-
-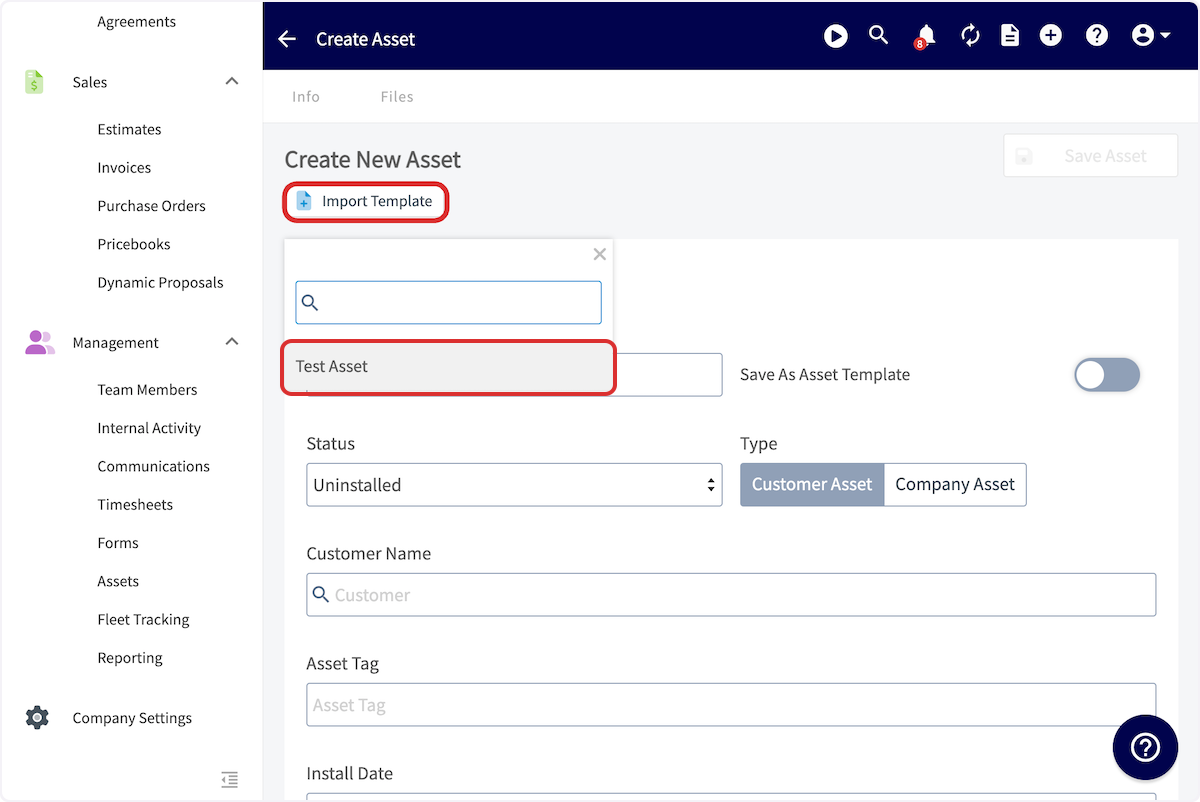
-
-All of the details you entered in the template will now auto-populate, but you can easily modify as needed. Be sure to press _Save_ after fine-tuning your asset.
-
----
-
-## Attaching / Linking an Asset
-
-### Job Record
-
-To attach an asset to a job, create a new job or edit job record. Just above the _Save Job_ button, you can attach an existing asset ( _Select Asset_) or create a new asset to attach ( _Add Asset_).
-
-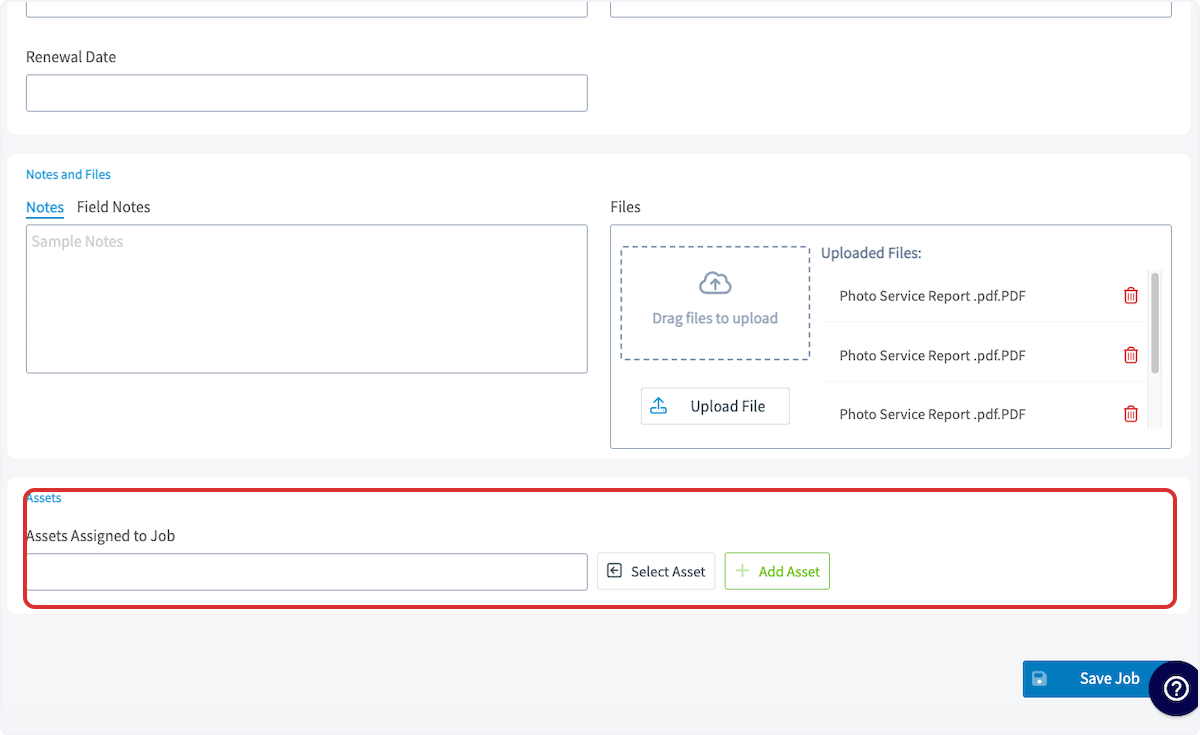
-
-### Customer Record
-
-To attach an asset to a customer, open their customer record. Select the _Asset_ tab at the top of the screen.
-
-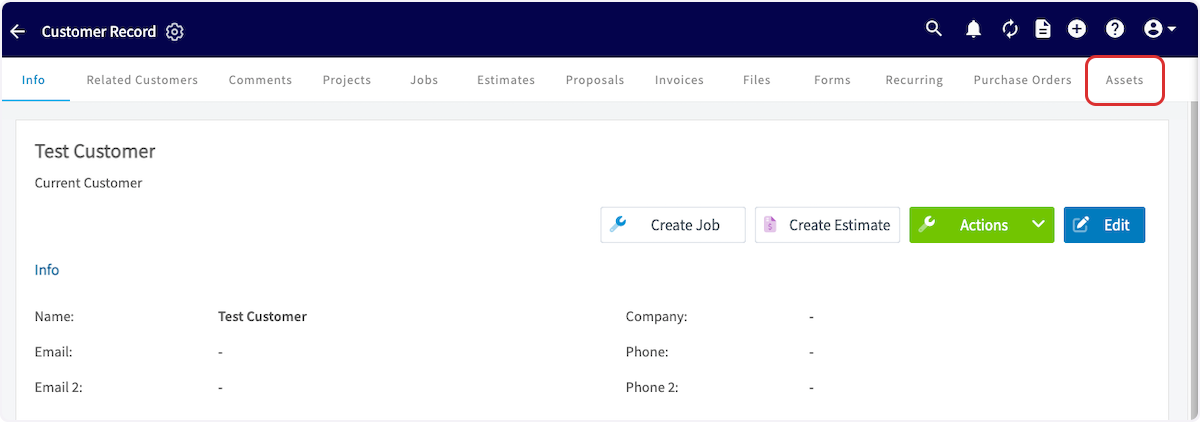
-
-Click _Create Asset_ and complete the fields as described above under **Creating an Asset**.
-
-
-
-### Maintenance Agreement Record
-
-To attach an asset to a maintenance agreement, open the record then select the _Asset_ tab at the top of the screen. By clicking the green _Actions_ button, you have the option to create a new asset or connect an existing asset.
-
-
-
----
-
-## Creating or Connecting Jobs from the Asset Record
-
-To help streamline workflows, two additional actions are available on your asset records: _**Create Job**_ and **_Connect Job_**.
-
-- **Create Job**: Opens the job creation page with the asset automatically linked to the job. If there’s a maintenance agreement linked to the asset, it will also be linked to the job.
-
-- **Connect Job**: Allows you to search and select an existing job. If a customer is selected, it will only search that customer’s jobs. Once selected, the asset and any linked maintenance agreement will automatically be connected to the job.
-
-
-
----
-
-## Dynamic Asset Reports
-
-Utilize the data from your asset records to generate a dynamic report and/or PDF! Combine multiple assets into a single, professional summary report for customers offering a comprehensive overview of services rendered and ensure you showcase relevant information while hiding unnecessary details with customizable display options. This report can be shared with customers and linked to dynamic estimates/invoices.
-
-### Single Asset Reports
-
-Begin by navigating to the asset record for which you'd like to create a dynamic asset report, then select _Generate Report_.
-
-
-
-You can now view the preview of your report as a Dynamic URL or PDF by selecting your preference the top of the screen.
-
-Additionally, use the display settings on the right-side menu to ensure you showcase relevant information while hiding unnecessary details. Select/deselect details such as asset summary, notes, details, and photos to customize your report.
-
-
-
-When your report is ready, select _Send to Customer_.
-
-
-
-You can now customize who the email is sent to, as well as the subject and body. Attach any pertinent files, and select to include the Dynamic Report, PDF Report, and/or Signature Request.
-
-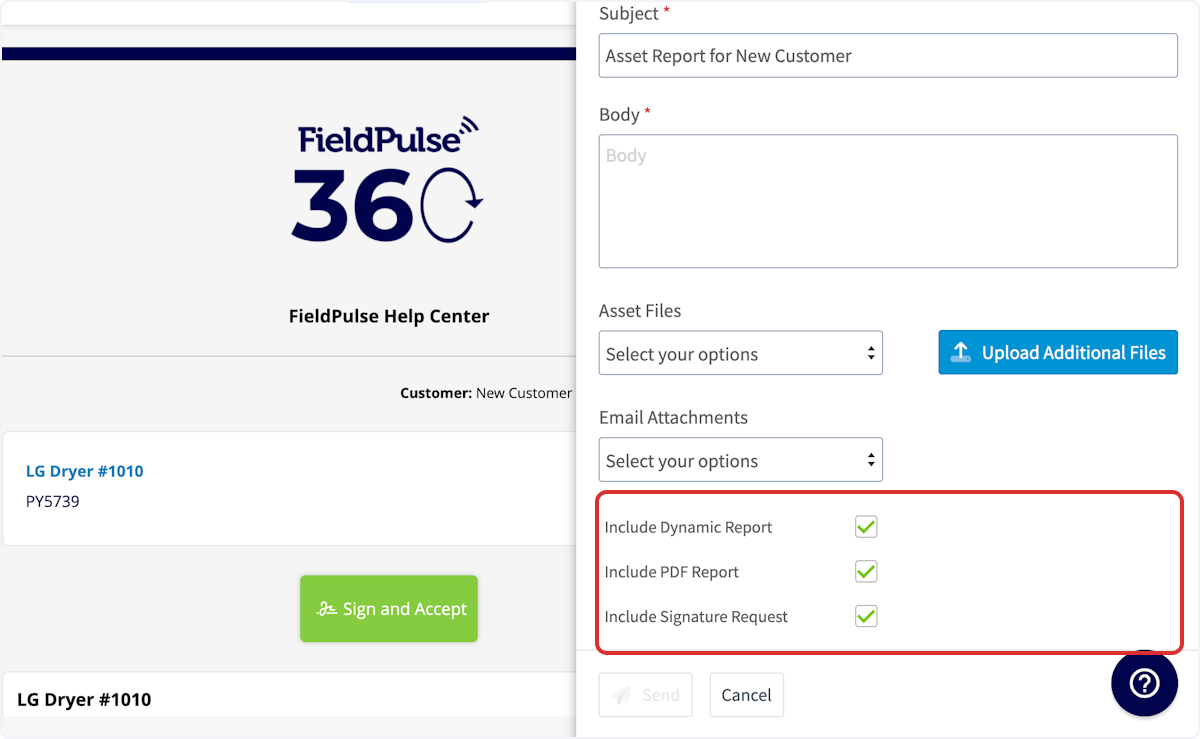
-
-Dynamic Report with Signature Request Example:
-
-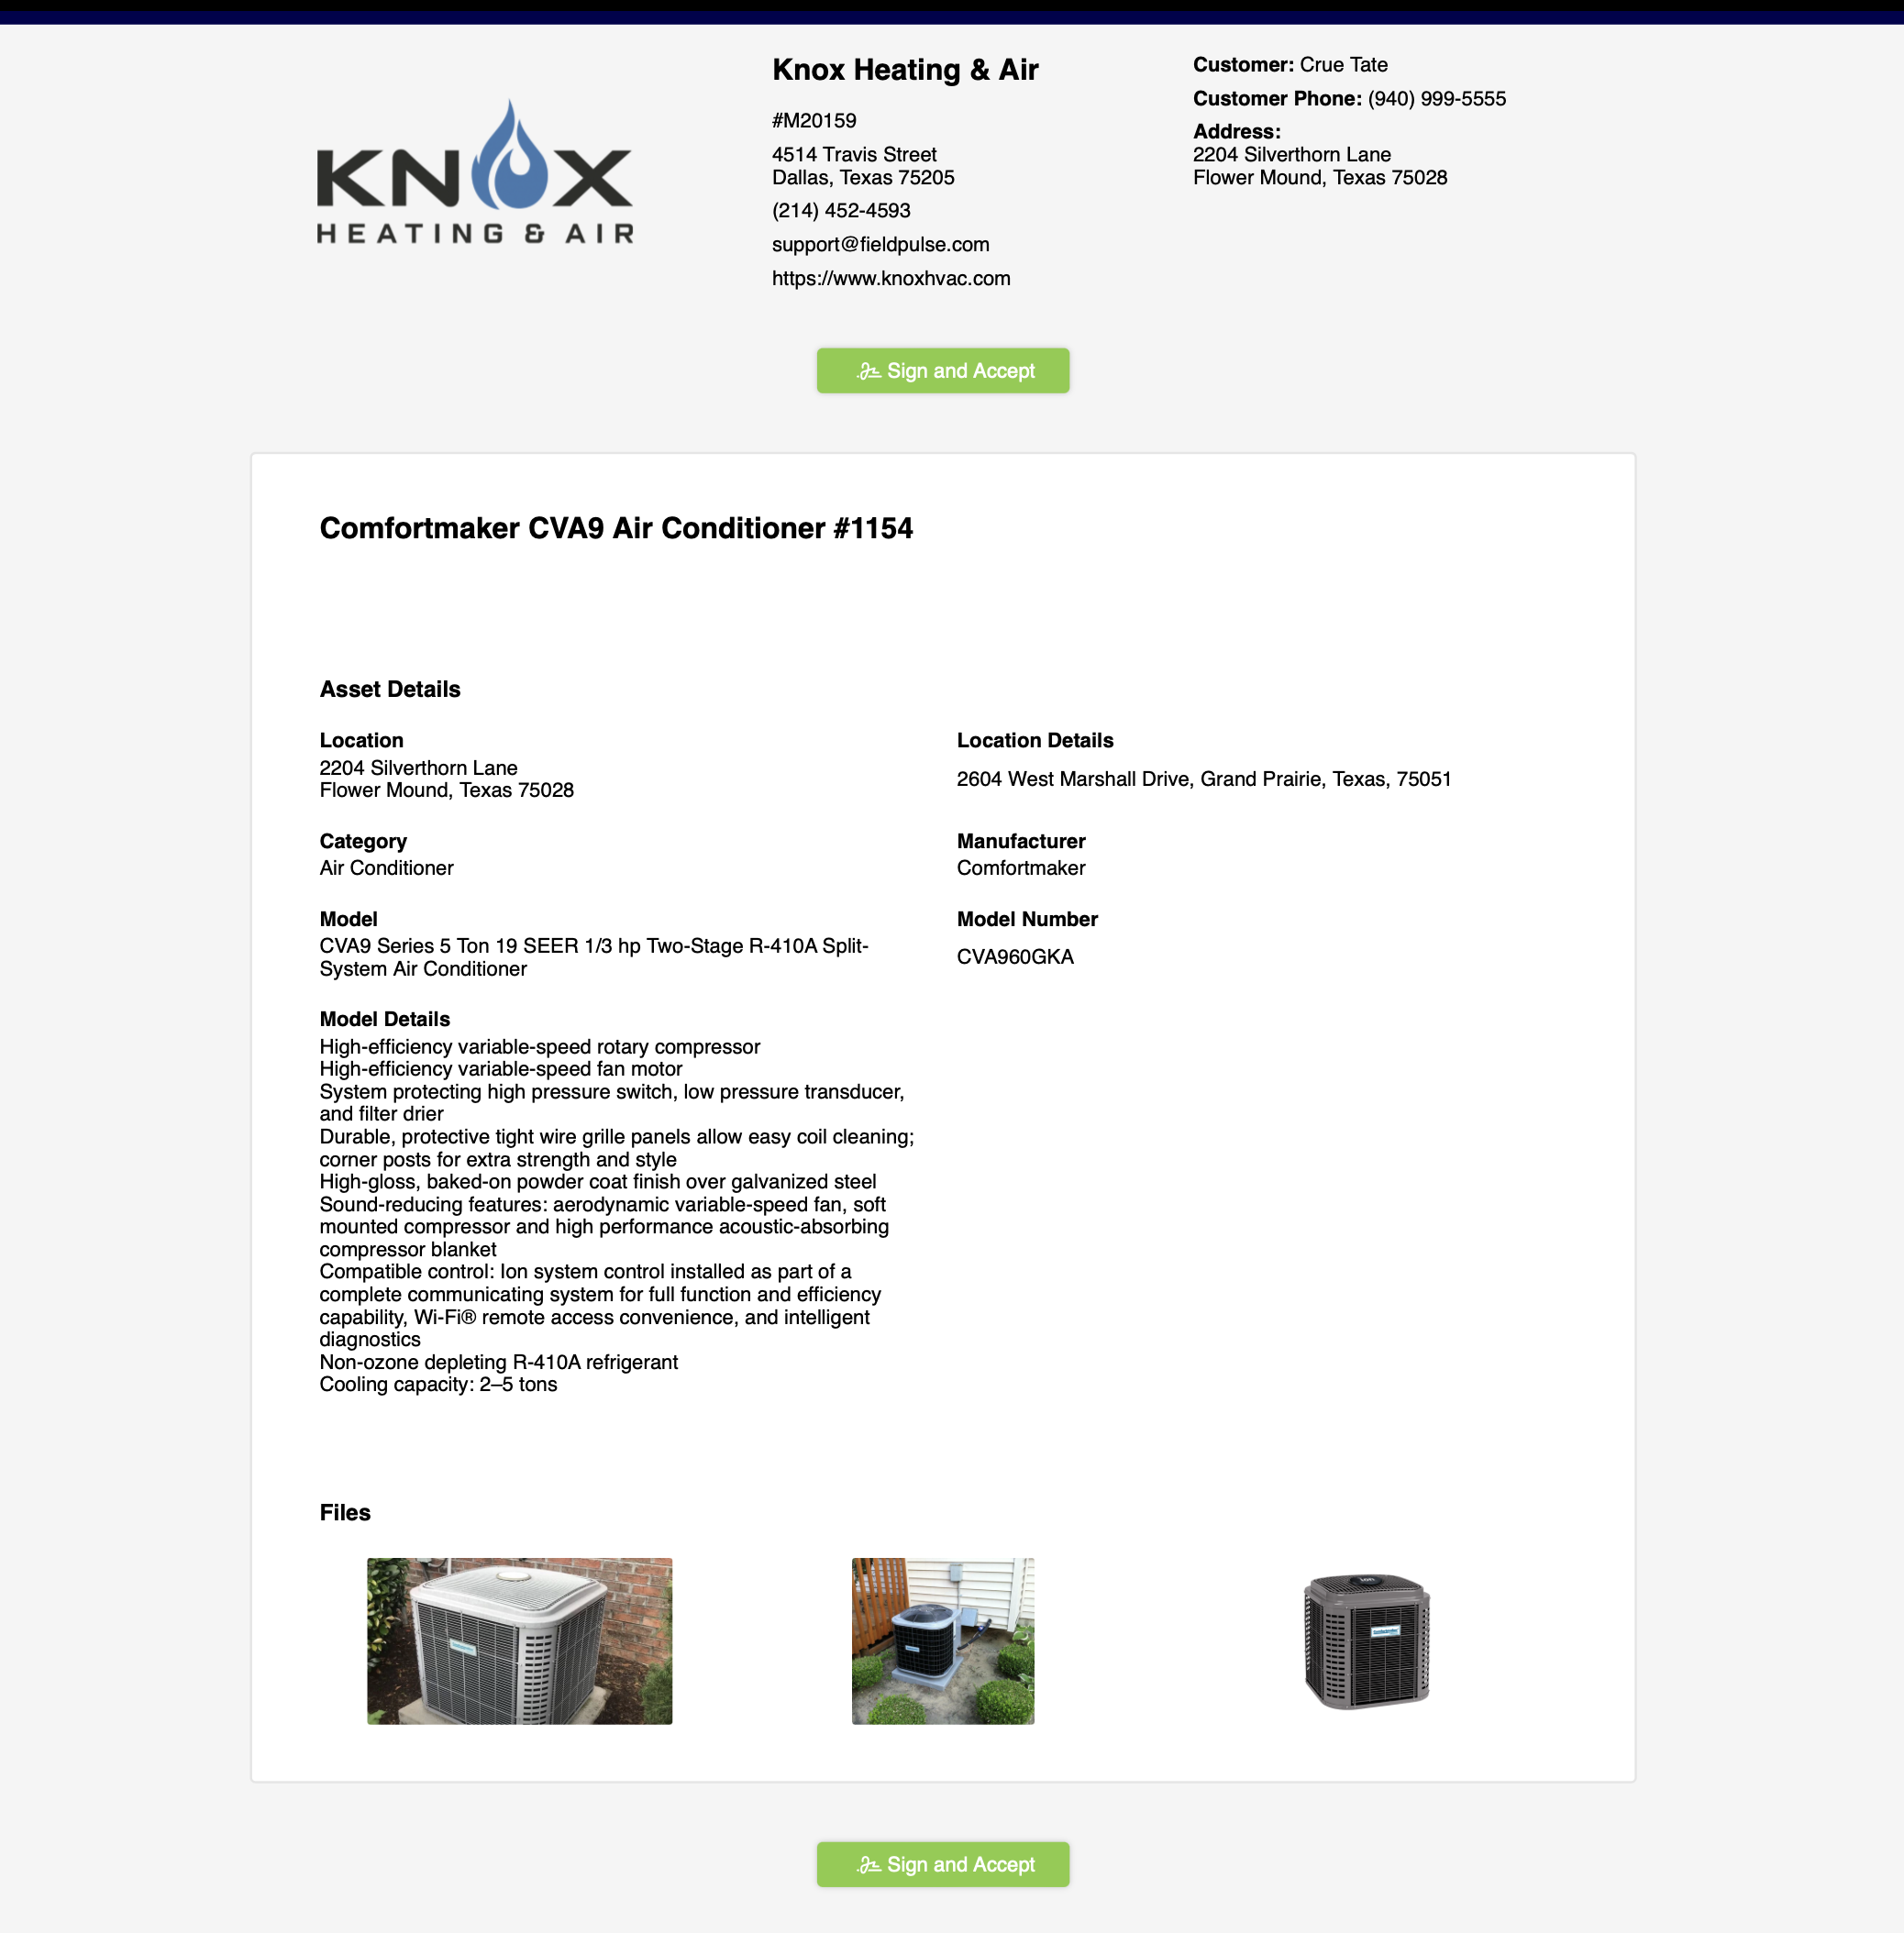
-
-### Multi-Asset Reports
-
-To create a report for multiple assets, begin by navigating to the customer record associated with those assets. Select _Assets_ from the top menu, then click the checkbox icon.
-
-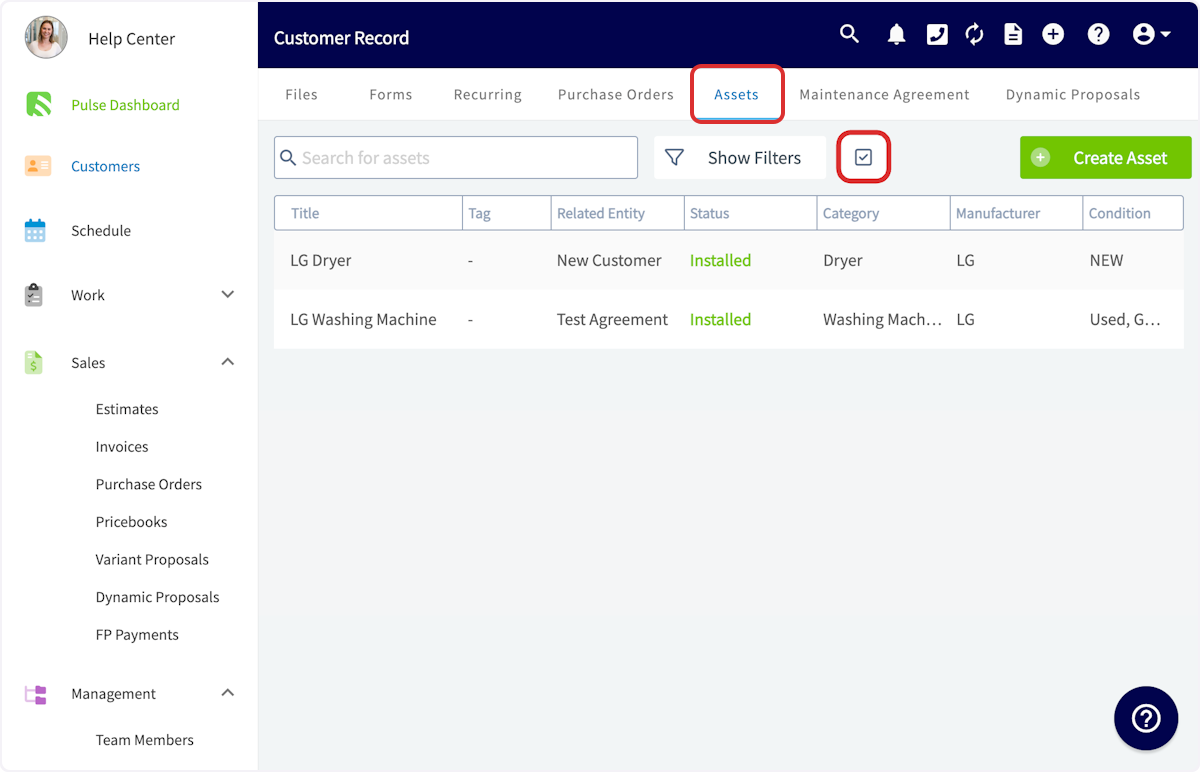
-
-You can now click to select the various asset records you'd like to be included in this report. When you are ready to generate the report, select the clipboard icon.
-
-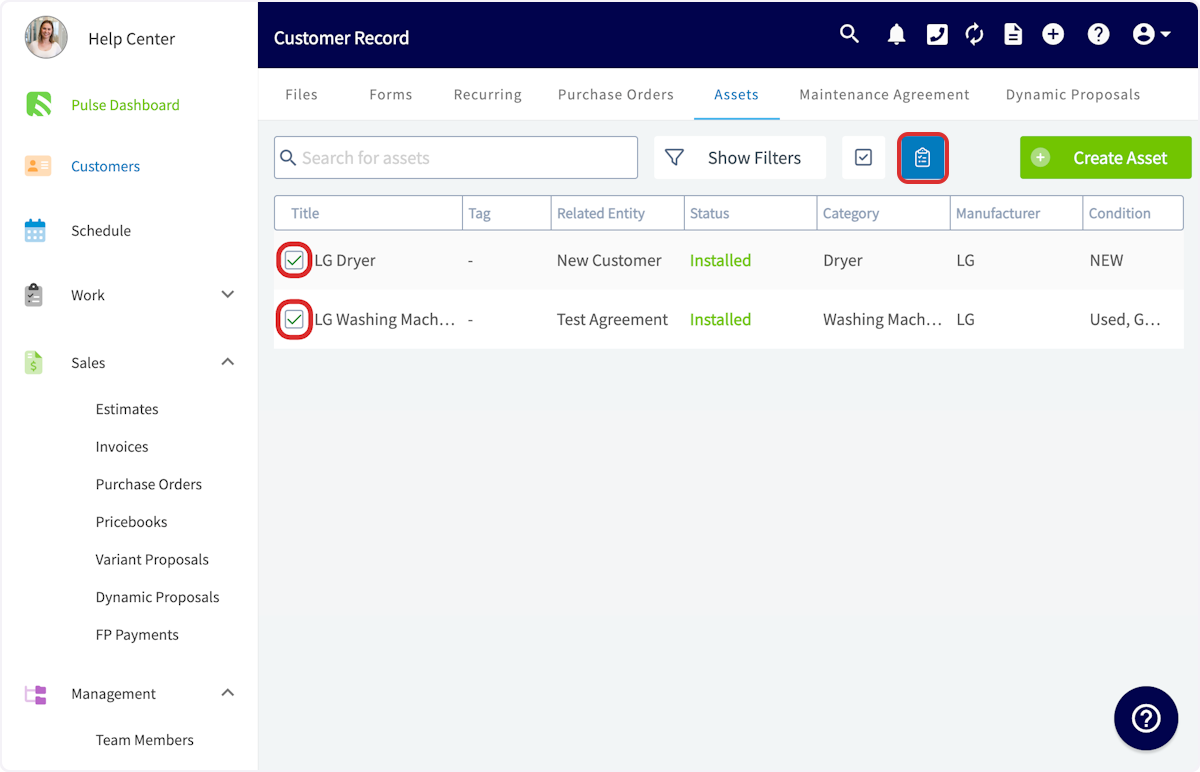
-
-You will now follow the same process of customizing your display options before sending the report to your customer. Here is an example of what your multi-asset report may look like:
-
-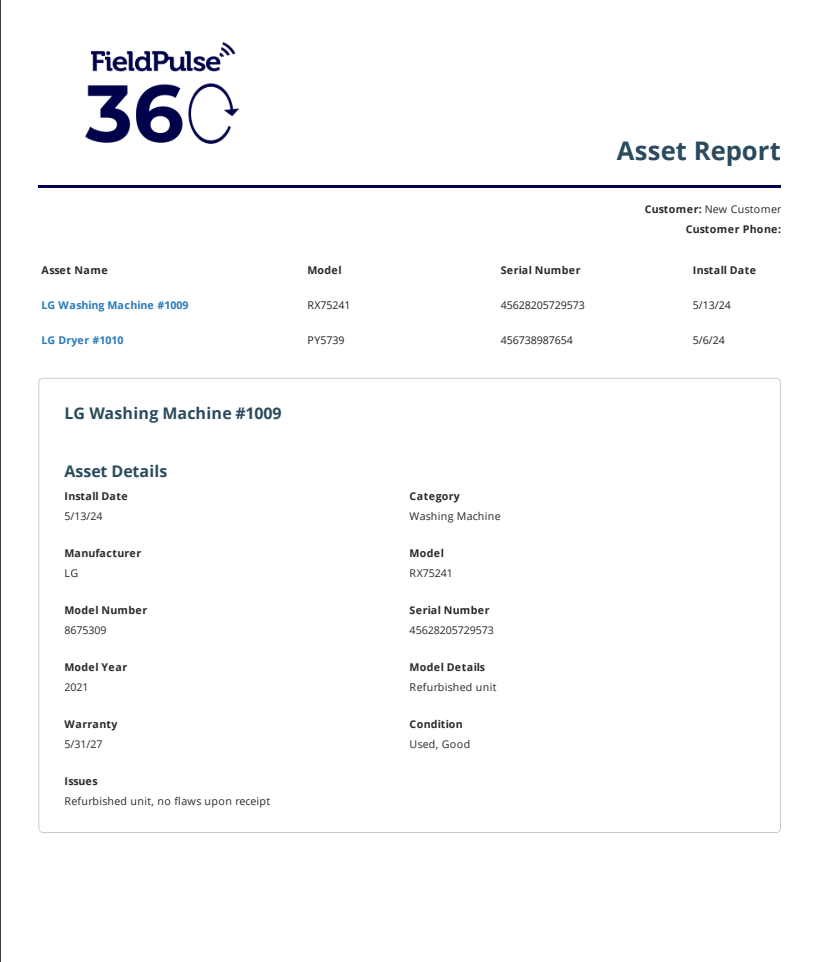
-
-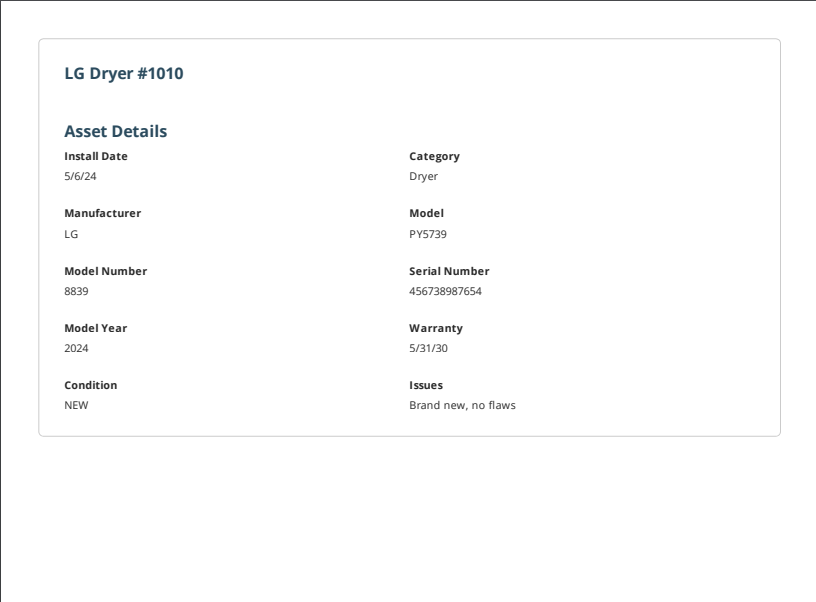
-
----
-
-## Asset Scanning
-
-Similar to our existing barcode scanning feature, you can scan and add new assets or update existing ones. Whether you're in the field picking up or dropping off assets, this tool makes it easy to quickly identify items and update important details, like their condition, on the go.
-
-<Frame caption="Asset Scanning">
- <iframe
- src="https://www.loom.com/embed/d63c199a744d45b489ad376d6b04ab6a?hide_owner=true&hide_share=true"
- title="Video: Asset Scanning"
- className="w-full rounded-lg"
- style={{aspectRatio: "16/9", border: "none"}}
- loading="lazy"
- allow="fullscreen"
- allowFullScreen
- />
-</Frame>
-
----
-
-## Video Tutorial
-
-<Frame caption="Assets">
- <iframe
- src="https://www.loom.com/embed/476d12a1ffa147e59a39f52b2d152909?hide_owner=true&hide_share=true"
- title="Video: Assets"
- className="w-full rounded-lg"
- style={{aspectRatio: "16/9", border: "none"}}
- loading="lazy"
- allow="fullscreen"
- allowFullScreen
- />
-</Frame>
-
----
-
-**Have additional questions?**
-
-_Contact us at [support@fieldpulse.com](mailto:support@fieldpulse.com) or use the chat feature in the bottom right corner of your screen._
\ No newline at end of file
Custom Forms Overview
- Module: Custom Forms
- File:
custom-forms-streamline-your-workflow-and-save-time.mdx - Intercom URL: https://help.fieldpulse.com/en/articles/10471409-custom-forms-overview
- Last modified: 2026-04-15
Index: custom-forms-streamline-your-workflow-and-save-time.mdx
===================================================================
--- custom-forms-streamline-your-workflow-and-save-time.mdx existing
+++ custom-forms-streamline-your-workflow-and-save-time.mdx intercom
@@ -1,57 +1,66 @@
-## The Value Custom Forms Can Bring Your Business
+# The Value Custom Forms Can Bring Your Business
-Custom Forms let you create or import professional, easy-to-use forms and checklists for any routine task. Share them with your team or customers via email or on-site, and keep everything organized in one place. Custom forms can serve as standalone records or be attached to records such as jobs, estimates, and invoices. Our Custom Forms attached to Job and Project records can also be accessed in Offline Mode. No signal? No problem! [Mastering Custom Forms A Step By Step Guide](/growth/custom-forms/mastering-custom-forms-a-step-by-step-guide) to learn more about how to use them offline.
+Custom Forms let you create or import professional, easy-to-use forms and checklists for any routine task. Share them with your team or customers via email or on-site, and keep everything organized in one place. Custom forms can serve as standalone records or be attached to records such as jobs, estimates, and invoices. Our Custom Forms attached to Job and Project records can also be accessed in Offline Mode. No signal? No problem! [Click here](https://help.fieldpulse.com/en/articles/10431393-mastering-custom-forms-a-step-by-step-guide#h_6debb575fa) to learn more about how to use them offline.
Our Custom Forms allow you to save time and eliminate errors on the backend. Custom Forms allows you to **pull in record information** instead of writing and/or typing in information to fill out each field on the form. This feature allows your team members to easily complete the form/checklist by selecting from the information directly associated with the customer, job, etc. Within Custom Forms, you can also toggle on/off "required" fields. This will ensure your team members and/or customers are not forgetting to fill in important information.
-## Use Custom Forms to Benefit Your Business
+# Use Custom Forms to Benefit Your Business
The following are **examples** of items you can create or import/edit within our Custom Forms feature:
-### Internal Document Examples
+## Internal Document Examples:
-- **Employee time off request forms:** A straightforward form for employees to request time off for vacation or illness. This helps keep track of who is absent and when, making it easier to manage schedules. See example below.
+- **Employee time off request forms:** A straightforward form for employees to request time off for vacation or illness. This helps keep track of who is absent and when, making it easier to manage schedules. See example below.
+
+ 
+
+- **Incident reports:** A form for employees to report accidents or problems that occur at work. This can assist your company in maintaining records and enhancing safety measures. See the example below.
+
+ 
+
+- **Pre work order forms:** Pre work order forms can house important information needed before beginning a job. This form holds employees accountable for noting any existing conditions, hazards, and specific requirements, ensuring that all preparations and safety measures are in place to prevent issues during the task.
+
-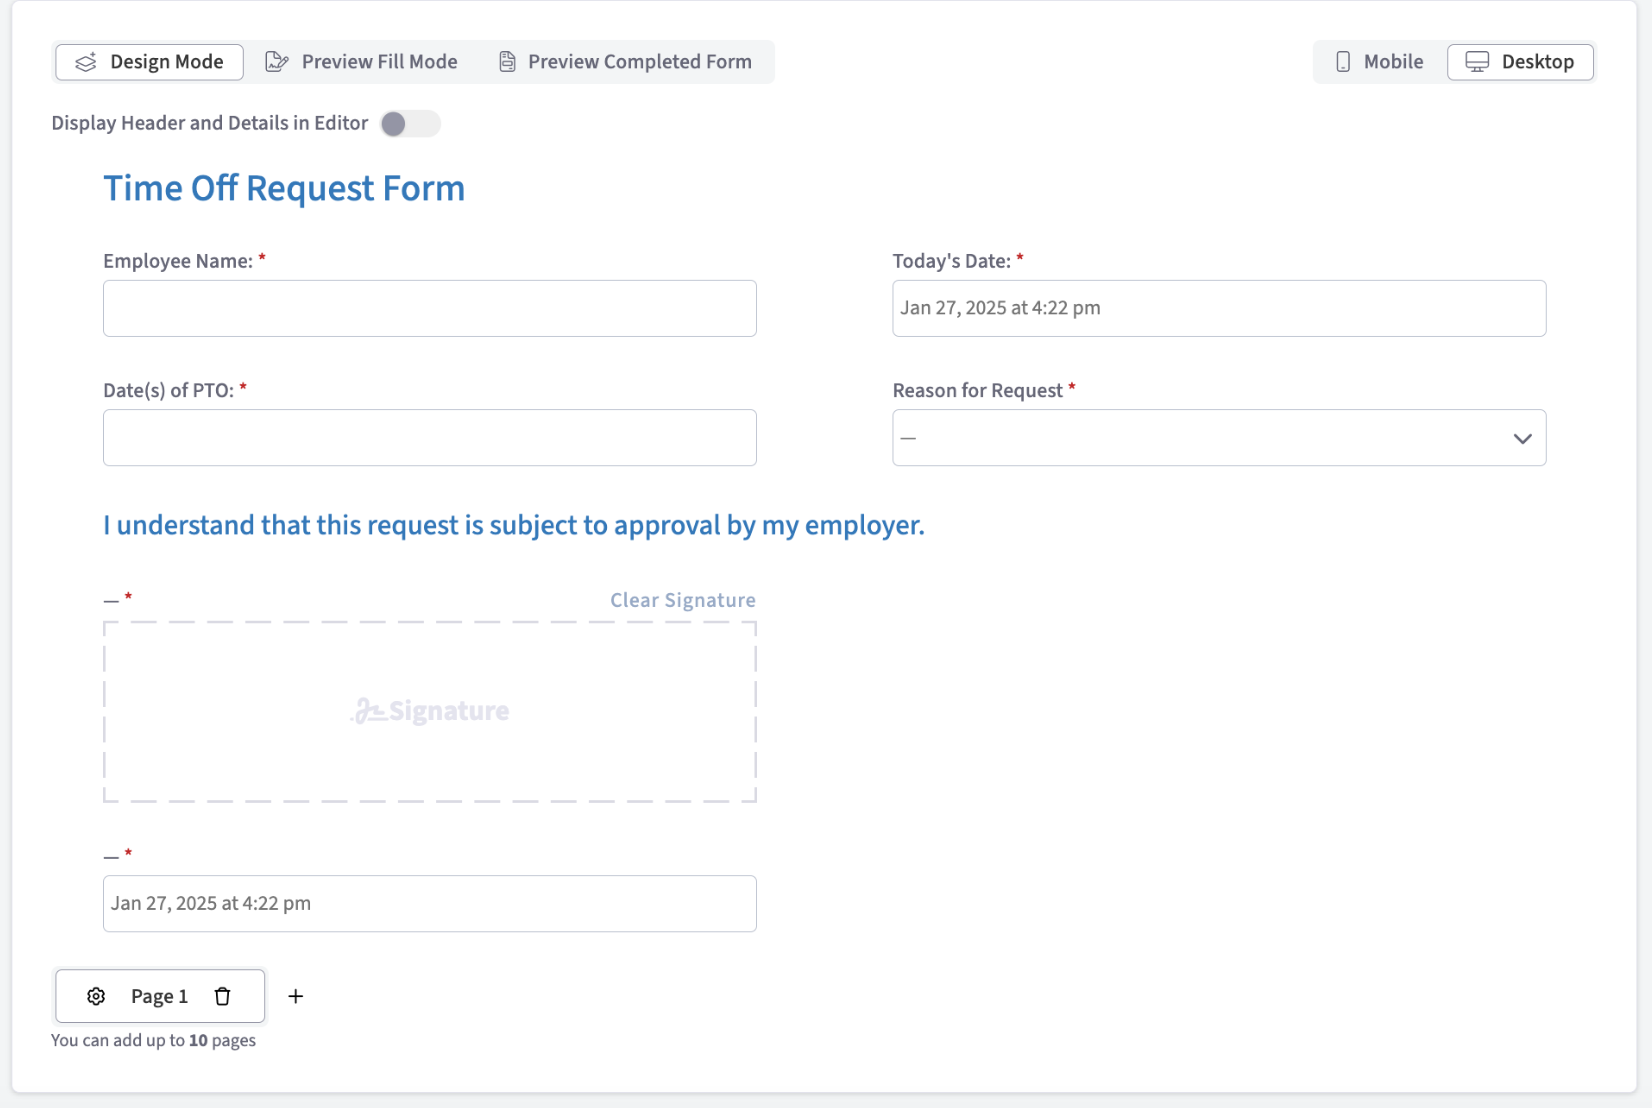
+- **Post work order forms:** These forms capture details after a job is finished. It allows employees to report on the work they've completed, any problems they faced, and follow-up actions needed if applicable. This form ensures proof of work completion and can help your business evaluate performance.
+
-- **Incident reports:** A form for employees to report accidents or problems that occur at work. This can assist your company in maintaining records and enhancing safety measures. See the example below.
+
-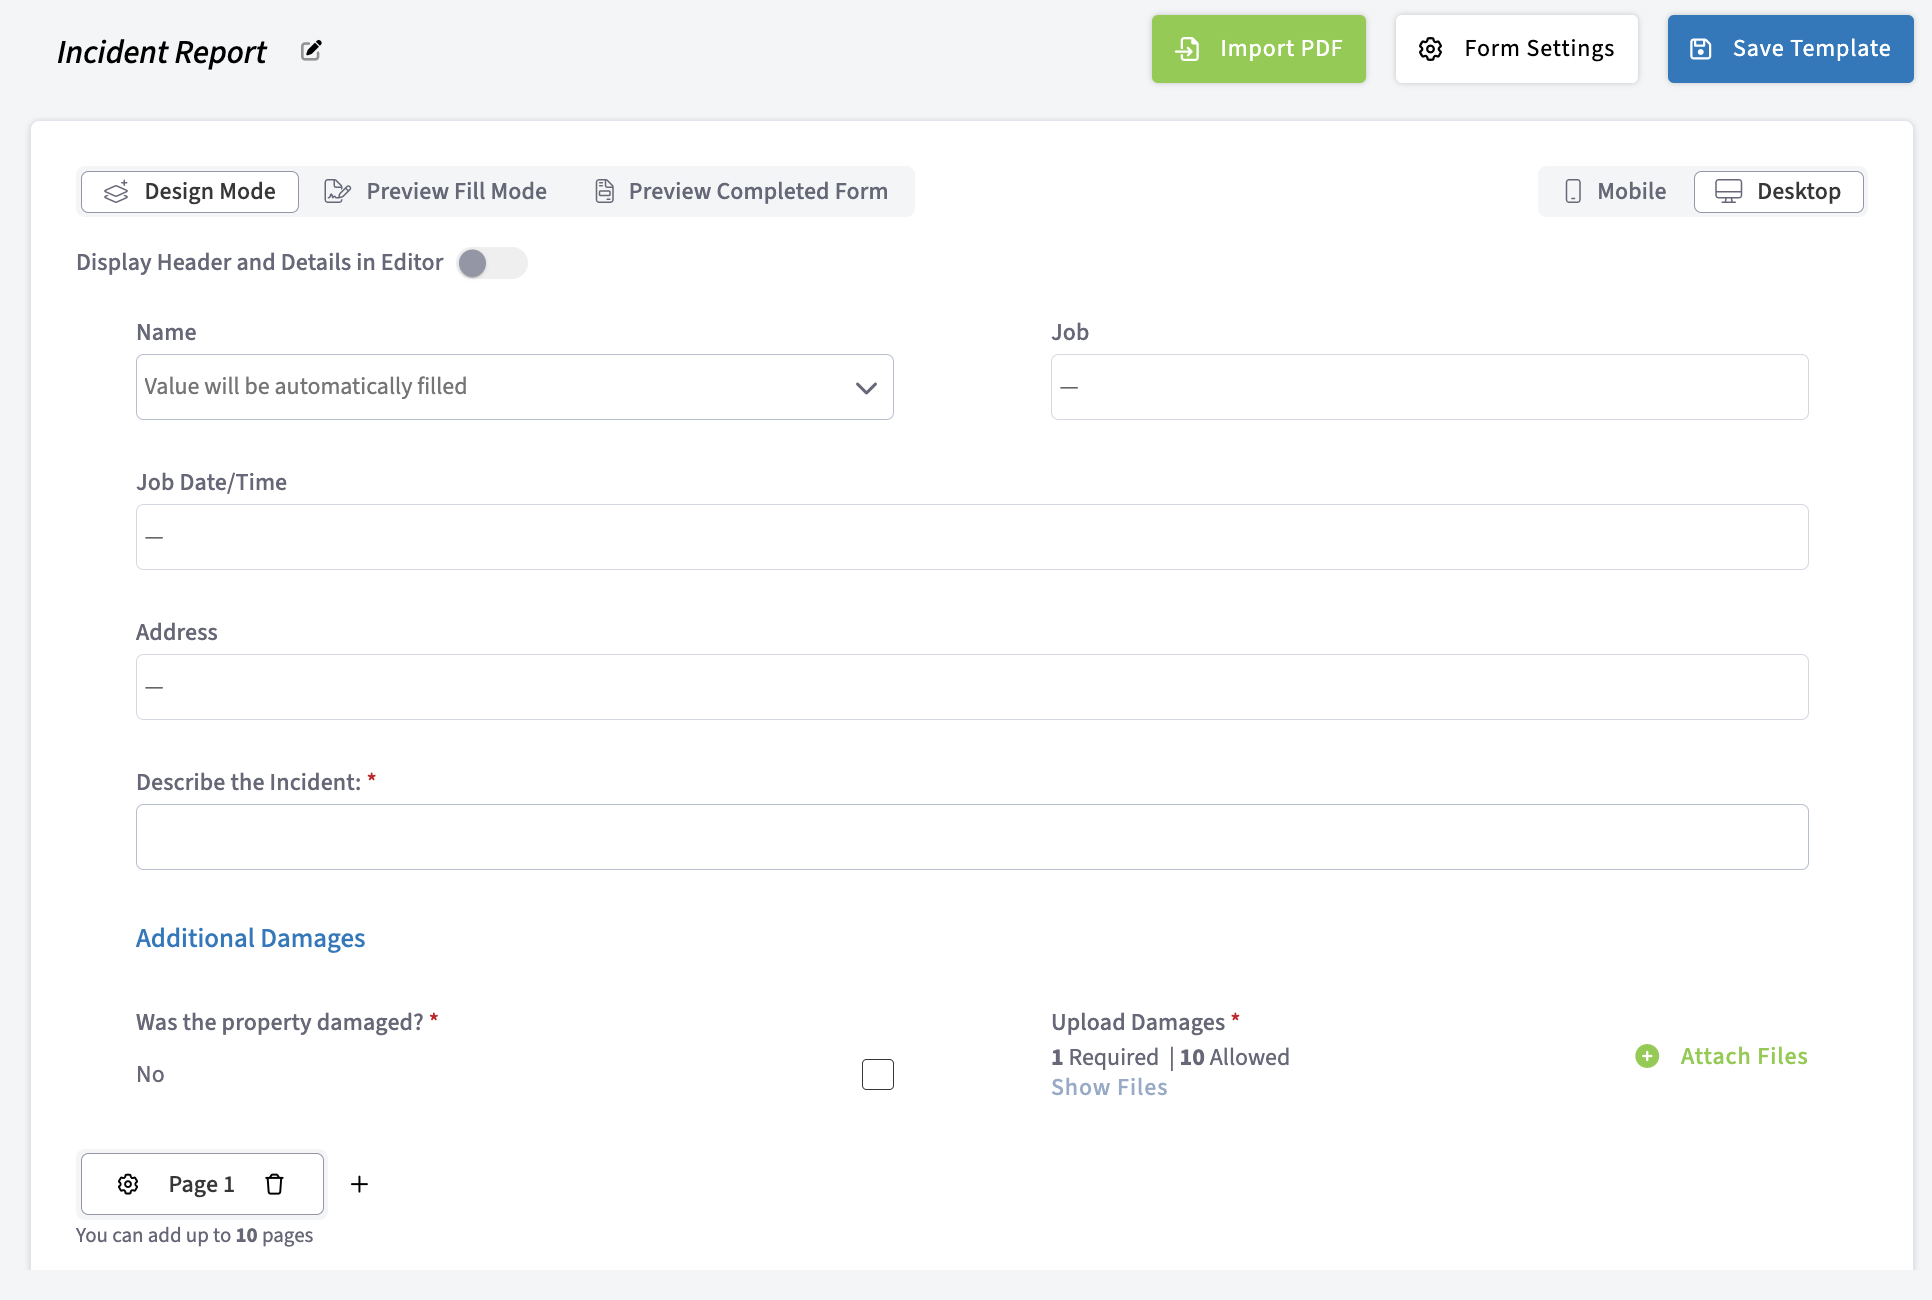
+- **Installation checklists/forms:** Completed installation forms serve as a record of what was done during the installation, which can be useful for future reference, warranty claims, or customer inquiries. In the example below, you can require that photos be taken as well as a signature from both the technician and customer. The form cannot be submitted without the required fields being filled out.
+
-- **Pre work order forms:** Pre work order forms can house important information needed before beginning a job. This form holds employees accountable for noting any existing conditions, hazards, and specific requirements, ensuring that all preparations and safety measures are in place to prevent issues during the task.
+
-- **Post work order forms:** These forms capture details after a job is finished. It allows employees to report on the work they've completed, any problems they faced, and follow-up actions needed if applicable. This form ensures proof of work completion and can help your business evaluate performance.
+- **Import and edit state and/or county required PDF forms:** Various states and/or county's require specific forms when installing equipment, documenting existing damage, etc. With Custom Forms, you can simply import the required PDF and overlay numerous fields such as free text, dates, and signatures. Adding these fields to required forms ensures that all necessary information is captured in a clear and organized manner. This is crucial for compliance with state and county regulations, as well as for maintaining accurate records. This can quickly be done by office administration or technicians on the job. Below, you can see an example of a Florida required electrical safety inspection form. The form was imported and made easily fillable by adding the various field options (shown in blue).
+
-
+
-- **Installation checklists/forms:** Completed installation forms serve as a record of what was done during the installation, which can be useful for future reference, warranty claims, or customer inquiries. In the example below, you can require that photos be taken as well as a signature from both the technician and customer. The form cannot be submitted without the required fields being filled out.
+- **Rebate forms:** Rebates can be considered customer facing forms as well as internal documents. Customer facing examples are designed for customers to fill out in order to claim rebates on products or services they have purchased. They usually require customers to provide specific information, such as proof of purchase, personal details, and any other necessary documentation to process the rebate. However, in the example below, they can also have an internal component if businesses use them to track and manage rebate submissions and approvals. In that case, they may be used internally to ensure that the rebate process is handled efficiently.
+
+ 
+
-
+## Customer Facing Examples:
-- **Import and edit state and/or county required PDF forms:** Various states and/or county's require specific forms when installing equipment, documenting existing damage, etc. With Custom Forms, you can simply import the required PDF and overlay numerous fields such as free text, dates, and signatures. Adding these fields to required forms ensures that all necessary information is captured in a clear and organized manner. This is crucial for compliance with state and county regulations, as well as for maintaining accurate records. This can quickly be done by office administration or technicians on the job. Below, you can see an example of a Florida required electrical safety inspection form. The form was imported and made easily fillable by adding the various field options (shown in blue).
+- **Customer intake forms:** Standardized forms, like the example below, minimize the chances of missing or incorrect information. With all relevant information collected upfront, your team can quickly process new customers and get them started with your services.
+
-
+
-- **Rebate forms:** Rebates can be considered customer facing forms as well as internal documents. Customer facing examples are designed for customers to fill out in order to claim rebates on products or services they have purchased. They usually require customers to provide specific information, such as proof of purchase, personal details, and any other necessary documentation to process the rebate. However, in the example below, they can also have an internal component if businesses use them to track and manage rebate submissions and approvals. In that case, they may be used internally to ensure that the rebate process is handled efficiently.
+- **Service feedback forms**: A quick form that you can share with your customers onsite or via email to gage their thoughts about your product / service. This helps your business understand what you're doing well and where improvements can be made for the future.
+
+ 
+
-
+* * *
-### Customer Facing Examples
+<Note>
+# Contact us TODAY to enable Custom Forms!
-- **Customer intake forms:** Standardized forms, like the example below, minimize the chances of missing or incorrect information. With all relevant information collected upfront, your team can quickly process new customers and get them started with your services.
-
-
-
-- **Service feedback forms**: A quick form that you can share with your customers onsite or via email to gage their thoughts about your product / service. This helps your business understand what you're doing well and where improvements can be made for the future.
-
-
-
----
-
-## Contact us TODAY to enable Custom Forms
-
_Contact us at [support@fieldpulse.com](mailto:support@fieldpulse.com) or use the chat feature in the bottom right corner of your screen._
+</Note>
-## --\> Already have Customs Forms?
+# \--> Already have Customs Forms?
-## Check out our step-by-step guide [Mastering Custom Forms A Step By Step Guide](/growth/custom-forms/mastering-custom-forms-a-step-by-step-guide)
\ No newline at end of file
+# Check out our step-by-step guide [here.](https://intercom.help/fieldpulse/en/articles/10431393-mastering-custom-forms-a-step-by-step-guide) <--
\ No newline at end of file
Custom Forms Linked to Job Records
- Module: Custom Forms
- File:
custom-forms-effortlessly-select-related-records-for-every-job.mdx - Intercom URL: https://help.fieldpulse.com/en/articles/10697135-custom-forms-linked-to-job-records
- Last modified: 2026-04-15
Index: custom-forms-effortlessly-select-related-records-for-every-job.mdx
===================================================================
--- custom-forms-effortlessly-select-related-records-for-every-job.mdx existing
+++ custom-forms-effortlessly-select-related-records-for-every-job.mdx intercom
@@ -1,29 +1,30 @@
-With Custom Forms, you have the ability to select related records directly within the form when it is attached to a job. This functionality is designed to **streamline workflows**, **improve data accuracy**, and provide a more **intuitive user experience**.
+With Custom Forms, you have the ability to select related records directly within the form when it is attached/linked to a job. This functionality is designed to **streamline workflows**, **improve data accuracy**, and provide a more **intuitive user experience**.
## What’s New?
When you fill out a Custom Form linked to a specific job, you will now have the ability to select from related records. For instance, if a form includes a field for "Asset Title," and the job has multiple assets associated with it, you can easily choose the relevant asset from a dropdown list. This feature not only simplifies the data entry process but also ensures that you are referencing the correct information, **reducing the likelihood of errors**.
-
+
## Key Benefits
-1. **Improved Accuracy**: By allowing you to select from existing related records, we minimize the chances of manual entry errors. This ensures that the data captured in the form is accurate and relevant to the job at hand.
+1. **Improved Accuracy**: By allowing you to select from existing related records, we minimize the chances of manual entry errors. This ensures that the data captured in the form is accurate and relevant to the job at hand.
+
+2. **Enhanced User Experience**: The ability to select related records directly within the form makes the process more intuitive. You can quickly find and select the information you need without having to navigate away from the form.
+
+3. **Streamlined Workflows**: This feature is designed to save time and improve efficiency. You can complete forms faster, as you no longer need to remember or look up related records separately.
+
-2. **Enhanced User Experience**: The ability to select related records directly within the form makes the process more intuitive. You can quickly find and select the information you need without having to navigate away from the form.
-
-3. **Streamlined Workflows**: This feature is designed to save time and improve efficiency. You can complete forms faster, as you no longer need to remember or look up related records separately.
-
## How It Works
To utilize this new feature, simply create or edit a Custom Form and attach it to a job. When adding fields to the form, you can specify which related records should be selectable. For example, if the form includes a field for "Invoice," you will see a dropdown menu populated with all invoices linked to that job. Selecting the appropriate invoice is as easy as a click, making the form-filling process smoother than ever.
-
+
This Custom Forms feature is designed with tradespeople like you in mind, making it easier to manage job-related records. By allowing you to select related records directly within the form, we’re helping you save time, reduce errors, and complete more jobs, ultimately increasing your revenue!
----
+* * *
## **Have additional questions?**
_Contact us at [support@fieldpulse.com](mailto:support@fieldpulse.com) or use the chat feature in the bottom right corner of your screen._
\ No newline at end of file
Viewing Photos and Files on Custom Form PDFs
- Module: Custom Forms
- File:
viewing-photos-files-on-custom-form-pdfs.mdx - Intercom URL: https://help.fieldpulse.com/en/articles/11519203-viewing-photos-and-files-on-custom-form-pdfs
- Last modified: 2026-04-15
Index: viewing-photos-files-on-custom-form-pdfs.mdx
===================================================================
--- viewing-photos-files-on-custom-form-pdfs.mdx existing
+++ viewing-photos-files-on-custom-form-pdfs.mdx intercom
@@ -1,17 +0,0 @@
-Currently, photos and files cannot be displayed directly within Custom Form PDFs. However, you can include a QR code on your Custom Form PDFs. When scanned, this QR code will direct your customers to a new page where they can view all associated photos and files.
-
-To ensure that your Custom Form includes the QR code when sending it to your customer, follow these steps:
-
-1. Click the button to **Send to be Filled** or **Send to be Viewed**.
-
-2. Make sure to check the box under the **Form Files Visibility** heading, as shown in the image below.
-
-3. From the dropdown menu, select the photos and/or files you want to be visible when the QR code is scanned.
-
-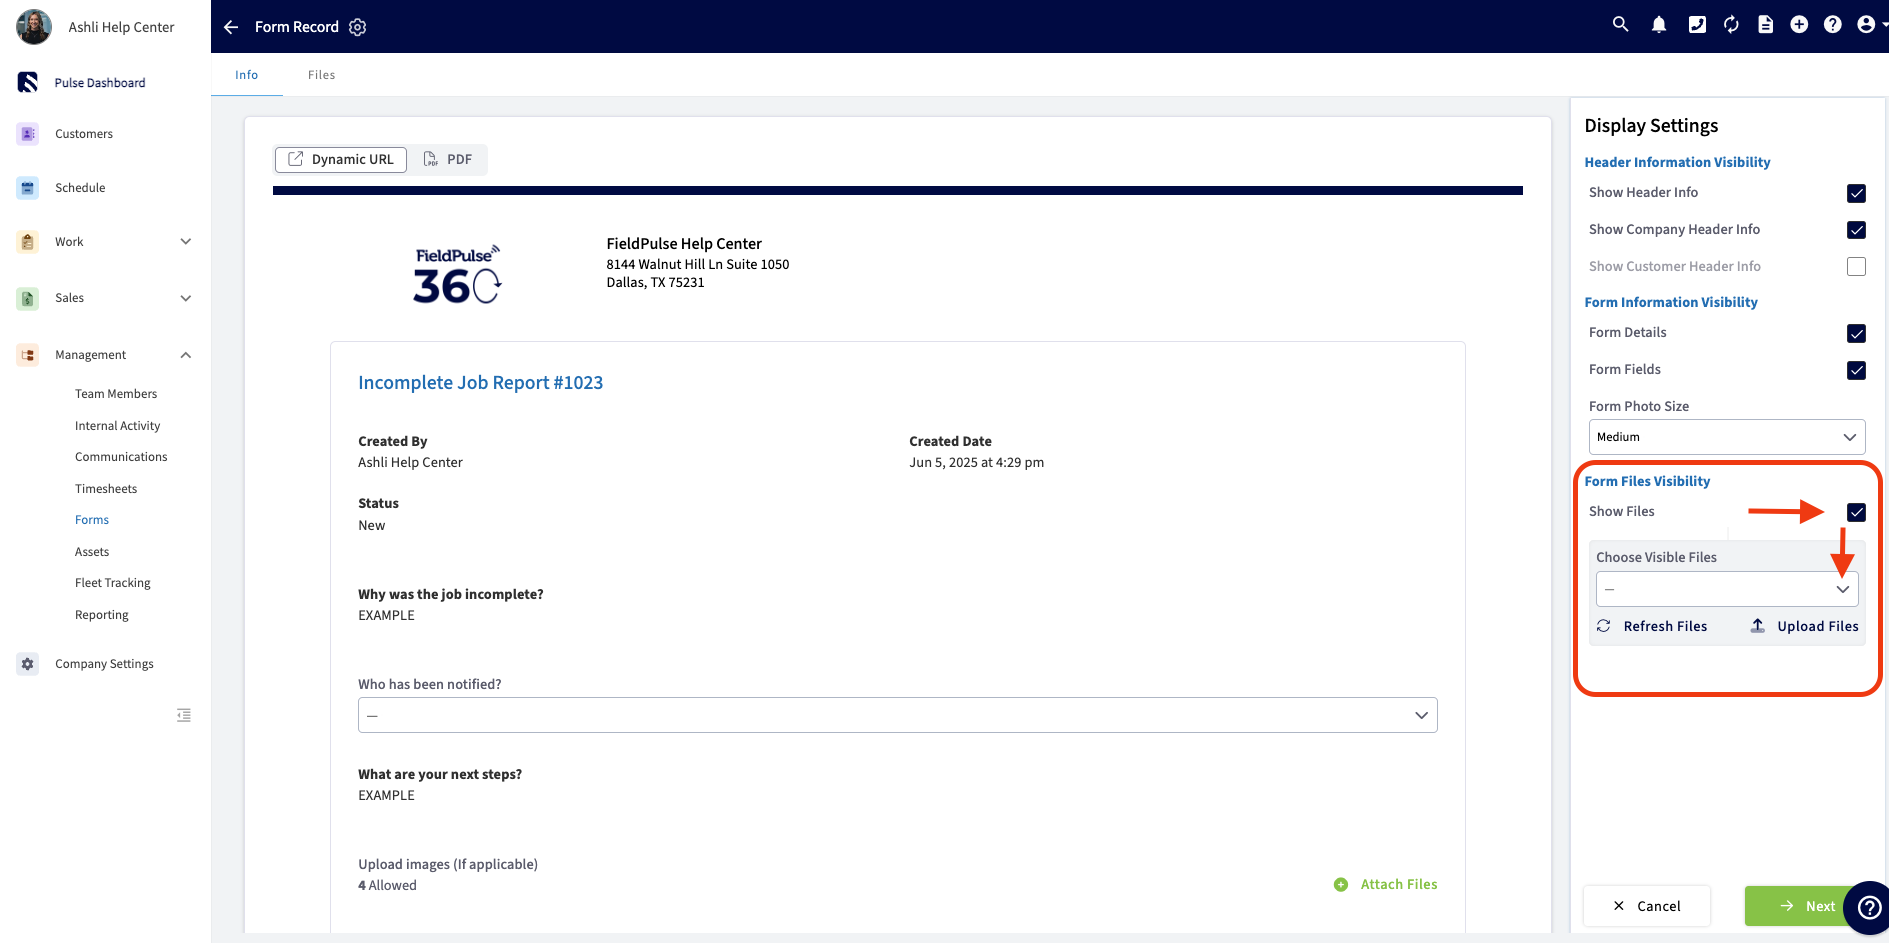
-
----
-
-**Have additional questions?**
-
-_Contact us at [support@fieldpulse.com](mailto:support@fieldpulse.com) or use the chat feature in the bottom right corner of your screen._
\ No newline at end of file
Creating a Custom Form
- Module: Custom Forms
- File:
mastering-custom-forms-a-step-by-step-guide.mdx - Intercom URL: https://help.fieldpulse.com/en/articles/10431393-creating-a-custom-form
- Last modified: 2026-04-15
Index: mastering-custom-forms-a-step-by-step-guide.mdx
===================================================================
--- mastering-custom-forms-a-step-by-step-guide.mdx existing
+++ mastering-custom-forms-a-step-by-step-guide.mdx intercom
@@ -1,383 +1,1 @@
-## Why Custom Forms?
-
-Click [Custom Forms Streamline Your Workflow And Save Time](/growth/custom-forms/custom-forms-streamline-your-workflow-and-save-time) to find out how it can save you time and streamline your workflow.
-
----
-
-## Enabling Custom Forms
-
-Contact us for pricing! To begin using, you'll need to enable the feature. Start by clicking on _Company Settings_ and selecting _Features & Plugins._ Navigate to _Custom Forms_ and select _Enable_. Now you're ready to begin customizing forms to streamline your operations!
-
-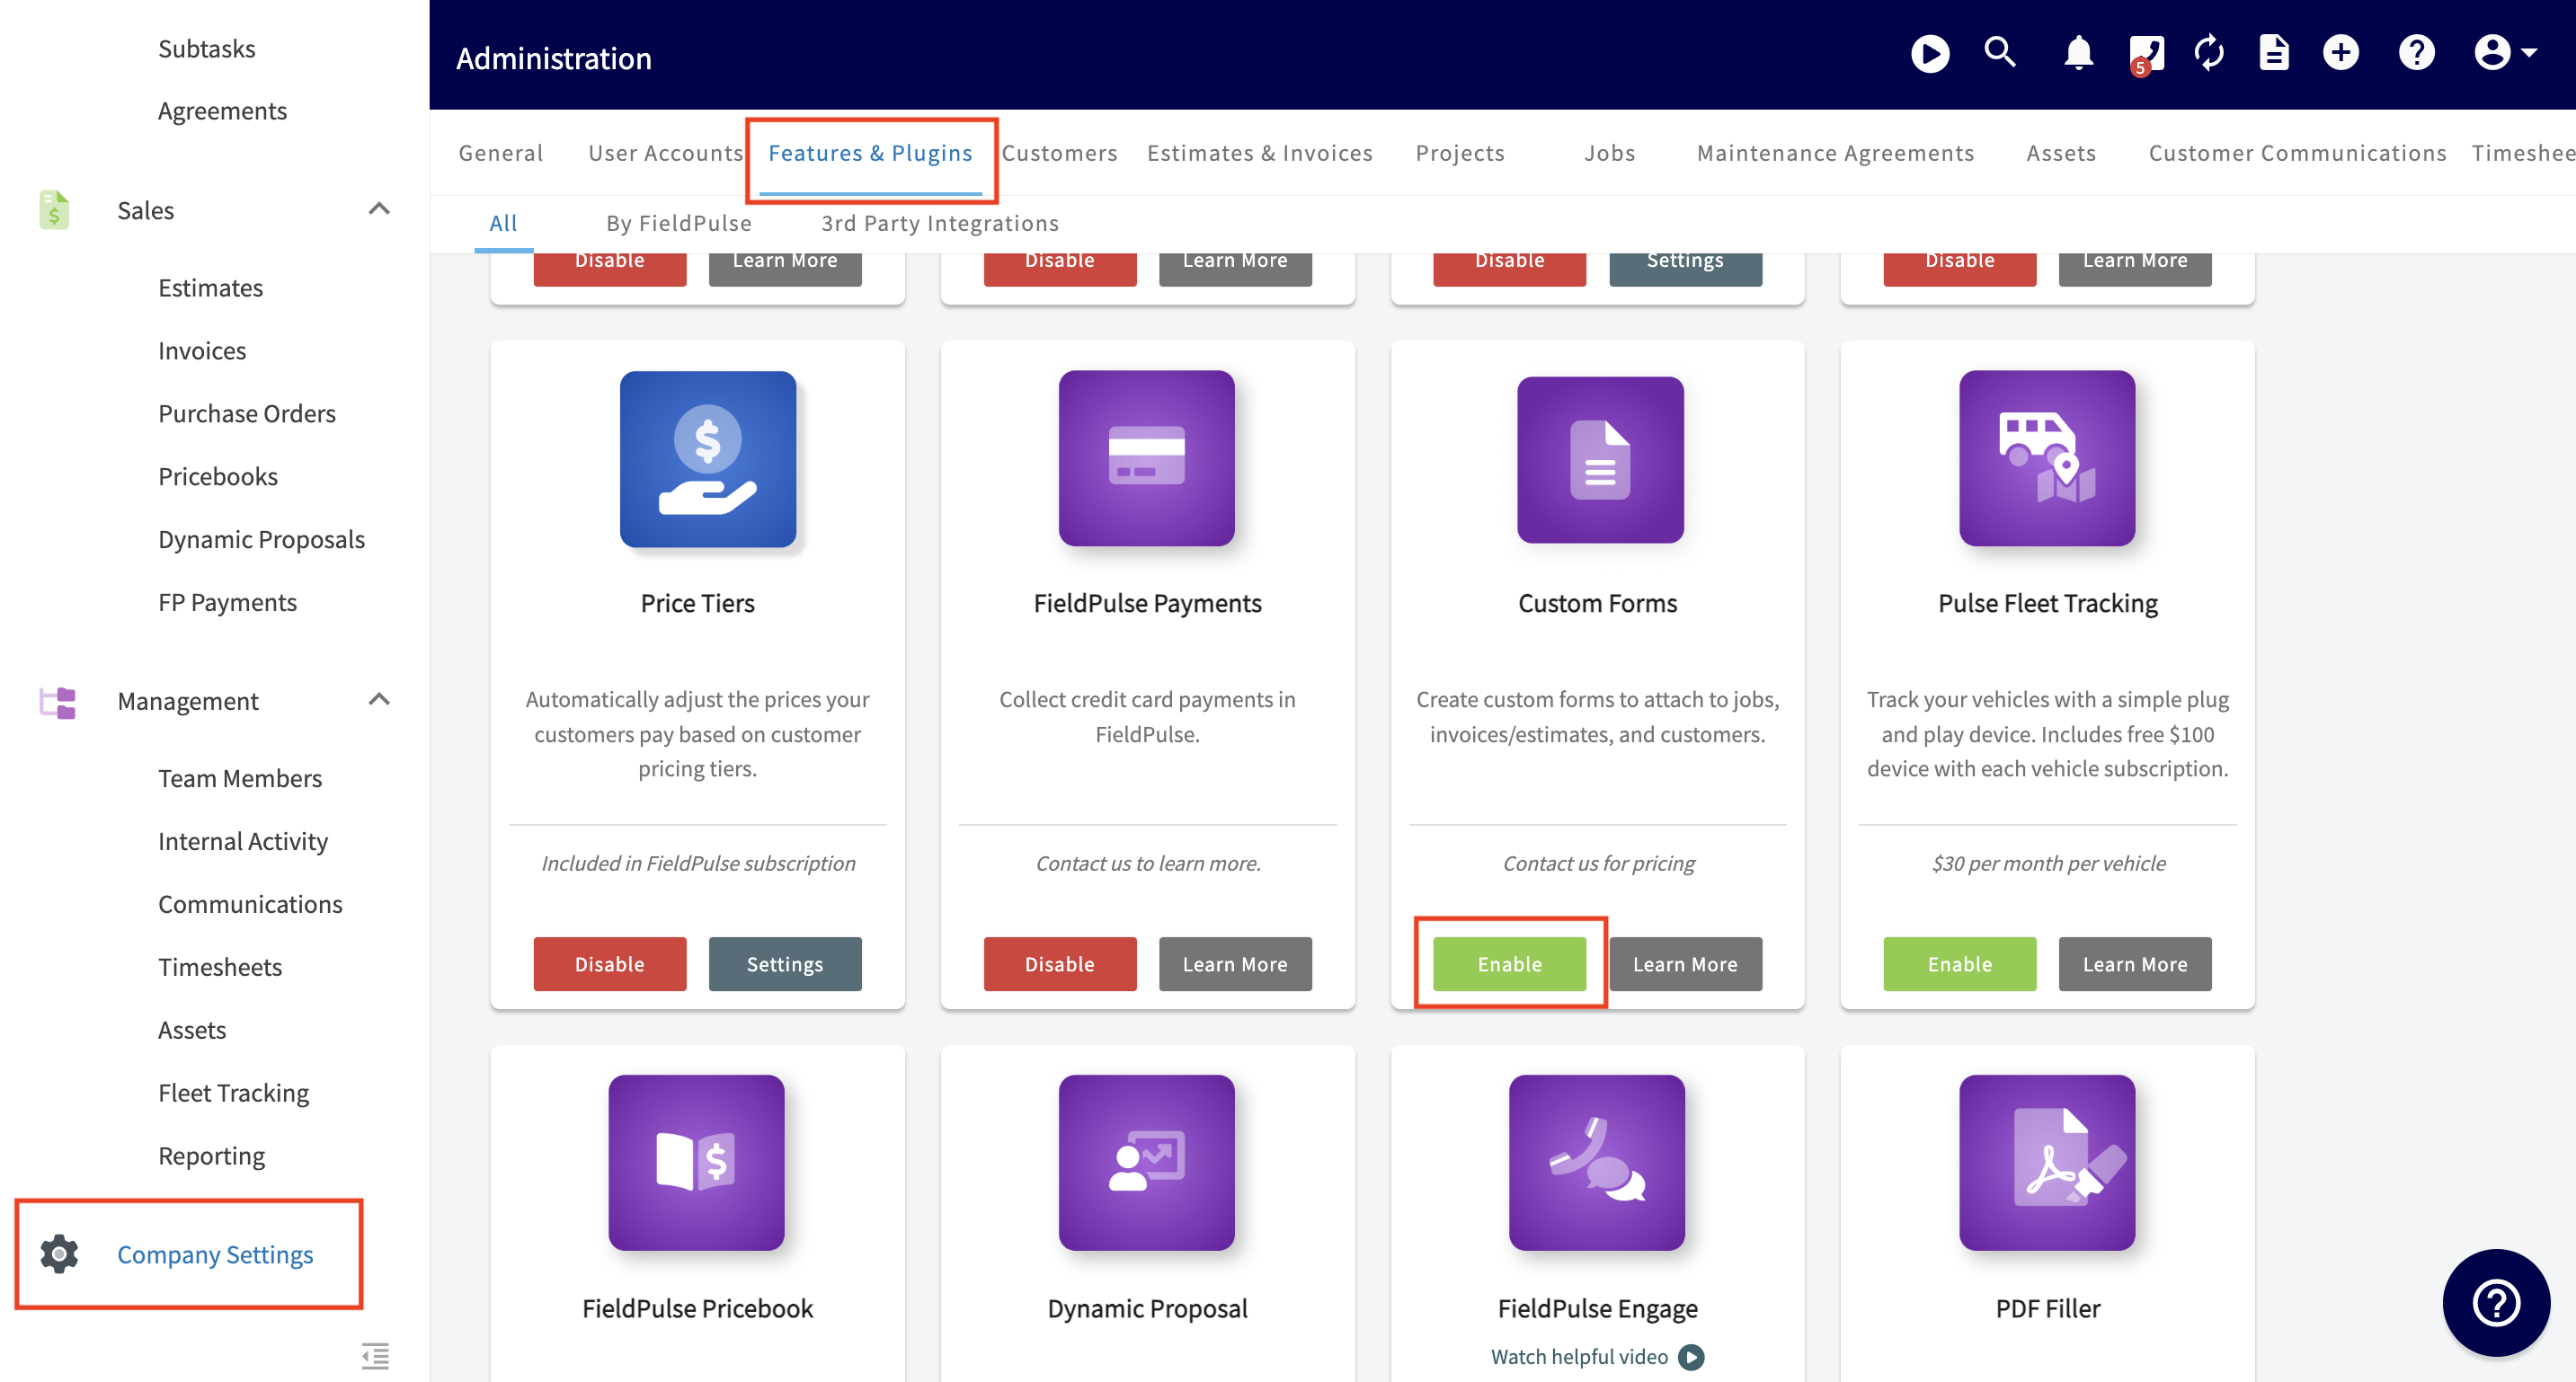
-
----
-
-## PDF Filler
-
-Within our Custom Forms you have the ability to import PDFs and image files to use as a background on the custom forms you desire to create. This is useful if your company has existing forms that you've seen great success with or forms that must be in a specific format for regulatory purposes.
-
-After enabling Custom Forms, navigate to _Company Settings_ then select _Custom Forms._ From here, select the green _Import PDF_ button.
-
-
-
-After selecting the green _Import PDF_ button, a screen may pop up asking if you'd like to replace the current pages you have open or if you would like to append, or add, new pages to the page that it currently open. Choose which options makes the most sense for you, your company, and the form you are wanting to import/create.
-
-
-
-### Once your PDF has been imported, you can
-
-- Easily click and drag fields from the right-side menu onto your form.
-
- - To remove a field, click and drag it back to the right hand side, select the field and hover over the green _Actions_ button at the bottom right then select _Delete_, or select the field and simply press the backspace button on your keyboard to initiate the removal of the field.
-
-- Decide to remove the _Field Borders_ on an individual field basis. This will ensure that what is entered in the field appears without any box around it when presented to your customer.
-
-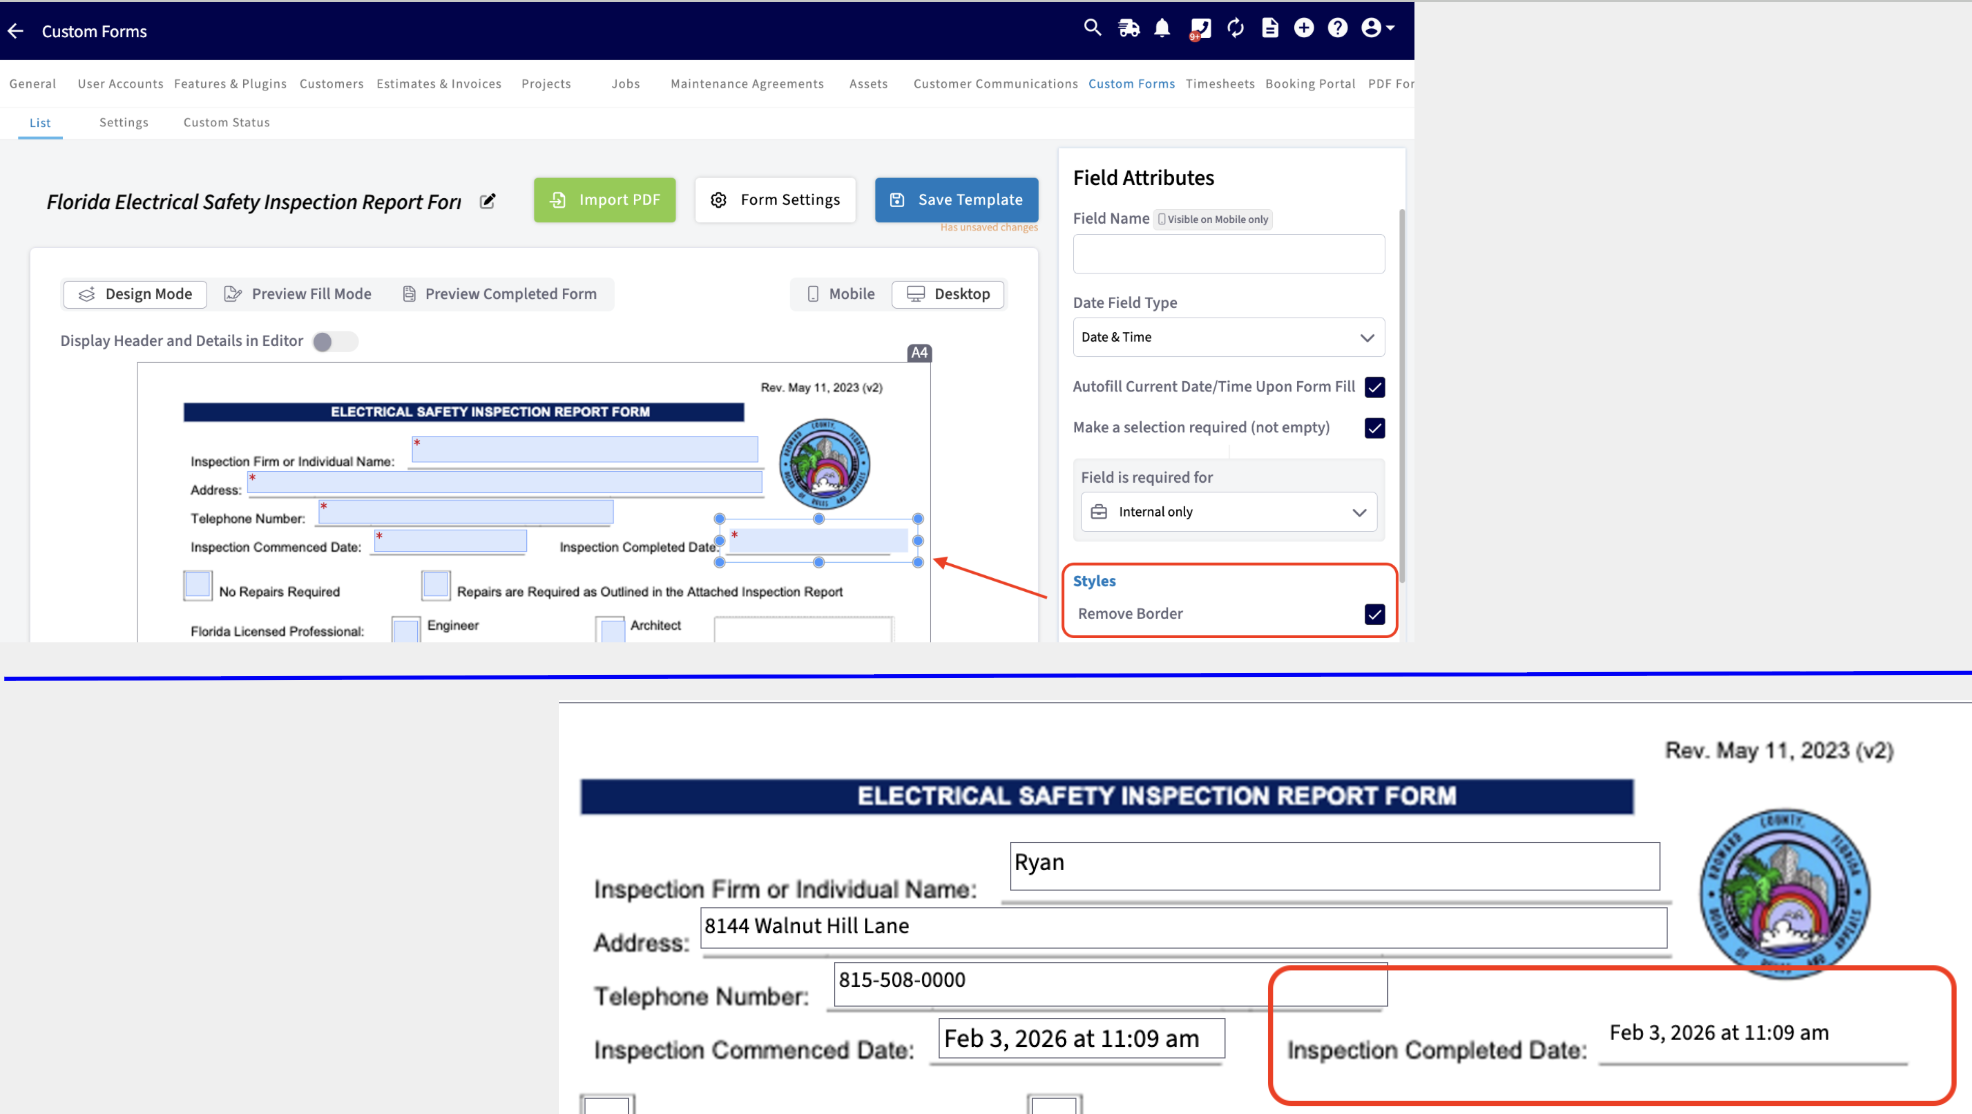
-
-- Decide the text alignment for each individual field: Left, Center, or Right.
-
-
-
-- Size and position each field. This can be done by manually dragging and stretching each field, setting the exact width and height, or by setting the exact X and Y coordinates.
-
-
-
-### PDF Filler Modes
-
-Use the various mode options to view your form in different scenarios. You can also preview the appearance of your form from a **Mobile** or **Desktop** view.
-
-- **Design Mode**\- You cancreate and edit a form by dragging and dropping fields.
-
-- **Preview Fill Mode**\- You canpreview how the form will look when someone is filling it out. You can also choose if a field is editable by a customer or not in this view.
-
-- **Preview Completed Form**\- You canpreview how the form will look once it has been completely filled out.
-
-
-
-The PDF form with overlay fields will translate well to Mobile! It can be viewable either in its full size with the ability to zoom in/out (pictured in the example above) or as fields one-by-one. This all will depend on what the user chooses.
-
----
-
-## Create a New Form
-
-After enabling Custom Forms, navigate to _Company Settings_ then select _Custom Forms._ On this page you can view Custom Forms you've previously created or select _Create New_.
-
-
-
----
-
-## Form Settings
-
-Begin personalizing your custom form by navigating to _Form Settings_.
-
-
-
-### General Settings
-
-Begin by naming your form and adjusting the font size. Next, toggle on/off the following settings:
-
-- _Form is Active_ \- This will activate the form for use in FieldPulse.
-
-- _Allow Template Creation_ \- This will allow this form to be used as a template for future forms.
-
-- _Enable Status Workflow_ \- This will enable custom status workflows for the form, allowing you to update statuses instantly based on your actions.
-
-_Connect Forms to Records_ allows you to specify which records (standalone, customer, job, estimate, invoice, project, maintenance agreement, asset) your newly created form can be attached and related to. Select **all** records on which you'd like this form to be used. **For example, if _Job_ is selected, then within a job record you can navigate to _Forms_ and then _Create New_. Here your Custom Form template (in this example titled: SAMPLE CUSTOM FORM) is available for use. If it was NOT selected, that individual form template would NOT be available to use.**
-
-
-
-### Custom Status Workflows
-
-You can create your own Custom Status Workflows and assign them to the different forms you create within Custom Forms. Custom Status Workflows are an internal tool. You can utilize them to keep all of your forms organized by knowing the current status of them. For example, is the form you created new or has it been sent by the customer? All of these can be tracked by the Workflow Status that you create.
-
-To create a Custom Status Workflow, first head to _Company Settings_. Locate _Custom Forms_ then click on _Custom Status._ From here, press _Create Custom Status_ and begin creating a unique workflow specific to your Custom Form.
-
-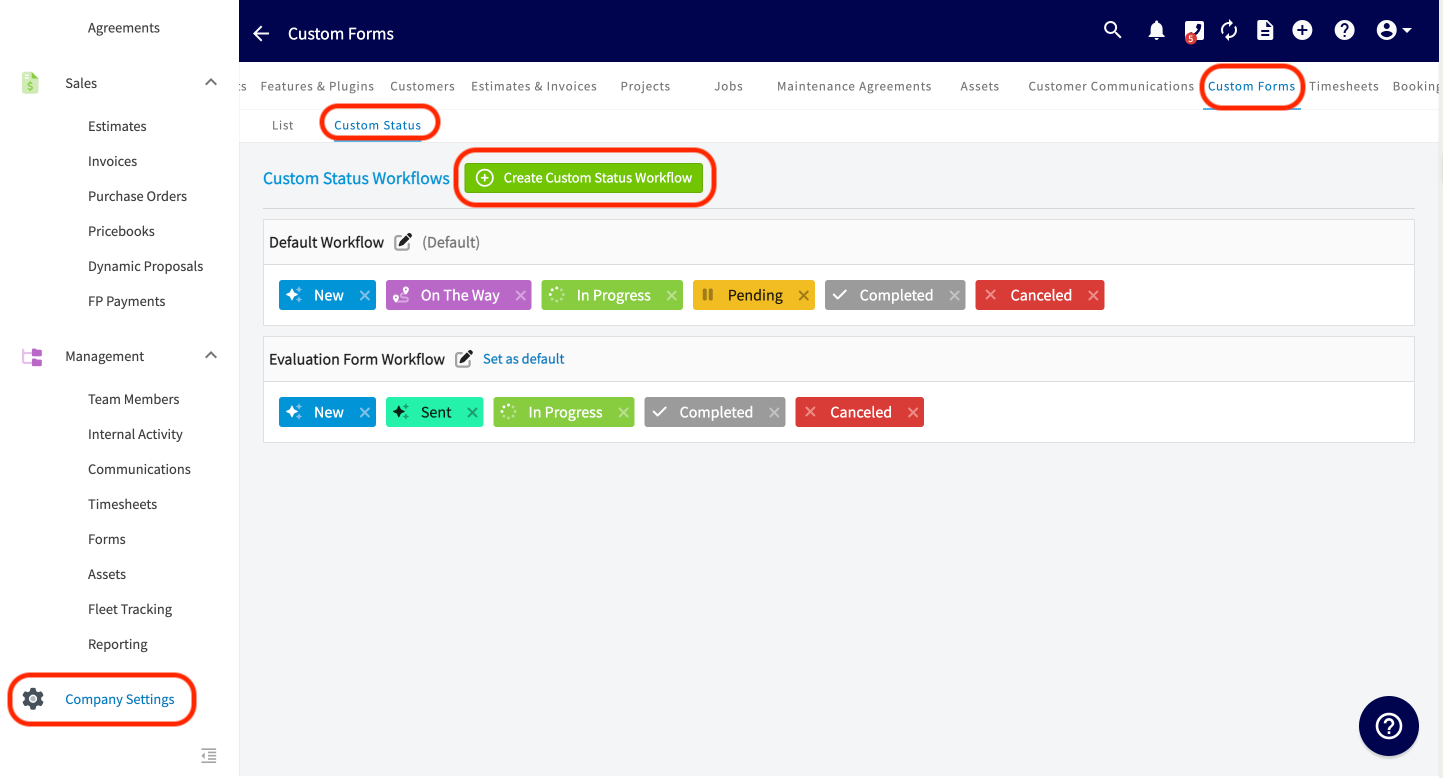
-
-After creating the workflow above, return to the _Custom Form Settings_. After checking the box to _Enable Status Workflow_ you can now select the status workflow you'd like to use for this individual form.
-
-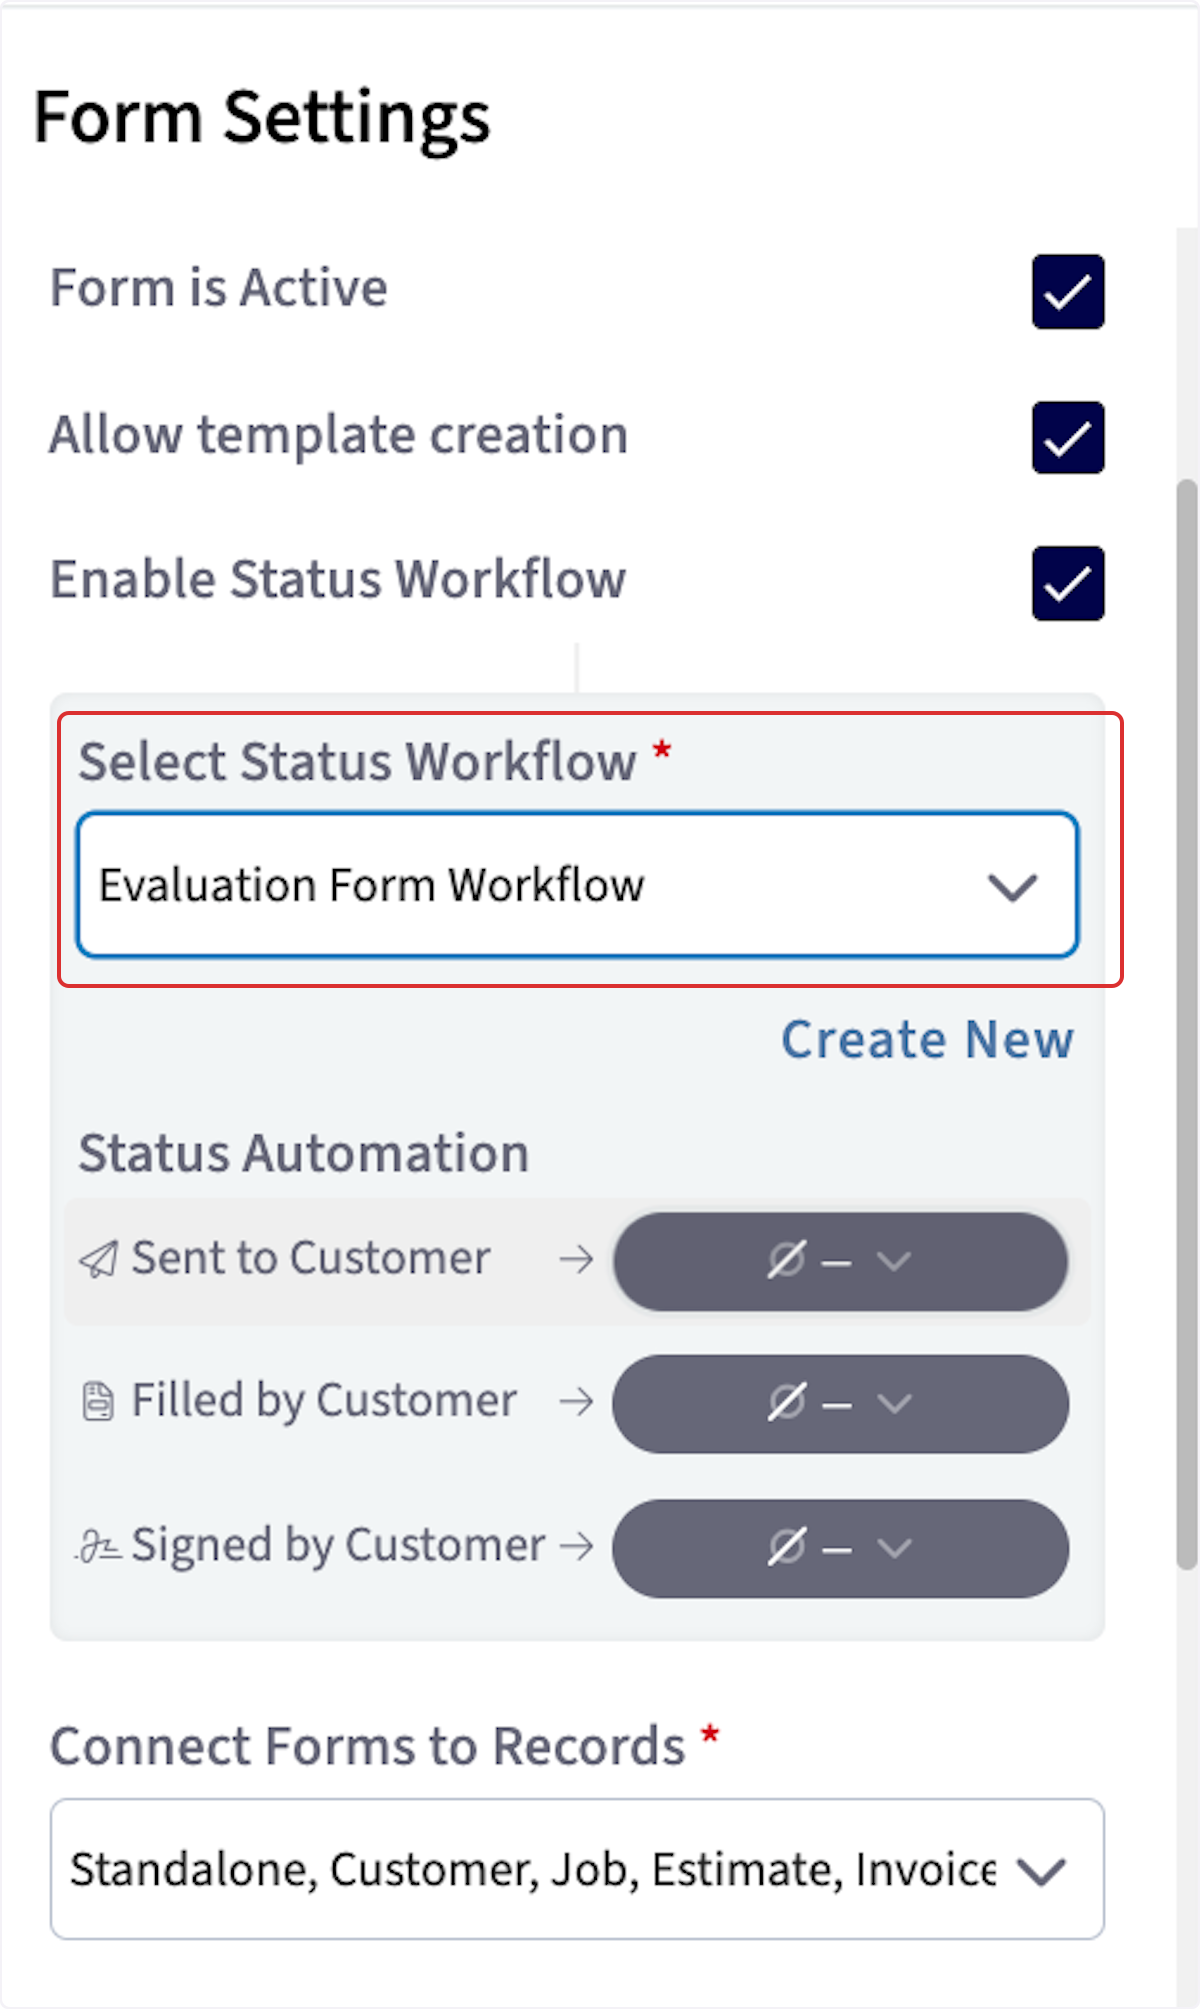
-
-From here, you can set up _Status Automations_. In this example, when the form is sent to the customer, it will automatically change to the _Sent_ status. If the form is filled out by the customer, it will automatically change to the _In Progress_ status. If the form is signed, it will automatically change the Custom Workflow Status to _Complete._
-
-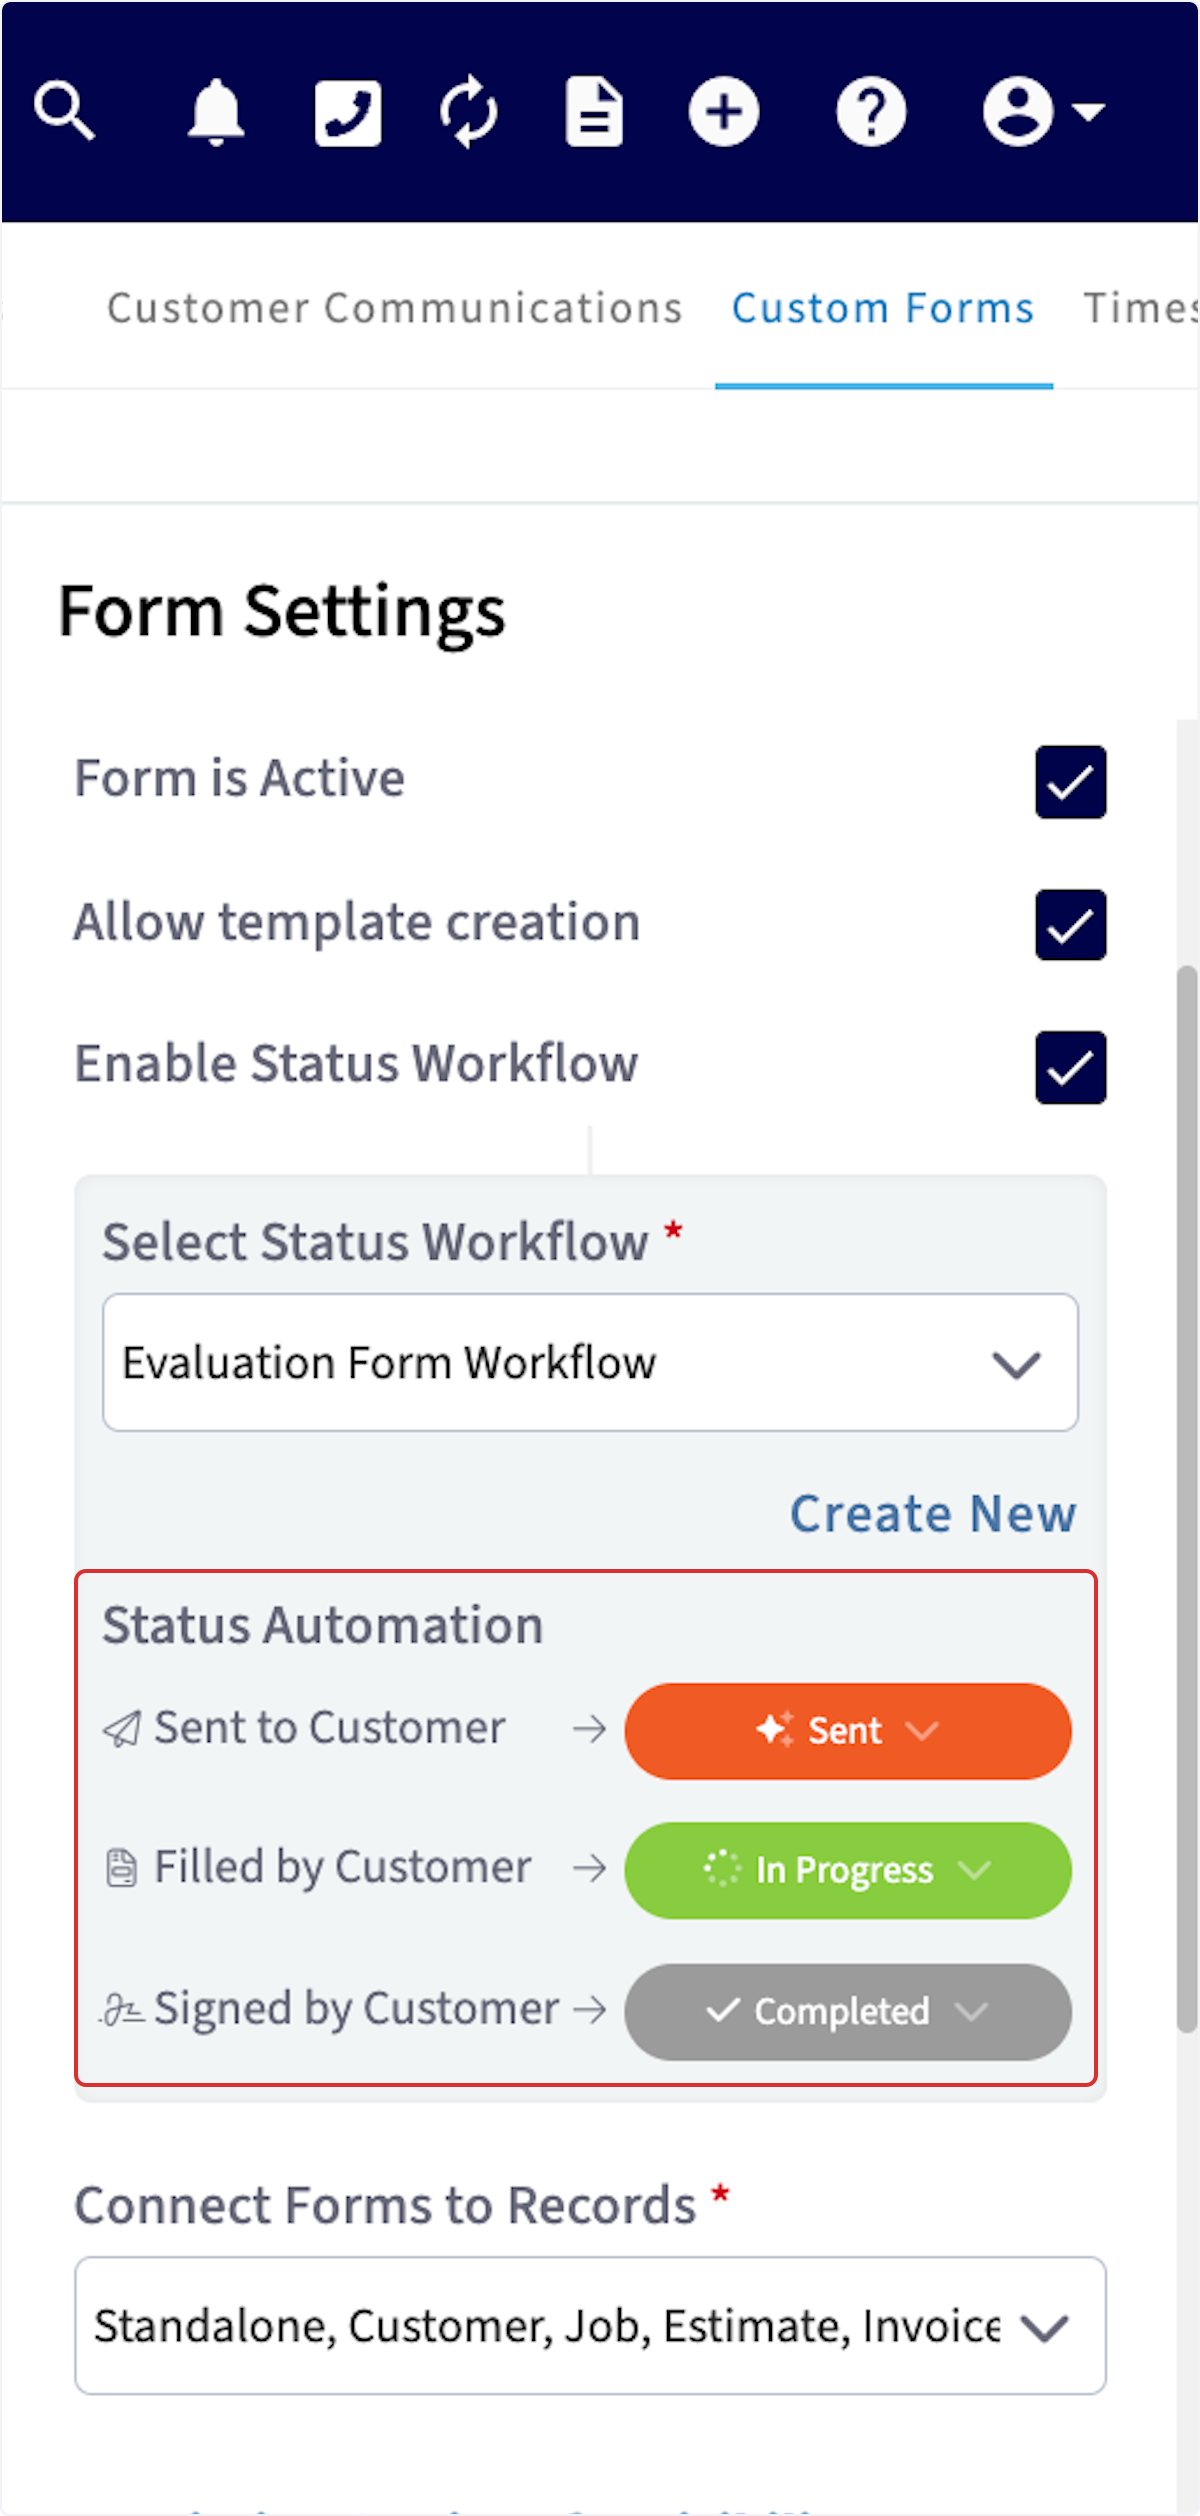
-
-### Permissions
-
-Adjust the permission settings for both visibility and creating/editing. Select specific users, teams, and/or roles to whom you'd like to give visibility and creating/editing permissions to.
-
-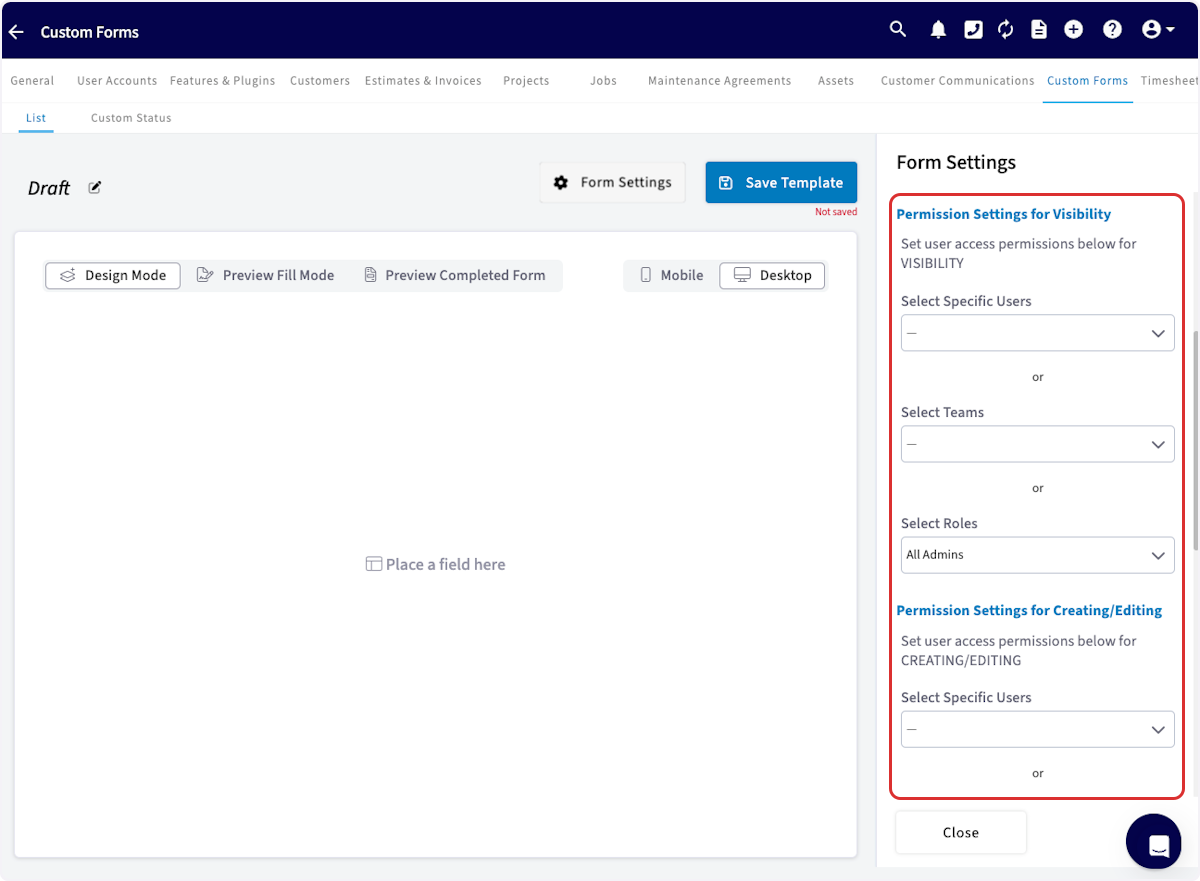
-
-### Email & SMS Configuration
-
-Here you can customize the default email and SMS messages used when sending a Custom Form out to a customer.
-
-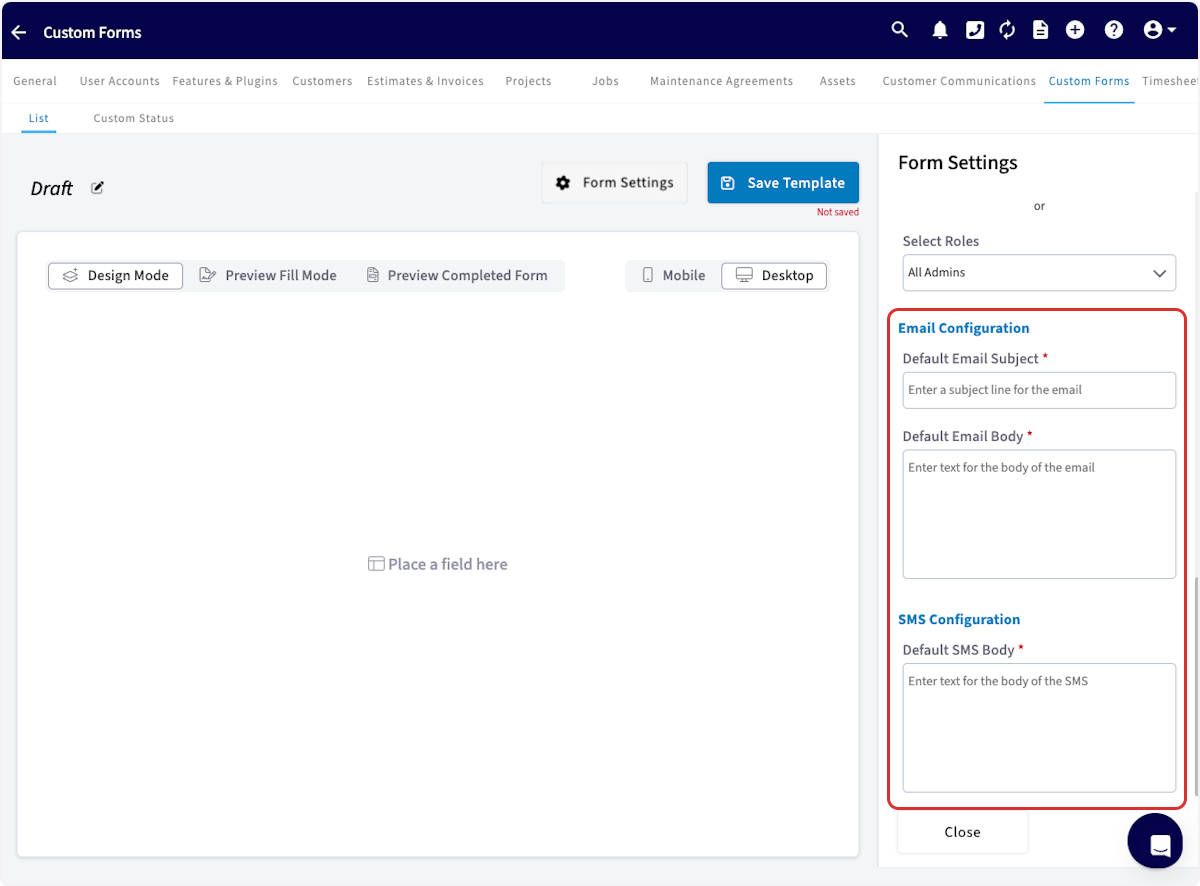
-
----
-
-## Page Count for Custom Forms
-
-The maximum page count for Custom Forms is 20 pages. To ensure all pages load properly, especially those with PDF backgrounds, we have implemented Pagination.
-
-- **Web App**: Custom Forms will paginate every 10 pages.
-
-- **Mobile App**: Custom Forms will paginate every 4 pages.
-
-
-
----
-
-## Building a Custom Form
-
-After you've adjusted your form settings, it's time to begin building your Custom Form! Easily click and drag fields from the right-side menu onto your blank custom form. **(Note: Be sure you're not still in _Form Settings_. To close the settings, click on _Form Settings_ again.)**
-
-
-
-Once a field is placed on a form, you can resize and reorder each field to your liking. To remove a field, click and drag it back to the right hand side, select the field and hover over the green _Actions_ button at the bottom right then select _Delete_, or select the field and simply press the backspace button on your keyboard to initiate the removal of the field.
-
-### Field types that can be added to your Custom Form
-
-- **Section Labels** \- Section header for names and titles
-
-- **Text Fields**\- Here you have the option to add "free text", allowing you/your customer to write/type freely in their own words
-
-- **Drop-down Field** -Select a single option from a dropdown list
-
-- **Multi-select Dropdown Field** \- Select multiple options from a dropdown list.(Note: You have the ability to specify minimum/maximum number of selections someone can make here)
-
-- **Quick Select**\- Multiple choice - you can add up to 5 options here
-
-- **Checkbox** \- Select (yes) or leave blank (no)
-
-- **Date & Time** \- Collect the date and time. You can check the box to autofill the current date and time when the form is submitted. The time selection features a scroll panel set in **15-minute increments**. Additionally, you can enter the exact time, down to the minute, by editing the _Time_ field in the bottom right corner.
-
-
-
-- **Image/Video** \- Upload jpg, pdf, mp4, and png files. You have the ability to specify the minimum/maximum number of files allowed (1-10 files permitted)
-
-- **Signature** \- Easily collect a signature with this field
-
-- **Related Record Fields** \- Import data from related records within FieldPulse. See examples of these fields below:
-
- - **_Field Value from Related Customers_**
-
- - Here you can pull any of the following information from the Customer record: name, notes, job notes, email, phone, billing address, location **(Note: if a customer has multiple locations or contacts, you can specify which user's information to fill the form with)**, status/type, pipeline status, lead source, tags, and any other custom fields you may have added to your Customer records.
-
- - **_Field Value from Related Jobs_**
-
- - Here you can pull any of the following information from the Job record: title, location name, location, job notes, field notes, status, assigned team members, scheduled date/time, customer arrival window, created by, tags, and any other custom fields you may have added to your Job records.
-
- - **_Field Value from Related Estimates_**
-
- - Here you can pull any of the following information from the Estimates
-
- record: title, estimate notes, internal notes, estimate date, author, status, location, reference, expiration date, tags, and any other custom fields you may have added to your Estimate records.
-
- - **_Field Value from Related Invoices_**
-
- - Here you can pull any of the following information from the Invoices record: title, invoice notes, internal notes, invoice date, author, status, location, reference, due date, tags, and any other custom fields you may have added to your Invoice records.
-
- - **_Field Value from Related Projects_**
-
- - Here you can pull any of the following information from the Projects record: title, notes, job notes, start date, end date, completion percentage, and any other custom fields you may have added to your Project records.
-
- - **_Field Value from Related Maintenance Agreements_**
-
- - Here you can pull any of the following information from the Maintenance Agreements record: title, job location, status, price per bill, total annual fee, agreement notes, job notes, and any other custom fields you may have added to your Maintenance Agreement records.
-
- - **_Field Value from Related Assets_**
-
- - Here you can pull any of the following information from the Assets record: asset tag, title, asset notes, install date, location, location details, category, manufacturer, model, model number, serial number, model year, model details, warranty, condition, warranty information, and any other custom fields you may have added to your Asset records.
-
-### [Click here for more details on adding relating field values on Custom Forms.](/growth/custom-forms/custom-forms-effortlessly-select-related-records-for-every-job)
-
-### Internal vs. Customer Facing Fields
-
-You can now designate Custom Form fields as _Internally Visible Only_, ensuring that your customers see only the fields they need to complete. Your team can still access internal notes, checkboxes, and other operational details.
-
-When a field is hidden, the rest of the form automatically adjusts. You can control how the layout responds, so your forms stay clean and professional.
-
-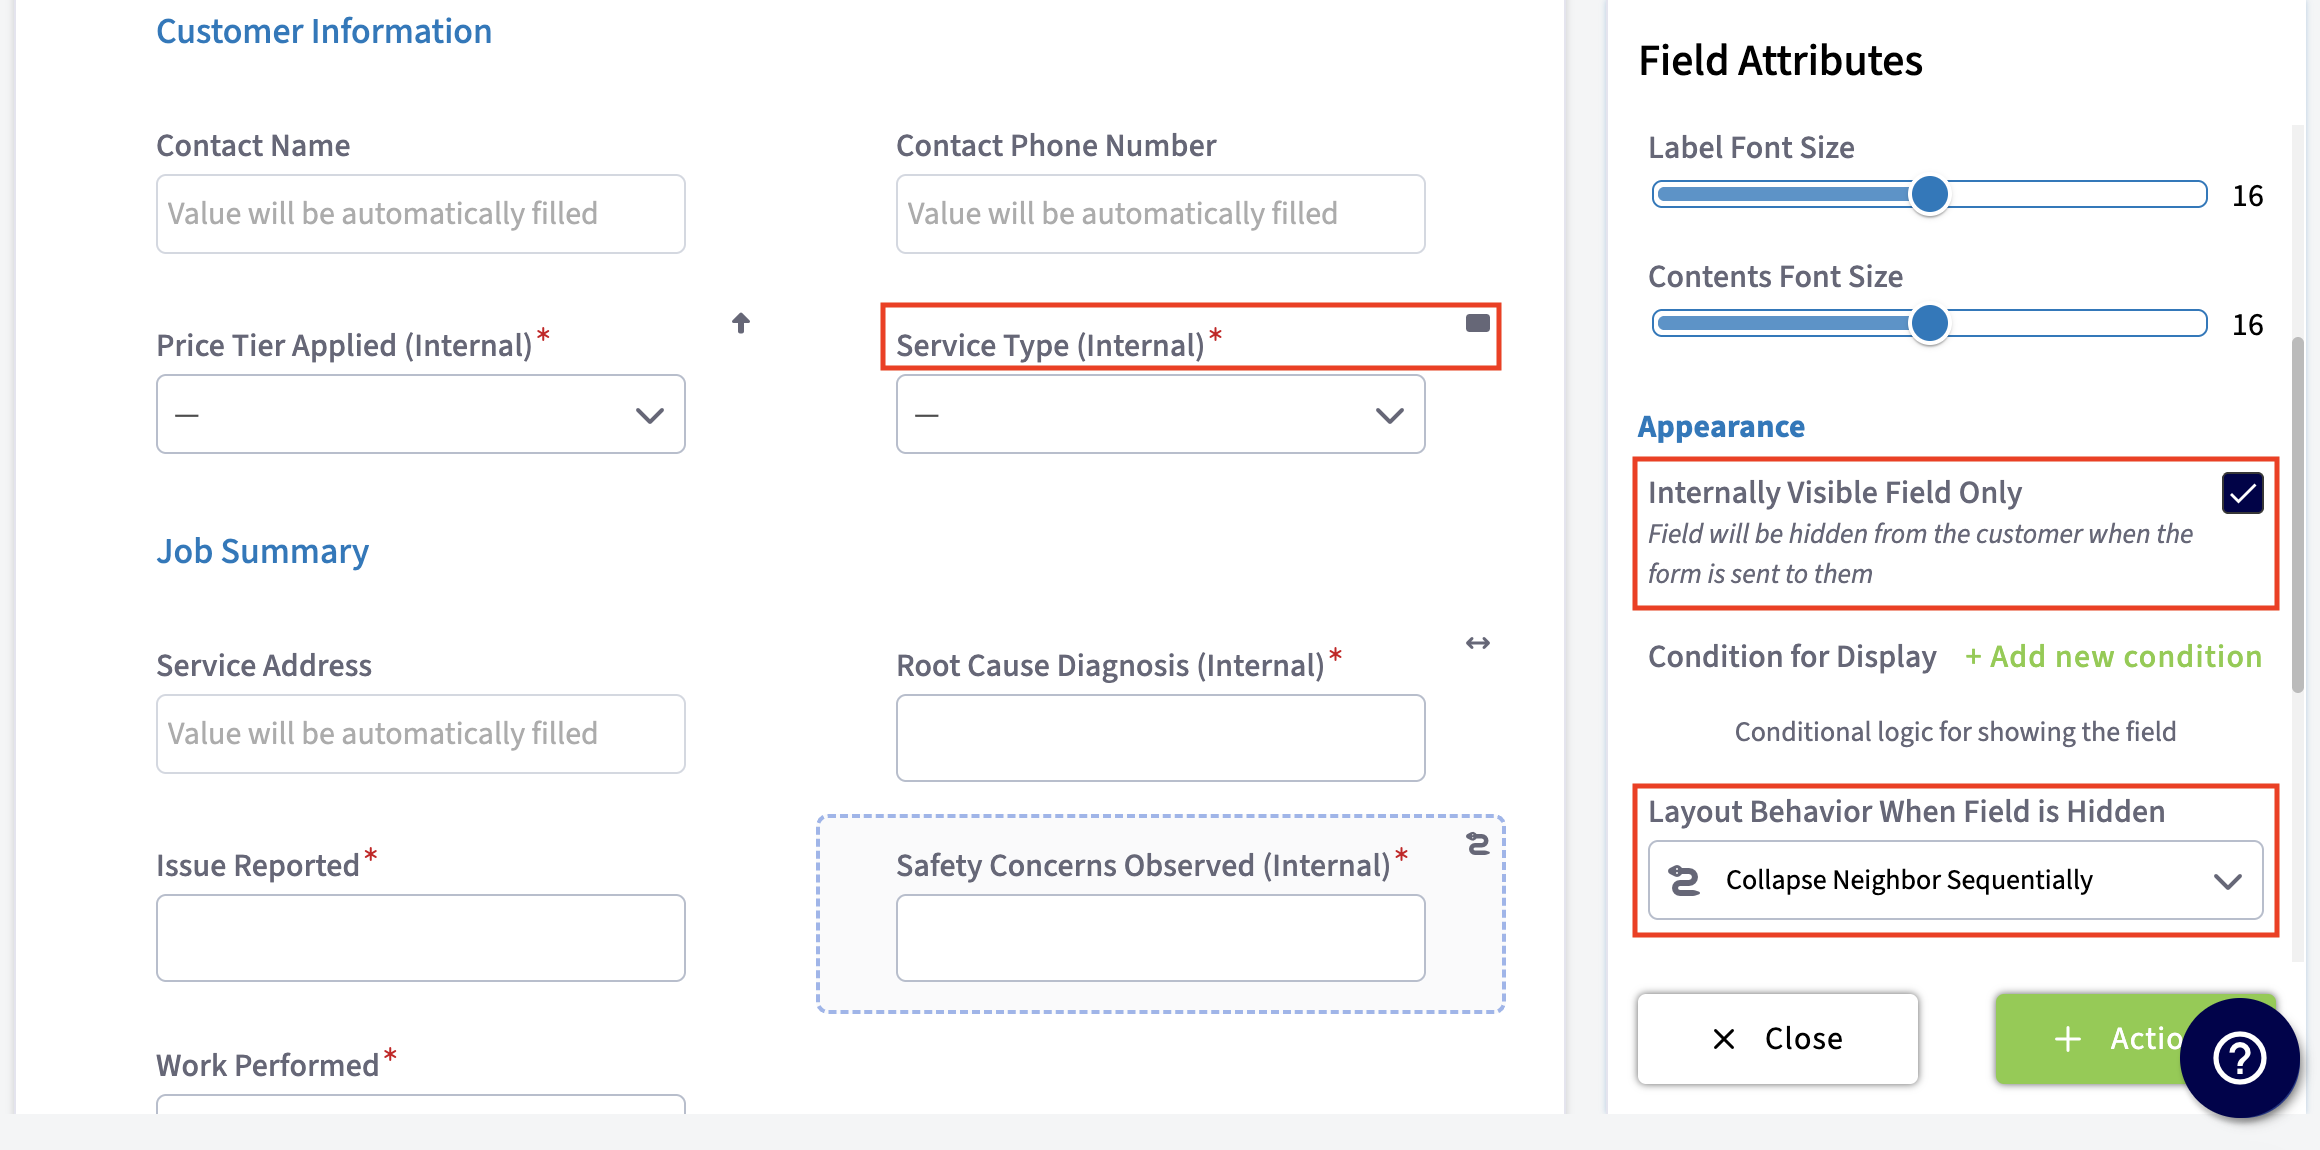
-
-**Why We Released This:**
-
-- **Streamlined Forms:** Your customers face shorter, clearer forms.
-
-- **Less Confusion:** Clearly differentiates between fields your team fills out and those required by your customers.
-
-**Features:**
-
-- Fields marked as _Internally Visible Only_ won’t show on customer-facing displays, including PDFs.
-
-- Required fields set to be internally required only.
-
-- Hidden internal related record Custom Field values can now cascade to Custom Forms.
-
-- Ability to designate internal PDFs for printing, allowing internal fields to appear on the copy.
-
-**Dynamic Formatting / Layout Behavior:**
-
-- Custom forms can consolidate blank spaces effectively, enhancing visual appeal:
-
- - **Preserve Space:** Keeps the original layout.
-
- - **Expand Neighbor Horizontally:** Expands adjacent fields.
-
- - **Collapse Neighbor Below:** Pulls up fields directly below.
-
- - **Collapse Neighbor Sequentially:** Adjusts layout in a cascading manner.
-
-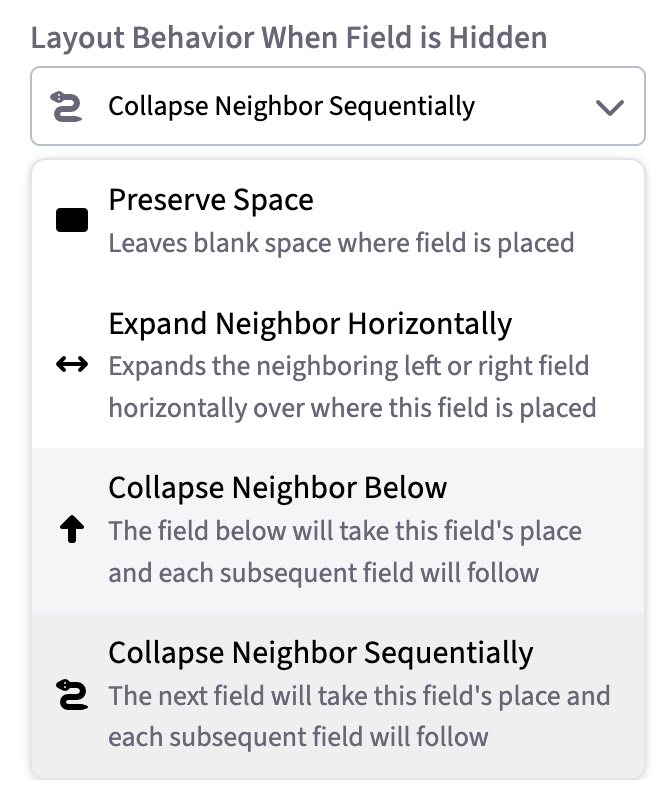
-
-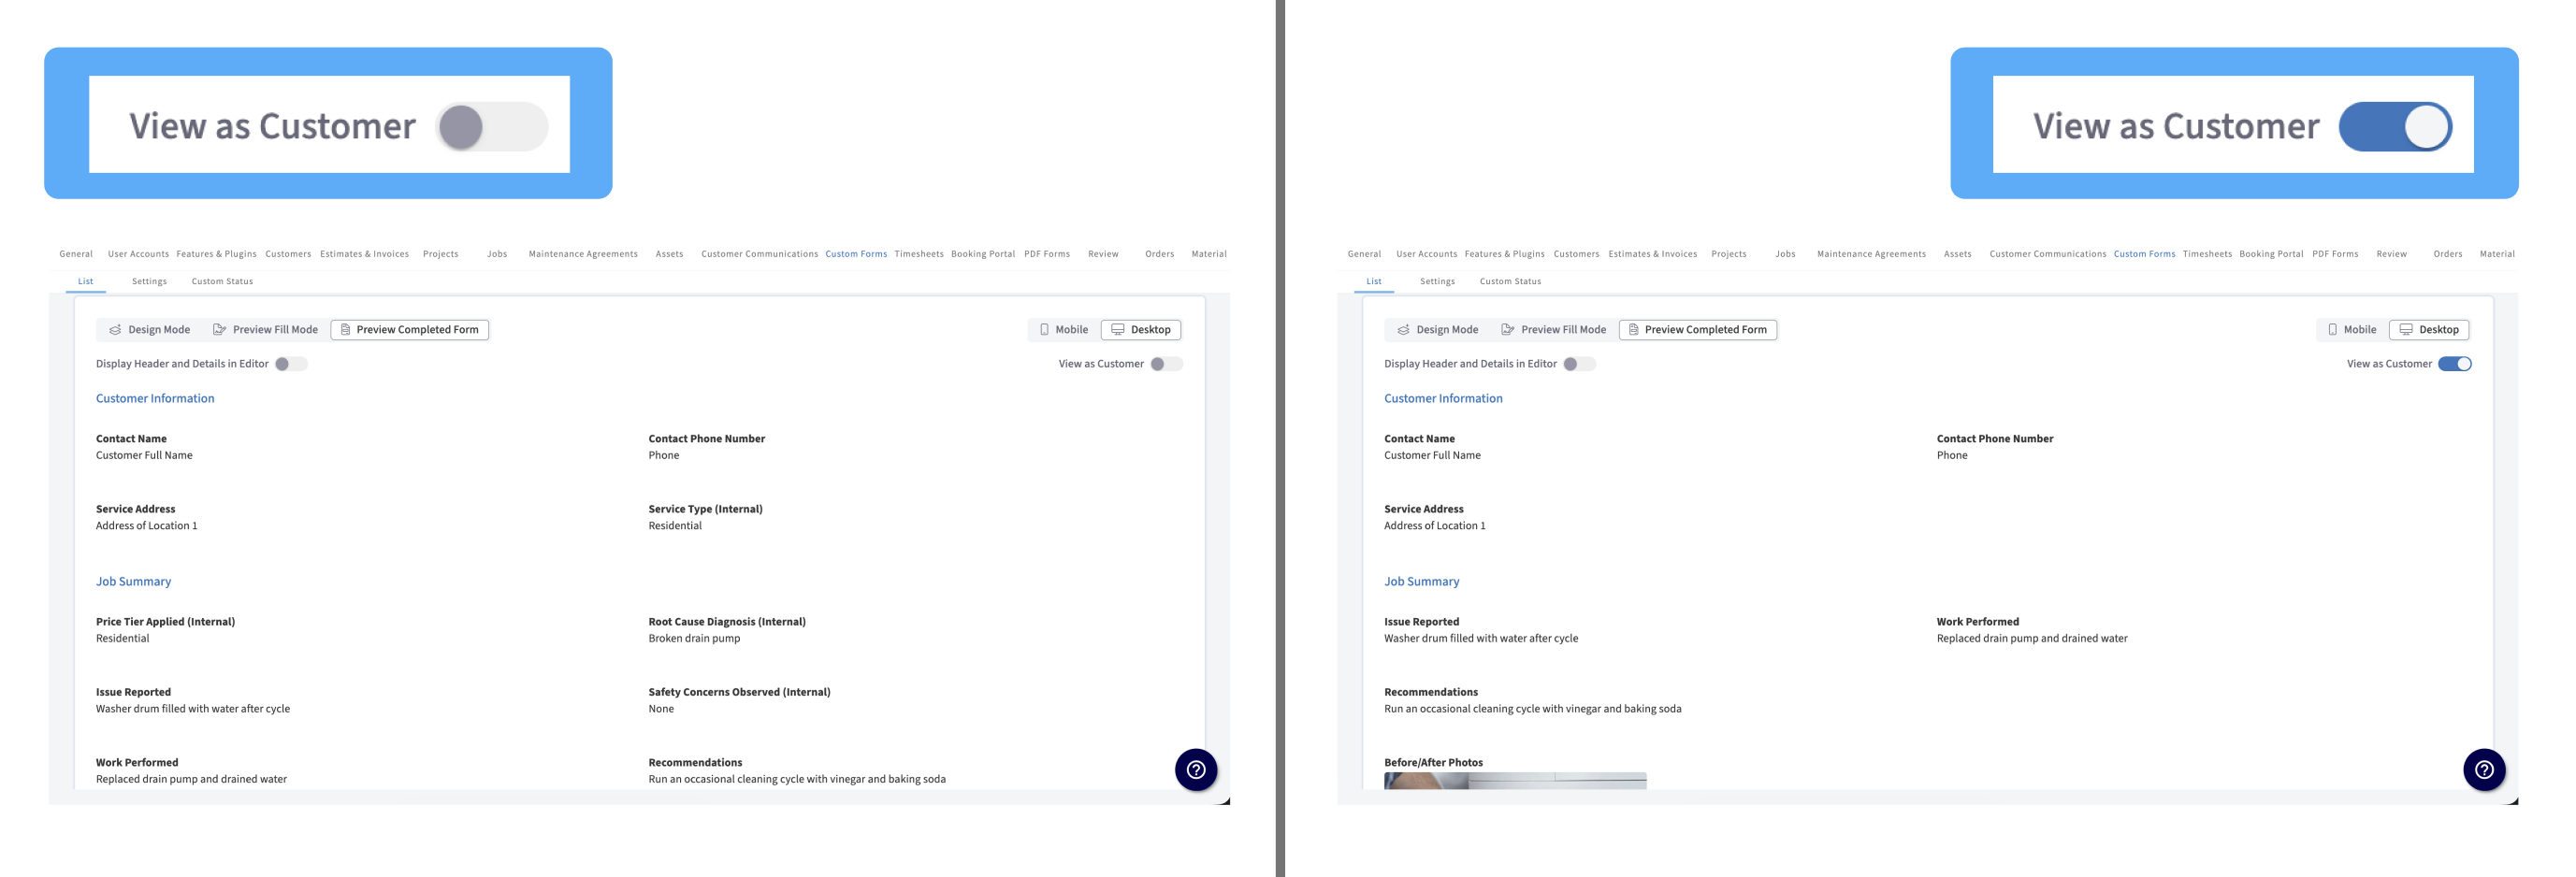
-
-Comparing Internal vs. Customer Facing Fields on a Custom Form
-
-### Required Fields
-
-You have the option to require a field to be filled out by your employee and/or your customer by simply checking a box.
-
-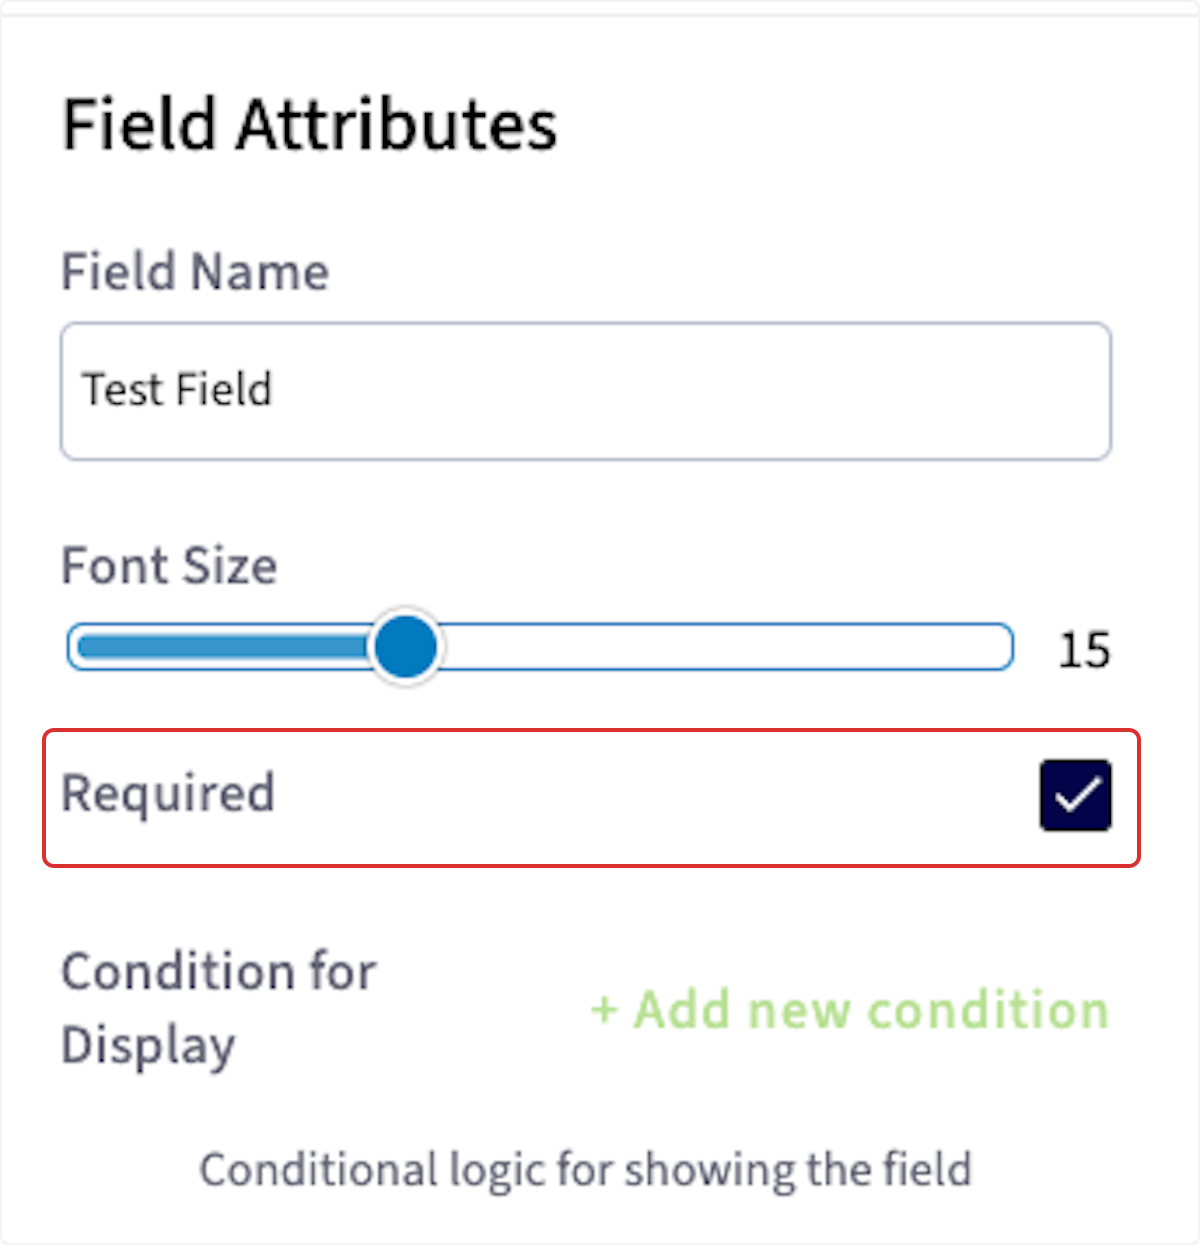
-
-### Editable Fields
-
-You can also choose if a field is editable by a customer or not. To see this, instead of being in _Design Mode_, select _Preview Fill Mode_. Next to each individual field you will see a lock or unlock icon. This allows you to give your customer and/or employee the right to edit the field or not.
-
-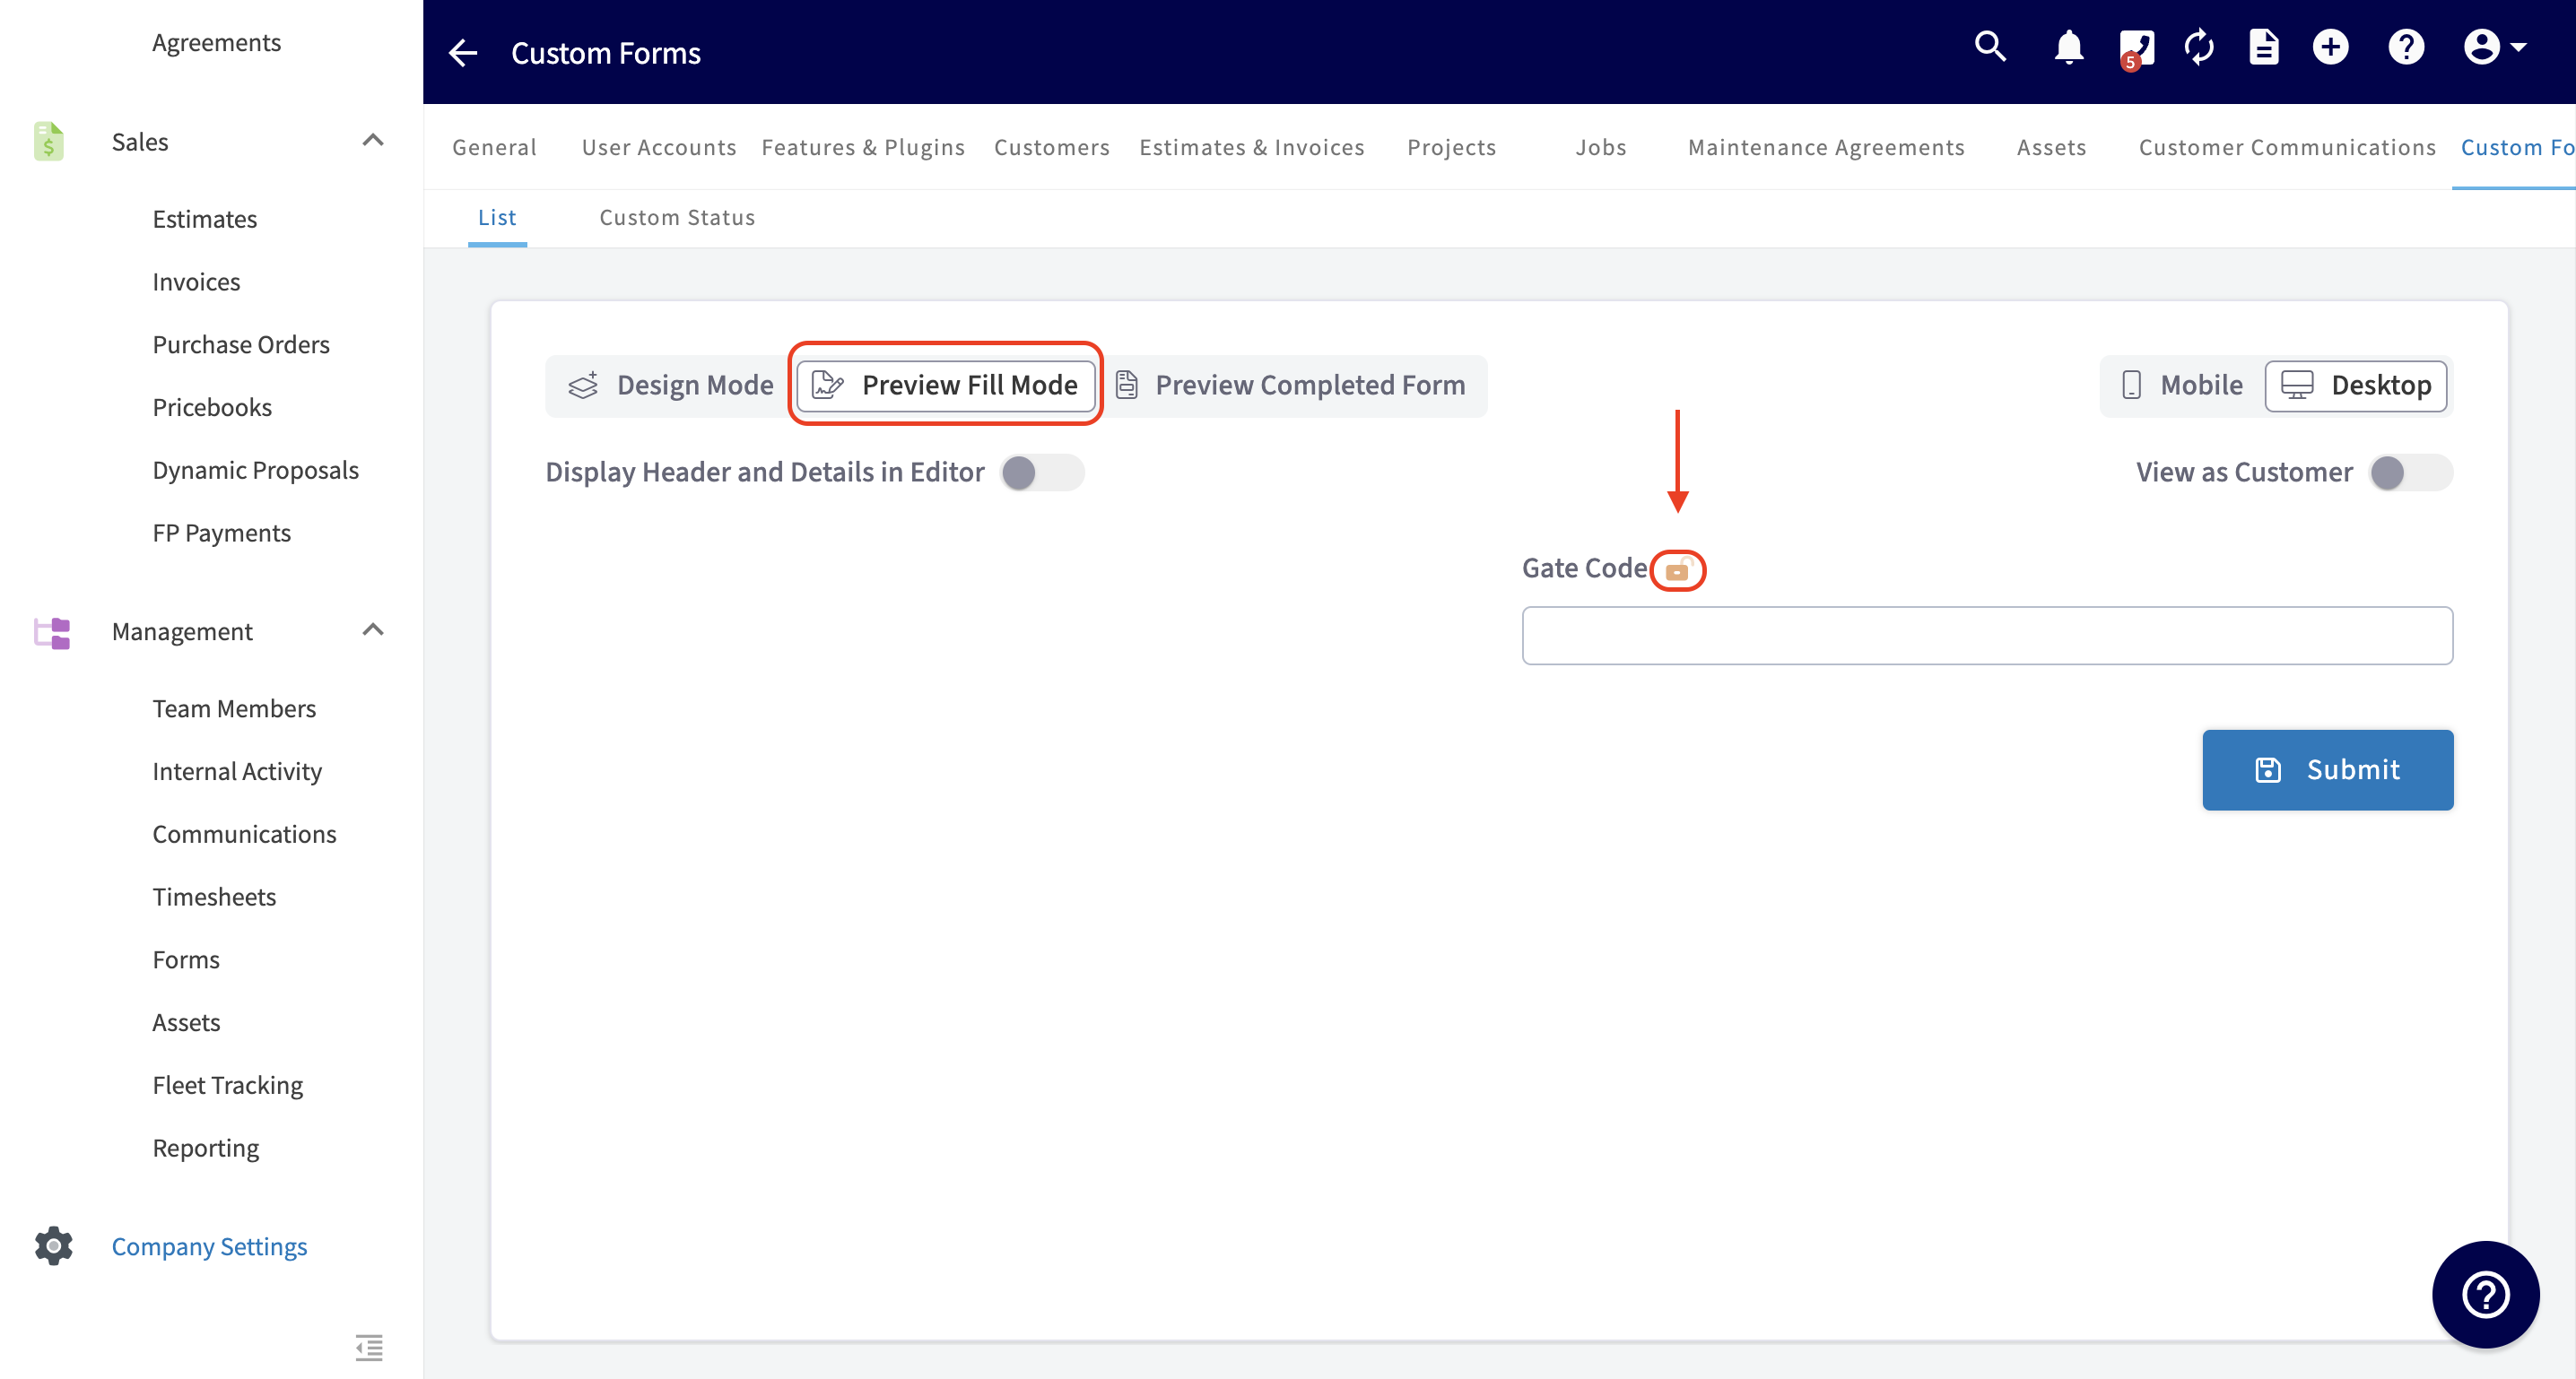
-
-### Conditional Logic
-
-Conditional logic allows certain fields to appear or change based on the responses the individual interacting with the form provides. This helps the form gather only relevant information.
-
-In the example below, we want to create conditional logic for the field titled "Gate Code", so it only appears for the user when certain criteria are met in the field titled "Gate Code Required for Entry?". When you're ready to create conditional logic for the "Gate Code" field, click on the "Gate Code" field and select _Add New Condition_.
-
-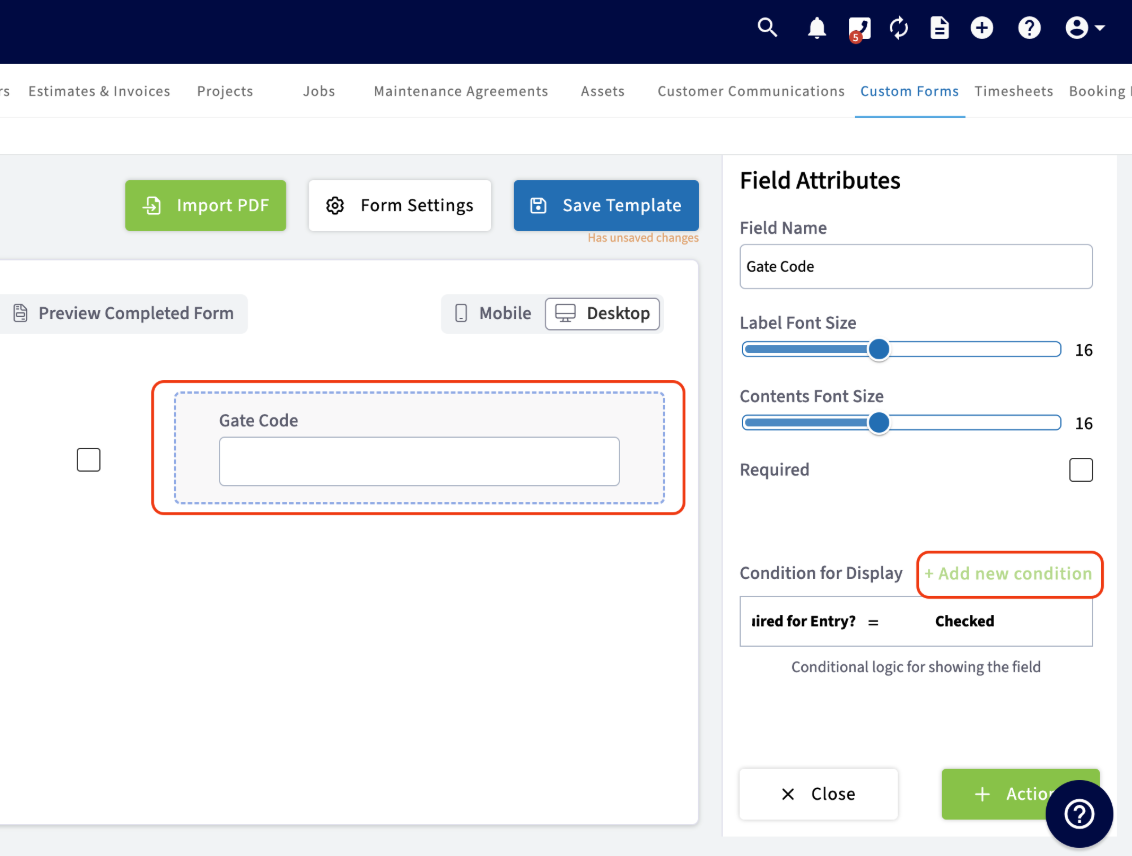
-
-If you want the "Gate Code" field to **only** display if the "Gate Code Required for Entry" contains a certain value, select the "Is Gate Code Required for Entry" field and your desired value. The desired value will depend on the kind of field you added. In this example, our condition is: "Gate Code Required for Entry? = Checked". This means if the box is checked indicating that YES a gate code is required for entry, then the field to enter the gate code will pop up for the user filling out the form.
-
-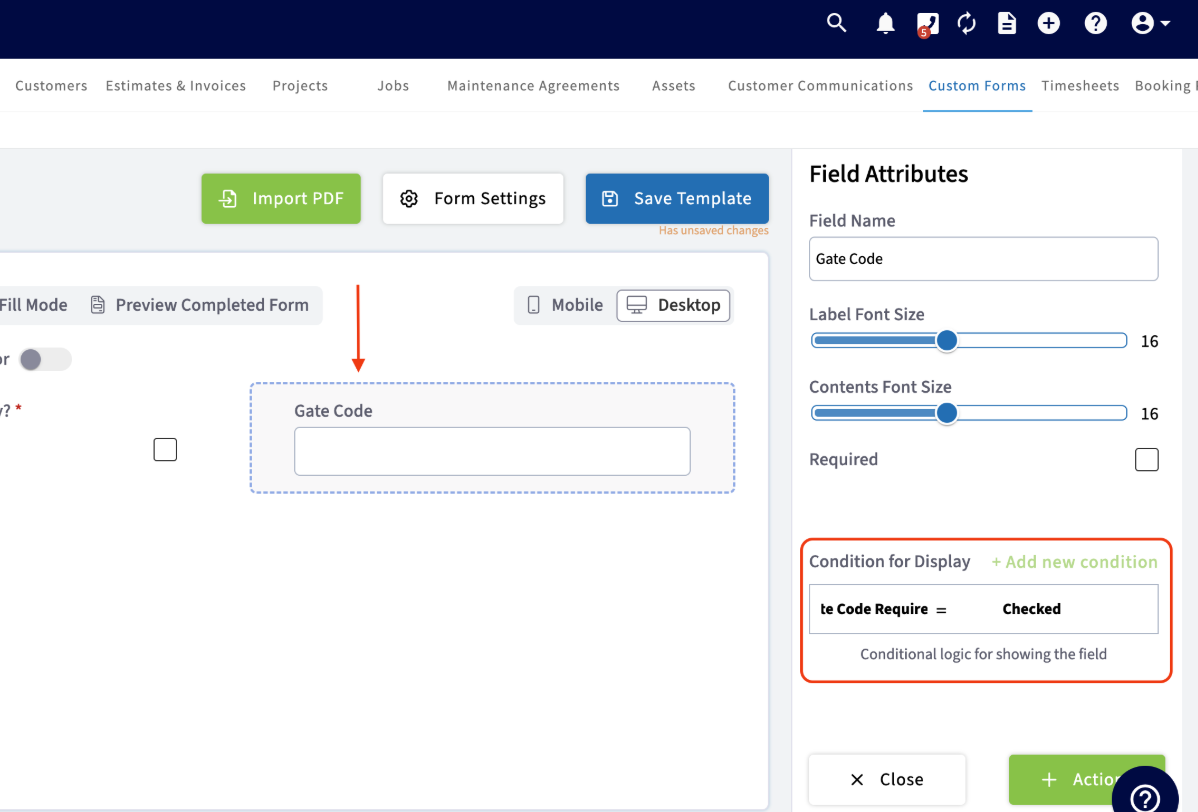
-
-### Modes
-
-Use the various mode options to view your form in different scenarios. You can also preview the appearance of your form from a Mobile or Desktop view.
-
-
-
-- **Design Mode**\- You cancreate and edit a form by dragging and dropping fields.
-
-- **Preview Fill Mode**\- You canpreview how the form will look when someone is filling it out. You can also choose if a field is editable by a customer or not in this view.
-
-- **Preview Completed Form**\- You canpreview how the form will look once it has been completely filled out.
-
----
-
-## Using the Custom Forms You Created
-
-To attach a custom form to a record, begin by clicking on/entering the record where you want to insert and include the form. This could be a customer, job, estimate, or invoice. Once you click on the record, select _Forms_ from the top menu, then _Create New_.
-
-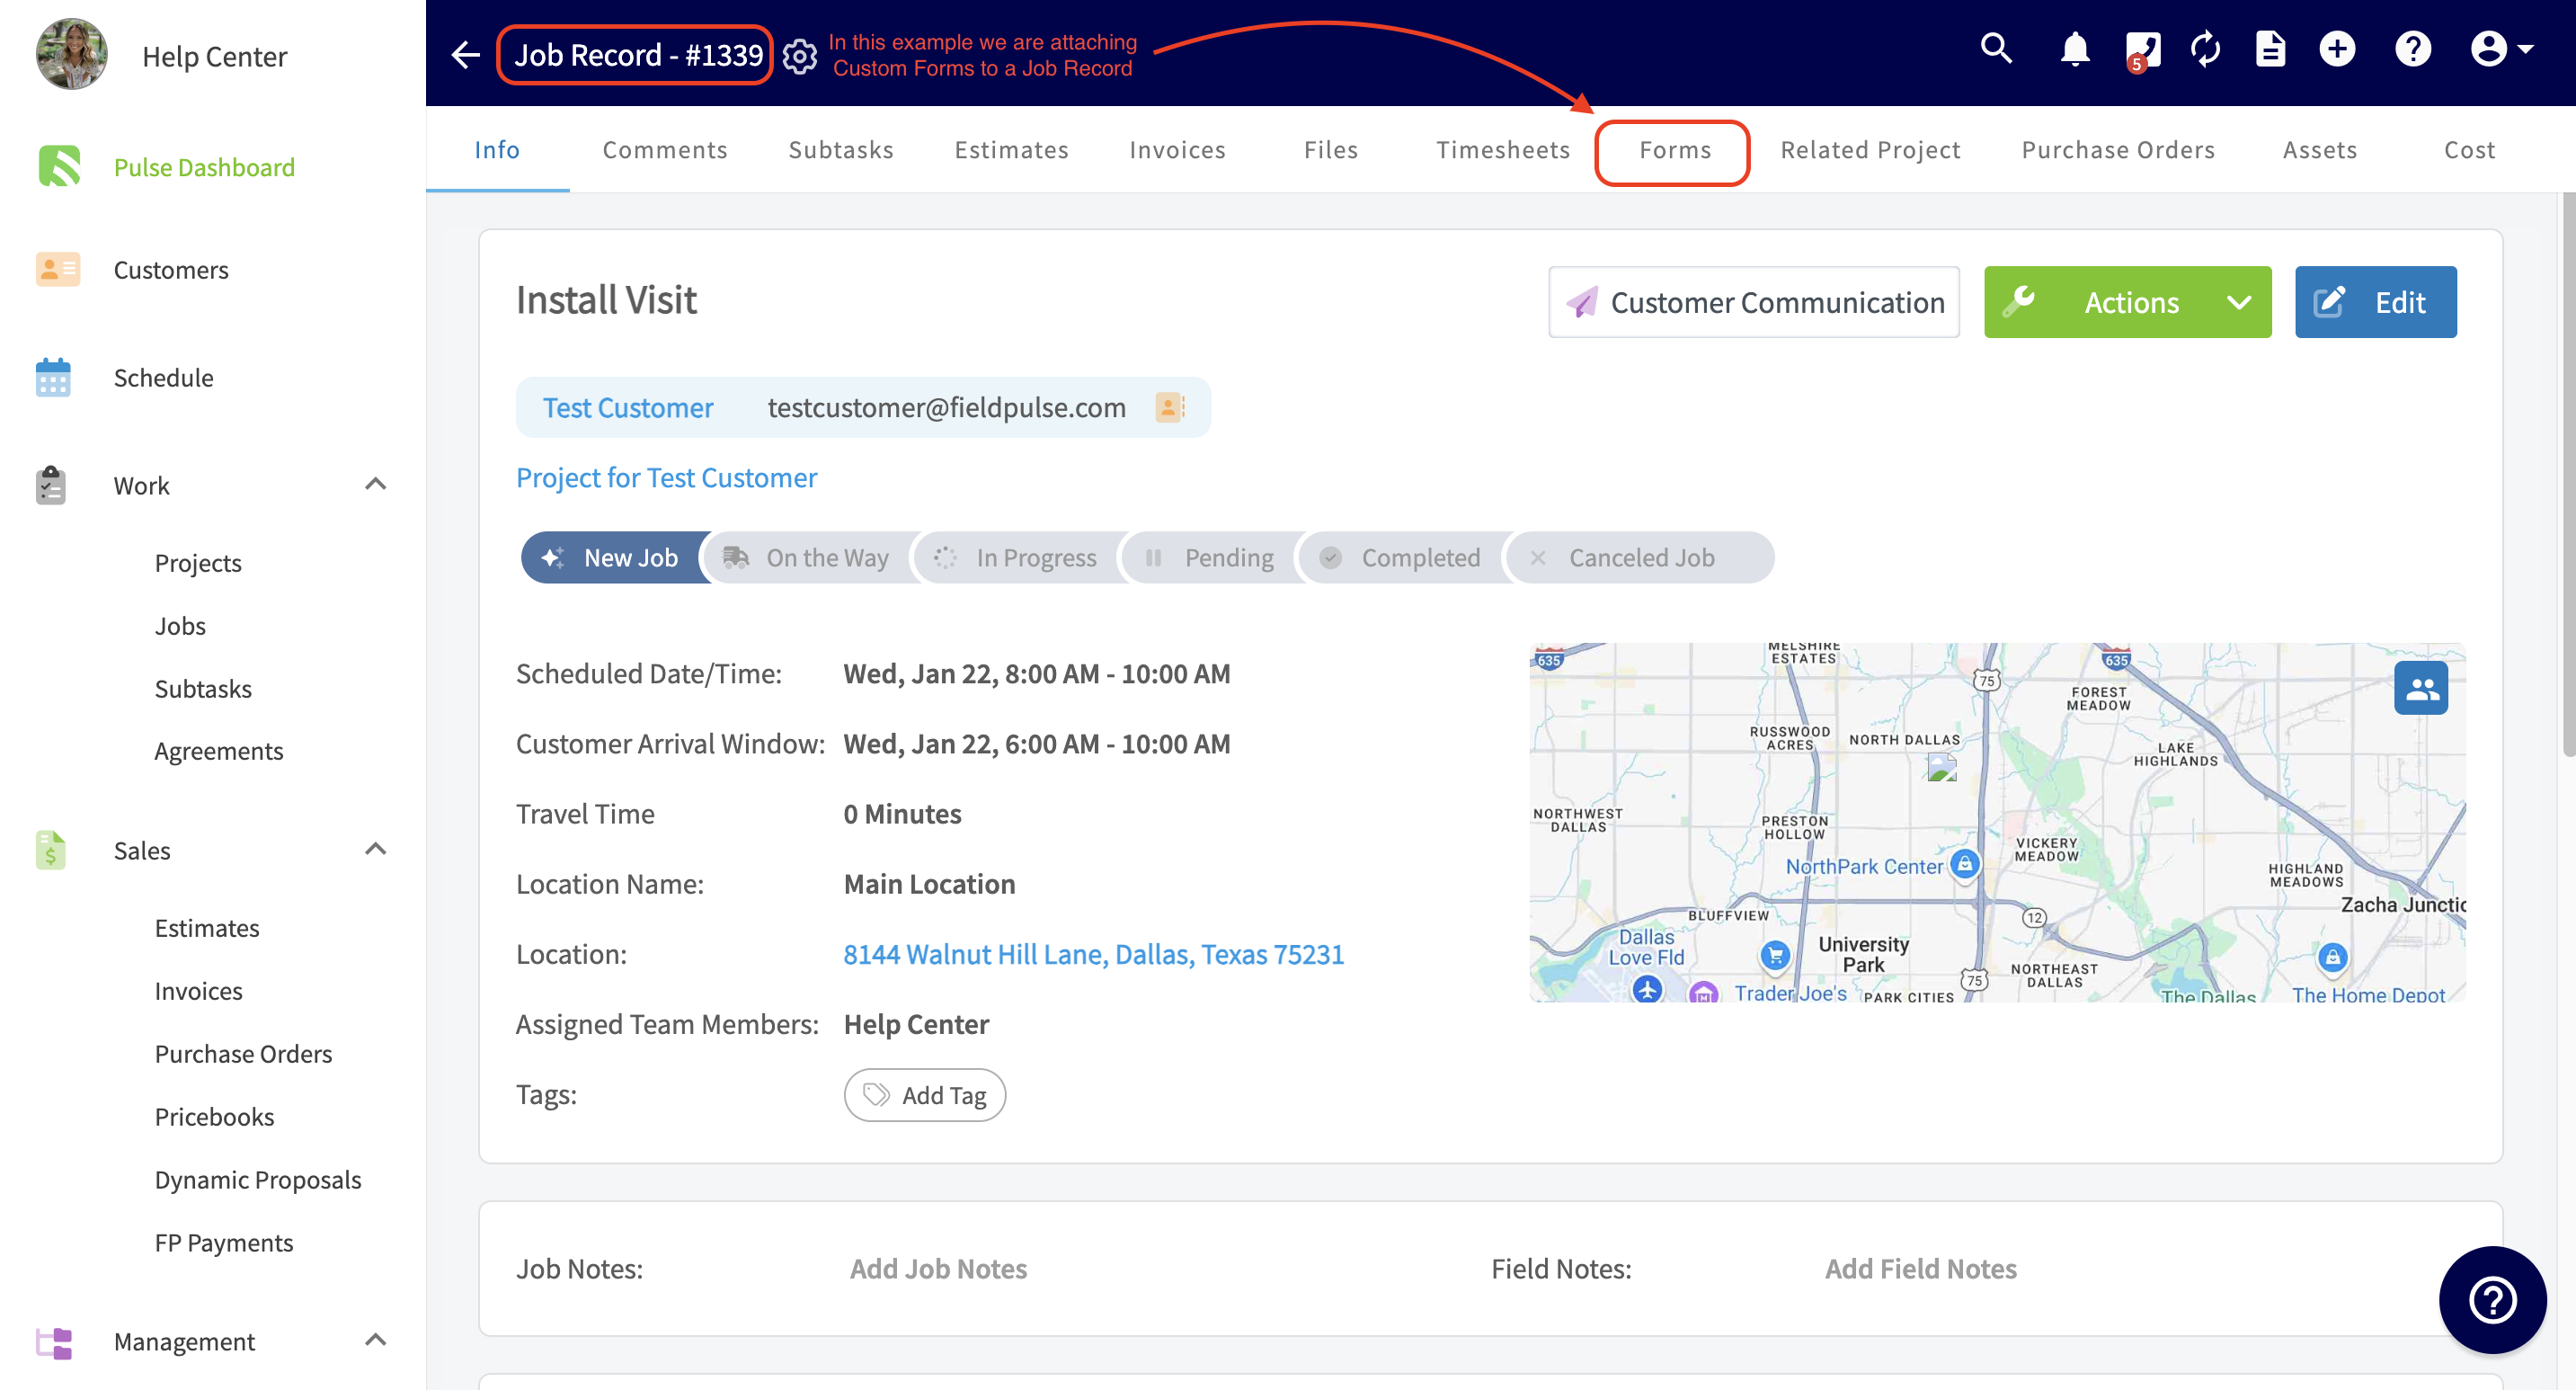
-
-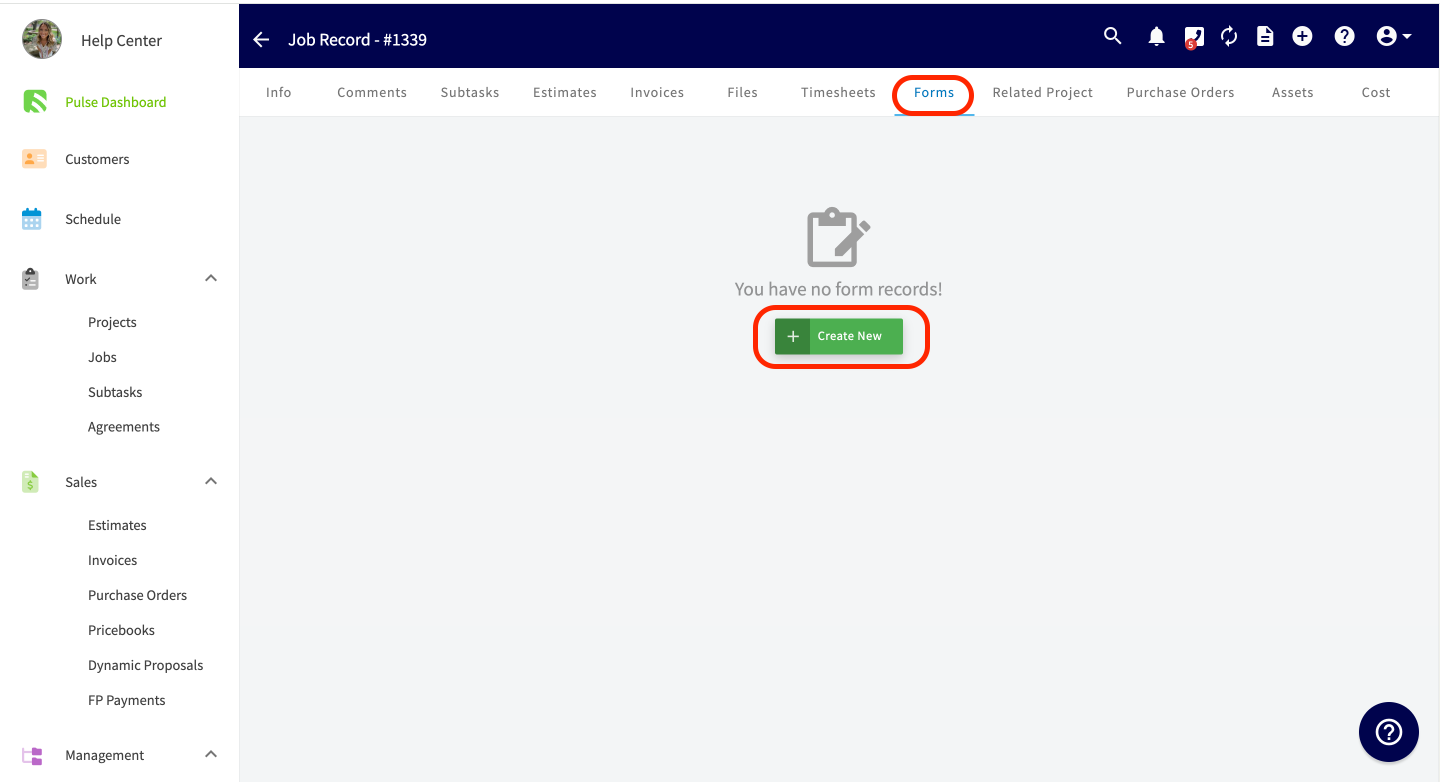
-
-You will now see a list of all of the custom forms you've created. You can choose which form to attach to this record. In this example, you can see the Custom Form we created titled "SAMPLE CUSTOM FORM" is available to be attached.
-
-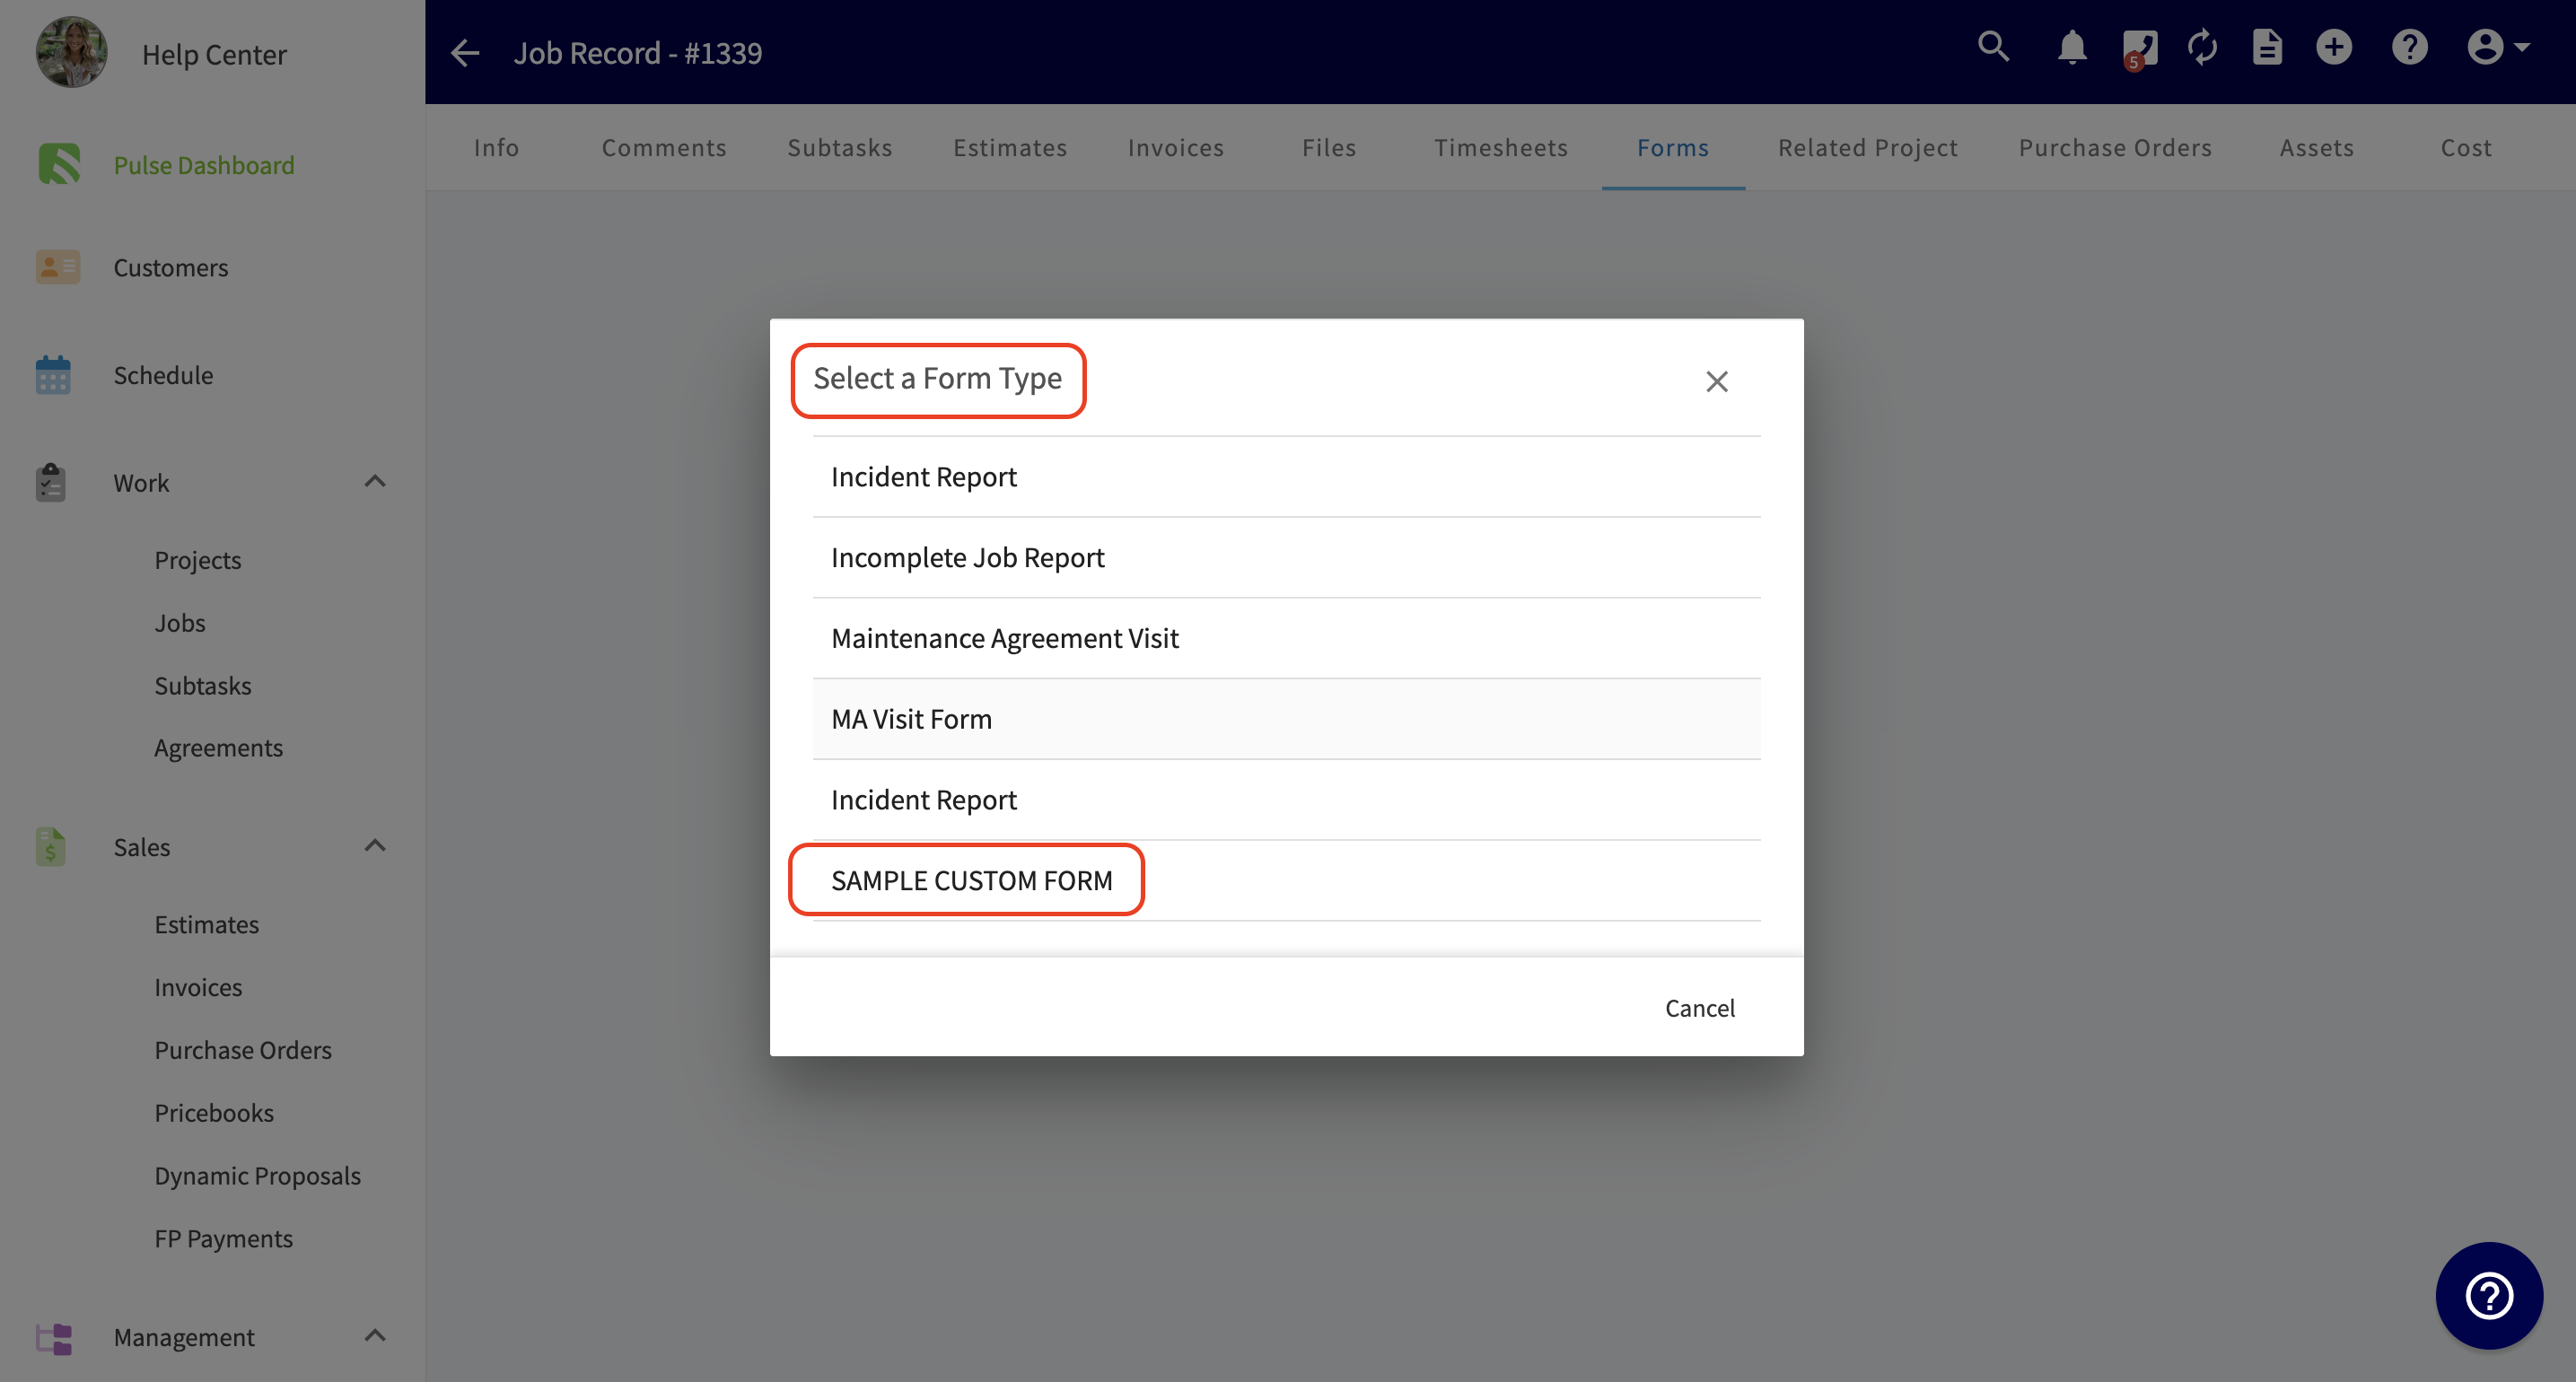
-
-Now, you can complete the form or save it to the record to be completed at a later date.
-
-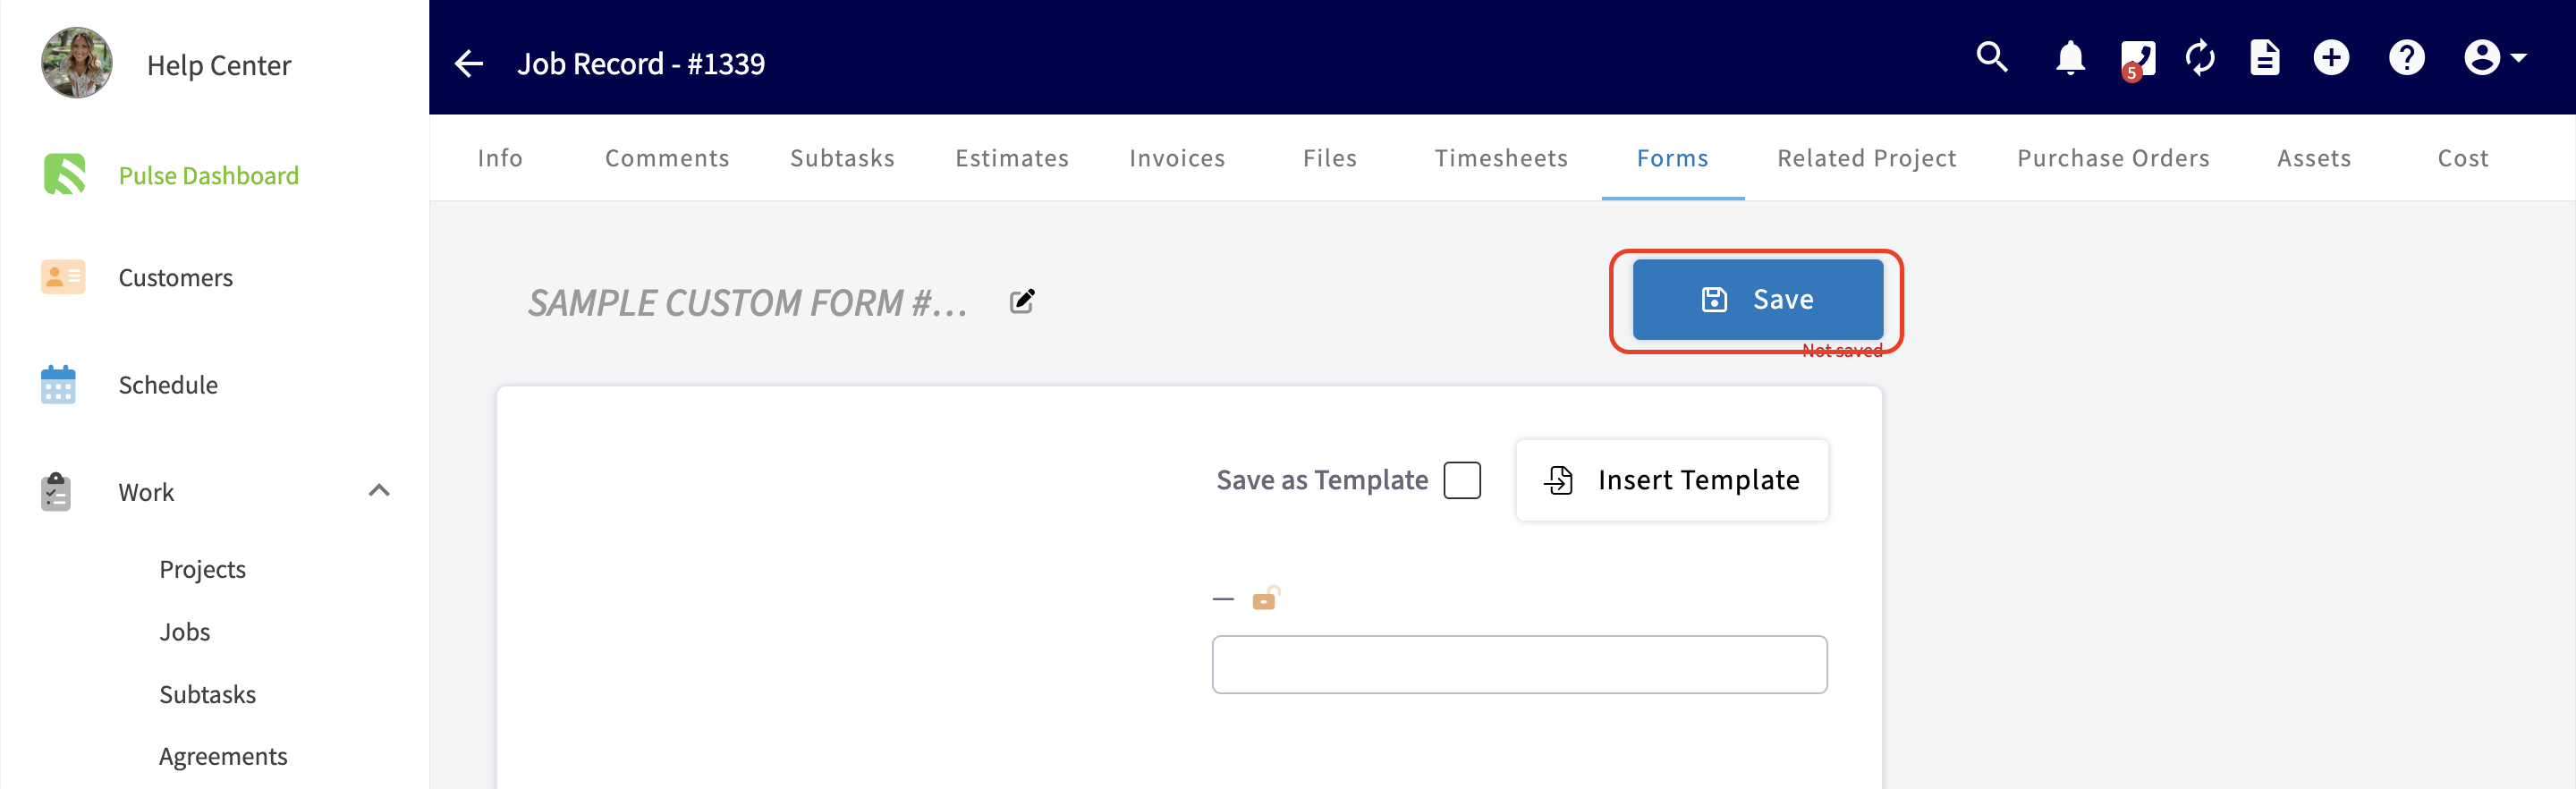
-
-To view the form attached to the record, navigate to the _Forms_ tab and click on the applicable form to open it.
-
-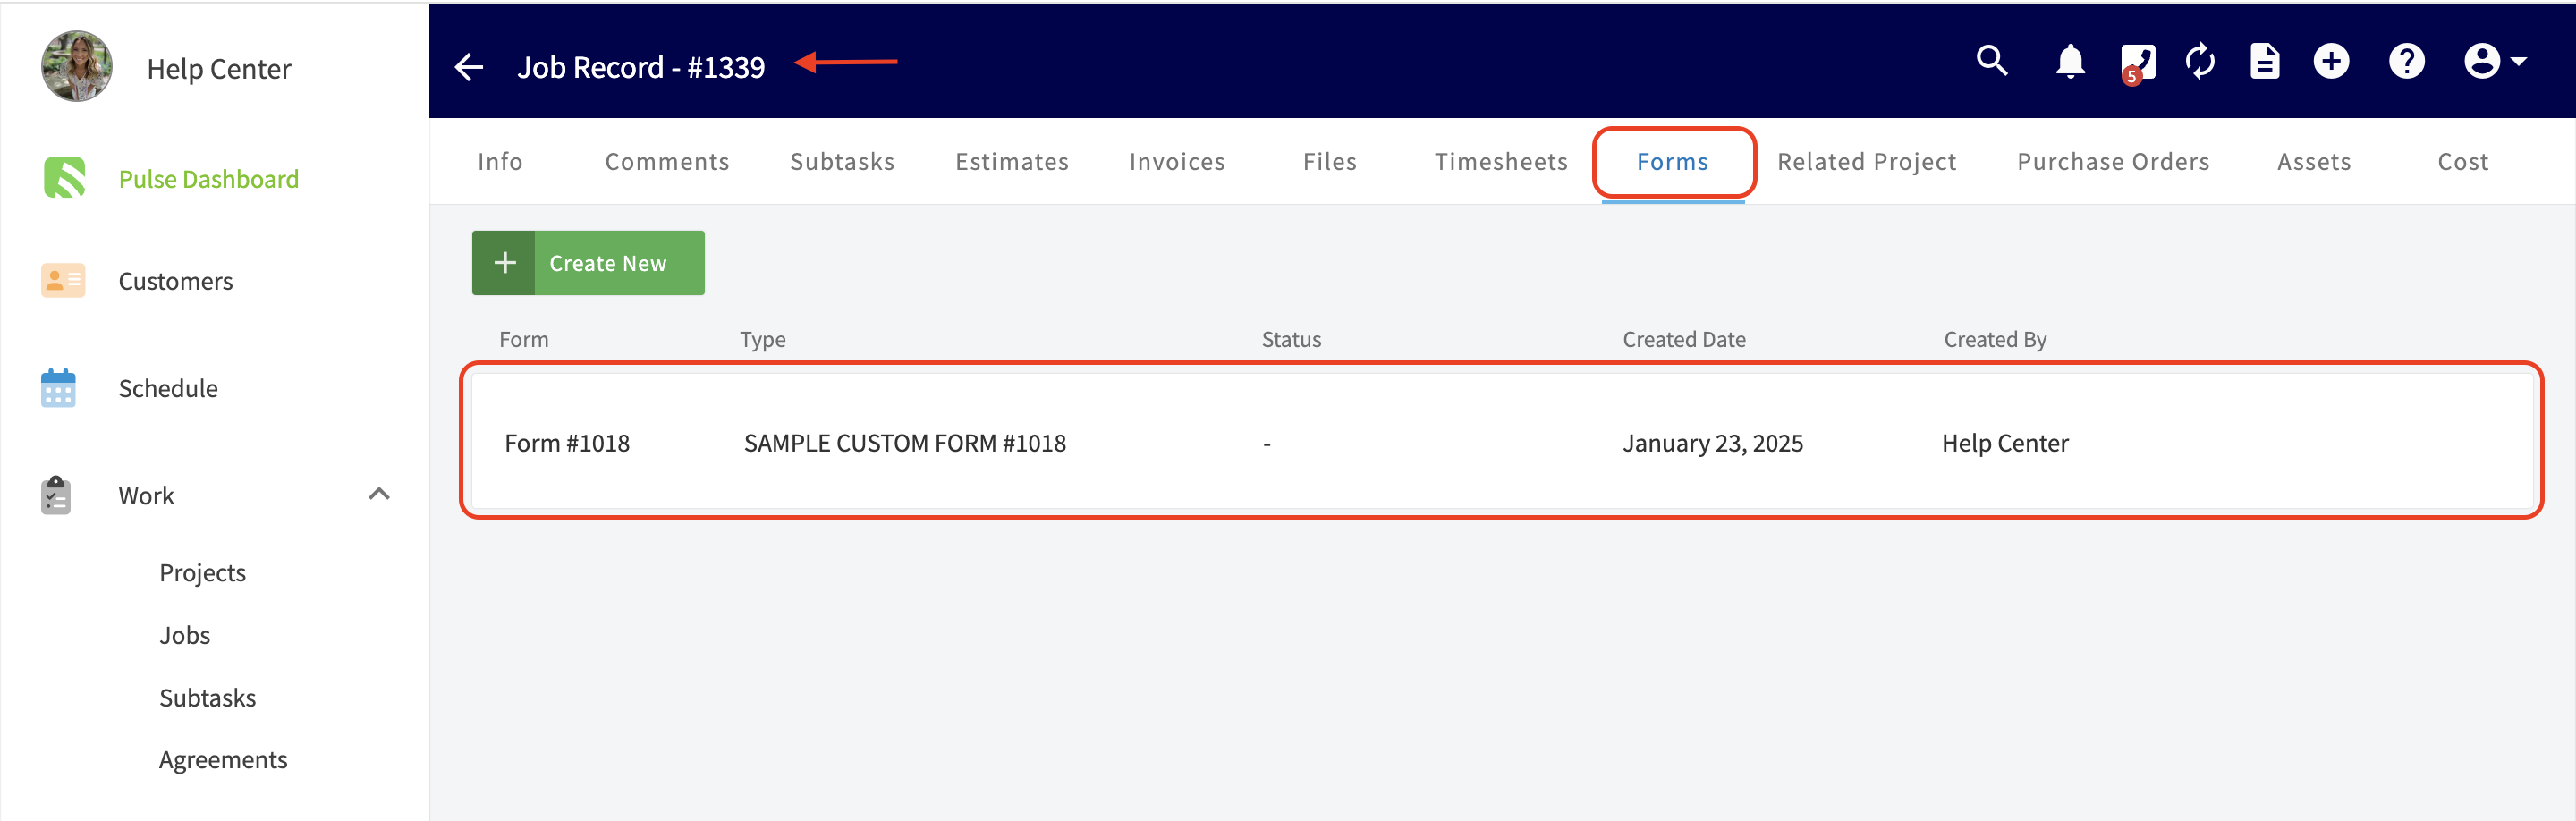
-
-After clicking into the form, you have the option to attach files, send it to be filled out by your customer, or send it to be viewed by your customer. You can view important details about the form on the right-side of the screen. These details include: the name of the related customer, job, project, who the form was created by, the date it was created, when the form was **sent** to be viewed, when the form was actually viewed, when the form was **sent** to be filled, when the form was actually filled, and a signature date.
-
-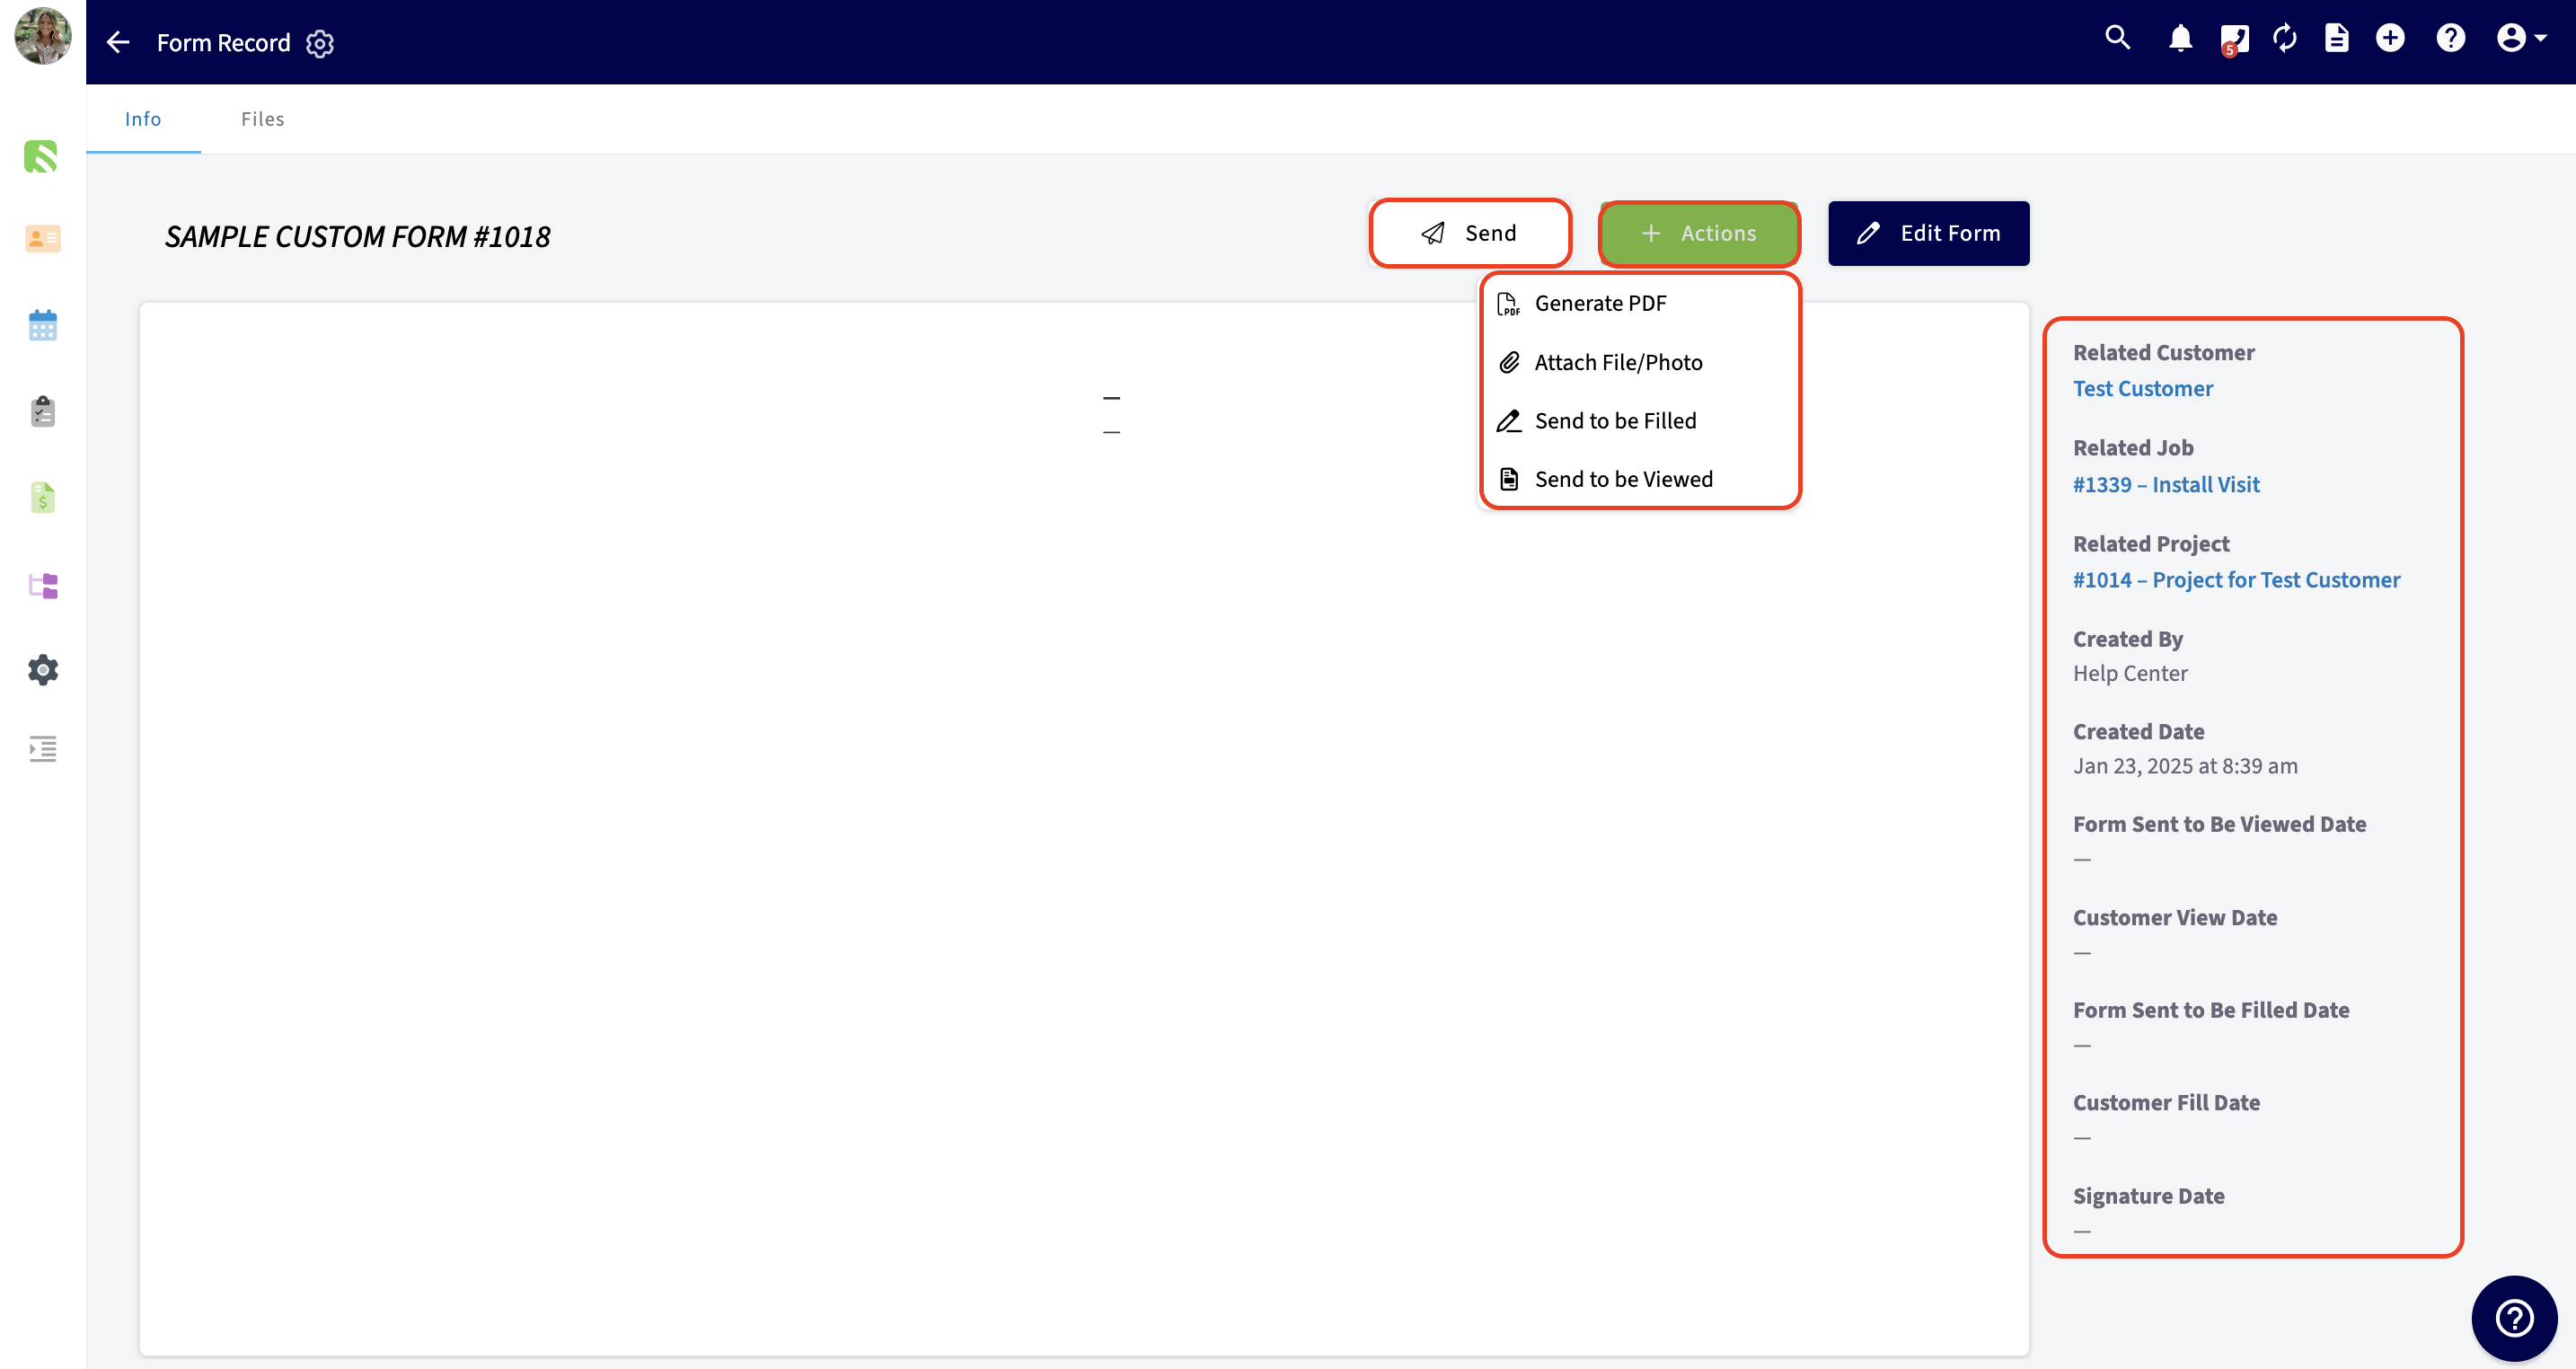
-
----
-
-## Custom Form Notifications
-
-When a custom form is filled by your customer or when your customer signs a custom form you can decide how you will be notified. Head to _Company Settings_ \> _Customer Communications_ \> _Notification Settings_ to make your customizations.
-
-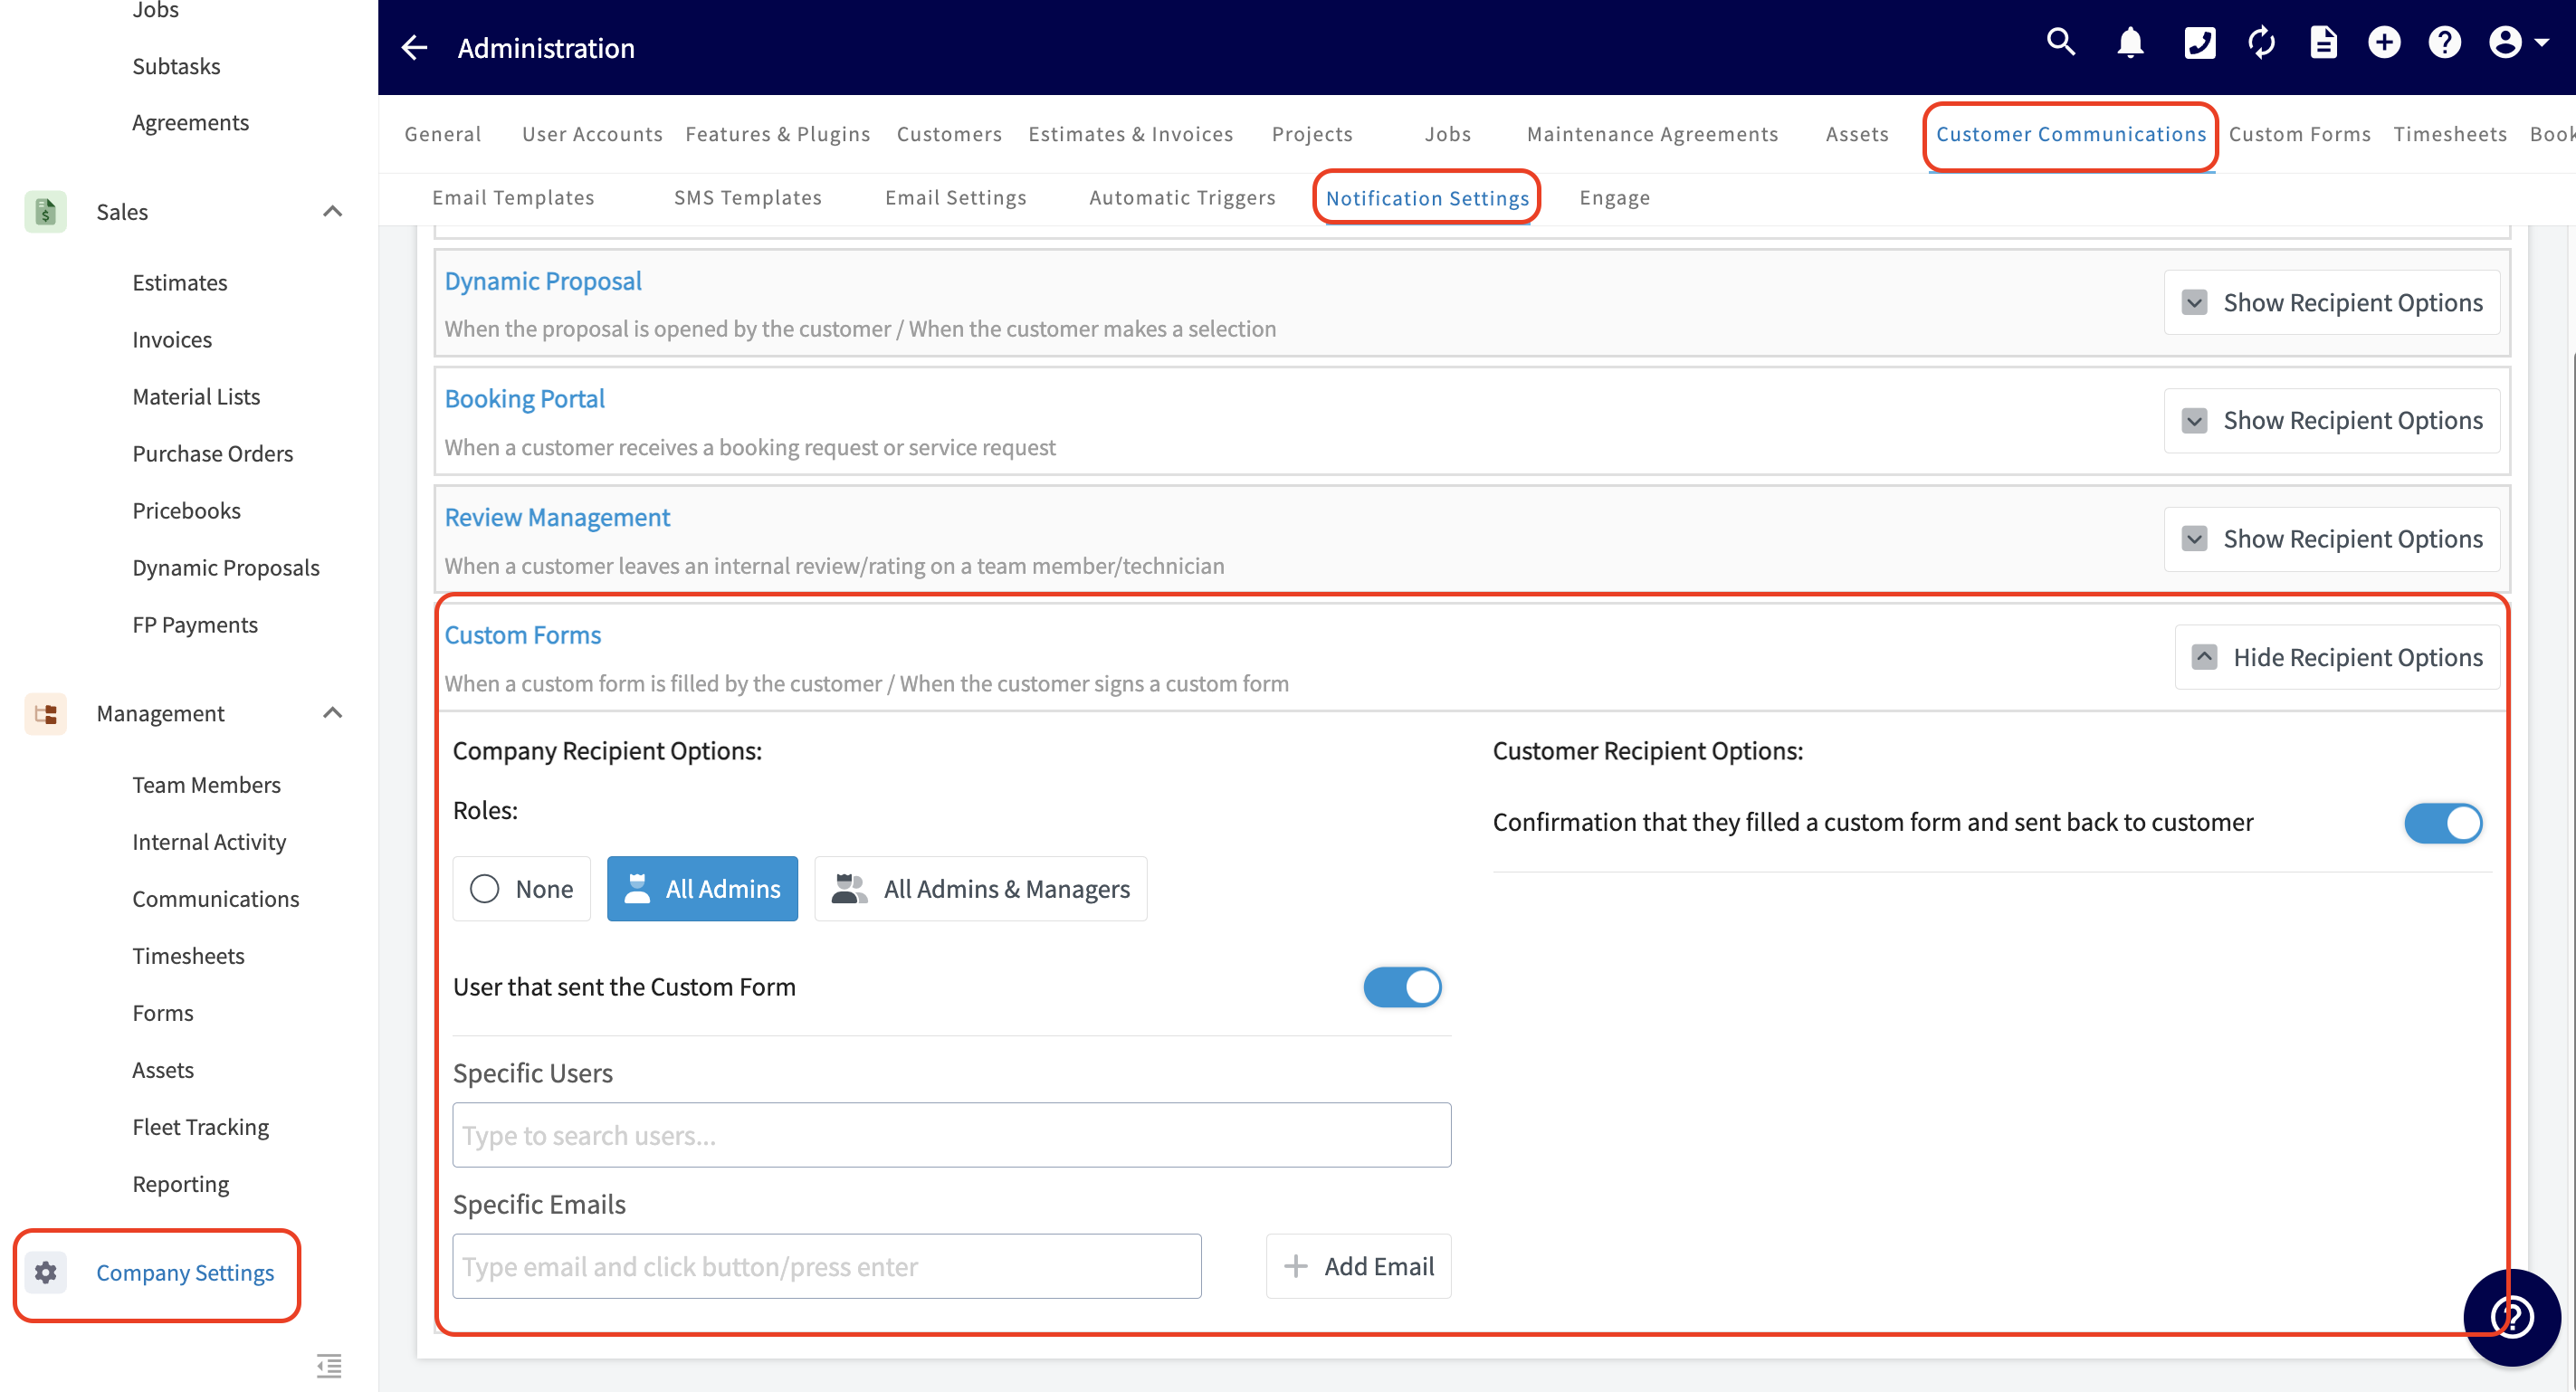
-
-Choose to notify all admin, managers, and/or individual team members. You also have the option to enter in specific email addresses. This would be great if you want to loop in an outside contractor, accountant, or just have a notification emailed to your personal email address.
-
----
-
-## Customizing PDF Page Layout for Forms
-
-You can now choose to display each form page on its own separate PDF page with page breaks, instead of having all pages flow continuously.
-
-### To enable this feature
-
-1. Navigate to **Company Settings**.
-
-2. Go to the **Custom Forms** tab.
-
-3. Select the **Settings** tab.
-
-4. Toggle the option ON/OFF.
-
-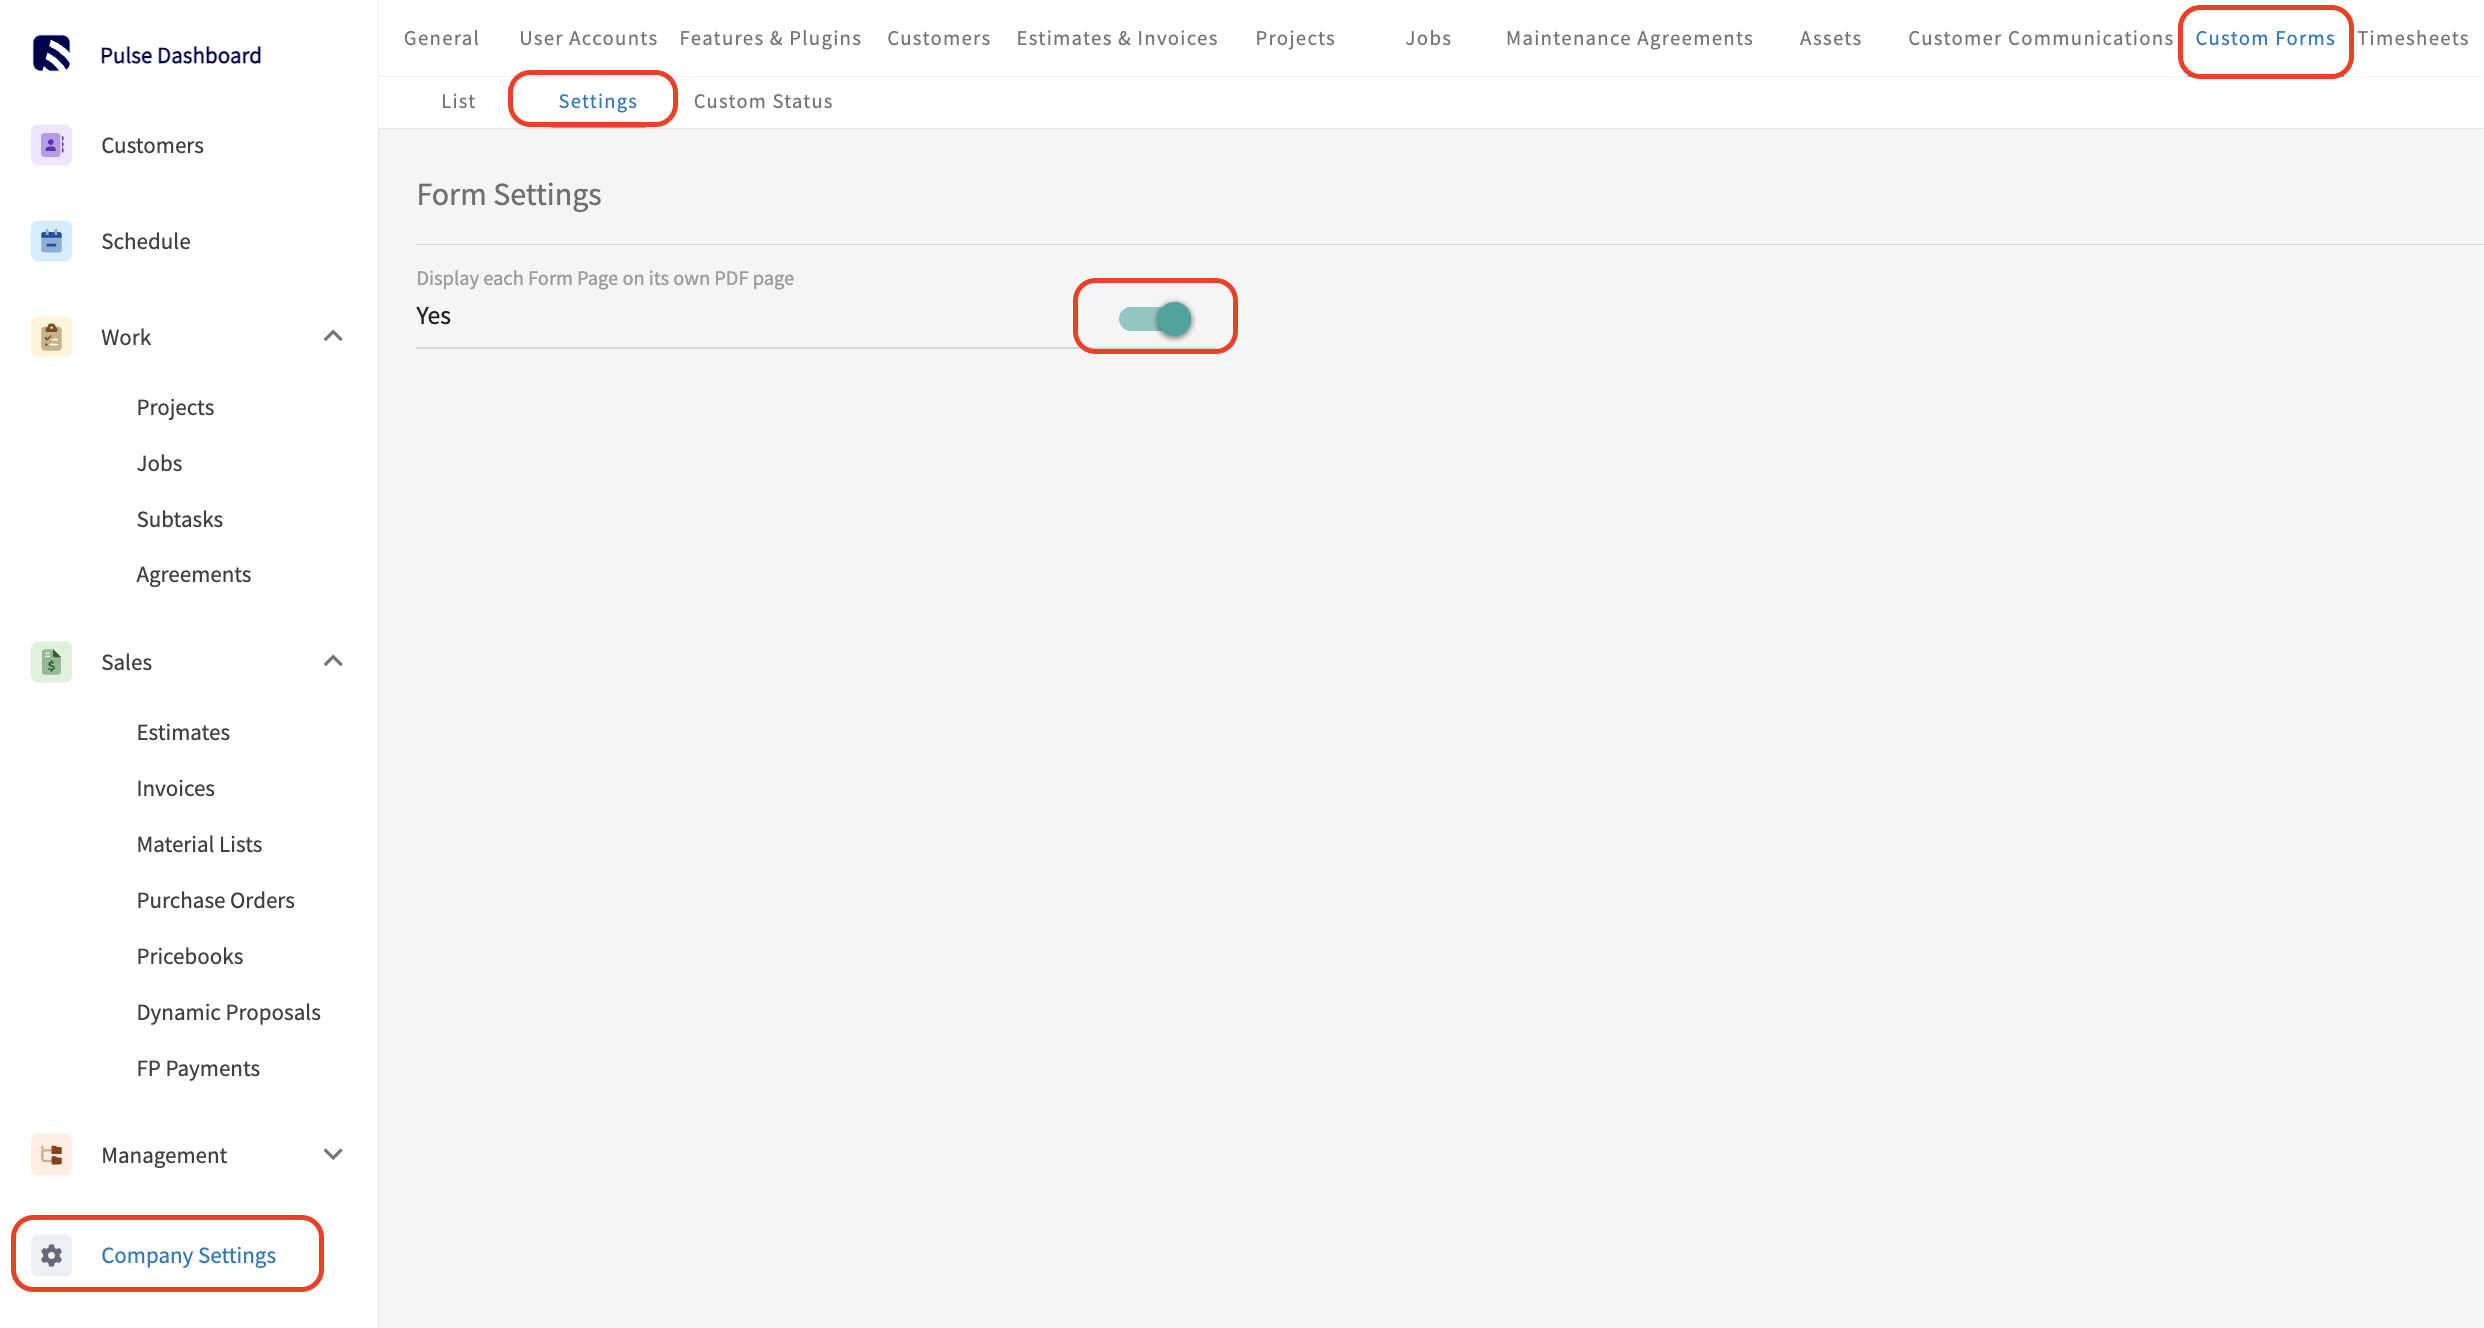
-
----
-
-## Offline Mode for Custom Forms
-
-In Offline Mode, you can open and edit any Custom Forms linked to your Job and Project records. Additionally, you can access and modify these Custom Forms while viewing the associated Customer record.
-
-### **Forms:**
-
-While in Offline Mode, you can access and edit a total of 600 existing forms—200 for each record type: Jobs, Projects, and Customers. You can create as many new drafts as you need without any restrictions. These forms will include those attached to your Job/Service records and Project records **for the current work week.**
-
-#### **Form Templates:**
-
-Twenty Custom Form templates will be available for use in Offline Mode. In the Settings of each Custom Form, you can specify which templates you want to make available by toggling the switch on or off.
-
-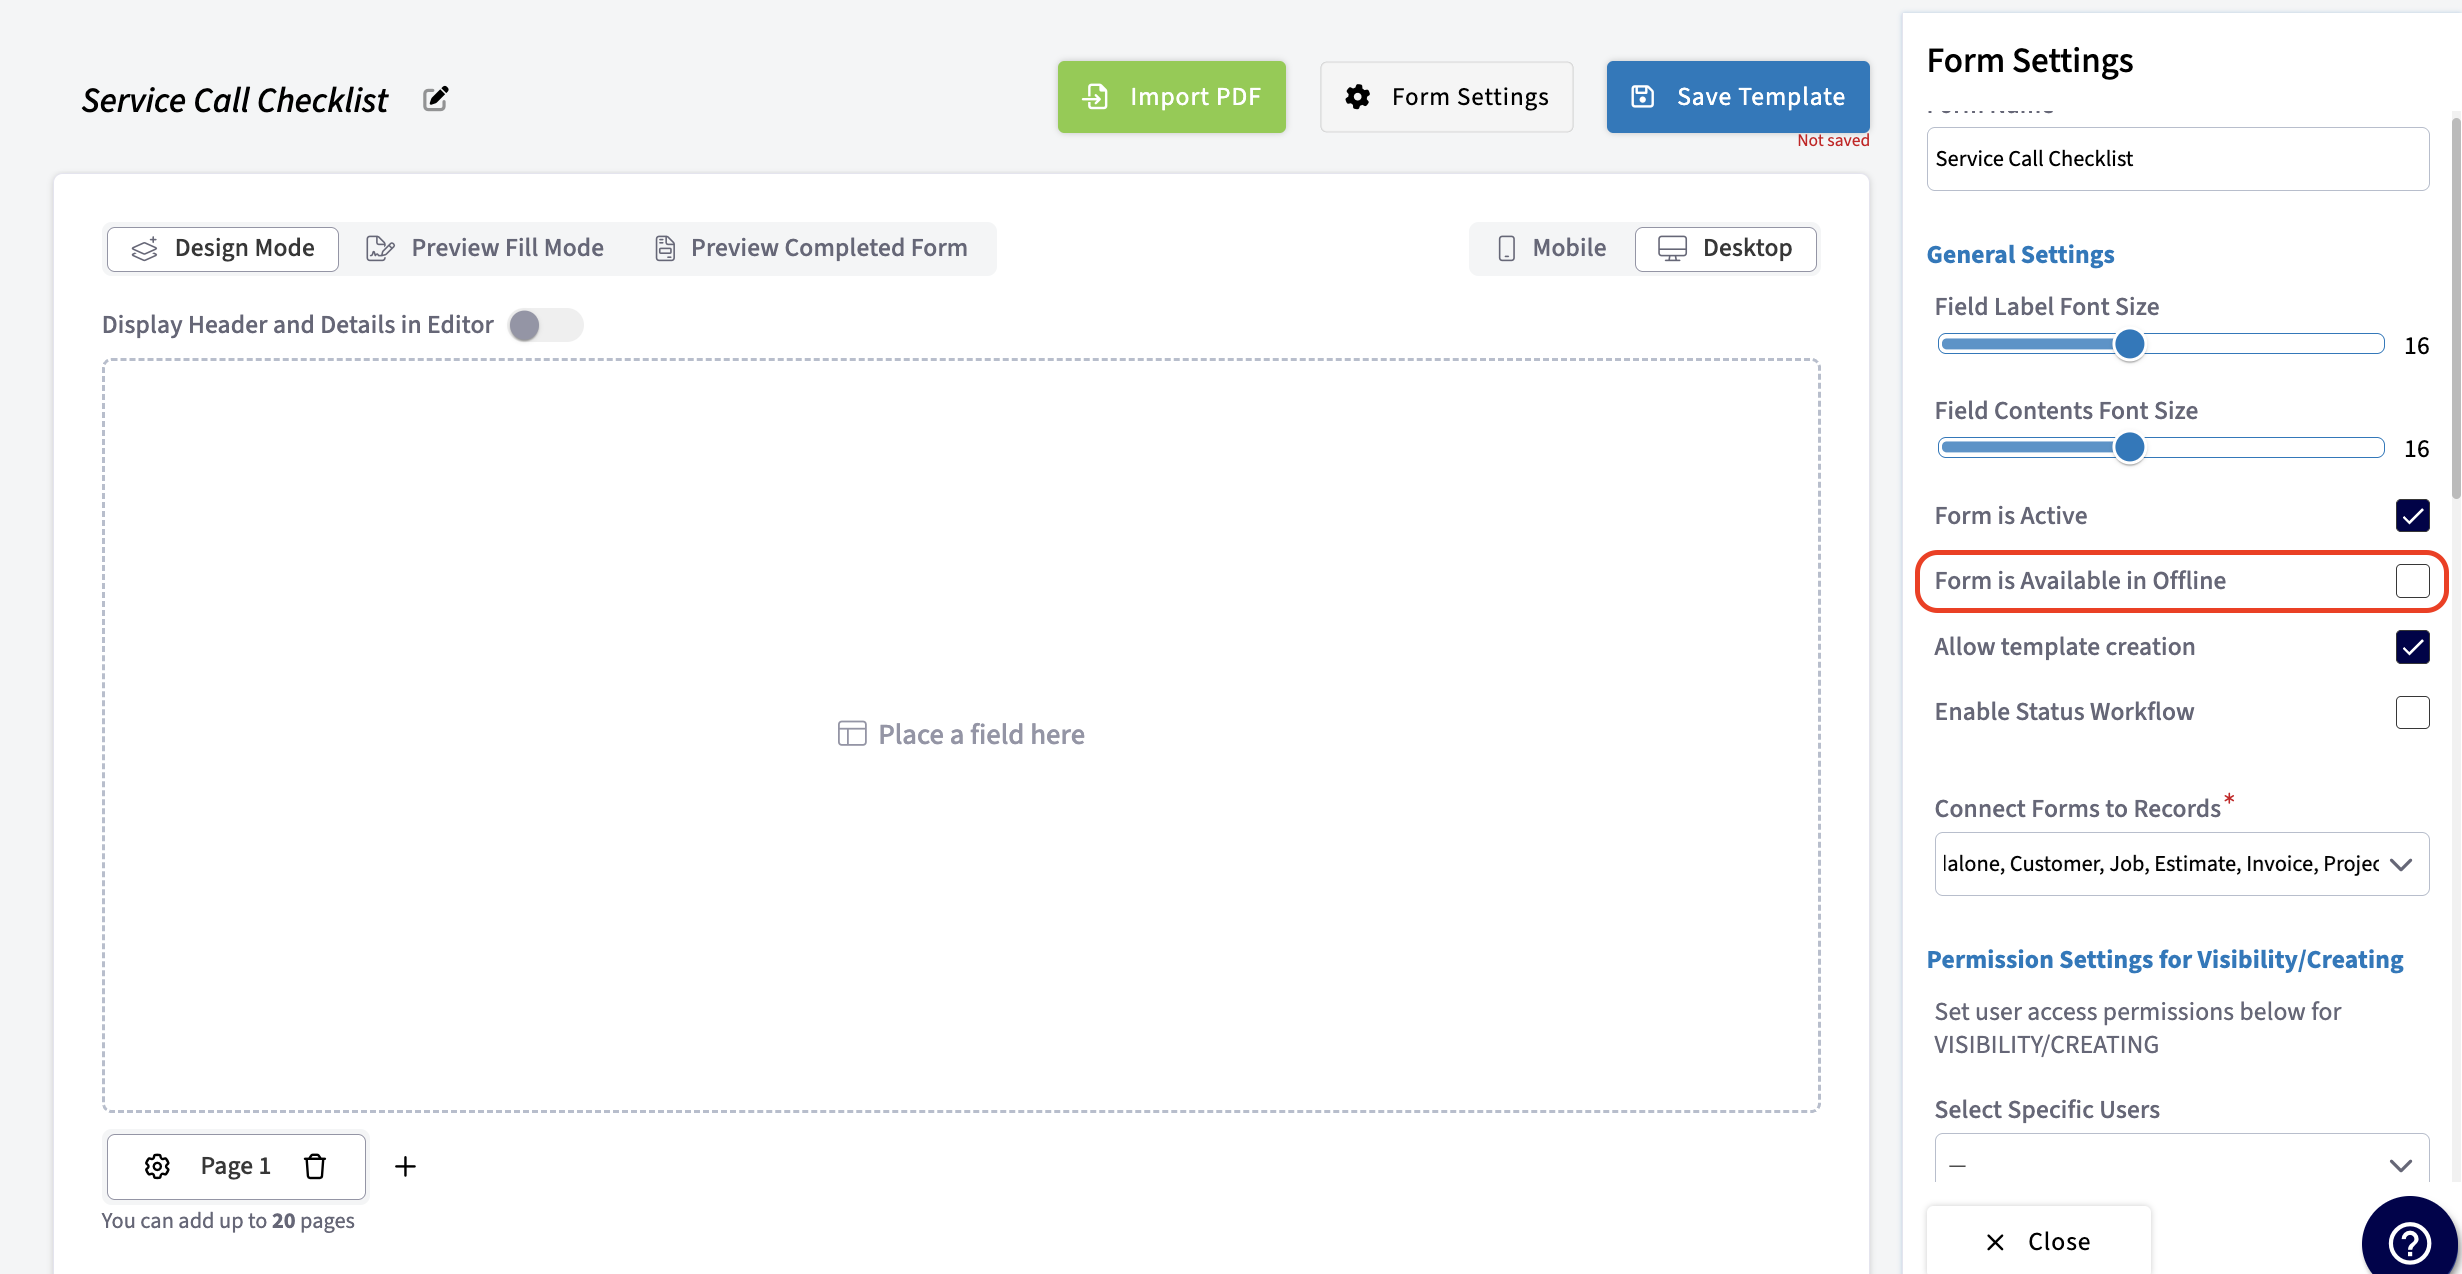
-
-#### **Making Edits and Creating New Forms:**
-
-In Offline Mode, any edits made or new forms created will be labeled as _Offline Drafts_. Once you reconnect to the internet, the forms you've edited or created will be permanently saved, and the _Offline Draft_ label will be removed. If multiple users make updates to forms in Offline Mode, the system will apply updates in the order that users return to Online Mode. For example, if User 1 makes updates and then returns online, their updates will be applied first. If User 2 then makes updates and returns online, their updates will be applied next.
-
-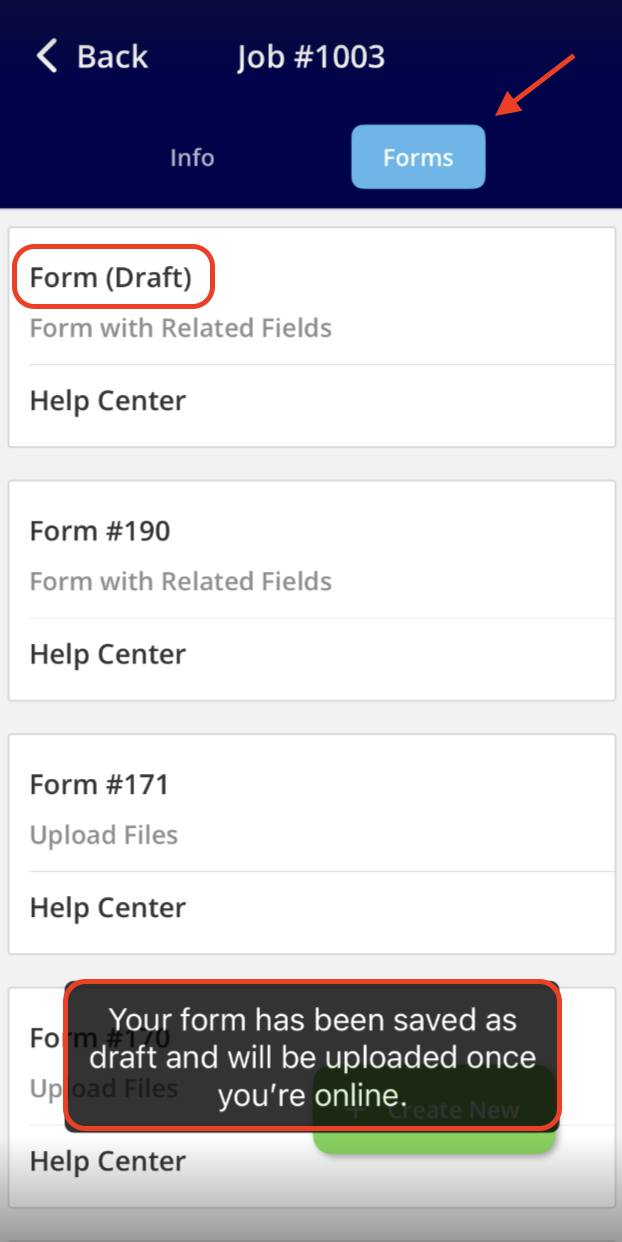
-
-#### **Related Fields on a Custom Form:**
-
-In Offline Mode, related field values will not automatically populate. Instead, you will see the message: _Value will be automatically filled when Online_ in the text box/field. Once you reconnect to the internet, these field values will automatically populate with the appropriate information.
-
-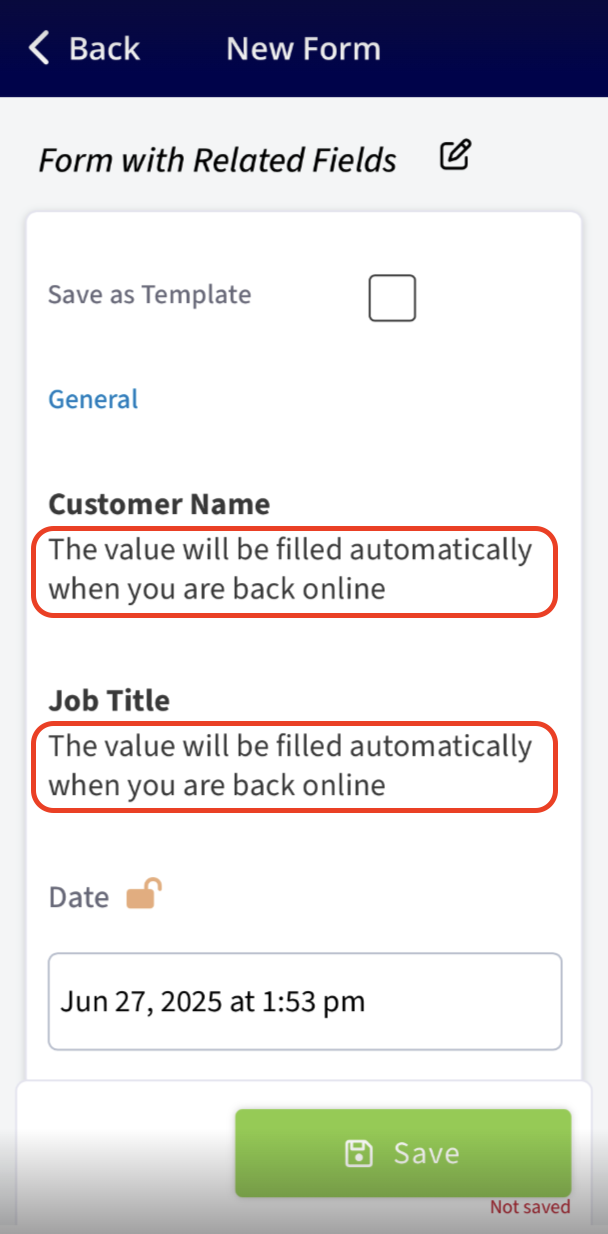
-
-#### **Adding Photos and Videos to a Custom Form:**
-
-No need to worry—you can still add photos and video files to your Custom Forms while in Offline Mode. They will be uploaded automatically once you reconnect to the internet.
-
----
-
-## Video Tutorial
-
-<Frame caption="Mastering Custom Forms: A Step-by-Step Guide">
- <iframe
- src="https://www.loom.com/embed/e40695b99c59435e910f7fec207541b8?hide_owner=true&hide_share=true"
- title="Video: Mastering Custom Forms: A Step-by-Step Guide"
- className="w-full rounded-lg"
- style={{aspectRatio: "16/9", border: "none"}}
- loading="lazy"
- allow="fullscreen"
- allowFullScreen
- />
-</Frame>
-
----
-
-**Have additional questions?**
-
-_Contact us at [support@fieldpulse.com](mailto:support@fieldpulse.com) or use the chat feature in the bottom right corner of your screen._
-
-Attachment icon
-
-Attachment icon
\ No newline at end of file
+# Why Custom Forms?
\ No newline at end of file
Can I create custom fields for my customer profiles? (PROTECTED)
- Module: Customer
- File:
can-i-create-custom-fields-for-my-customer-profiles.mdx - Intercom URL: https://help.fieldpulse.com/en/articles/1126836-can-i-create-custom-fields-for-my-customer-profiles
- Last modified: 2025-09-15
Can I use GPS coordinates as addresses? (PROTECTED)
- Module: Customer
- File:
can-i-use-gps-coordinates-as-addresses.mdx - Intercom URL: https://help.fieldpulse.com/en/articles/9185258-can-i-use-gps-coordinates-as-addresses
- Last modified: 2025-09-15
Customer Record: FieldPulse Character Limits and Validation Rules (PROTECTED)
- Module: Customer
- File:
customer-record-fieldpulse-character-limits-and-validation-rules.mdx - Intercom URL: https://help.fieldpulse.com/en/articles/11558003-customer-record-fieldpulse-character-limits-and-validation-rules
- Last modified: 2025-09-15
Wisetack Consumer Financing (PROTECTED)
- Module: Customer
- File:
wisetack-consumer-financing.mdx - Intercom URL: https://help.fieldpulse.com/en/articles/6005327-wisetack-consumer-financing
- Last modified: 2024-08-08
Understanding Parent/Child vs. Multi-Location Account Structures in FieldPulse (PROTECTED)
- Module: Customer
- File:
understanding-parent-child-vs-multi-location-account-structures-in-fieldpulse.mdx - Intercom URL: https://help.fieldpulse.com/en/articles/13404051-understanding-parent-child-vs-multi-location-account-structures-in-fieldpulse
- Last modified: 2026-01-15
Custom Fields on Customer Records (PROTECTED)
- Module: Customer
- File:
custom-fields-on-customer-records.mdx - Intercom URL: https://help.fieldpulse.com/en/articles/676182-custom-fields-on-customer-records
- Last modified: 2025-09-15
Custom Tags for Customers (PROTECTED)
- Module: Customer
- File:
custom-tags-for-customers.mdx - Intercom URL: https://help.fieldpulse.com/en/articles/1221408-custom-tags-for-customers
- Last modified: 2025-09-15
Creating a Customer (PROTECTED)
- Module: Customer
- File:
creating-a-customer.mdx - Intercom URL: https://help.fieldpulse.com/en/articles/482394-creating-a-customer
- Last modified: 2025-09-15
Customers & Scheduling: Quick Start (PROTECTED)
- Module: Customer
- File:
customers-scheduling.mdx - Intercom URL: https://help.fieldpulse.com/en/articles/5899623-customers-scheduling-quick-start
- Last modified: 2026-04-15
Importing Customers (PROTECTED)
- Module: Customer
- File:
importing-customers.mdx - Intercom URL: https://help.fieldpulse.com/en/articles/1140147-importing-customers
- Last modified: 2025-09-15
Exporting Customers (PROTECTED)
- Module: Customer
- File:
exporting-customers.mdx - Intercom URL: https://help.fieldpulse.com/en/articles/1184442-exporting-customers
- Last modified: 2025-09-15
Multi-Location & Multi-Contact Customers (PROTECTED)
- Module: Customer
- File:
multi-location-multi-contact-customers.mdx - Intercom URL: https://help.fieldpulse.com/en/articles/8932242-multi-location-multi-contact-customers
- Last modified: 2026-02-17
Customer Notification Preferences (PROTECTED)
- Module: Customer
- File:
customer-notification-preferences.mdx - Intercom URL: https://help.fieldpulse.com/en/articles/9922018-customer-notification-preferences
- Last modified: 2026-03-03
Creating Related Customers (PROTECTED)
- Module: Customer
- File:
creating-related-customers.mdx - Intercom URL: https://help.fieldpulse.com/en/articles/1476393-creating-related-customers
- Last modified: 2025-09-15
Tracking Lead Sources (PROTECTED)
- Module: Customer
- File:
tracking-lead-sources.mdx - Intercom URL: https://help.fieldpulse.com/en/articles/6540311-tracking-lead-sources
- Last modified: 2025-02-24
FieldPulse360: How to get FieldPulse to do the most for your workflows - Part 2: Automatic Customer Communications & Notification Settings (PROTECTED)
- Module: Customer
- File:
fieldpulse360-how-to-get-fieldpulse-to-do-the-most-for-your-workflows-part-2-automatic-customer-communications-notification-settings.mdx - Intercom URL: https://help.fieldpulse.com/en/articles/11994569-fieldpulse360-how-to-get-fieldpulse-to-do-the-most-for-your-workflows-part-2-automatic-customer-communications-notification-settings
- Last modified: 2025-08-12
Customer Communications (PROTECTED)
- Module: Customer
- File:
customer-communications.mdx - Intercom URL: https://help.fieldpulse.com/en/articles/7198265-customer-communications
- Last modified: 2026-04-02
Customer Portal (PROTECTED)
- Module: Customer
- File:
customer-portal.mdx - Intercom URL: https://help.fieldpulse.com/en/articles/2608754-customer-portal
- Last modified: 2026-04-15
Index: customer-portal.mdx
===================================================================
--- customer-portal.mdx existing
+++ customer-portal.mdx intercom
@@ -1,125 +1,1 @@
-Our Customer Portal gives your customers the power to view all of their jobs, estimates, invoices and payments. This allows your customers to review their details and take action on their account - without needing to call you.
-
----
-
-## Enabling the Customer Portal
-
-To begin using the Customer Portal, you'll first need to enable it. Start by clicking on _Company Settings_ and selecting _Features & Plugins._ Navigate to _Customer Portal_ and select _Enable_. Now you're ready to begin customizing and automating your communications!
-
-
-
----
-
-## Sharing the Customer Portal
-
-To get started, you need to share a link with your customer to their personal portal. To do this, open a customer's profile in FieldPulse and click the _Actions_ button.
-
-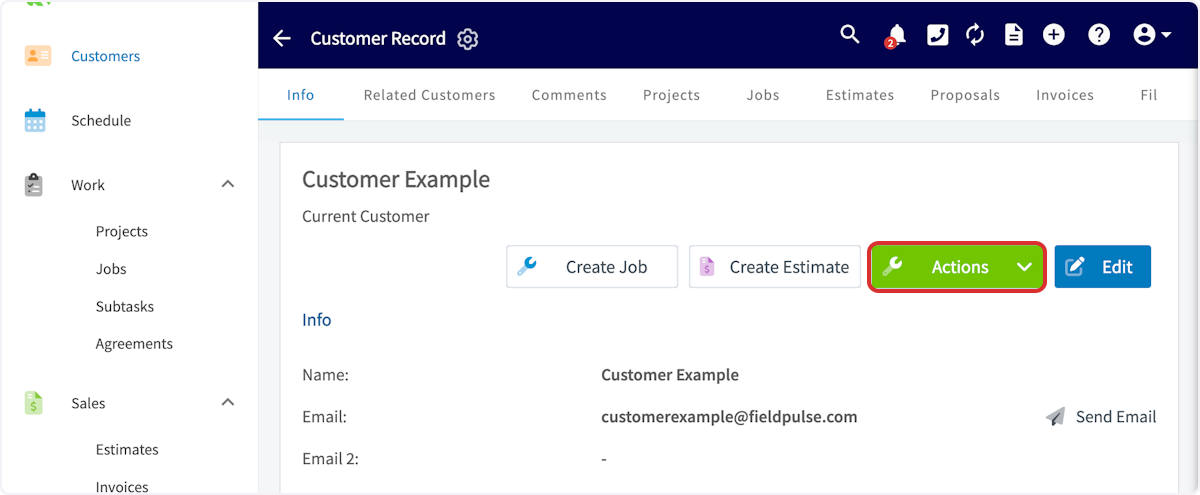
-
-In the dropdown, hover over _Copy Customer Portal Link._
-
-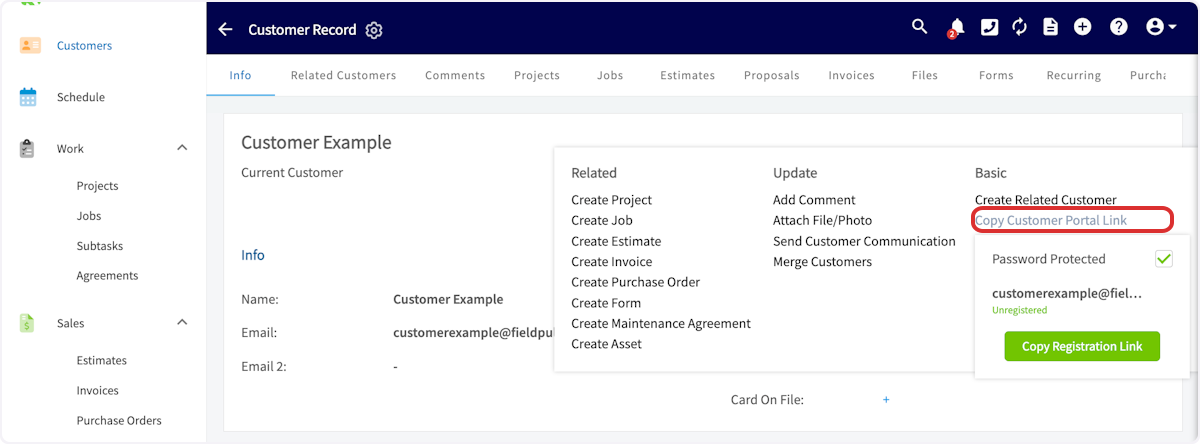
-
-You'll notice the option to enable password-protected customer portal for this customer. If you'd like to do so, select the _Password Protected_ checkbox. Then, copy the registration link. You can then paste the registration link in an email or text to your customer.
-
-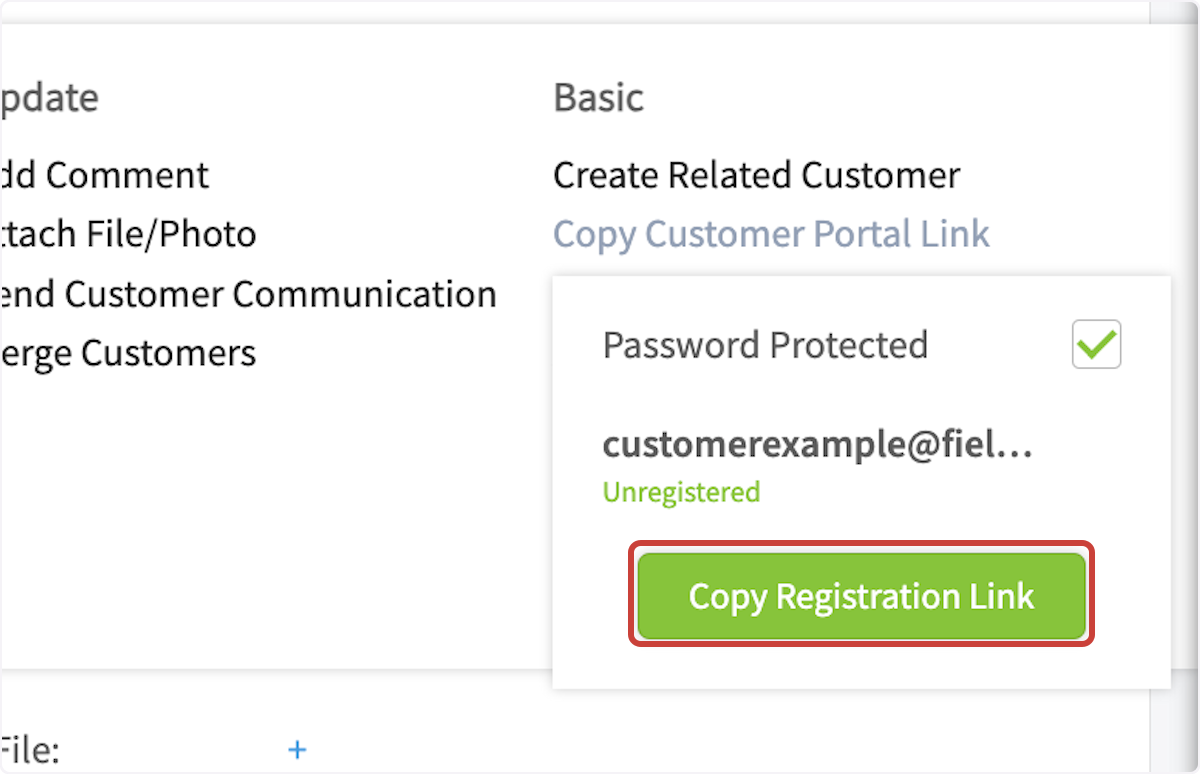
-
-If you have selected password-protected customer portal, your customer will be prompted to enter their email and create a password when they click the link.
-
-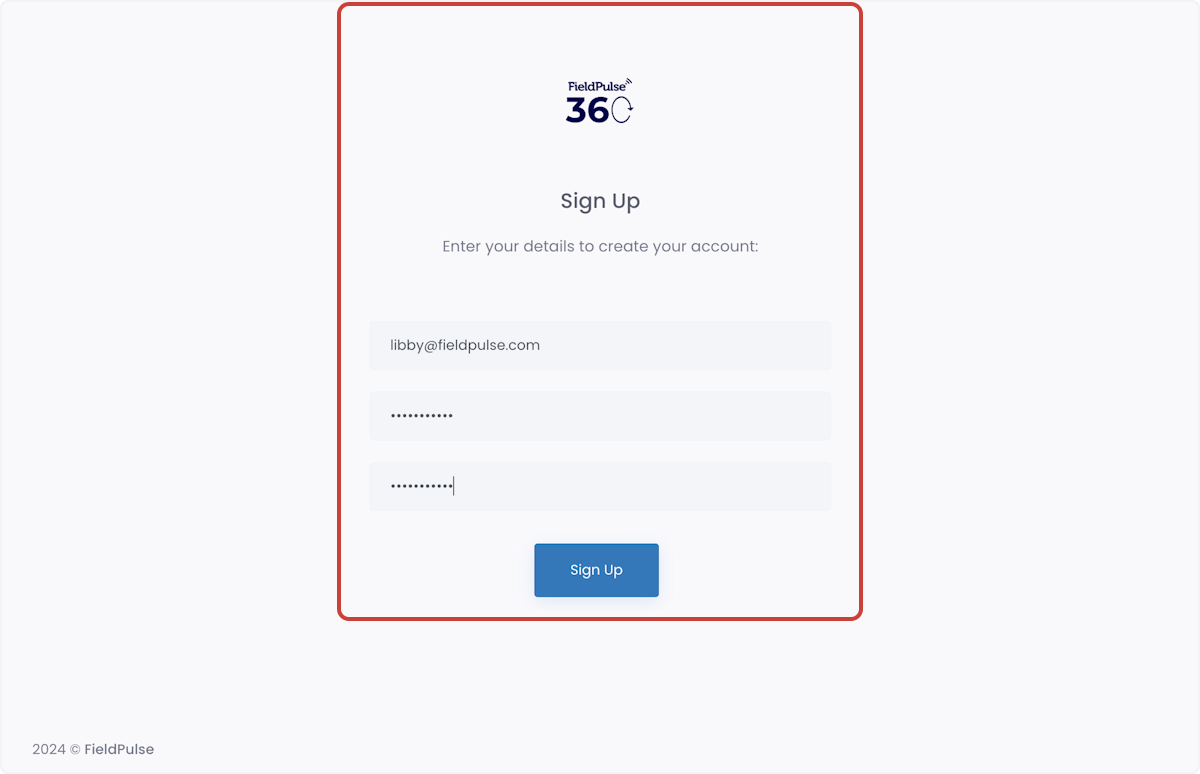
-
-After a customer has set up their sign-in details, they will need to sign in before accessing their customer portal.
-
-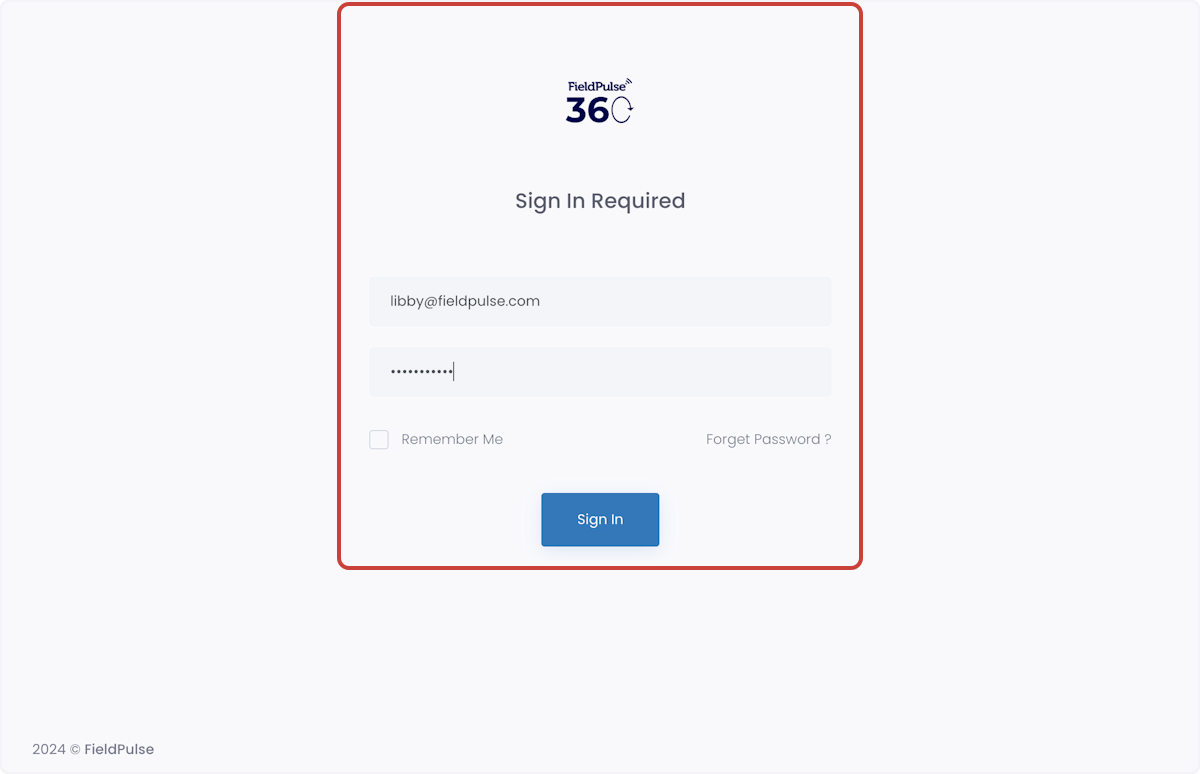
-
-To monitor a customer's password-protected customer portal status, navigate to _Copy Customer Portal_ _Link_ to view whether the customer is _Unregistered_ or _Registered_.
-
-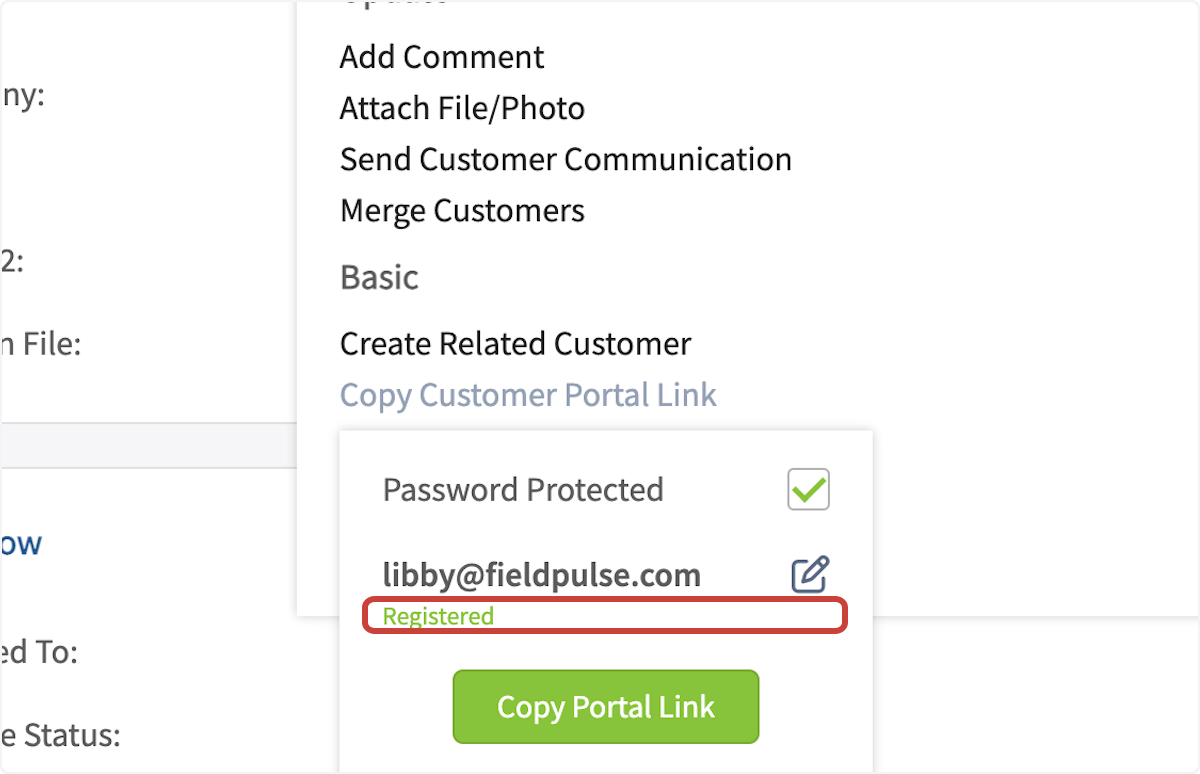
-
----
-
-## Customer Portal & Customer Communications
-
-When creating a customer communication email or SMS template, you can input a variety of field values. The customer portal link and password-protected customer portal link can be included in your customer communication templates. Simply select _Insert Field Value_ and select the component you'd like to include. To learn more, see the [Customer Communications guide](/core-platform/customers/communications/index).
-
-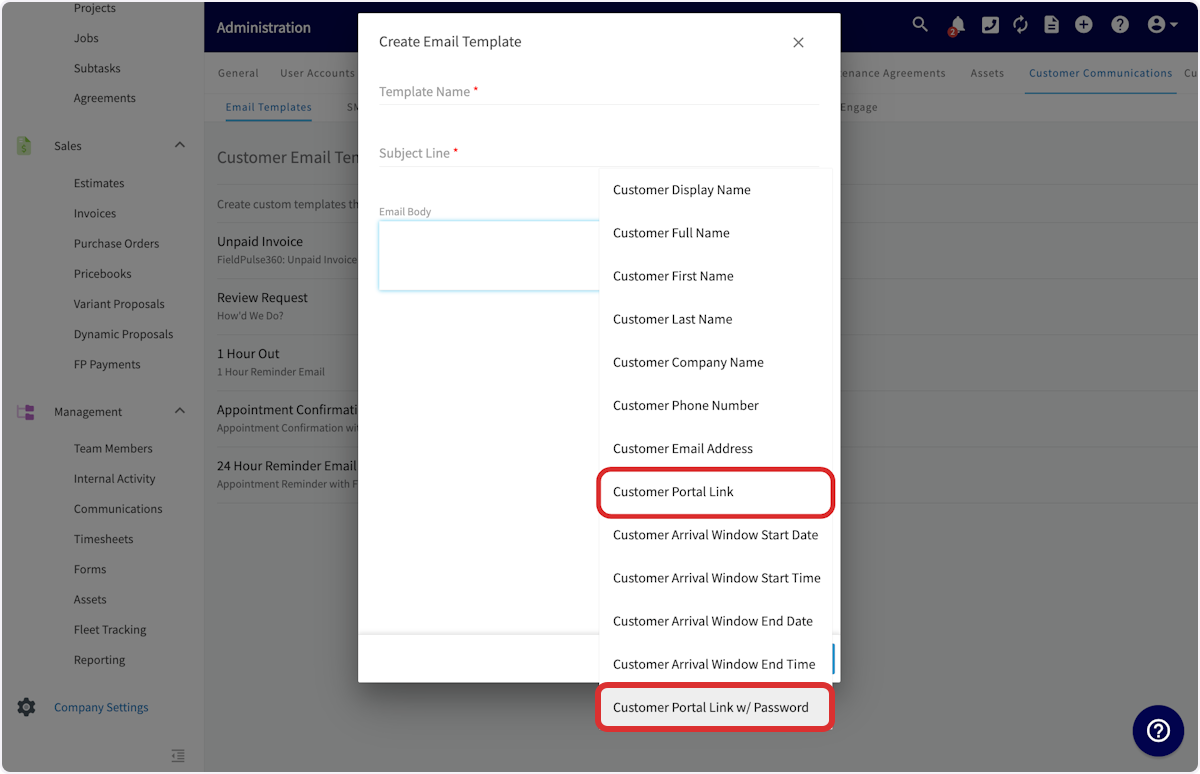
-
----
-
-## Using the Customer Portal
-
-When your customer opens the URL, they will see the main page with their contact details displayed. They can edit these personal details if needed. They can click in any field, make changes, and then press _Save Changes_ .
-
-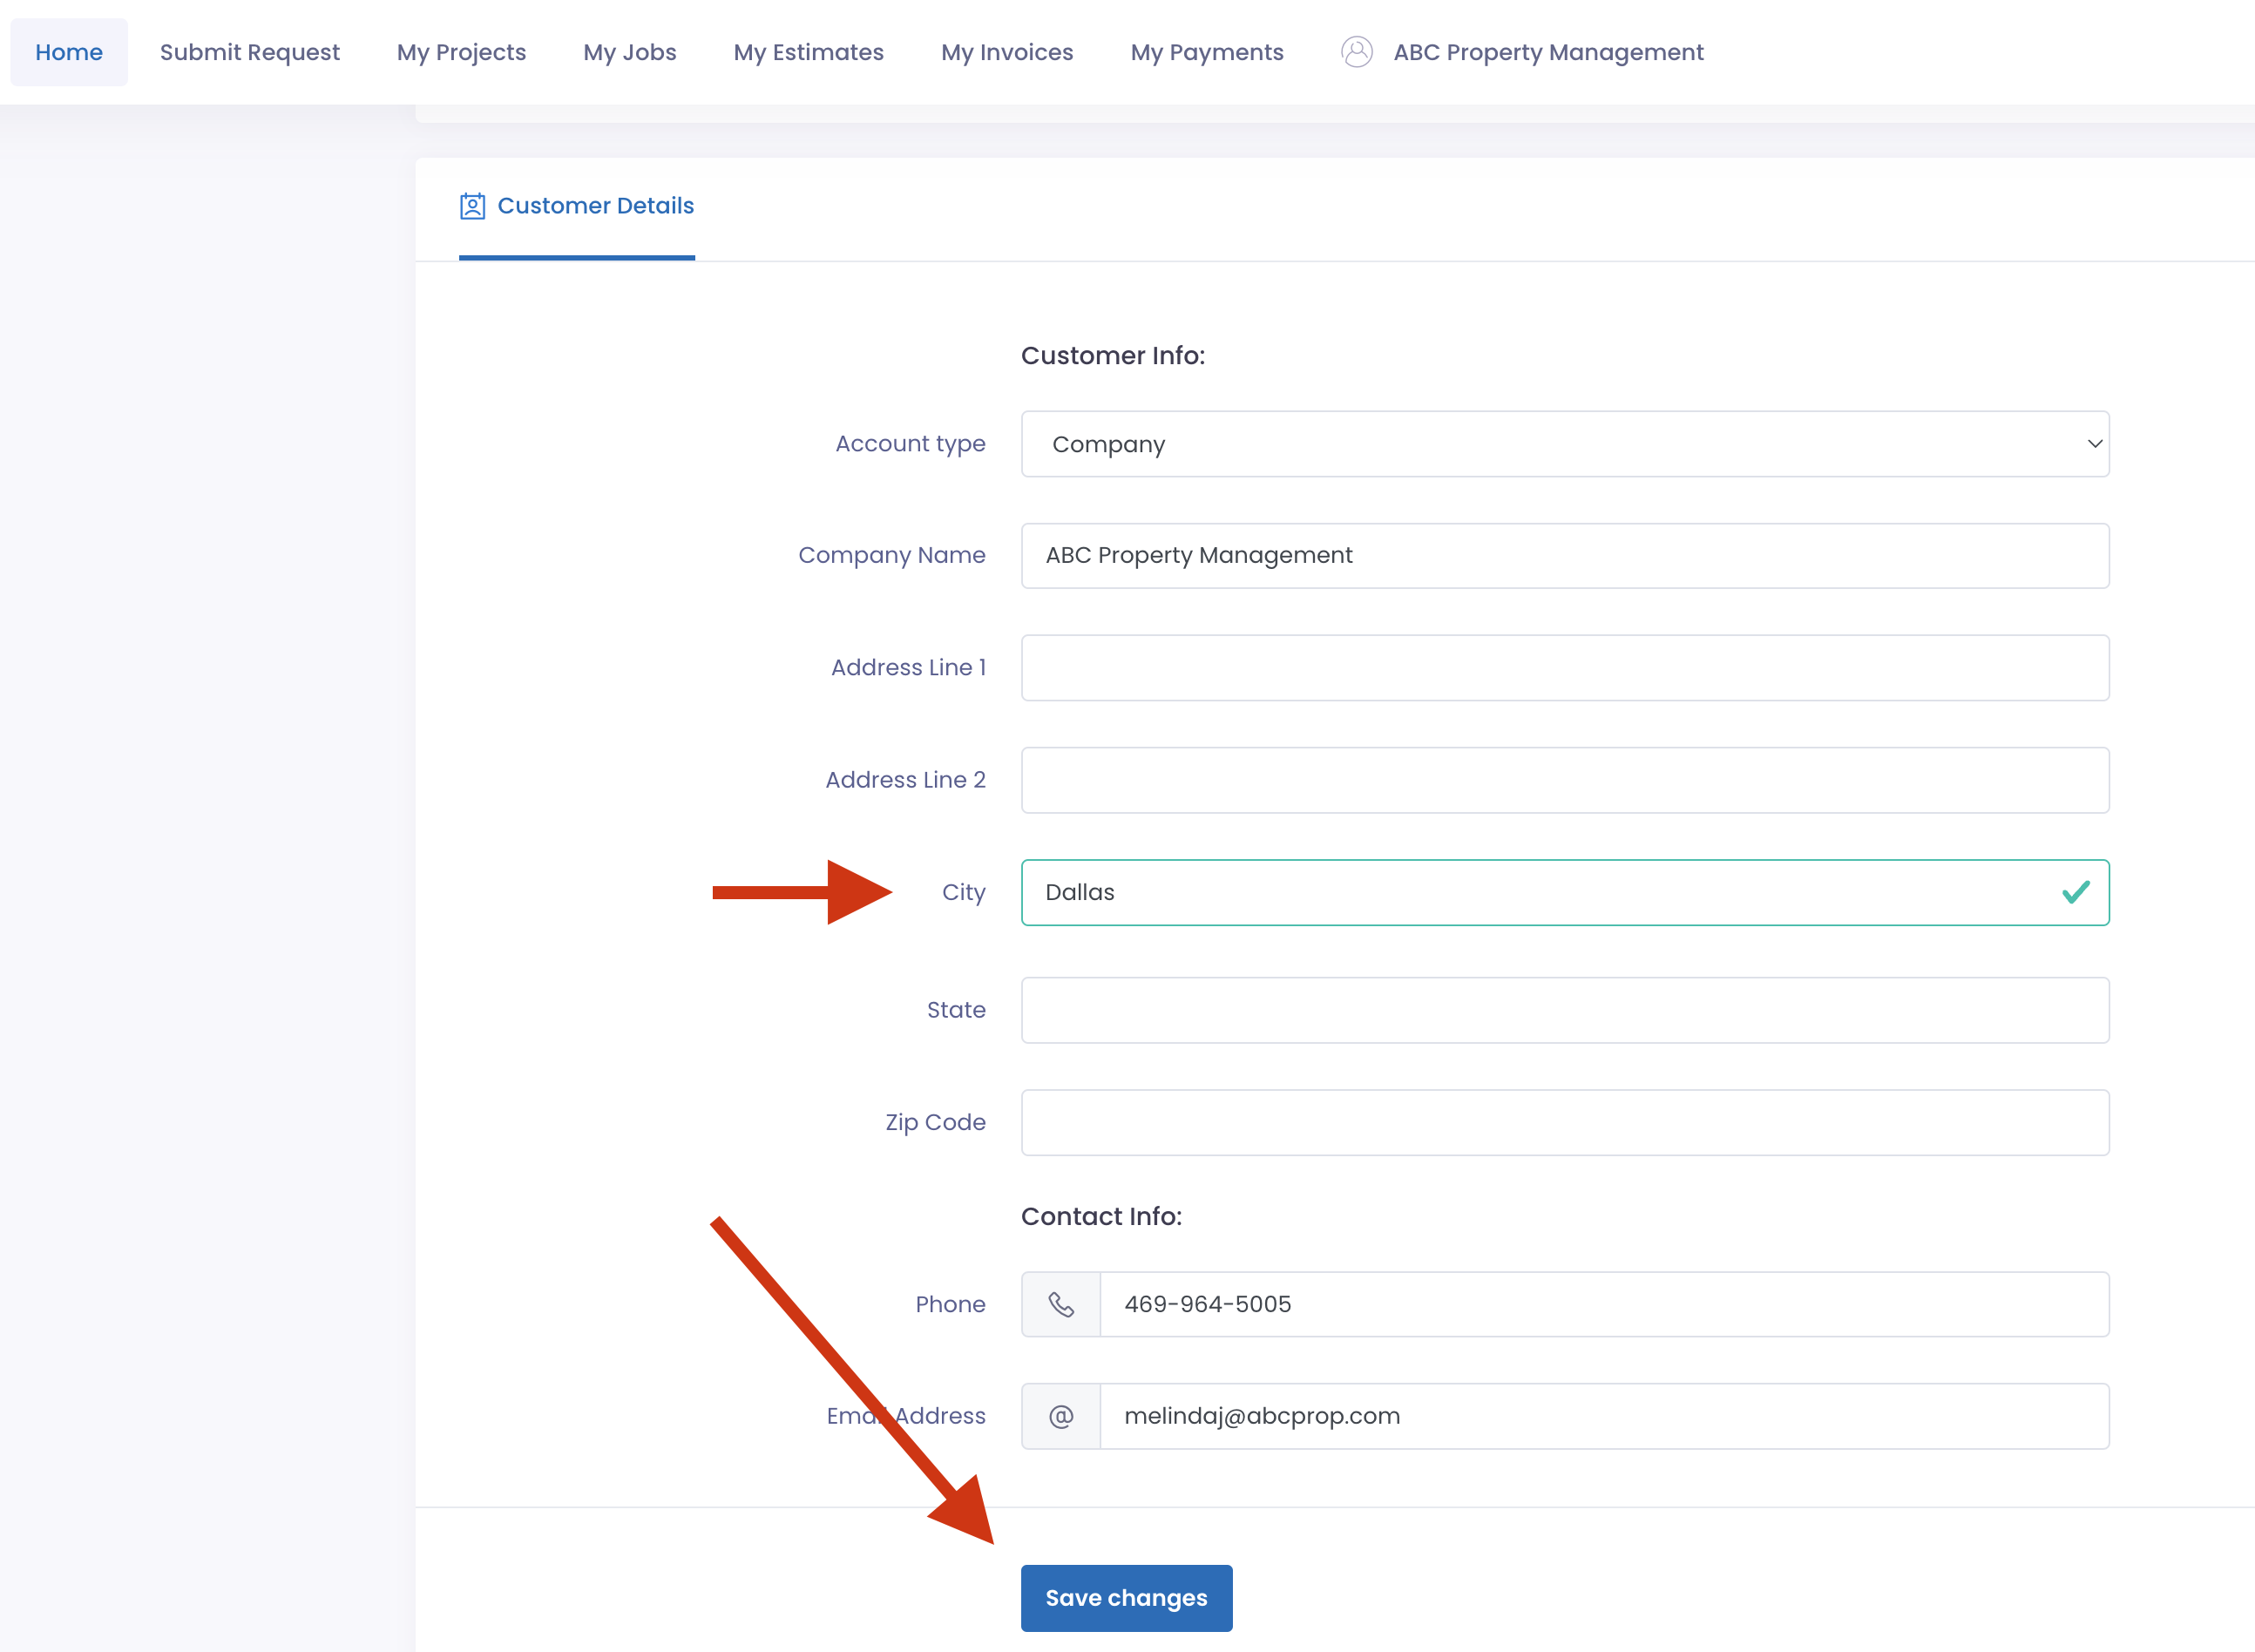
-
-The next tab at the top of the page is _Submit Request_. Clicking this will open a new tab with your FieldPulse online scheduling page. To learn more, see the [Booking Portal guide](/core-platform/booking-portal/booking-portal).
-
-
-
-On the scheduling page, the customer can book or request a job with you. Once that's done, they can return to the customer portal.
-
-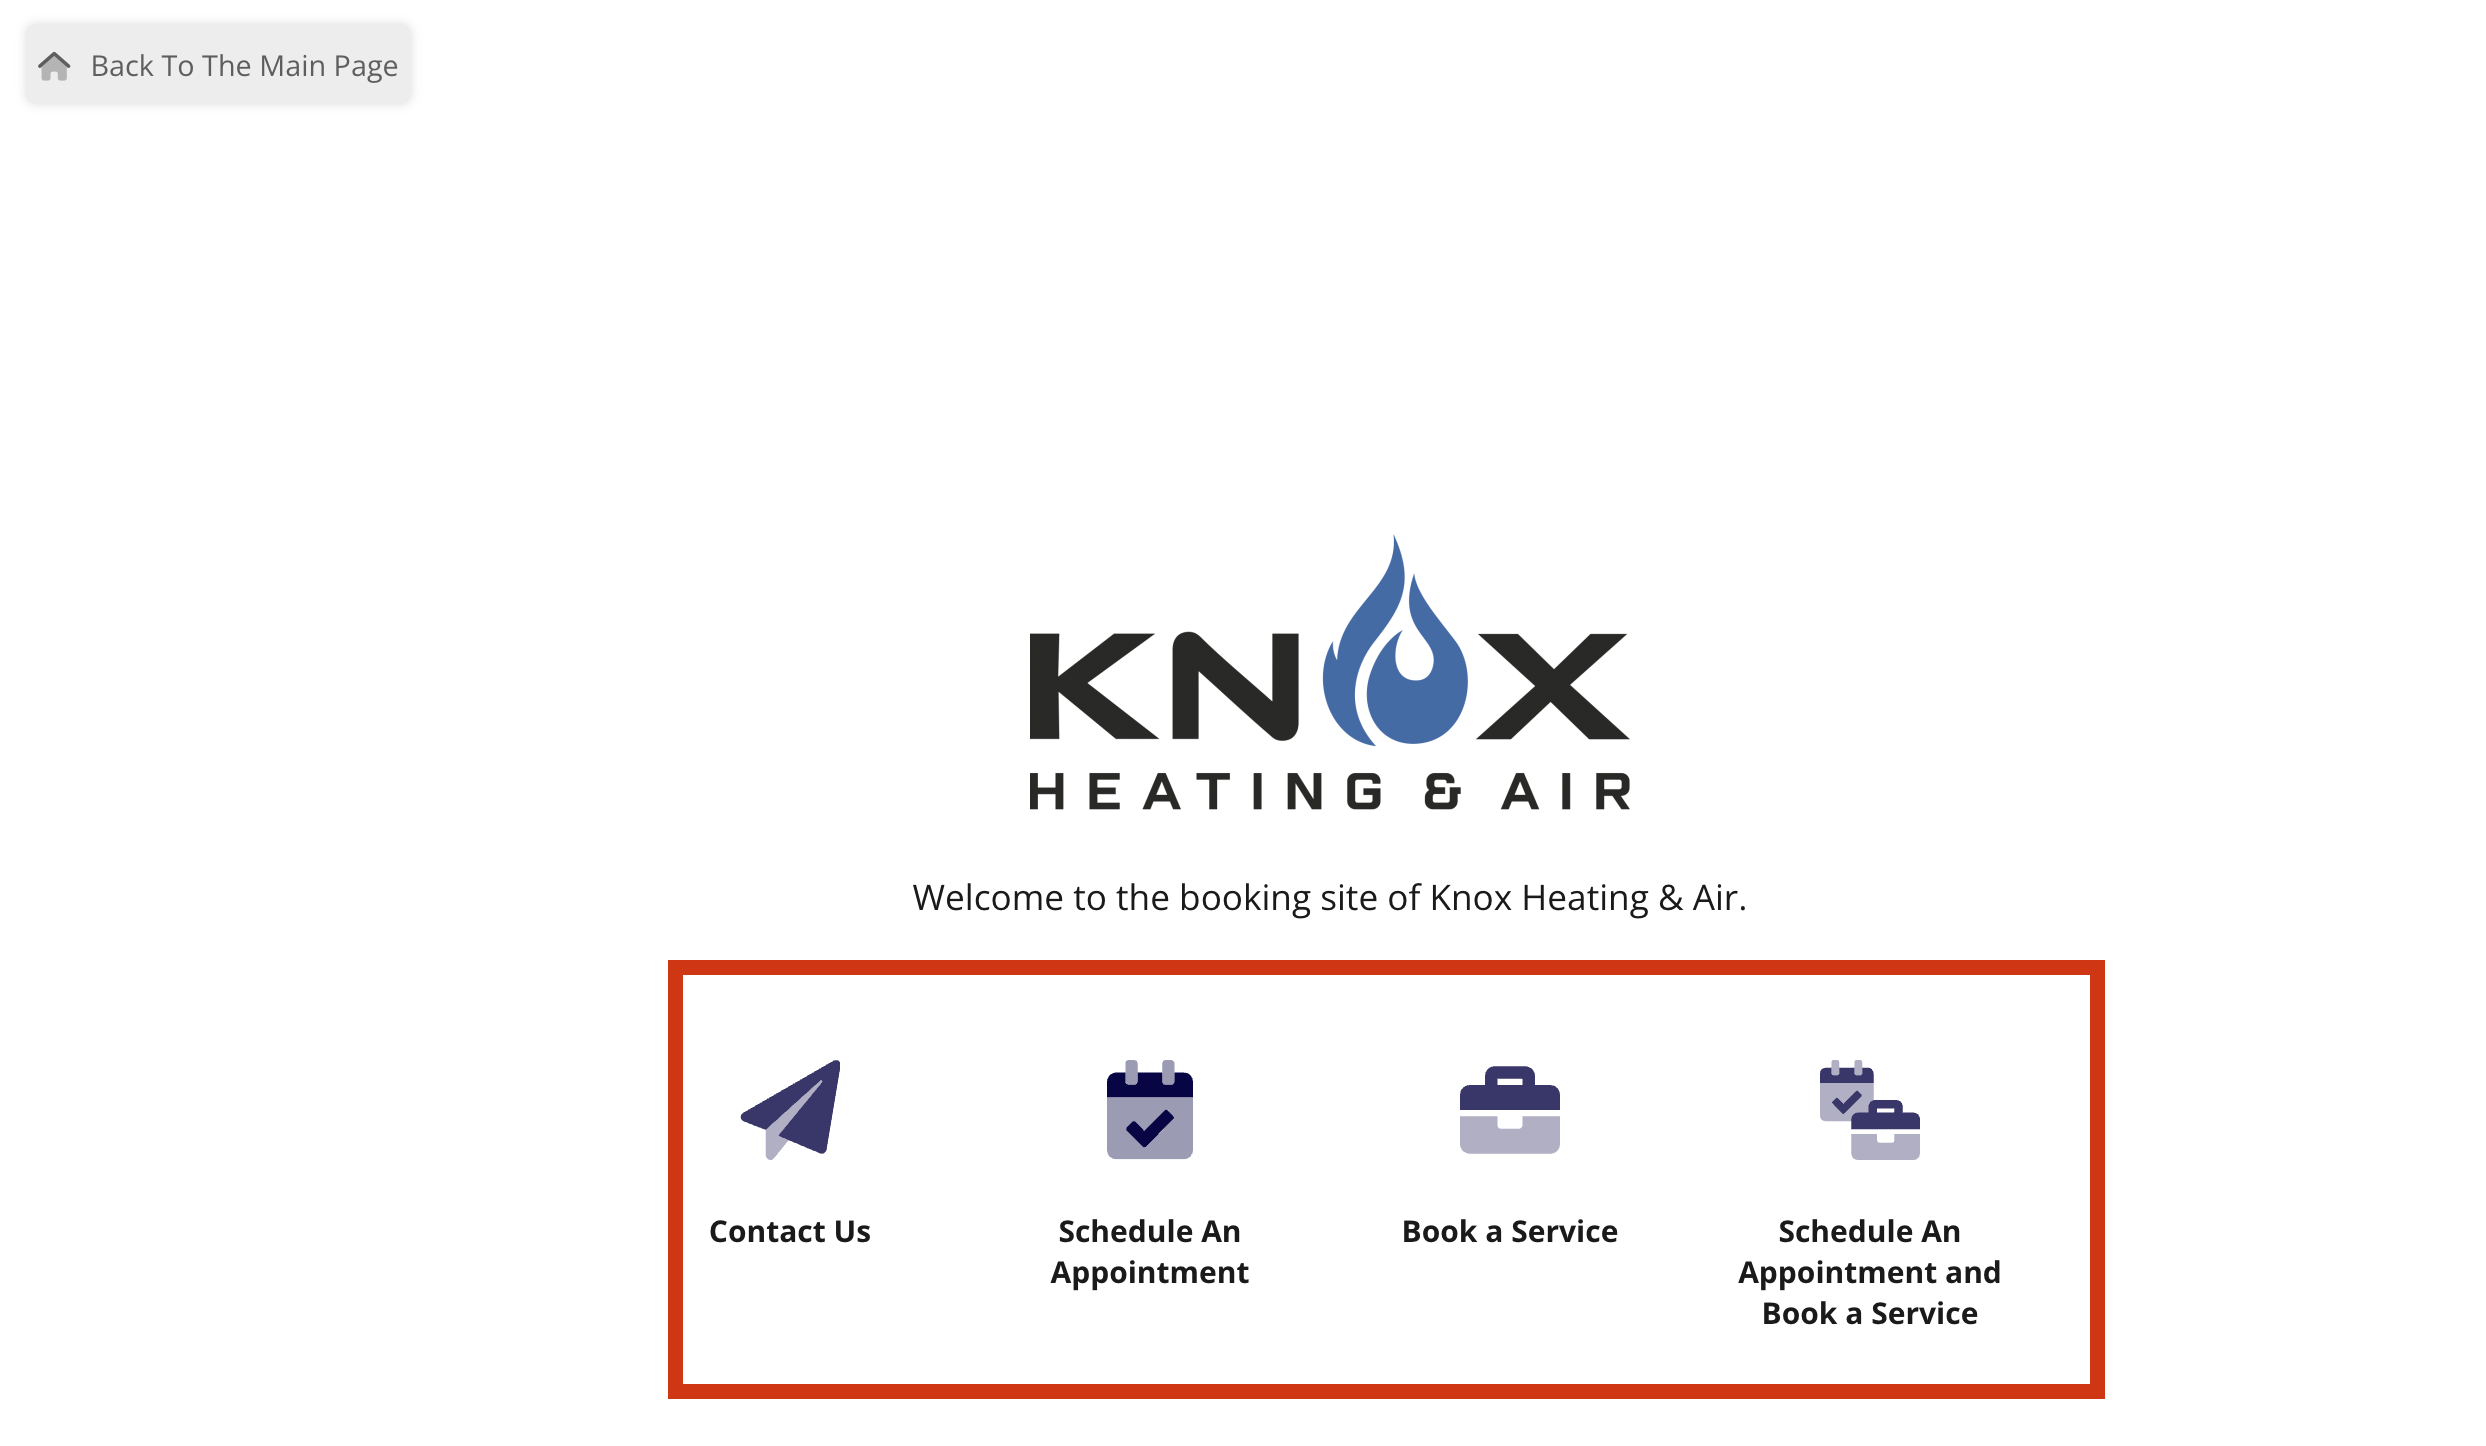
-
-Back on the Customer Portal, the next tab at the top of the page shows the customer to a list of their jobs. The date, time and status of the job are shown for all open jobs.
-
-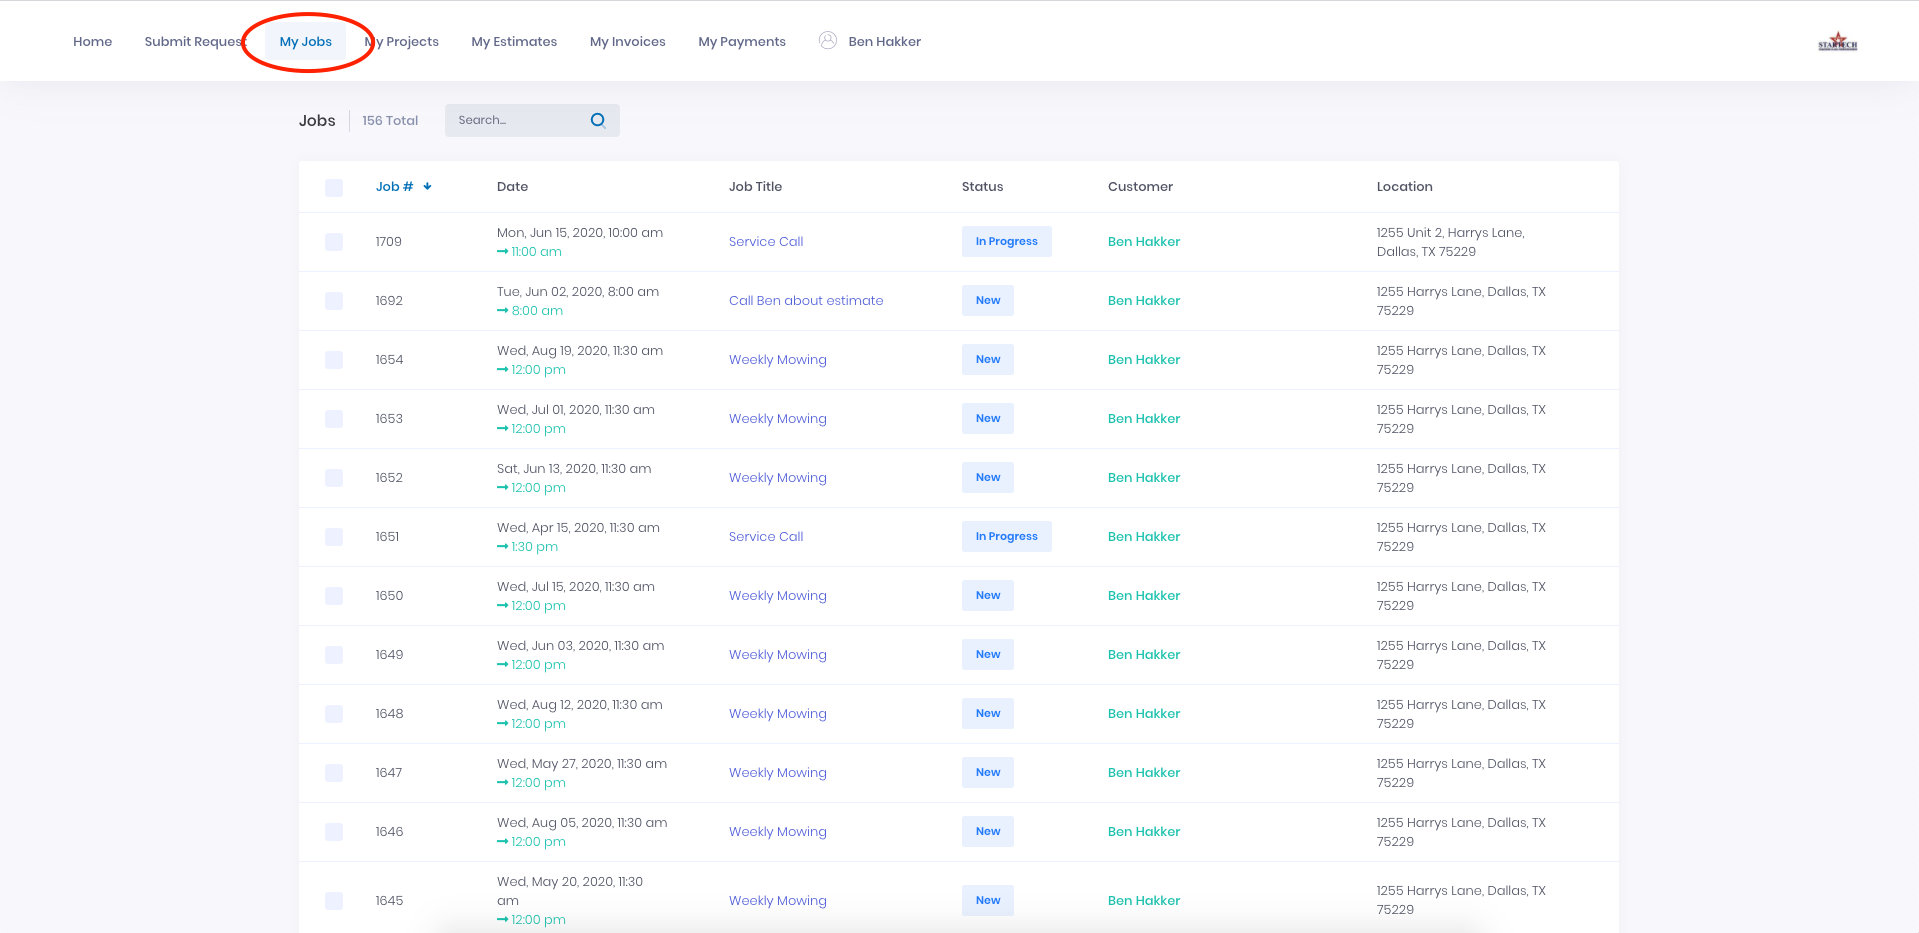
-
-Clicking any job will allow the customer to review the details as well as view and download any of the files associated with the job.
-
-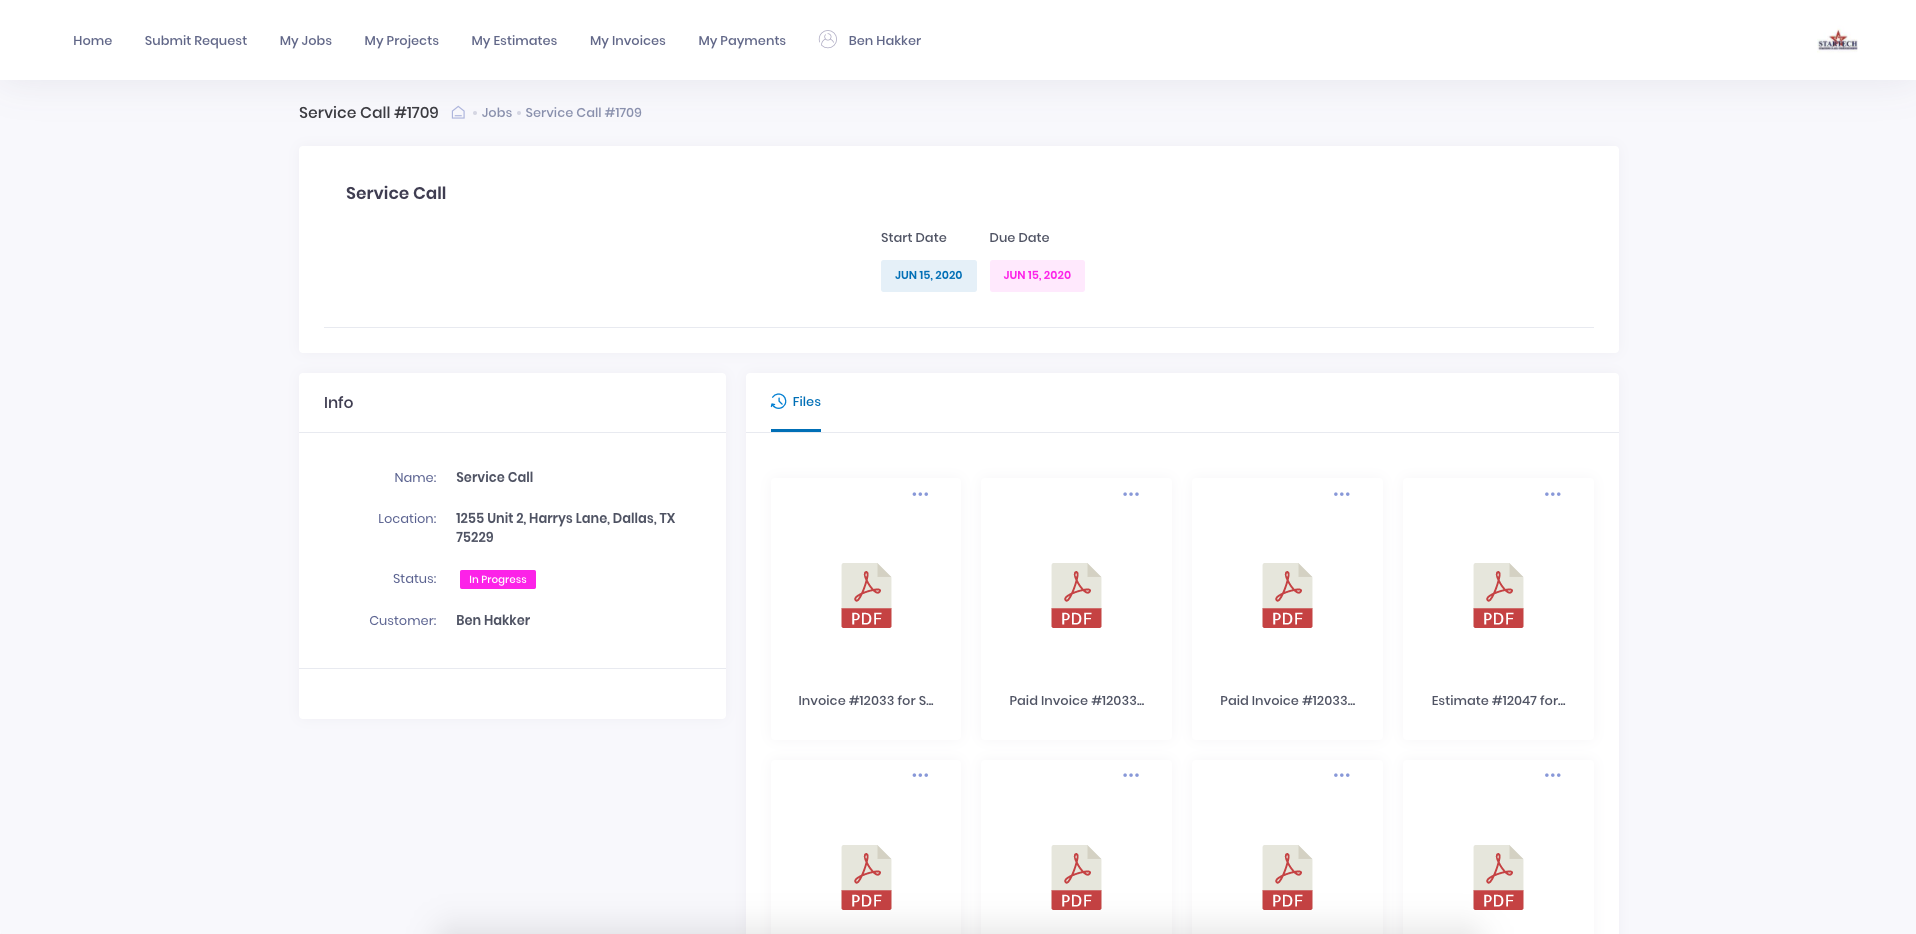
-
-On the _My Projects_ page, your customer can see the date, time, status and completion percentage of any open projects, and click on any project to view the details or associated files.
-
-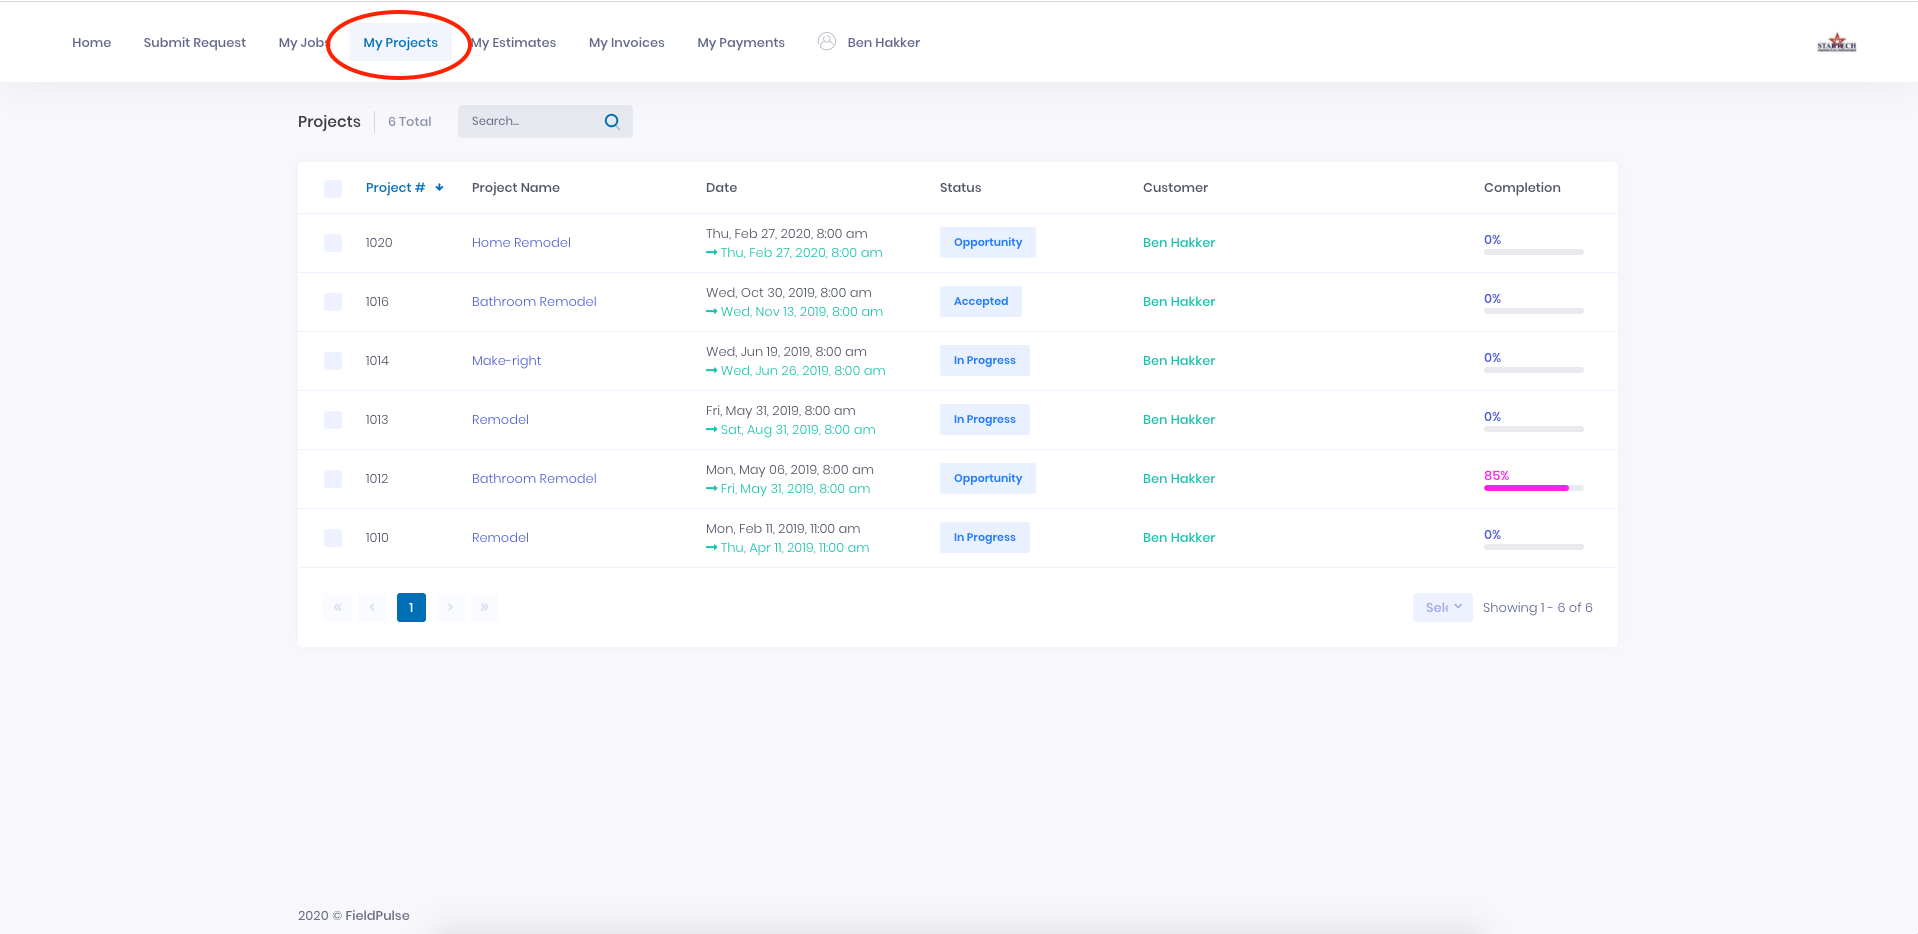
-
-On the _My Estimates_ page, your customer can view all of their estimates and click on any of them to open it. The status, sent date, expiration date and total amount is listed for each estimate.
-
-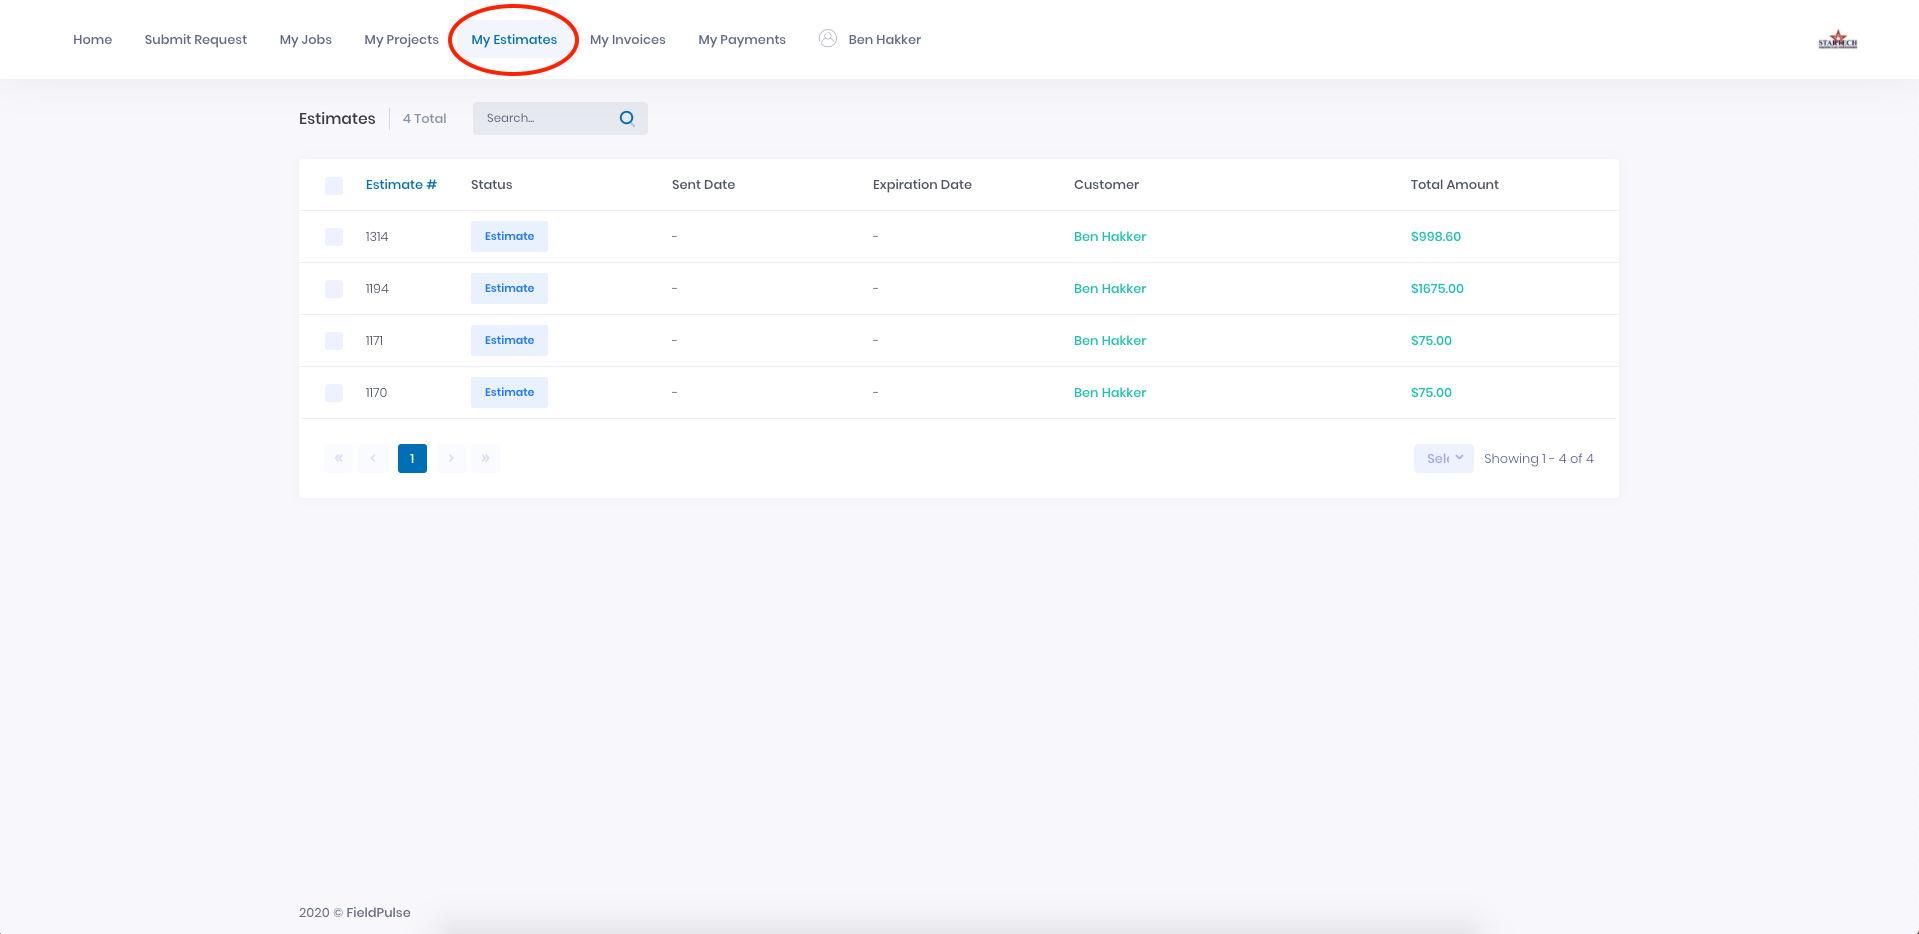
-
-After clicking on a specific estimate, the customer can view, download, or print a PDF of the estimate. The customer can also accept estimates here.
-
-
-
-Under _My Invoices_, your customer can view the invoice date, due date, amount paid, and amount due for all of their invoices.
-
-
-
-Clicking on any of the invoices opens it up as a PDF and allows you to view, download, or print the invoice.
-
-
-
-On the _My Payments_ page, your customer can view all of the payments they've made to you, including the payment date and method.
-
-
-
----
-
-## Customer Portal Comments
-
-Comments left on Job and Project records can also be sent to the Customer Portal, making them viewable by your customers. This allows you to use the Customer Portal as a communication medium while automatically documenting these communications within the related Job and Projects in FieldPulse.
-
-This functionality is currently only available on our web app. To learn more, see [Customer Portal Comments](/core-platform/comments/comments).
-
----
-
-## Video Tutorial
-
-<Frame caption="Customer Portal">
- <iframe
- src="https://www.loom.com/embed/ddaff379c8104e8e813100fb789e3210?hide_owner=true&hide_share=true"
- title="Video: Customer Portal"
- className="w-full rounded-lg"
- style={{aspectRatio: "16/9", border: "none"}}
- loading="lazy"
- allow="fullscreen"
- allowFullScreen
- />
-</Frame>
-
----
-
-**Have additional questions?**
-
-_Contact us at [support@fieldpulse.com](mailto:support@fieldpulse.com) or use the chat feature in the bottom right corner of your screen._
-
\ No newline at end of file
Creating a Customer - Mobile App (PROTECTED)
- Module: Customer
- File:
creating-a-customer-mobile-app.mdx - Intercom URL: https://help.fieldpulse.com/en/articles/6167418-creating-a-customer-mobile-app
- Last modified: 2025-02-19
What information do customer profiles contain? (PROTECTED)
- Module: Customer
- File:
what-information-do-customer-profiles-contain.mdx - Intercom URL: https://help.fieldpulse.com/en/articles/482414-what-information-do-customer-profiles-contain
- Last modified: 2025-09-15
Can I import my customers? (PROTECTED)
- Module: Customer
- File:
can-i-import-my-customers.mdx - Intercom URL: https://help.fieldpulse.com/en/articles/701933-can-i-import-my-customers
- Last modified: 2025-09-15
Can I export my customers from FieldPulse? (PROTECTED)
- Module: Customer
- File:
can-i-export-my-customers-from-fieldpulse.mdx - Intercom URL: https://help.fieldpulse.com/en/articles/1126766-can-i-export-my-customers-from-fieldpulse
- Last modified: 2025-09-15
Can I manage customers with multiple locations or related customers? (PROTECTED)
- Module: Customer
- File:
can-i-manage-customers-with-multiple-locations-or-related-customers.mdx - Intercom URL: https://help.fieldpulse.com/en/articles/1126812-can-i-manage-customers-with-multiple-locations-or-related-customers
- Last modified: 2025-09-15
Can I use FieldPulse to communicate with my customers? (PROTECTED)
- Module: Customer
- File:
can-i-use-fieldpulse-to-communicate-with-my-customers.mdx - Intercom URL: https://help.fieldpulse.com/en/articles/1126579-can-i-use-fieldpulse-to-communicate-with-my-customers
- Last modified: 2025-09-15
Can I store secondary contacts and contact methods for customer profiles? (PROTECTED)
- Module: Customer
- File:
can-i-store-secondary-contacts-and-contact-methods-for-customer-profiles.mdx - Intercom URL: https://help.fieldpulse.com/en/articles/482409-can-i-store-secondary-contacts-and-contact-methods-for-customer-profiles
- Last modified: 2025-09-15
When a customer is created in FieldPulse, is a unique customer ID assigned to each customer? (PROTECTED)
- Module: Customer
- File:
when-a-customer-is-created-in-fieldpulse-is-a-unique-customer-id-assigned-to-each-customer.mdx - Intercom URL: https://help.fieldpulse.com/en/articles/11525948-when-a-customer-is-created-in-fieldpulse-is-a-unique-customer-id-assigned-to-each-customer
- Last modified: 2026-02-03
Can I create custom tags for my customers? (PROTECTED)
- Module: Customer
- File:
can-i-create-custom-tags-for-my-customers.mdx - Intercom URL: https://help.fieldpulse.com/en/articles/1126845-can-i-create-custom-tags-for-my-customers
- Last modified: 2025-09-15
FieldPulse360: Customers & Scheduling (PROTECTED)
- Module: Customer
- File:
fieldpulse360-customers-scheduling.mdx - Intercom URL: https://help.fieldpulse.com/en/articles/9039602-fieldpulse360-customers-scheduling
- Last modified: 2025-09-15
Can I have residential and commercial customers in FieldPulse? (PROTECTED)
- Module: Customer
- File:
can-i-have-residential-and-commercial-customers-in-fieldpulse.mdx - Intercom URL: https://help.fieldpulse.com/en/articles/482423-can-i-have-residential-and-commercial-customers-in-fieldpulse
- Last modified: 2025-09-15
Are customer communications always tied to the main parent contact, even if a specific contact is selected for a job? (PROTECTED)
- Module: Customer
- File:
are-customer-communications-always-tied-to-the-main-parent-contact-even-if-a-specific-contact-is-selected-for-a-job.mdx - Intercom URL: https://help.fieldpulse.com/en/articles/12946849-are-customer-communications-always-tied-to-the-main-parent-contact-even-if-a-specific-contact-is-selected-for-a-job
- Last modified: 2025-11-26
Customer Communications - Mobile App (PROTECTED)
- Module: Customer
- File:
customer-communications-mobile-app.mdx - Intercom URL: https://help.fieldpulse.com/en/articles/2517252-customer-communications-mobile-app
- Last modified: 2025-09-15
What time do communications send from FieldPulse to my customers? (PROTECTED)
- Module: Customer
- File:
what-time-do-communications-send-from-fieldpulse-to-my-customers.mdx - Intercom URL: https://help.fieldpulse.com/en/articles/13287252-what-time-do-communications-send-from-fieldpulse-to-my-customers
- Last modified: 2026-01-05
FieldPulse360: Customer Communications (PROTECTED)
- Module: Customer
- File:
fieldpulse360-customer-communications.mdx - Intercom URL: https://help.fieldpulse.com/en/articles/9298615-fieldpulse360-customer-communications
- Last modified: 2025-09-15
New Articles
April 2026
- Intercom ID: 14432912
- URL: https://help.fieldpulse.com/en/articles/14432912-april-2026
- Created: 2026-04-02
- Suggested module: Invoices/Estimates
Timesheets - Offline Mode
- Intercom ID: 14647011
- URL: https://help.fieldpulse.com/en/articles/14647011-timesheets-offline-mode
- Created: 2026-04-15
- Suggested module: Contracts & Signatures
Material Lists - Offline Mode
- Intercom ID: 14647057
- URL: https://help.fieldpulse.com/en/articles/14647057-material-lists-offline-mode
- Created: 2026-04-15
- Suggested module: Invoices/Estimates
FieldPulse Payments vs. Legacy
- Intercom ID: 13730902
- URL: https://help.fieldpulse.com/en/articles/13730902-fieldpulse-payments-vs-legacy
- Created: 2026-02-13
- Suggested module: FP Payments (Fintech)
Dimensional Pricebook
- Intercom ID: 11133117
- URL: https://help.fieldpulse.com/en/articles/11133117-dimensional-pricebook
- Created: 2025-04-23
- Suggested module: Invoices/Estimates
Custom Estimate & Invoice Workflows
- Intercom ID: 13047173
- URL: https://help.fieldpulse.com/en/articles/13047173-custom-estimate-invoice-workflows
- Created: 2025-12-08
- Suggested module: Invoices/Estimates
🌟 FieldPulse Feature Roadmap 🌟
- Intercom ID: 9222125
- URL: https://help.fieldpulse.com/en/articles/9222125-fieldpulse-feature-roadmap
- Created: 2024-04-19
- Suggested module: Invoices/Estimates
Ask a Pro: Upcoming Sessions
- Intercom ID: 9654488
- URL: https://help.fieldpulse.com/en/articles/9654488-ask-a-pro-upcoming-sessions
- Created: 2024-07-24
- Suggested module: Contracts & Signatures
March 2026
- Intercom ID: 13908349
- URL: https://help.fieldpulse.com/en/articles/13908349-march-2026
- Created: 2026-03-02
- Suggested module: Contracts & Signatures
Can I manually change the “next number” of my Job Records?
- Intercom ID: 13047543
- URL: https://help.fieldpulse.com/en/articles/13047543-can-i-manually-change-the-next-number-of-my-job-records
- Created: 2025-12-08
- Suggested module: Contracts & Signatures
Can I manually change the “next number” of my Purchase Orders?
- Intercom ID: 13047913
- URL: https://help.fieldpulse.com/en/articles/13047913-can-i-manually-change-the-next-number-of-my-purchase-orders
- Created: 2025-12-08
- Suggested module: Contracts & Signatures
Can I send a one-time password or verification code to my Engage line/phone number?
- Intercom ID: 14049141
- URL: https://help.fieldpulse.com/en/articles/14049141-can-i-send-a-one-time-password-or-verification-code-to-my-engage-line-phone-number
- Created: 2026-03-12
- Suggested module: Engage
November 2024
- Intercom ID: 10098552
- URL: https://help.fieldpulse.com/en/articles/10098552-november-2024
- Created: 2024-11-07
- Suggested module: QuickBooks Online
July 2025
- Intercom ID: 11683192
- URL: https://help.fieldpulse.com/en/articles/11683192-july-2025
- Created: 2025-06-30
- Suggested module: QuickBooks Desktop
June 2025
- Intercom ID: 11498374
- URL: https://help.fieldpulse.com/en/articles/11498374-june-2025
- Created: 2025-06-02
- Suggested module: QuickBooks Online
January 2025
- Intercom ID: 10346329
- URL: https://help.fieldpulse.com/en/articles/10346329-january-2025
- Created: 2025-01-03
- Suggested module: QuickBooks Online
What is the file size limit for files sent through Engage?
- Intercom ID: 13931472
- URL: https://help.fieldpulse.com/en/articles/13931472-what-is-the-file-size-limit-for-files-sent-through-engage
- Created: 2026-03-04
- Suggested module: Engage
What is the file size limit for email attachments sent through FieldPulse?
- Intercom ID: 13931462
- URL: https://help.fieldpulse.com/en/articles/13931462-what-is-the-file-size-limit-for-email-attachments-sent-through-fieldpulse
- Created: 2026-03-04
- Suggested module: Files
What is the maximum file size limit for the FieldPulse platform?
- Intercom ID: 13931391
- URL: https://help.fieldpulse.com/en/articles/13931391-what-is-the-maximum-file-size-limit-for-the-fieldpulse-platform
- Created: 2026-03-04
- Suggested module: Files
April 2025
- Intercom ID: 11010421
- URL: https://help.fieldpulse.com/en/articles/11010421-april-2025
- Created: 2025-04-01
- Suggested module: Invoices/Estimates
When clicking the hyperlink to take me to the job/service site in the FieldPulse mobile app, how do I reset the default maps app that it opens (Google Maps or Apple Maps)?
- Intercom ID: 13917158
- URL: https://help.fieldpulse.com/en/articles/13917158-when-clicking-the-hyperlink-to-take-me-to-the-job-service-site-in-the-fieldpulse-mobile-app-how-do-i-reset-the-default-maps-app-that-it-opens-google-maps-or-apple-maps
- Created: 2026-03-03
- Suggested module: Job
February 2026
- Intercom ID: 13611758
- URL: https://help.fieldpulse.com/en/articles/13611758-february-2026
- Created: 2026-02-03
- Suggested module: Custom Status/Workflow
January 2026
- Intercom ID: 13273227
- URL: https://help.fieldpulse.com/en/articles/13273227-january-2026
- Created: 2026-01-02
- Suggested module: QuickBooks Desktop
December 2025
- Intercom ID: 13161225
- URL: https://help.fieldpulse.com/en/articles/13161225-december-2025
- Created: 2025-12-15
- Suggested module: Invoices/Estimates
QuickBooks Disconnected
- Intercom ID: 13179611
- URL: https://help.fieldpulse.com/en/articles/13179611-quickbooks-disconnected
- Created: 2025-12-17
- Suggested module: Payments
FieldPulse360: Upcoming Sessions
- Intercom ID: 9071956
- URL: https://help.fieldpulse.com/en/articles/9071956-fieldpulse360-upcoming-sessions
- Created: 2024-03-14
- Suggested module: Contracts & Signatures
FieldPulse360: Fintech for Future Growth
- Intercom ID: 13065981
- URL: https://help.fieldpulse.com/en/articles/13065981-fieldpulse360-fintech-for-future-growth
- Created: 2025-12-09
- Suggested module: FP Payments (Fintech)
November 2025
- Intercom ID: 12713335
- URL: https://help.fieldpulse.com/en/articles/12713335-november-2025
- Created: 2025-10-31
- Suggested module: Payments
October 2025
- Intercom ID: 12460324
- URL: https://help.fieldpulse.com/en/articles/12460324-october-2025
- Created: 2025-09-30
- Suggested module: Commission/Markups/Profitability
September 2025
- Intercom ID: 12143346
- URL: https://help.fieldpulse.com/en/articles/12143346-september-2025
- Created: 2025-09-02
- Suggested module: FP Payments (Fintech)
May 2025
- Intercom ID: 11378999
- URL: https://help.fieldpulse.com/en/articles/11378999-may-2025
- Created: 2025-05-13
- Suggested module: Invoices/Estimates
Company Settings: Accounting Integration
- Intercom ID: 11104549
- URL: https://help.fieldpulse.com/en/articles/11104549-company-settings-accounting-integration
- Created: 2025-04-18
- Suggested module: General UI/UX
FieldPulse360: From Request to Reality - Showcasing Features Built for You
- Intercom ID: 11056922
- URL: https://help.fieldpulse.com/en/articles/11056922-fieldpulse360-from-request-to-reality-showcasing-features-built-for-you
- Created: 2025-04-08
- Suggested module: Custom Status/Workflow
March 2025
- Intercom ID: 10720659
- URL: https://help.fieldpulse.com/en/articles/10720659-march-2025
- Created: 2025-03-06
- Suggested module: Custom Status/Workflow
February 2025
- Intercom ID: 10508920
- URL: https://help.fieldpulse.com/en/articles/10508920-february-2025
- Created: 2025-02-04
- Suggested module: Invoices/Estimates
FieldPulse360: Mastering Extended Timeline Work
- Intercom ID: 10030217
- URL: https://help.fieldpulse.com/en/articles/10030217-fieldpulse360-mastering-extended-timeline-work
- Created: 2024-10-22
- Suggested module: Custom Status/Workflow
FieldPulse360: Make Your Data Make Sense
- Intercom ID: 9972066
- URL: https://help.fieldpulse.com/en/articles/9972066-fieldpulse360-make-your-data-make-sense
- Created: 2024-10-08
- Suggested module: Custom Fields
FieldPulse360: Building Your Brand
- Intercom ID: 9917937
- URL: https://help.fieldpulse.com/en/articles/9917937-fieldpulse360-building-your-brand
- Created: 2024-09-24
- Suggested module: Lead Management
FieldPulse360: Feature Updates
- Intercom ID: 9792861
- URL: https://help.fieldpulse.com/en/articles/9792861-fieldpulse360-feature-updates
- Created: 2024-08-27
- Suggested module: Invoices/Estimates
FieldPulse360: Money Matters
- Intercom ID: 9617310
- URL: https://help.fieldpulse.com/en/articles/9617310-fieldpulse360-money-matters
- Created: 2024-07-16
- Suggested module: FP Payments (Fintech)
FieldPulse360: Feature Enhancements
- Intercom ID: 9424909
- URL: https://help.fieldpulse.com/en/articles/9424909-fieldpulse360-feature-enhancements
- Created: 2024-06-05
- Suggested module: Payments
FieldPulse360: Employee Management
- Intercom ID: 9362339
- URL: https://help.fieldpulse.com/en/articles/9362339-fieldpulse360-employee-management
- Created: 2024-05-22
- Suggested module: UNCLASSIFIED — needs manual placement
October 2024
- Intercom ID: 8890895
- URL: https://help.fieldpulse.com/en/articles/8890895-october-2024
- Created: 2024-01-31
- Suggested module: FP Payments (Fintech)
December 2024
- Intercom ID: 8890901
- URL: https://help.fieldpulse.com/en/articles/8890901-december-2024
- Created: 2024-01-31
- Suggested module: Invoices/Estimates
July 2024
- Intercom ID: 8890891
- URL: https://help.fieldpulse.com/en/articles/8890891-july-2024
- Created: 2024-01-31
- Suggested module: Invoices/Estimates
August 2024
- Intercom ID: 8890893
- URL: https://help.fieldpulse.com/en/articles/8890893-august-2024
- Created: 2024-01-31
- Suggested module: QuickBooks Online
September 2024
- Intercom ID: 8890894
- URL: https://help.fieldpulse.com/en/articles/8890894-september-2024
- Created: 2024-01-31
- Suggested module: Custom Status/Workflow
April 2024
- Intercom ID: 8890884
- URL: https://help.fieldpulse.com/en/articles/8890884-april-2024
- Created: 2024-01-31
- Suggested module: Contracts & Signatures
May 2024
- Intercom ID: 8890887
- URL: https://help.fieldpulse.com/en/articles/8890887-may-2024
- Created: 2024-01-31
- Suggested module: Payments
June 2024
- Intercom ID: 8890890
- URL: https://help.fieldpulse.com/en/articles/8890890-june-2024
- Created: 2024-01-31
- Suggested module: Contracts & Signatures
March 2024
- Intercom ID: 8890882
- URL: https://help.fieldpulse.com/en/articles/8890882-march-2024
- Created: 2024-01-31
- Suggested module: FP Payments (Fintech)
February 2024
- Intercom ID: 8890878
- URL: https://help.fieldpulse.com/en/articles/8890878-february-2024
- Created: 2024-01-31
- Suggested module: FP Payments (Fintech)
January 2024
- Intercom ID: 8776652
- URL: https://help.fieldpulse.com/en/articles/8776652-january-2024
- Created: 2024-01-04
- Suggested module: Invoices/Estimates
New Job Templates
- Intercom ID: 6990038
- URL: https://help.fieldpulse.com/en/articles/6990038-new-job-templates
- Created: 2023-02-15
- Suggested module: Invoices/Estimates
$100 Gift Card- Capterra Review
- Intercom ID: 6703382
- URL: https://help.fieldpulse.com/en/articles/6703382-100-gift-card-capterra-review
- Created: 2022-11-03
- Suggested module: Engage
August 2025
- Intercom ID: 11971447
- URL: https://help.fieldpulse.com/en/articles/11971447-august-2025
- Created: 2025-08-08
- Suggested module: Invoices/Estimates
Deleted/Unpublished Articles
These articles exist in module-config.json but are no longer published in Intercom.
- sync quickbooks desktop (ID: 9307828) —
QuickBooks Desktop/sync-quickbooks-desktop.mdx - custom reporting dashboard (ID: 9142751) —
Reporting/custom-reporting-dashboard.mdx - my business has a complex team structure can we operate in teams (ID: 482415) —
General UI/UX/my-business-has-a-complex-team-structure-can-we-operate-in-teams.mdx - ask a pro from clicks to customers unlocking lead conversion (ID: 10514580) —
Customer/ask-a-pro-from-clicks-to-customers-unlocking-lead-conversion.mdx - flat rate job commissions (ID: 12525029) —
Commission/Markups/Profitability/flat-rate-job-commissions.mdx - pricebook (ID: 8729090) —
Dynamic Proposals/pricebook.mdx