> ## Documentation Index
> Fetch the complete documentation index at: https://help.fieldpulse.com/llms.txt
> Use this file to discover all available pages before exploring further.
# Setting Up a Custom Sales Pipeline
> Enable the Custom Sales Pipeline in FieldPulse, build pipeline statuses that fit how you sell, and drag customers between stages in the By Pipeline view.
> **Who uses this:** Administrators — enabling the Custom Sales Pipeline and building pipeline statuses both happen in **Company Settings**, which only Administrators can view. **Availability:** All regions.
The Custom Sales Pipeline tracks each [customer](https://www.fieldpulse.com/features/customer-management) through your sales process. You name the pipeline statuses yourself, add a status to each customer, and then see your customers laid out by stage on one board.
## Overview
Setting up the Custom Sales Pipeline takes three parts: enable the feature, build the pipeline statuses that match how you sell, and add a status to each customer. Once statuses are in place, the **By Pipeline** view shows your customers as cards you can drag from one stage to the next.
## Video walkthrough
Watch a short walkthrough of the Custom Sales Pipeline, then follow the written steps below.
## Before you begin
* Sign in as an Administrator. **Company Settings**, where both the feature toggle and the pipeline statuses live, is Administrator-only.
* Decide the stages your sales process actually moves through before you build them in FieldPulse — for example, New Lead, Estimate Sent, Follow-Up, Won, Lost. Naming the stages after real steps your team takes makes the pipeline easier to read later.
## Step-by-step setup
### 1. Enable the Custom Sales Pipeline
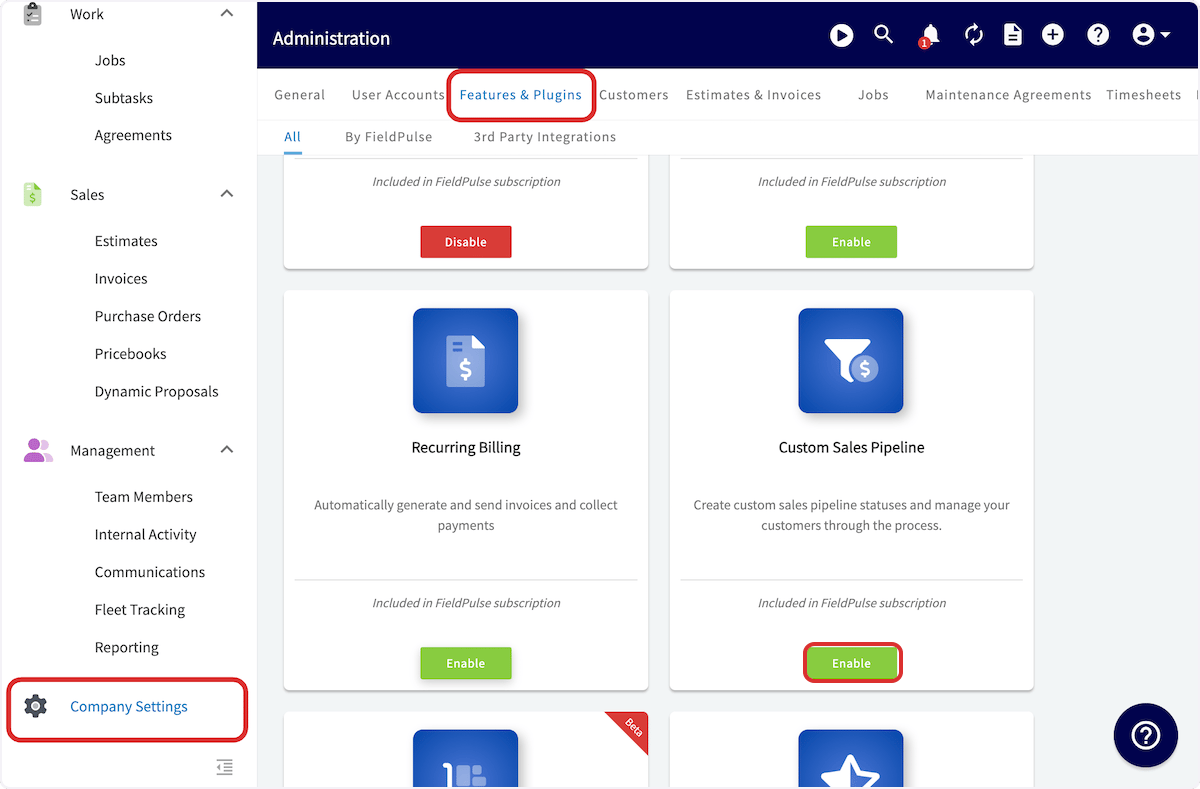
The Custom Sales Pipeline is off until an Administrator turns it on in **Features & Plugins**.
1. Go to **Company Settings** > **Features & Plugins**.
2. Find the **Custom Sales Pipeline** tile and select **Enable**.
 ### 2. Build your pipeline statuses
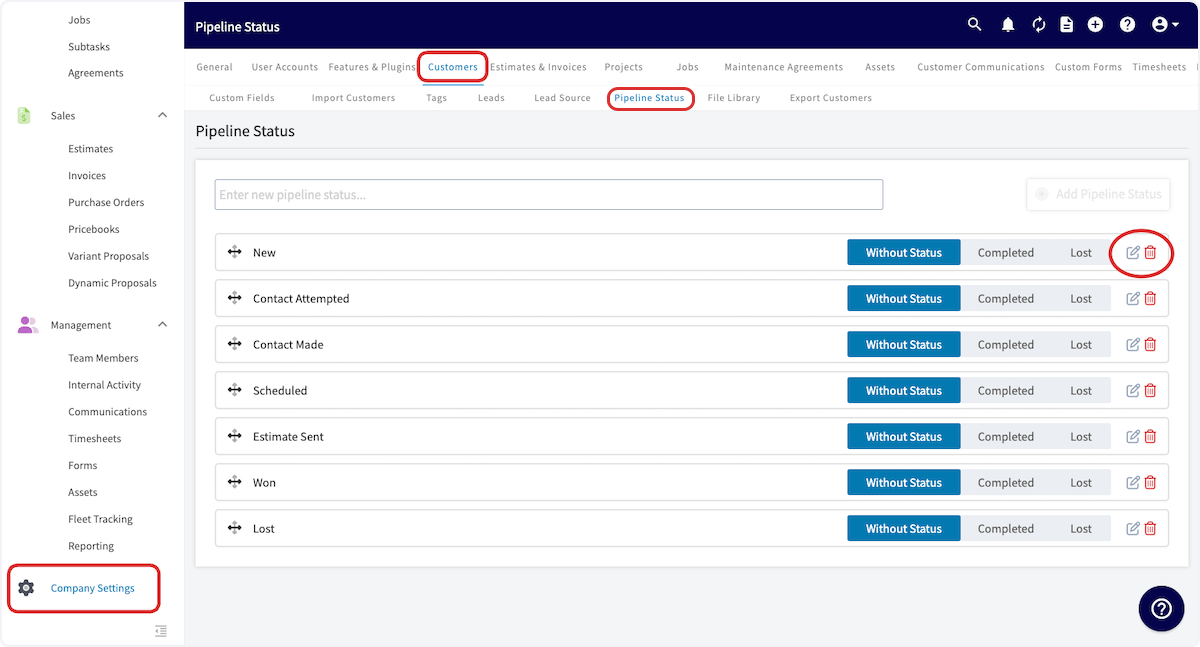
Pipeline statuses are yours to name, and you manage the whole list on the **Pipeline Status** page.
1. Go to **Company Settings** > **Customers** > **Pipeline Status**.
### 2. Build your pipeline statuses
Pipeline statuses are yours to name, and you manage the whole list on the **Pipeline Status** page.
1. Go to **Company Settings** > **Customers** > **Pipeline Status**.
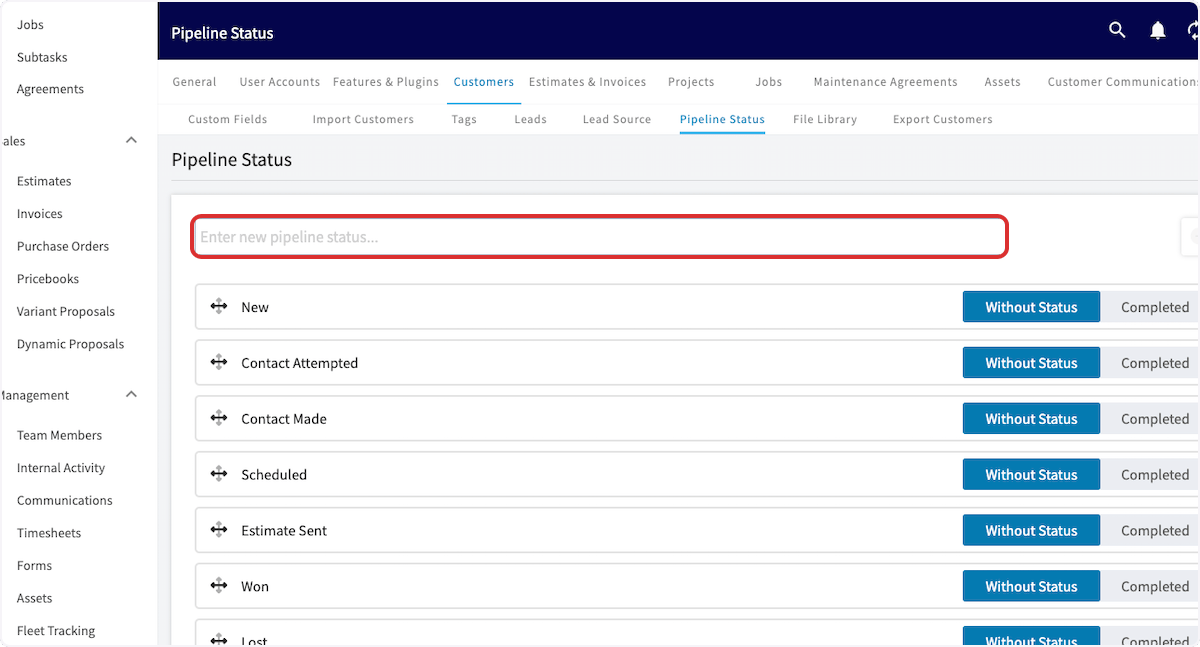
 2. Type the new status name in the **Enter new pipeline status** field.
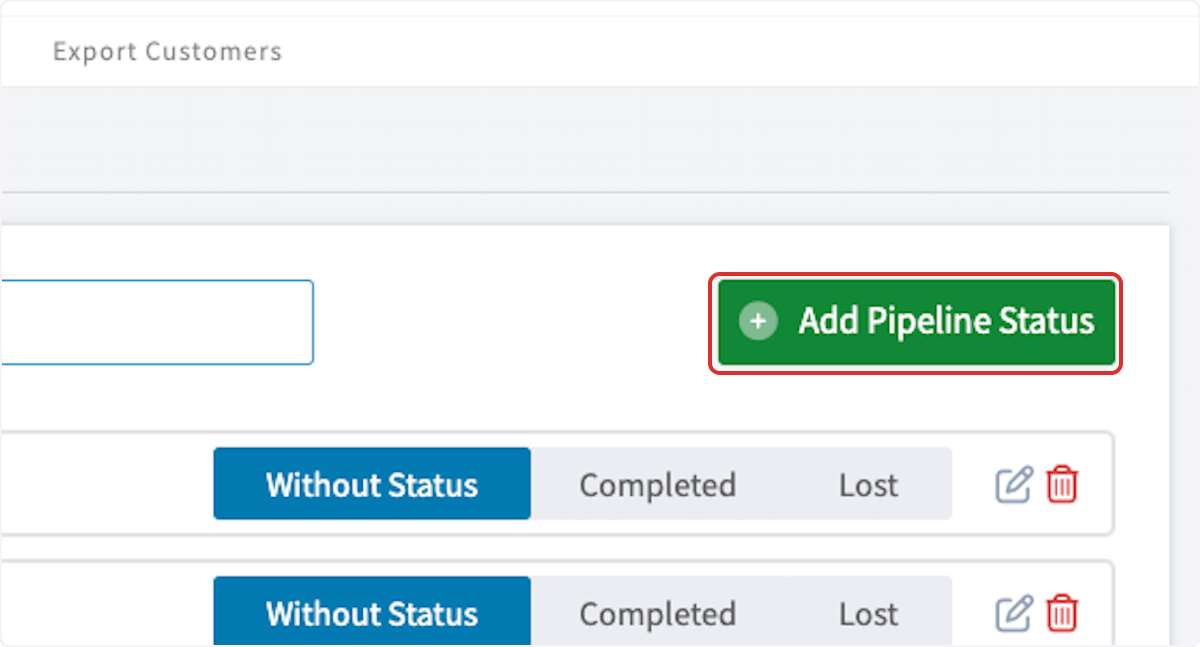
3. Select **Add Pipeline Status**.
2. Type the new status name in the **Enter new pipeline status** field.
3. Select **Add Pipeline Status**.
 To edit a status, select the pencil icon on its row. To delete a status, select the trash icon on its row.
### 3. Add a pipeline status to a customer
You set a customer's pipeline status on the customer record itself.
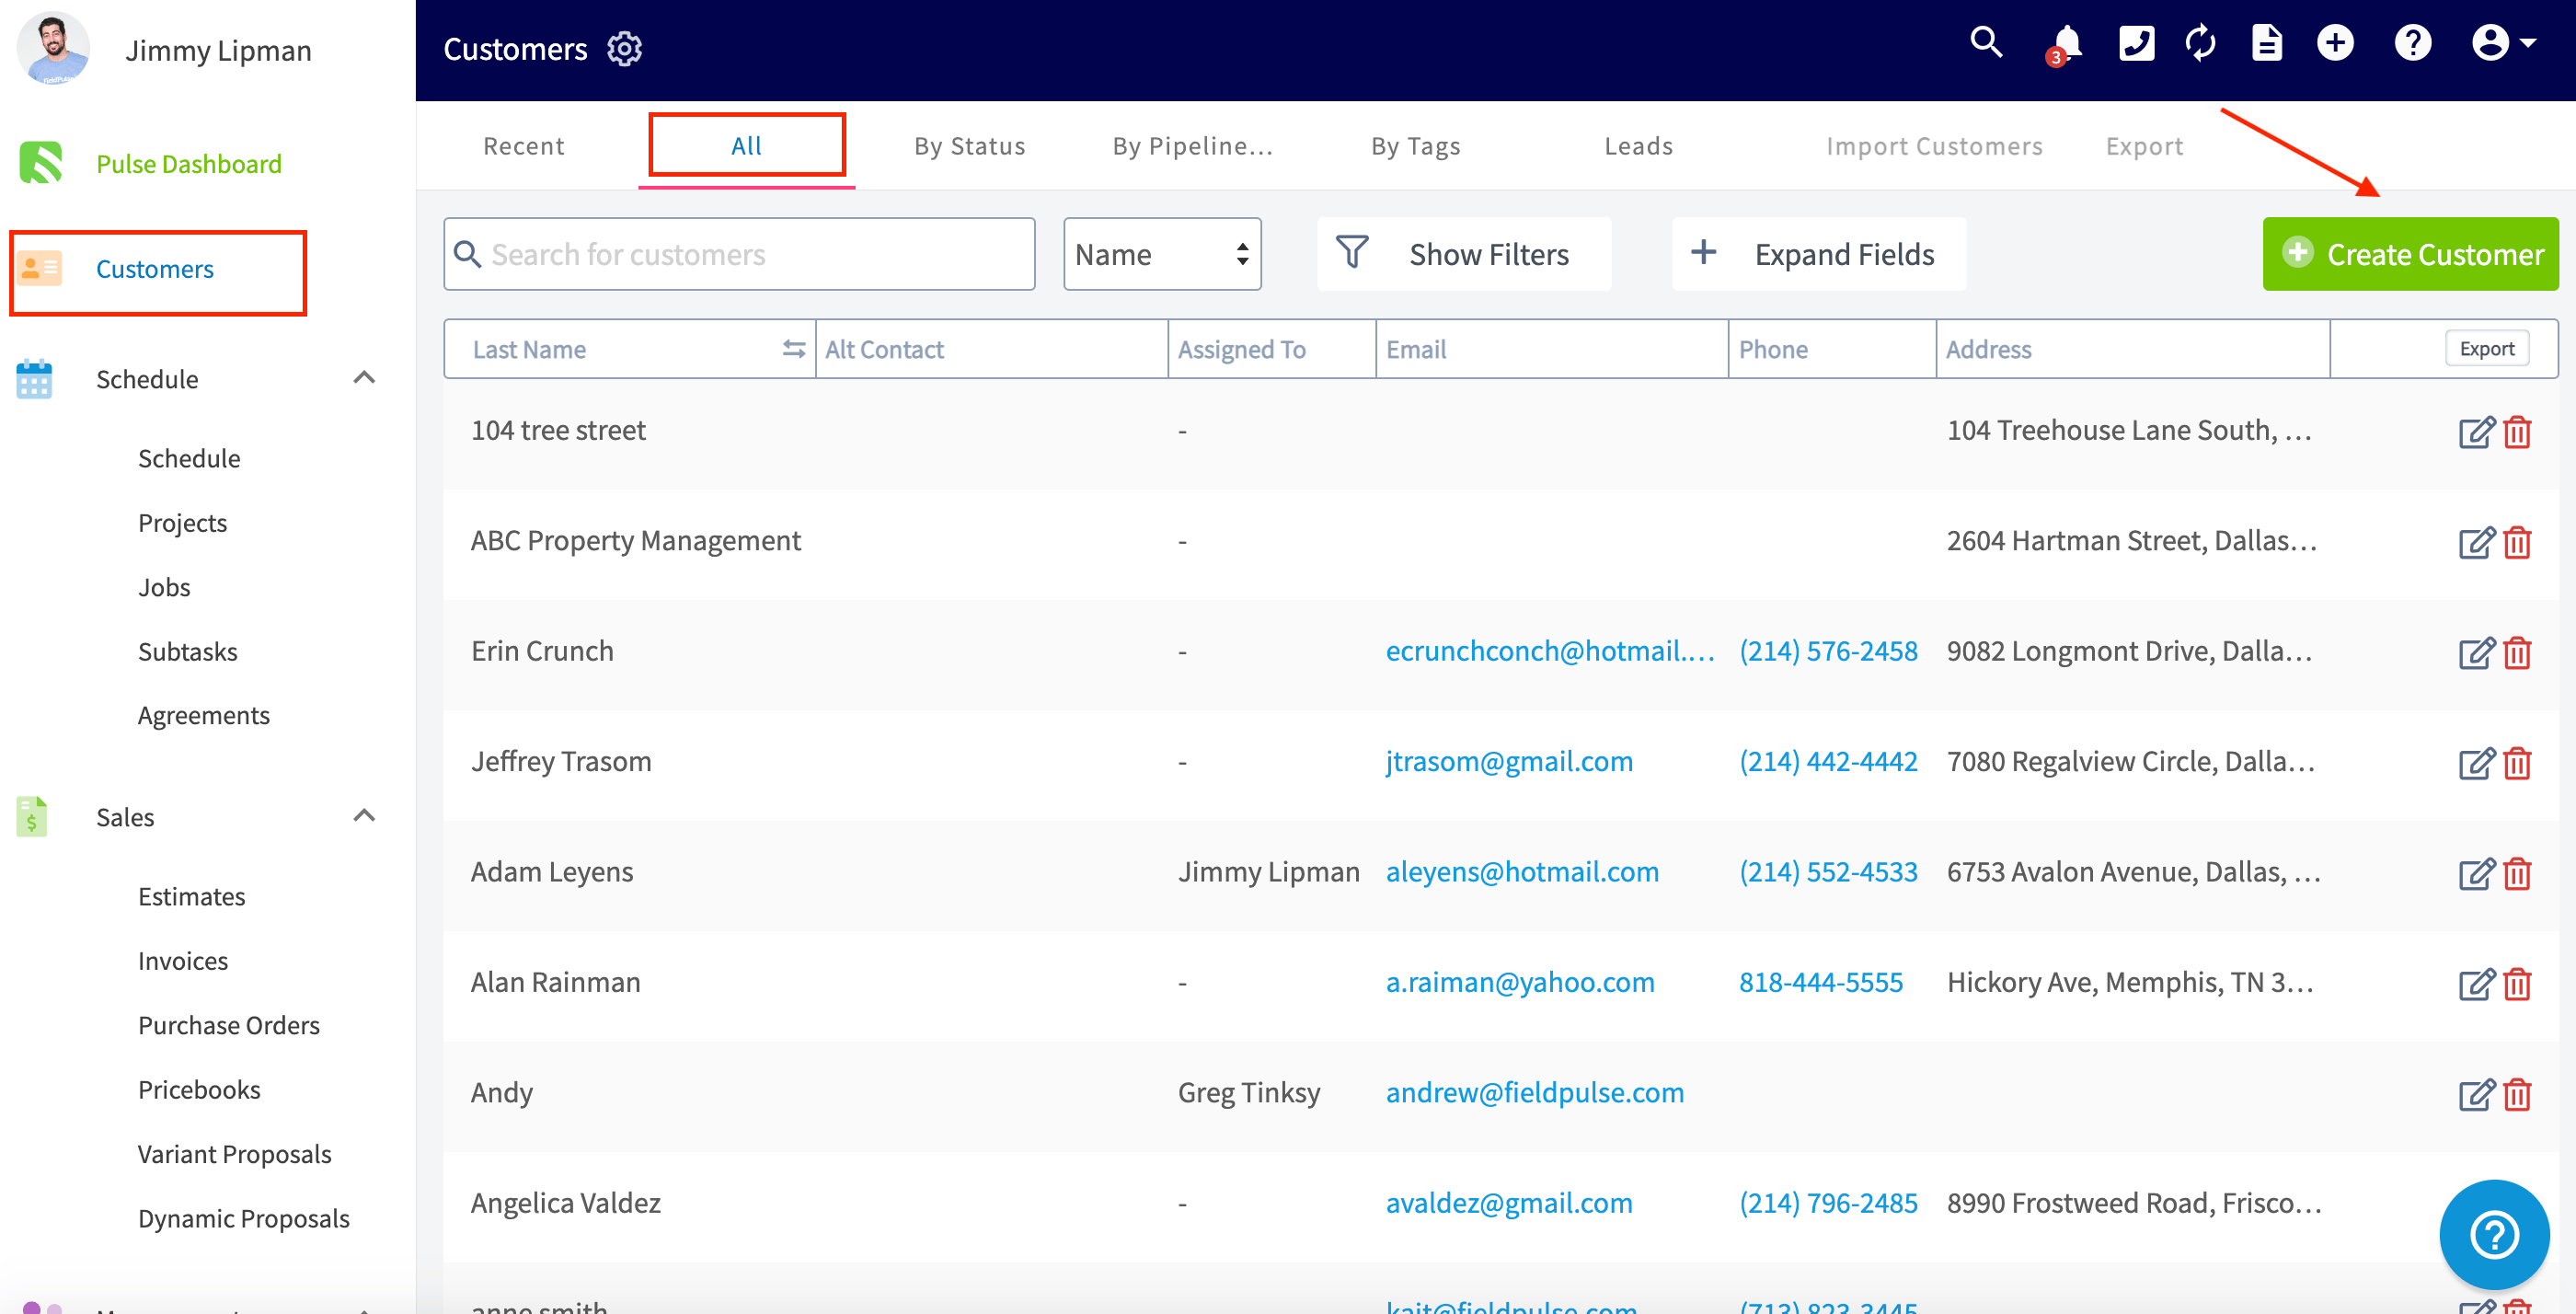
1. Select **Customers** in the left navigation.
2. Select the customer's name to open the customer record, then select **Edit**. If the customer does not exist yet, select **Create Customer** and build the record first.
To edit a status, select the pencil icon on its row. To delete a status, select the trash icon on its row.
### 3. Add a pipeline status to a customer
You set a customer's pipeline status on the customer record itself.
1. Select **Customers** in the left navigation.
2. Select the customer's name to open the customer record, then select **Edit**. If the customer does not exist yet, select **Create Customer** and build the record first.
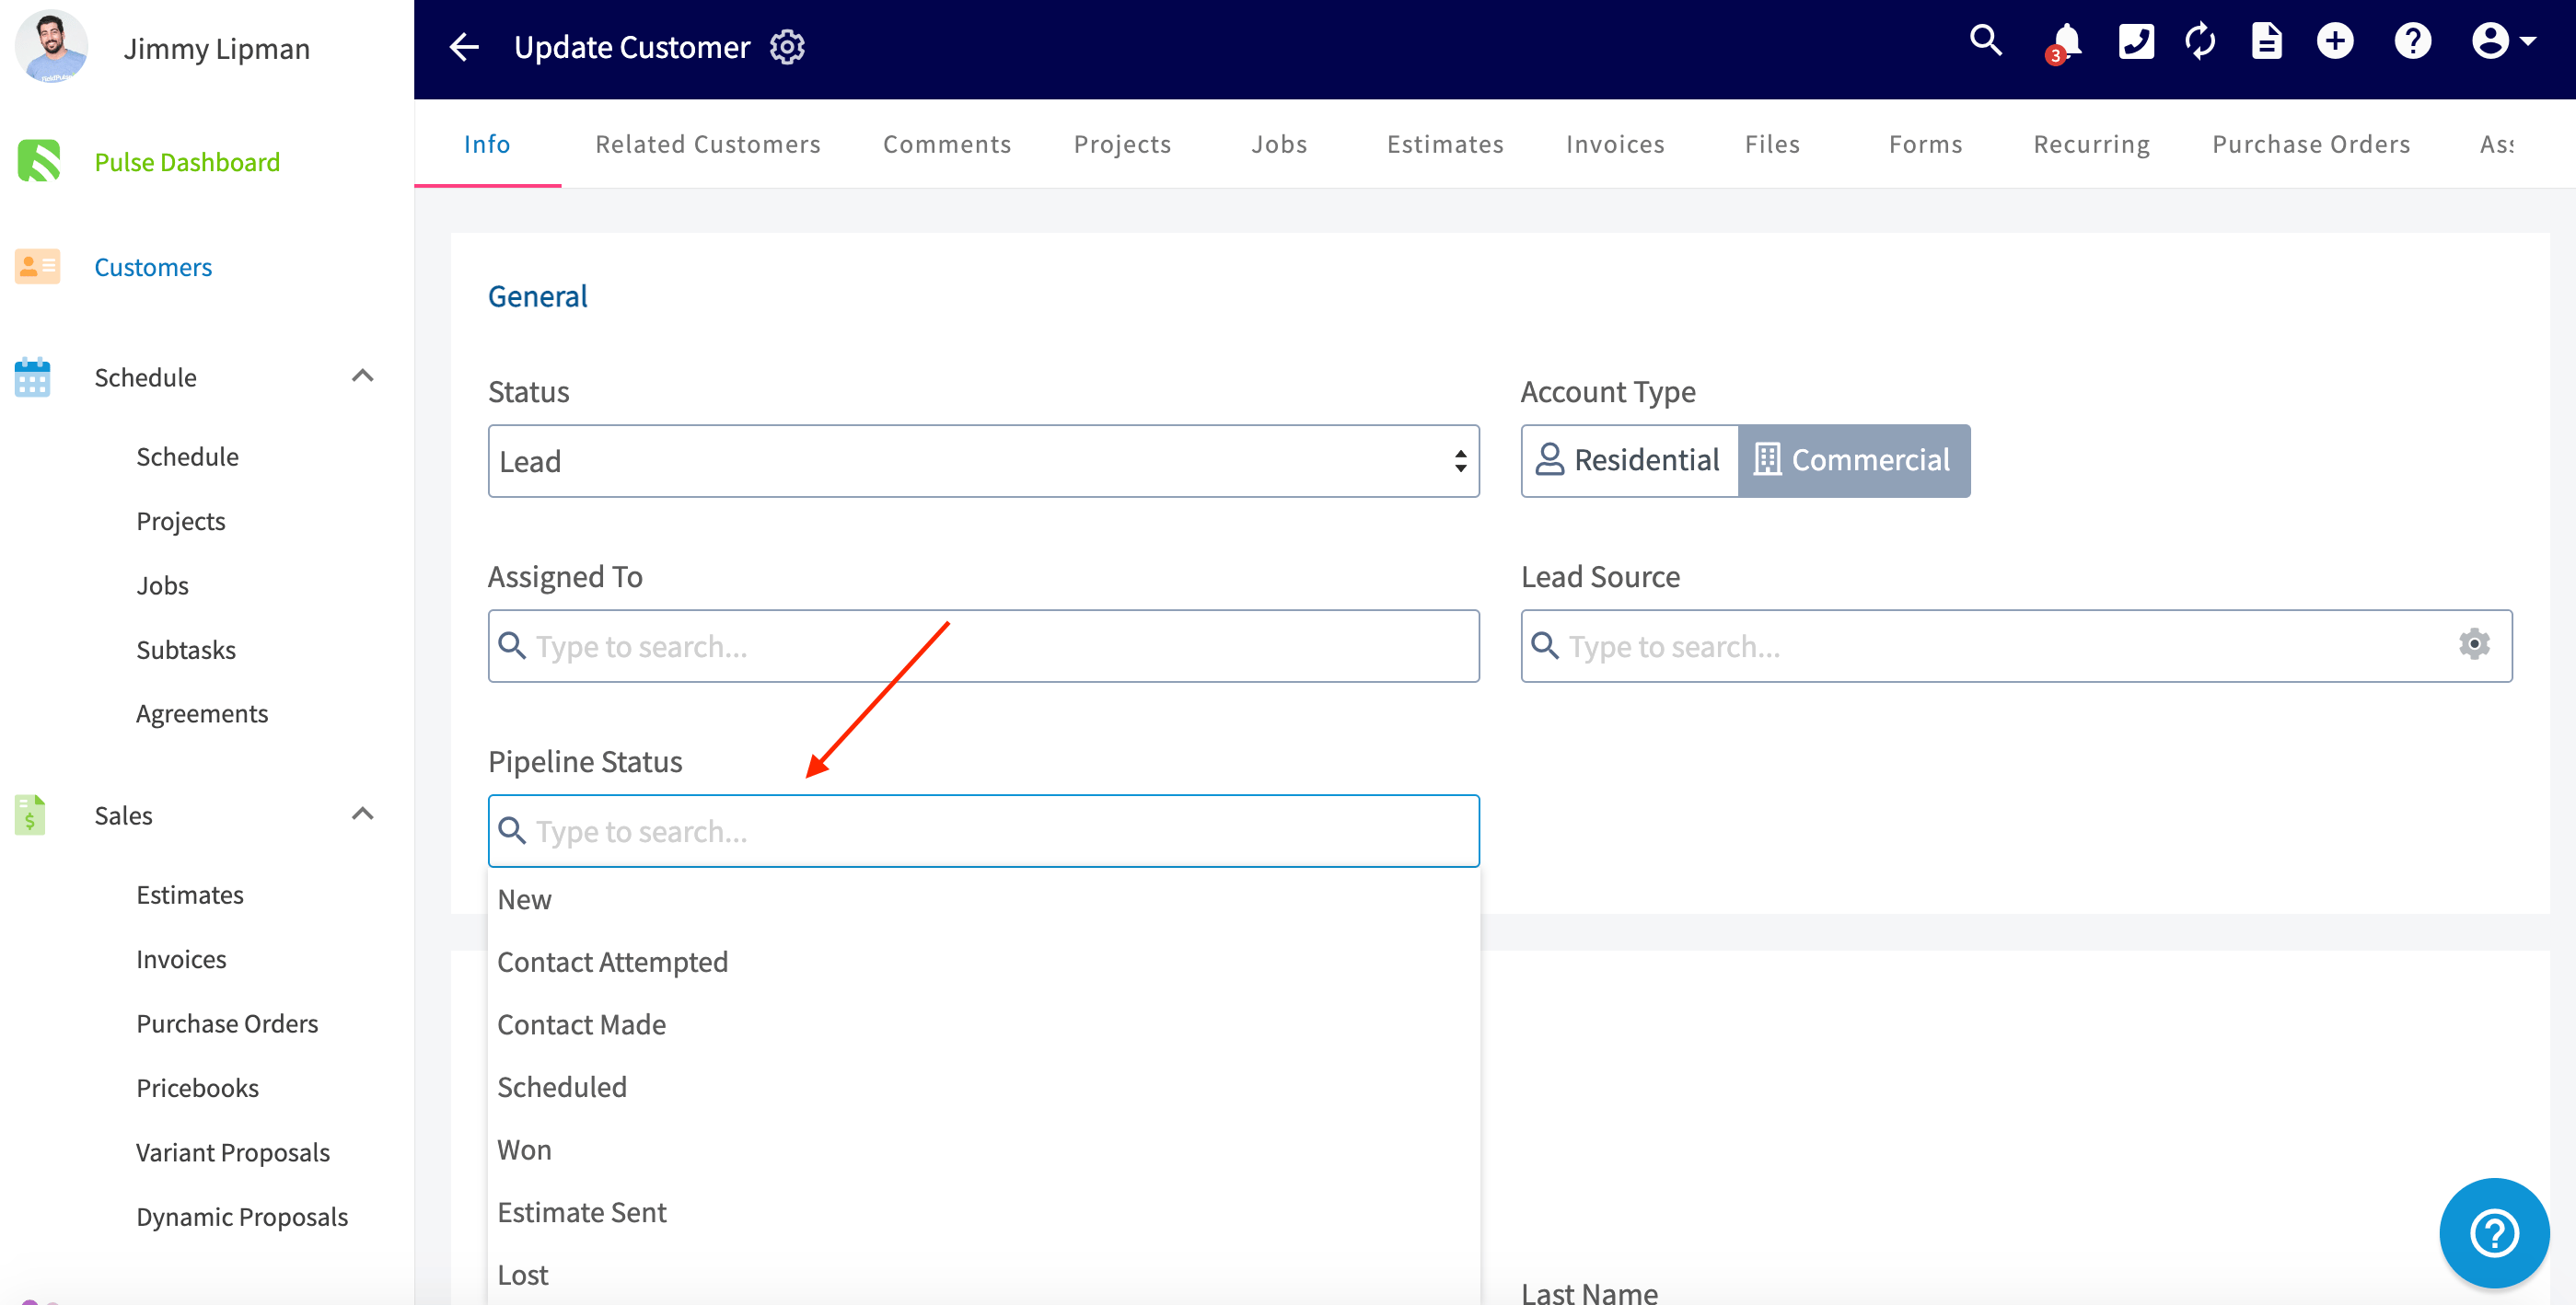
 3. Select the **Pipeline Status** field and choose the status that matches where the customer sits in your process.
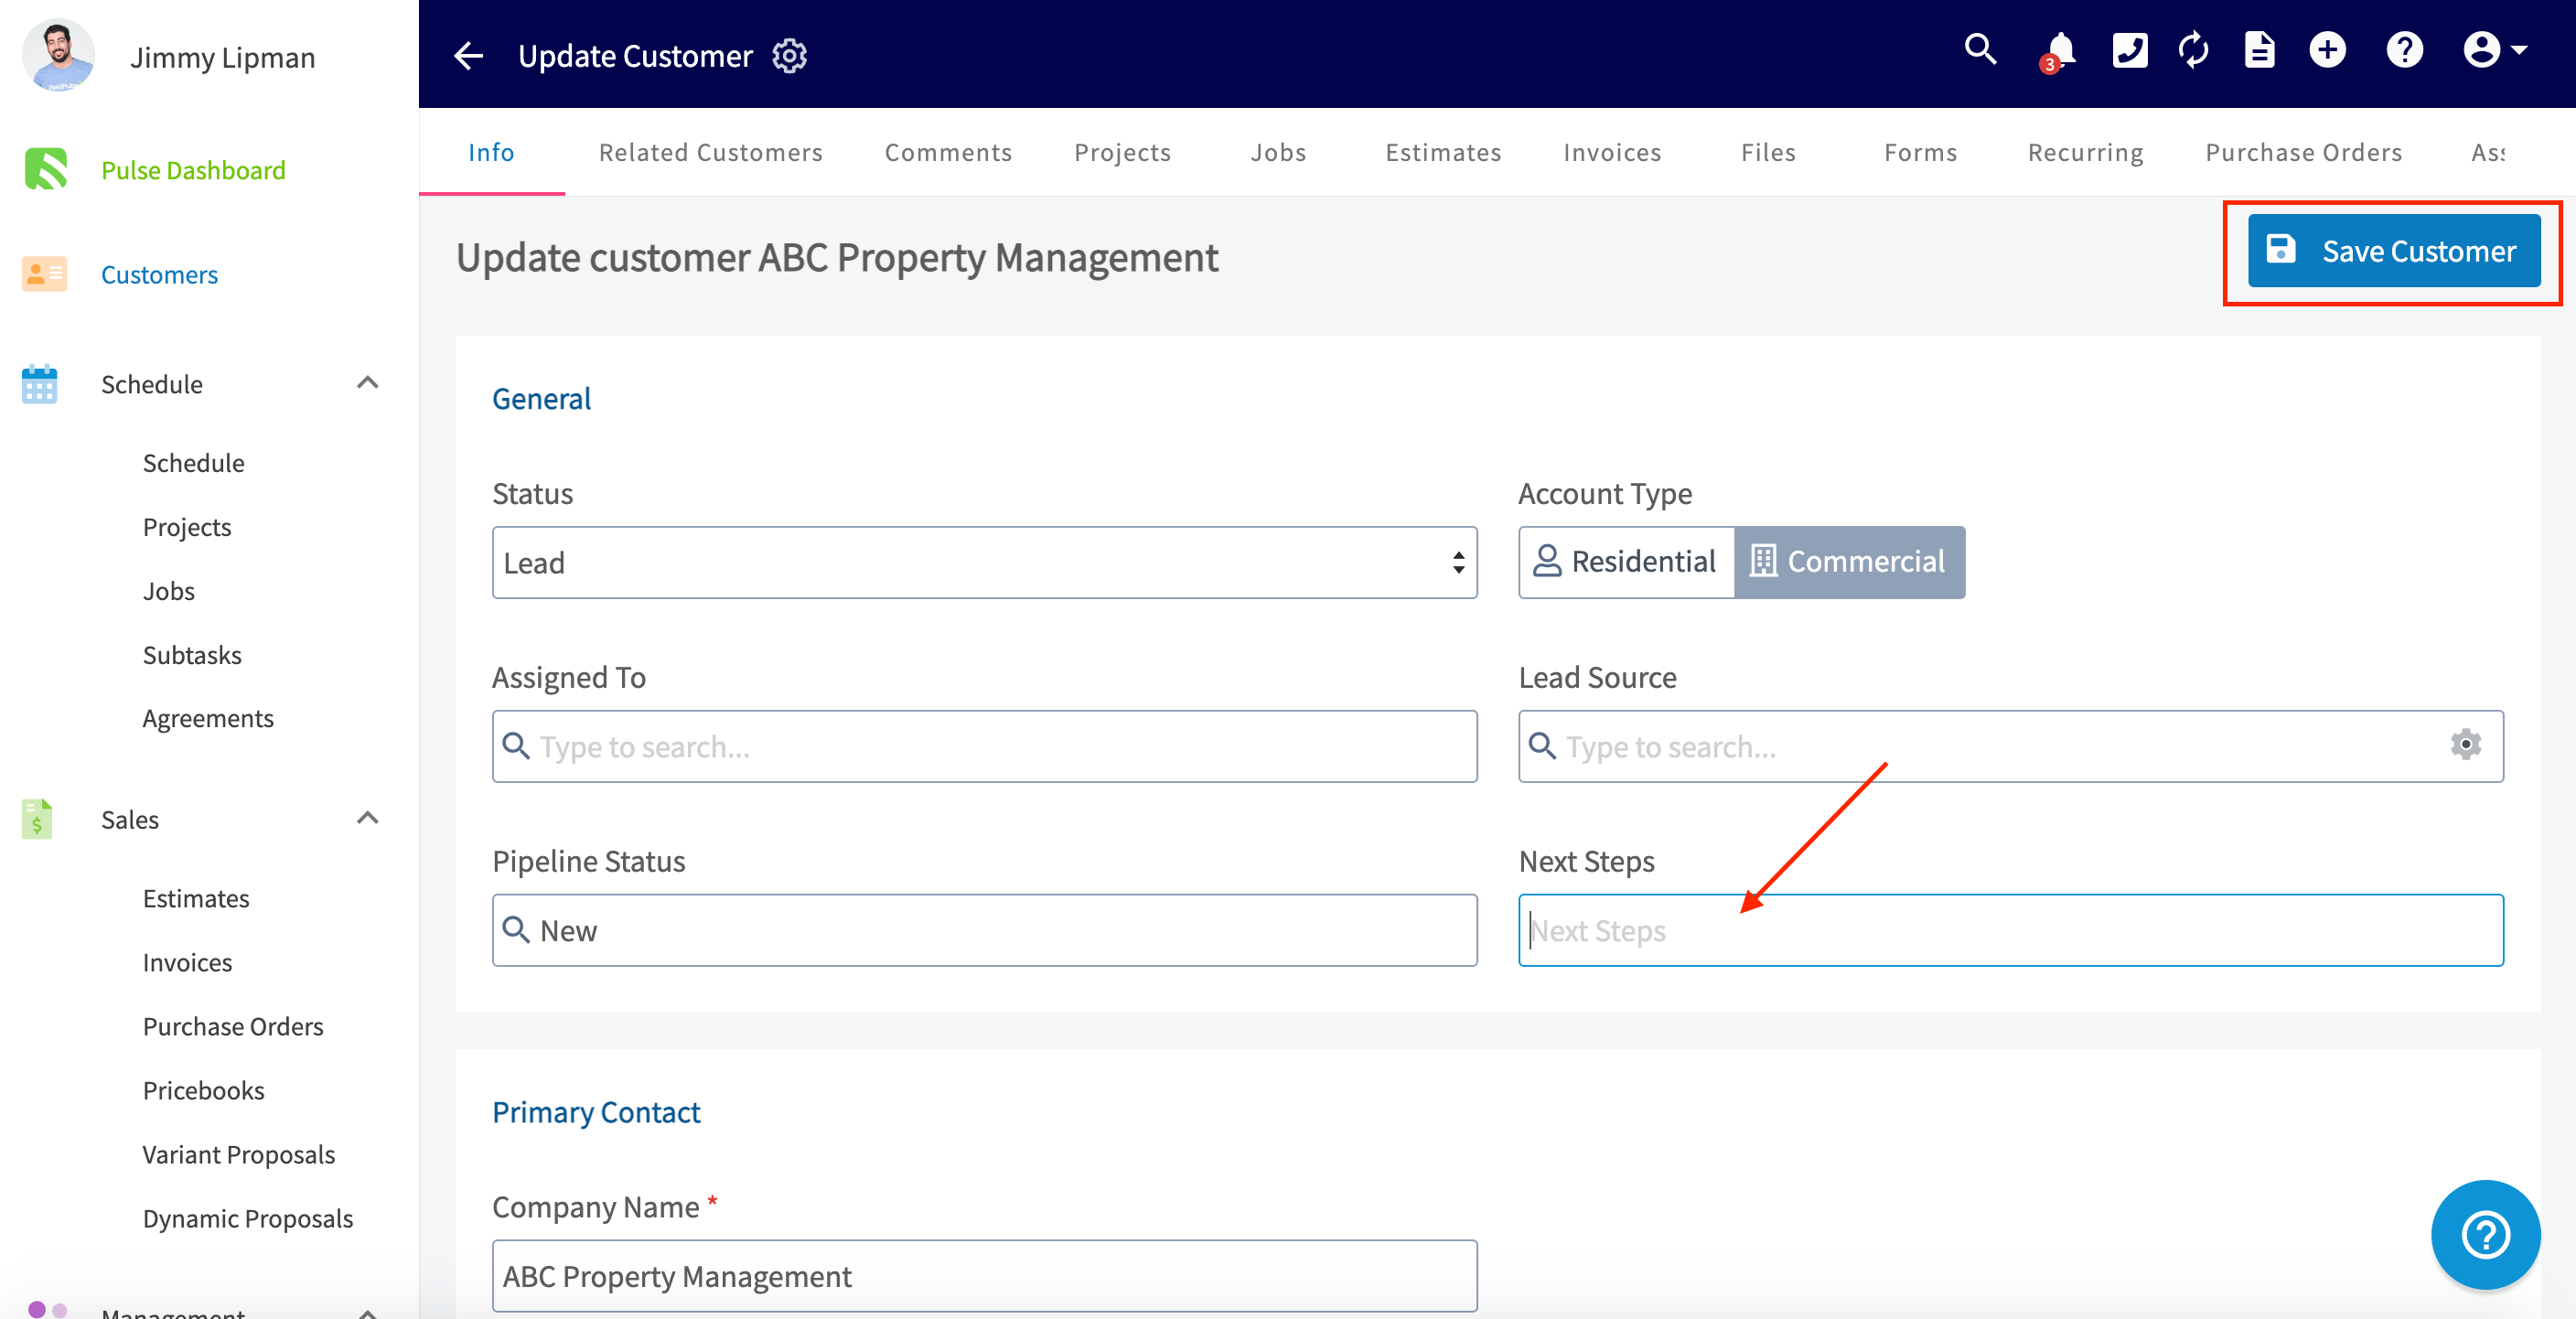
 4. Add **Next Steps** if you want to record the follow-up action for that customer.
5. Select **Save Customer**.
4. Add **Next Steps** if you want to record the follow-up action for that customer.
5. Select **Save Customer**.
 ### 4. Work your customers in the By Pipeline view
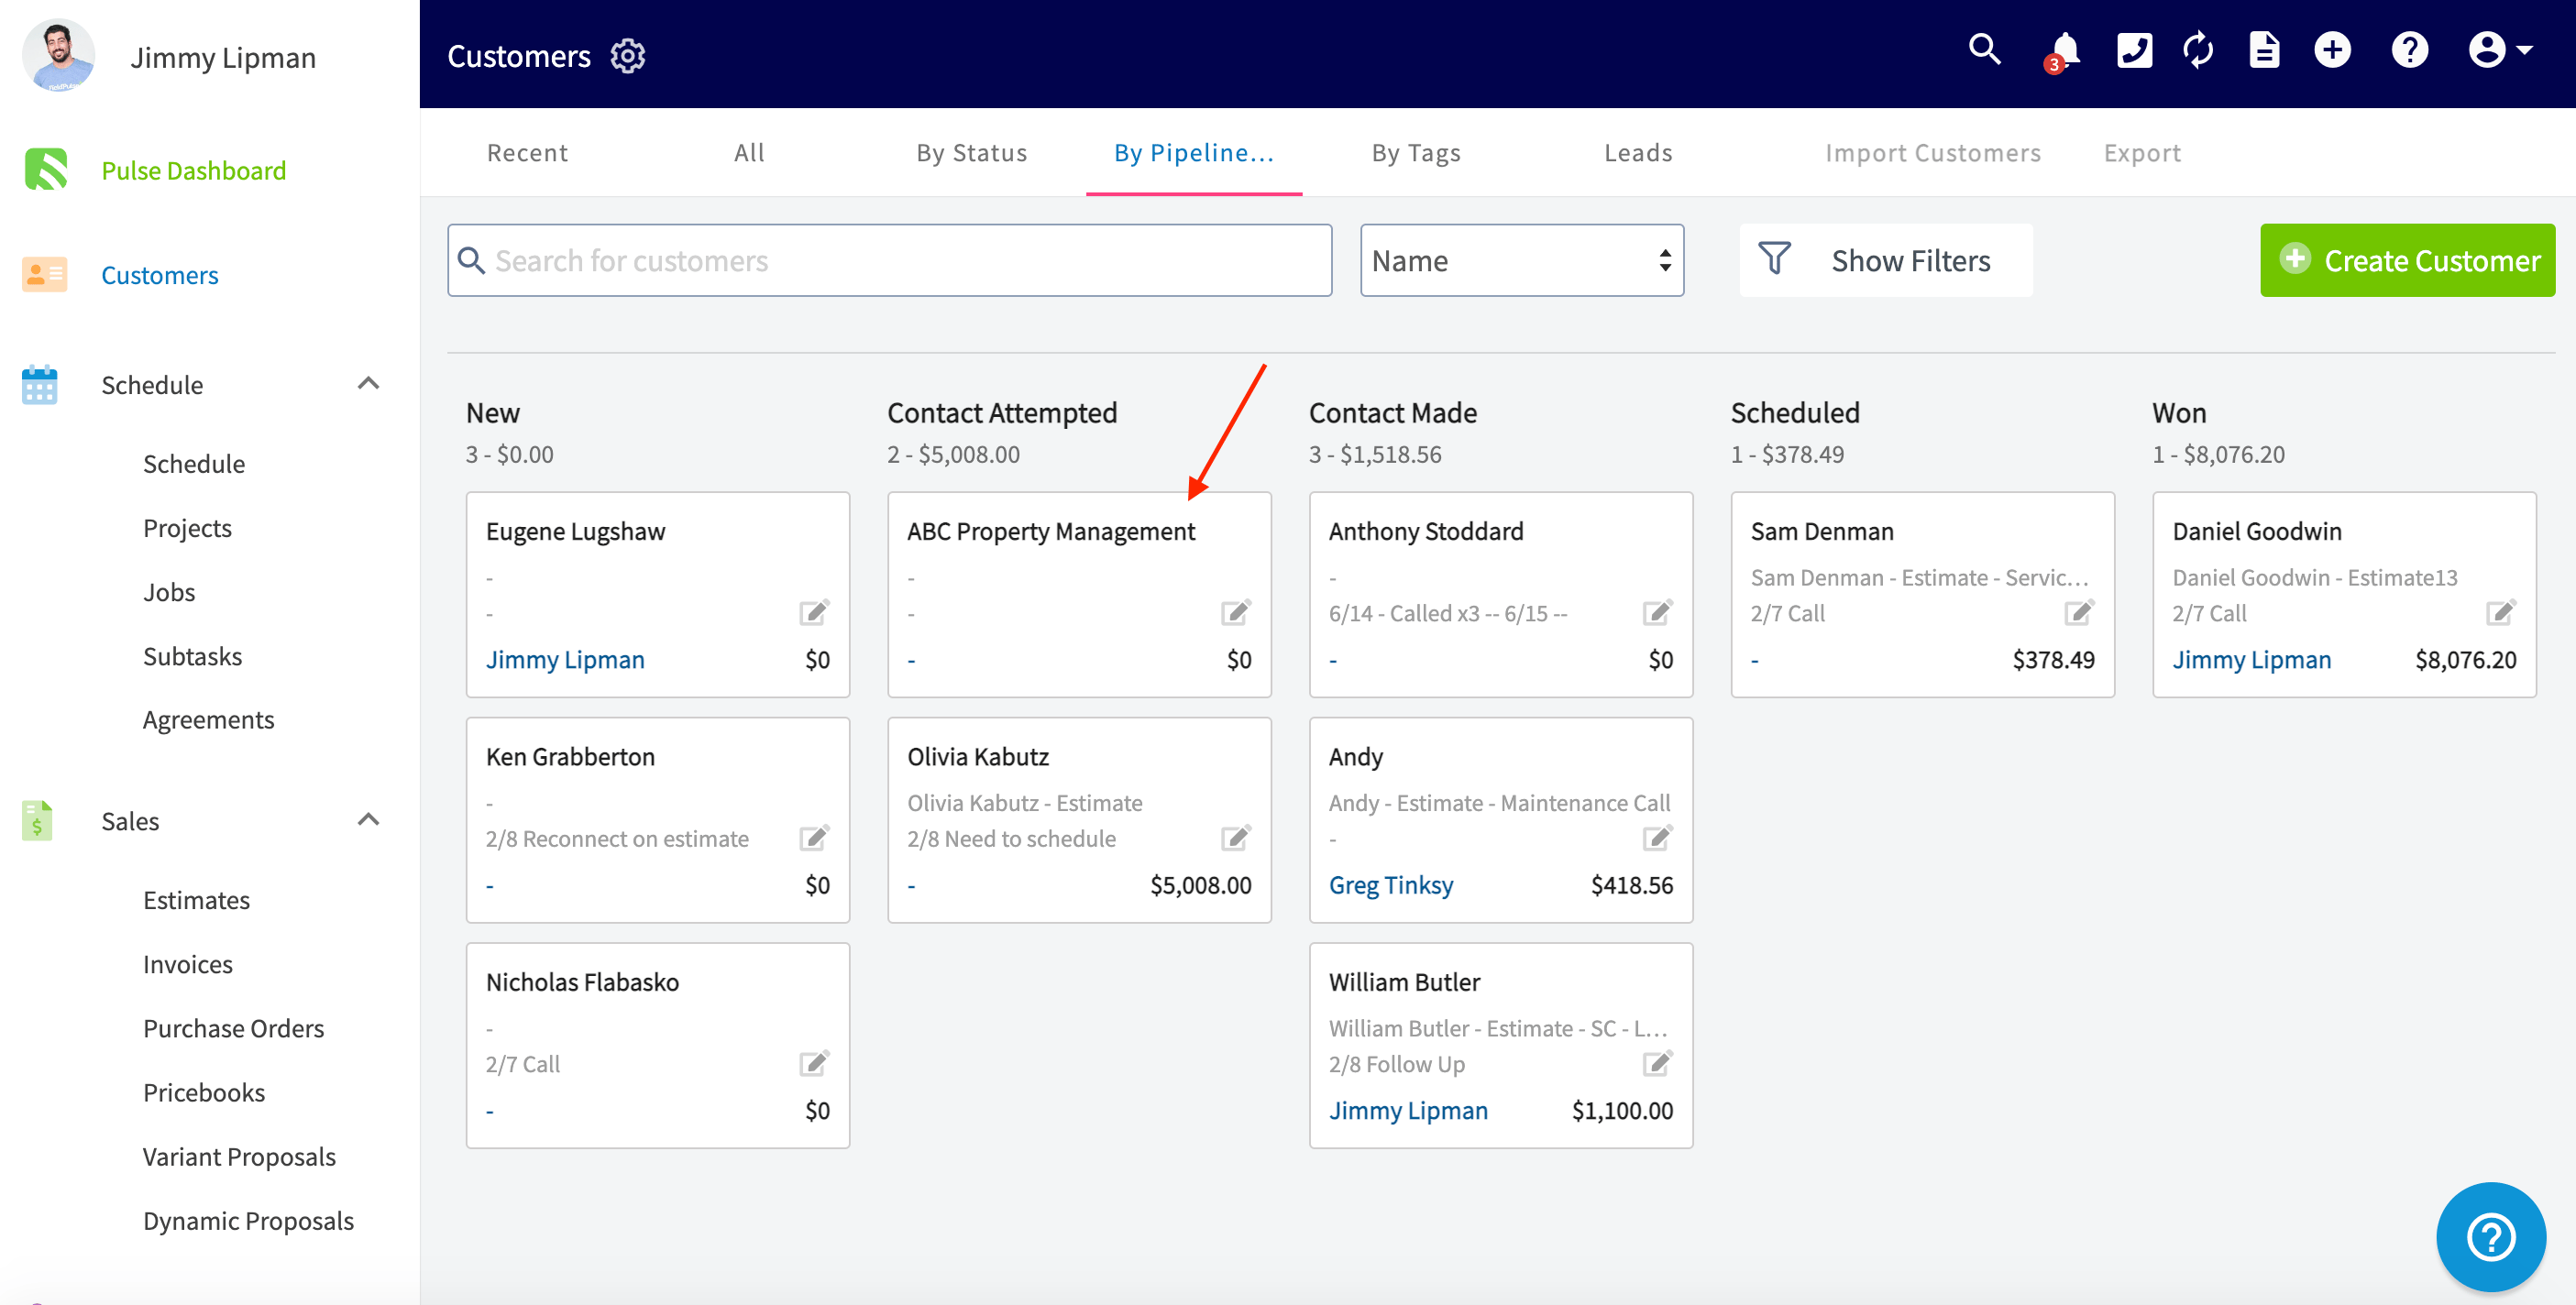
The **By Pipeline** view sorts your customers into a column per pipeline status, and shows each customer's next steps and the monetary amount of their most recent estimate.
1. Select **Customers**, then open the **By Pipeline** tab.
### 4. Work your customers in the By Pipeline view
The **By Pipeline** view sorts your customers into a column per pipeline status, and shows each customer's next steps and the monetary amount of their most recent estimate.
1. Select **Customers**, then open the **By Pipeline** tab.
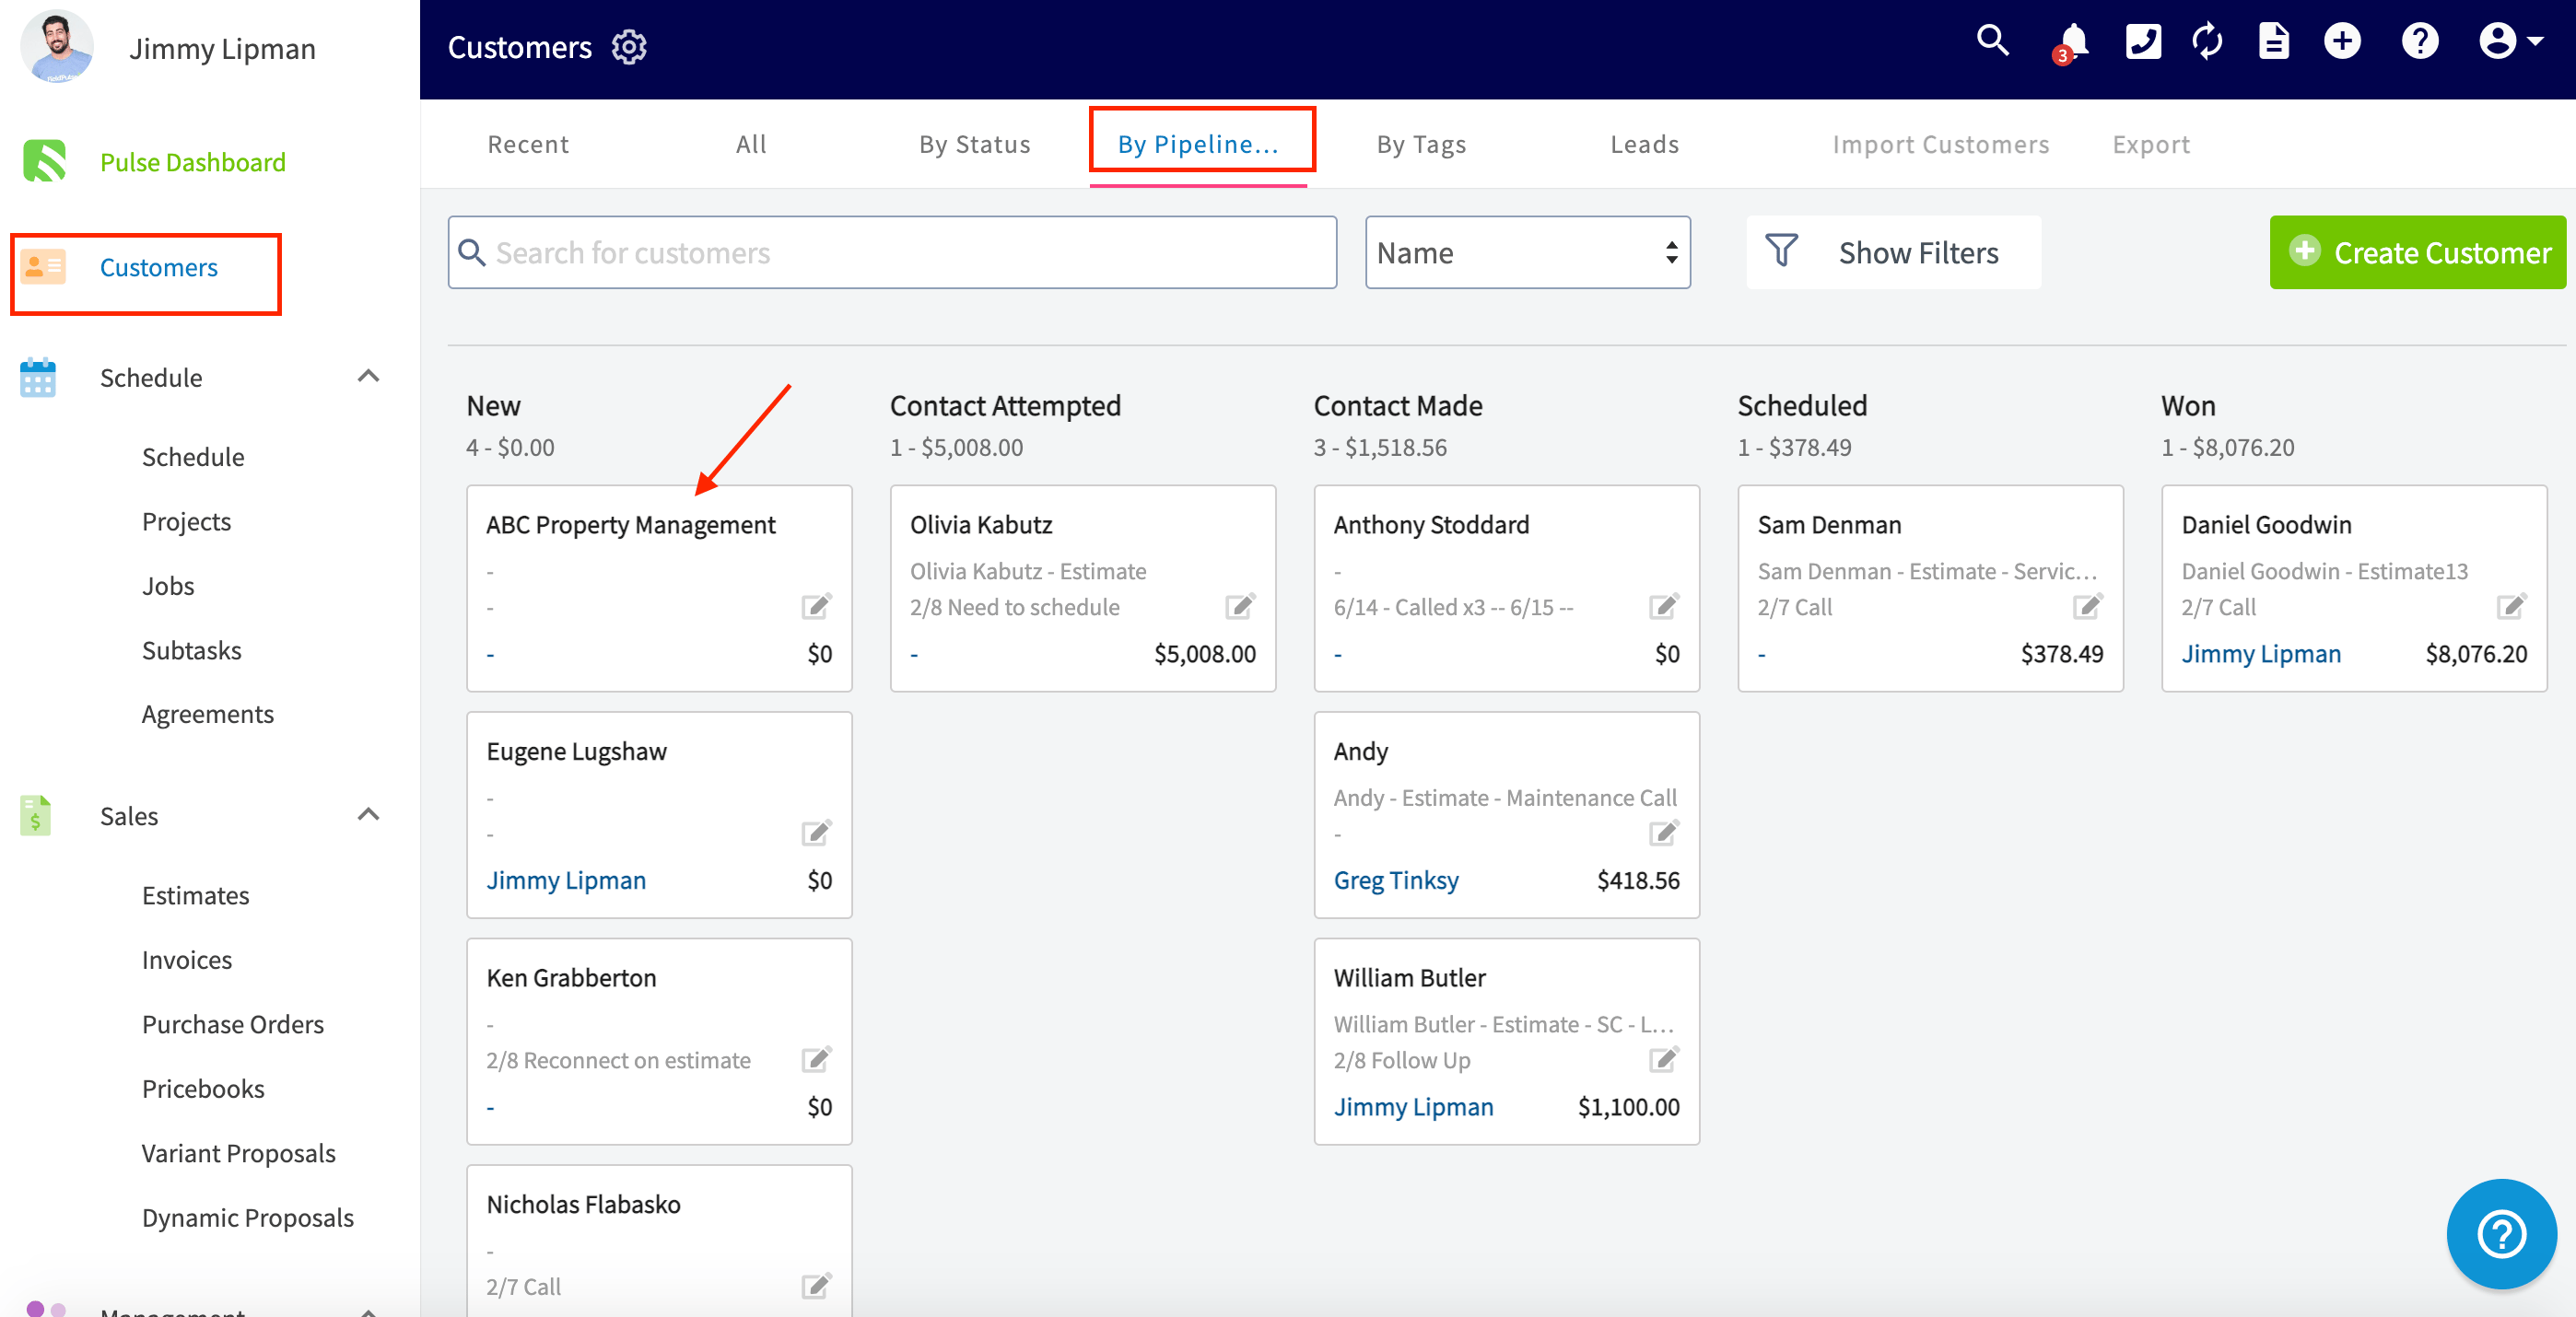 2. Drag a customer's card into another column. Dropping the card there changes that customer's pipeline status.
 Once a customer has been marked lost or completed for one week, that customer no longer appears in the **By Pipeline** view. The pipeline status is still stored on the customer record.
## Settings reference
| Control | Where it lives | What it does |
| ---------------------------------------------------------------------- | ---------------------------------------------- | --------------------------------------------------------------------------------------- |
| **Enter new pipeline status** field and **Add Pipeline Status** button | Company Settings > Customers > Pipeline Status | Creates a new pipeline status |
| Pencil icon | Company Settings > Customers > Pipeline Status | Edits an existing pipeline status |
| Trash icon | Company Settings > Customers > Pipeline Status | Deletes a pipeline status |
| **Pipeline Status** field | Customer record | Sets the stage the customer sits in, which is the column the customer's card appears in |
| **Next Steps** field | Customer record | Records the follow-up action, shown on the customer's card in the By Pipeline view |
## Related articles
* [How to Track Lead Sources](/customers/leads-pipeline/sources)
* [How to Create a Customer](/customers/managing-customers/creating-a-customer)
* [Setting Up Customer Statuses](/customers/managing-customers/statuses)
Your setup is working when every active customer sits in the right column of the **By Pipeline** view, and you can move a customer forward by dragging their card instead of opening one record at a time.
## Related topics
- [Leads & Pipeline](/customers/leads-pipeline/index.md)
- [Setting Up Customer Statuses](/customers/managing-customers/statuses.md)
- [How to Create a Customer](/customers/managing-customers/creating-a-customer.md)
- [Customer Record Field Details](/customers/managing-customers/record-fields.md)
Once a customer has been marked lost or completed for one week, that customer no longer appears in the **By Pipeline** view. The pipeline status is still stored on the customer record.
## Settings reference
| Control | Where it lives | What it does |
| ---------------------------------------------------------------------- | ---------------------------------------------- | --------------------------------------------------------------------------------------- |
| **Enter new pipeline status** field and **Add Pipeline Status** button | Company Settings > Customers > Pipeline Status | Creates a new pipeline status |
| Pencil icon | Company Settings > Customers > Pipeline Status | Edits an existing pipeline status |
| Trash icon | Company Settings > Customers > Pipeline Status | Deletes a pipeline status |
| **Pipeline Status** field | Customer record | Sets the stage the customer sits in, which is the column the customer's card appears in |
| **Next Steps** field | Customer record | Records the follow-up action, shown on the customer's card in the By Pipeline view |
## Related articles
* [How to Track Lead Sources](/customers/leads-pipeline/sources)
* [How to Create a Customer](/customers/managing-customers/creating-a-customer)
* [Setting Up Customer Statuses](/customers/managing-customers/statuses)
Your setup is working when every active customer sits in the right column of the **By Pipeline** view, and you can move a customer forward by dragging their card instead of opening one record at a time.
## Related topics
- [Leads & Pipeline](/customers/leads-pipeline/index.md)
- [Setting Up Customer Statuses](/customers/managing-customers/statuses.md)
- [How to Create a Customer](/customers/managing-customers/creating-a-customer.md)
- [Customer Record Field Details](/customers/managing-customers/record-fields.md)