> ## Documentation Index
> Fetch the complete documentation index at: https://help.fieldpulse.com/llms.txt
> Use this file to discover all available pages before exploring further.
# How to Tag and Sort Customers
> Create and apply custom customer tags in FieldPulse, view customers by tag, and manage your tag list to filter and report on customer segments.
> **Who uses this:** Anyone who creates or edits customer records adds and removes tags on those records; the account-wide tag list is managed in **Company Settings**. **Availability:** All regions.
Custom tags group your customers into lists by trade, service, or any other category you choose. If you do HVAC work for some customers, handyman work for others, and roofing for the rest, you can create HVAC, Handyman, and Roofing tags and pull up each group on its own. Tagging a [customer](https://www.fieldpulse.com/features/customer-management) record is how you build those segments.
## Overview
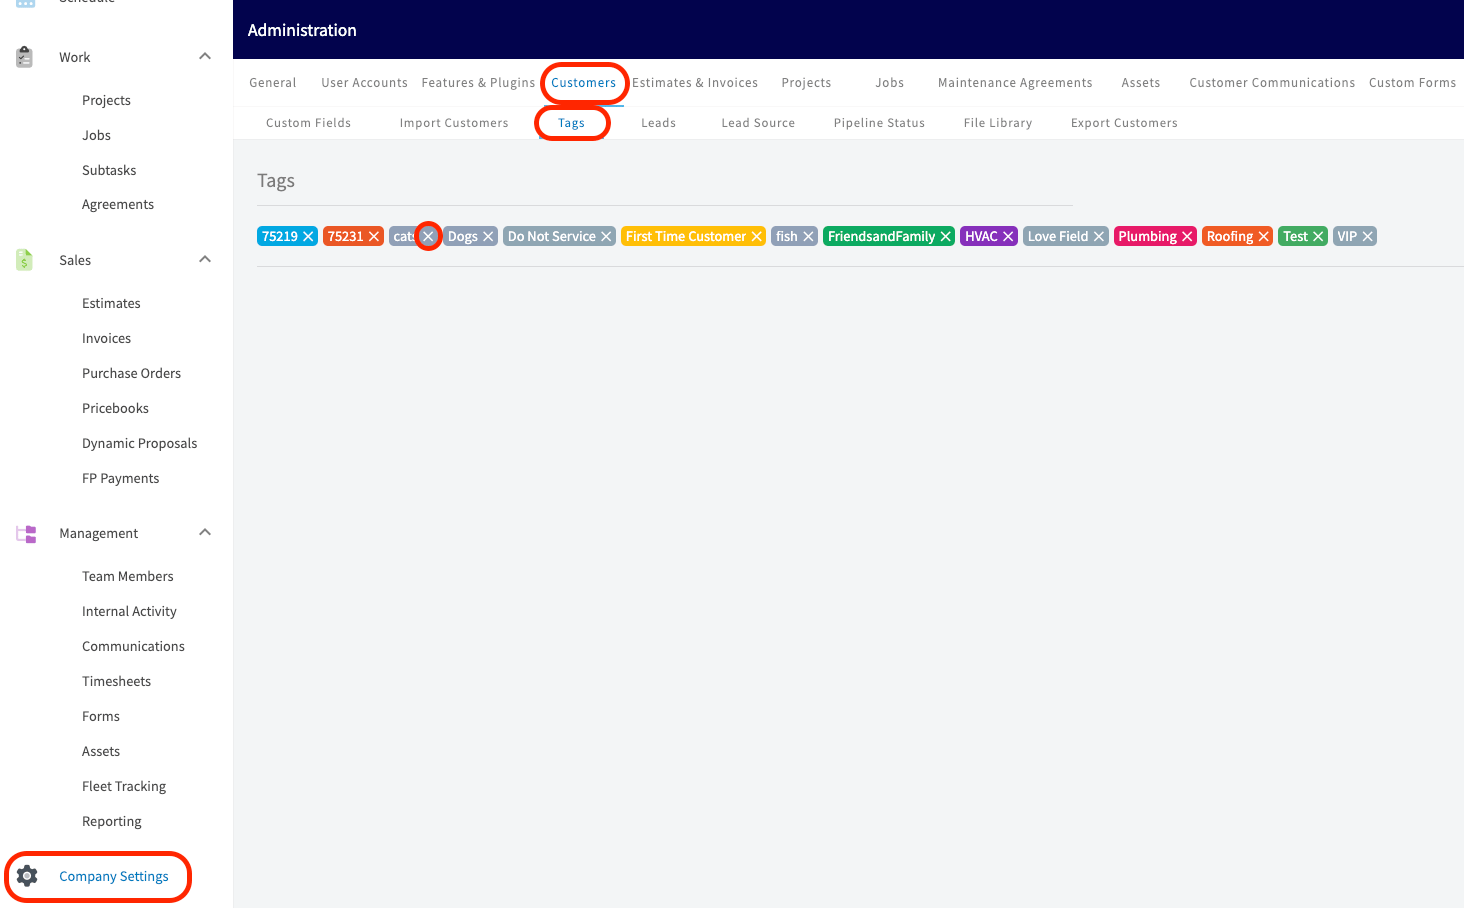
Tagging customers has two parts: you add tags to customer records as you create or edit them, then you open the **By Tags** tab on the Customers page to see every customer that carries a tag. Any tag you type on a customer record is saved to your account's tag list, so it is available to pick again on future customer records, and the full list of tags is managed in **Company Settings > Customers > Tags**. You can also run reports on the tags you create from the **Reporting** tab.
## Video walkthrough
Watch a short walkthrough of custom customer tags, then follow the written steps below.
## Add tags to a new customer
You add tags to a new customer in the **Tags** section at the bottom of the **Create Customer** form.
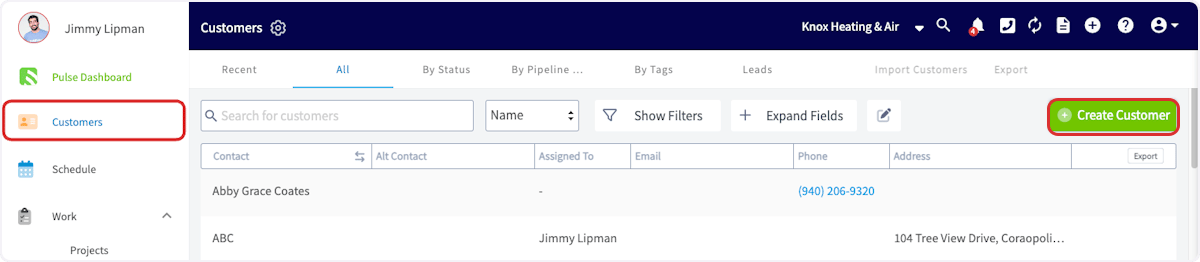
1. Go to **Customers** and select **Create Customer**.
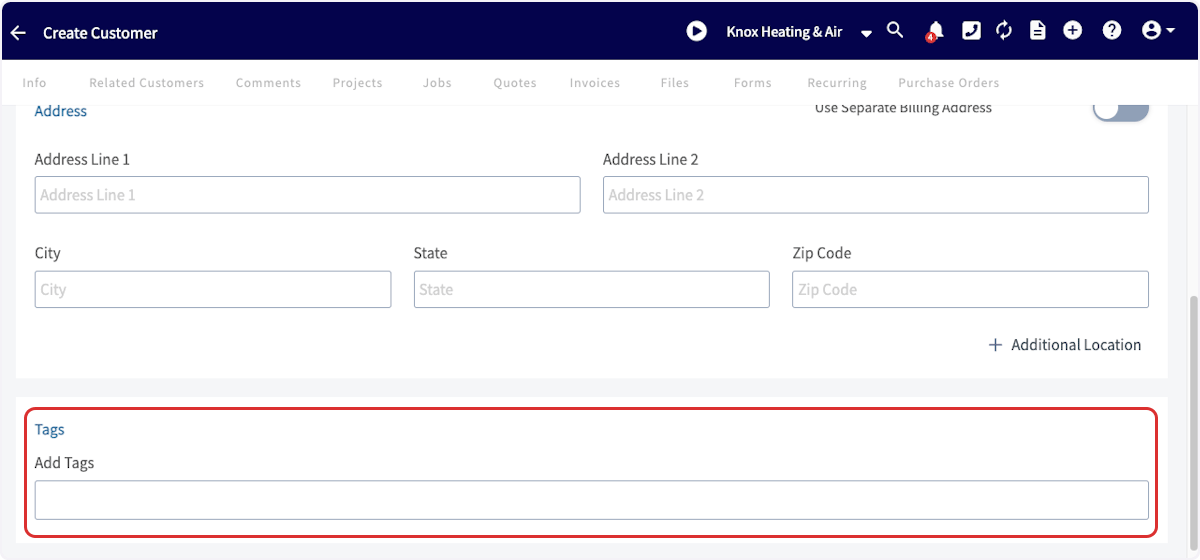
 2. Fill in the new customer's details, then scroll to the **Tags** section at the bottom of the form.
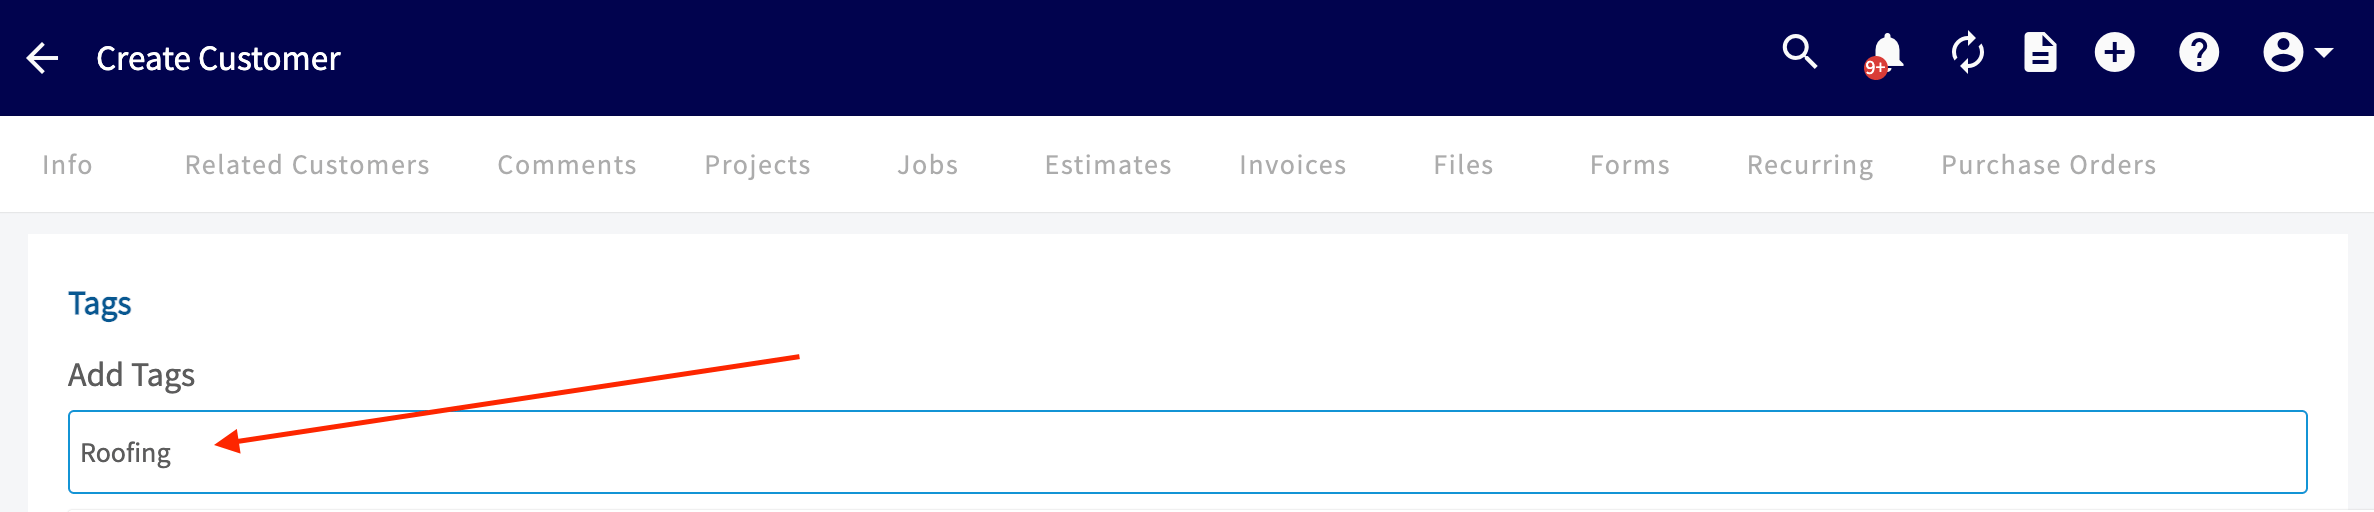
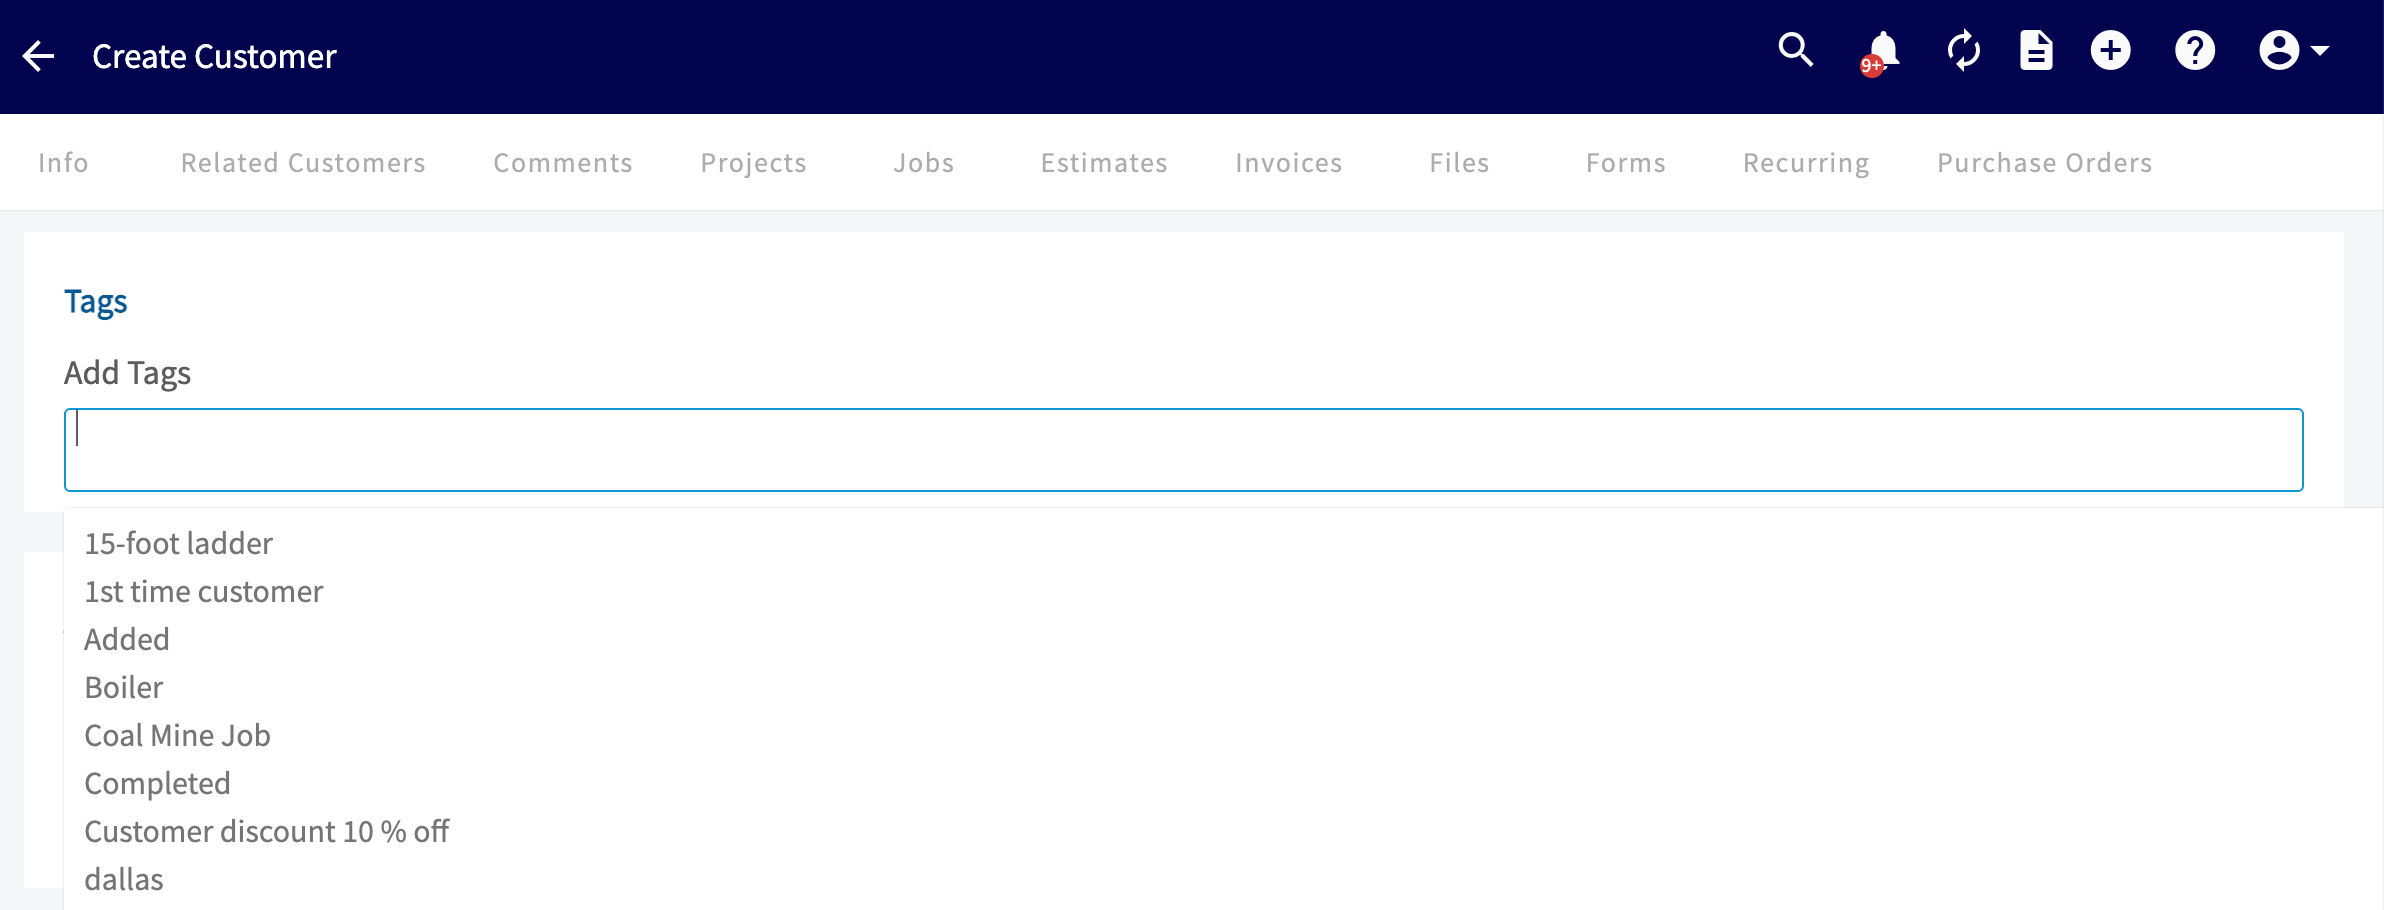
 3. Type a tag name into the **Add Tags** field and press **Enter** to add it. Repeat for each tag you want on this customer. To reuse a tag, select it from the list of previously used tags that drops down under the field.
 4. Scroll to the bottom of the page and select **Save Customer**.
You can also set a color for a new tag. Any tag you create on this record now appears in the previously used tags list on future customer records.
## Add tags to an existing customer
You add a tag to a customer who is already in your system from that customer's record.
1. Go to the **Customers** page and select the customer you want to tag.
4. Scroll to the bottom of the page and select **Save Customer**.
You can also set a color for a new tag. Any tag you create on this record now appears in the previously used tags list on future customer records.
## Add tags to an existing customer
You add a tag to a customer who is already in your system from that customer's record.
1. Go to the **Customers** page and select the customer you want to tag.
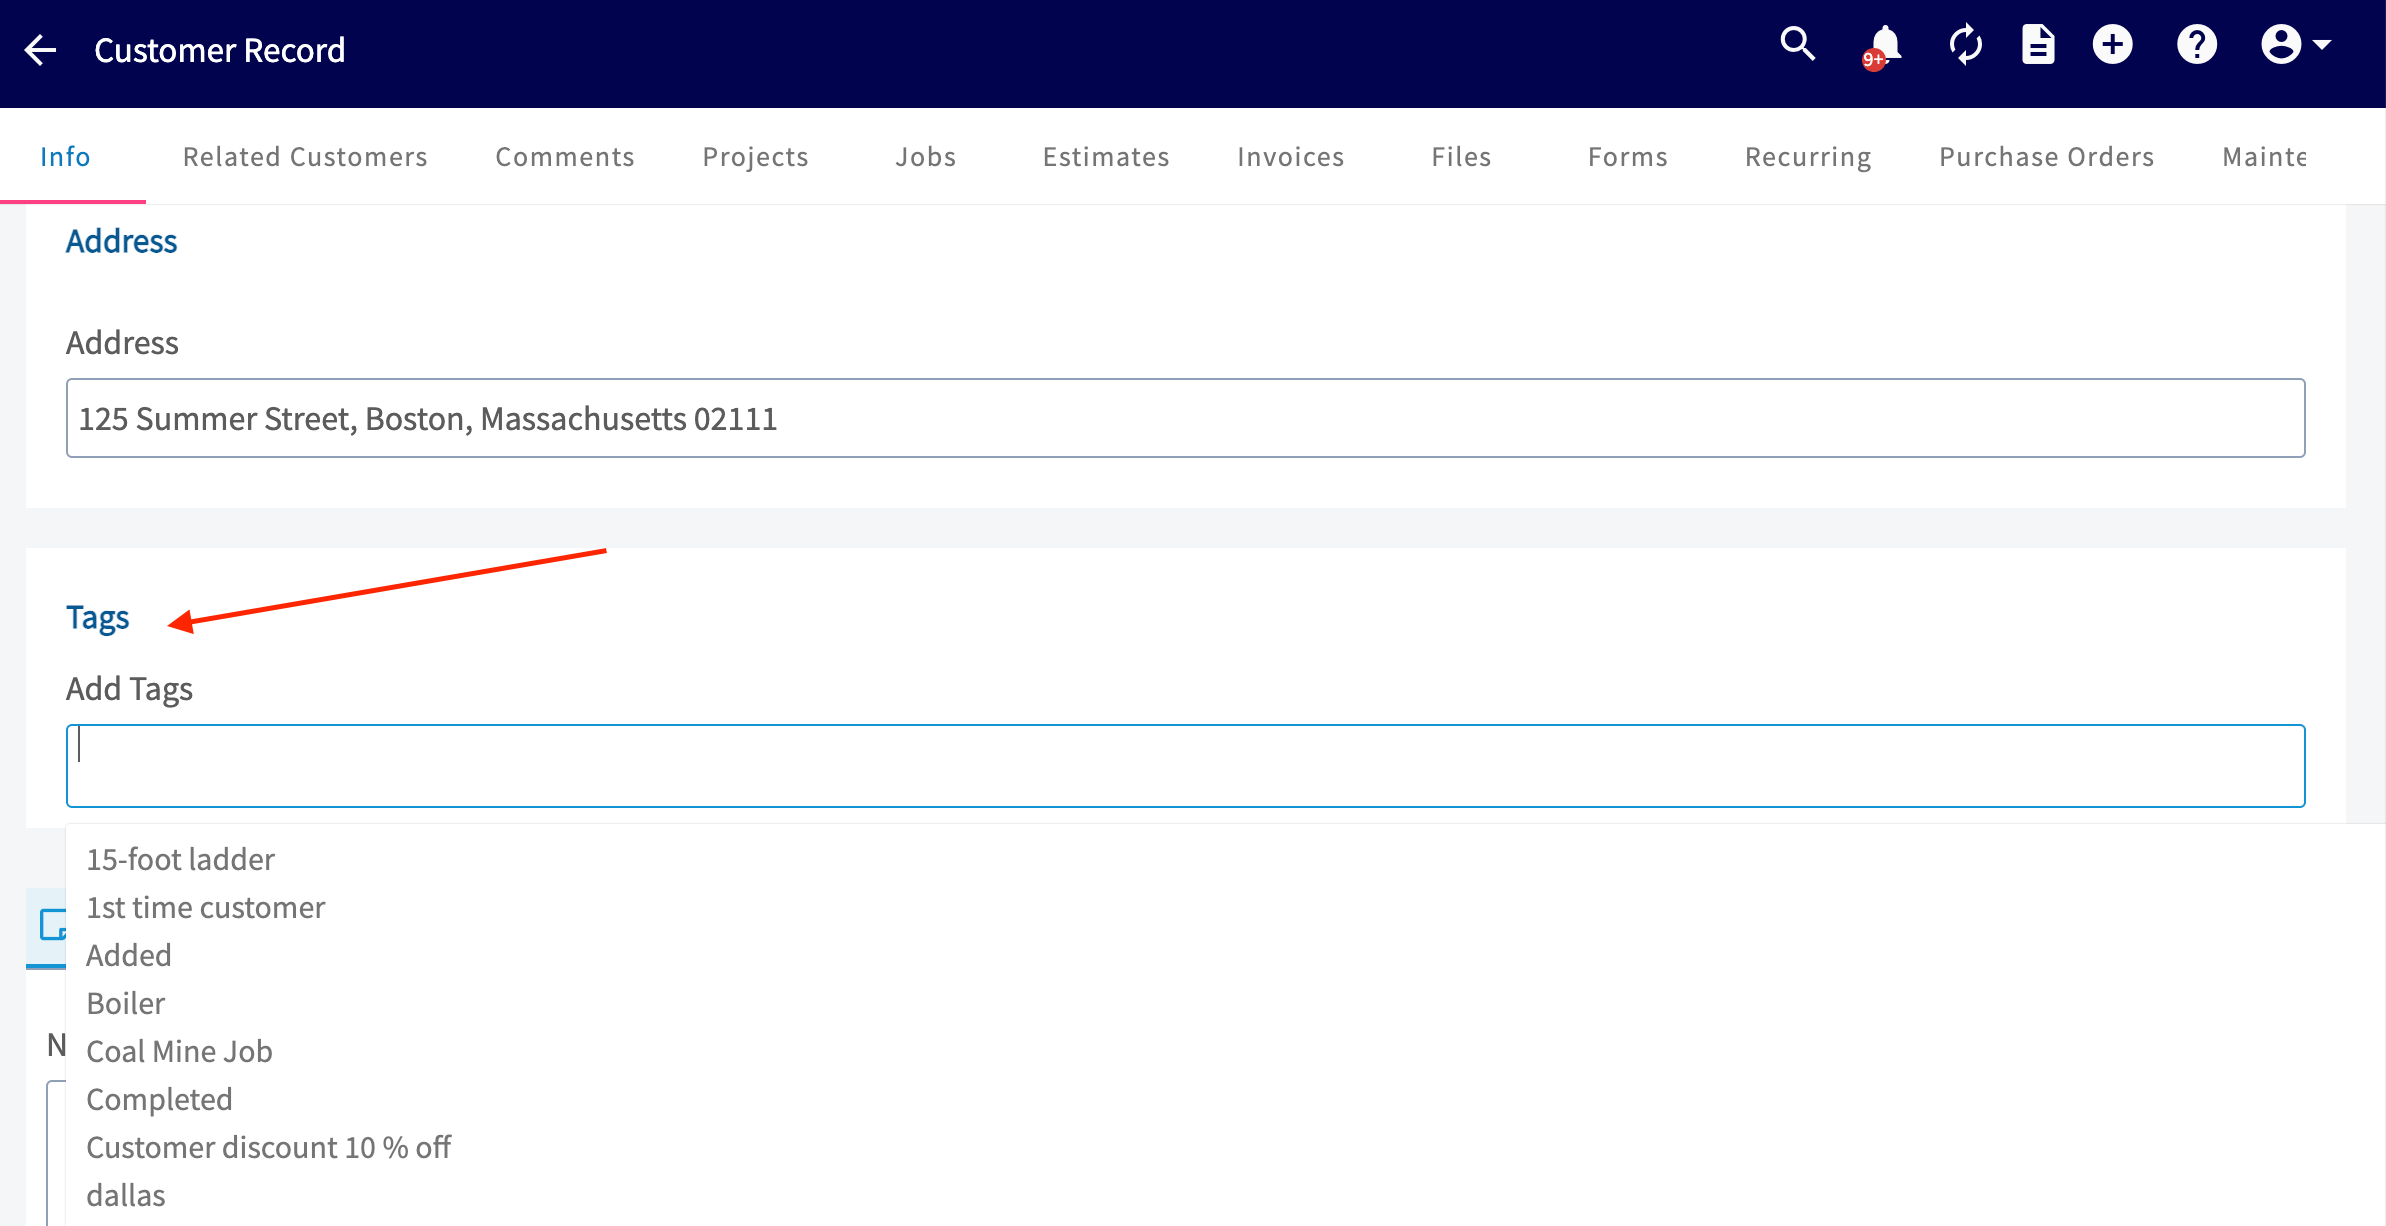
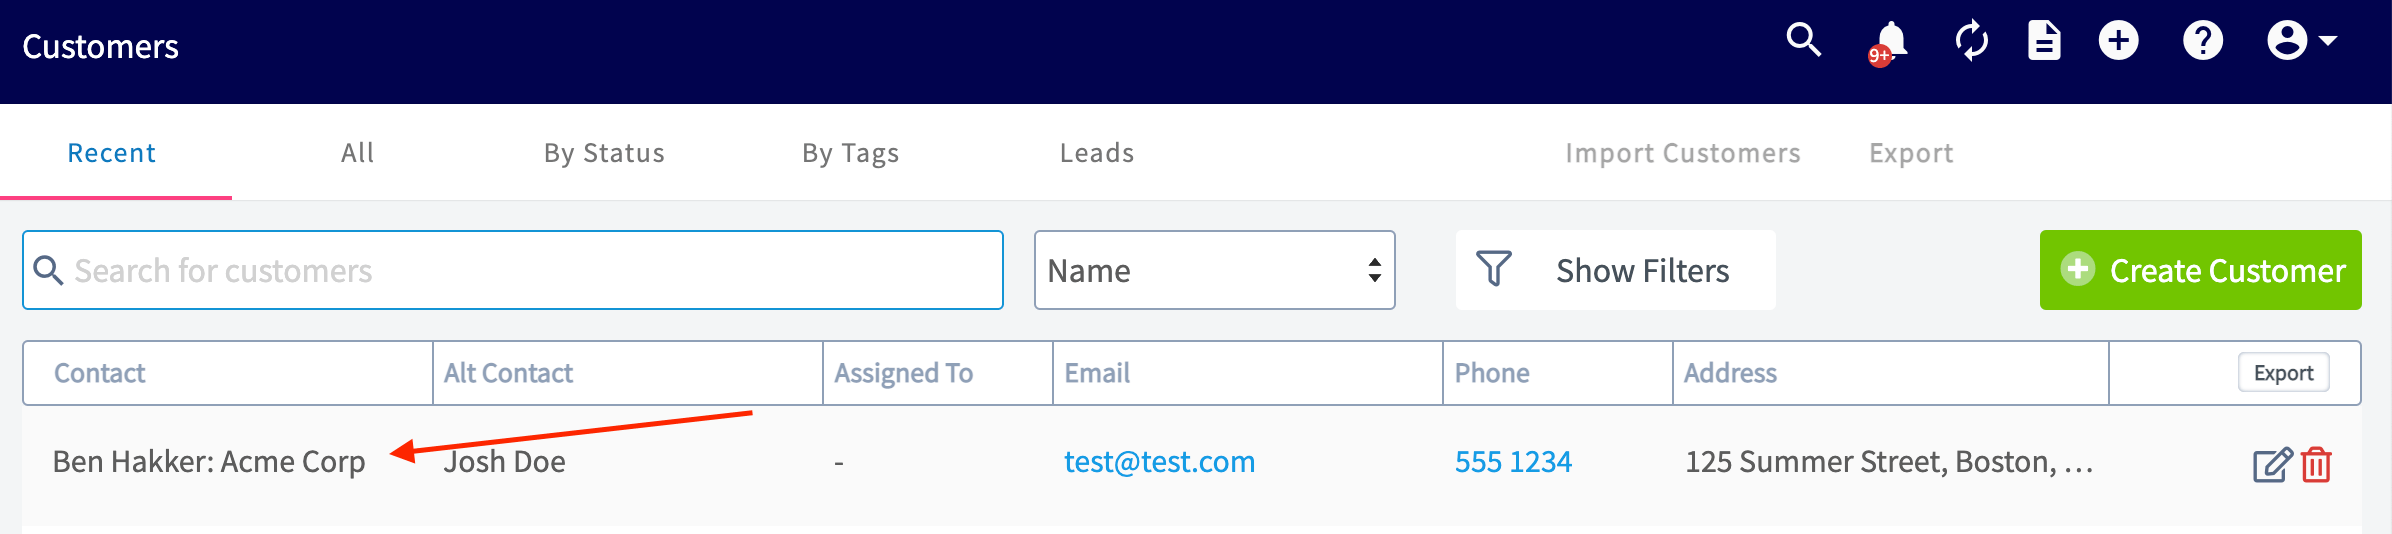 2. On the customer record, select **Edit** and scroll down to the **Tags** section.
3. Start typing to create a new tag, or select an existing tag from the list that drops down.
2. On the customer record, select **Edit** and scroll down to the **Tags** section.
3. Start typing to create a new tag, or select an existing tag from the list that drops down.
 4. Save the customer record.
## View customers by tag
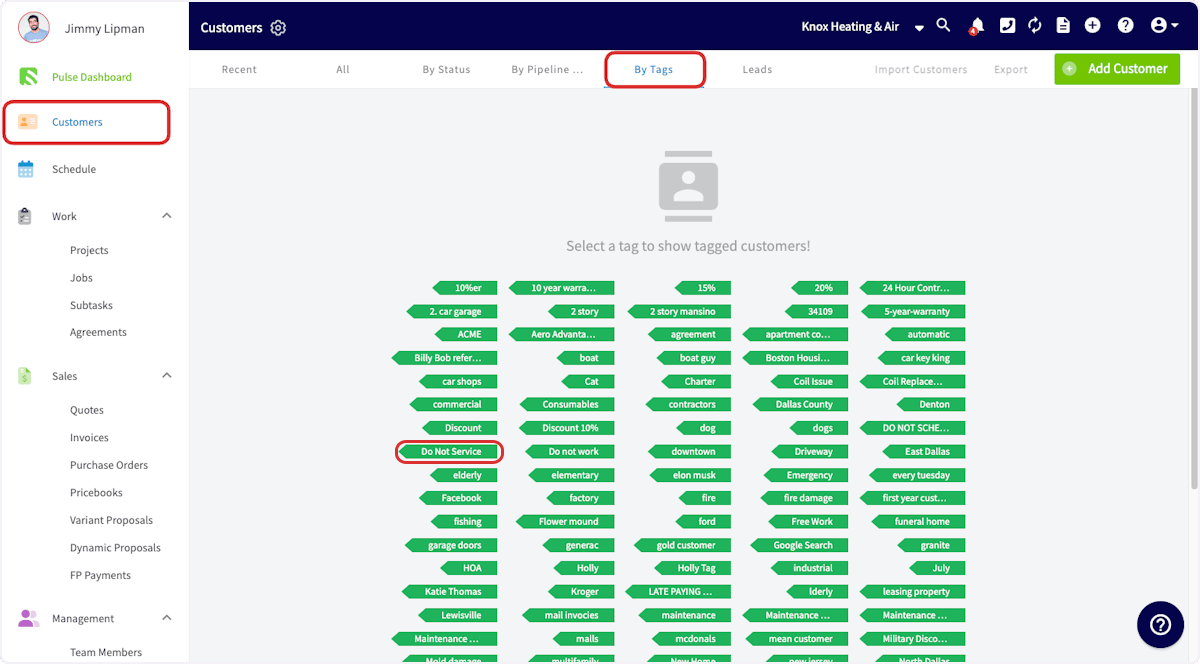
The **By Tags** tab on the Customers page shows your customer list organized by the tags you have applied.
1. Go to the **Customers** page and select **By Tags**.
2. Select the tag you want to view from the tags shown.
4. Save the customer record.
## View customers by tag
The **By Tags** tab on the Customers page shows your customer list organized by the tags you have applied.
1. Go to the **Customers** page and select **By Tags**.
2. Select the tag you want to view from the tags shown.
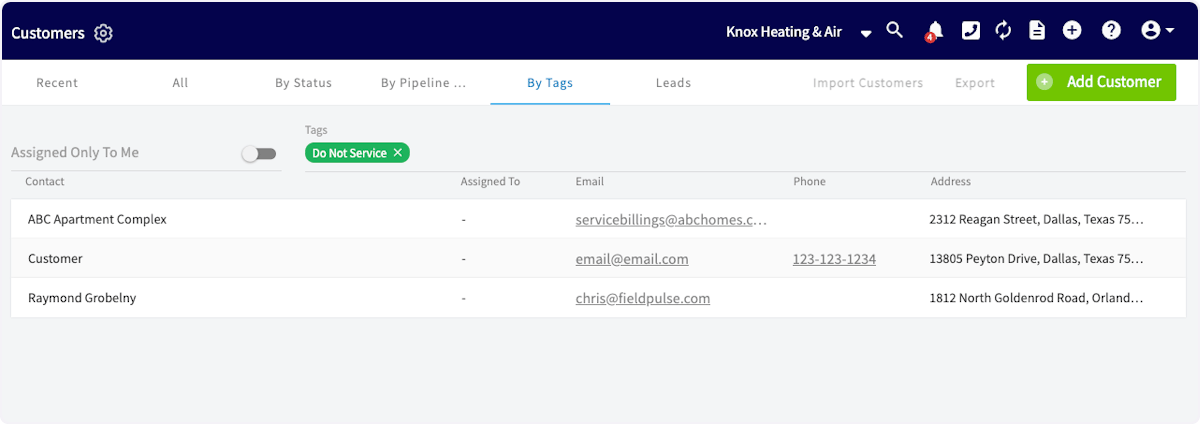
 The list then shows every customer that carries the selected tag.
 ## Delete a tag
You can remove a tag from one customer, or delete it from your account's tag list so it no longer appears as an option to choose from.
* **From one customer record:** select the **x** next to the tag name.
* **From your account's tag list:** go to **Company Settings > Customers > Tags**, then select the **x** next to each tag you want to delete.
## Delete a tag
You can remove a tag from one customer, or delete it from your account's tag list so it no longer appears as an option to choose from.
* **From one customer record:** select the **x** next to the tag name.
* **From your account's tag list:** go to **Company Settings > Customers > Tags**, then select the **x** next to each tag you want to delete.
 ## Related articles
* [How to Create a Customer](/customers/managing-customers/creating-a-customer)
* [Setting Up Customer Statuses](/customers/managing-customers/statuses)
* [How to Create Customer Reports](/reporting/raw-data/customer-reports)
* [Customer FAQs](/customers/managing-customers/creating-a-customer)
Your tagging is working when selecting a tag on the **By Tags** tab returns exactly the customers you expect to see in that segment.
## Related topics
- [Customer Record Field Details](/customers/managing-customers/record-fields.md)
- [Setting Up the Marketing 360 Integration](/integrations/marketing/marketing-360.md)
- [How to Create a Customer](/customers/managing-customers/creating-a-customer.md)
- [Setting Up Customer Statuses](/customers/managing-customers/statuses.md)
## Related articles
* [How to Create a Customer](/customers/managing-customers/creating-a-customer)
* [Setting Up Customer Statuses](/customers/managing-customers/statuses)
* [How to Create Customer Reports](/reporting/raw-data/customer-reports)
* [Customer FAQs](/customers/managing-customers/creating-a-customer)
Your tagging is working when selecting a tag on the **By Tags** tab returns exactly the customers you expect to see in that segment.
## Related topics
- [Customer Record Field Details](/customers/managing-customers/record-fields.md)
- [Setting Up the Marketing 360 Integration](/integrations/marketing/marketing-360.md)
- [How to Create a Customer](/customers/managing-customers/creating-a-customer.md)
- [Setting Up Customer Statuses](/customers/managing-customers/statuses.md)