> ## Documentation Index
> Fetch the complete documentation index at: https://help.fieldpulse.com/llms.txt
> Use this file to discover all available pages before exploring further.
# Setting Up Your Account
> Configure company info, your logo, users, features, and core defaults from Company Settings so the rest of your FieldPulse setup builds on solid basics.
> **Who uses this:** Admins configure Company Settings — only admin users can open it. Every user sets their own My Settings preferences. **Availability:** All regions.
Setting up your FieldPulse account means configuring the basics from **Company Settings**: your company info and logo, your users and teams, the features you want turned on, and core defaults like your timezone and workweek. Getting these right first means the rest of your setup — [scheduling](https://www.fieldpulse.com/features/scheduling-and-dispatching), [jobs](https://www.fieldpulse.com/features/job-management), automated customer messages — builds on solid basics.
## Overview
Your FieldPulse account has two setup areas. **Company Settings** holds the account-wide basics an admin configures once — company details, user accounts, and features. **My Settings** holds the per-user preferences each person sets for themselves, mainly how and when they get notified. This page walks through both, in the order most accounts follow on day one.
## Before you begin
* You need an **admin** account. Only admin users can open Company Settings.
* Have your **company details** ready: company name, contact information, and a logo file in JPG, PNG, or BMP format under 3 MB.
* Know who's on your **team** and what each person should be able to do, so you can assign the right roles as you add them.
## Step-by-step setup
### 1. Add your company info and logo
1. In the left-side menu, select **Company Settings**.
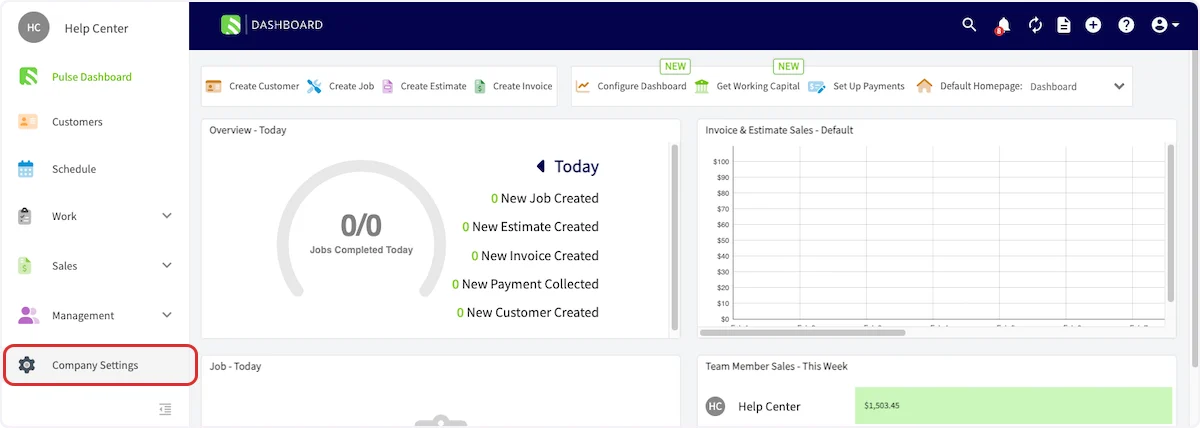 2. Open the **General** tab.
3. Add or edit your **company name**, **contact information**, and **company logo**. The logo you upload appears on your invoice PDFs.
2. Open the **General** tab.
3. Add or edit your **company name**, **contact information**, and **company logo**. The logo you upload appears on your invoice PDFs.
 ### 2. Build your team in User Accounts
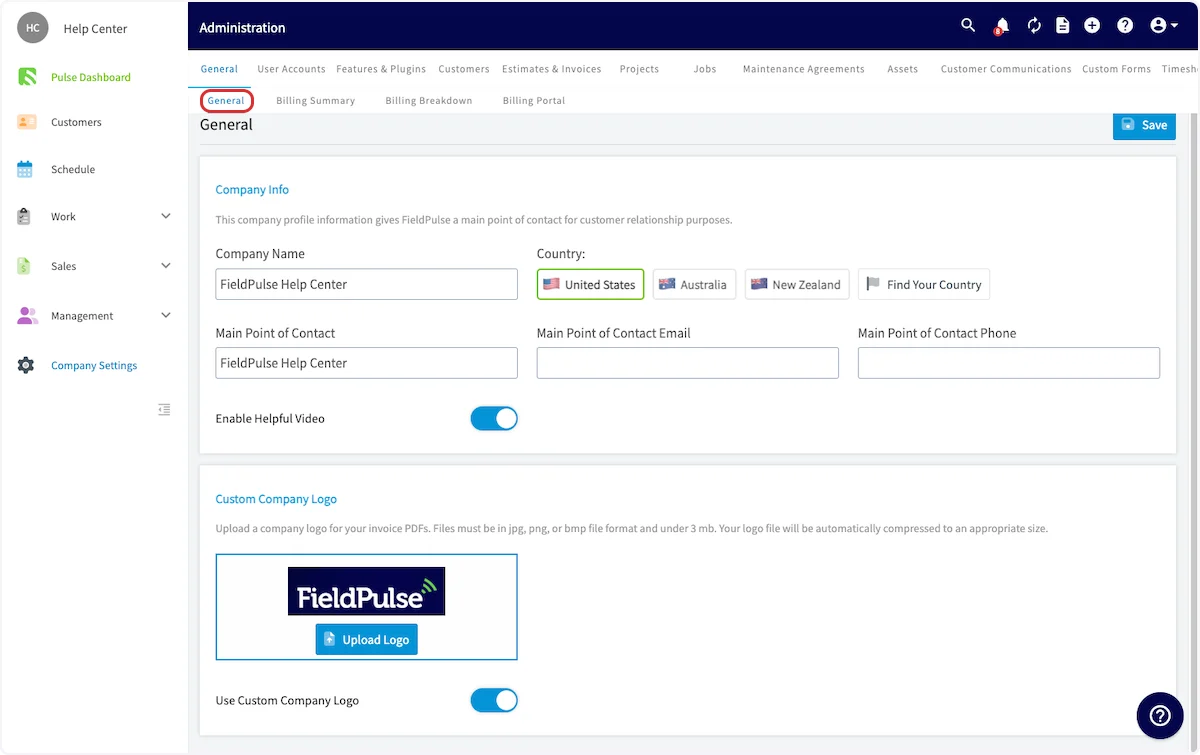
1. Open the **User Accounts** tab.
2. Add each team member as a user account and assign their role. See [How to Add New Users](/settings/users-teams/adding-users) and [User Roles and Permissions Details](/settings/users-teams/user-roles).
3. Group your users into teams. See [How to Create a Team](/settings/users-teams/creating-a-team).
### 2. Build your team in User Accounts
1. Open the **User Accounts** tab.
2. Add each team member as a user account and assign their role. See [How to Add New Users](/settings/users-teams/adding-users) and [User Roles and Permissions Details](/settings/users-teams/user-roles).
3. Group your users into teams. See [How to Create a Team](/settings/users-teams/creating-a-team).
 ### 3. Enable your features
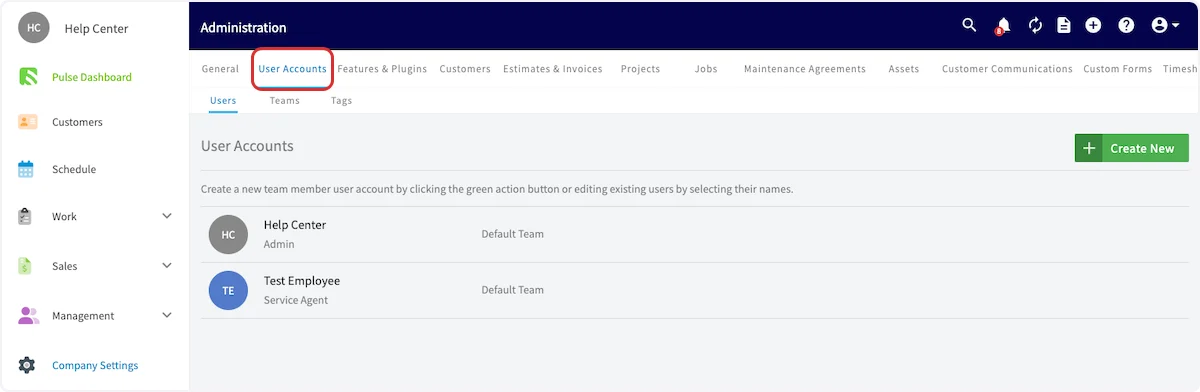
1. Open the **Features & Plugins** tab.
2. Select **Enable** under each feature you want to turn on for your business. See the Features & Plugins color coding reference below for what the colors mean.
### 3. Enable your features
1. Open the **Features & Plugins** tab.
2. Select **Enable** under each feature you want to turn on for your business. See the Features & Plugins color coding reference below for what the colors mean.
 ### 4. Set your personal preferences in My Settings
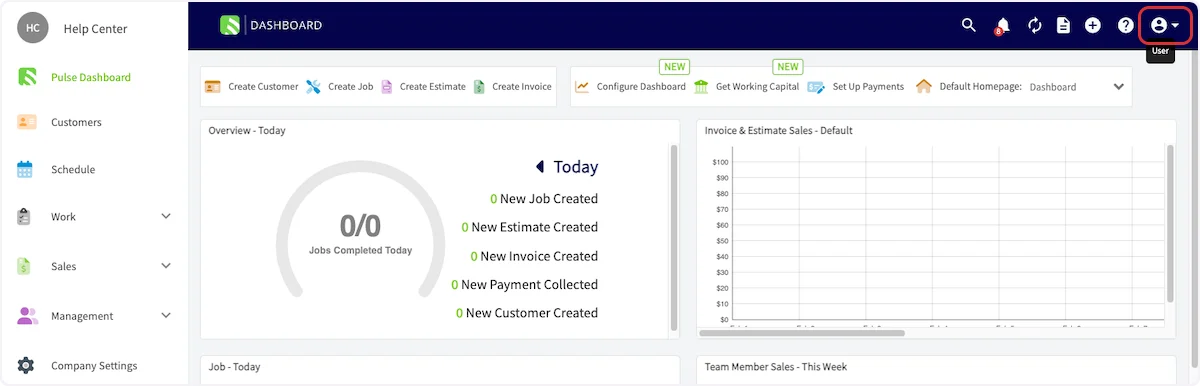
1. Select the **account icon** in the top-right corner of the web app.
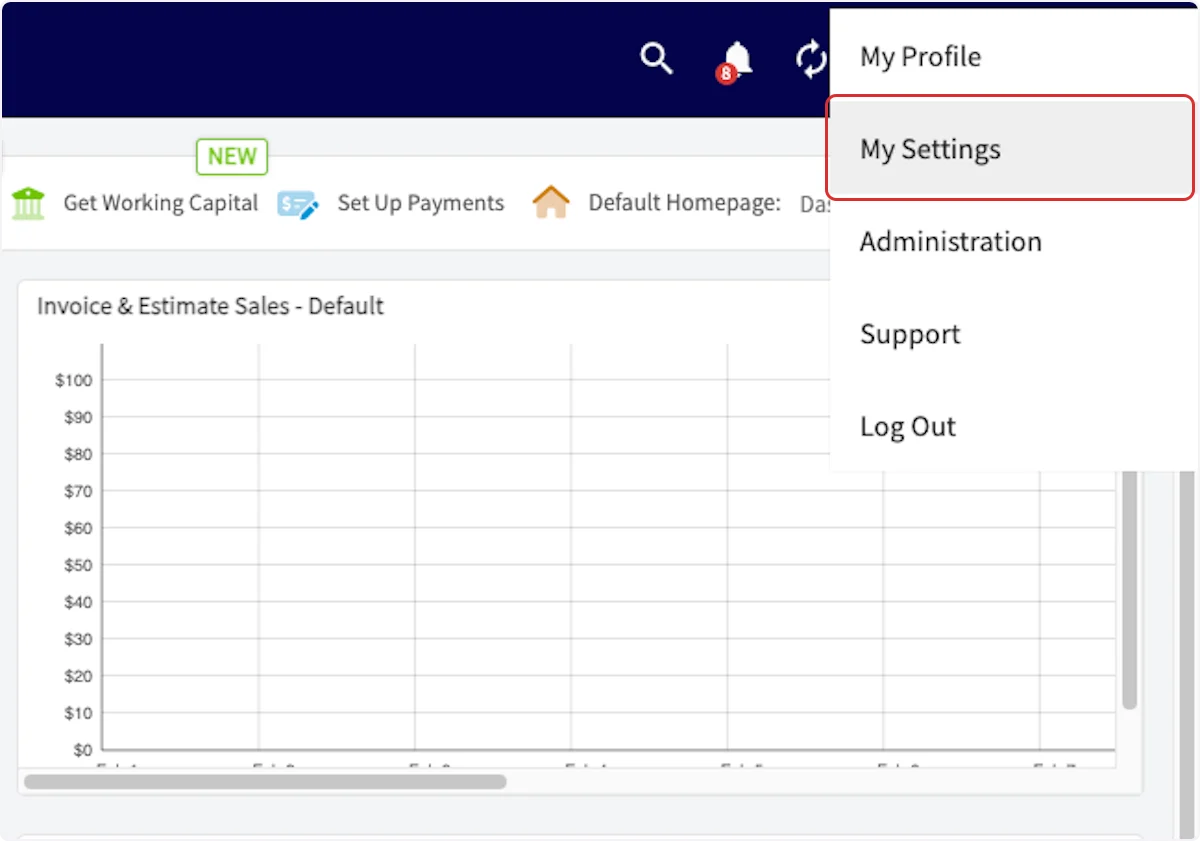
2. Select **My Settings**.
### 4. Set your personal preferences in My Settings
1. Select the **account icon** in the top-right corner of the web app.
2. Select **My Settings**.
 3. Set the preferences described in the My Settings preferences reference below — your timezone, calendar start date, the Google Calendar integration, and your notifications.
## Settings reference
### Features & Plugins color coding
Features and plugins are color-coded so you can tell at a glance what's included and what's an add-on:
| **Color** | **What it means** |
| ----------- | ------------------------------------ |
| **Blue** | Included in your base subscription. |
| **Purple** | An add-on to your base subscription. |
| Below these | Preferred partners and integrations. |
To decide what to turn on, see the [Features & Plugins Overview](/getting-started/next-steps/features-plugins-overview).
### My Settings preferences
Set these per-user preferences so FieldPulse schedules and notifies you the way you expect:
| **Setting** | **What it does** |
| ---------------------------------- | ------------------------------------------------------------------------------------------------------------------------------------------------------------------------------------------------------------------------------------------------------------------------------------------------------------------------------------------- |
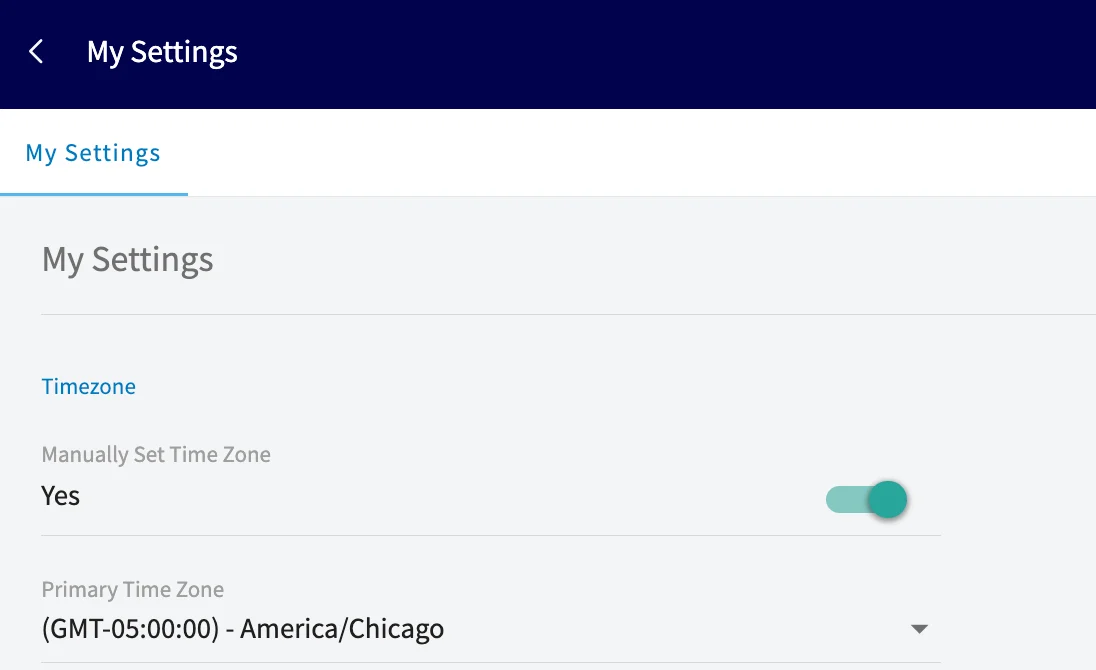
| **Timezone** | Sets your business timezone so jobs schedule correctly and automated customer messages (triggers) go out at the right local time. Turn on **Manually Set Time Zone**, then choose your **Primary Time Zone**. |
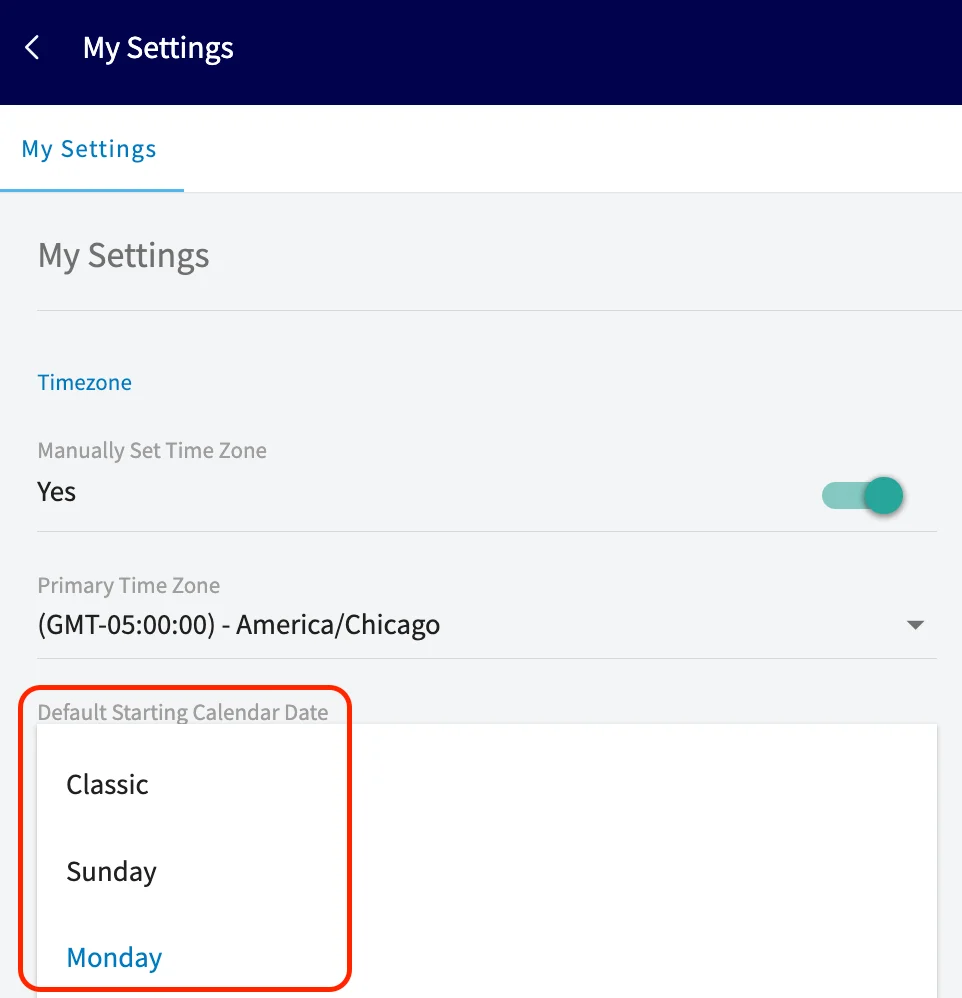
| **Default Starting Calendar Date** | Sets Sunday or Monday as the first day of your workweek, so your calendar and schedules match how you plan. |
| **Google Calendar integration** | Enables one-way sync that adds your FieldPulse jobs and site visits to Google Calendar. Only jobs and site visits created after you connect — and assigned to you — appear; events created in Google Calendar do not sync back to FieldPulse. See [Setting Up the Google Calendar Integration](/integrations/partner-apps/google-calendar). |
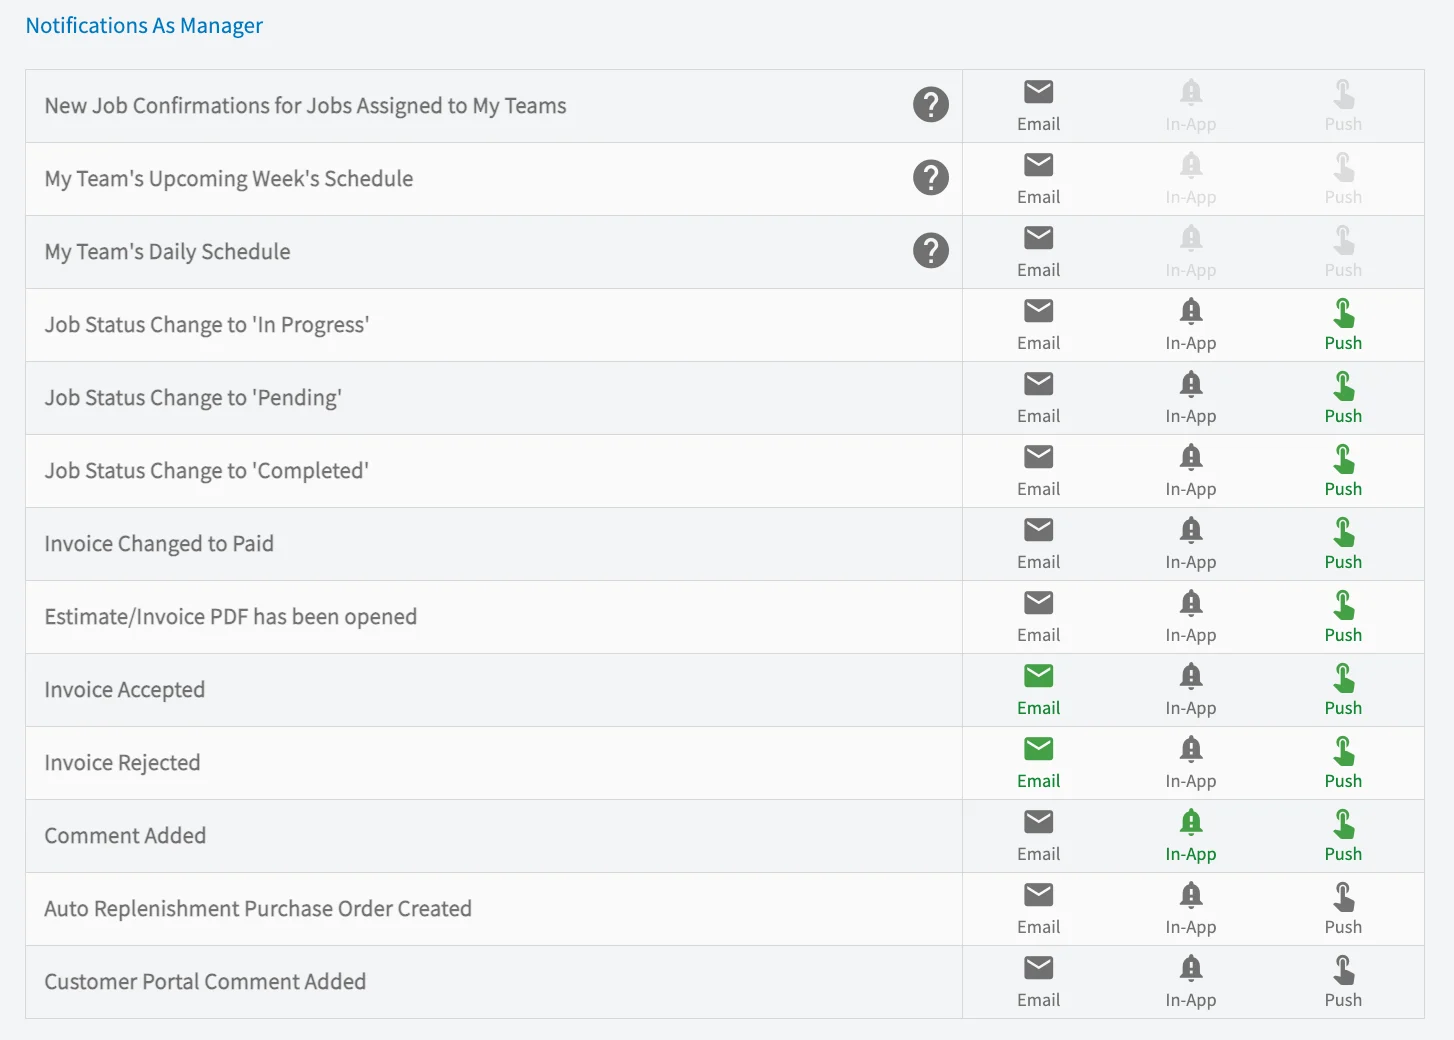
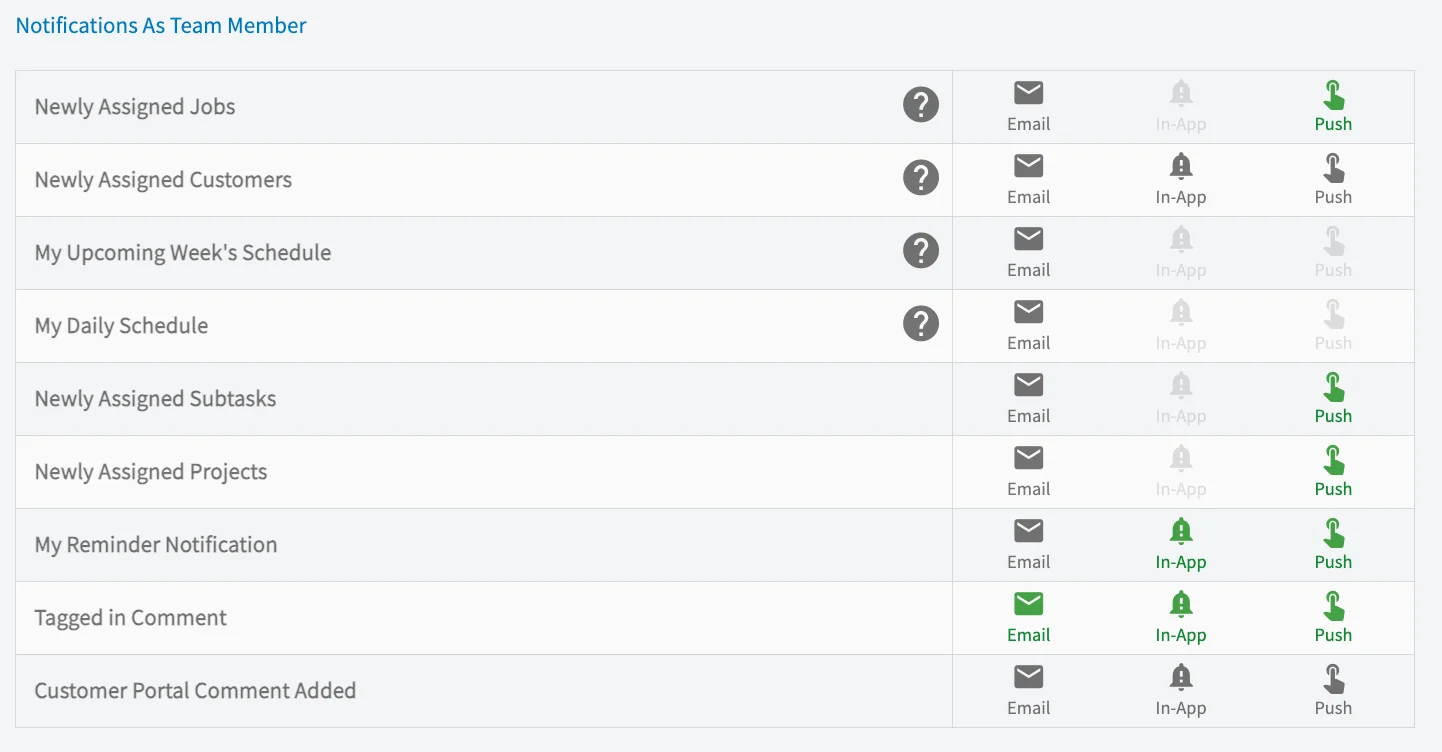
| **Notification preferences** | Chooses how you receive alerts: Email, In-App, or Push. Most notifications support all three. |
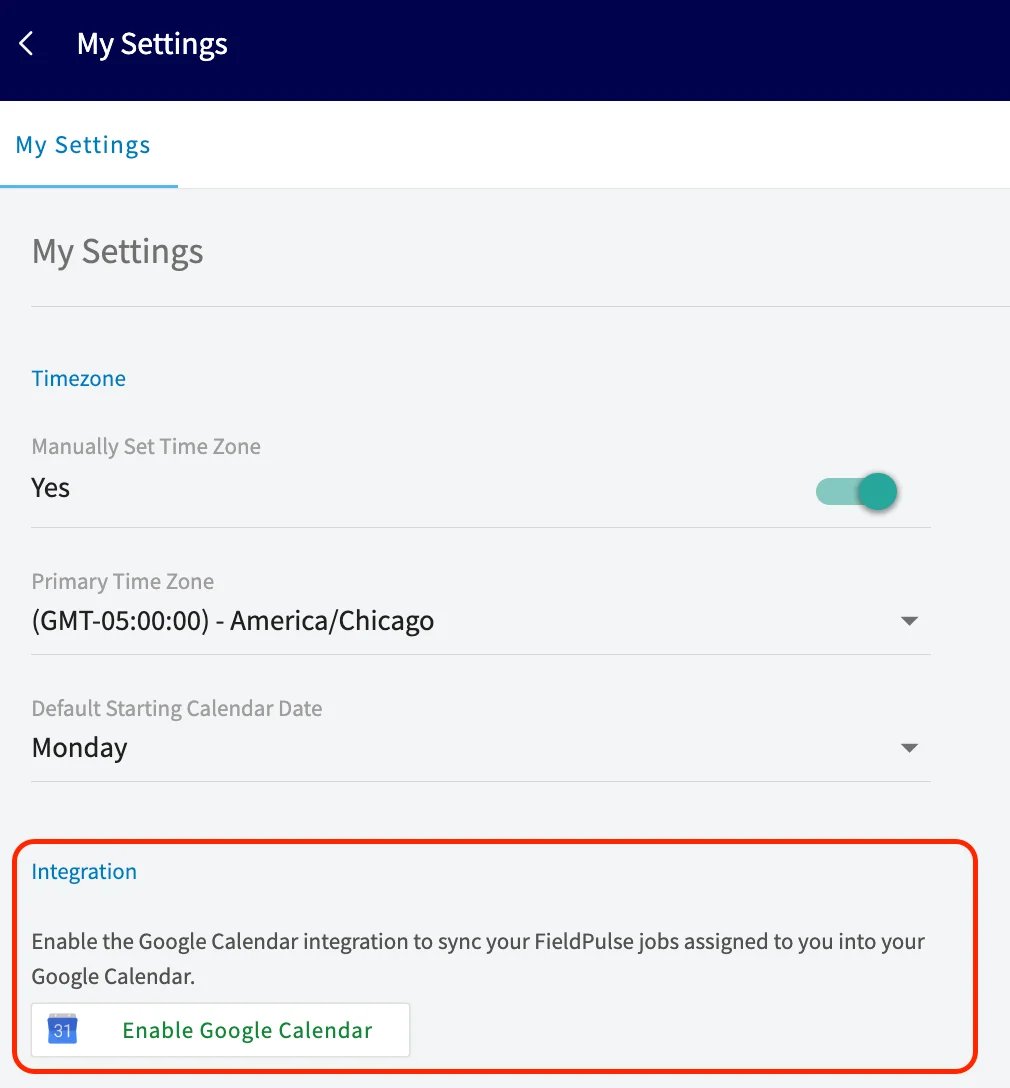
The **Timezone** and **Default Starting Calendar Date** settings sit at the top of the My Settings page:
3. Set the preferences described in the My Settings preferences reference below — your timezone, calendar start date, the Google Calendar integration, and your notifications.
## Settings reference
### Features & Plugins color coding
Features and plugins are color-coded so you can tell at a glance what's included and what's an add-on:
| **Color** | **What it means** |
| ----------- | ------------------------------------ |
| **Blue** | Included in your base subscription. |
| **Purple** | An add-on to your base subscription. |
| Below these | Preferred partners and integrations. |
To decide what to turn on, see the [Features & Plugins Overview](/getting-started/next-steps/features-plugins-overview).
### My Settings preferences
Set these per-user preferences so FieldPulse schedules and notifies you the way you expect:
| **Setting** | **What it does** |
| ---------------------------------- | ------------------------------------------------------------------------------------------------------------------------------------------------------------------------------------------------------------------------------------------------------------------------------------------------------------------------------------------- |
| **Timezone** | Sets your business timezone so jobs schedule correctly and automated customer messages (triggers) go out at the right local time. Turn on **Manually Set Time Zone**, then choose your **Primary Time Zone**. |
| **Default Starting Calendar Date** | Sets Sunday or Monday as the first day of your workweek, so your calendar and schedules match how you plan. |
| **Google Calendar integration** | Enables one-way sync that adds your FieldPulse jobs and site visits to Google Calendar. Only jobs and site visits created after you connect — and assigned to you — appear; events created in Google Calendar do not sync back to FieldPulse. See [Setting Up the Google Calendar Integration](/integrations/partner-apps/google-calendar). |
| **Notification preferences** | Chooses how you receive alerts: Email, In-App, or Push. Most notifications support all three. |
The **Timezone** and **Default Starting Calendar Date** settings sit at the top of the My Settings page:
 Turn on the Google Calendar sync from the **Integration** section with **Enable Google Calendar**:
 Notification toggles are listed in two groups — the notifications you receive as a manager of a team, and the ones you receive as a team member:
 Daily emails are sent at 6am in your timezone.
## FAQs
### Does the notification feed have a limit?
Yes. The notification feed shows your 50 most recent notifications, read or unread combined, on both web and mobile. Once a new notification pushes the count past 50, the oldest notification is automatically hidden from the feed.
## Related articles
* [Welcome to FieldPulse](/getting-started/welcome/overview)
* [Setting Up Google Single Sign-On](/getting-started/welcome/google-sso)
* [Setting Up Two-Factor Authentication (2FA)](/getting-started/welcome/two-factor-auth)
* [How to Add New Users](/settings/users-teams/adding-users)
* [Notifications Overview](/settings/notifications/notifications-master-guide)
Your setup is working when your company logo appears on your invoice PDFs, your team members can log in with the roles you assigned, the features you need show as enabled in Features & Plugins, and notifications reach you the way you chose in My Settings.
## Related topics
- [Welcome & Account Setup](/getting-started/welcome/index.md)
- [Setting Up Google Single Sign-On](/getting-started/welcome/google-sso.md)
- [Setting Up Two-Factor Authentication (2FA)](/getting-started/welcome/two-factor-auth.md)
- [Setting Up Your Pricebook](/add-ons/sales-suite/pricebook.md)
Daily emails are sent at 6am in your timezone.
## FAQs
### Does the notification feed have a limit?
Yes. The notification feed shows your 50 most recent notifications, read or unread combined, on both web and mobile. Once a new notification pushes the count past 50, the oldest notification is automatically hidden from the feed.
## Related articles
* [Welcome to FieldPulse](/getting-started/welcome/overview)
* [Setting Up Google Single Sign-On](/getting-started/welcome/google-sso)
* [Setting Up Two-Factor Authentication (2FA)](/getting-started/welcome/two-factor-auth)
* [How to Add New Users](/settings/users-teams/adding-users)
* [Notifications Overview](/settings/notifications/notifications-master-guide)
Your setup is working when your company logo appears on your invoice PDFs, your team members can log in with the roles you assigned, the features you need show as enabled in Features & Plugins, and notifications reach you the way you chose in My Settings.
## Related topics
- [Welcome & Account Setup](/getting-started/welcome/index.md)
- [Setting Up Google Single Sign-On](/getting-started/welcome/google-sso.md)
- [Setting Up Two-Factor Authentication (2FA)](/getting-started/welcome/two-factor-auth.md)
- [Setting Up Your Pricebook](/add-ons/sales-suite/pricebook.md)