> ## Documentation Index
> Fetch the complete documentation index at: https://help.fieldpulse.com/llms.txt
> Use this file to discover all available pages before exploring further.
# Setting Up Custom Fields on Material Lists
> Add custom fields to FieldPulse material lists to record supplier references or delivery dates, set their order, and control who sees each one.
> **Who uses this:** Admins and anyone with access to Company Settings create the fields; each field's own visibility is set for the **Managers** and **Service Agent** roles. **Availability:** All regions and all plans.
A material list custom field stores a piece of information the standard material list does not already capture — a supplier reference, a bin location, an expected delivery date, or anything else your business tracks. You create each field once in Company Settings, set the order the fields appear in, and decide which roles can see the field and whether it shows on the documents your customers and suppliers receive.
## Overview
A material list custom field is an extra field you define in Company Settings that then appears on every material list in your account. Each field has three parts you control:
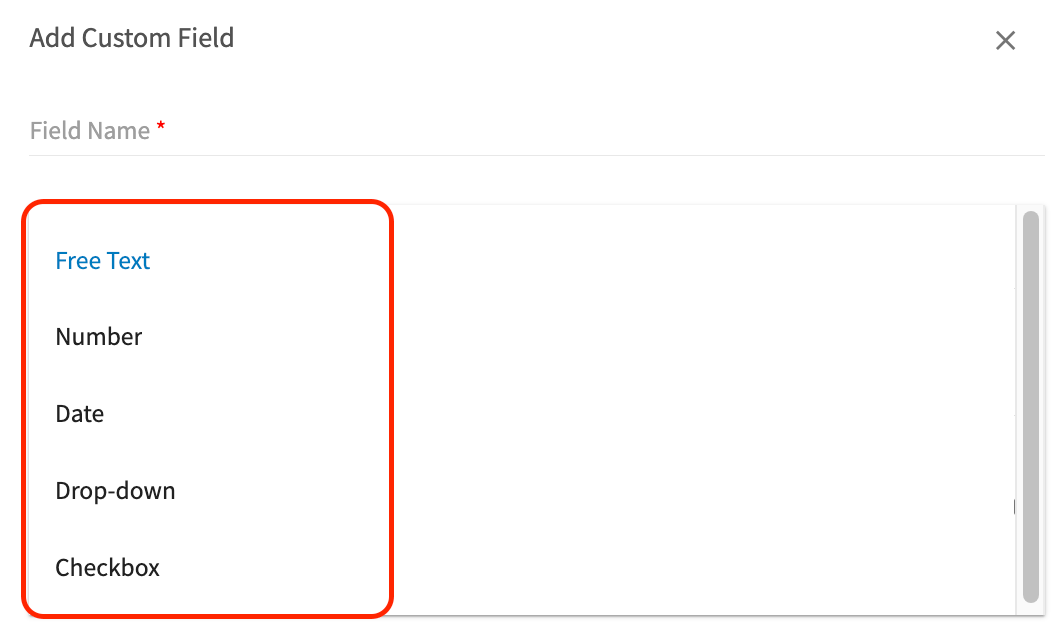
* **Type** — what kind of data the field holds. There are five types: Free Text, Number, Date, Drop-down, and Checkbox.
* **Field Visibility by Role** — which team members can see the field.
* **Is visible to customer & supplier** — whether the field also shows on purchase order PDFs, job reports, [estimates and invoices](https://www.fieldpulse.com/features/estimates-and-invoices), and asset reports.
Custom fields you have already created on the customer record can cascade onto every material list, so check those before you build a duplicate field here.
## Before you begin
* Decide who should see each field. Every custom field carries role-based visibility, so know whether the field is for **Managers**, **Service Agent**, or both before you create it.
* Name each field for the data it holds, not for one job. A custom field applies to every material list in the account.
* Plan the options for any **Drop-down** field in advance, including which option should be the default. You add the options while you create the field.
## Step-by-step setup
### Create a custom field
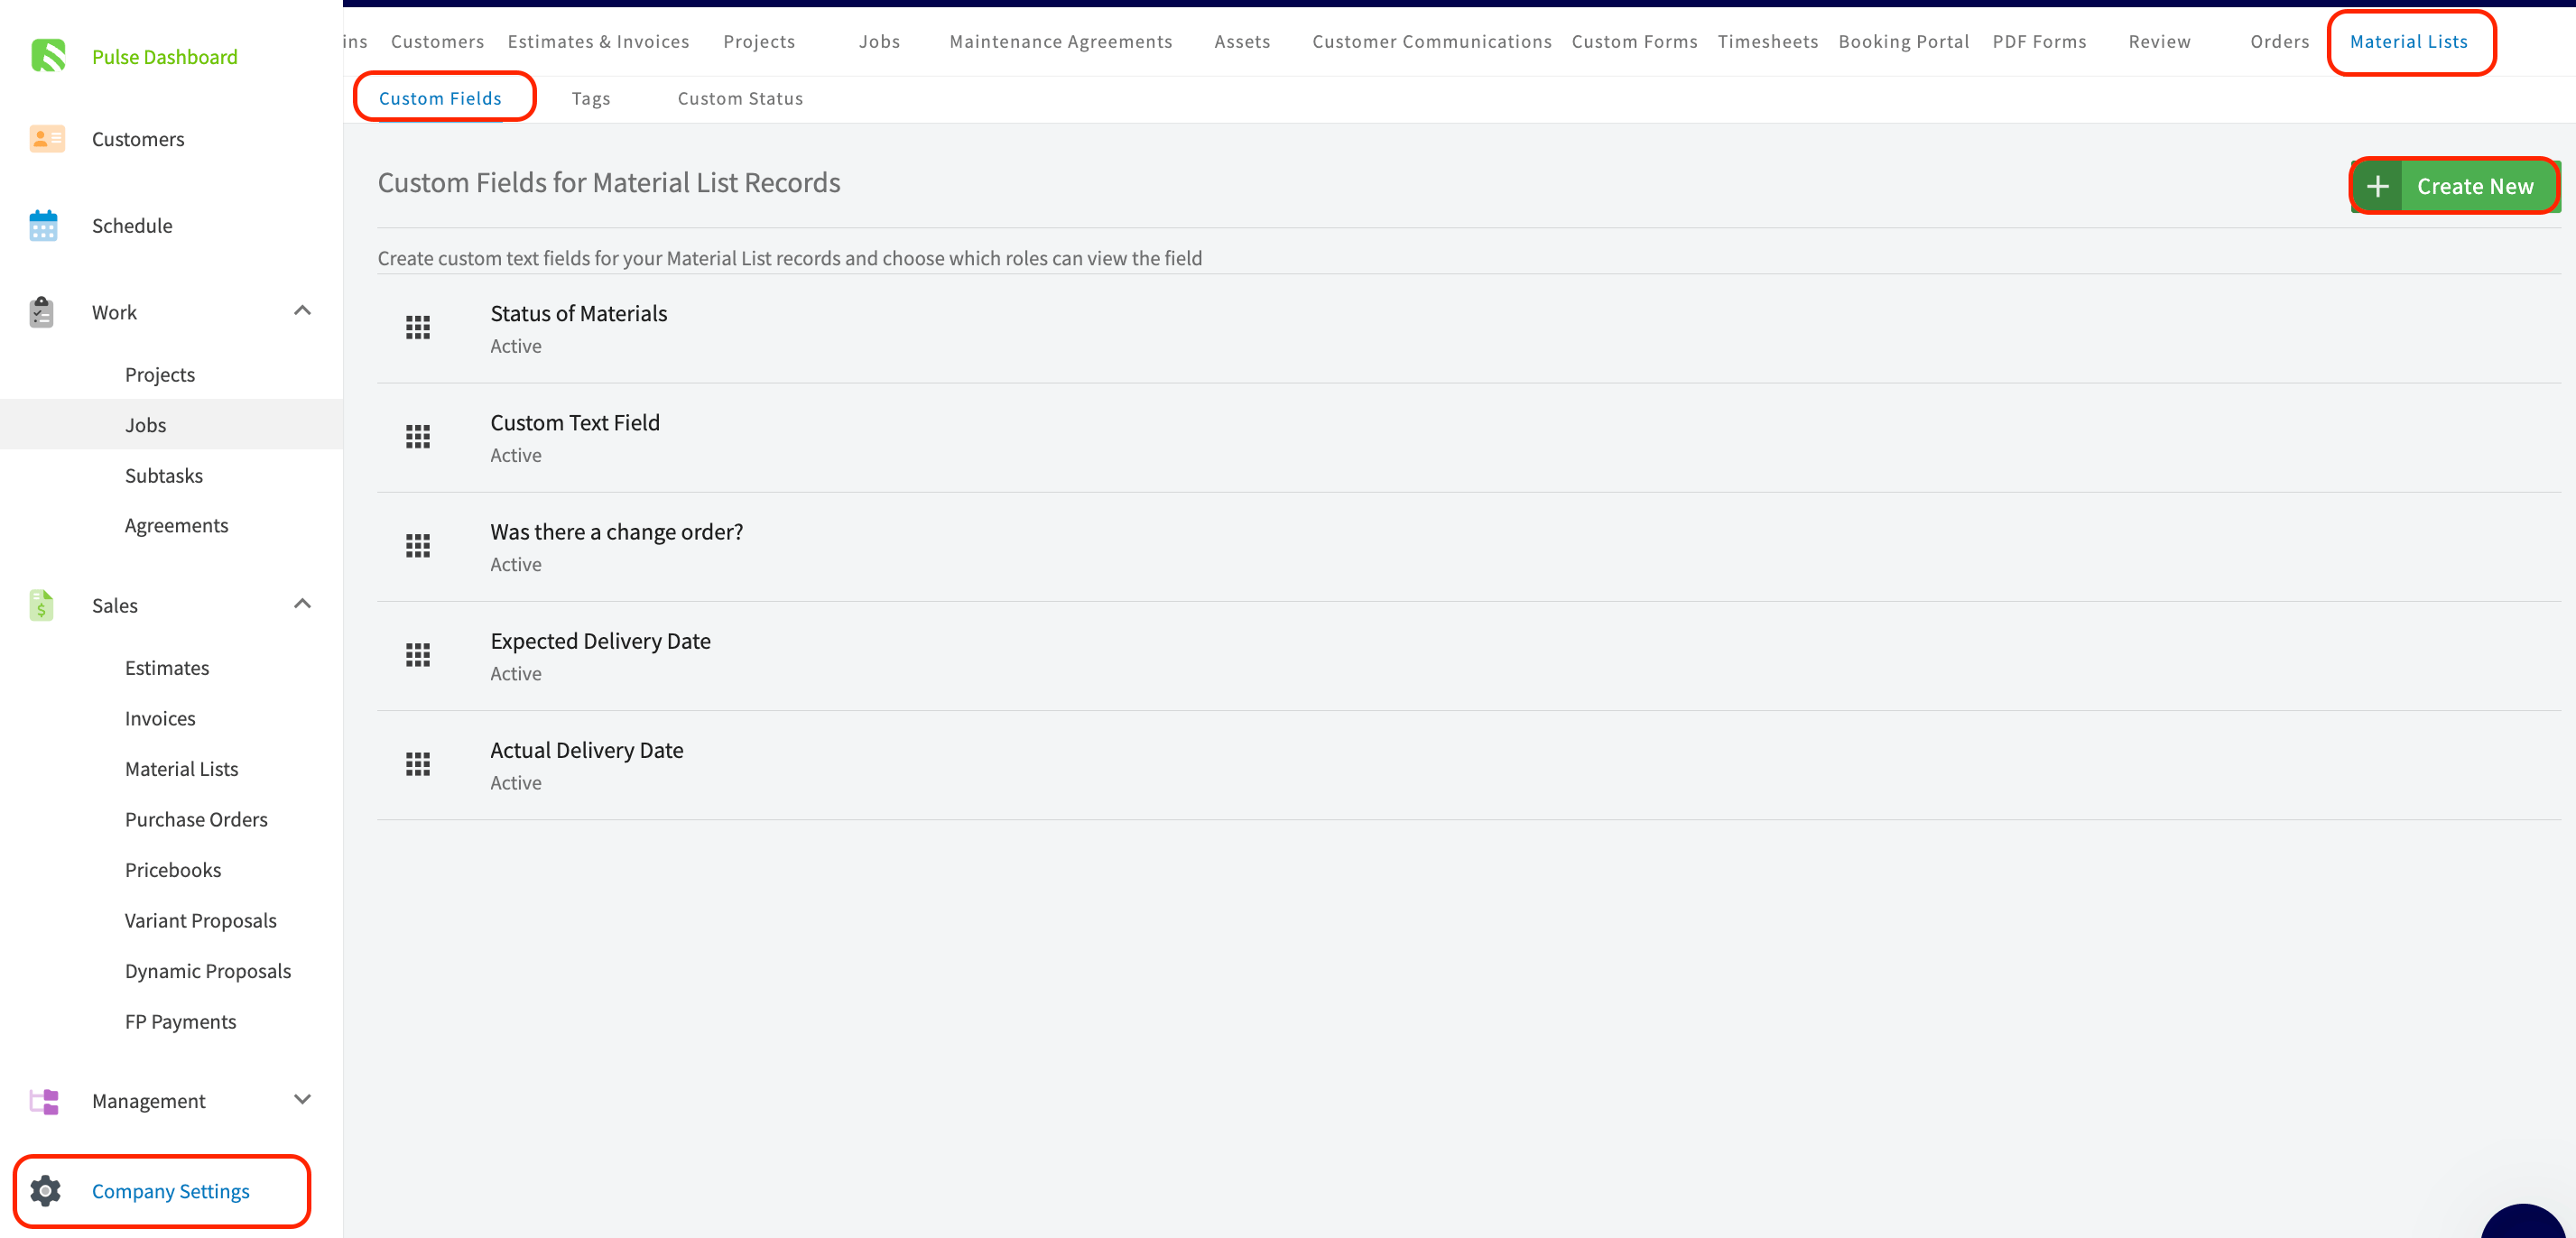
1. Go to **Company Settings**.
2. Select **Material Lists**.
3. Select the **Custom Fields** tab.
4. Select **Create New**.
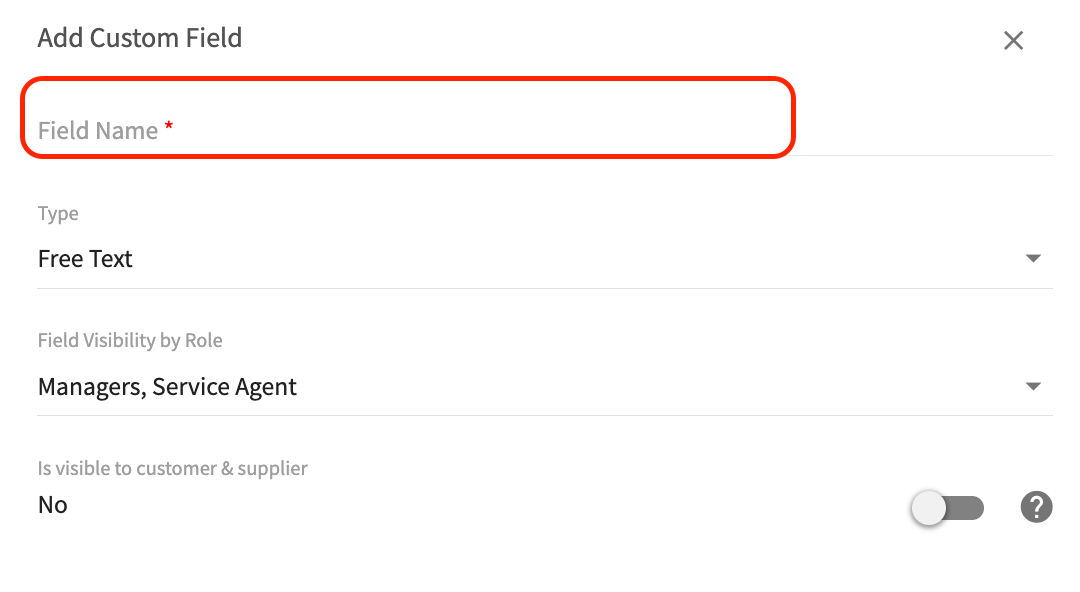
 5. In the **Add Custom Field** window, enter the **Field Name**.
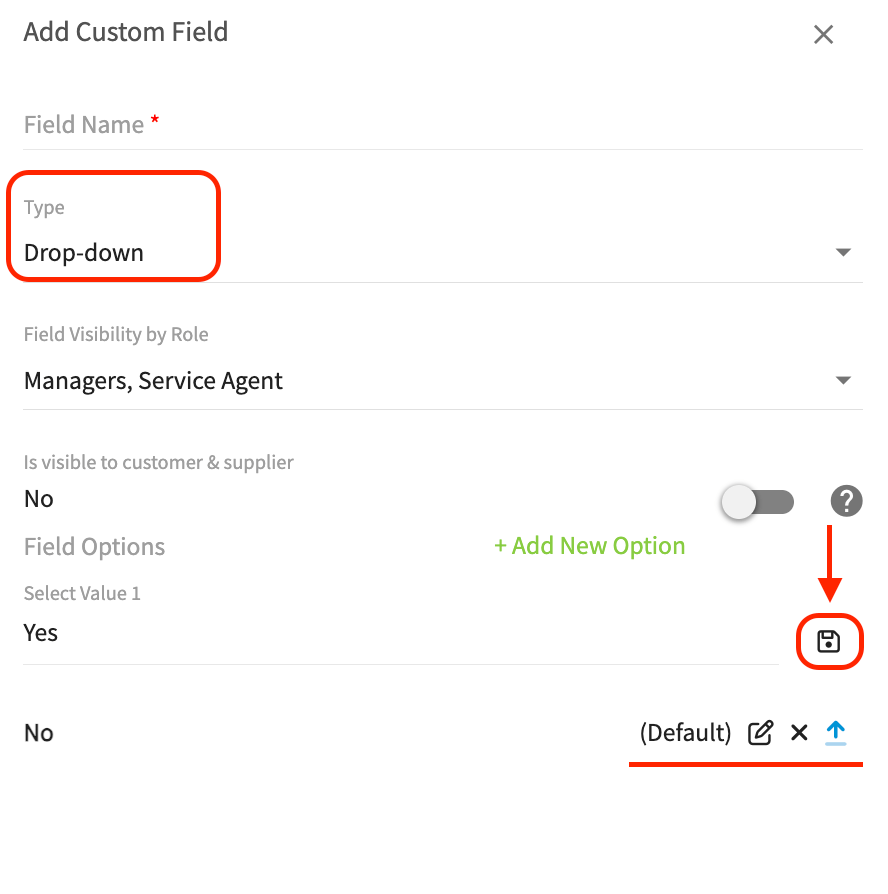
 6. Select a **Type** from the dropdown. See the Settings reference below for what each type stores.
 7. For a **Drop-down** field, select **+ Add New Option**.
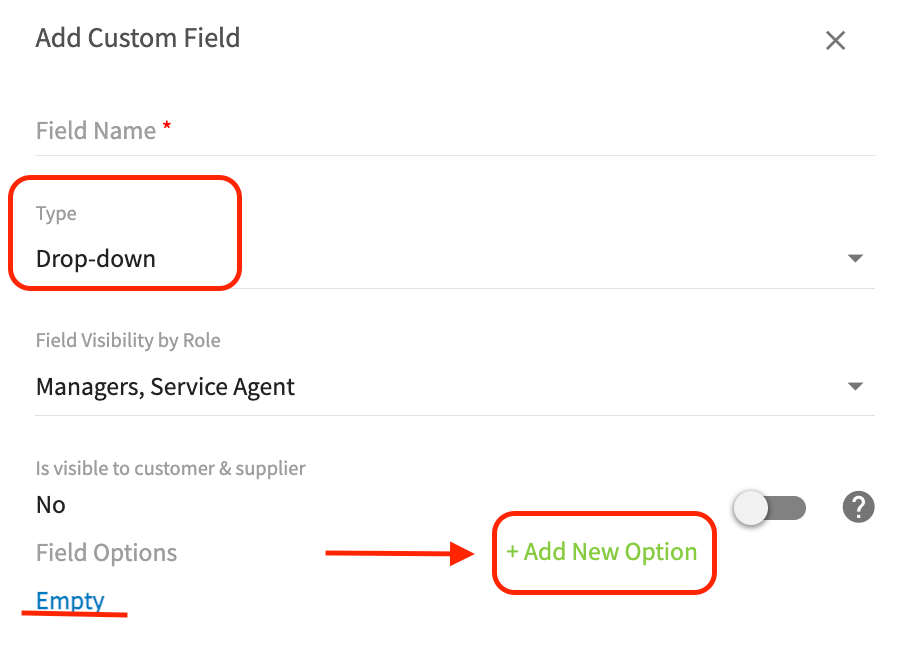 8. Enter the option name and select the save icon to keep it. Repeat for every option you need.
9. Mark one option as the **Default**. The default option is the value that shows on the material list until a user with permissions edits it.
8. Enter the option name and select the save icon to keep it. Repeat for every option you need.
9. Mark one option as the **Default**. The default option is the value that shows on the material list until a user with permissions edits it.
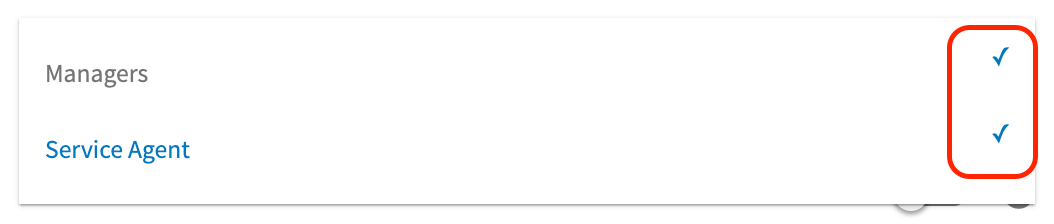
 10. Set **Field Visibility by Role** by checking or unchecking **Managers** and **Service Agent**.
 11. Set **Is visible to customer & supplier** on or off.
12. Save the field. The field is now active and appears on every material list for the roles you selected.
### Set the order the fields appear in
On the **Custom Fields** page, drag the handle to the left of a field name to move that field up or down the list. The order you set here is the order the fields appear on every material list, so put the fields your team fills in most often at the top.
## Settings reference
### Field types
| **Field type** | **What it stores** |
| -------------- | ------------------------------------------------------------------ |
| **Free Text** | Unrestricted text you type in your own words |
| **Number** | A number or quantity for the line item |
| **Date** | A date, entered from a calendar icon |
| **Drop-down** | One selection from options you define, with a customizable default |
| **Checkbox** | An on/off toggle |
### Visibility controls
| **Control** | **What it does** |
| ------------------------------------- | ------------------------------------------------------------------------------------------------------------------------------------------------------------------------ |
| **Field Visibility by Role** | Sets which team members — **Managers**, **Service Agent**, or both — can see the field, through check marks next to each role. |
| **Is visible to customer & supplier** | When on, your customers and suppliers can see the field on purchase order PDFs, job reports, estimates, invoices, and asset reports. When off, the field stays internal. |
### Fields that cascade from the customer record
Custom fields created on the customer record have the option to cascade onto all of your material lists, so you do not have to rebuild them here. See [Setting Up Customer Custom Fields](/customers/managing-customers/custom-fields) to set that up.
## Related articles
* [Material Lists Overview](/inventory-materials/material-lists/material-lists)
* [How to Use Material Lists on the Mobile App](/inventory-materials/material-lists/mobile-app)
* [Setting Up Customer Custom Fields](/customers/managing-customers/custom-fields)
* [Setting Up Custom Fields on Purchase Orders](/inventory-materials/purchase-orders/custom-fields)
Your setup is working when a team member opens a material list and finds your custom field in the position you set, visible to the roles you checked — and customers and suppliers see it on their documents only if you turned **Is visible to customer & supplier** on.
## Related topics
- [Material Lists Overview](/inventory-materials/material-lists/material-lists.md)
- [Material Lists](/inventory-materials/material-lists/index.md)
- [Setting Up Item Custom Fields](/inventory-materials/item-list/item-custom-fields.md)
- [Setting Up Custom Fields on Purchase Orders](/inventory-materials/purchase-orders/custom-fields.md)
11. Set **Is visible to customer & supplier** on or off.
12. Save the field. The field is now active and appears on every material list for the roles you selected.
### Set the order the fields appear in
On the **Custom Fields** page, drag the handle to the left of a field name to move that field up or down the list. The order you set here is the order the fields appear on every material list, so put the fields your team fills in most often at the top.
## Settings reference
### Field types
| **Field type** | **What it stores** |
| -------------- | ------------------------------------------------------------------ |
| **Free Text** | Unrestricted text you type in your own words |
| **Number** | A number or quantity for the line item |
| **Date** | A date, entered from a calendar icon |
| **Drop-down** | One selection from options you define, with a customizable default |
| **Checkbox** | An on/off toggle |
### Visibility controls
| **Control** | **What it does** |
| ------------------------------------- | ------------------------------------------------------------------------------------------------------------------------------------------------------------------------ |
| **Field Visibility by Role** | Sets which team members — **Managers**, **Service Agent**, or both — can see the field, through check marks next to each role. |
| **Is visible to customer & supplier** | When on, your customers and suppliers can see the field on purchase order PDFs, job reports, estimates, invoices, and asset reports. When off, the field stays internal. |
### Fields that cascade from the customer record
Custom fields created on the customer record have the option to cascade onto all of your material lists, so you do not have to rebuild them here. See [Setting Up Customer Custom Fields](/customers/managing-customers/custom-fields) to set that up.
## Related articles
* [Material Lists Overview](/inventory-materials/material-lists/material-lists)
* [How to Use Material Lists on the Mobile App](/inventory-materials/material-lists/mobile-app)
* [Setting Up Customer Custom Fields](/customers/managing-customers/custom-fields)
* [Setting Up Custom Fields on Purchase Orders](/inventory-materials/purchase-orders/custom-fields)
Your setup is working when a team member opens a material list and finds your custom field in the position you set, visible to the roles you checked — and customers and suppliers see it on their documents only if you turned **Is visible to customer & supplier** on.
## Related topics
- [Material Lists Overview](/inventory-materials/material-lists/material-lists.md)
- [Material Lists](/inventory-materials/material-lists/index.md)
- [Setting Up Item Custom Fields](/inventory-materials/item-list/item-custom-fields.md)
- [Setting Up Custom Fields on Purchase Orders](/inventory-materials/purchase-orders/custom-fields.md)