> ## Documentation Index
> Fetch the complete documentation index at: https://help.fieldpulse.com/llms.txt
> Use this file to discover all available pages before exploring further.
# How to Manage Assets
> Enable Asset Management in FieldPulse, create customer and company assets, link them to jobs, transfer ownership, and send customers asset reports.
> **Who uses this:** Admins and Team Managers create, edit, archive, and view assets; Service Agents can archive assets and can create, edit, and view them when an Admin enables that permission; Limited Agents have no asset access. Transferring ownership requires a role selected under **Ability to Transfer Assets** (Admin and Team Manager by default). **Availability:** All regions · included in the FieldPulse subscription; Asset Management must be enabled in **Company Settings > Features & Plugins**.
An asset is the record that holds everything about a piece of equipment — model, install date, warranty, photos, and every job it's been part of. When the asset is tied to a customer, you build a service history you can pull up on the next call instead of piecing it together from memory.
## Overview
Asset Management tracks both customer equipment and your own company gear at the same level of detail. You enable the feature once, then create assets, save templates for equipment you handle often, link assets to [jobs](https://www.fieldpulse.com/features/job-management) and [maintenance agreements](https://www.fieldpulse.com/features/maintenance-agreements), transfer ownership when a property changes hands, and generate reports to send to customers. Each asset also totals how many times it's been serviced and how much the customer has spent on it over its lifetime.
## Video walkthrough
## Before you begin
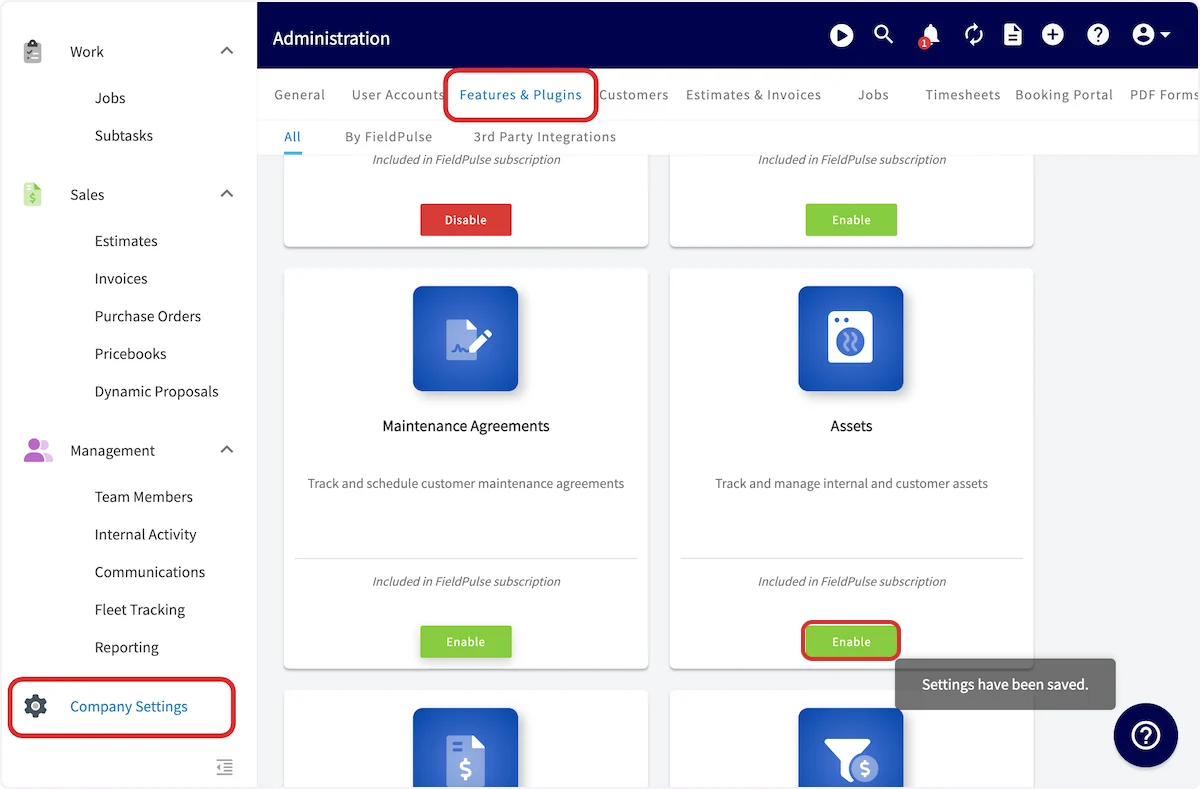
Enable Asset Management first. Go to **Company Settings** > **Features & Plugins**, find **Assets**, and select **Enable**. Once it's on, you can start creating assets.
 ## Create an asset
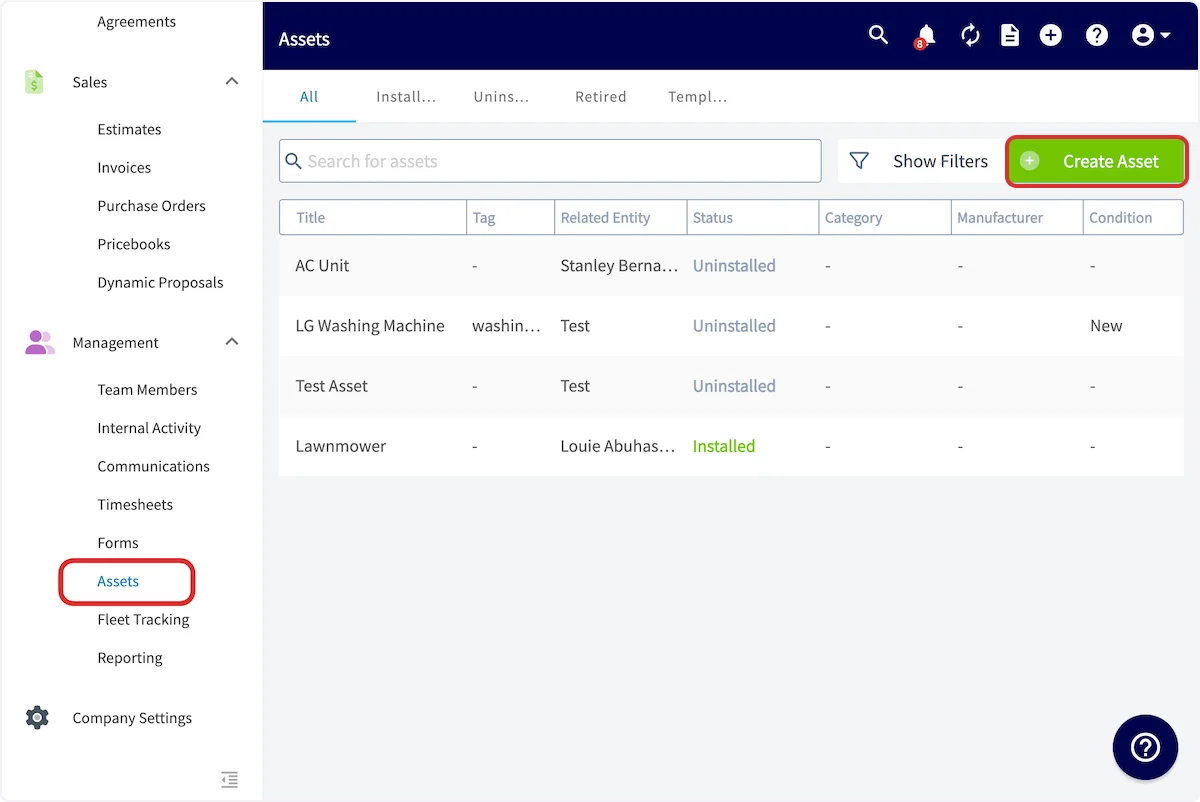
1. Select **Assets** in the left-side menu.
## Create an asset
1. Select **Assets** in the left-side menu.
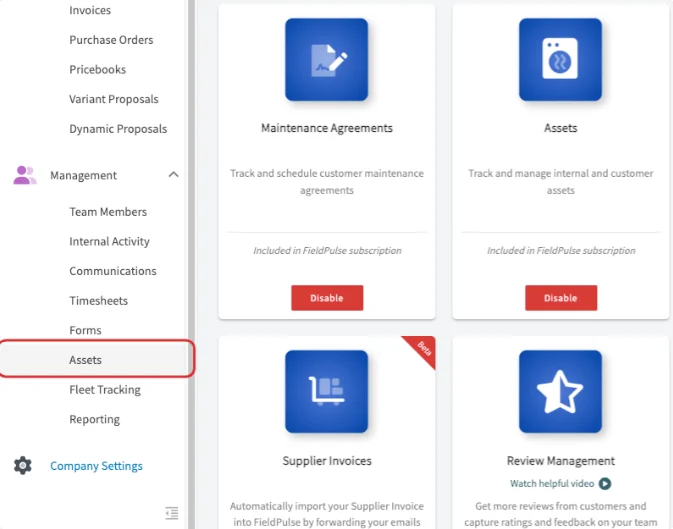 2. Select **Create Asset**. The Assets page sorts your assets into categories at the top of the screen — **All**, **Installed**, **Uninstalled**, **Retired**, and **Templates**.
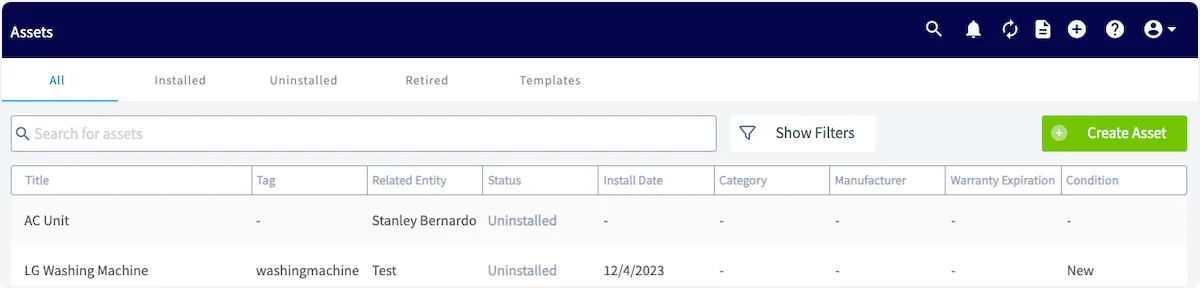 3. Add a **title** for the asset.
4. Choose whether it's a **Customer Asset** (becomes your customer's property) or a **Company Asset** (owned, used, and maintained by you). For a Customer Asset, you're prompted to link a customer, which auto-populates their location as the asset's location.
5. If you want to set coordinates yourself, enter them in Decimal Degrees (for example, 34.0522, -118.2437) or Degrees, Minutes, Seconds (for example, 34°03'08"N, 118°14'37"W).
6. Set the **status** — **Uninstalled**, **Installed/In Use**, or **Retired**.
7. Add **asset tags** to sort and categorize. Attach an existing **maintenance agreement** if there is one. Set the **install date** and a **location description** if they apply.
3. Add a **title** for the asset.
4. Choose whether it's a **Customer Asset** (becomes your customer's property) or a **Company Asset** (owned, used, and maintained by you). For a Customer Asset, you're prompted to link a customer, which auto-populates their location as the asset's location.
5. If you want to set coordinates yourself, enter them in Decimal Degrees (for example, 34.0522, -118.2437) or Degrees, Minutes, Seconds (for example, 34°03'08"N, 118°14'37"W).
6. Set the **status** — **Uninstalled**, **Installed/In Use**, or **Retired**.
7. Add **asset tags** to sort and categorize. Attach an existing **maintenance agreement** if there is one. Set the **install date** and a **location description** if they apply.
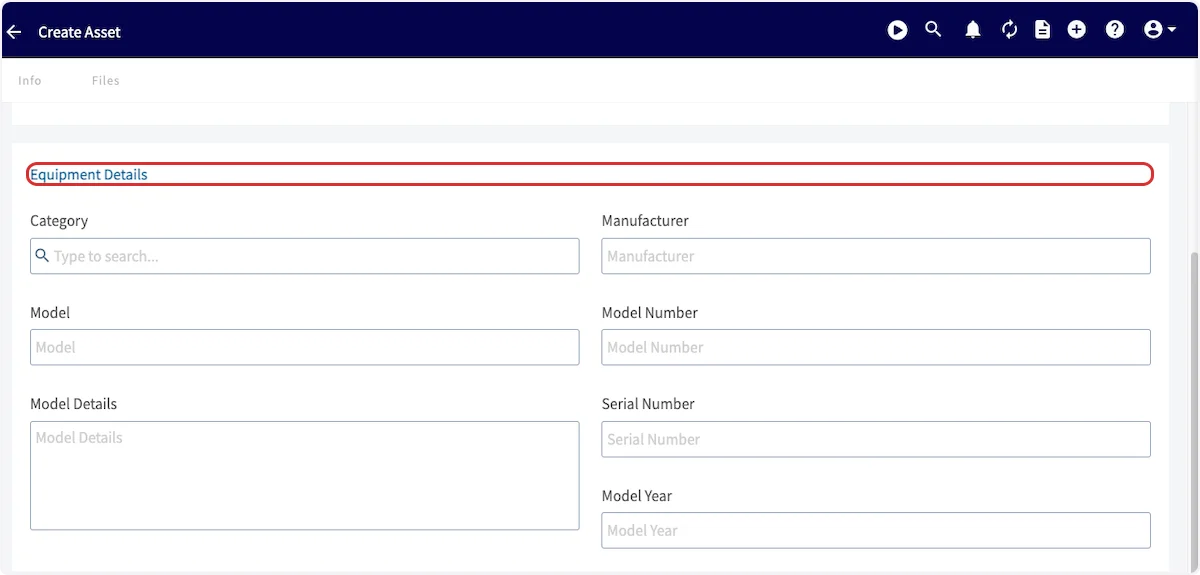
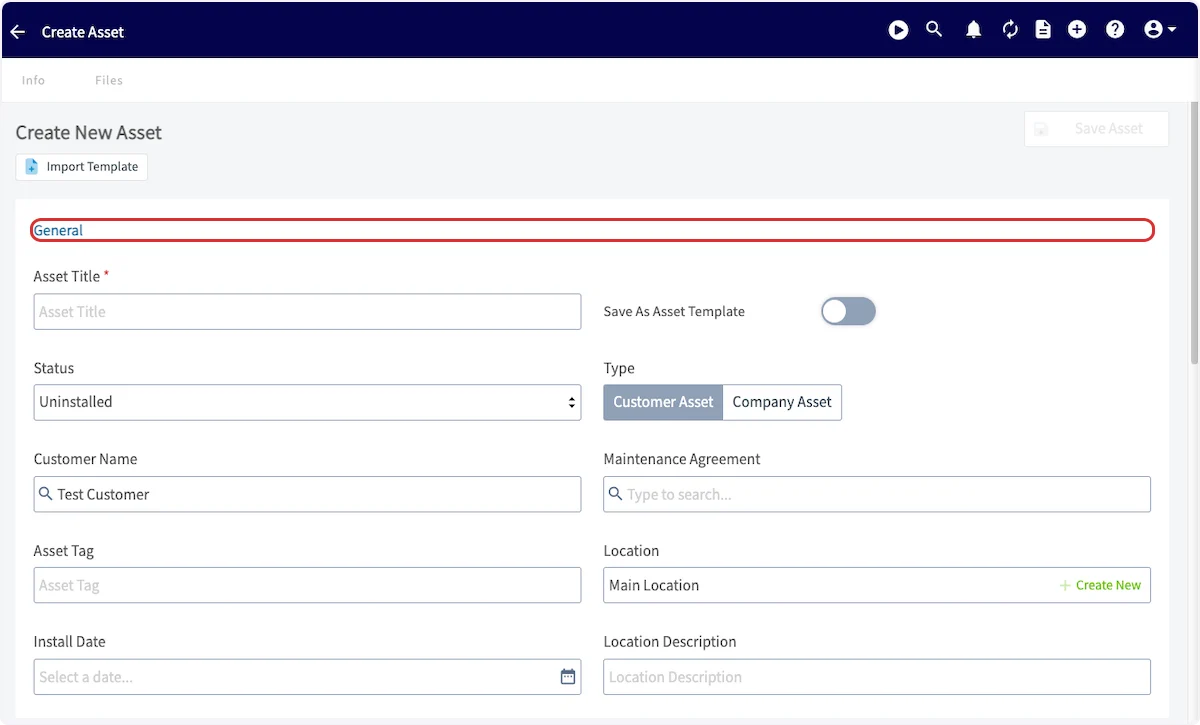 8. Enter the **equipment details**. Add as many or as few as you need.
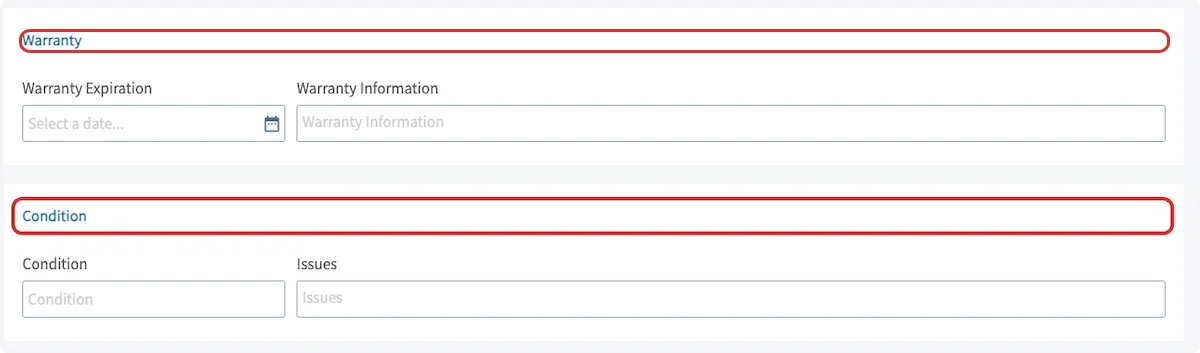
 9. Add a **warranty expiration date** and warranty details if applicable, and name and describe the asset's **condition**.
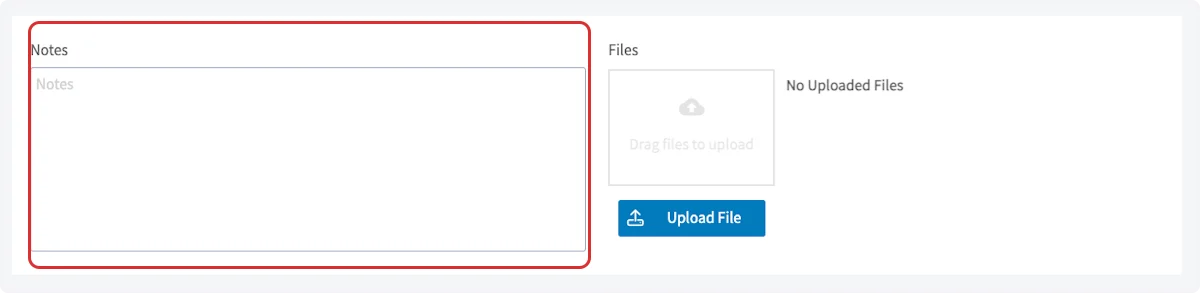
 10. Add **notes** and **files** as needed.
 11. Select **Save**.
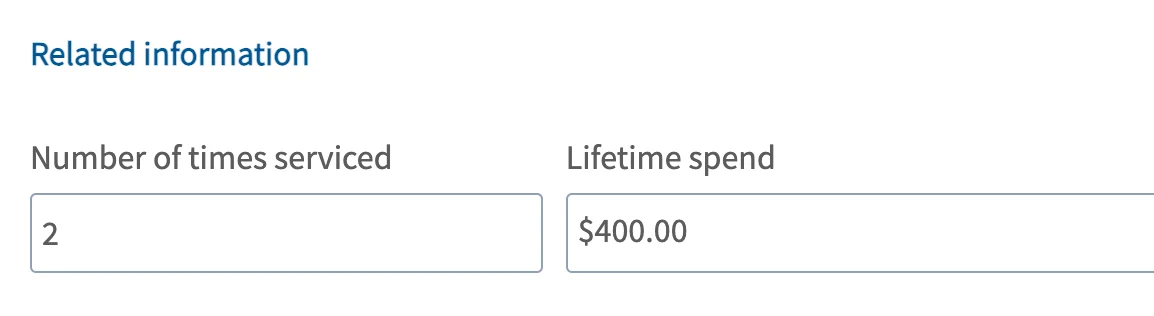
After you save, FieldPulse opens the **Asset Record**, where two fields calculate on their own:
* **Number of Times Serviced** — counts every Job and Site Visit record linked to the asset.
* **Lifetime Spend** — totals the invoice value from completed jobs tied to the asset. Draft and Void invoices are excluded.
11. Select **Save**.
After you save, FieldPulse opens the **Asset Record**, where two fields calculate on their own:
* **Number of Times Serviced** — counts every Job and Site Visit record linked to the asset.
* **Lifetime Spend** — totals the invoice value from completed jobs tied to the asset. Draft and Void invoices are excluded.
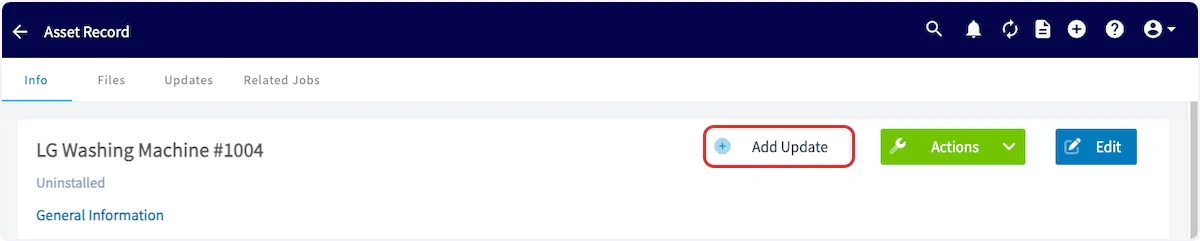
 To log an update later, open the Asset Record and select **Add Update**.
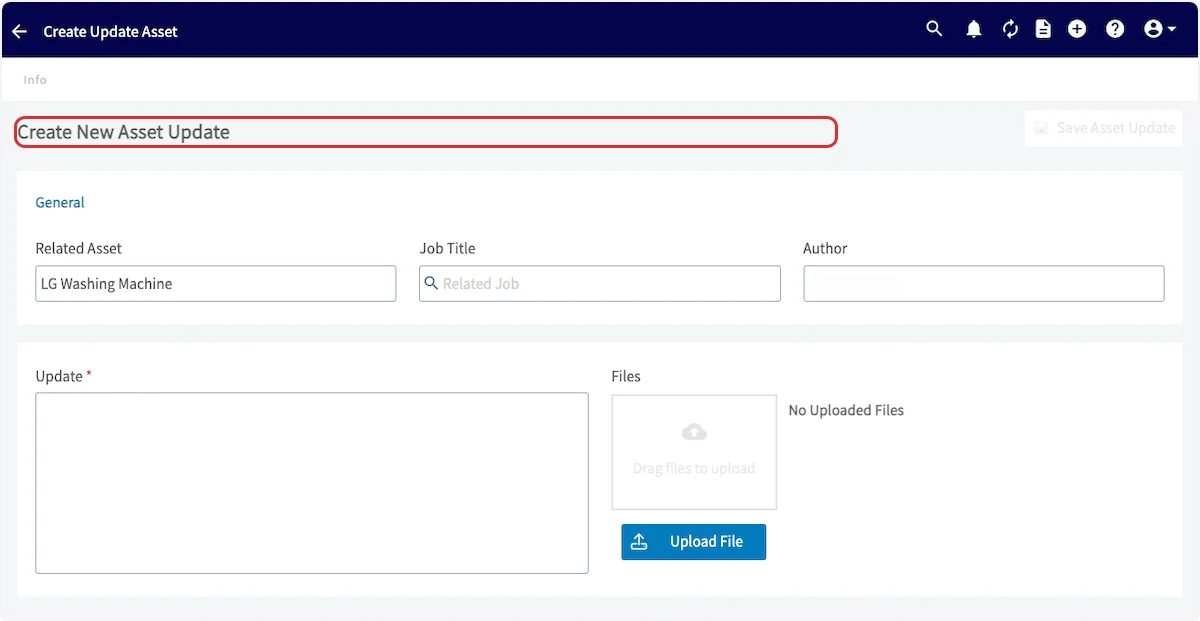
 In the asset update, you can link a related job, type the update, and attach files.
 ## Save and reuse asset templates
If you handle the same kind of equipment often, save a template so you're not re-entering the same details every time.
### Create a template
1. Go to **Assets** and select **Create Asset**.
## Save and reuse asset templates
If you handle the same kind of equipment often, save a template so you're not re-entering the same details every time.
### Create a template
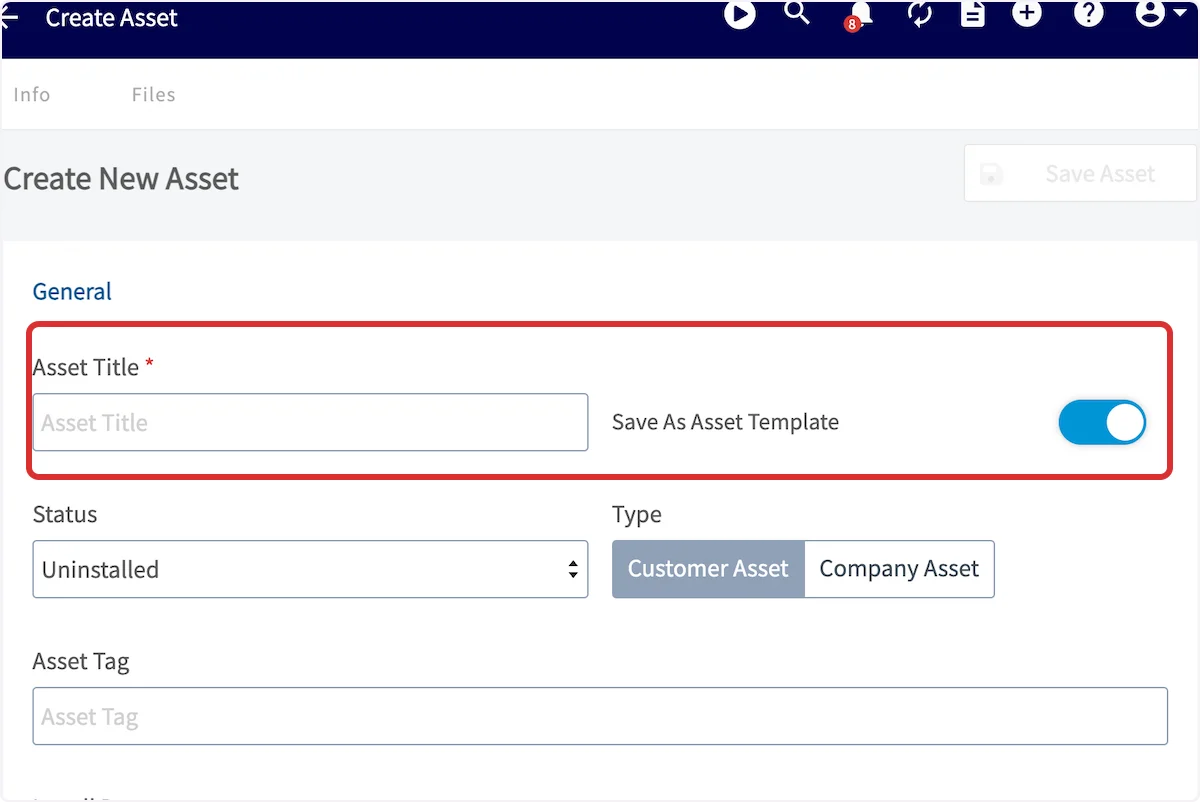
1. Go to **Assets** and select **Create Asset**.
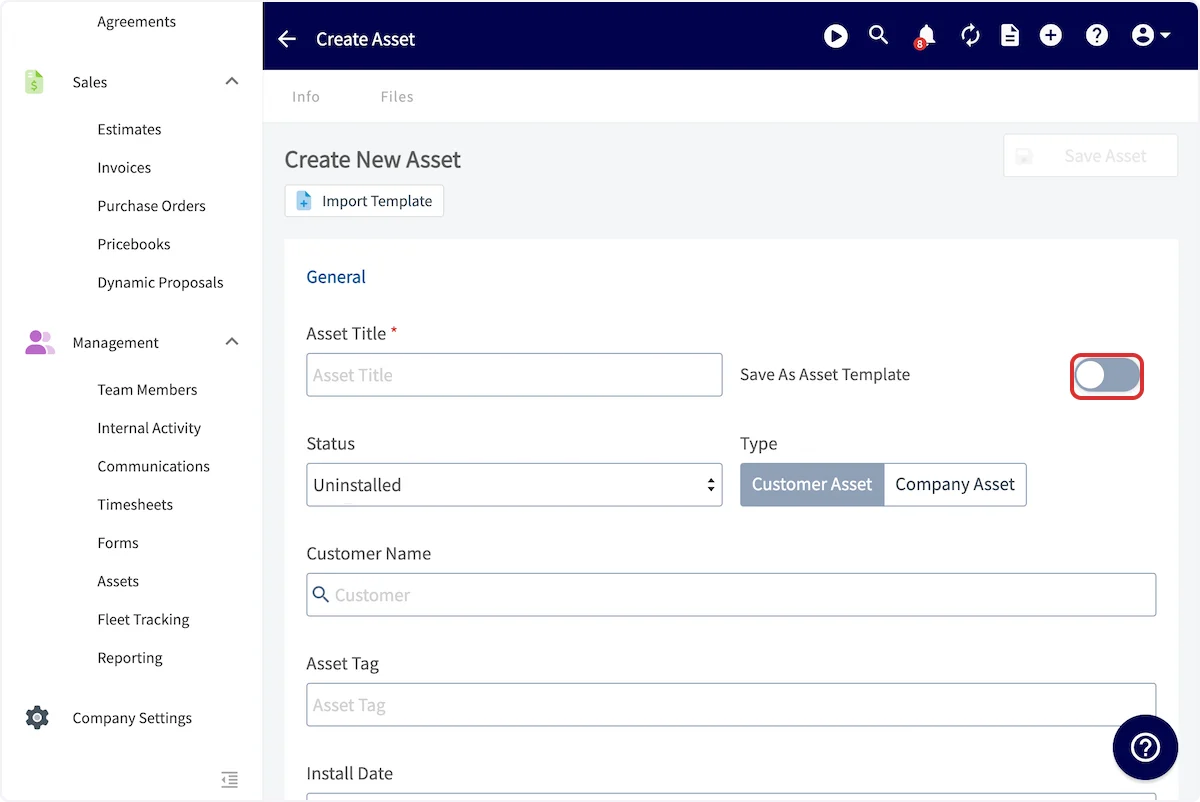
 2. Before adding any information, turn on **Save As Asset Template**.
 3. Title the template.
4. Enter the details you want to reuse — condition, warranty, and notes.
5. Select **Save**.
3. Title the template.
4. Enter the details you want to reuse — condition, warranty, and notes.
5. Select **Save**.
 ### Use a template
1. Go to **Assets** and select **Create Asset**.
2. Before entering any details, select **Import Template** and choose the template.
### Use a template
1. Go to **Assets** and select **Create Asset**.
2. Before entering any details, select **Import Template** and choose the template.
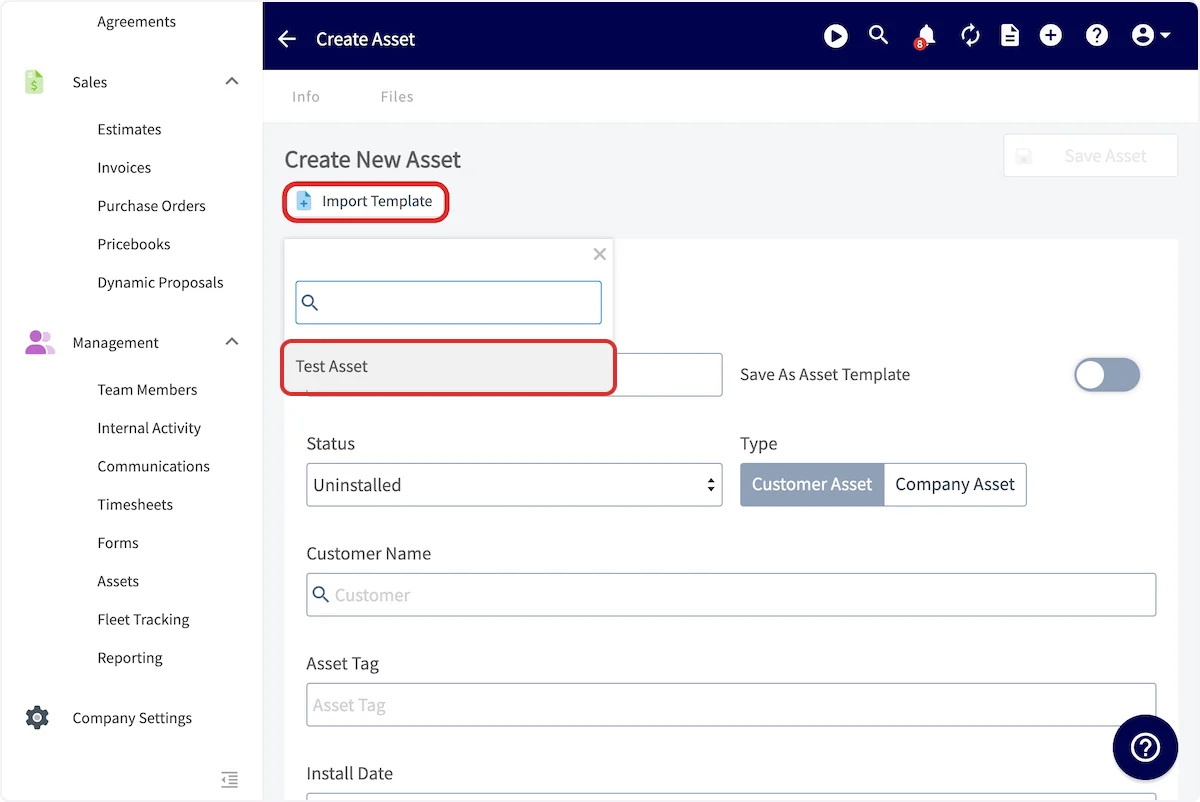 3. The saved details fill in automatically. Adjust anything that's different for this asset.
4. Select **Save**.
## Link an asset to a job, customer, or maintenance agreement
### From a job
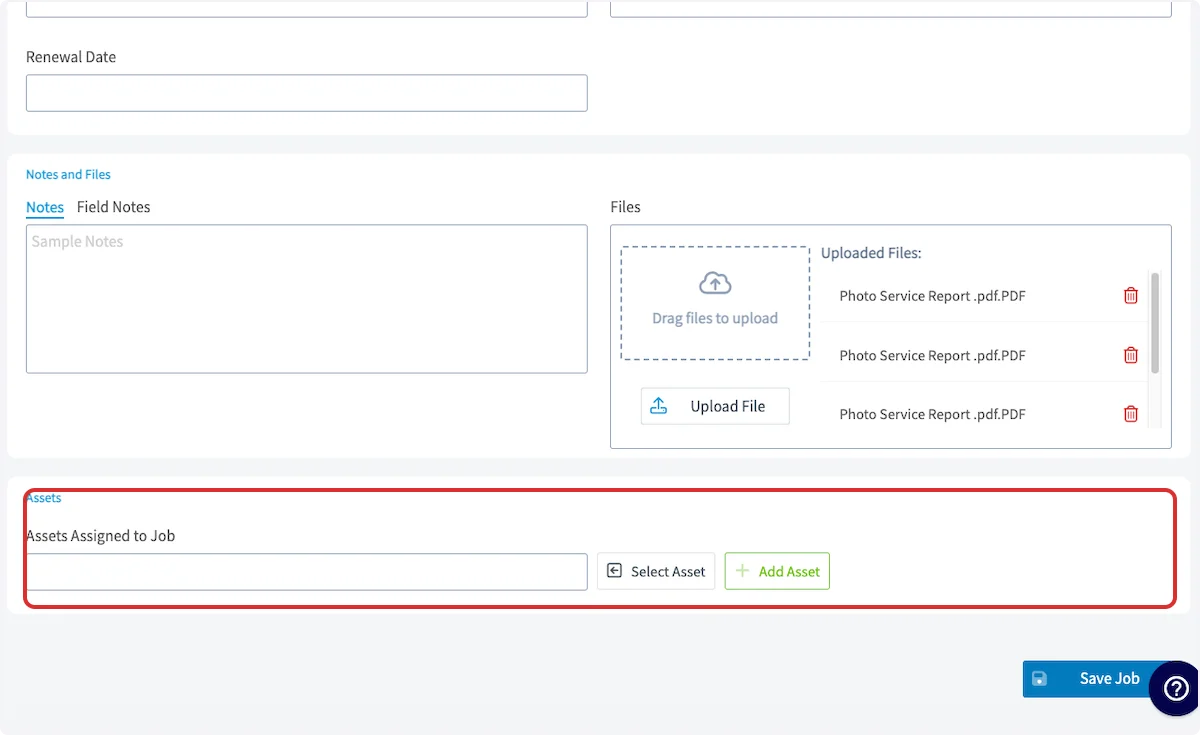
Create or edit a job. Directly above **Save Job**, attach an existing asset with **Select Asset** or create a new one with **Add Asset**.
3. The saved details fill in automatically. Adjust anything that's different for this asset.
4. Select **Save**.
## Link an asset to a job, customer, or maintenance agreement
### From a job
Create or edit a job. Directly above **Save Job**, attach an existing asset with **Select Asset** or create a new one with **Add Asset**.
 ### From a customer
Open the customer record and select the **Assets** tab at the top of the screen.
### From a customer
Open the customer record and select the **Assets** tab at the top of the screen.
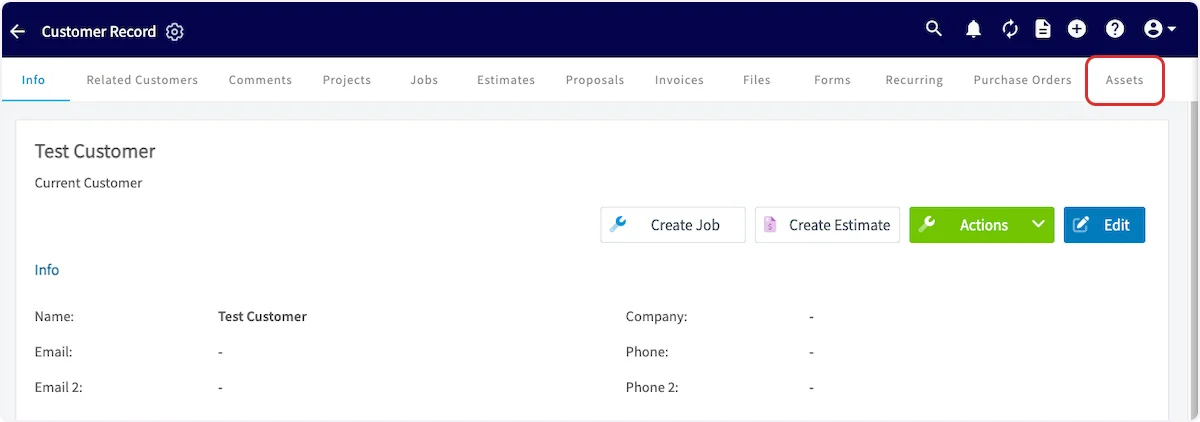 Select **Create Asset** and complete the fields as described under Create an asset.
 ### From a maintenance agreement
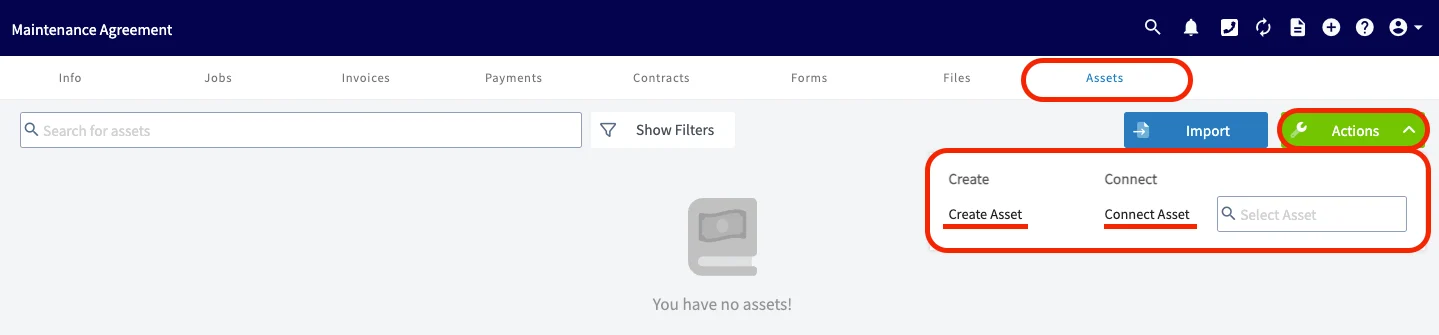
Open the agreement record and select the **Assets** tab at the top of the screen, then use the green **Actions** button to create a new asset or connect an existing one.
### From a maintenance agreement
Open the agreement record and select the **Assets** tab at the top of the screen, then use the green **Actions** button to create a new asset or connect an existing one.
 ## Create or connect jobs from the asset record
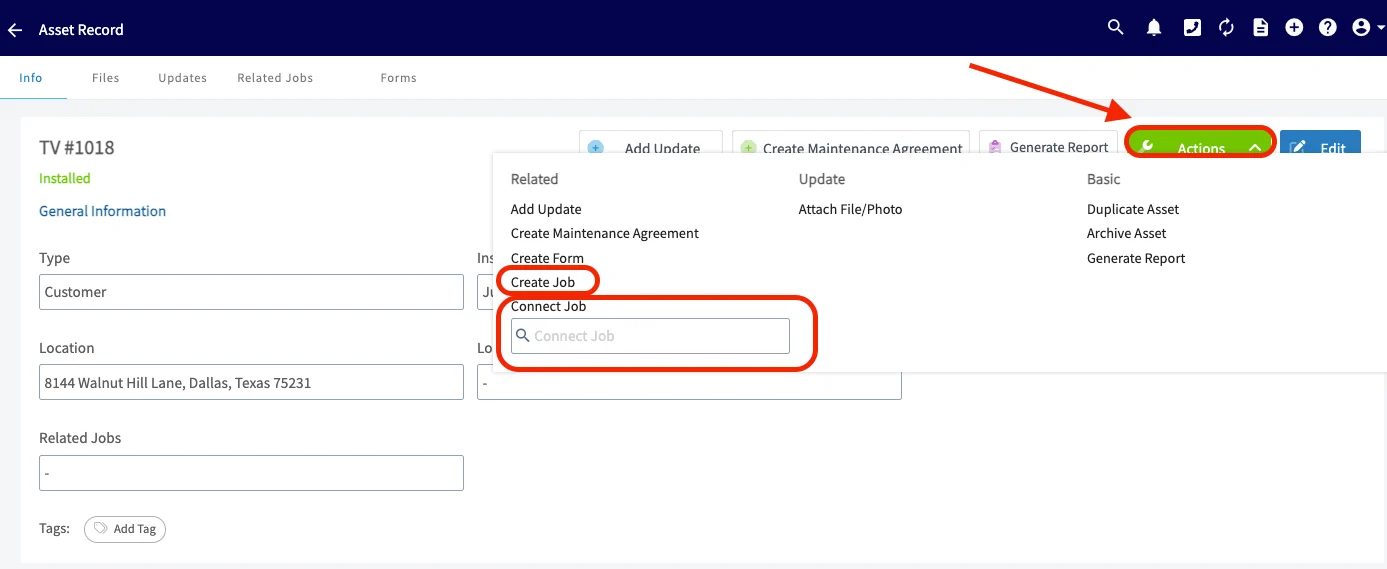
Two actions on the asset record let you work in the other direction:
* **Create Job** — opens the job creation page with the asset already linked. If a maintenance agreement is linked to the asset, it links to the job too.
* **Connect Job** — lets you search for and select an existing job. If a customer is selected, the search is limited to that customer's jobs. Once you pick a job, the asset and any linked maintenance agreement connect to it automatically.
## Create or connect jobs from the asset record
Two actions on the asset record let you work in the other direction:
* **Create Job** — opens the job creation page with the asset already linked. If a maintenance agreement is linked to the asset, it links to the job too.
* **Connect Job** — lets you search for and select an existing job. If a customer is selected, the search is limited to that customer's jobs. Once you pick a job, the asset and any linked maintenance agreement connect to it automatically.
 ## Remove an asset from a job
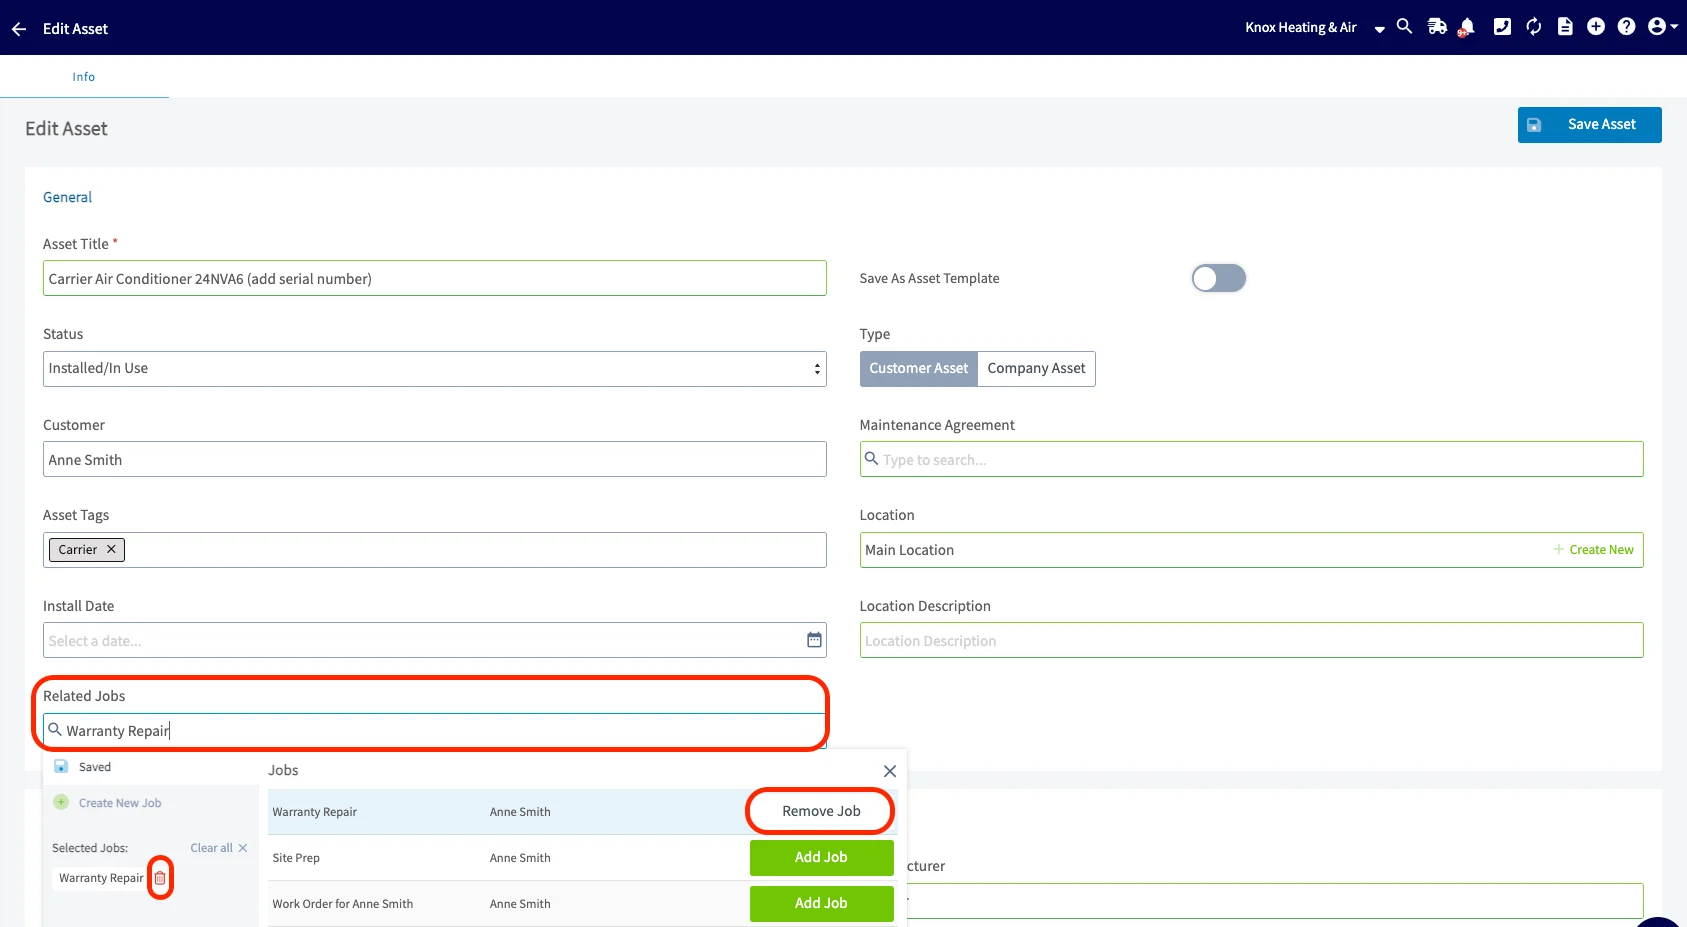
1. On the asset record, select **Edit**.
2. Select the **Related Jobs** field.
3. Remove the job with the red trash icon or the **Remove Job** button.
## Remove an asset from a job
1. On the asset record, select **Edit**.
2. Select the **Related Jobs** field.
3. Remove the job with the red trash icon or the **Remove Job** button.
 ## Scan asset barcodes
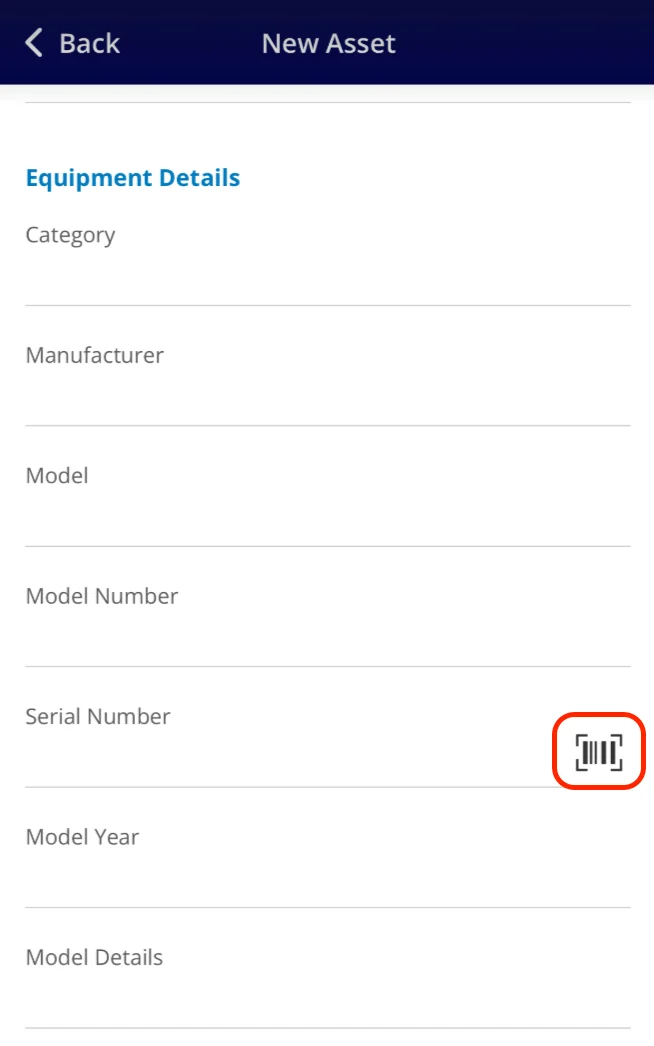
You can scan the barcodes on your assets from the field. Scanning lets you add a new asset or pull up an existing one to update details like its condition — useful when you're picking up or dropping off equipment on site. On the mobile asset form, the barcode scan icon sits next to the **Serial Number** field.
## Scan asset barcodes
You can scan the barcodes on your assets from the field. Scanning lets you add a new asset or pull up an existing one to update details like its condition — useful when you're picking up or dropping off equipment on site. On the mobile asset form, the barcode scan icon sits next to the **Serial Number** field.
 ## Generate asset reports
Turn the data on your asset records into a report you can send to a customer, as a dynamic URL or a PDF. You can combine multiple assets into a single summary report, customize which details show, and link reports to dynamic estimates and invoices.
> **FieldPulse Pro Tips:**
>
> * **Generate an asset report** after finishing a new equipment installation. It gives your customers a useful reference and helps them identify who to reach out to if any issues arise in the future.
>
> * **Add company-branded contact stickers** to the installed equipment so your customers have quick access to your information whenever they need assistance.
### Single-asset report
1. Open the asset record and select **Generate Report**.
## Generate asset reports
Turn the data on your asset records into a report you can send to a customer, as a dynamic URL or a PDF. You can combine multiple assets into a single summary report, customize which details show, and link reports to dynamic estimates and invoices.
> **FieldPulse Pro Tips:**
>
> * **Generate an asset report** after finishing a new equipment installation. It gives your customers a useful reference and helps them identify who to reach out to if any issues arise in the future.
>
> * **Add company-branded contact stickers** to the installed equipment so your customers have quick access to your information whenever they need assistance.
### Single-asset report
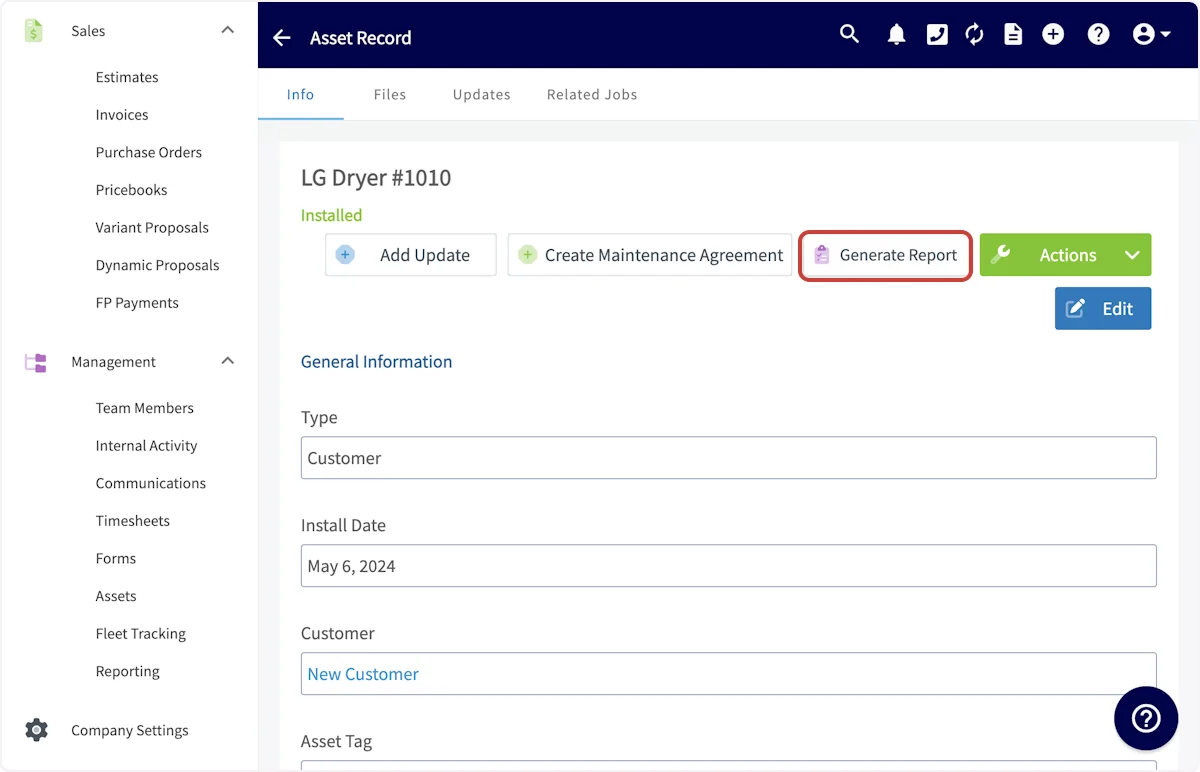
1. Open the asset record and select **Generate Report**.
 2. Choose **Dynamic URL** or **PDF** at the top of the preview.
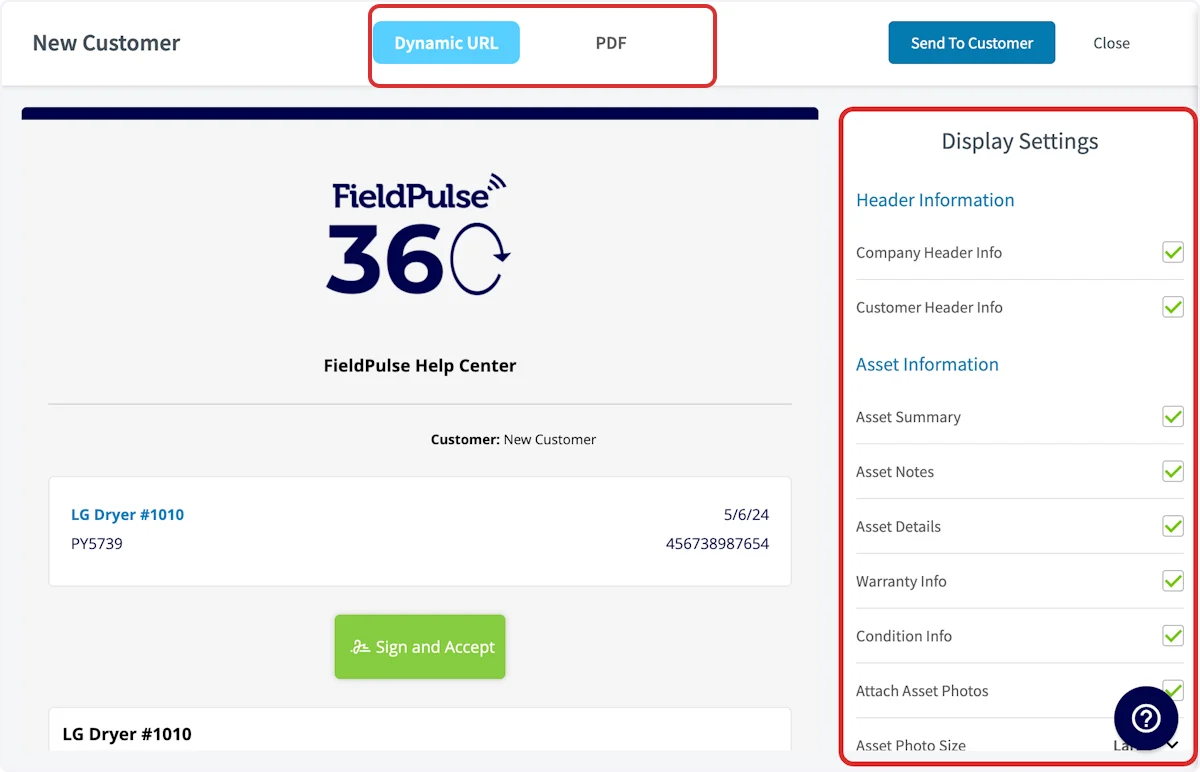 3. Use the display settings on the right to show or hide sections — asset summary, notes, details, and photos.
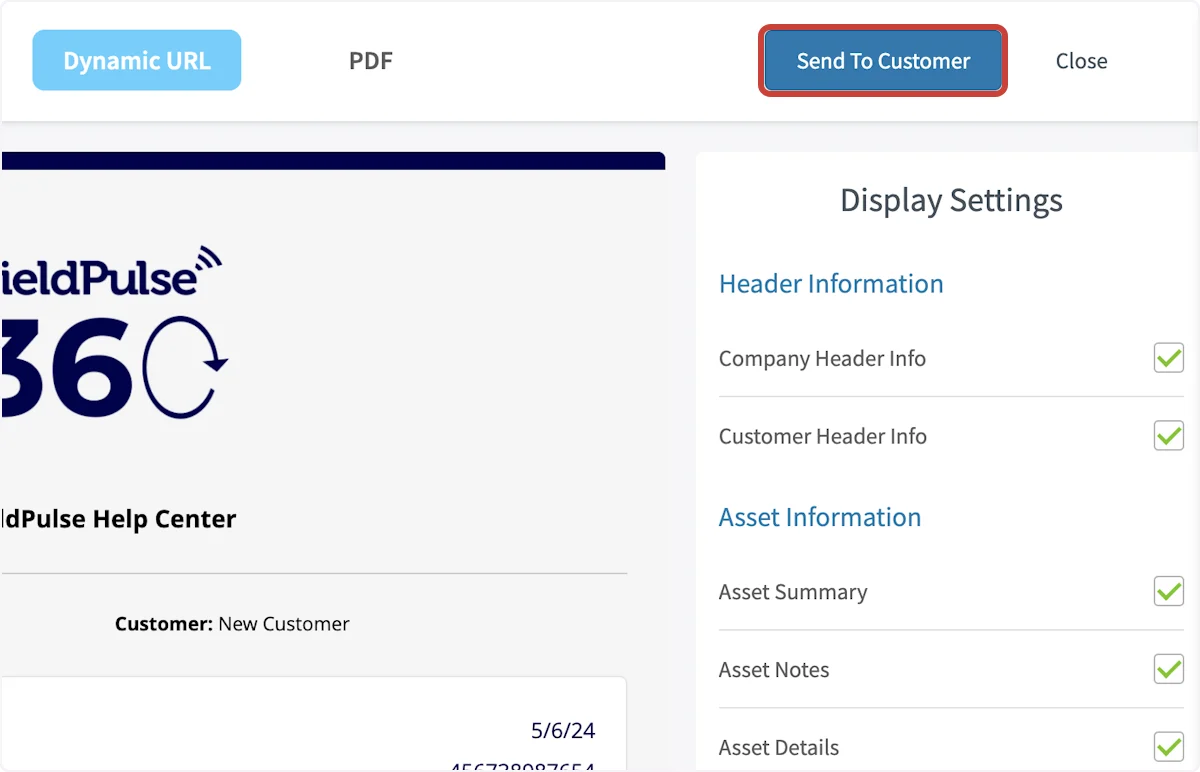
4. Select **Send to Customer**.
3. Use the display settings on the right to show or hide sections — asset summary, notes, details, and photos.
4. Select **Send to Customer**.
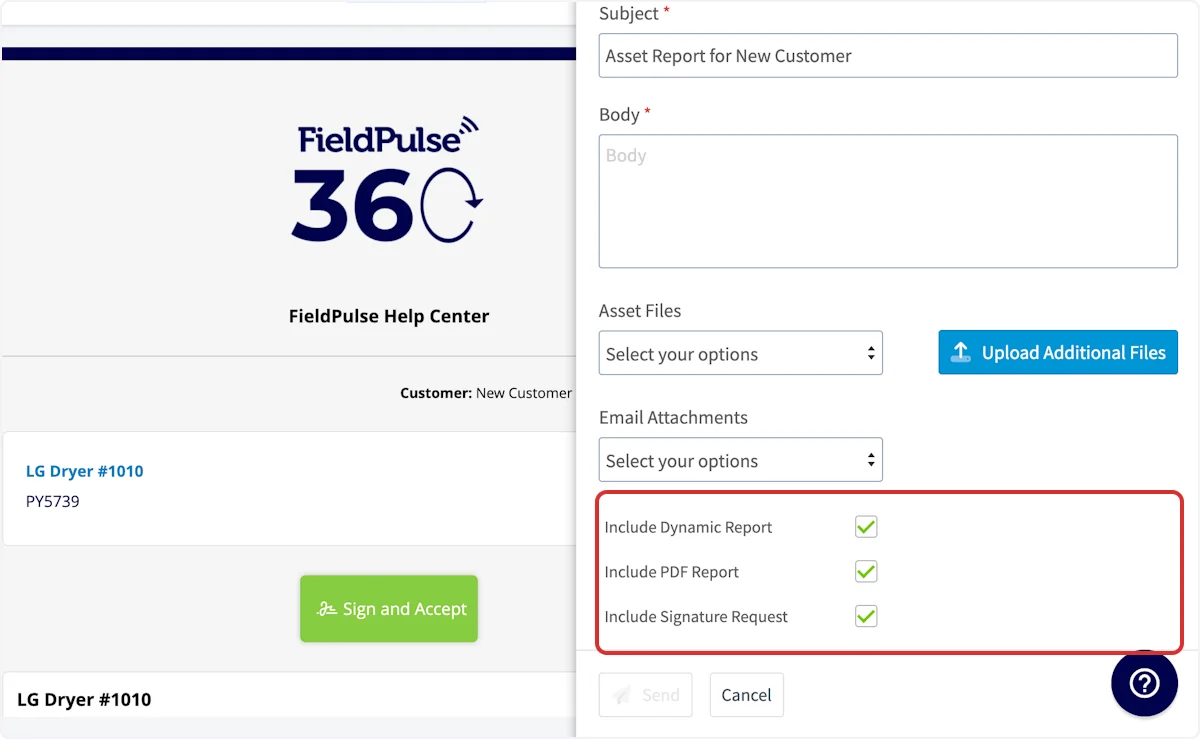
 5. Set the recipient, subject, and body. Attach any files, and choose whether to include the **Dynamic Report**, **PDF Report**, and a **Signature Request**.
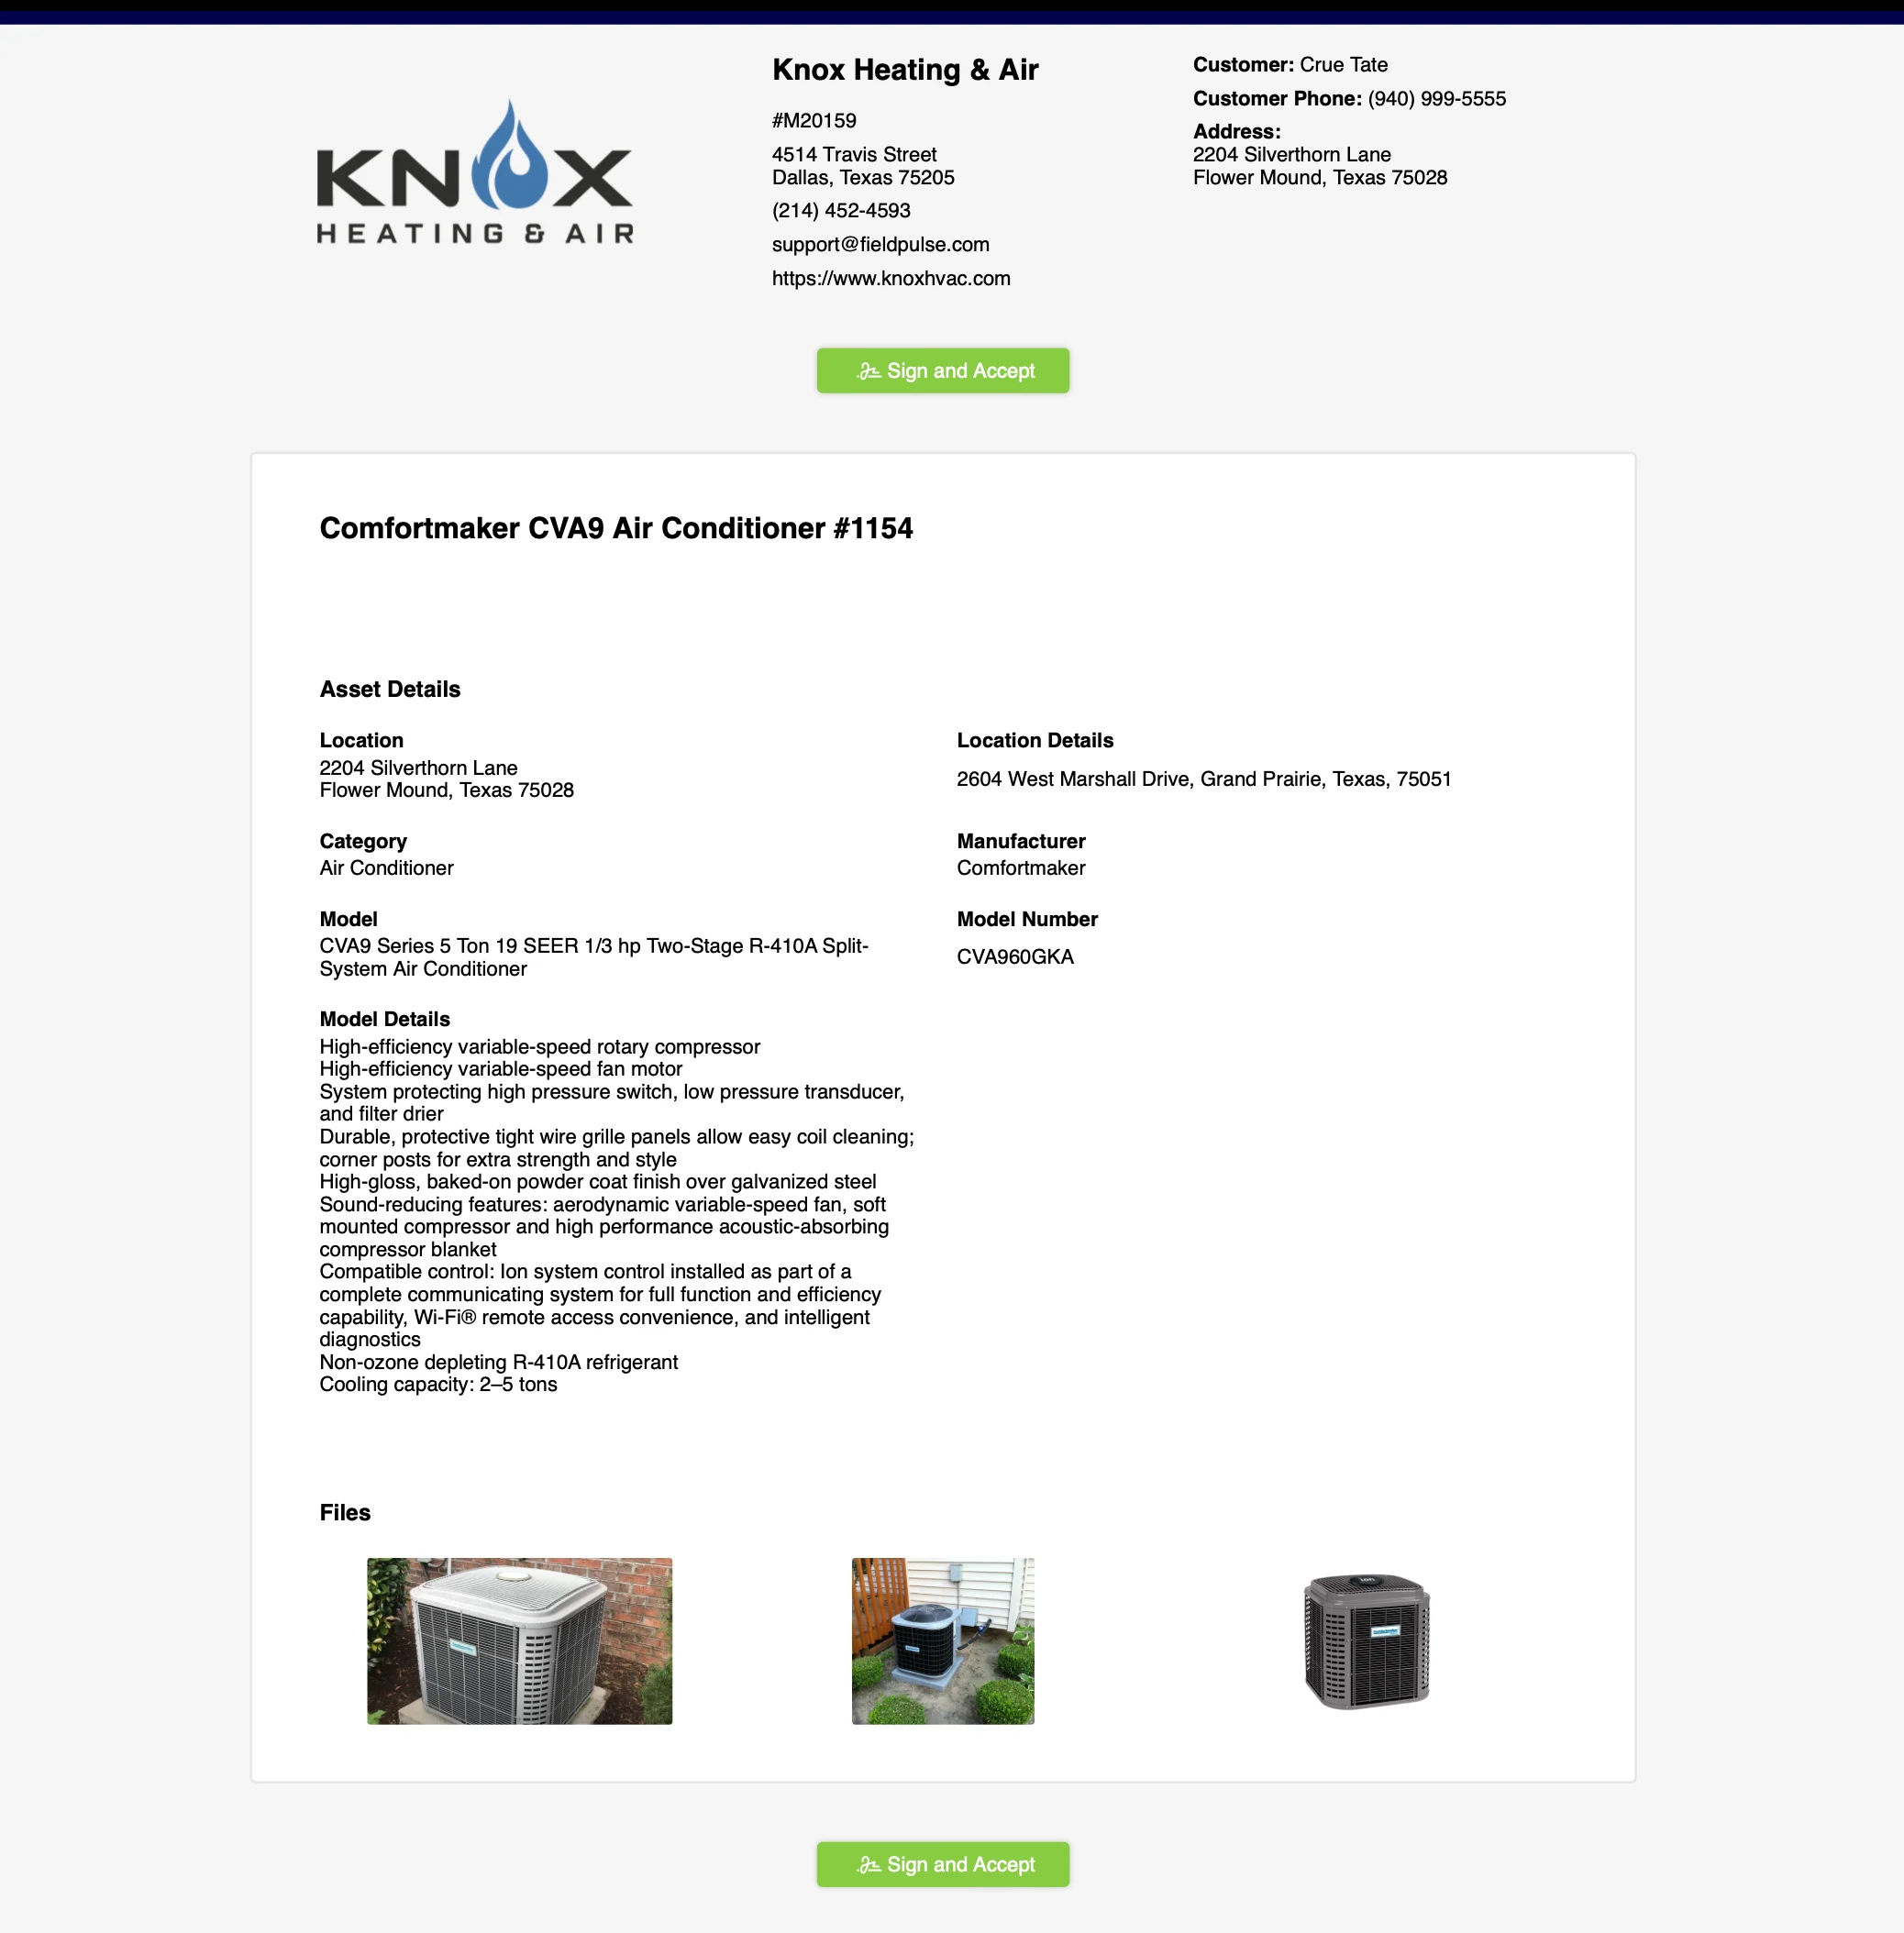
 Here's an example of a dynamic report with a signature request:
 ### Multi-asset report
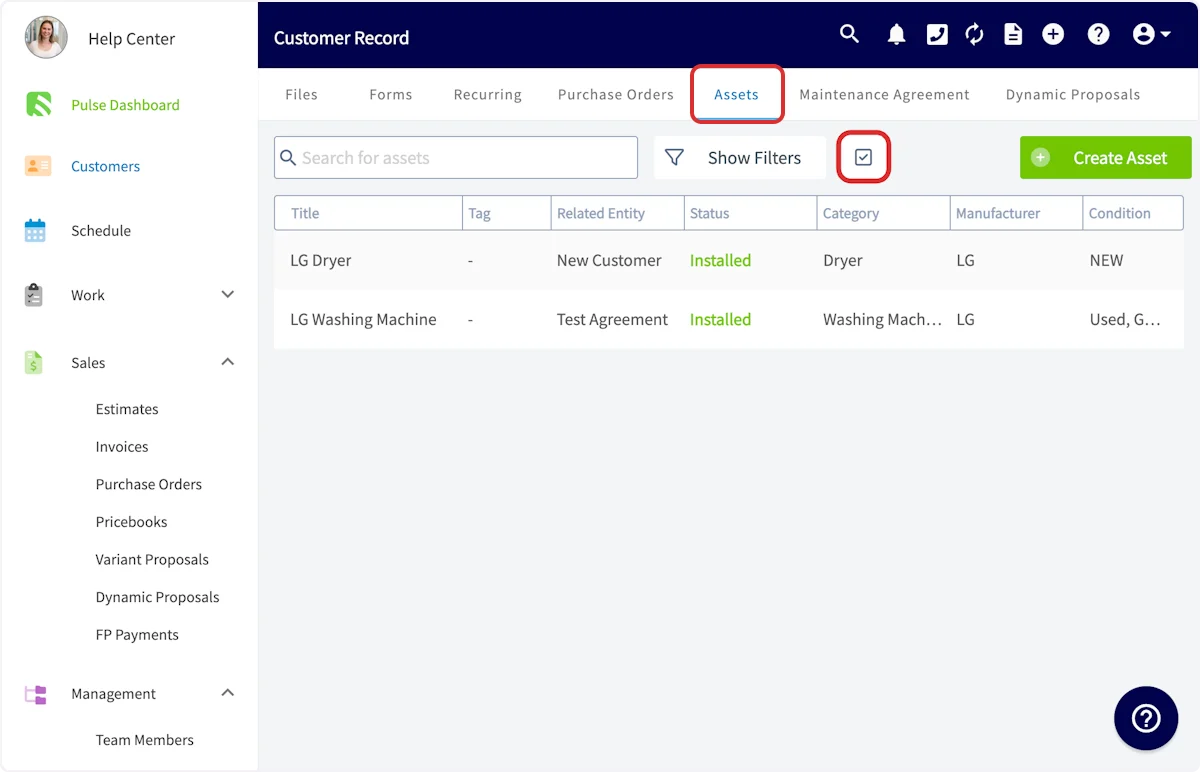
1. Open the customer record tied to the assets and select **Assets** from the top menu.
2. Select the checkbox icon.
### Multi-asset report
1. Open the customer record tied to the assets and select **Assets** from the top menu.
2. Select the checkbox icon.
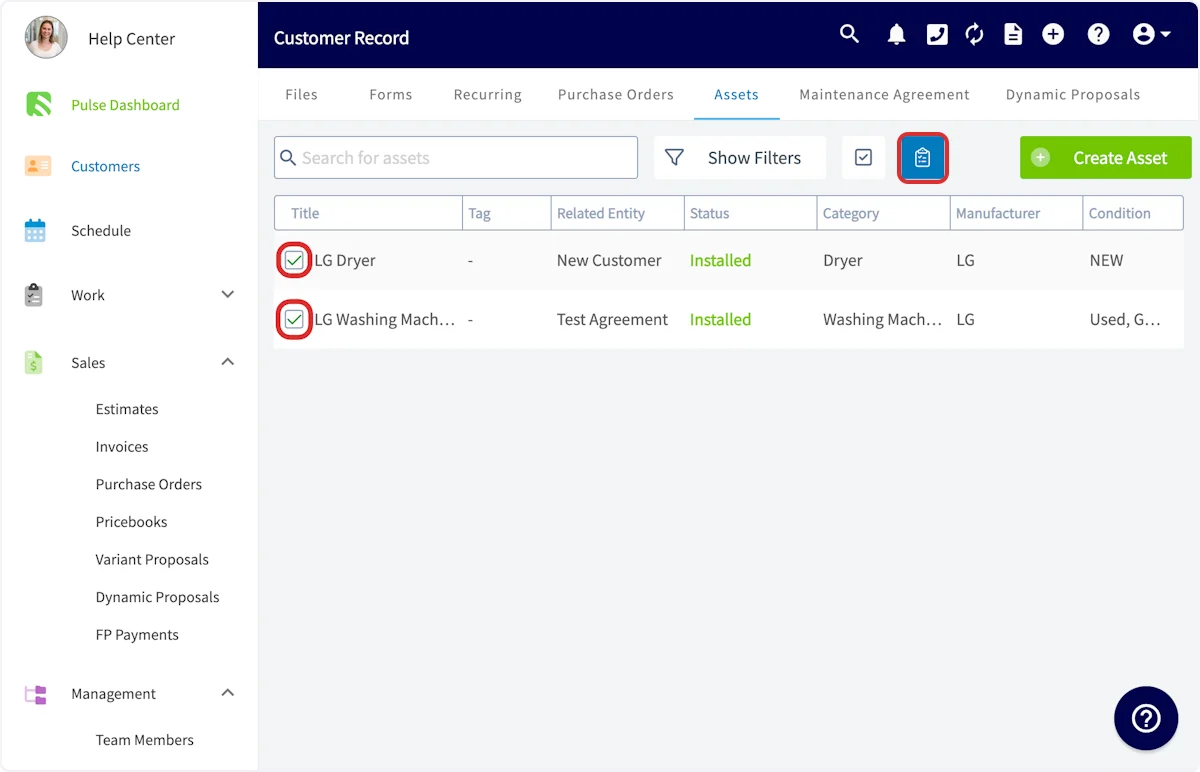
 3. Choose the asset records to include, then select the clipboard icon to generate the report.
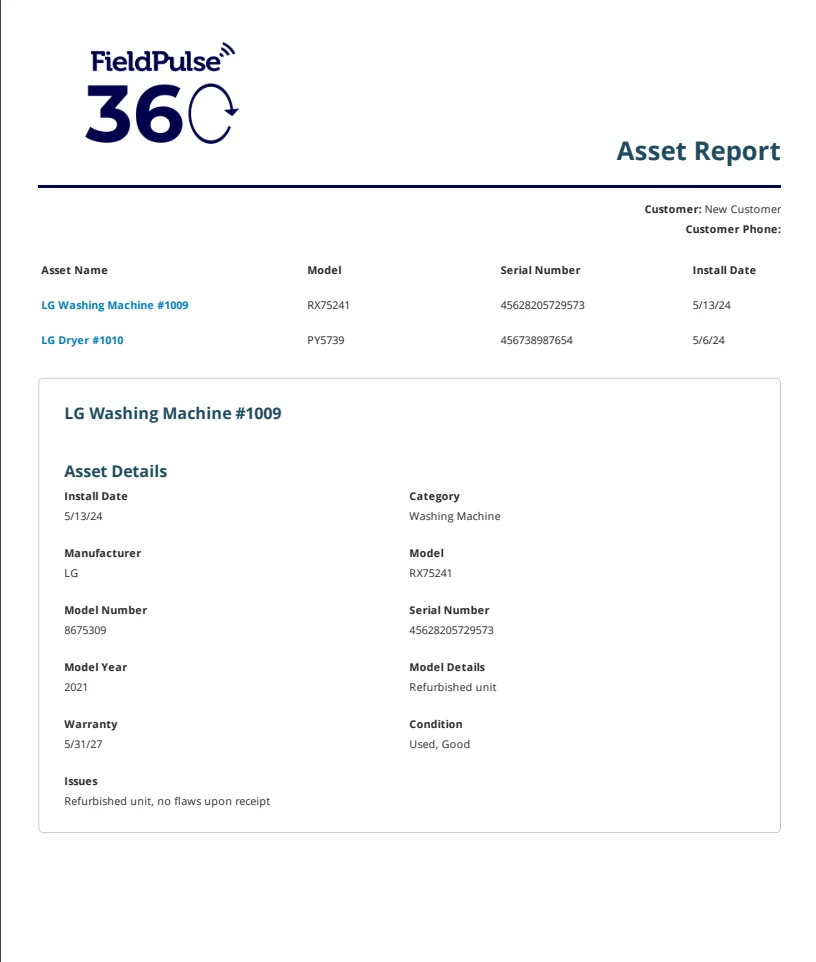
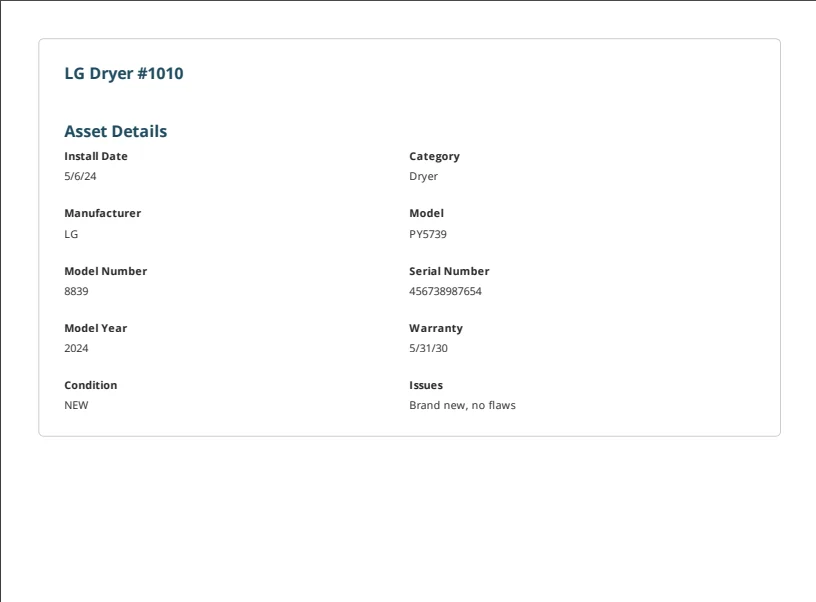
 4. Customize the display options and send the report the same way as a single-asset report. Here's an example of a multi-asset report:
 ## Transfer asset ownership
Ownership transfer is available for **Customer Assets** only. The action appears on the asset record once a customer is linked, and every transfer is logged so you keep a full audit trail.
### Set up transfer permissions
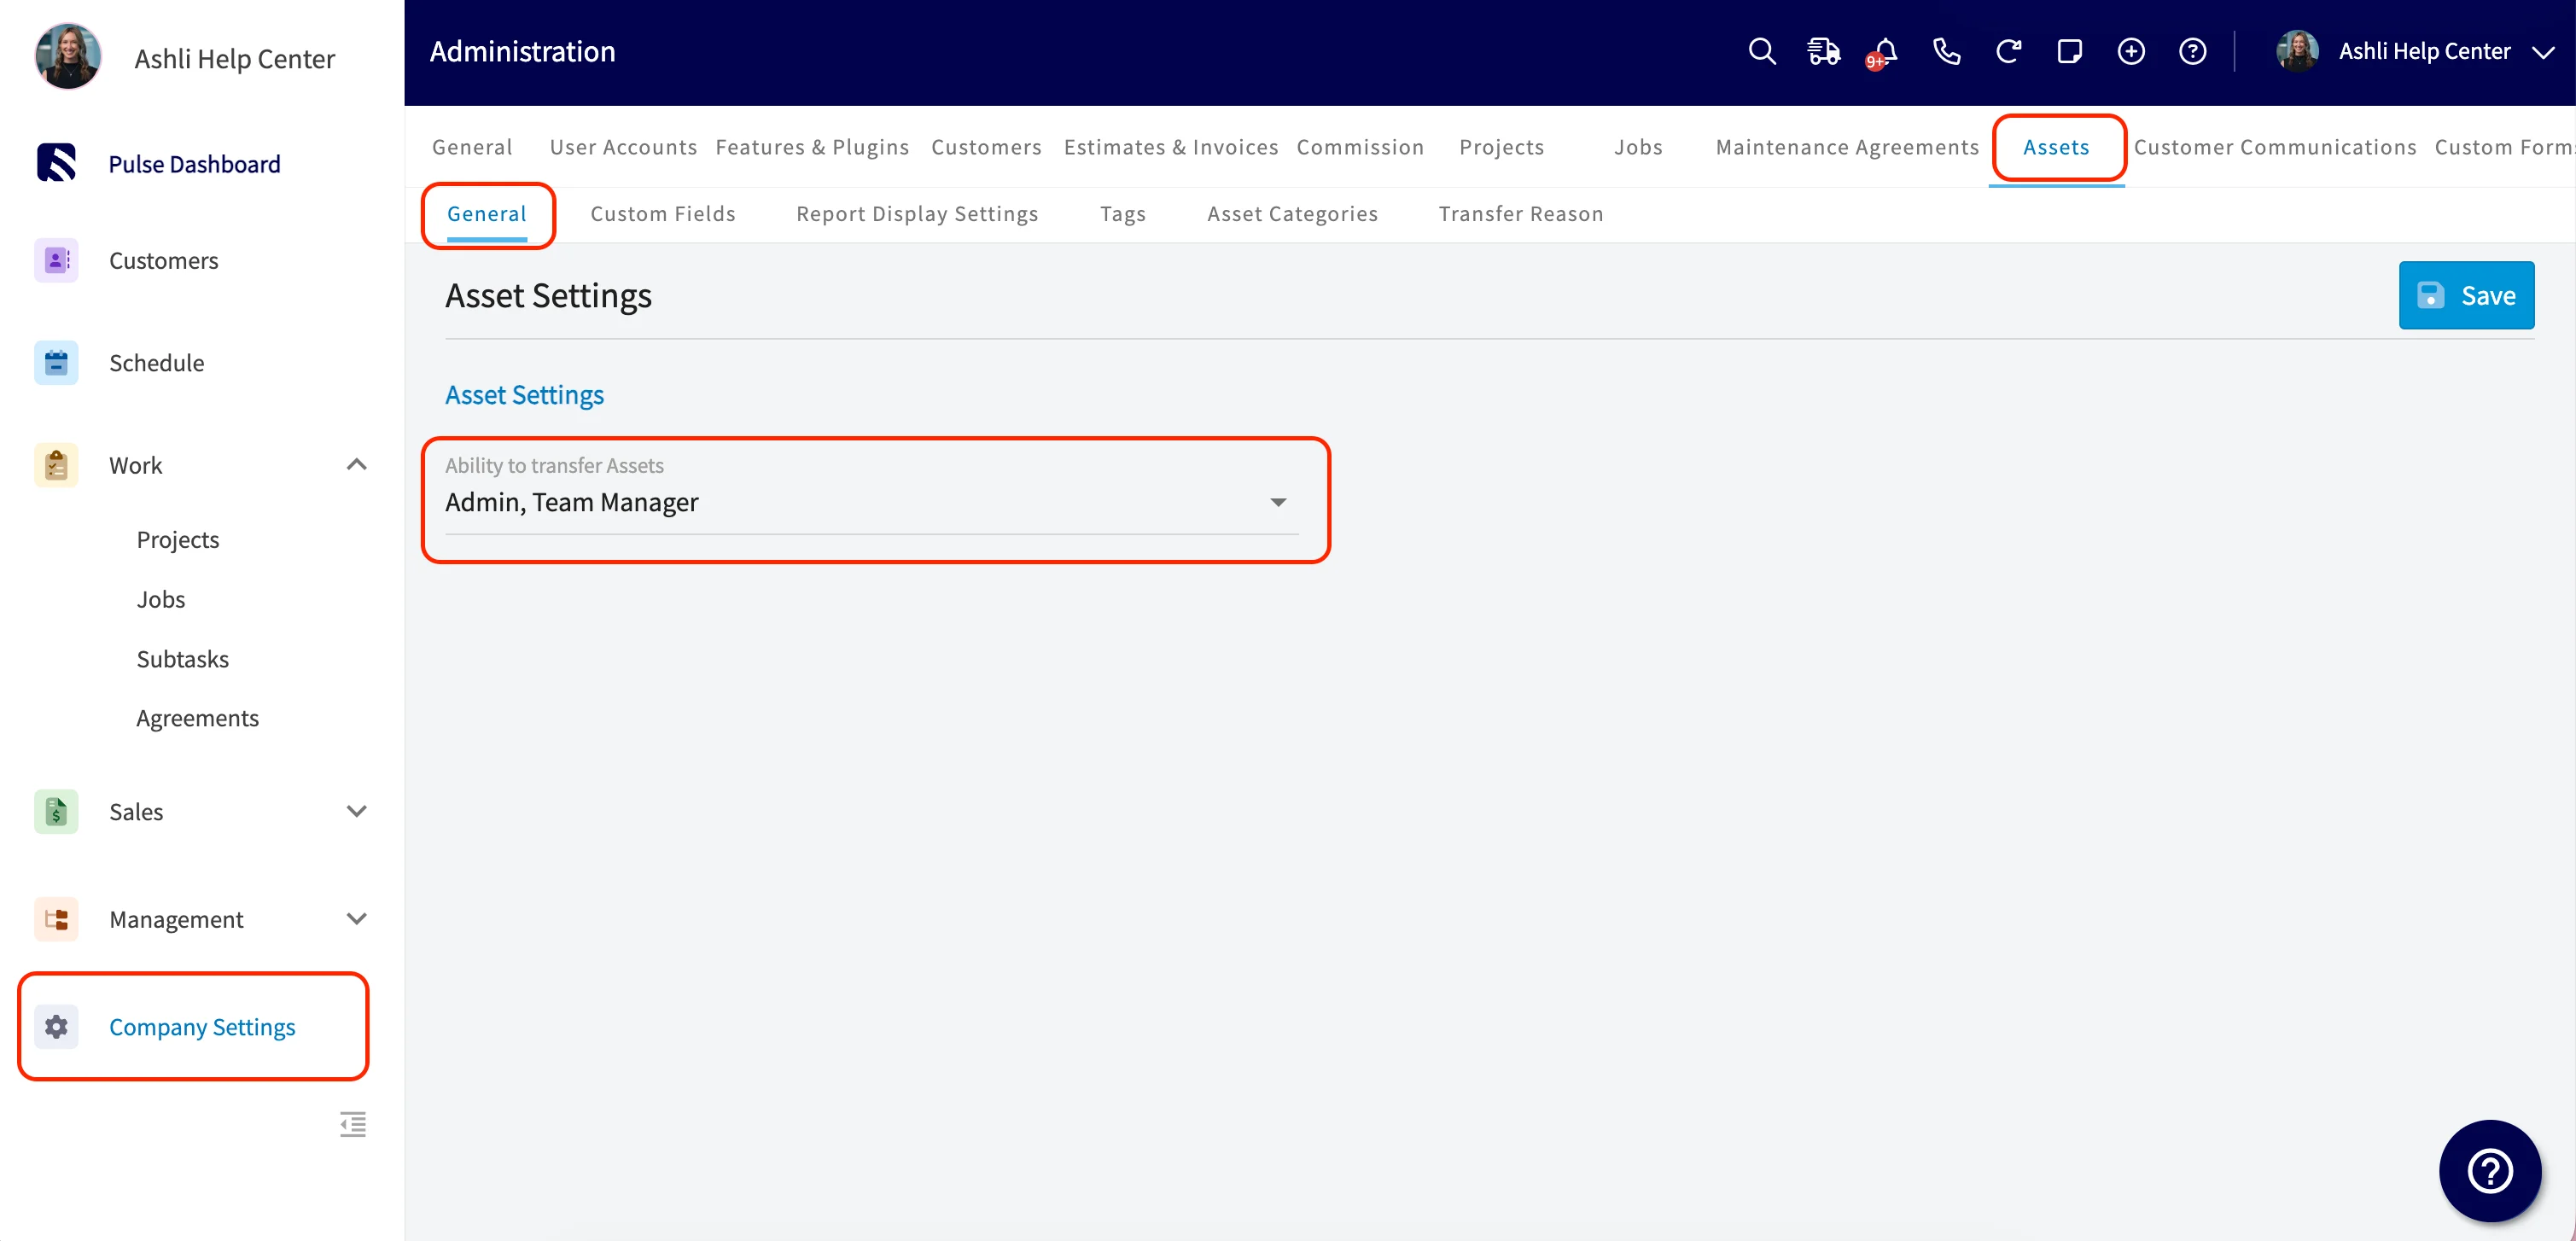
1. Go to **Company Settings** > **Assets** > **General**.
2. Under **Ability to Transfer Assets**, select the roles that should have access. By default, **Admin** and **Team Manager** are on and **Service Agent** is off. You can select more than one role.
## Transfer asset ownership
Ownership transfer is available for **Customer Assets** only. The action appears on the asset record once a customer is linked, and every transfer is logged so you keep a full audit trail.
### Set up transfer permissions
1. Go to **Company Settings** > **Assets** > **General**.
2. Under **Ability to Transfer Assets**, select the roles that should have access. By default, **Admin** and **Team Manager** are on and **Service Agent** is off. You can select more than one role.
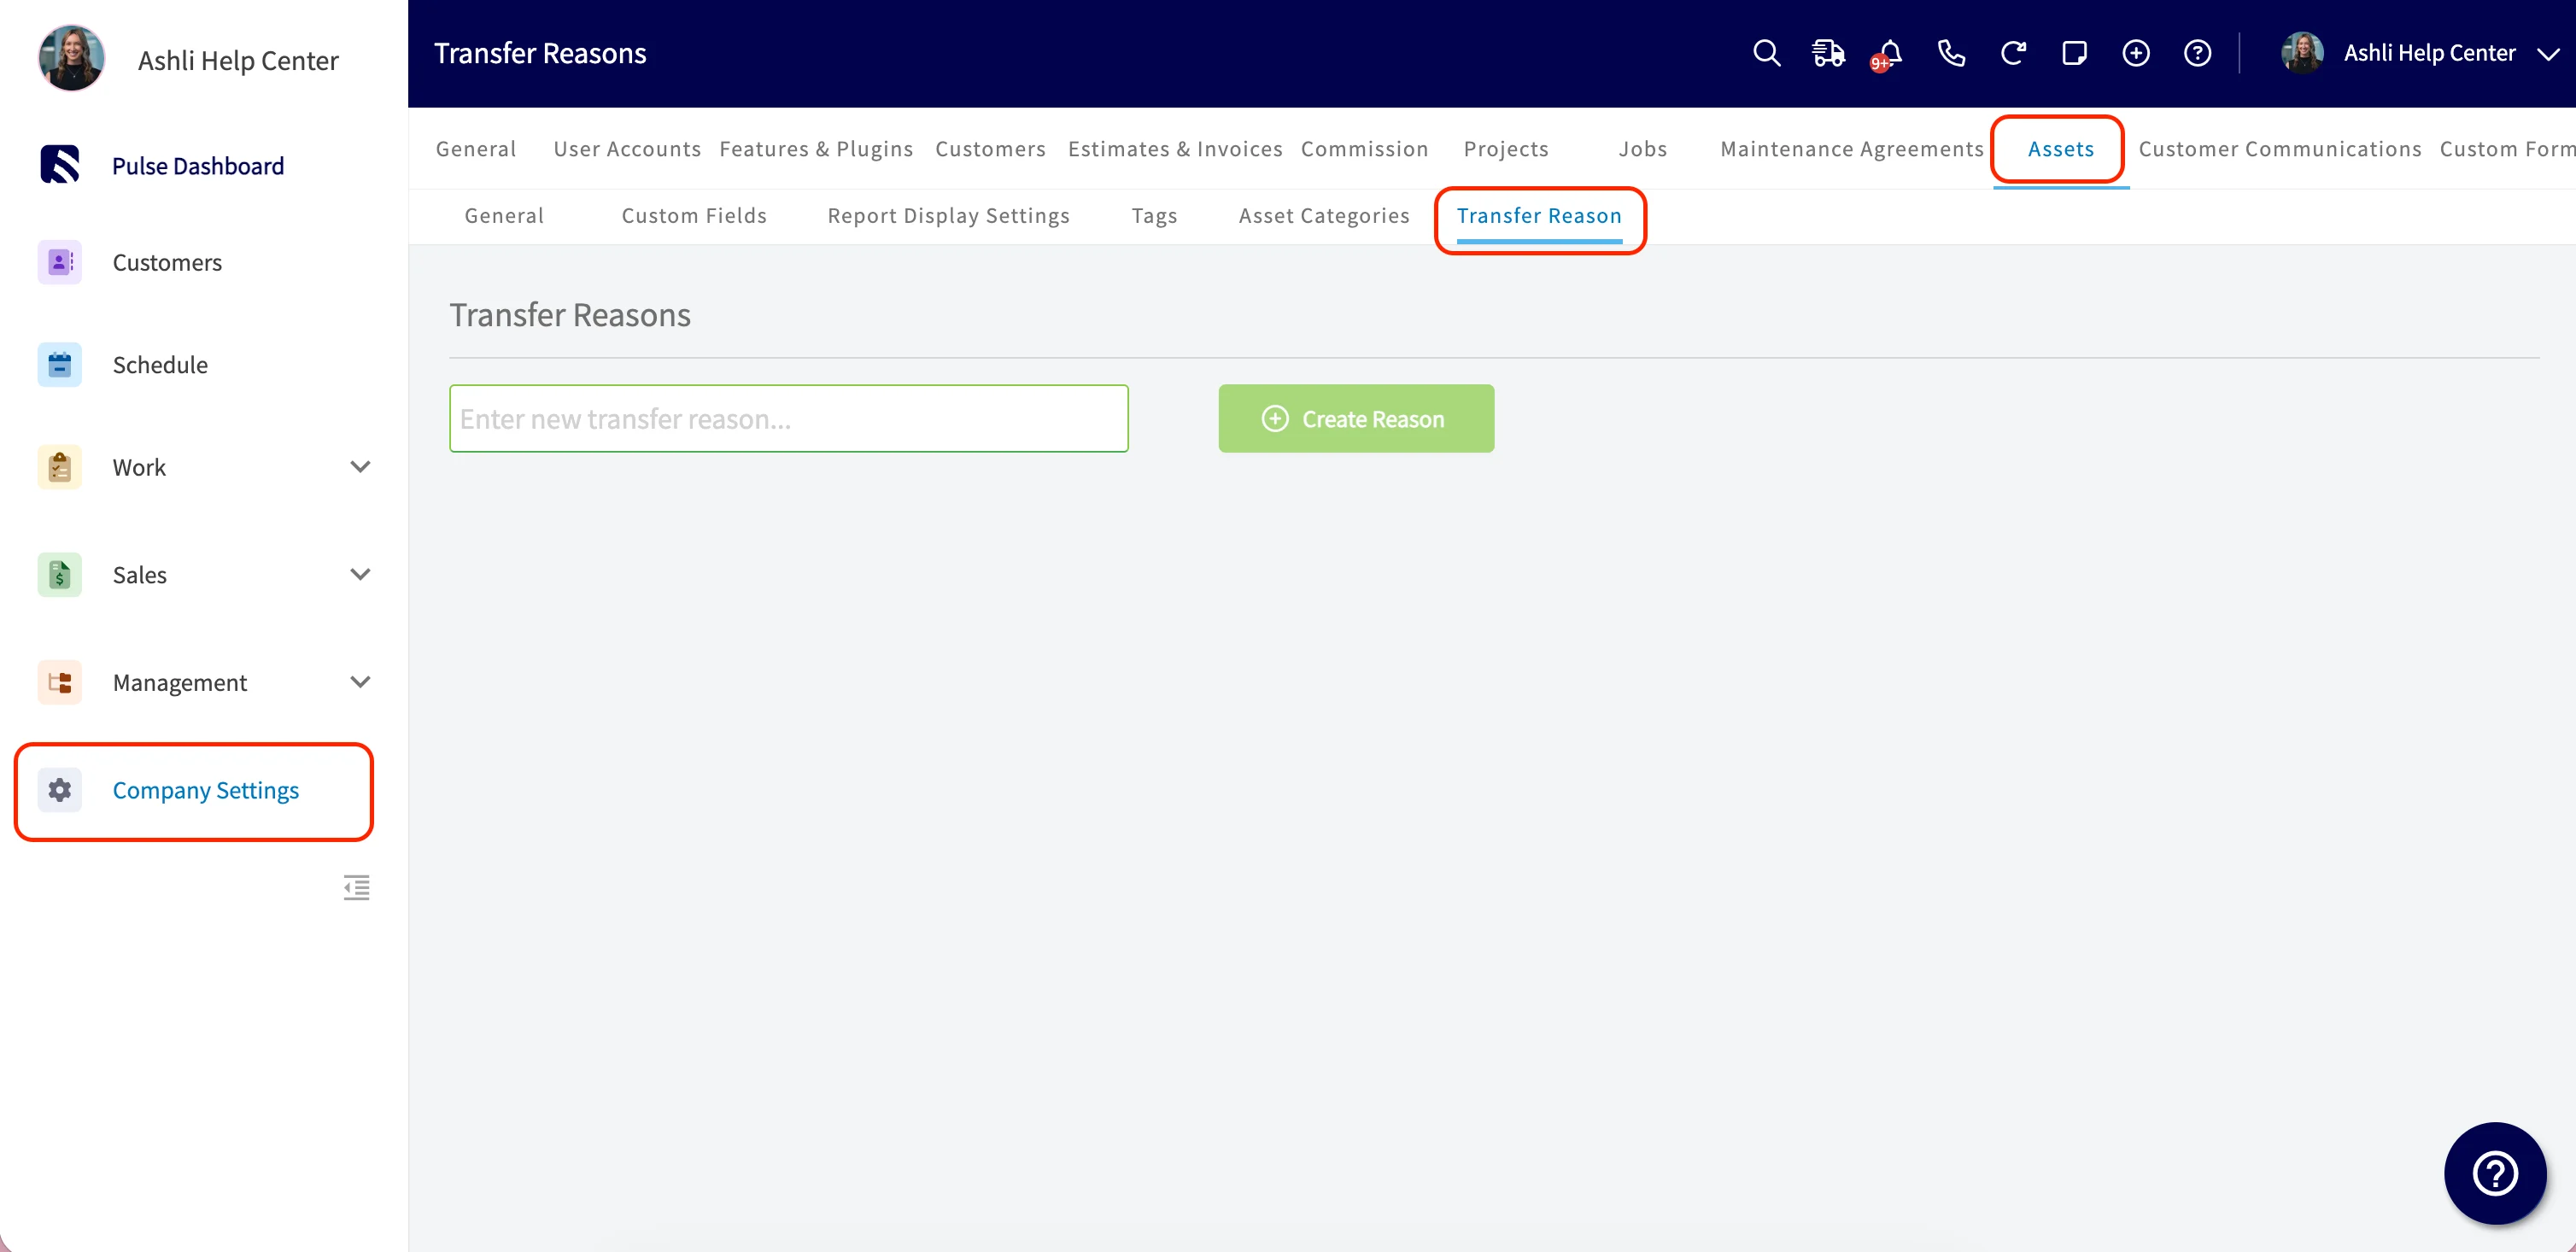
 3. Go to **Company Settings** > **Assets** > **Transfer Reason** to set up the reasons your team picks from during a transfer. Common ones include Change of Ownership (Home Sale), Builder to Homeowner Transfer, Landlord to Tenant Transition, Tenant Turnover, and Property Management Change.
 ### Transfer an asset
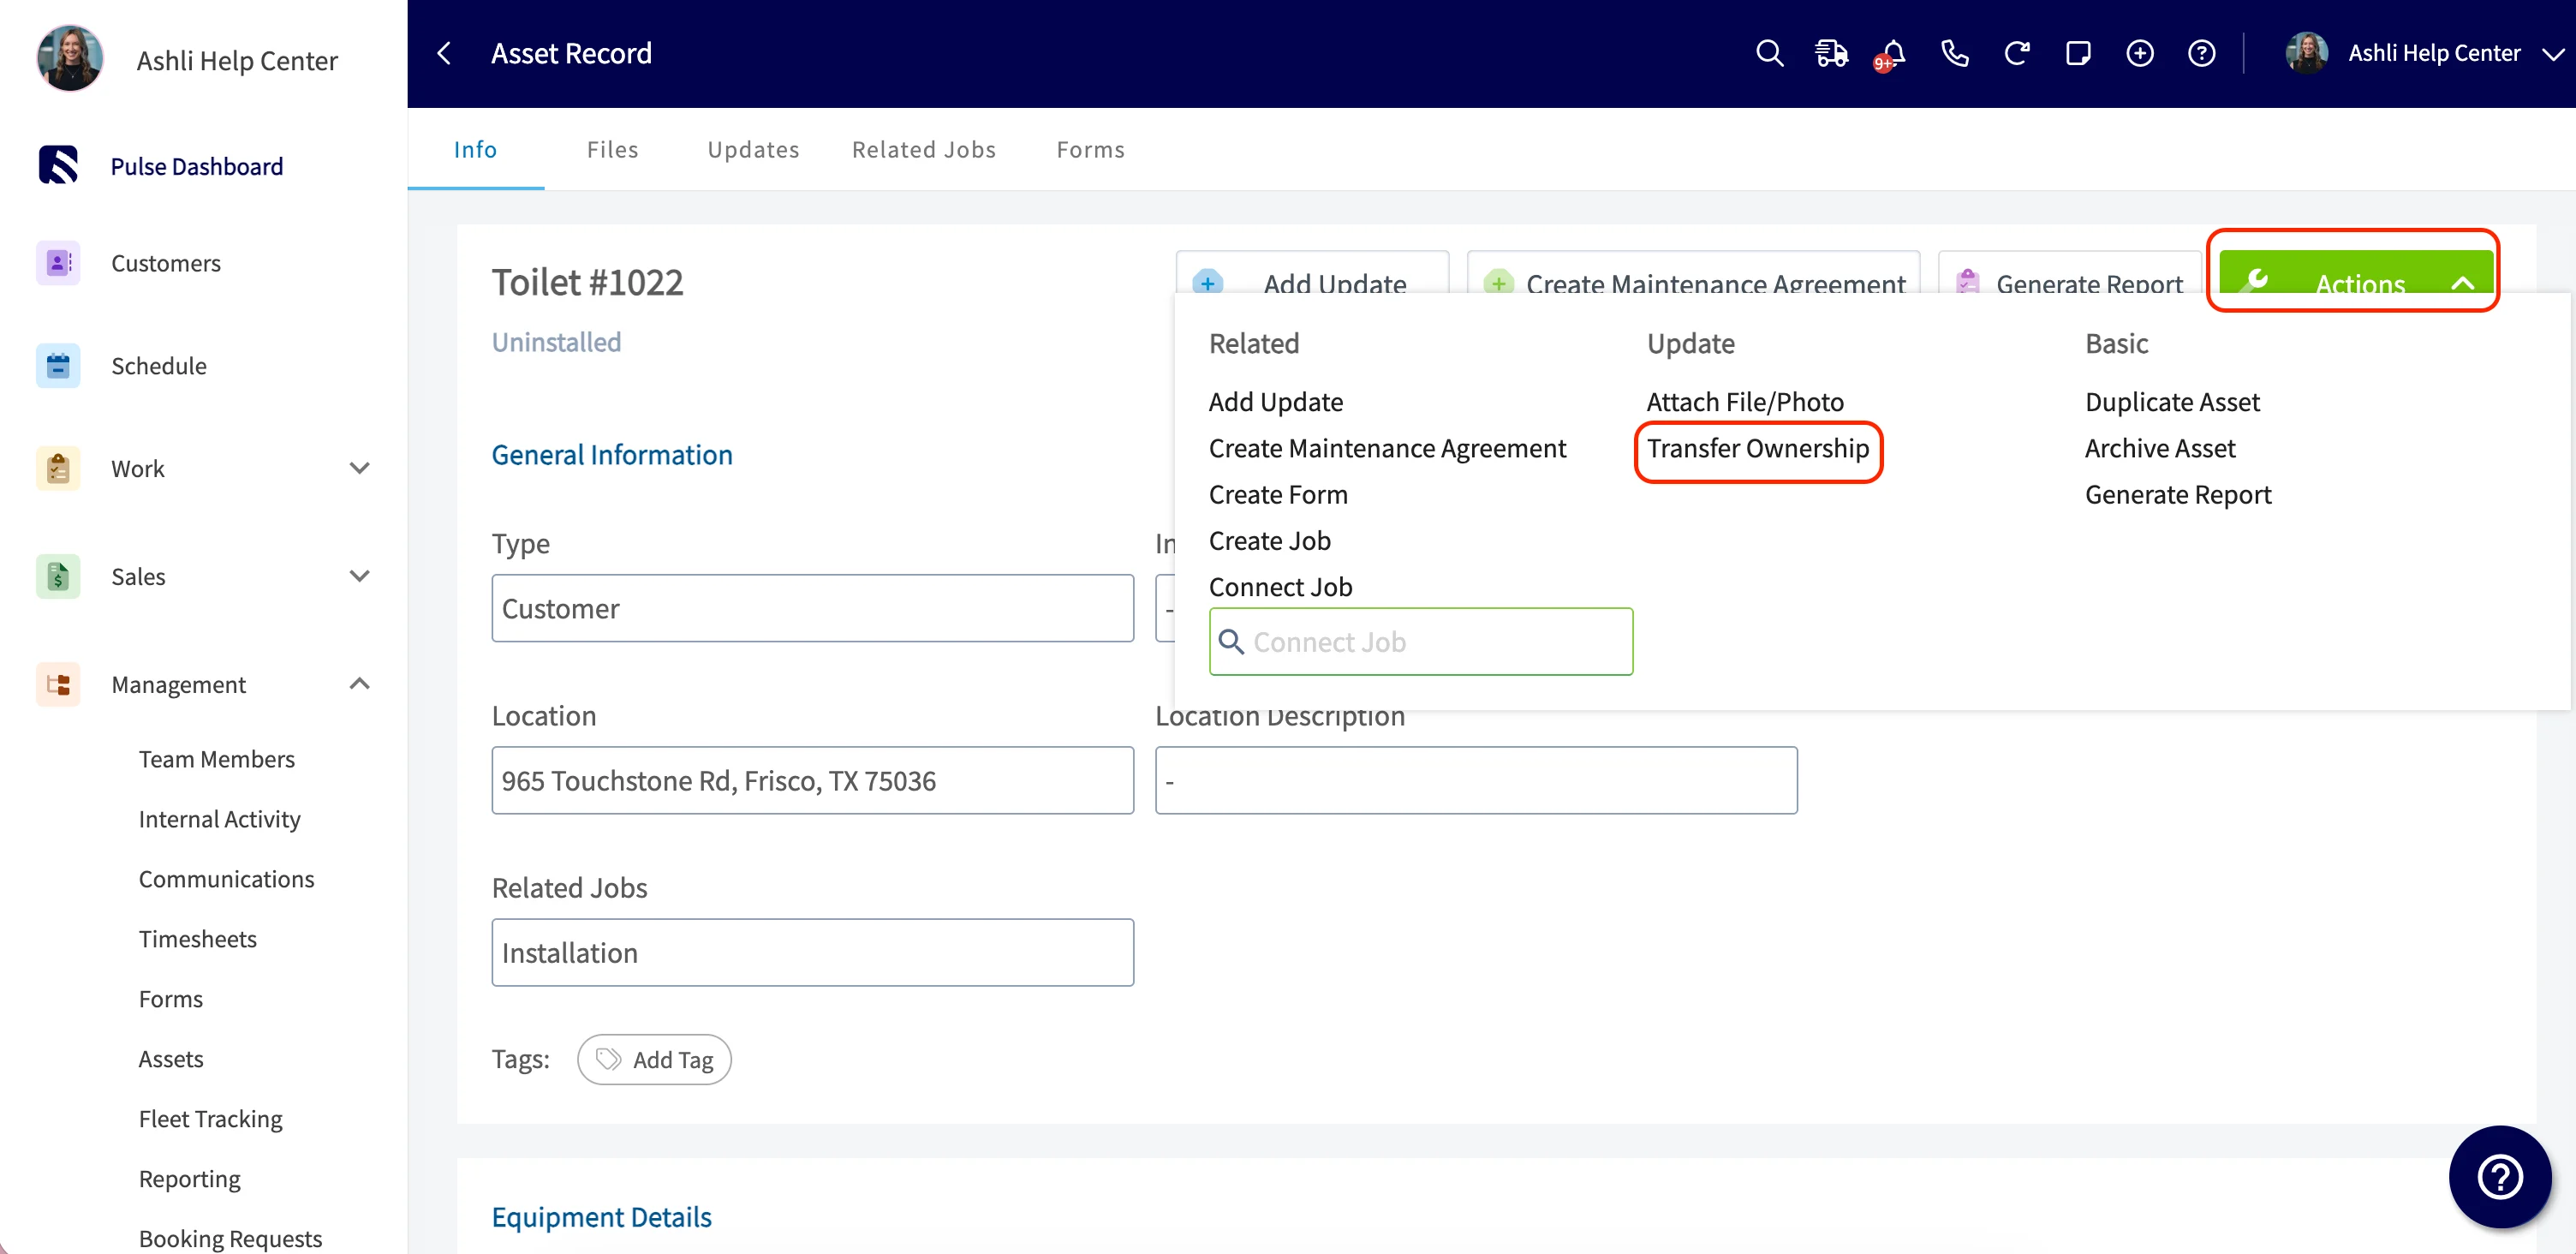
1. Open the asset record and select **Actions** > **Transfer Ownership**.
### Transfer an asset
1. Open the asset record and select **Actions** > **Transfer Ownership**.
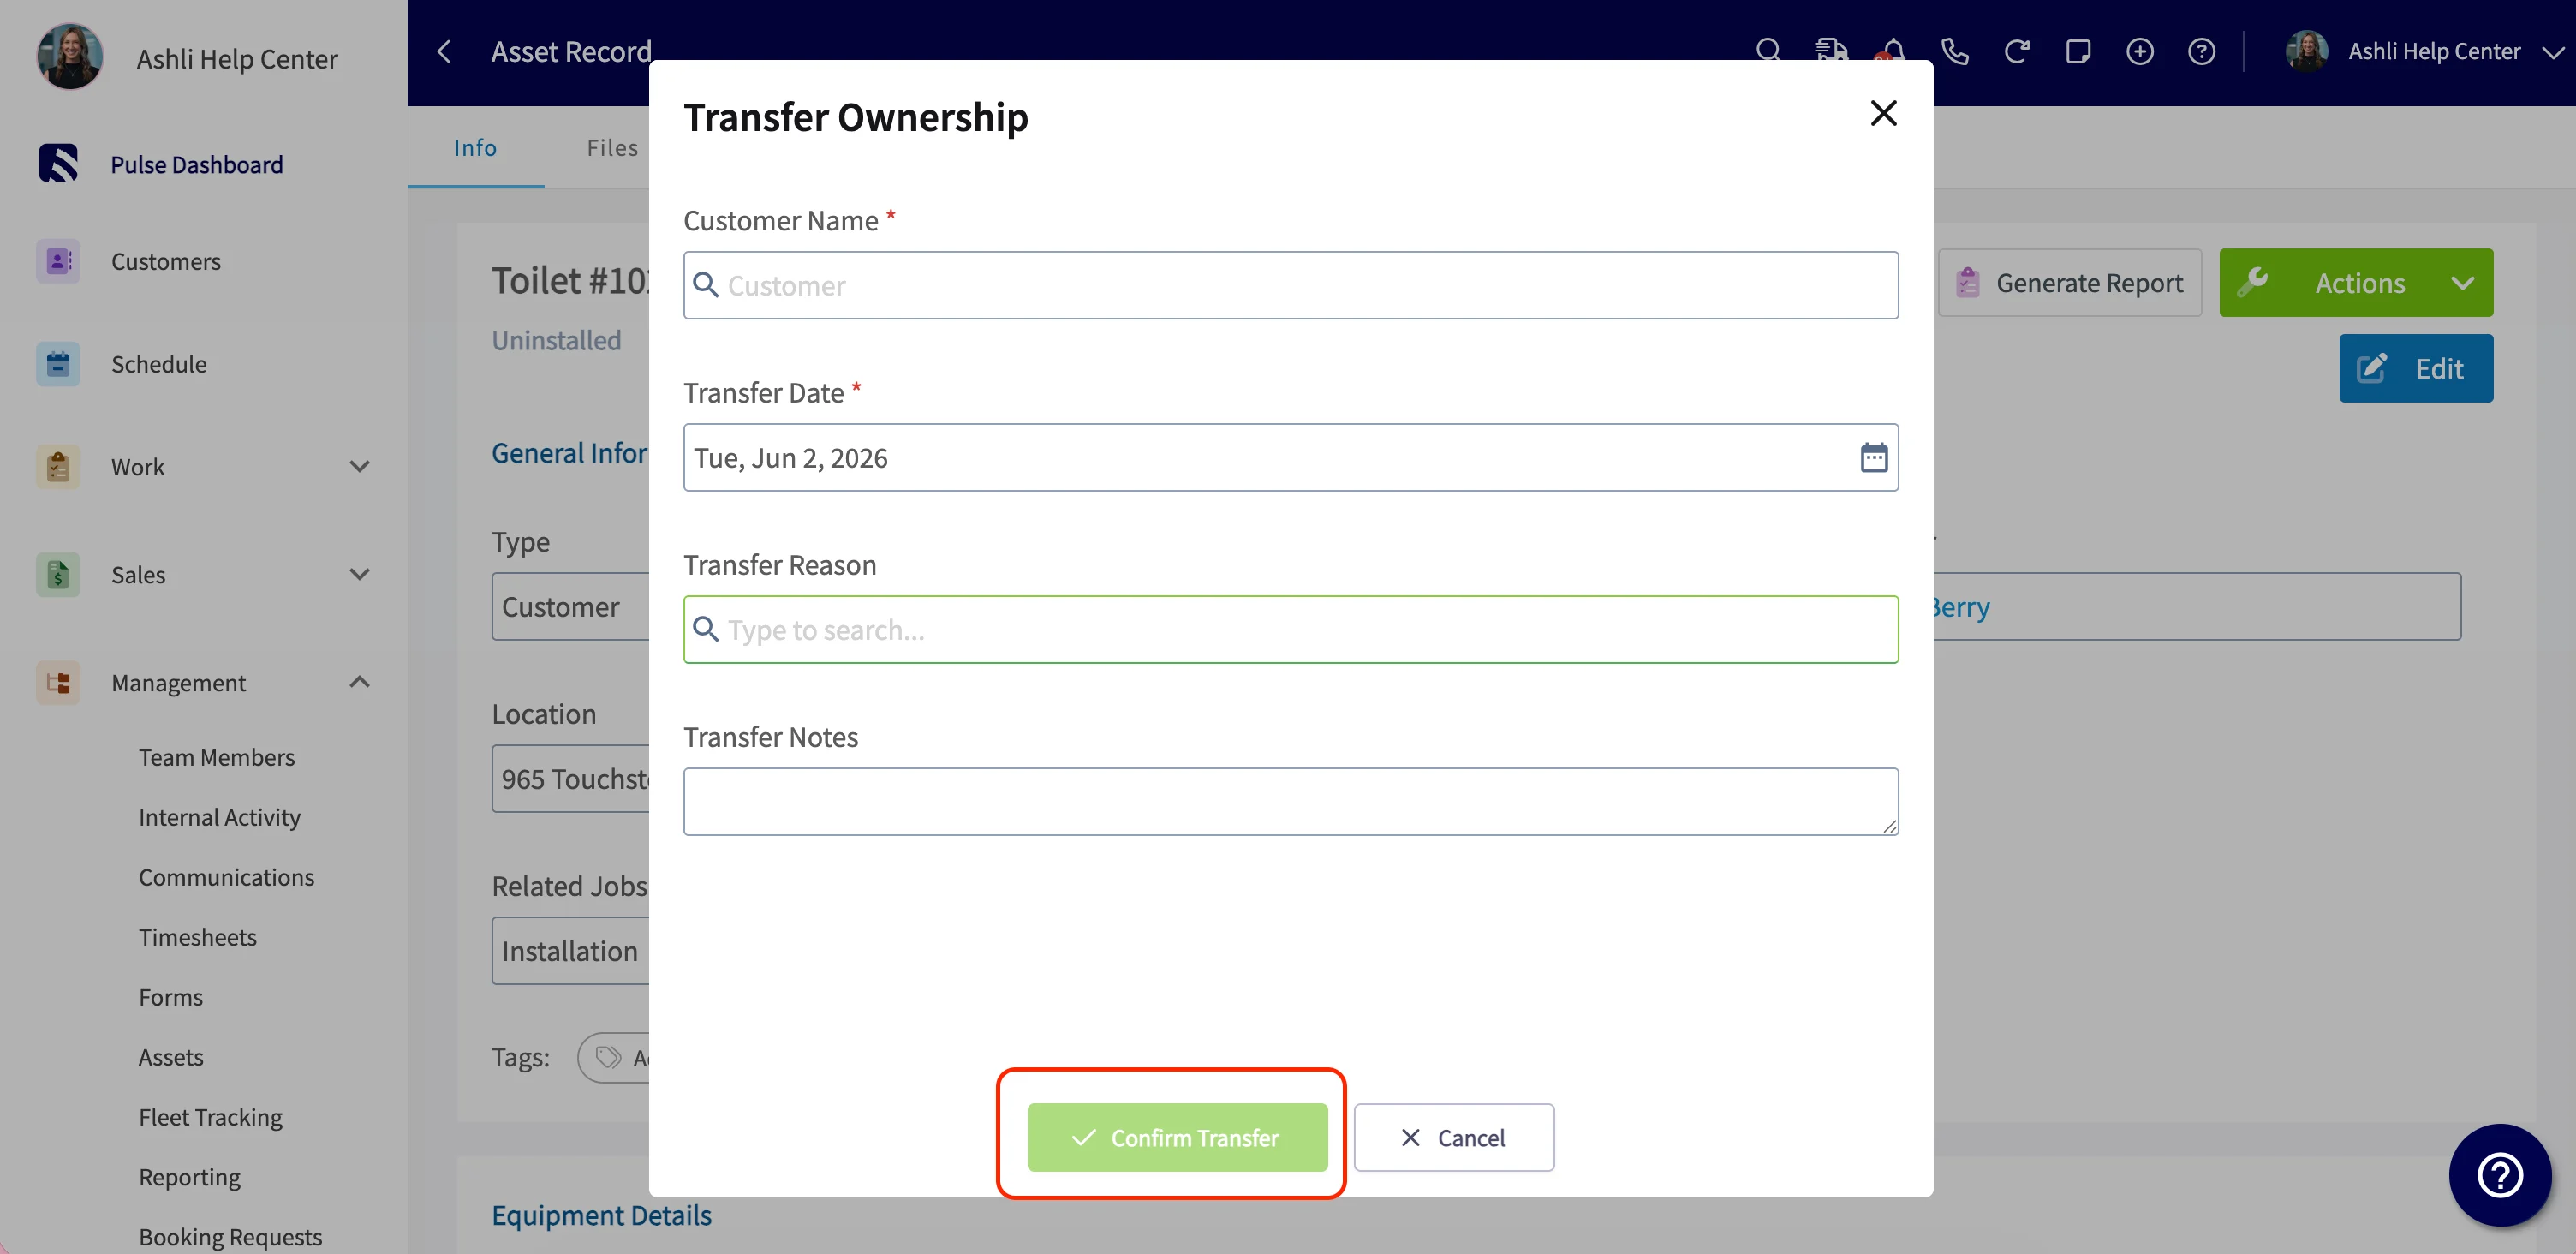
 2. Fill in the transfer details — the new customer, transfer date, transfer reason, and any notes — and select **Confirm Transfer**.
 ### Review ownership history
Open the asset and find the **Ownership History** section — it appears once the asset has at least one logged transfer. Each entry shows the From Customer, To Customer, Transfer Date, Transferred By, Reason, and Notes, so you have the full trail no matter how many times the asset has changed hands.
## FAQs
### Can I archive assets?
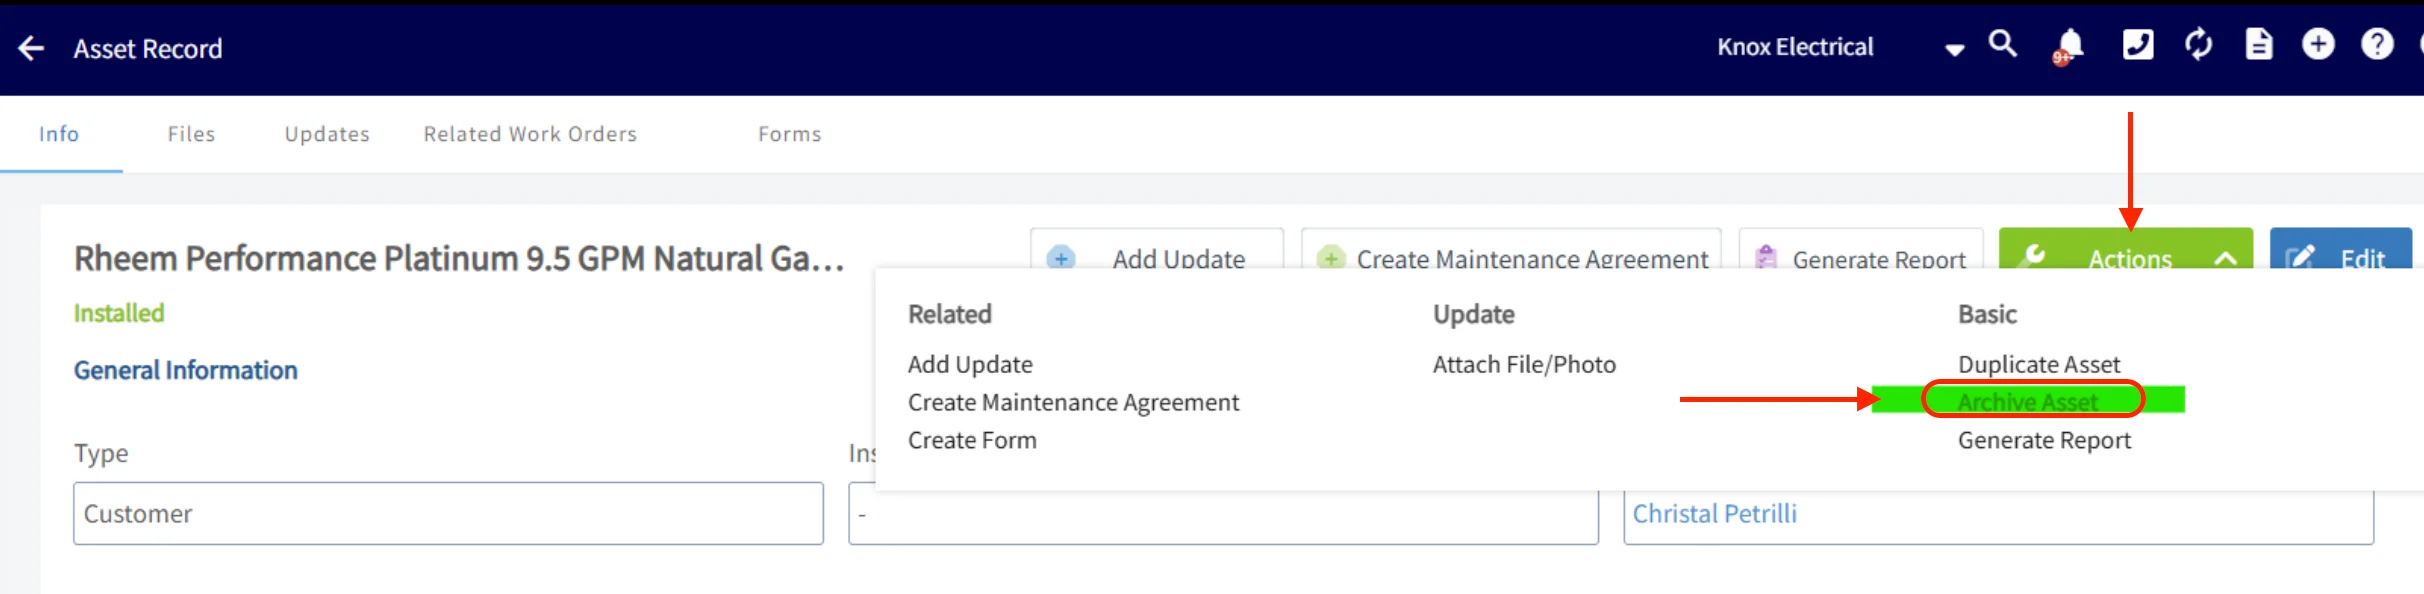
Yes. Open the asset record, select the green **Actions** button in the top-right corner, and choose **Archive Asset**.
### Review ownership history
Open the asset and find the **Ownership History** section — it appears once the asset has at least one logged transfer. Each entry shows the From Customer, To Customer, Transfer Date, Transferred By, Reason, and Notes, so you have the full trail no matter how many times the asset has changed hands.
## FAQs
### Can I archive assets?
Yes. Open the asset record, select the green **Actions** button in the top-right corner, and choose **Archive Asset**.
 ## Related articles
* [Company Equipment & Asset Tracking Overview](/jobs/assets/tracking-equipment-assets)
* [How to Create a Maintenance Agreement](/jobs/assets/maintenance-agreements)
* [How to Create a Job](/jobs/jobs-tasks/creating-a-job)
Your setup is working when a tech can open an asset in the field, see its full service history and warranty, and add today's visit to it — and when the office can pull a report on that equipment without hunting through old jobs.
## Related topics
- [How to Create a Job](/jobs/jobs-tasks/creating-a-job.md)
- [How to Create a Maintenance Agreement](/jobs/assets/maintenance-agreements.md)
- [Assets & Maintenance](/jobs/assets/index.md)
- [How to Create Asset Reports](/reporting/raw-data/asset-reports.md)
## Related articles
* [Company Equipment & Asset Tracking Overview](/jobs/assets/tracking-equipment-assets)
* [How to Create a Maintenance Agreement](/jobs/assets/maintenance-agreements)
* [How to Create a Job](/jobs/jobs-tasks/creating-a-job)
Your setup is working when a tech can open an asset in the field, see its full service history and warranty, and add today's visit to it — and when the office can pull a report on that equipment without hunting through old jobs.
## Related topics
- [How to Create a Job](/jobs/jobs-tasks/creating-a-job.md)
- [How to Create a Maintenance Agreement](/jobs/assets/maintenance-agreements.md)
- [Assets & Maintenance](/jobs/assets/index.md)
- [How to Create Asset Reports](/reporting/raw-data/asset-reports.md)