> ## Documentation Index
> Fetch the complete documentation index at: https://help.fieldpulse.com/llms.txt
> Use this file to discover all available pages before exploring further.
# Inventory Hubs
> Set up hubs for each truck, van, or warehouse to track stock by location and know when to reorder or replenish.
In FieldPulse, a hub serves as a designated location where you store your inventory. This could be a workshop, truck, van, office, or warehouse. Your business might utilize a single hub or multiple hubs. Many companies establish hubs for each of their work trucks or vans, along with a central hub for their office or warehouse. This approach enables monitoring when a driver's vehicle requires additional stock.
By tracking stock movements between the warehouse and hubs, you can strategically determine when to reorder supplies. Consider the flexibility to set up replenishment levels specific to the inventory at each hub. This allows you to maintain lower quantities in trucks for immediate use while storing bulk stock in the warehouse. You can then initiate replenishment orders when inventory levels reach predefined thresholds, ensuring seamless operations and avoiding stock-outs.
***
# Setting Up Hubs
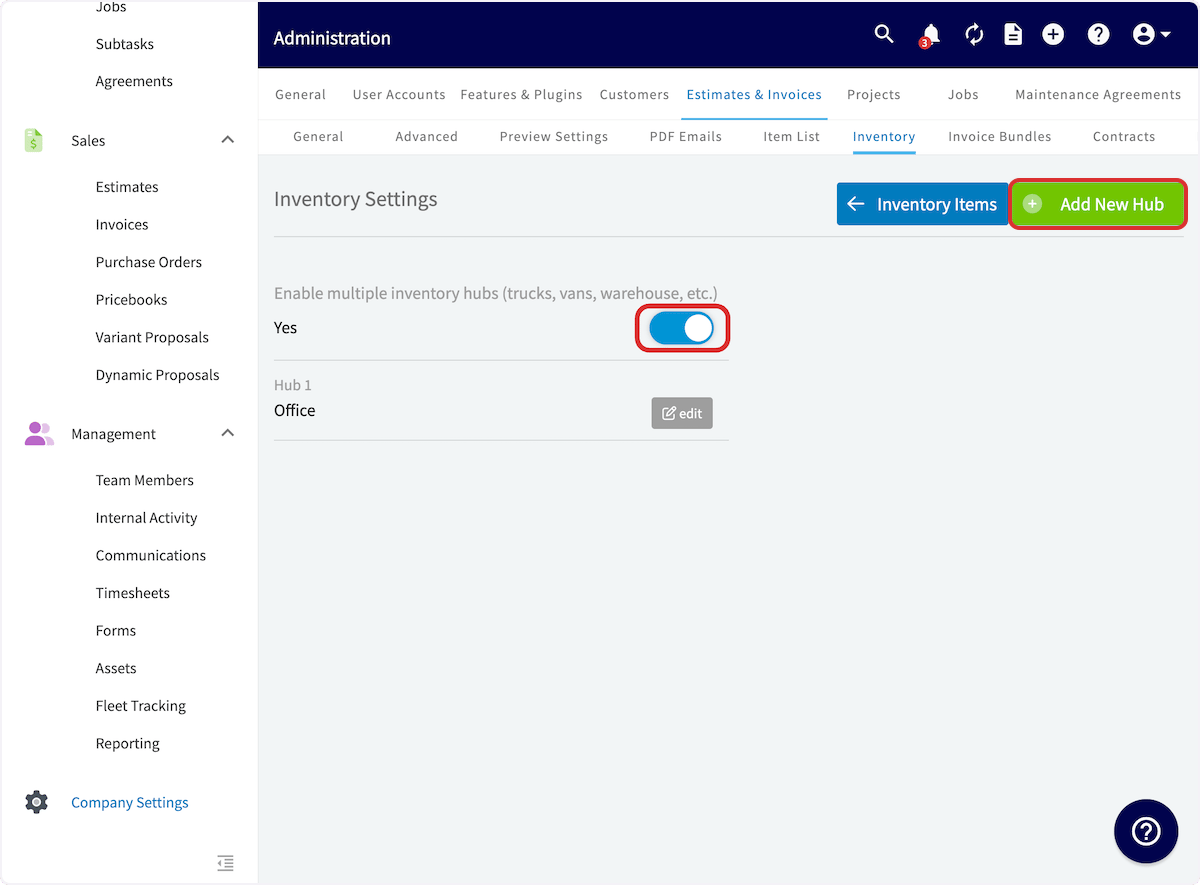
Navigate to *Company Settings*, then select *Estimates & Invoices*. From here, select *Inventory*, then click on *Inventory Settings*.
 Here, you can toggle on *Enable Multiple Inventory Hubs* and then select *Add New Hub*.
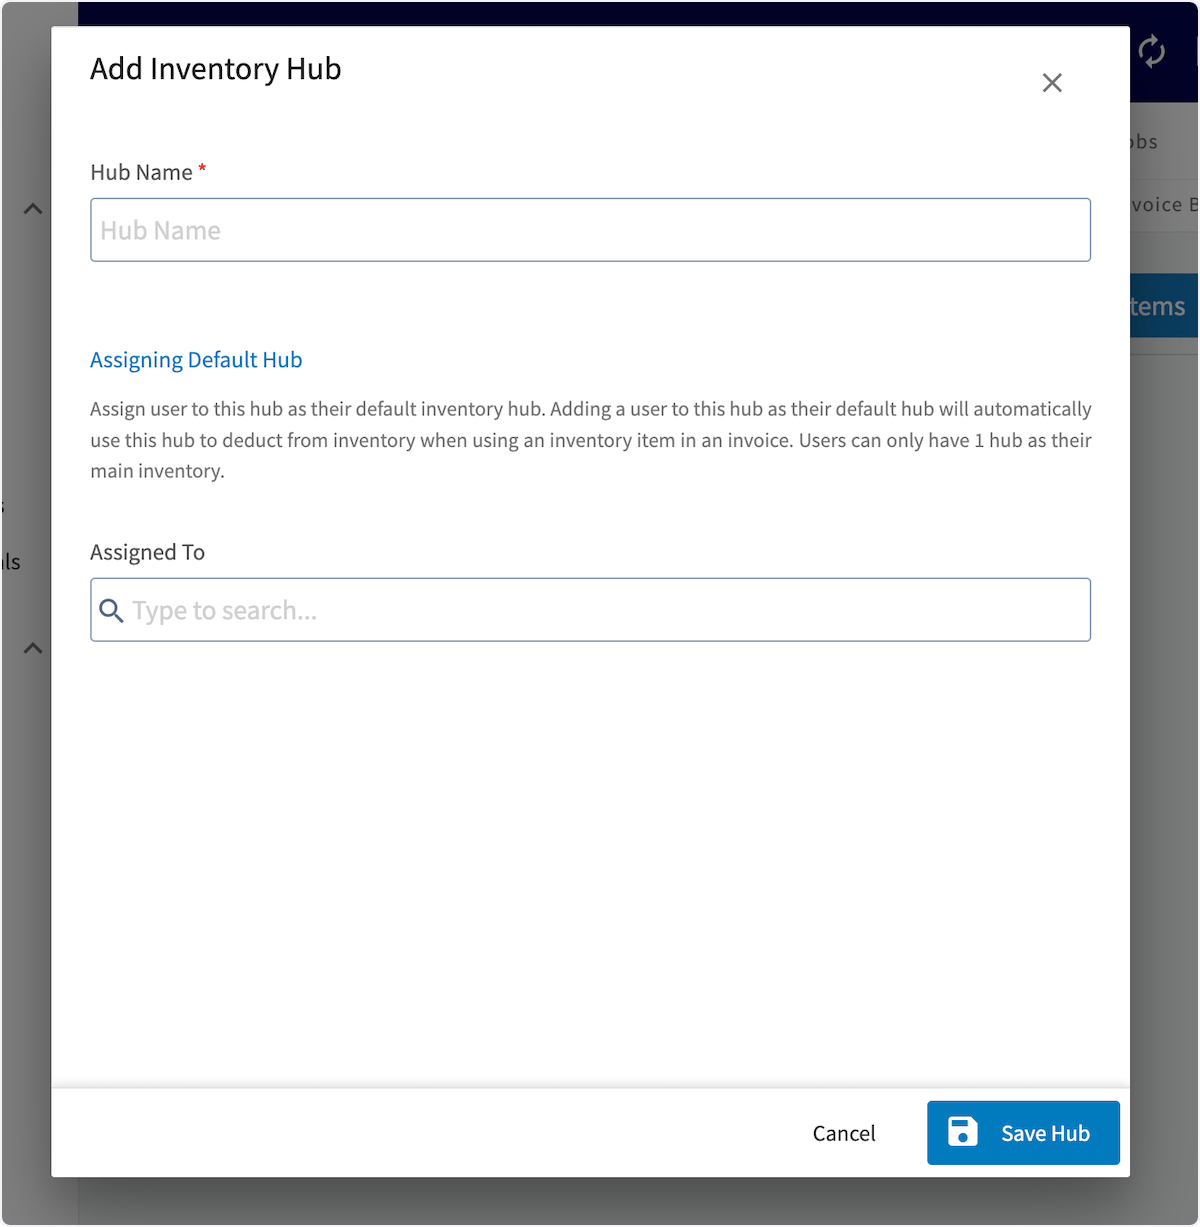
 Now, you can name your hub (ex. Chris's Truck; South Dallas Warehouse) as well as assign users to this hub. *(**Note:** A hub can have multiple team members assigned to view, count, or adjust inventory levels, but **each user can only be assigned to one hub for default inventory deduction**.)*
Each user can only be assigned to one hub because [auto-replenishment](/using-fieldpulse/purchase-orders/purchase-orders#h_76bf7c5ec7) (if enabled) will deduct the line items used on invoices from their associated hub and create a [purchase order](/using-fieldpulse/purchase-orders/purchase-orders) when the inventory at that hub drops below the designated threshold.
Now, you can name your hub (ex. Chris's Truck; South Dallas Warehouse) as well as assign users to this hub. *(**Note:** A hub can have multiple team members assigned to view, count, or adjust inventory levels, but **each user can only be assigned to one hub for default inventory deduction**.)*
Each user can only be assigned to one hub because [auto-replenishment](/using-fieldpulse/purchase-orders/purchase-orders#h_76bf7c5ec7) (if enabled) will deduct the line items used on invoices from their associated hub and create a [purchase order](/using-fieldpulse/purchase-orders/purchase-orders) when the inventory at that hub drops below the designated threshold.
 ***
# Adding Inventory to Hubs
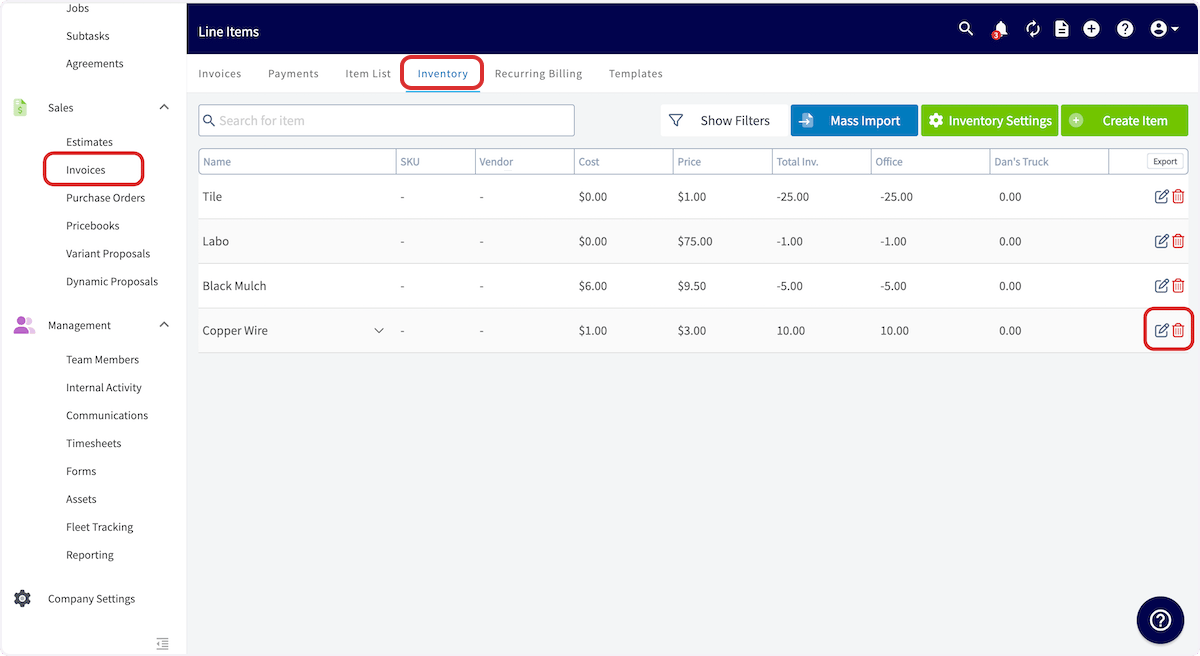
To add inventory to a hub, begin by navigating to *Invoices* in the left-side menu, then selecting *Inventory*. Click the pencil icon to edit the line item you wish to update. You can also add inventory to hubs when creating a new line item.
***
# Adding Inventory to Hubs
To add inventory to a hub, begin by navigating to *Invoices* in the left-side menu, then selecting *Inventory*. Click the pencil icon to edit the line item you wish to update. You can also add inventory to hubs when creating a new line item.
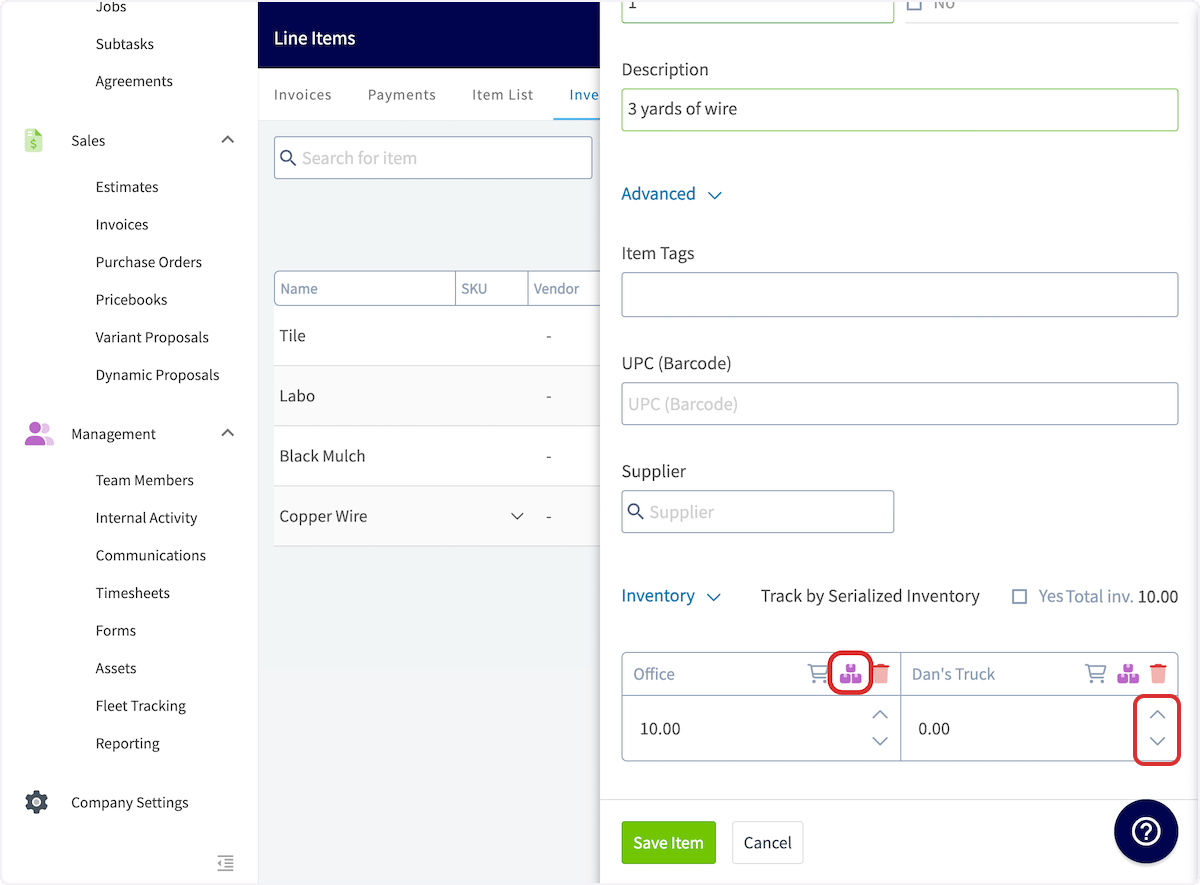
 You can select *Add Hub* to add a new hub to store the line item.
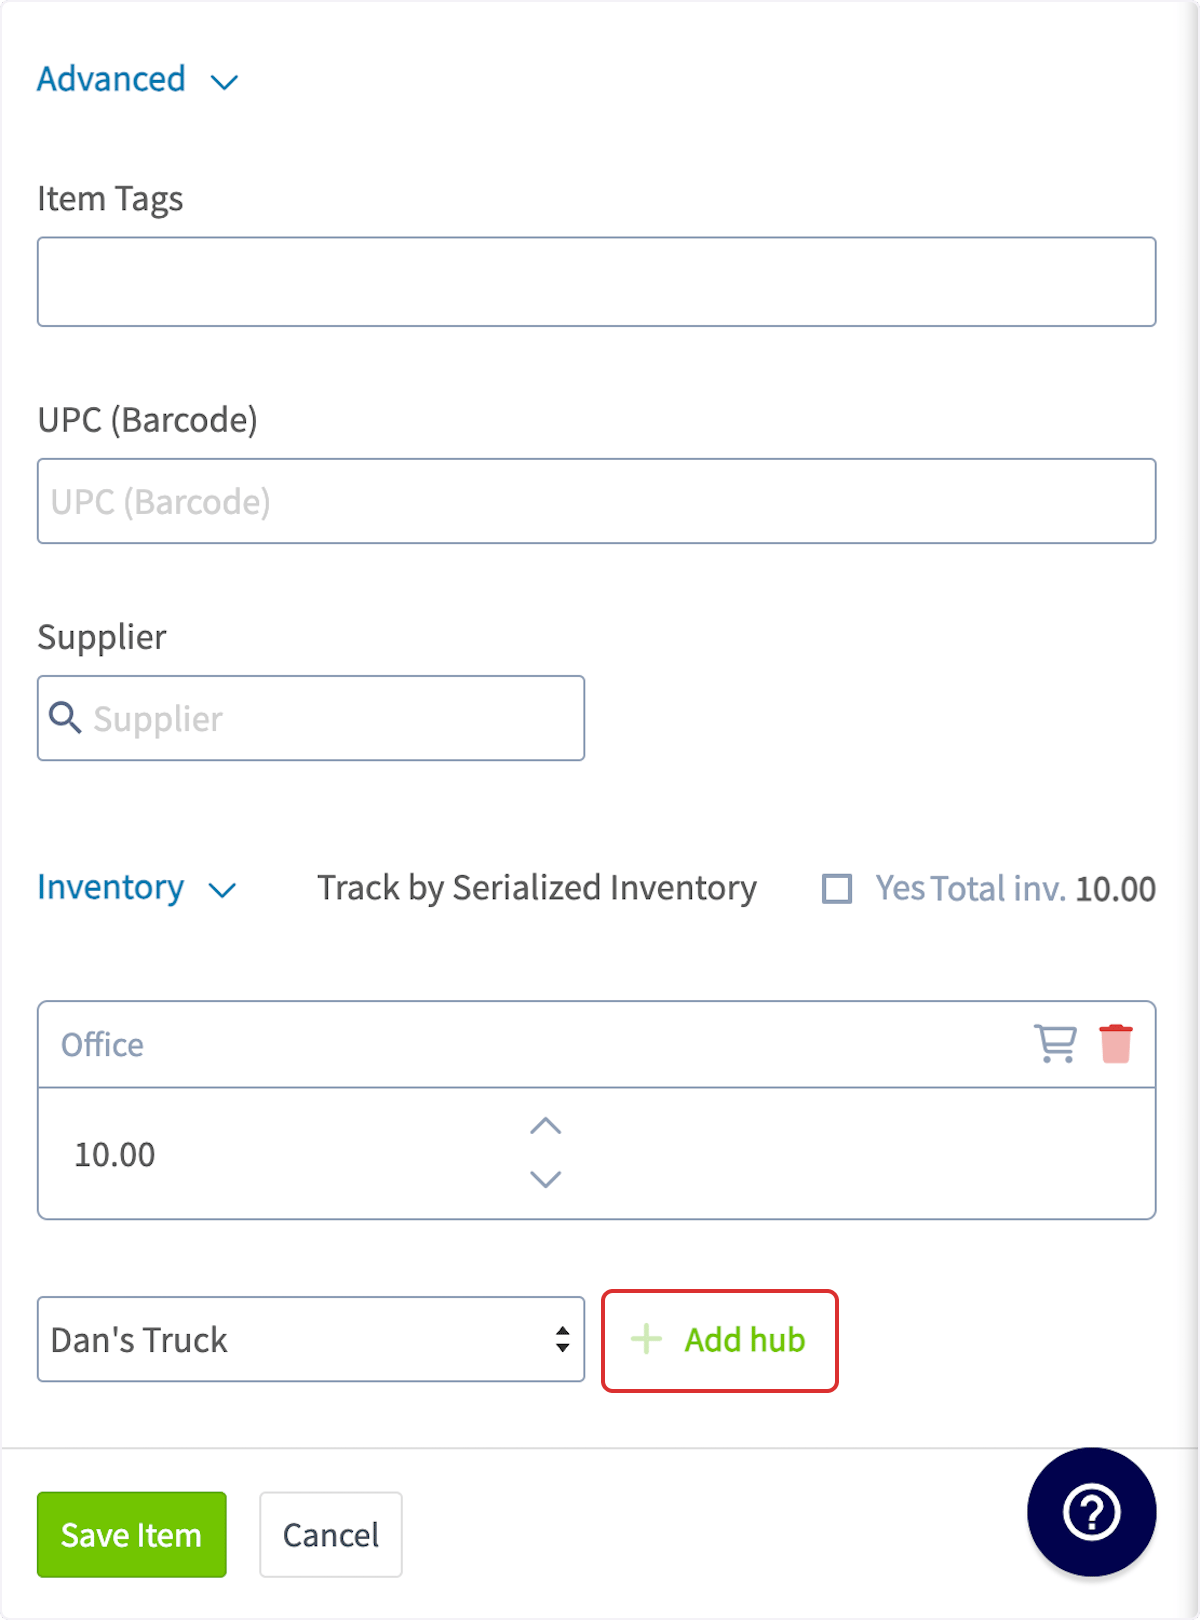 You can also can use the up & down arrows to adjust stock within each hub or select the purple boxes icon to reallocate inventory between your hubs.
 To reallocate inventory between hubs, use the pop-up to adjust quantities between locations, then press *Save*.
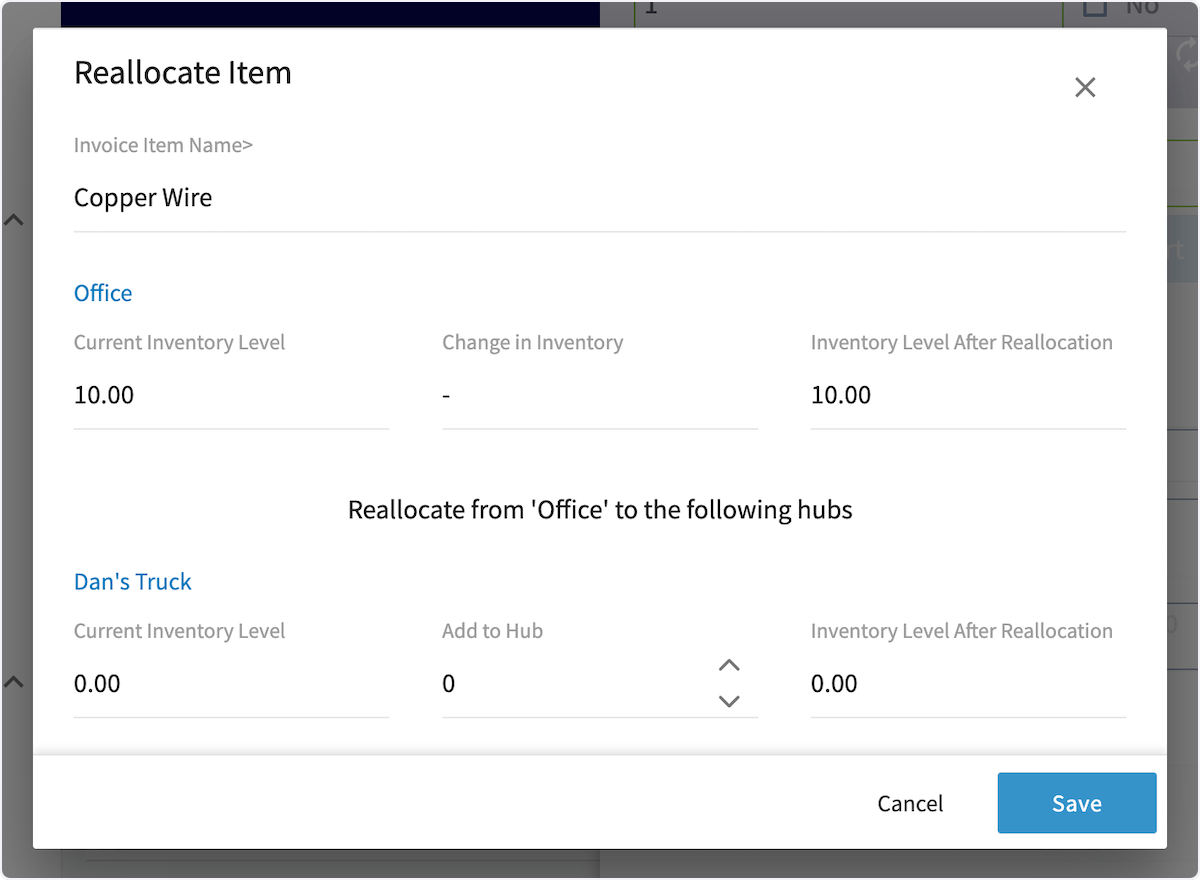 After adding hubs and adjusting inventory, be sure to save the line item.
***
# FAQs
**Is there a limit to the amount of hubs that can be added?**
No, there is no limit.
***
# Video Tutorial
***
**Have additional questions?**
*Contact us at [support@fieldpulse.com](mailto:support@fieldpulse.com) or use the chat feature in the bottom right corner of your screen.*
After adding hubs and adjusting inventory, be sure to save the line item.
***
# FAQs
**Is there a limit to the amount of hubs that can be added?**
No, there is no limit.
***
# Video Tutorial
***
**Have additional questions?**
*Contact us at [support@fieldpulse.com](mailto:support@fieldpulse.com) or use the chat feature in the bottom right corner of your screen.*