FieldPulse’s Custom Sales Pipeline is a tool that helps you manage your customers and stay organized throughout the entire sales process. Customize your pipeline statuses so your team can easily keep track of new or existing customers.Documentation Index
Fetch the complete documentation index at: https://fieldpulse.mintlify.app/llms.txt
Use this file to discover all available pages before exploring further.
Enabling Custom Sales Pipeline
To begin using Custom Sales Pipeline, you’ll first need to enable it. Start by clicking on Company Settings and selecting Features & Plugins. Navigate to Custom Sales Pipeline and select Enable. Now you’re ready to begin customizing and tracking your customers through the process!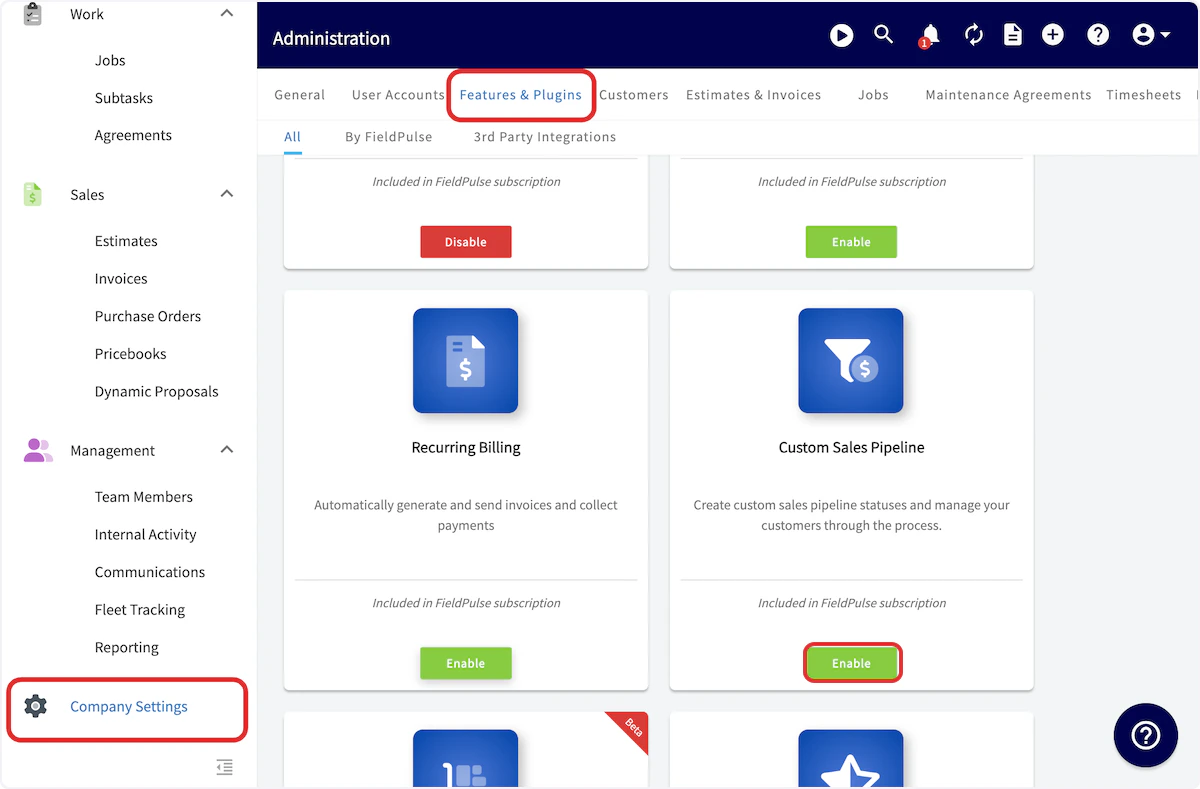
Customizing Pipeline Statuses
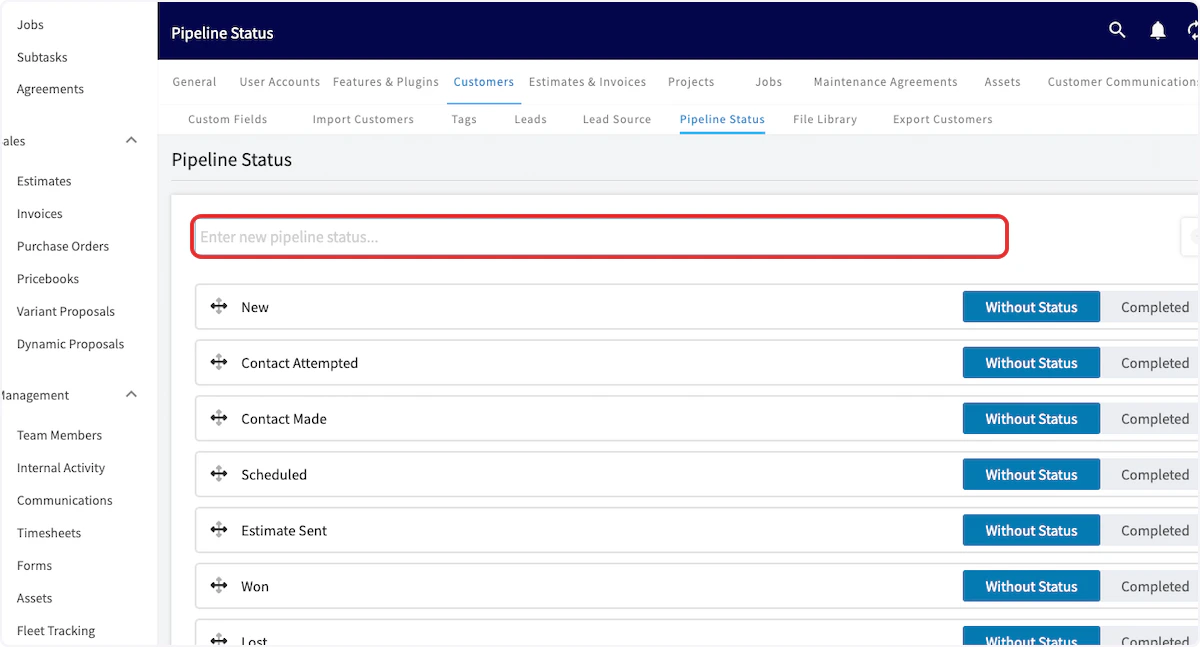
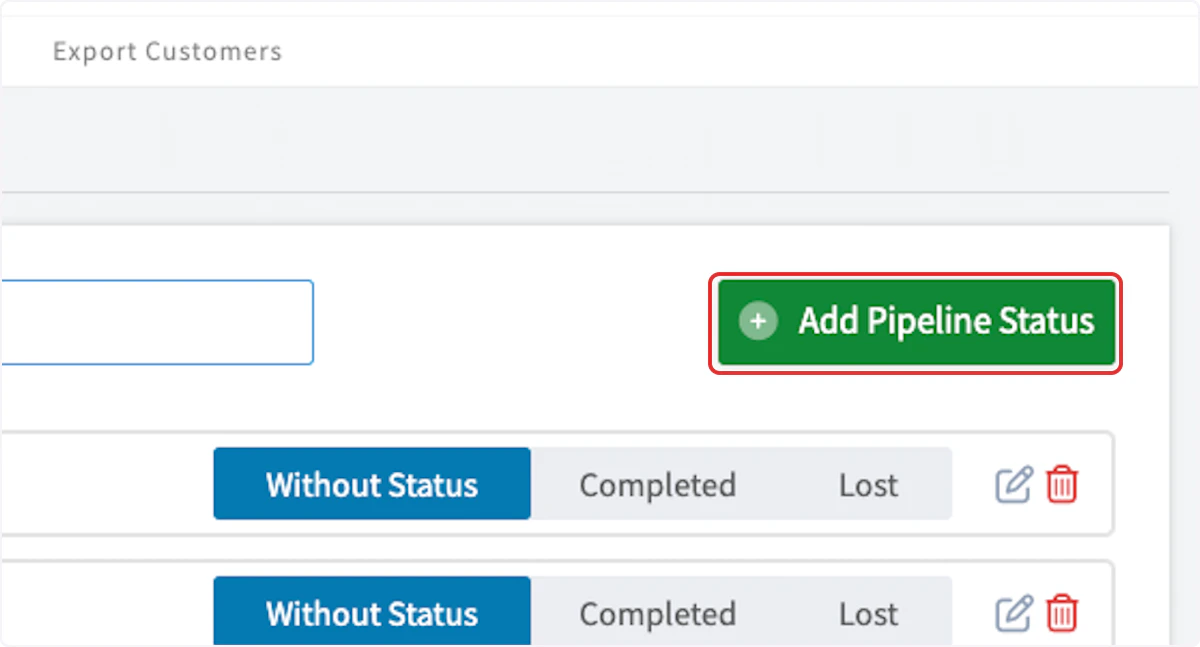
After enabling the Custom Sales Pipeline navigate to the Customers tab within Company Settings and click on Pipeline Status. On this page, you can edit any of the statuses by clicking on the pencil icon or delete any statuses by clicking on the trashcan icon.
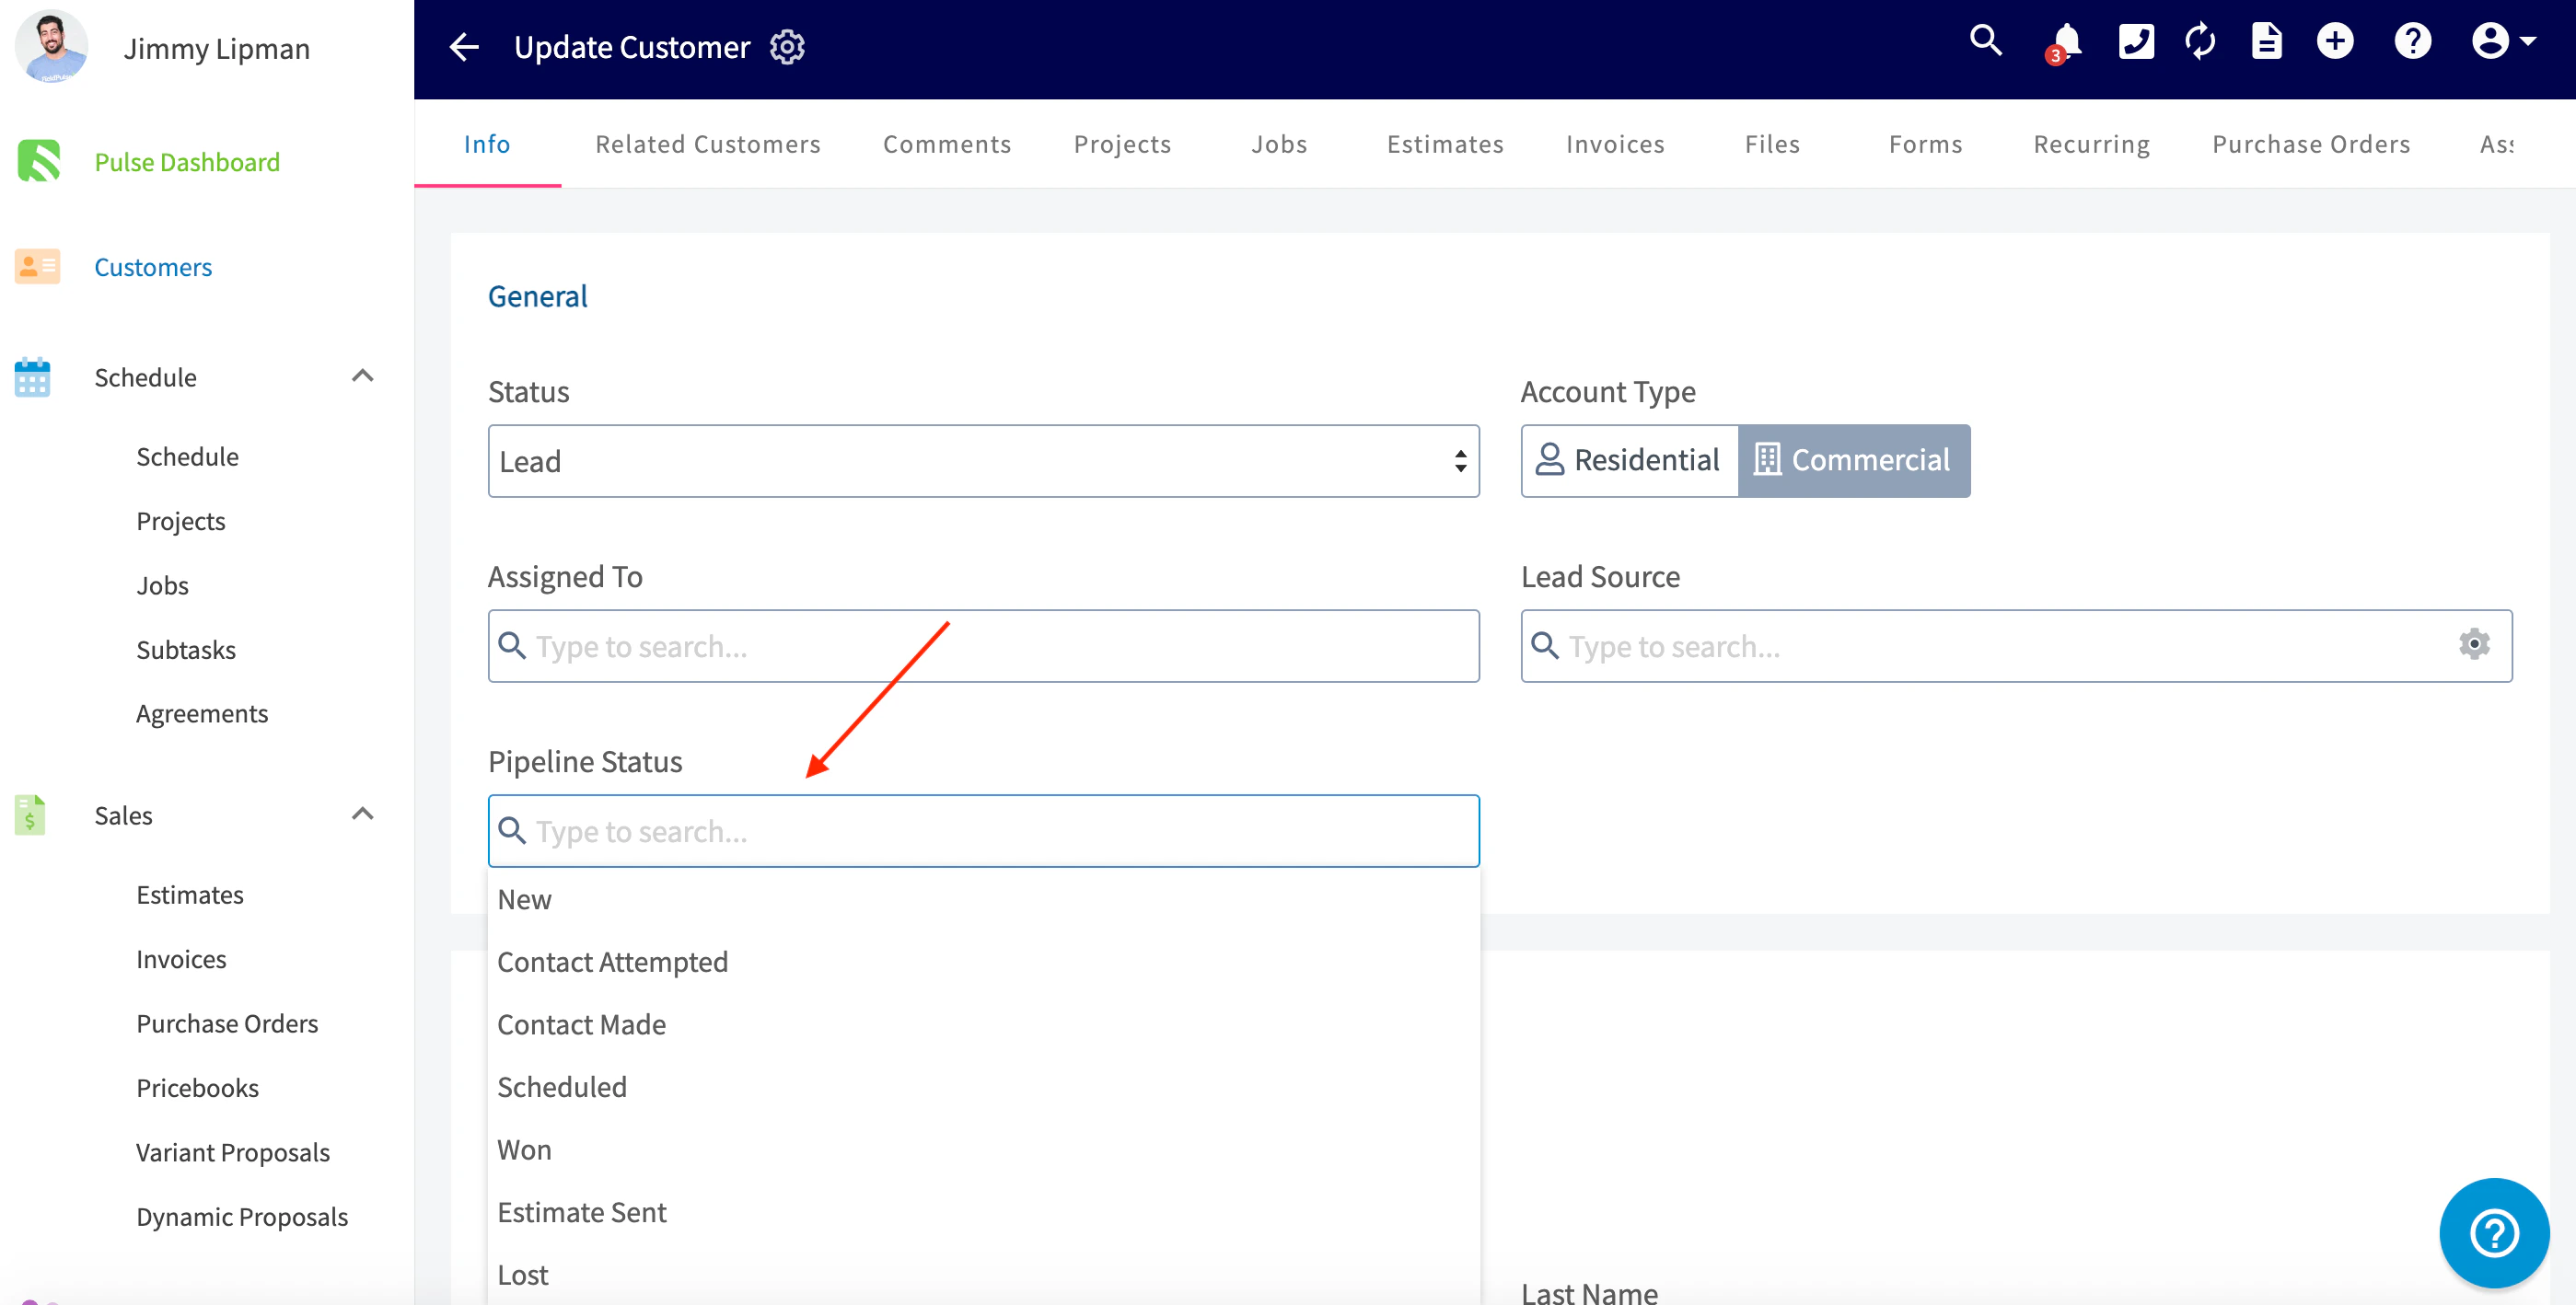
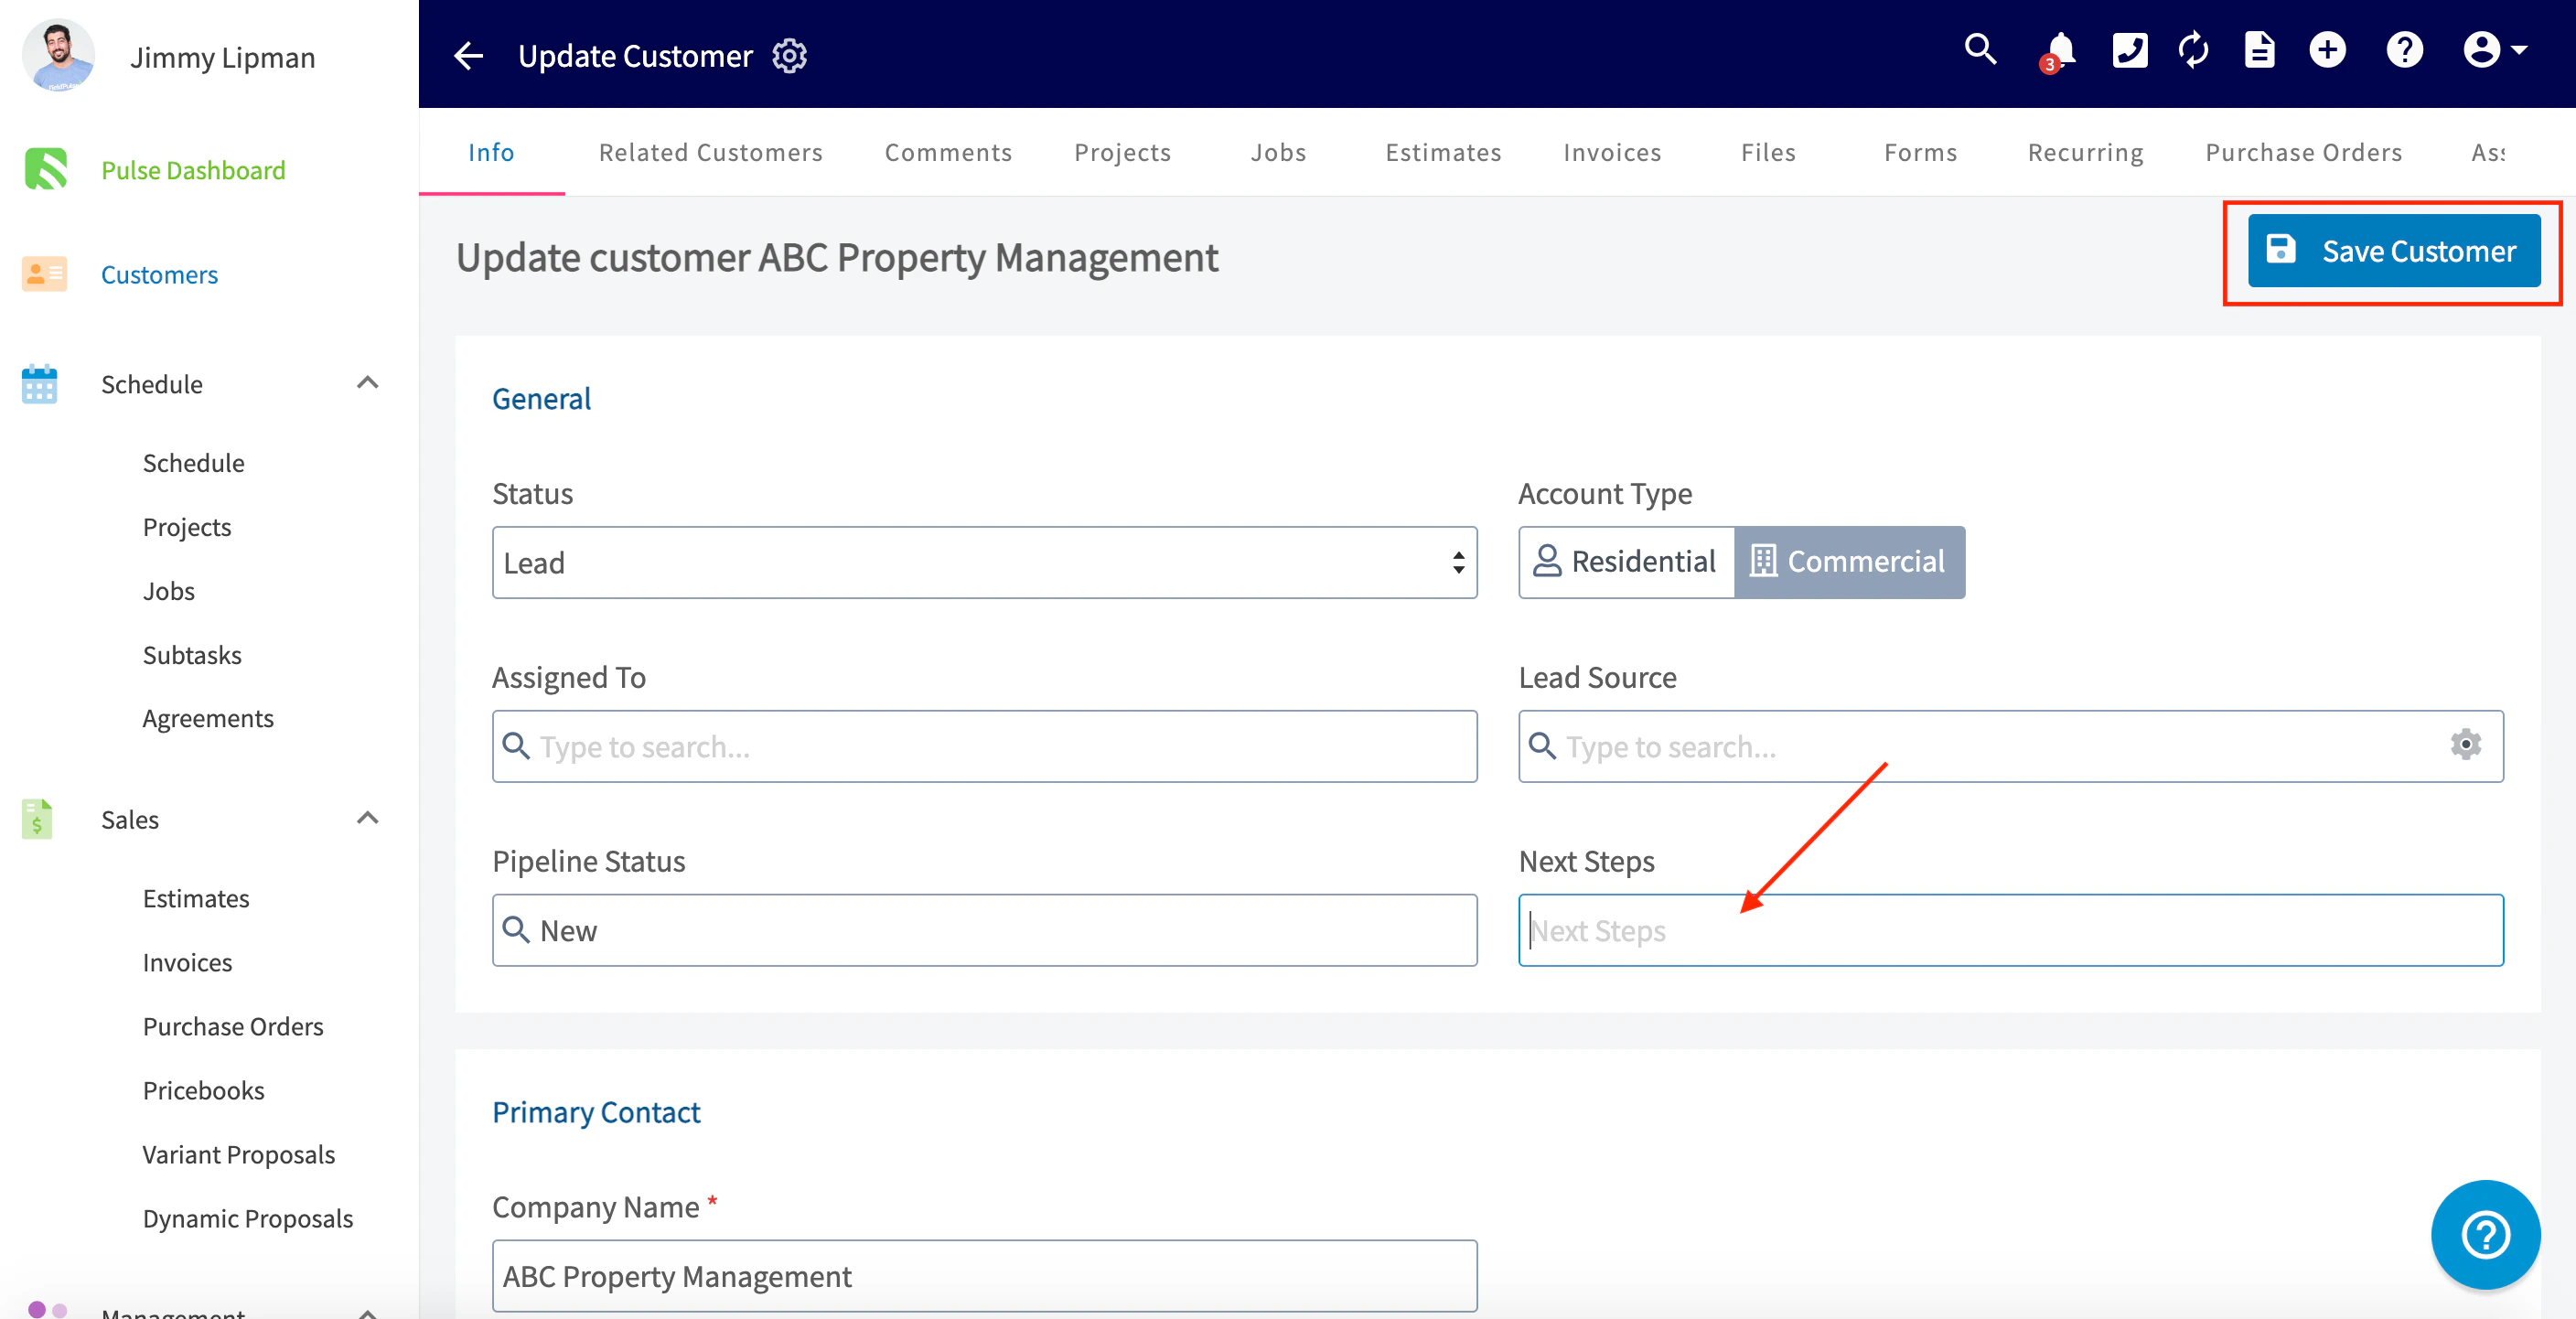
Adding Statuses to Customers
To add statuses to customers, navigate to the Customers tab on the left-side of your screen. To add a status to an existing customer, click on the customer’s name to open their customer record and press Edit. If the customer does not exist, click Create Customer to create a new customer.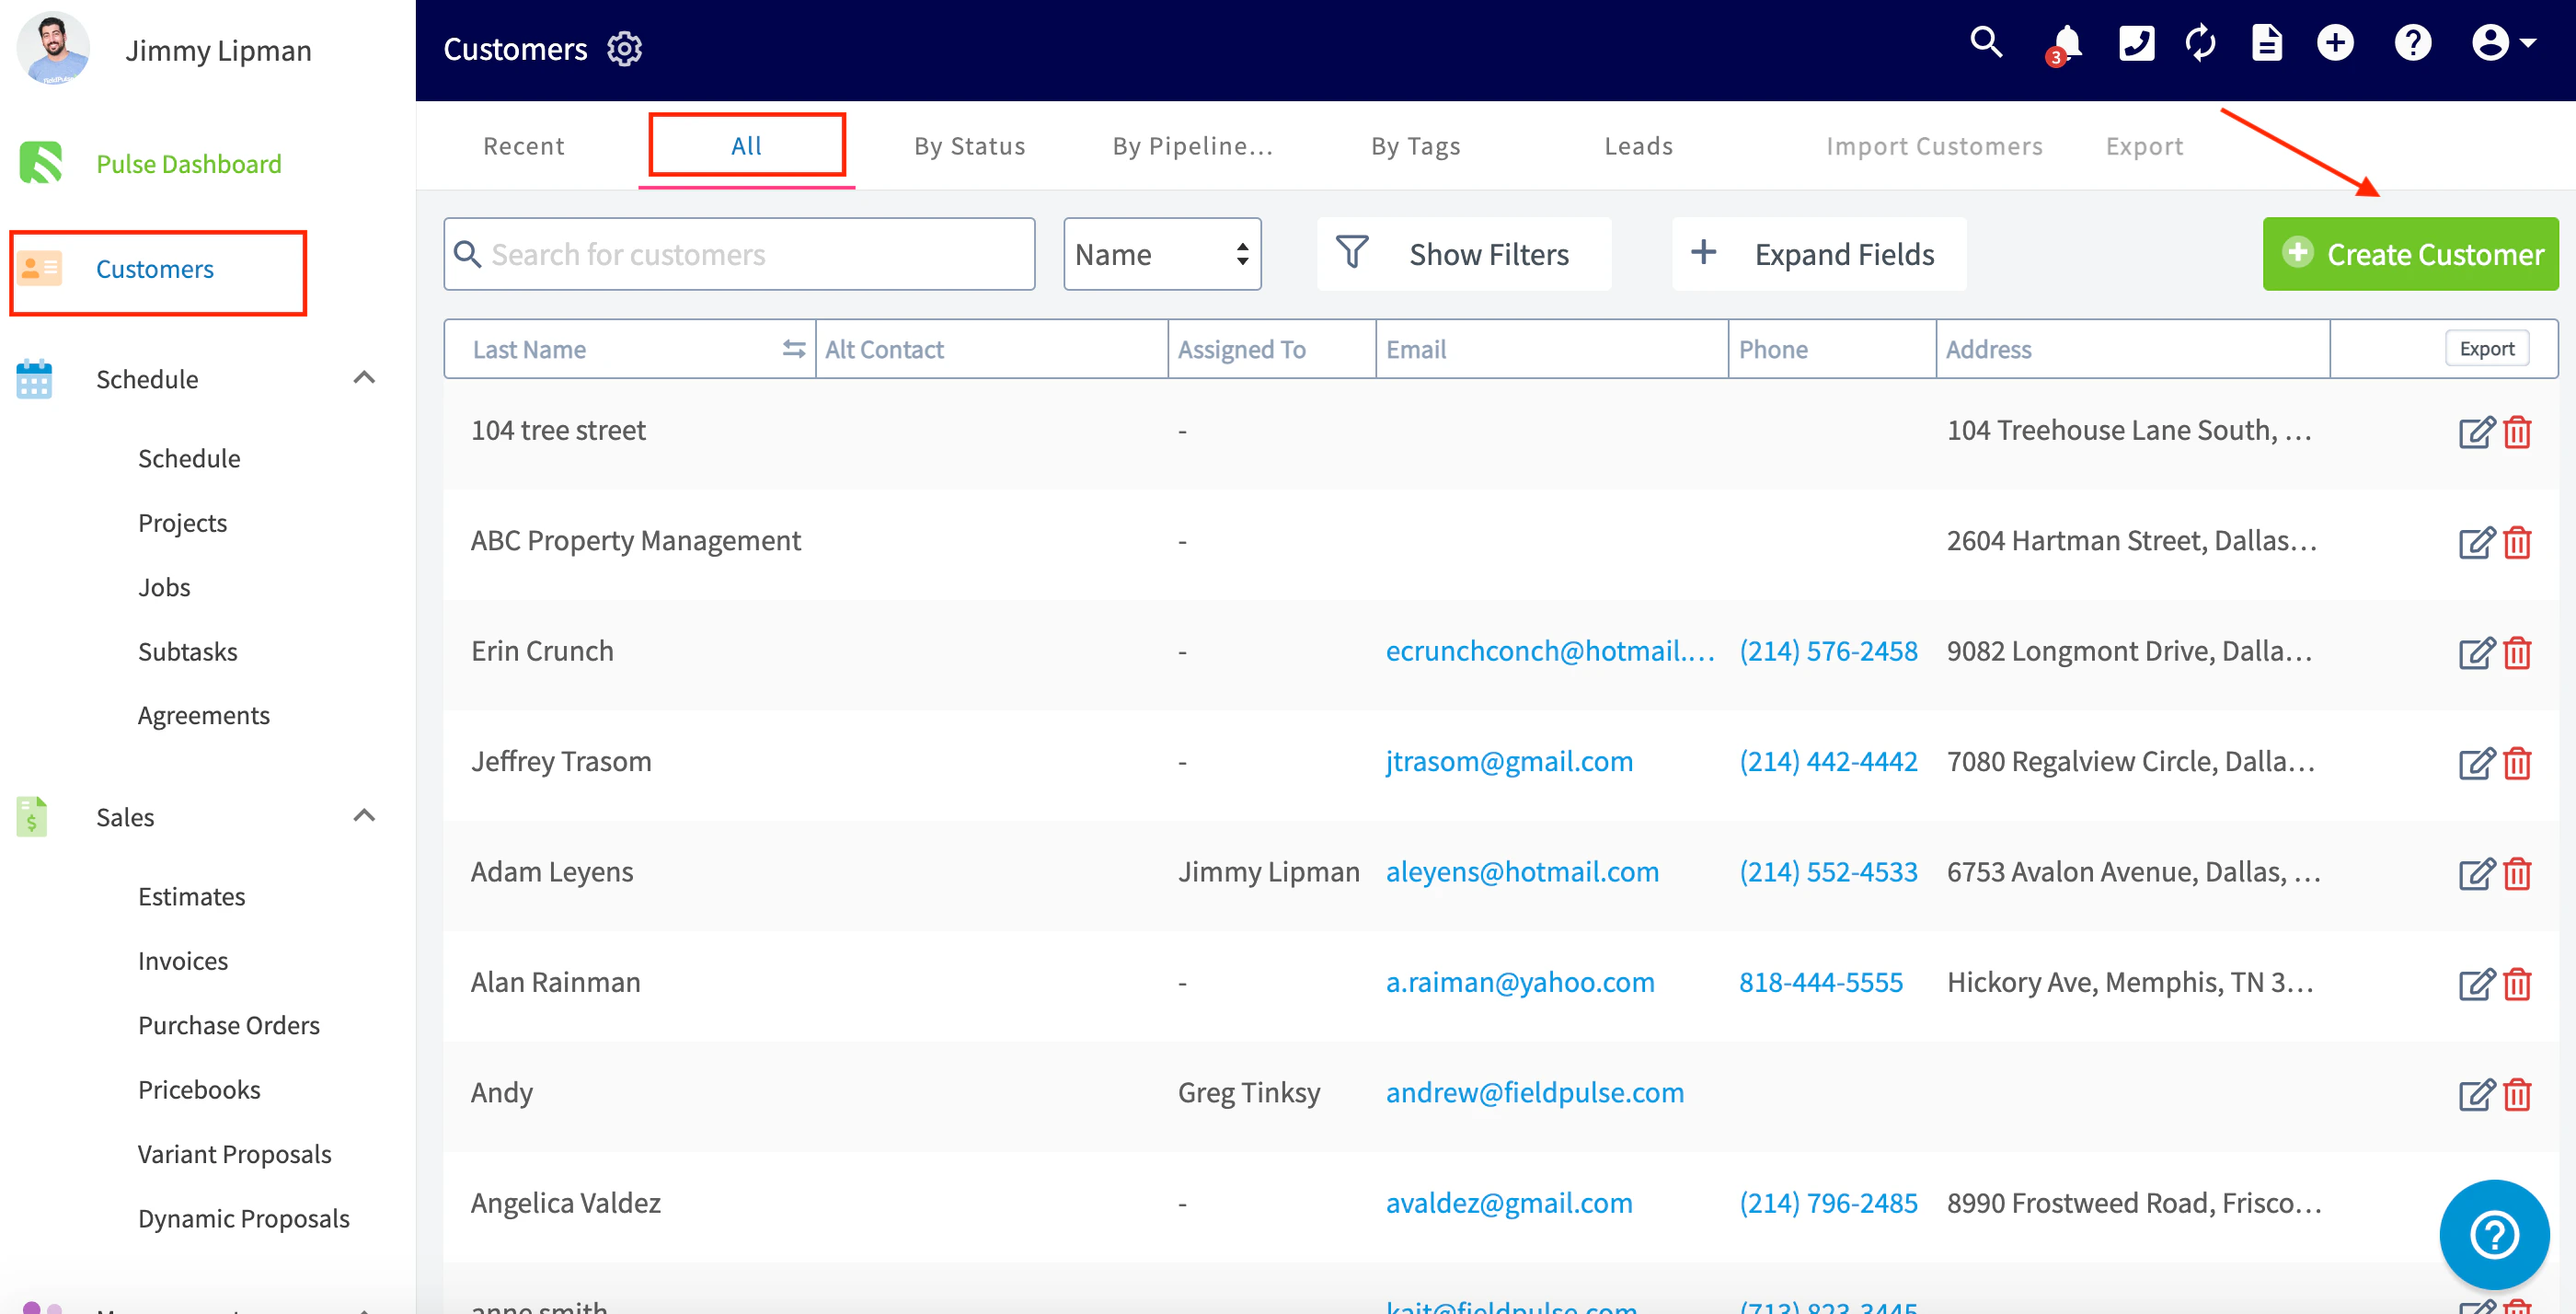
Sorting Customers by Pipeline Status
After adding statuses to your customers, you can manage the pipeline statuses by going to the Customers tab and clicking on By Pipeline. On this tab, you will see customers sorted by their pipeline status, next steps, and the monetary amount of their most recent estimate.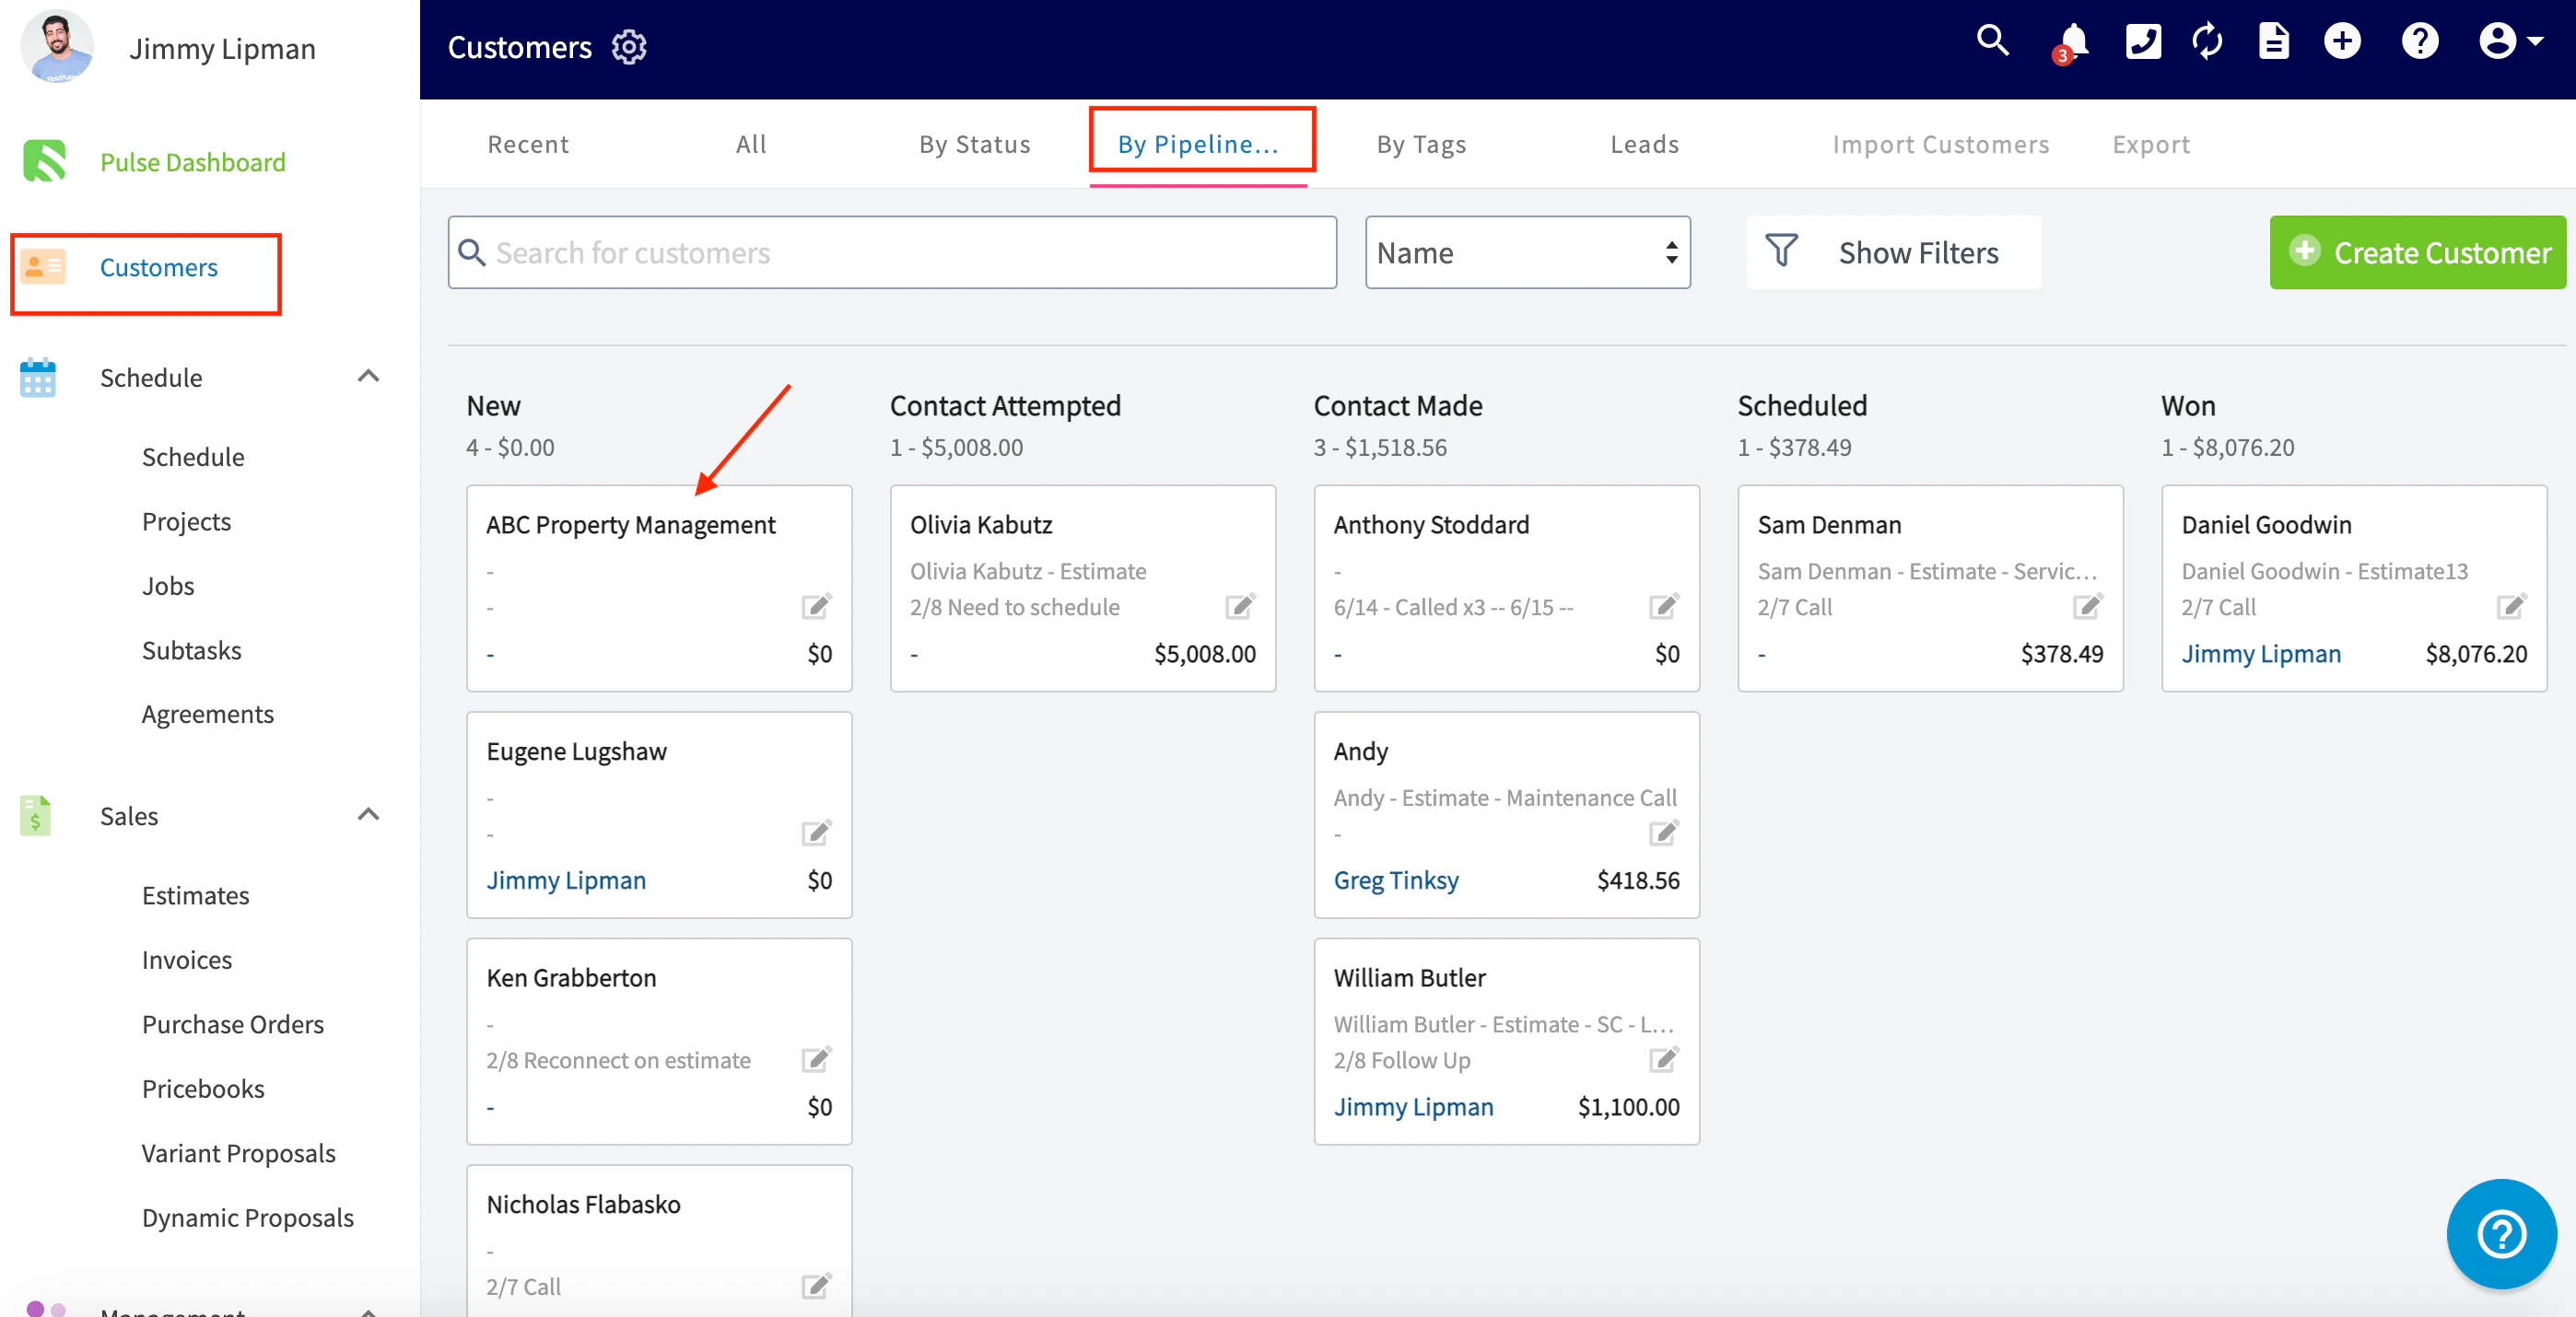

Video Tutorial
Have additional questions? Contact us at support@fieldpulse.com or use the chat feature in the bottom right corner of your screen.