
Who uses this: Admins create line item custom fields in Company Settings (a section only the Administrator role can view) and choose which roles see each field; the team members you give access to fill the fields in on a purchase order. Availability: All regions. Purchase Orders is included in the FieldPulse subscription and has to be enabled before you can create custom fields for its line items.A line item custom field stores information about an individual item on a purchase order that the standard purchase order fields do not capture — whether the item has arrived, when it is due, or what condition it arrived in. You create each field once in Company Settings, and it then appears on the line items of every purchase order for the roles you gave access to.
Overview
A line item custom field is an extra data point attached to the individual items on a purchase order rather than to the order as a whole. There is no limit on the number of line item custom fields you can create, and each field carries two controls you set when you build it — which roles can see the field, and whether the field also appears on the documents your customers and suppliers receive.Line item custom fields are internal only and do not sync to QuickBooks.
- Item status — track each item in the order as “Not Arrived,” “Dispatched,” “Arrived,” or “Returned.”
- Expected arrival date — tell the team when items are due, which helps when items on one order arrive on different dates.
- Item condition — record the condition of an item on receipt and note any damage, so issues get addressed promptly.
- Related job — an entire purchase order can be related to a job, and a line item custom field ties a specific item to a particular job or project.
- Return toggle — mark items that need to go back and start the reorder.
Video walkthrough
Watch the full walkthrough of line item custom fields, then follow the written steps below.Video walkthrough: setting up and using line item custom fields on purchase orders
Before you begin
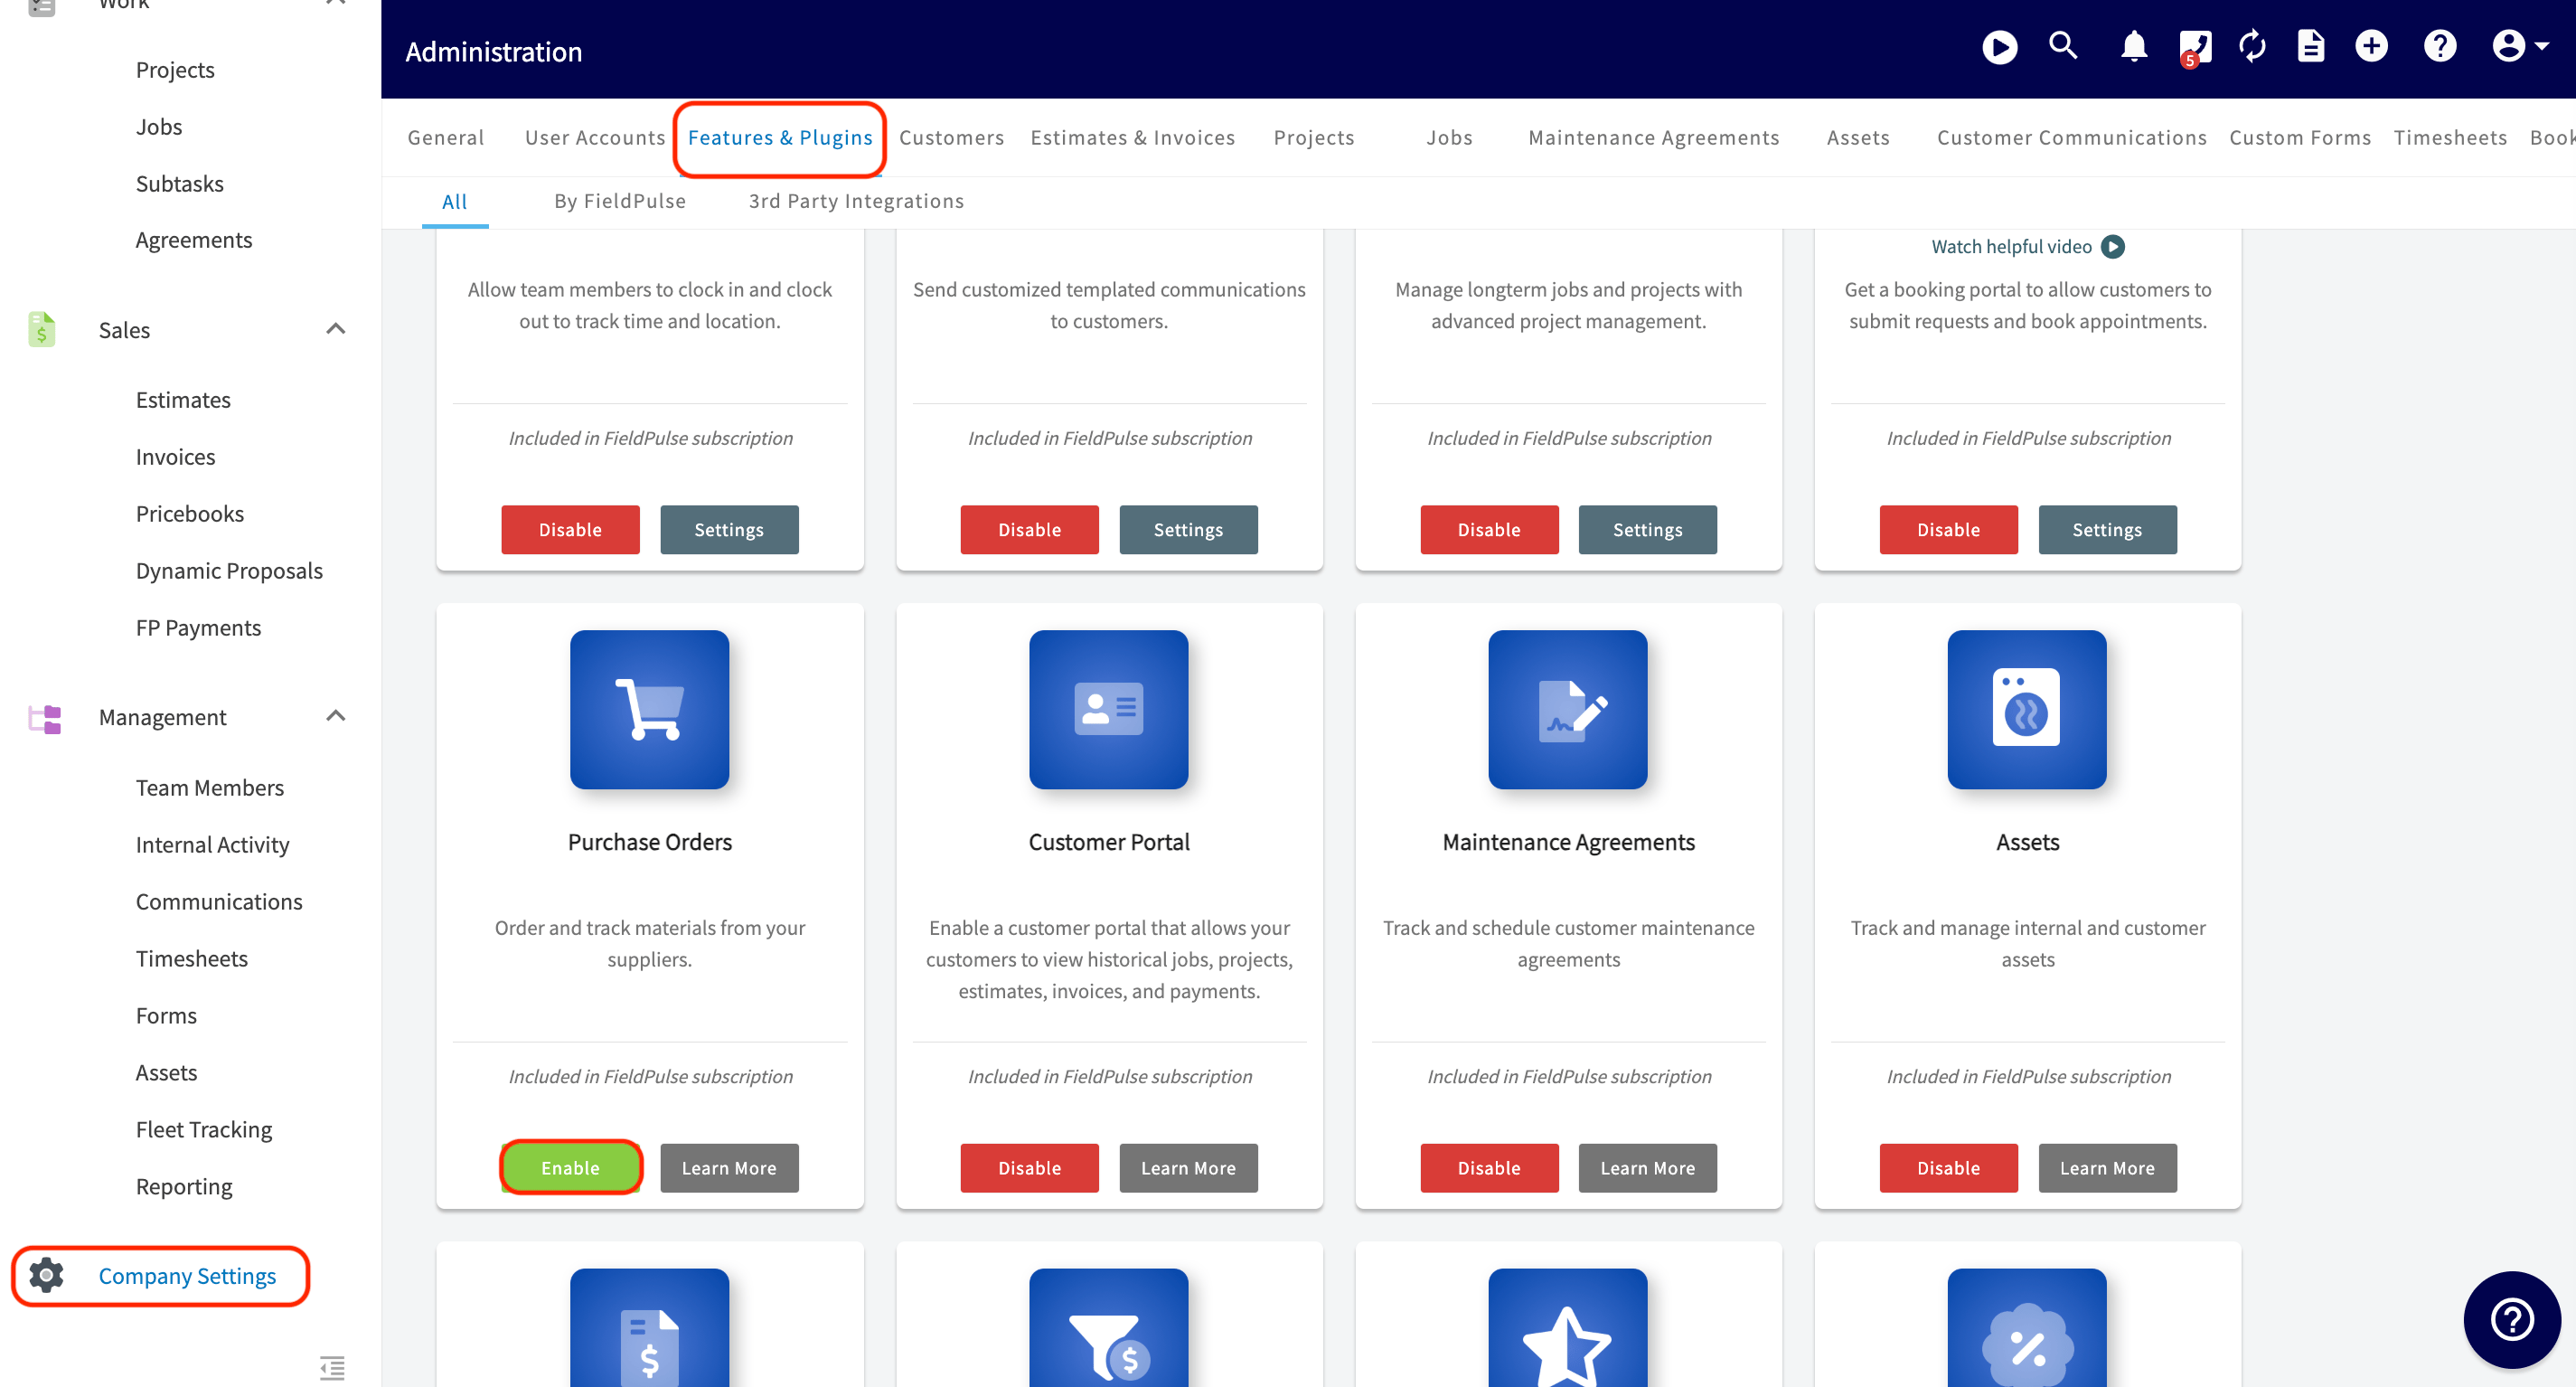
- Enable Purchase Orders. Go to Company Settings, select Features & Plugins, find Purchase Orders, and select Enable. Line item custom fields live under the Orders settings that this turns on.
- Decide who should see each field. Every line item custom field carries role-based visibility, so know which roles need the field before you create it.
- Decide whether customers and suppliers should see the field. One toggle per field controls that, and it is off by default.
- Plan the options for any drop-down field, including which option should be the default. You add the options while you create the field.
Step-by-step setup
Create a line item custom field
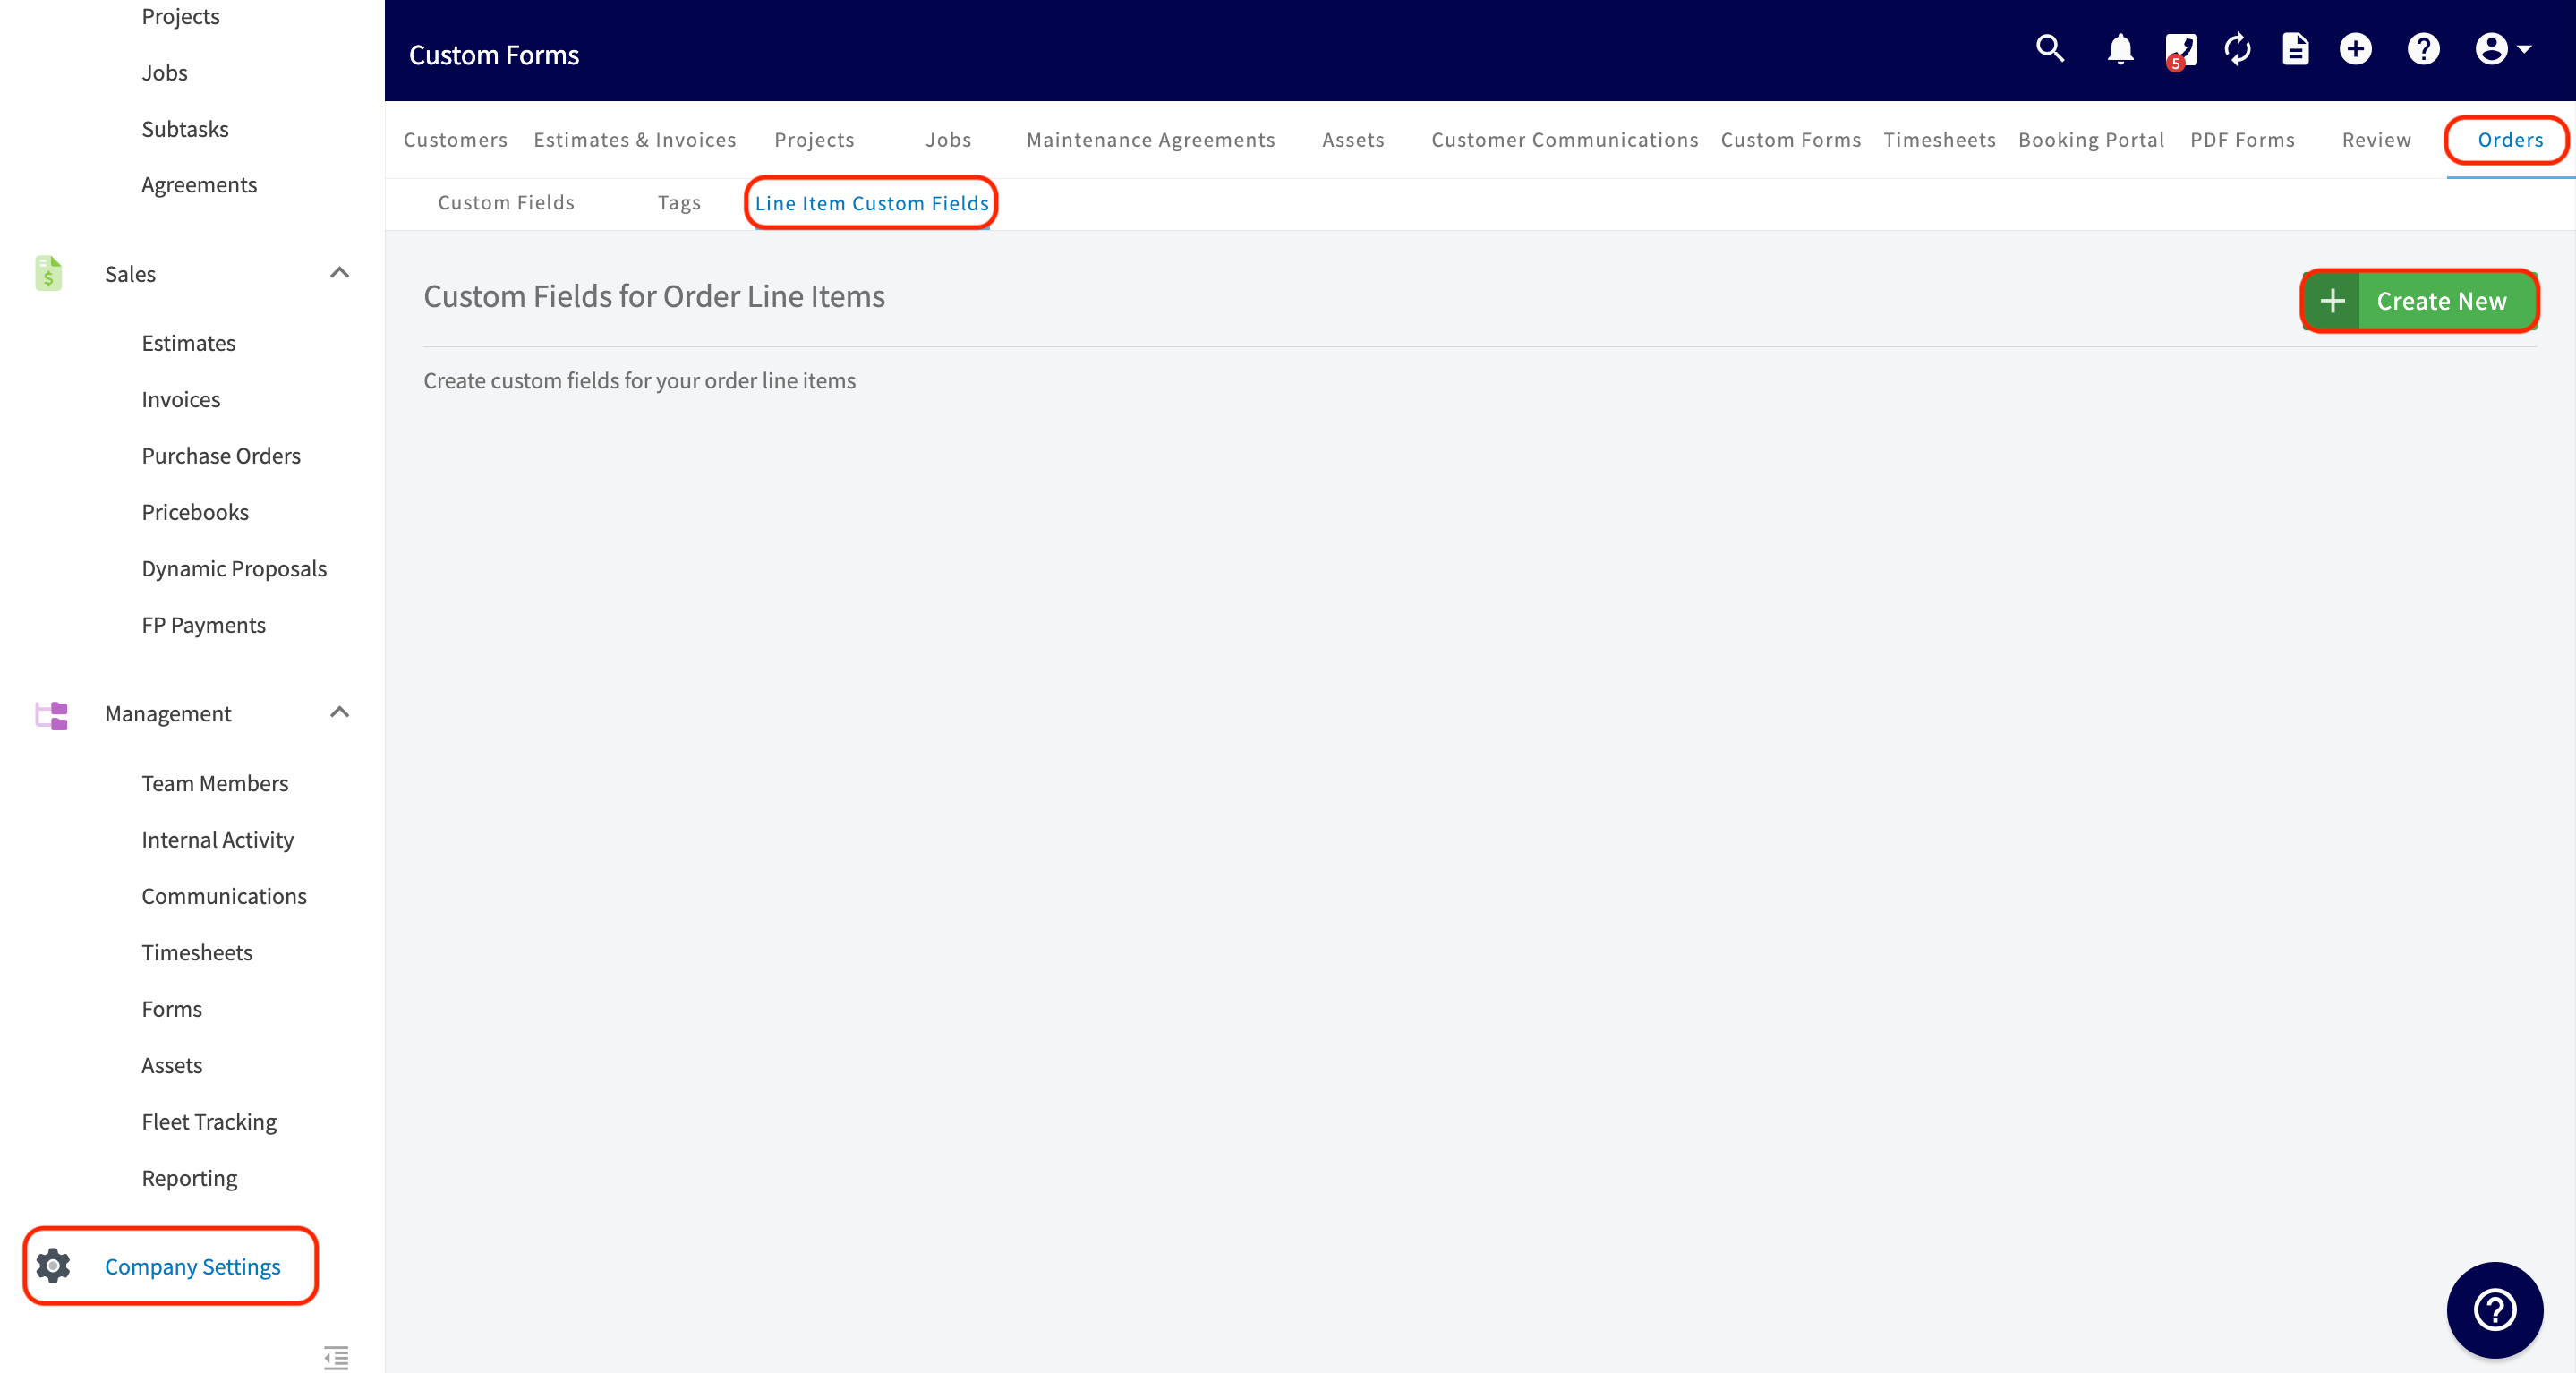
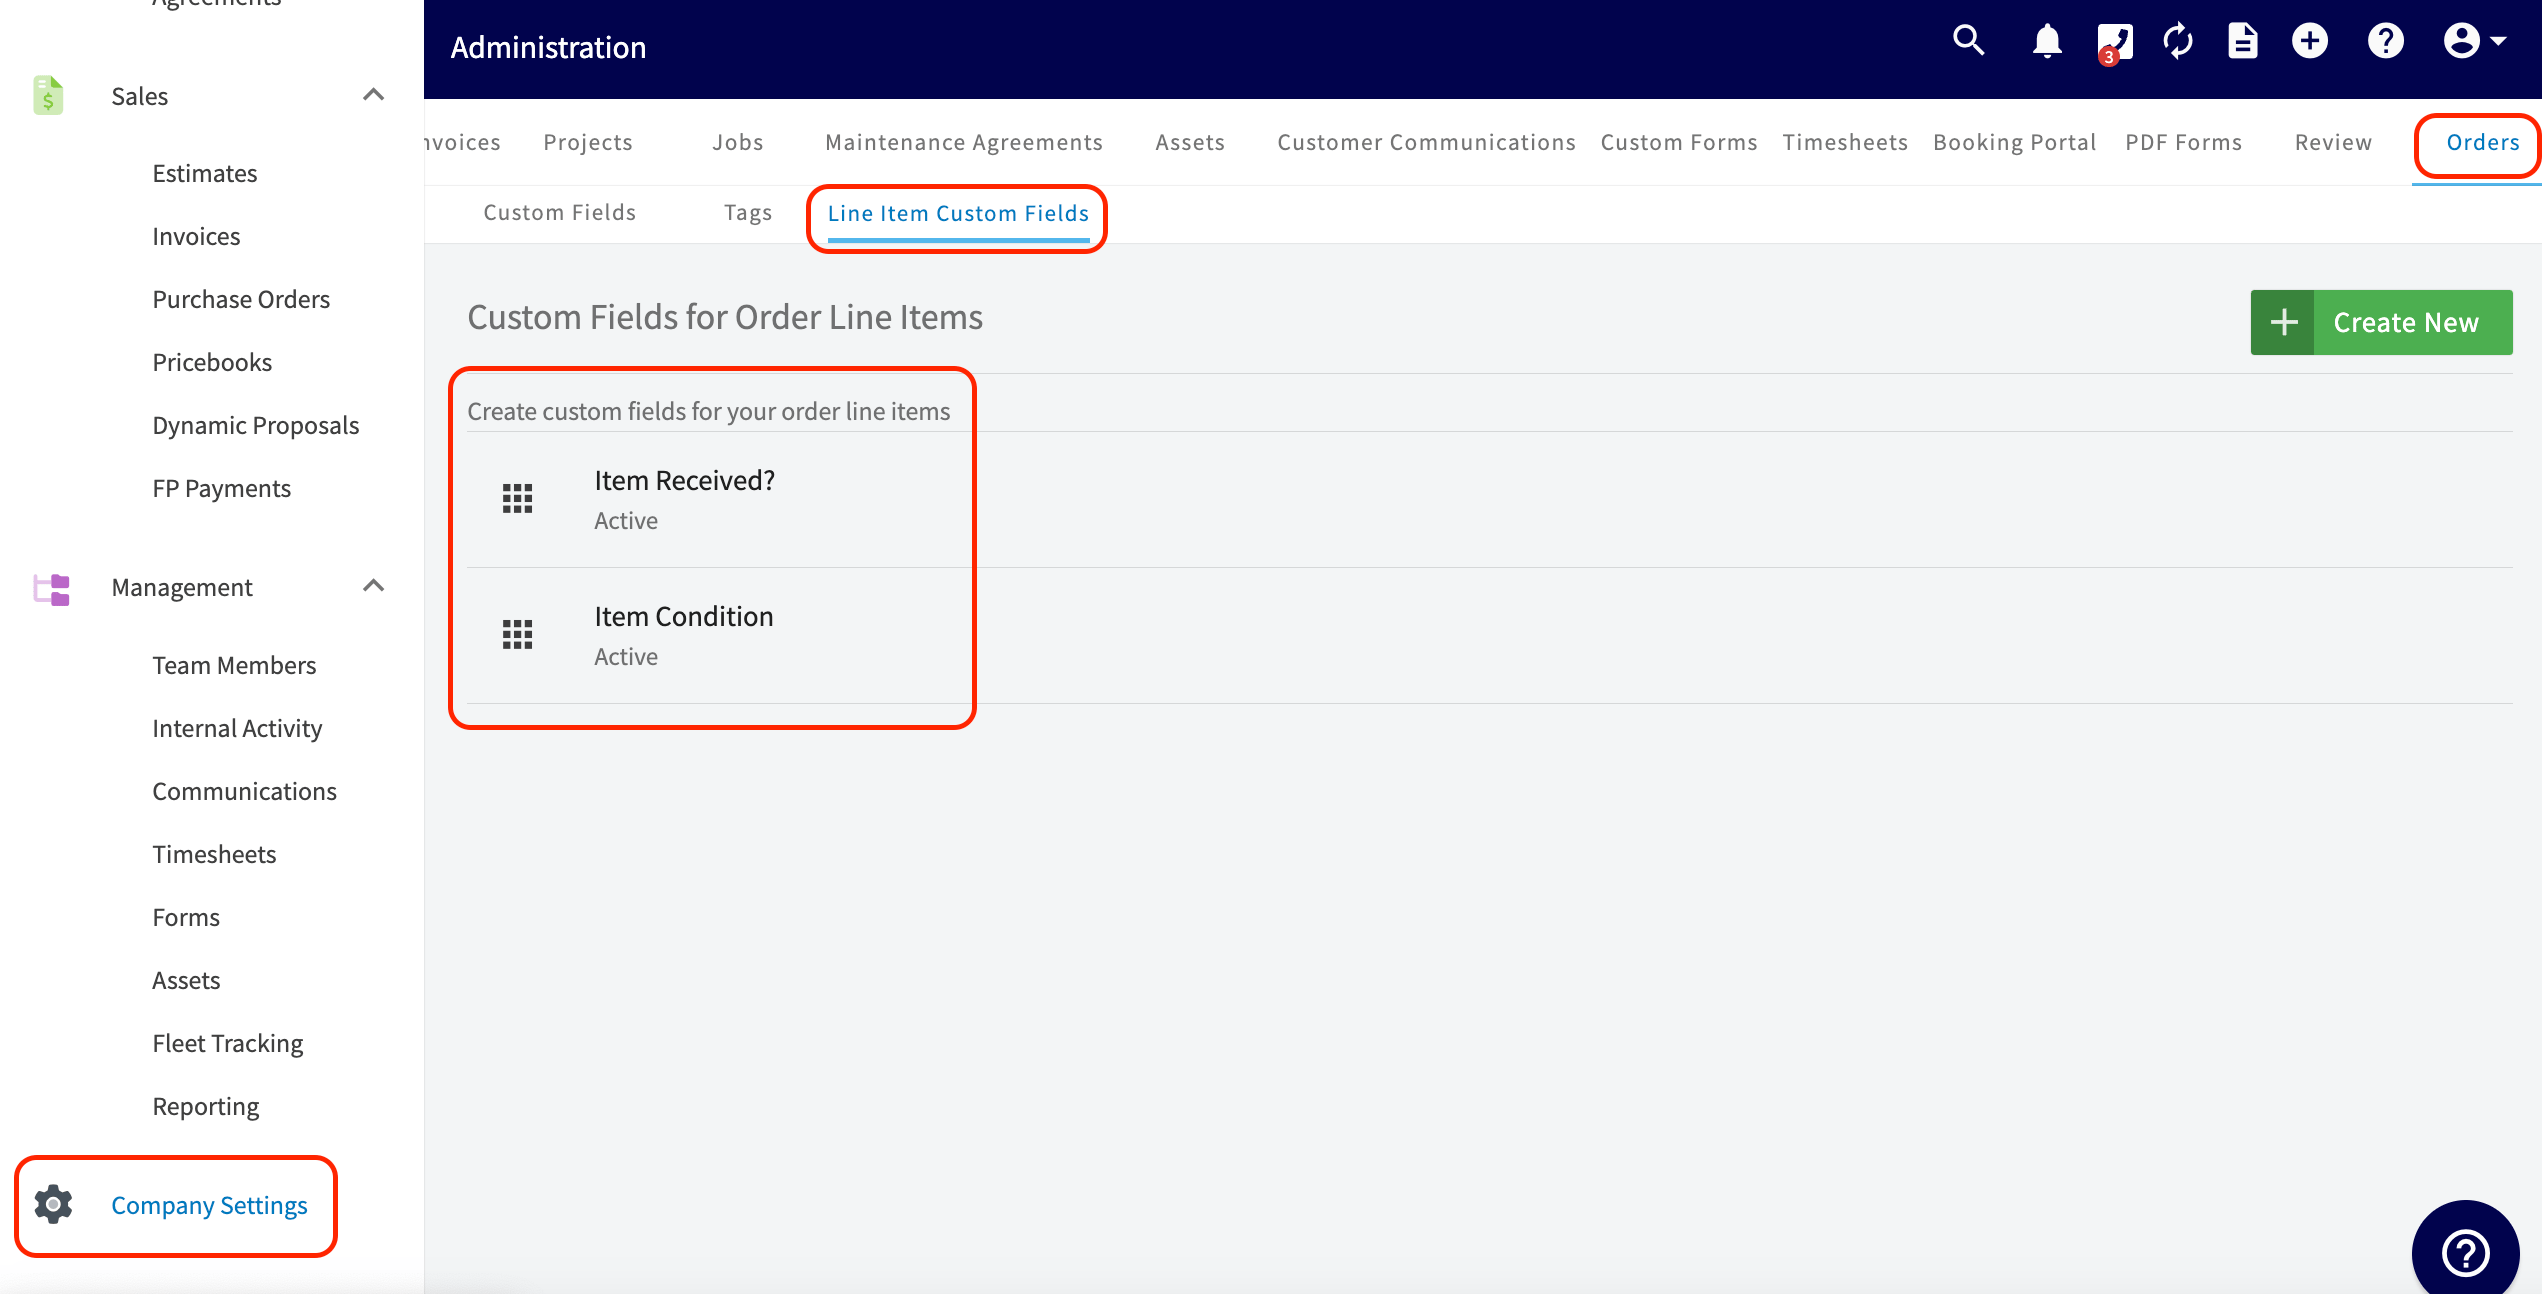
- Select Company Settings from the left side menu.
- Scroll the top menu bar to the Orders tab and select it.
- Select the Line Item Custom Fields tab.
-
Select Create New.
-
In the Add Custom Field window, enter the Field Name. This is the only required entry.
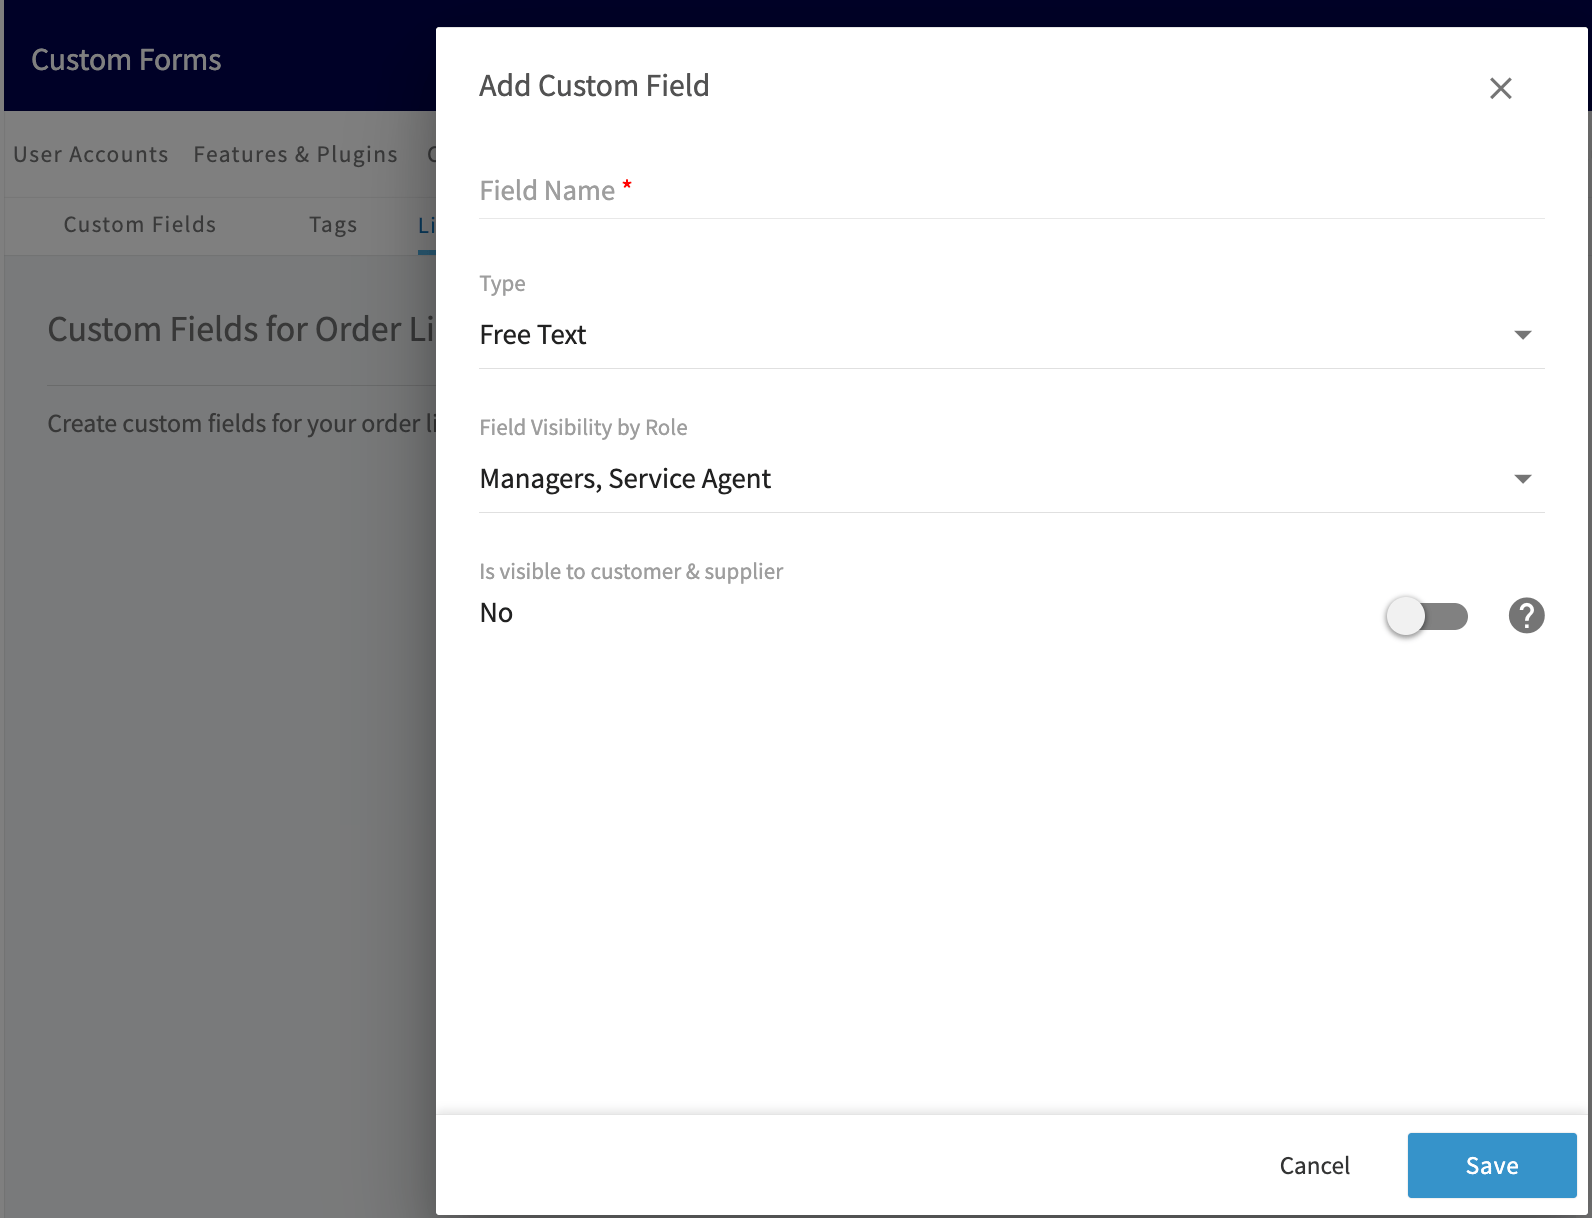
- Select a Type. The settings reference below lists what each type stores.
-
For a Drop-down field, select + Add New Option.
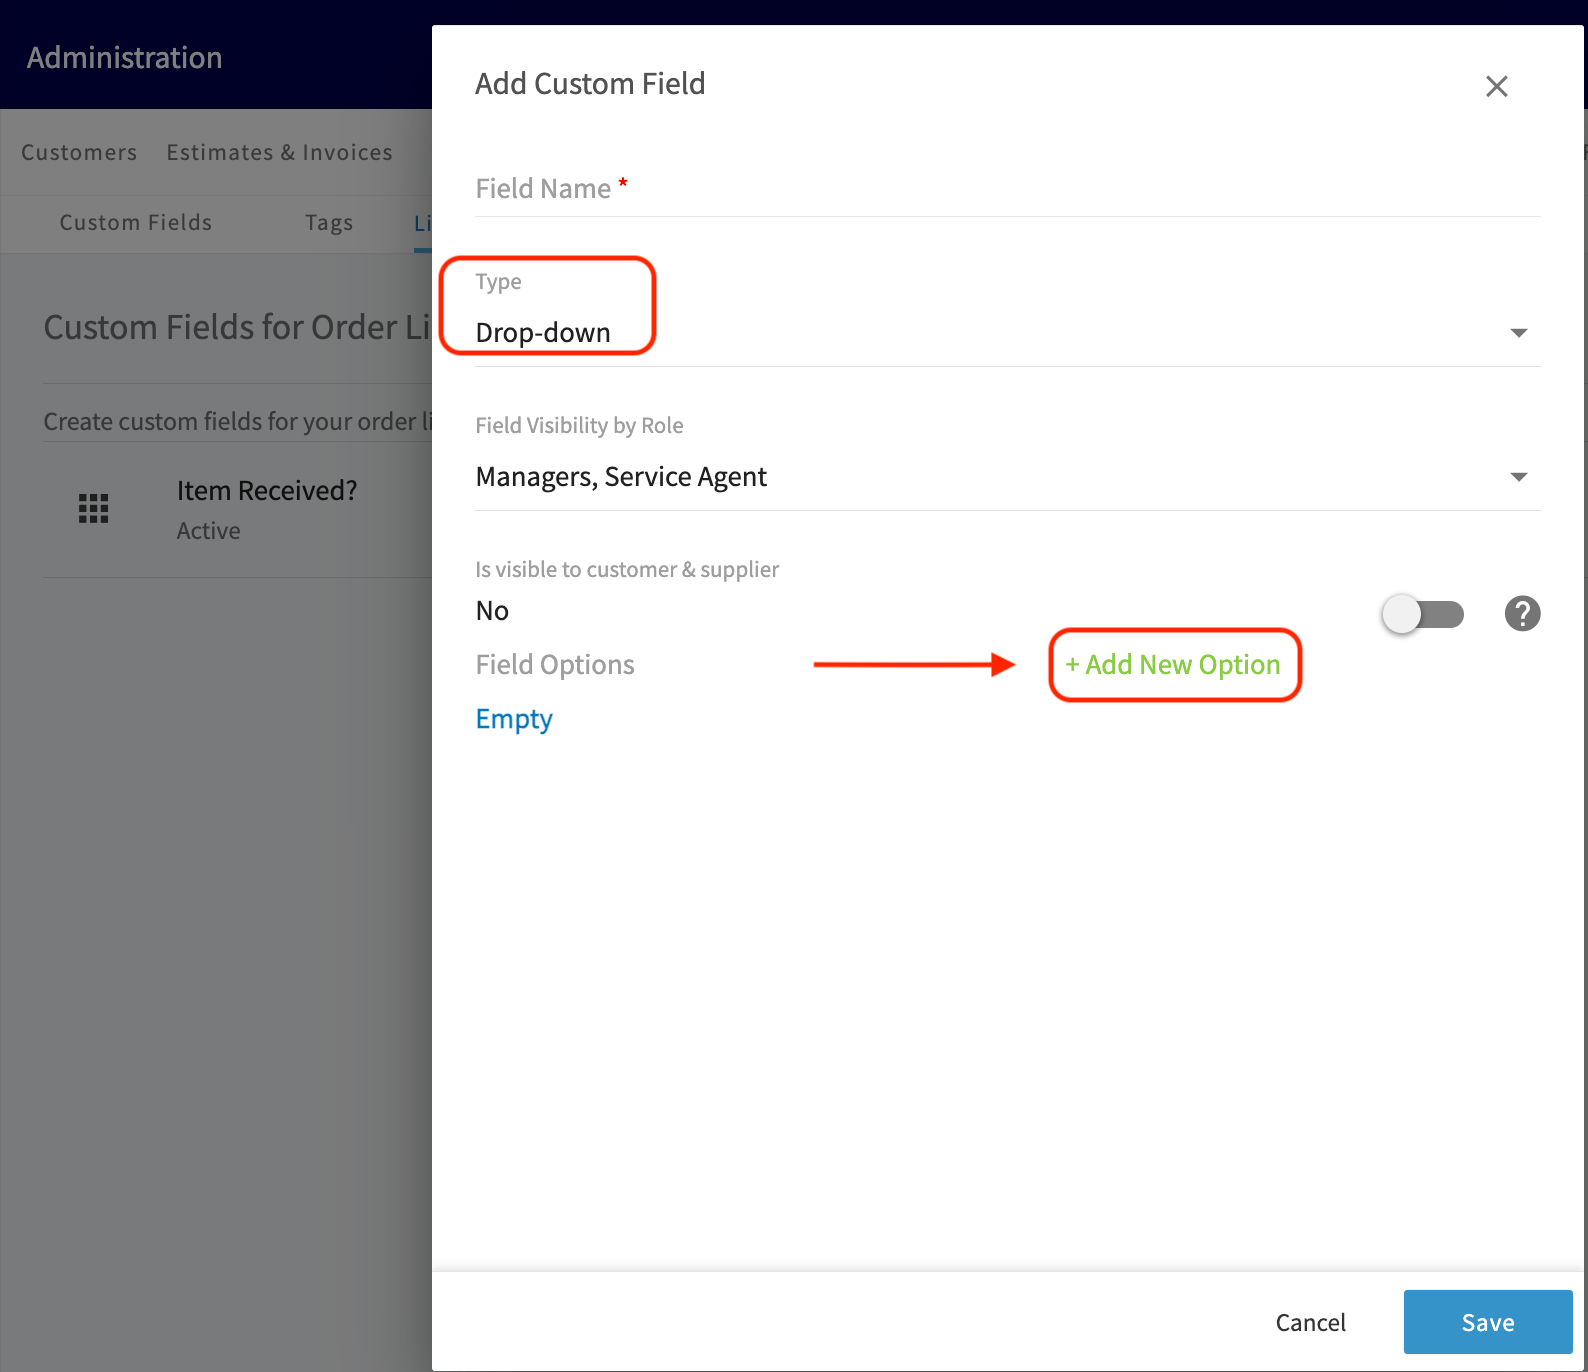
- Enter the option name and select the save icon to keep it. Repeat for every option you need.
-
Mark one option as the Default. The option labeled (Default) is the value applied to every item until a user with permission changes it.
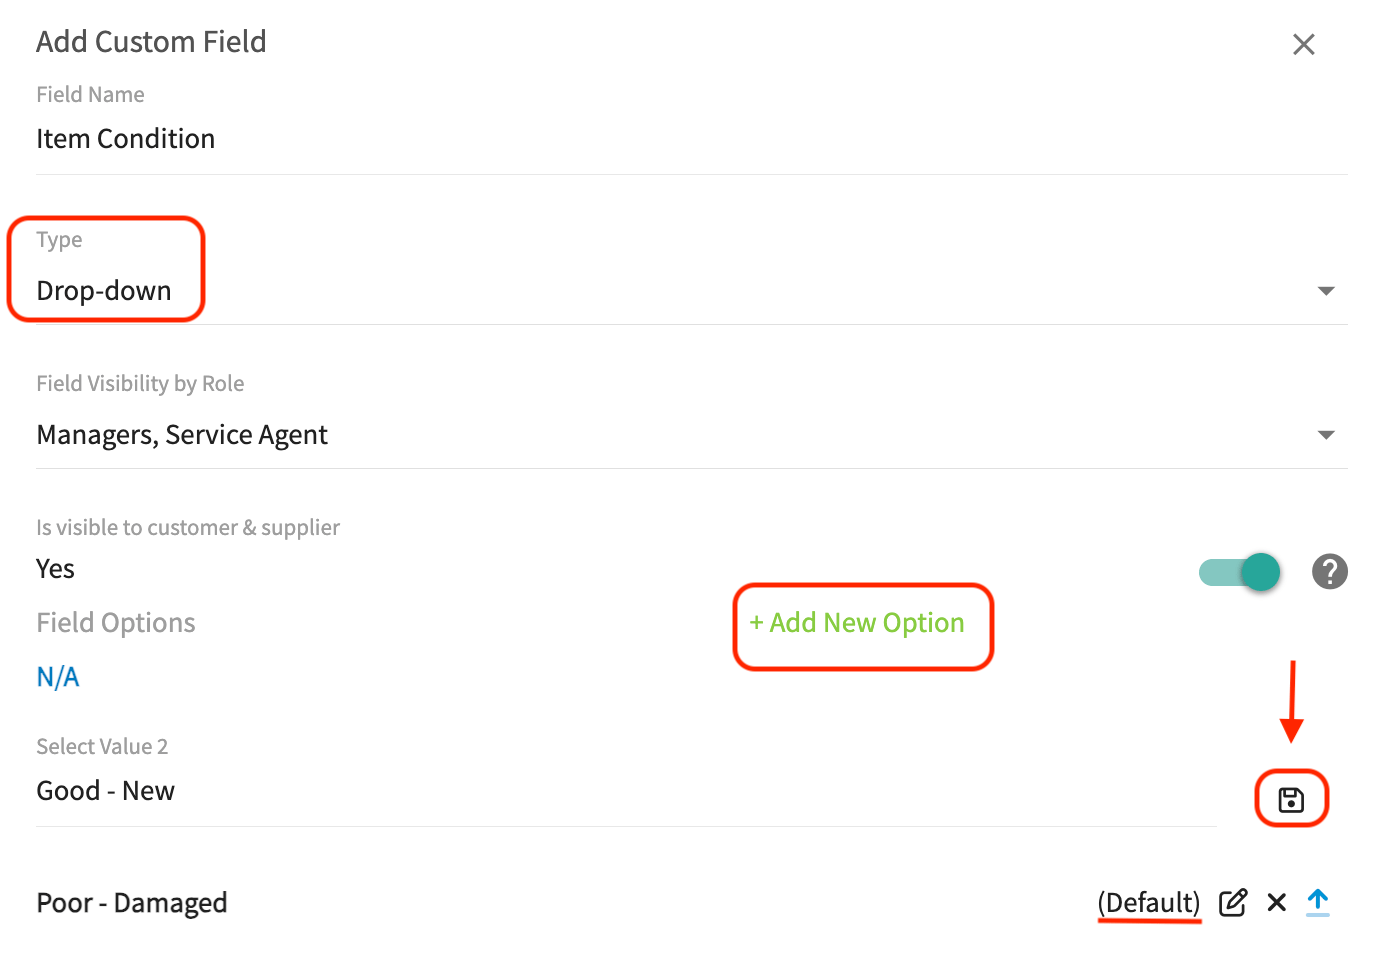
- Set Field Visibility by Role by checking or unchecking each role — service agents, team managers, and administration.
- Set Is visible to customer & supplier. On makes the field visible to customers and suppliers on purchase order PDFs, job reports, estimates and invoices, and asset reports; off keeps the field internal.
- Select Save.
Filling in custom fields on a purchase order
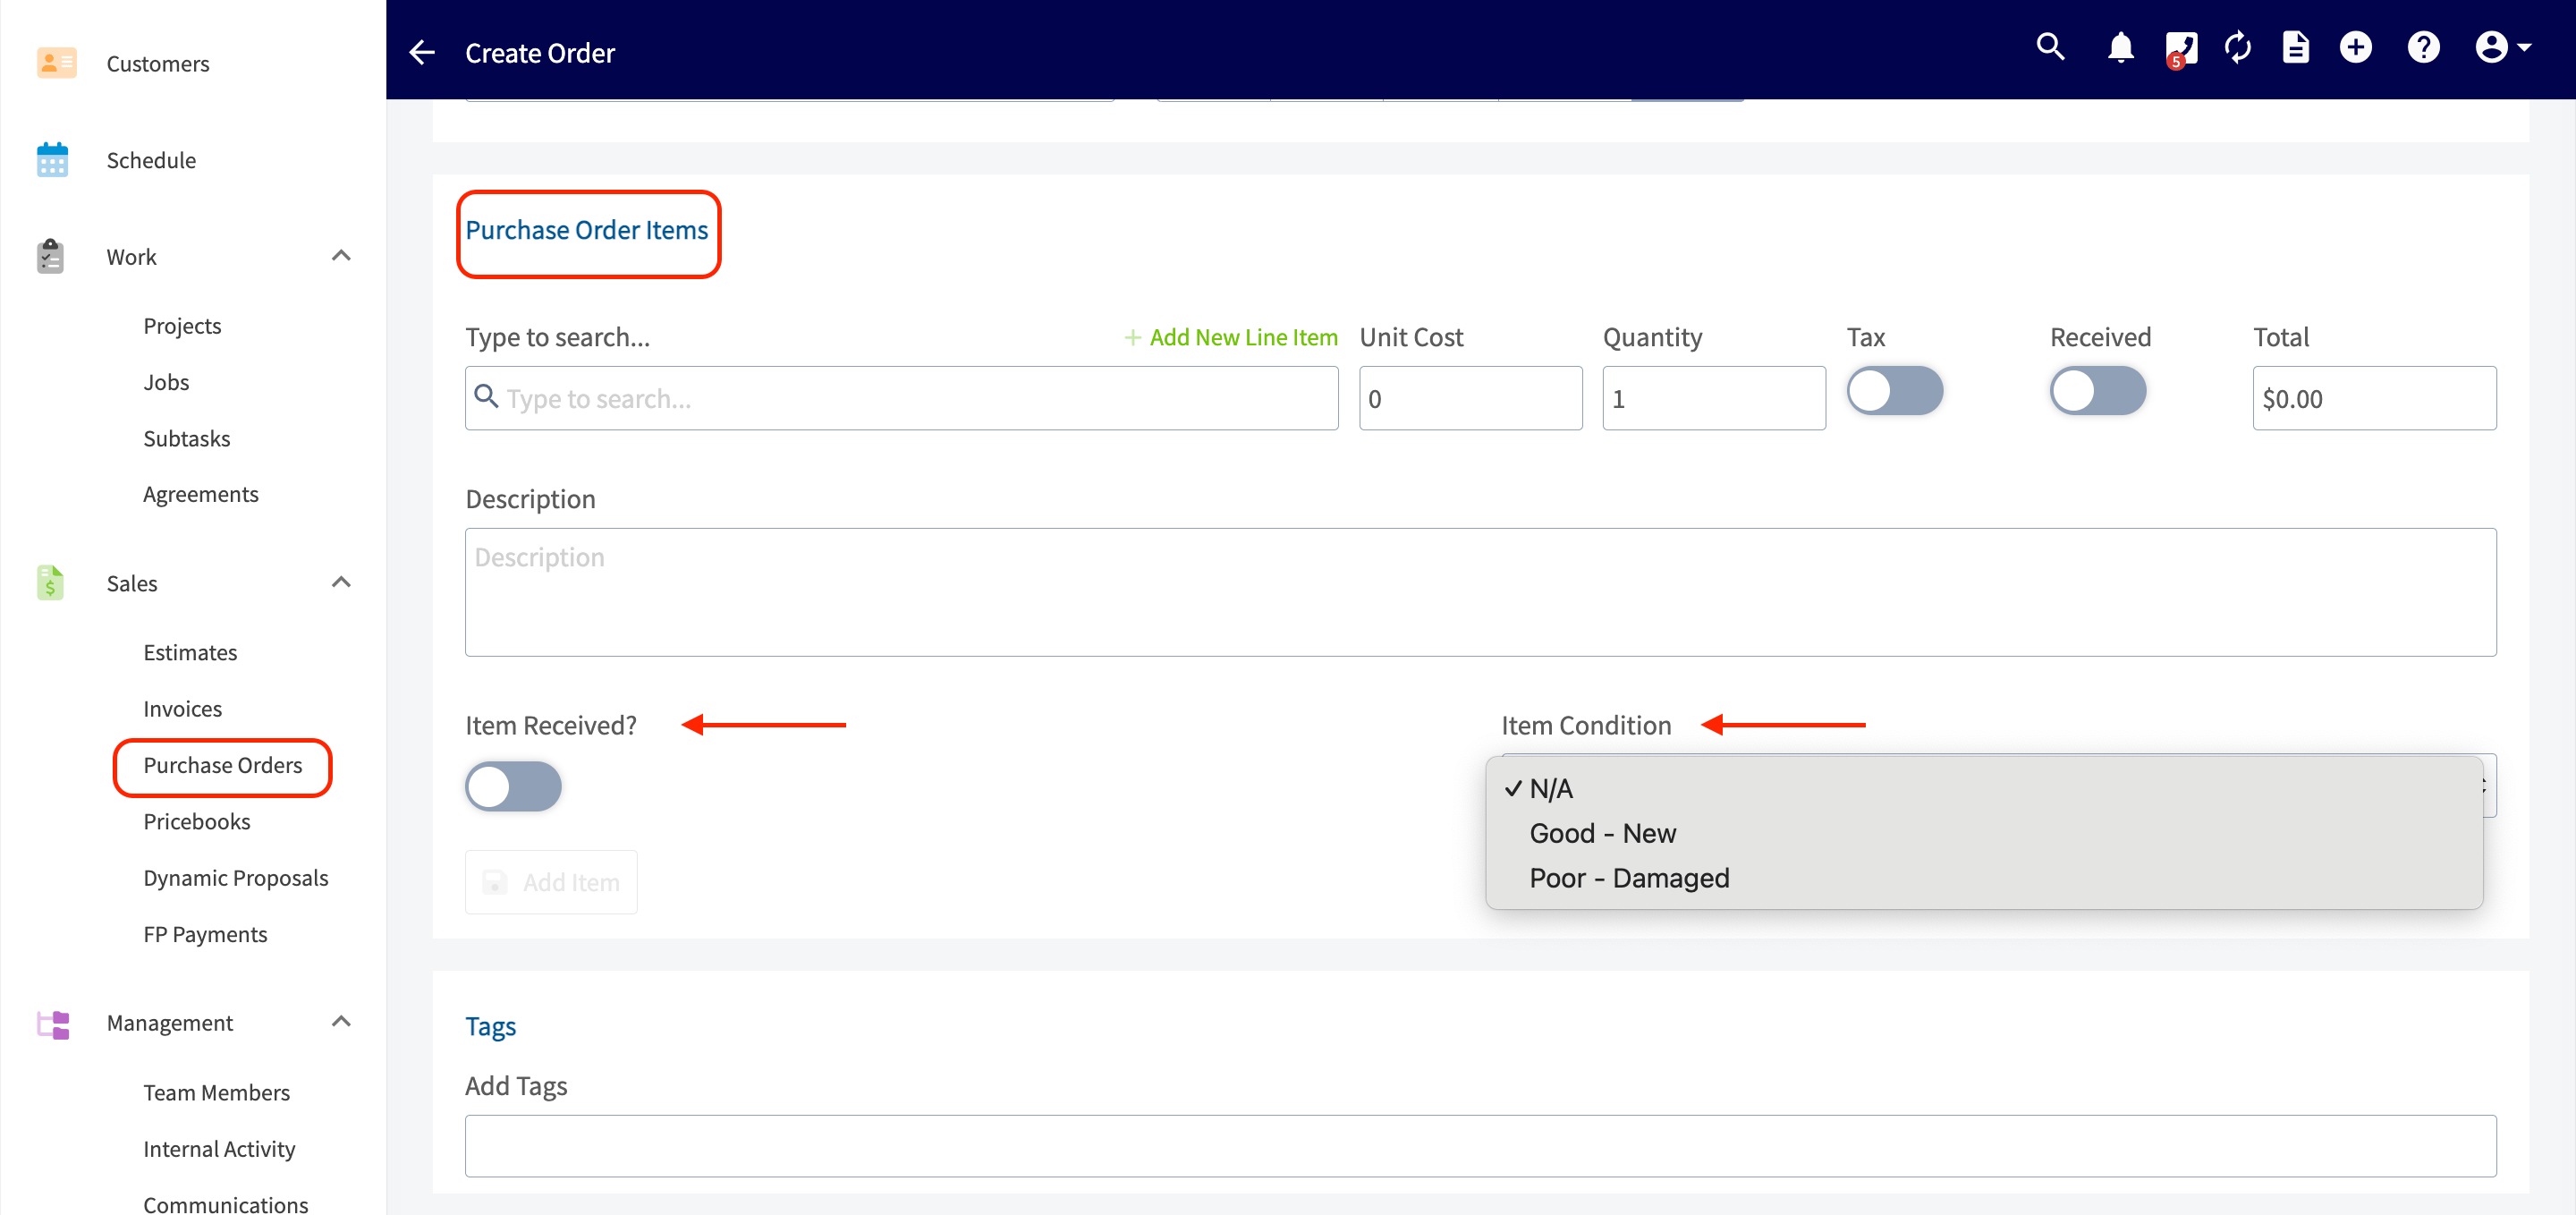
Your line item custom fields appear on every purchase order under the Purchase Order Items heading, next to the item they belong to.- Select Purchase Orders from the left side menu.
- Open an existing purchase order or create a new one.
- Fill in each custom field on the line item it belongs to. A drop-down field opens the list of options you defined, and a checkbox field shows as a toggle.
Video walkthrough: updating line item custom fields on a purchase order
Reporting on line item custom fields
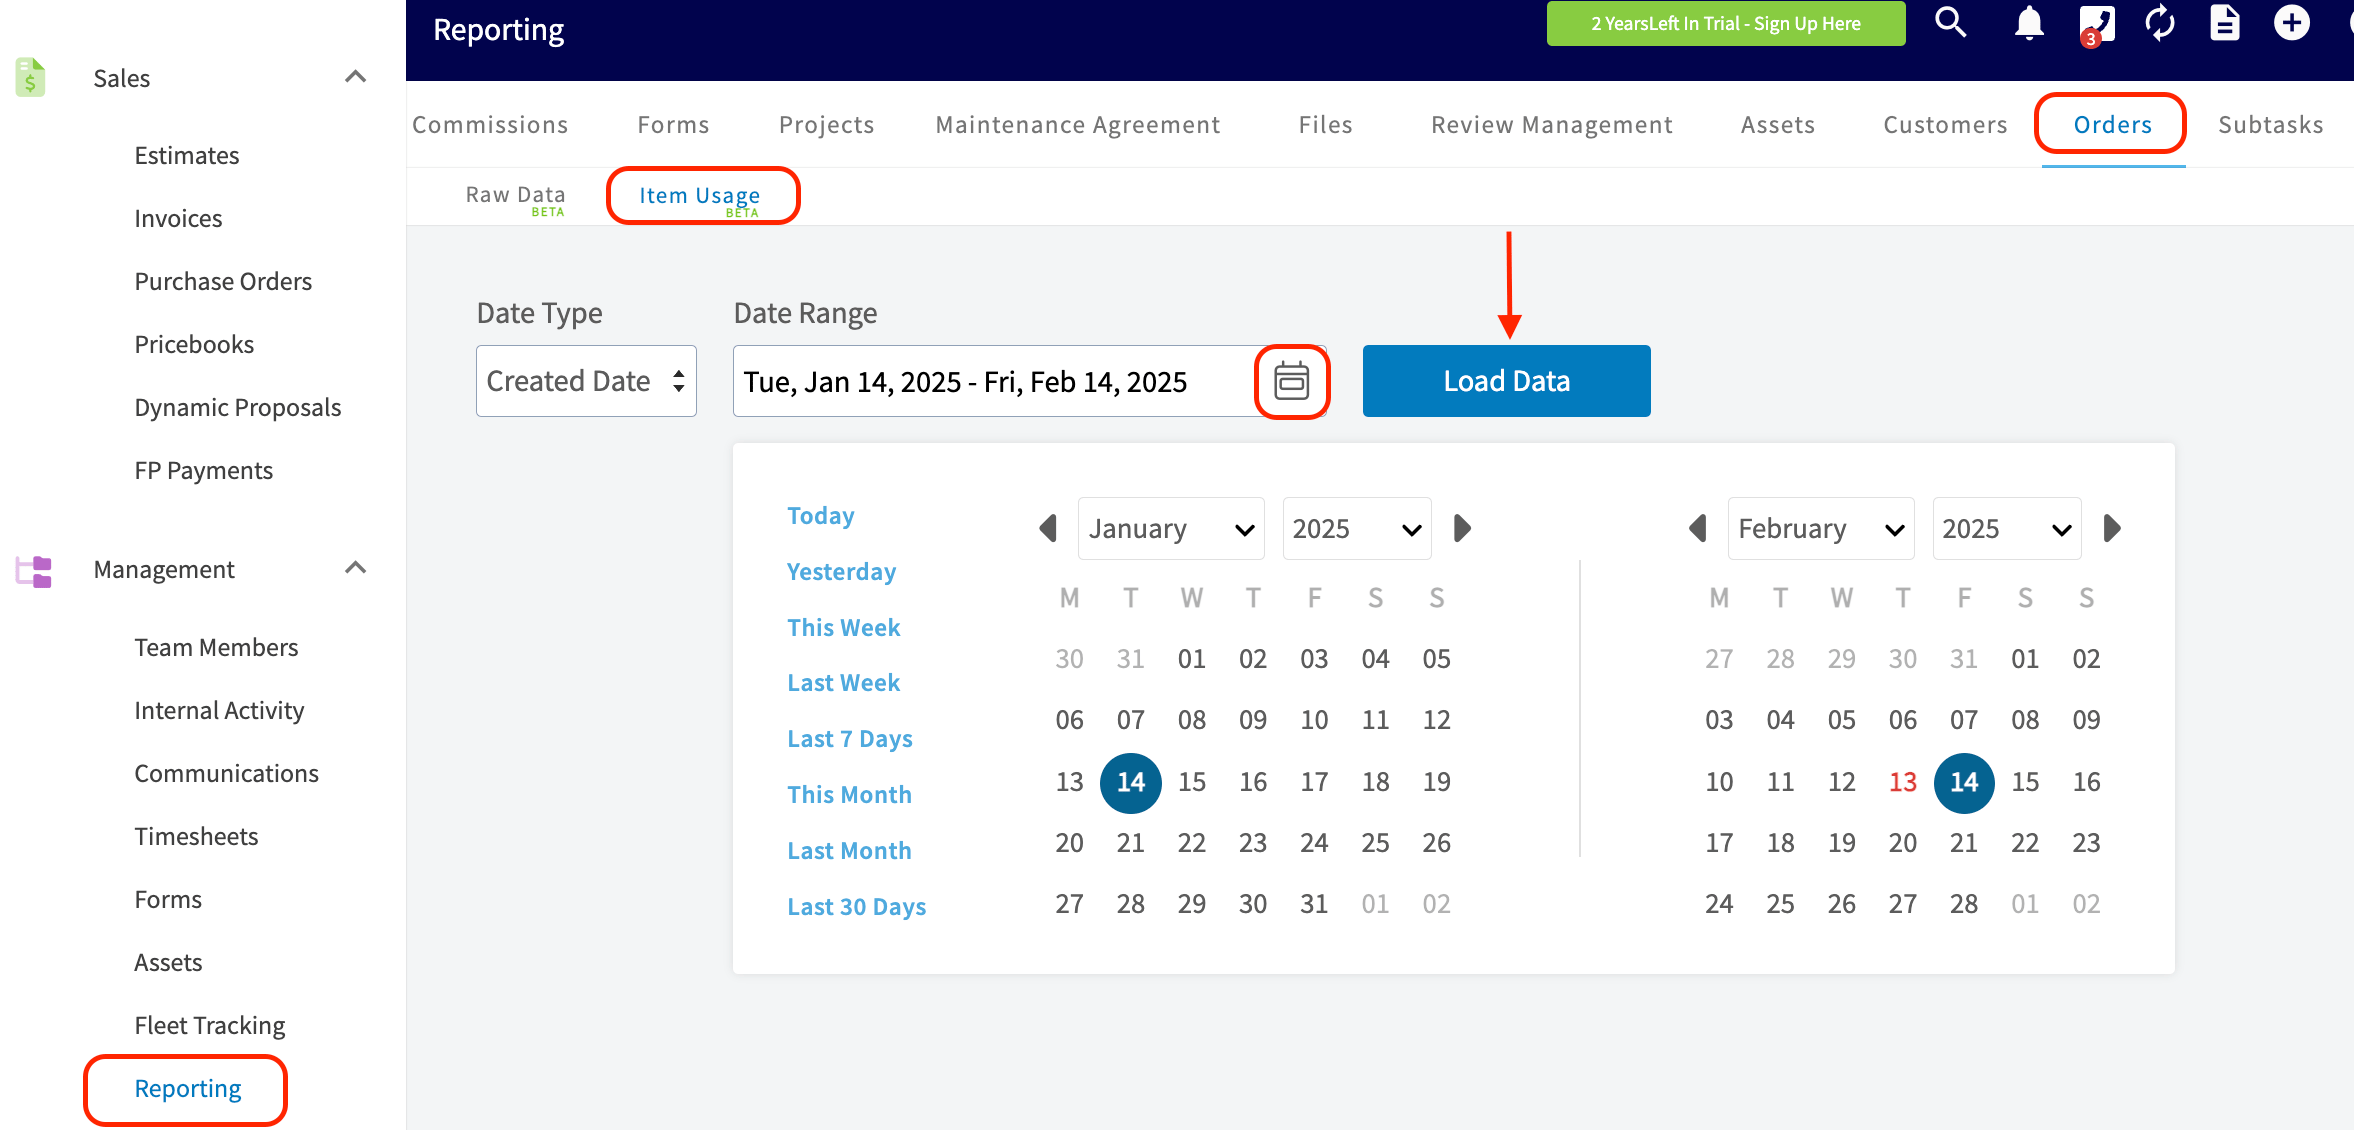
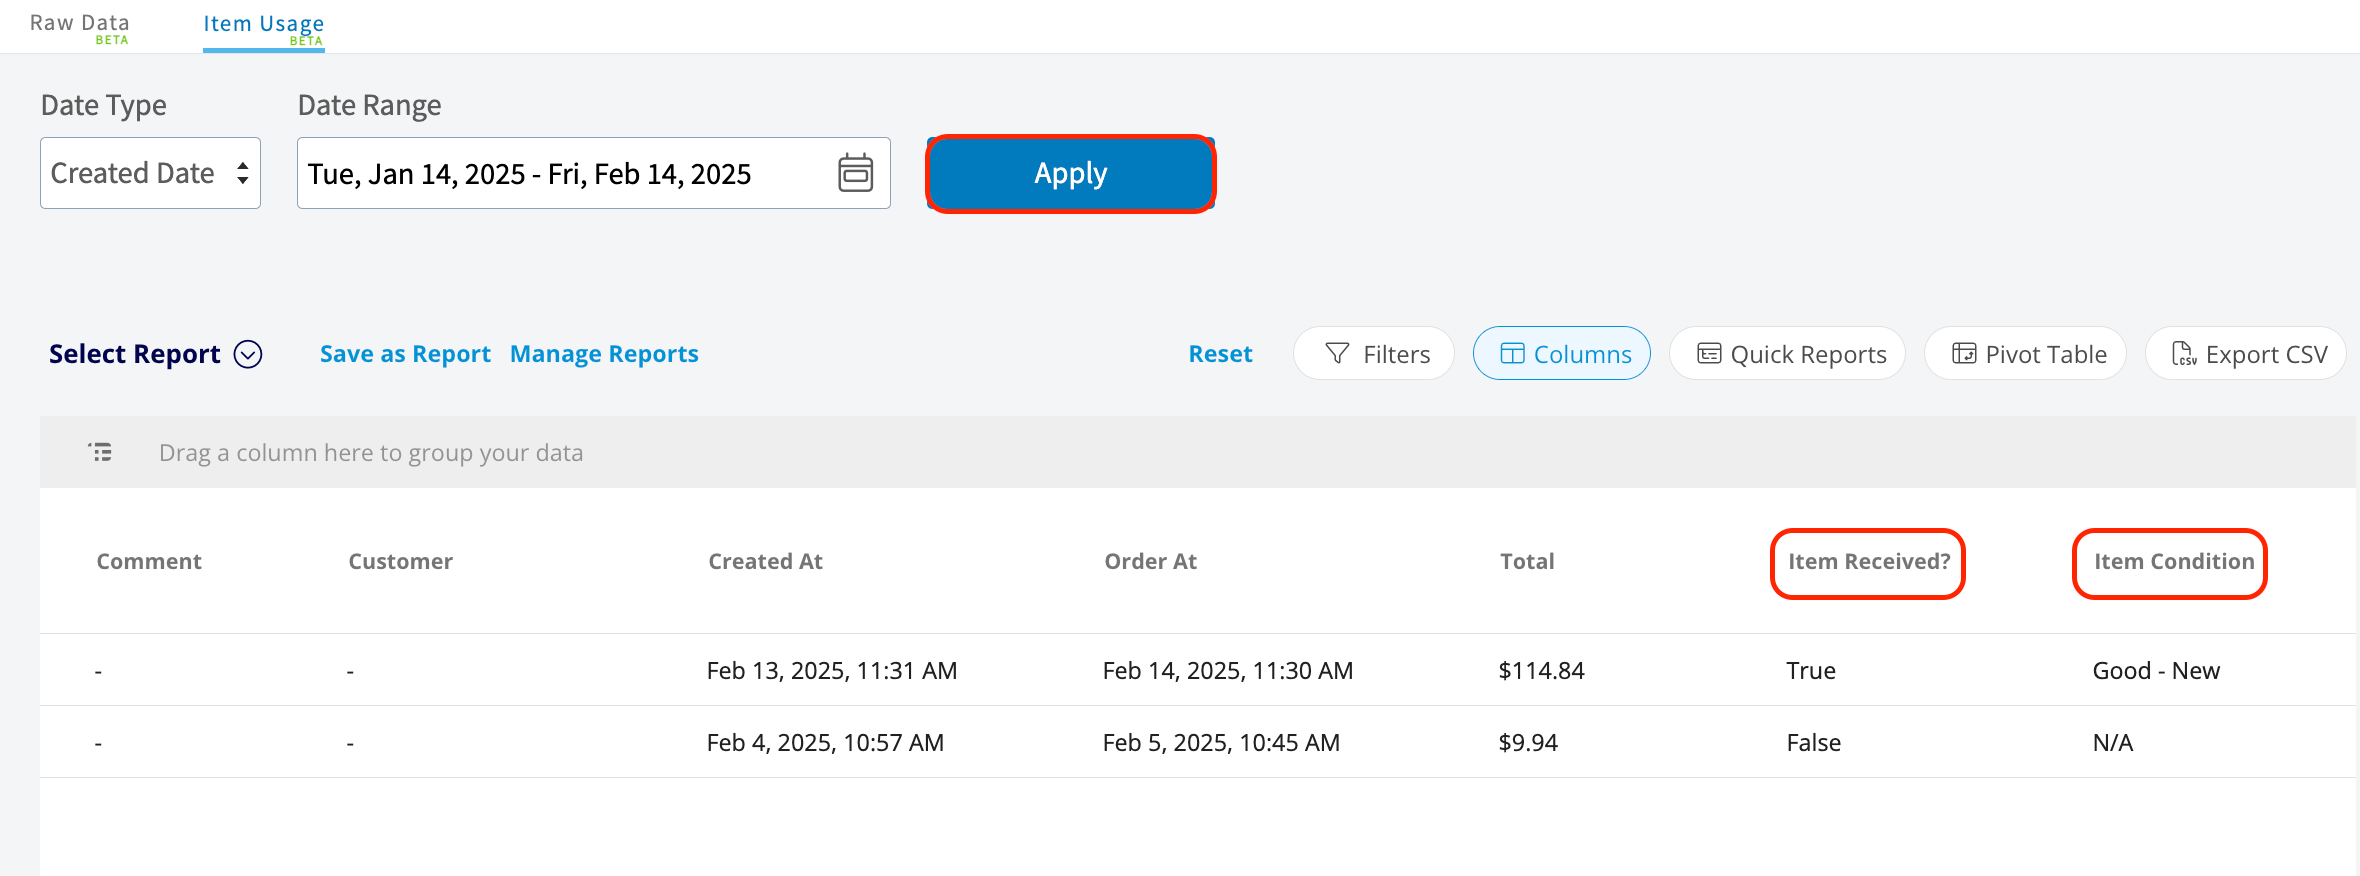
Line item custom fields come through as columns on the Item Usage report, so you can read them across every purchase order in a date range.- Select Reporting from the left side menu.
- Scroll the top menu bar to the Orders tab and select Item Usage.
-
Choose your Date Range and select Load Data.
-
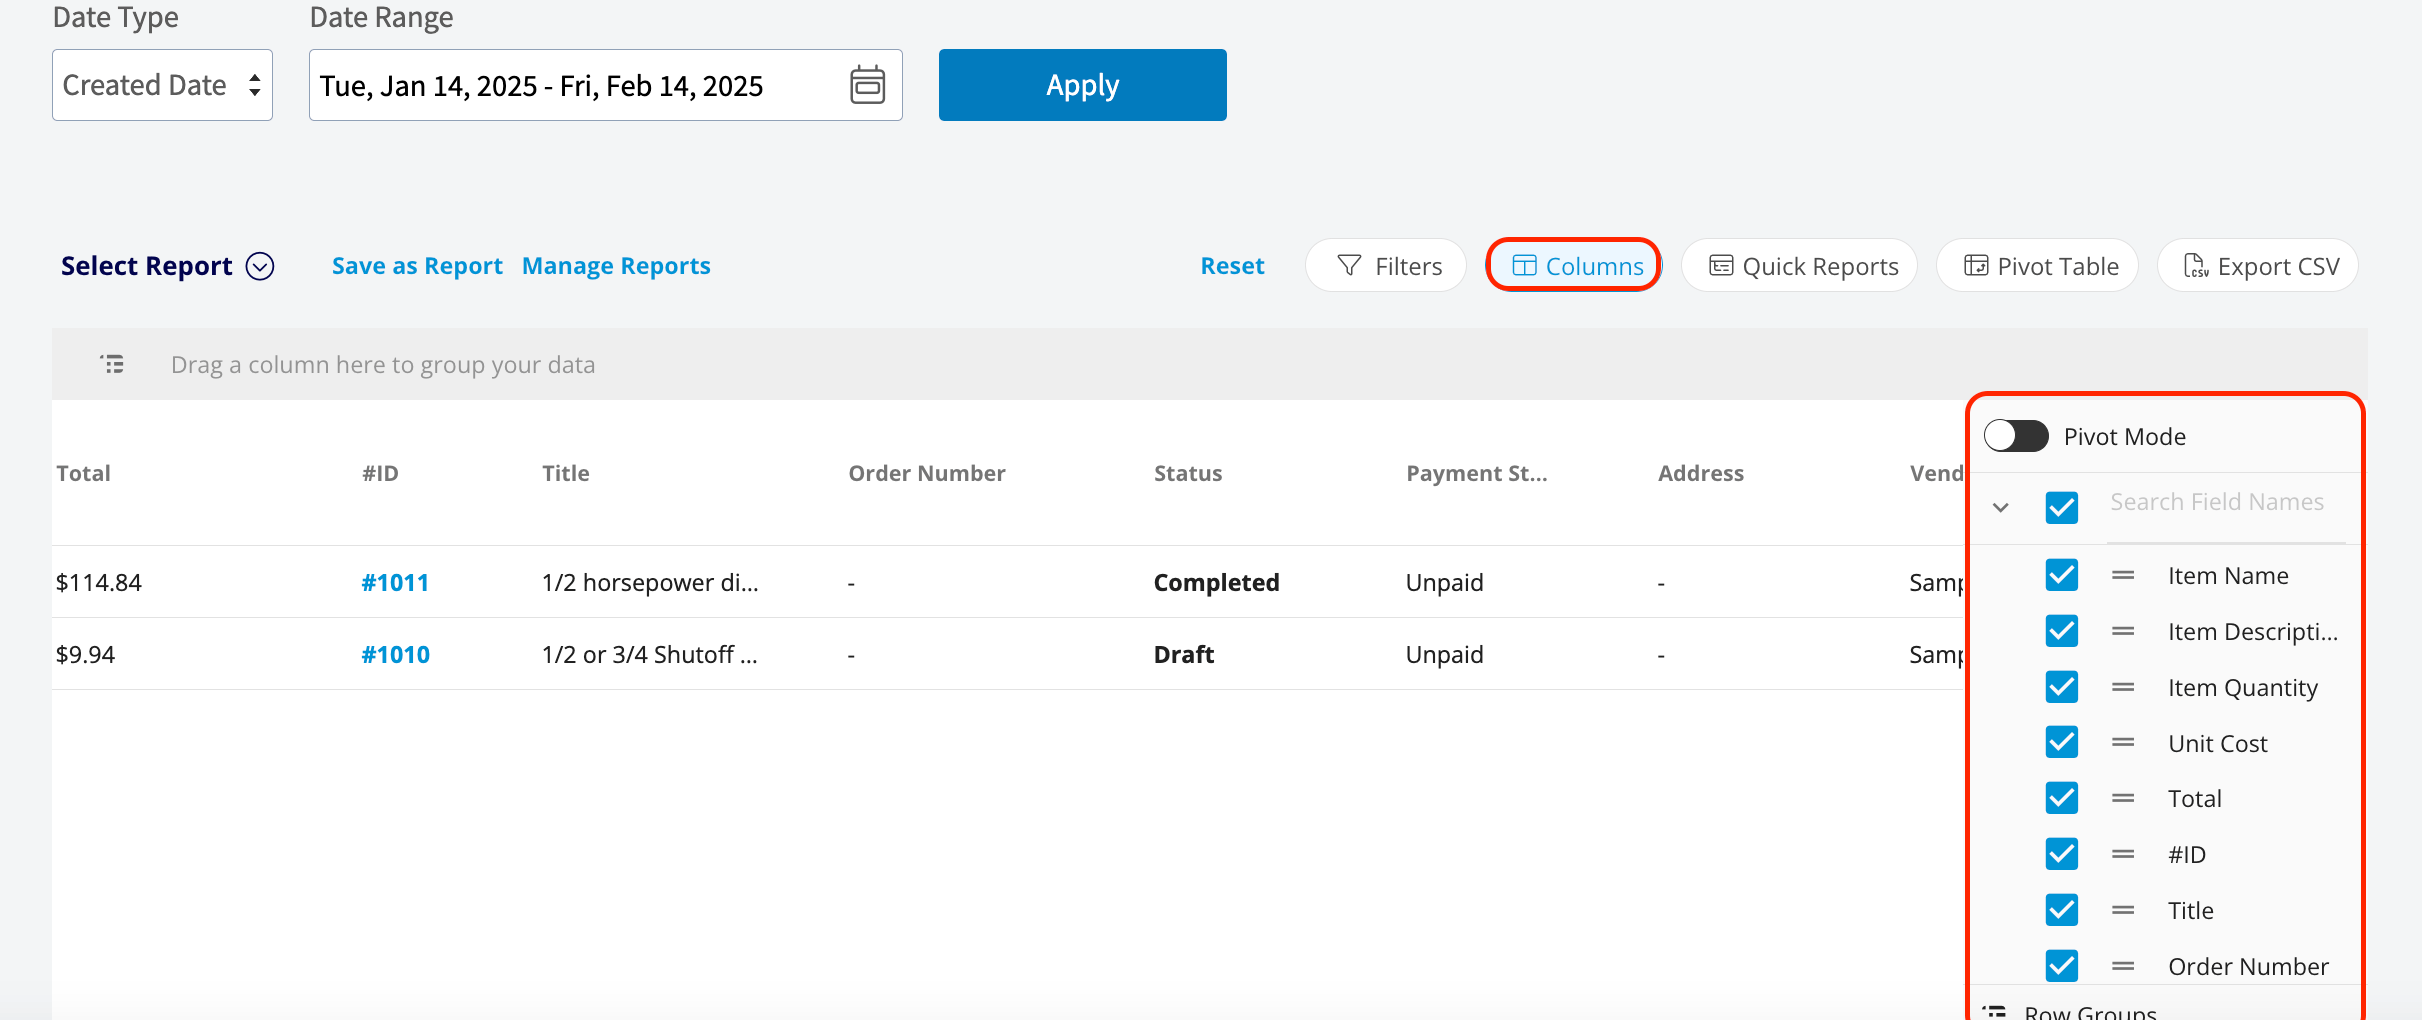
Select Columns, then check the box for each line item custom field you want in the report. Uncheck any column you do not need.
- Select Apply.
Settings reference
Field types
Visibility controls
Related articles
- How to Manage Purchase Orders
- Setting Up Custom Fields on Material Lists
- Setting Up Item List & Inventory
- Material Lists Overview
- How to Create Item Usage Reports