Who uses this: Admins and Team Managers can create, edit, view, and attach material lists on any job, project, purchase order, estimate, or invoice record. Service Agents get only what their material list permissions in Company Settings allow. Availability: All regions · Material lists must be enabled for the account.The FieldPulse mobile app puts material lists in the hands of the person doing the work. A tech can build a material list at the job site, edit it as the work changes, and attach it to a job, project, purchase order, estimate, or invoice — so the list reflects what actually happened instead of waiting for someone at the office to key it in.
Overview
A material list on the mobile app works the way it does on web: you create the material list, add items to it, and push those items into another record. Two things are specific to the field. You can open the material lists attached to a job record while you are standing on the job, and you can pin a material list to a job or project record so the crew sees what still needs to be loaded. Turning material lists on, setting each user’s permissions, and building material list templates all happen in the web app. See Material Lists Overview for those tasks.Before you begin
- Material lists must be enabled for the account. An Admin enables them in the web app under Company Settings → Features & Plugins → Material Lists.
- Check the user’s permissions. Admins and Team Managers can work with material lists on any record. A Service Agent gets only what that user’s material list permissions in Company Settings allow, so confirm those settings before sending a tech out to build lists.
- Sign in to the FieldPulse mobile app on the phone or tablet the tech will use in the field.
Create a material list
You can start a material list from two places on the mobile app.From the Material Lists screen
- Select the Sales tab at the bottom of the screen.
-
Select Material Lists.
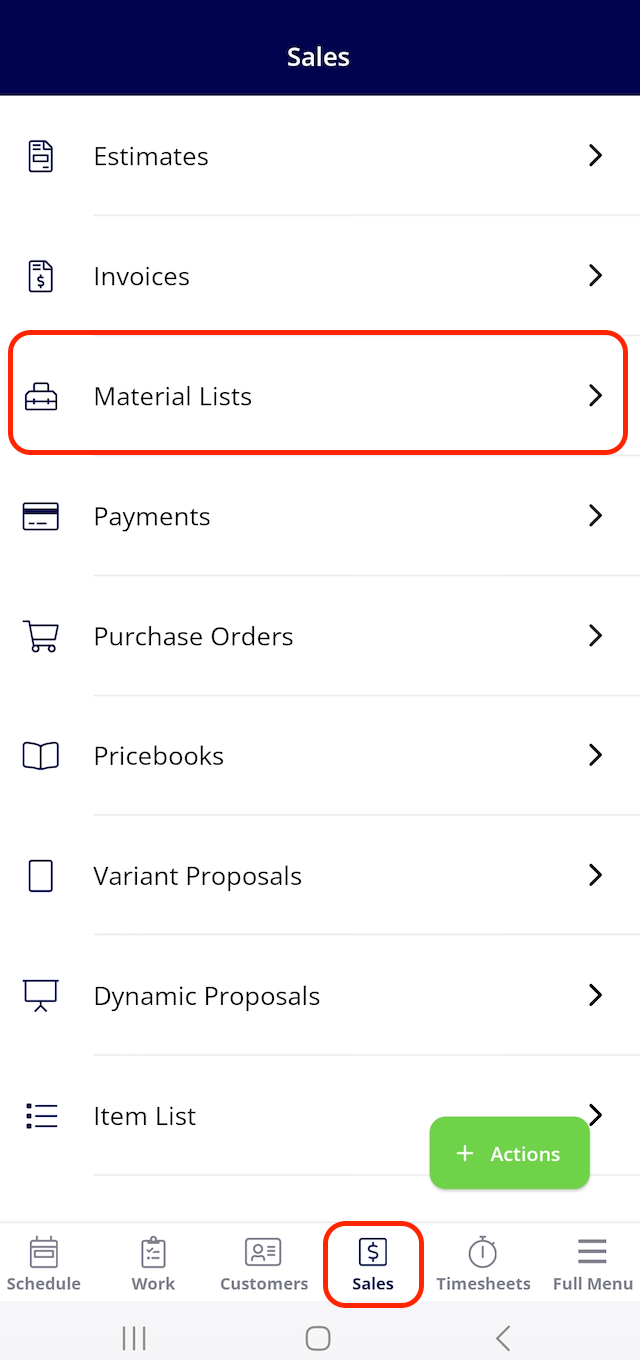
- Select the green Create New button in the lower right of the Material Lists screen.
- Add the material list’s details and items, then save the list.
From a record’s Actions button
- Open the job, project, or other record the material list belongs to.
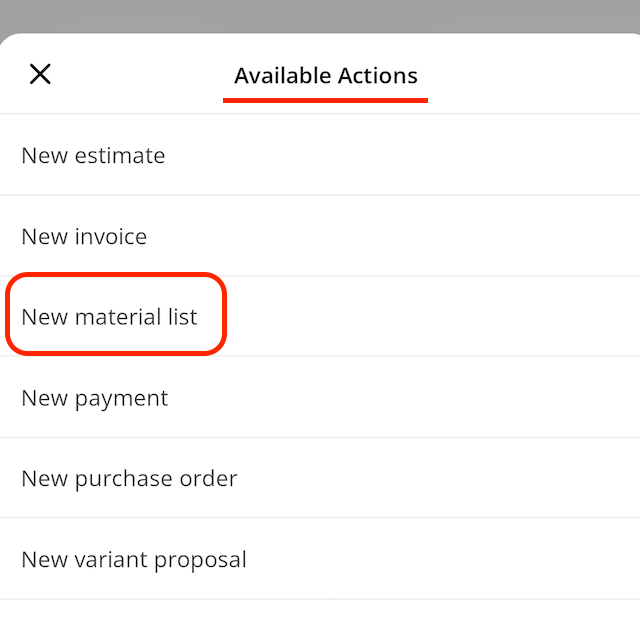
- Select the green Actions button.
- Select New material list from the Available Actions list.
Add material list items to another record
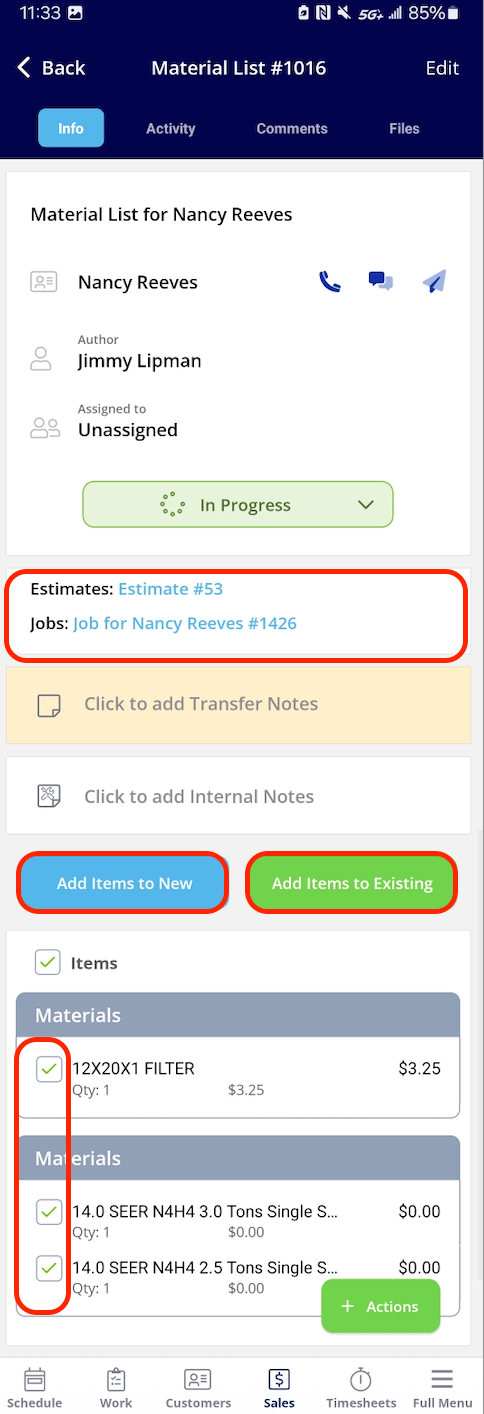
An open material list can send its items into another record, so nobody re-types them. Open the material list and use the two buttons above the items:
Every item is selected by default, so all of them carry over unless you say otherwise. Clear the checkbox to the left of an item name to leave that item behind — a tool or consumable you do not want on the customer’s invoice, for example — then confirm the transfer.
Records the material list is already connected to appear near the top of the material list, above the notes fields. Select a blue record link there to open that record’s details.
View the material lists attached to a job
Open the job record and select the Material Lists tab at the top of the screen. Every material list attached to that job appears there with its status, assignee, and total, and the Create Material List button on the same tab adds another list to the job.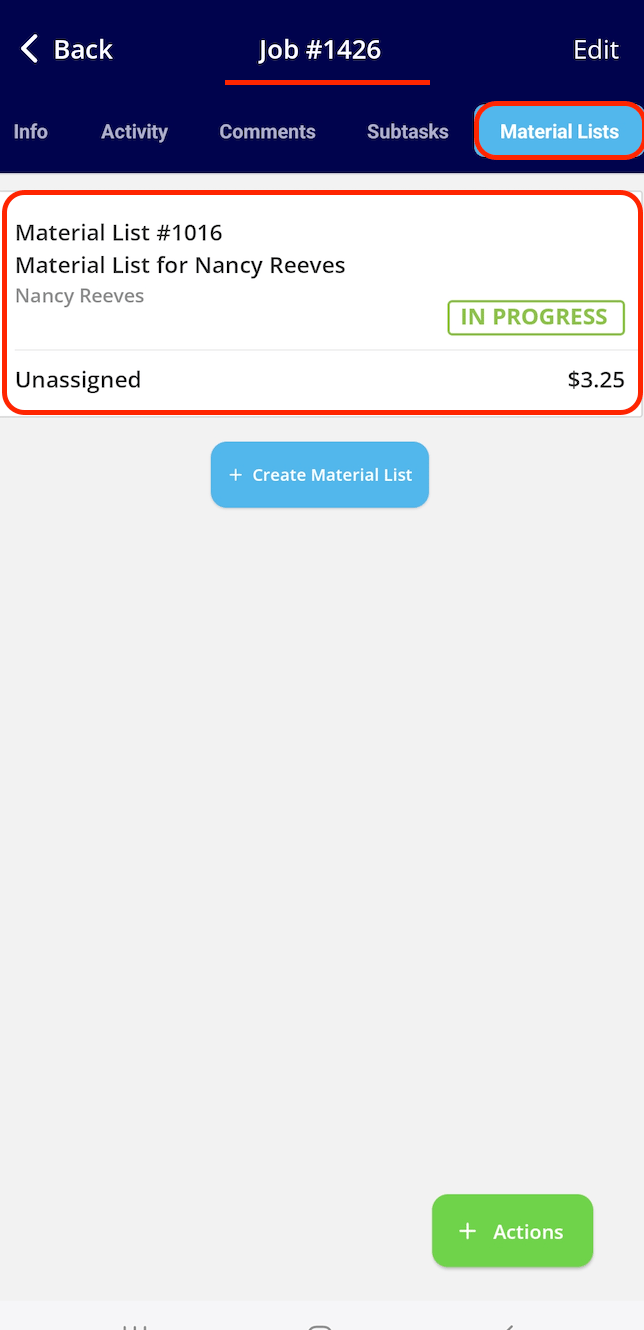
Pin a material list to a job or project
Pinning a material list keeps it on the record’s info page instead of behind a tab, which makes it quick to identify what materials still need to be loaded for the day. On the job or project record, open the Pin sections menu — it lists every section you can pin to the record’s info page — and check Material Lists. Use the arrows beside each section to set the order the pinned sections appear in, or select Pin All to pin every section at once, then select Close.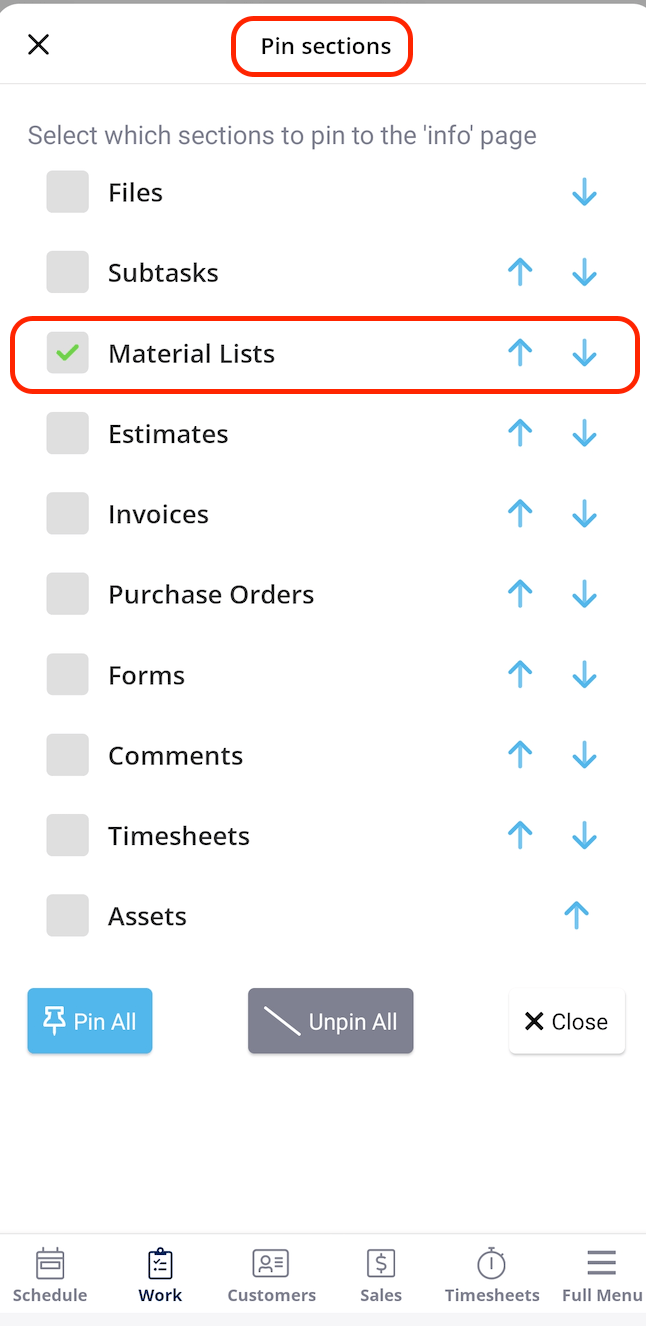
View your material lists
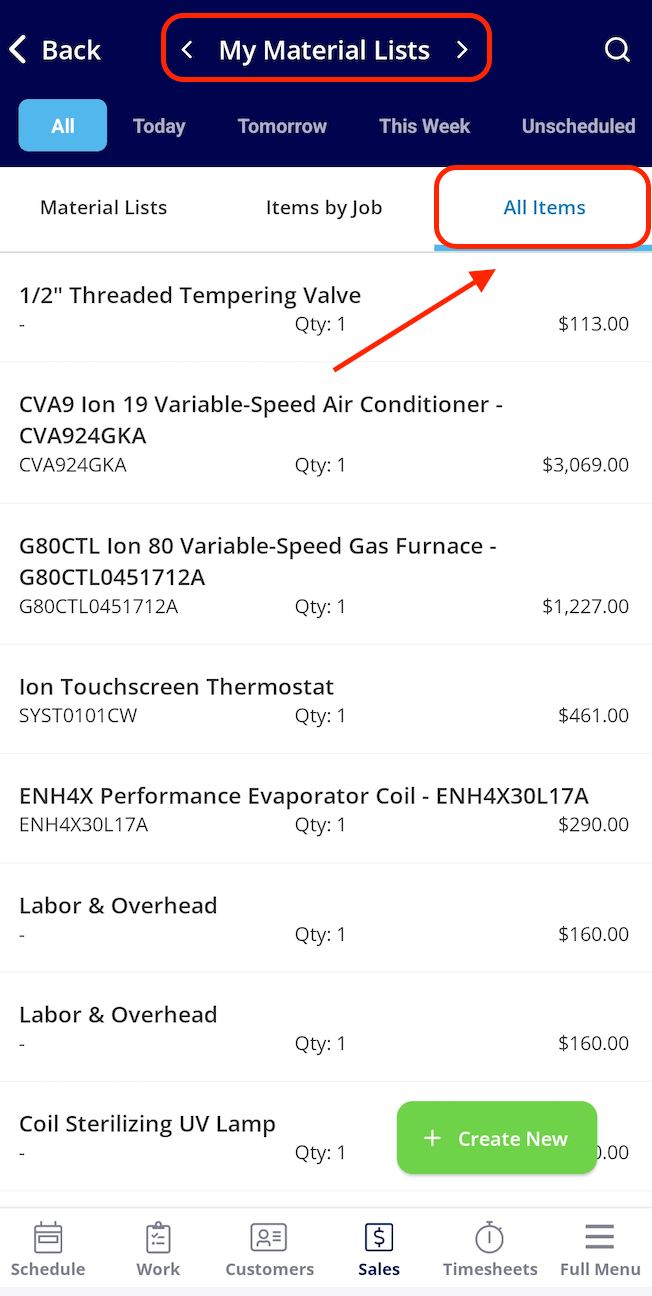
The mobile app gives you four views of the material lists you work with. Select the Sales tab, then Material Lists to open the screen. The arrows on either side of the title switch between your own lists and your team’s lists, the date row filters to All, Today, Tomorrow, This Week, or Unscheduled, and the Material Lists, Items by Job, and All Items tabs change what the screen shows.My Material Lists
My Material Lists shows your own material lists, grouped by date, with each list’s status, assignee, and total.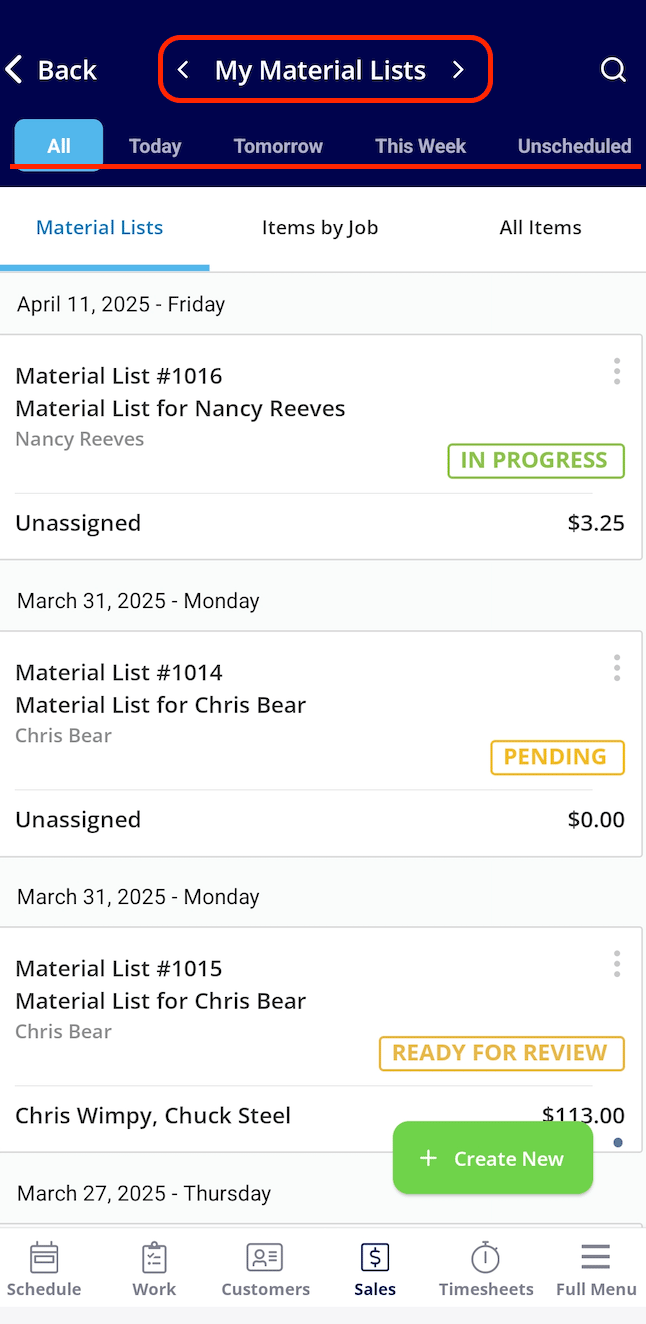
Team Material Lists
Team Material Lists shows the material lists across your team in the same date-grouped layout.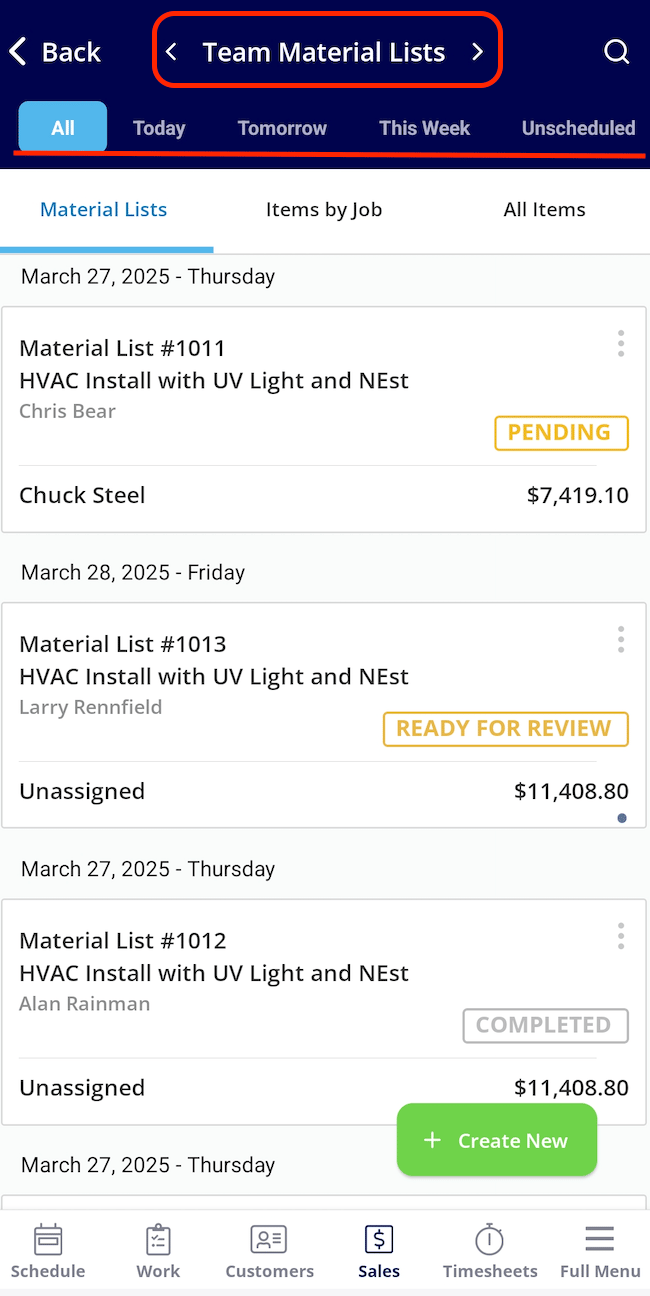
Items by Job
Items by Job lists the individual items from your material lists grouped under the job each item belongs to, with quantity and price.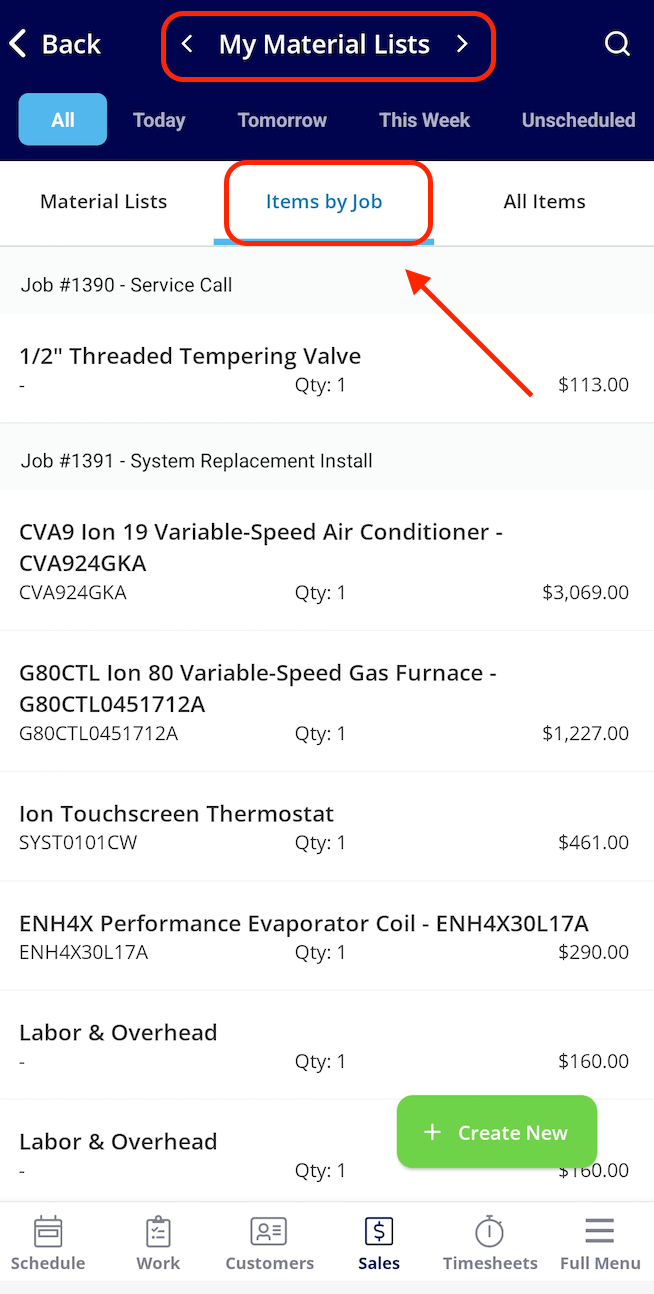
All Items
All Items lists every item across your material lists in one flat list, with quantity and price, so you can scan what the day needs without opening each list.