
Who uses this: Users with FieldPulse Payments access — set per user under Company Settings > User Accounts, and that access covers both taking payments and making refunds. Availability: FieldPulse Payments is available to businesses located in the United States.When you need to return money to a customer, you process the refund right where the payment lives — from the invoice’s Payments tab or the FP Payments tab — without logging into a separate processor. There are two ways to start a refund; both let you set the amount and record why.
Overview
A refund returns funds for a payment you collected through FieldPulse Payments. You can start one from the payment record on the invoice’s Payments tab, or from the FP Payments tab. Every refund posts as its own line item below the original payment, so your refund activity stays visible at a glance.Before you begin
- Confirm your user account has FieldPulse Payments access. Access is set per user under Company Settings > User Accounts and covers both taking payments and making refunds.
- Find the invoice or payment you want to refund before you start.
Refund from the invoice’s Payments tab
Start the refund from the invoice record the payment was collected on.- Open the invoice record you want to refund.
-
Select the Payments tab from the top menu bar.

- Select the payment that was collected for this invoice.
- In the payment record, select the Refund button in the lower-left corner to start the refund.
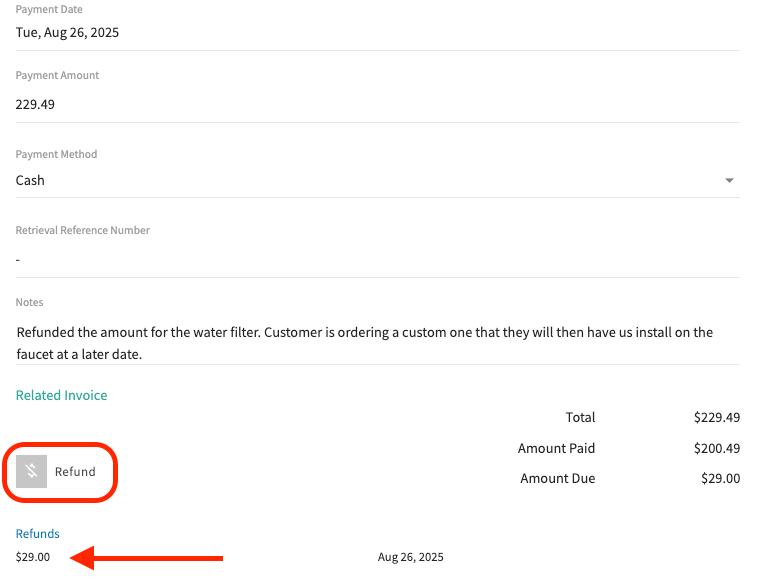
Refund from the FP Payments tab
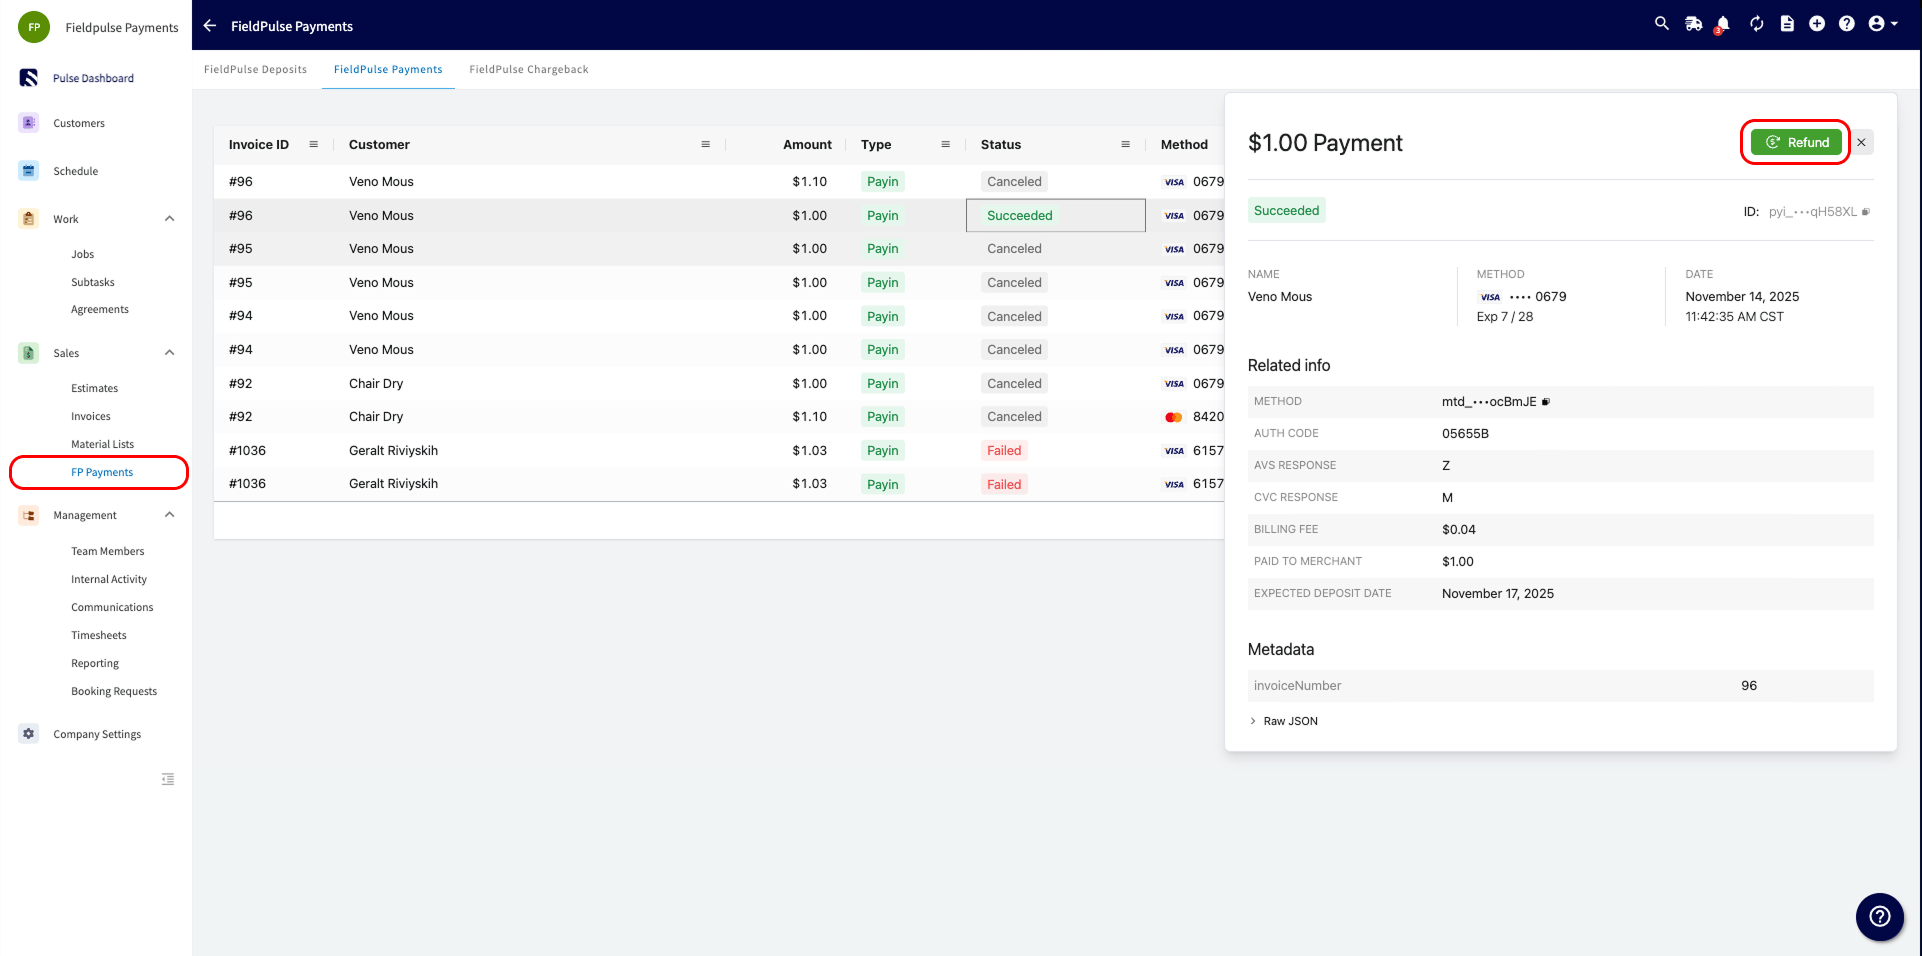
You can also start a refund directly from the FP Payments tab.- Select FP Payments under Sales in the left-side menu.
- Select the payment you want to refund.
-
Select the green Refund button in the top-right corner of the payment details.
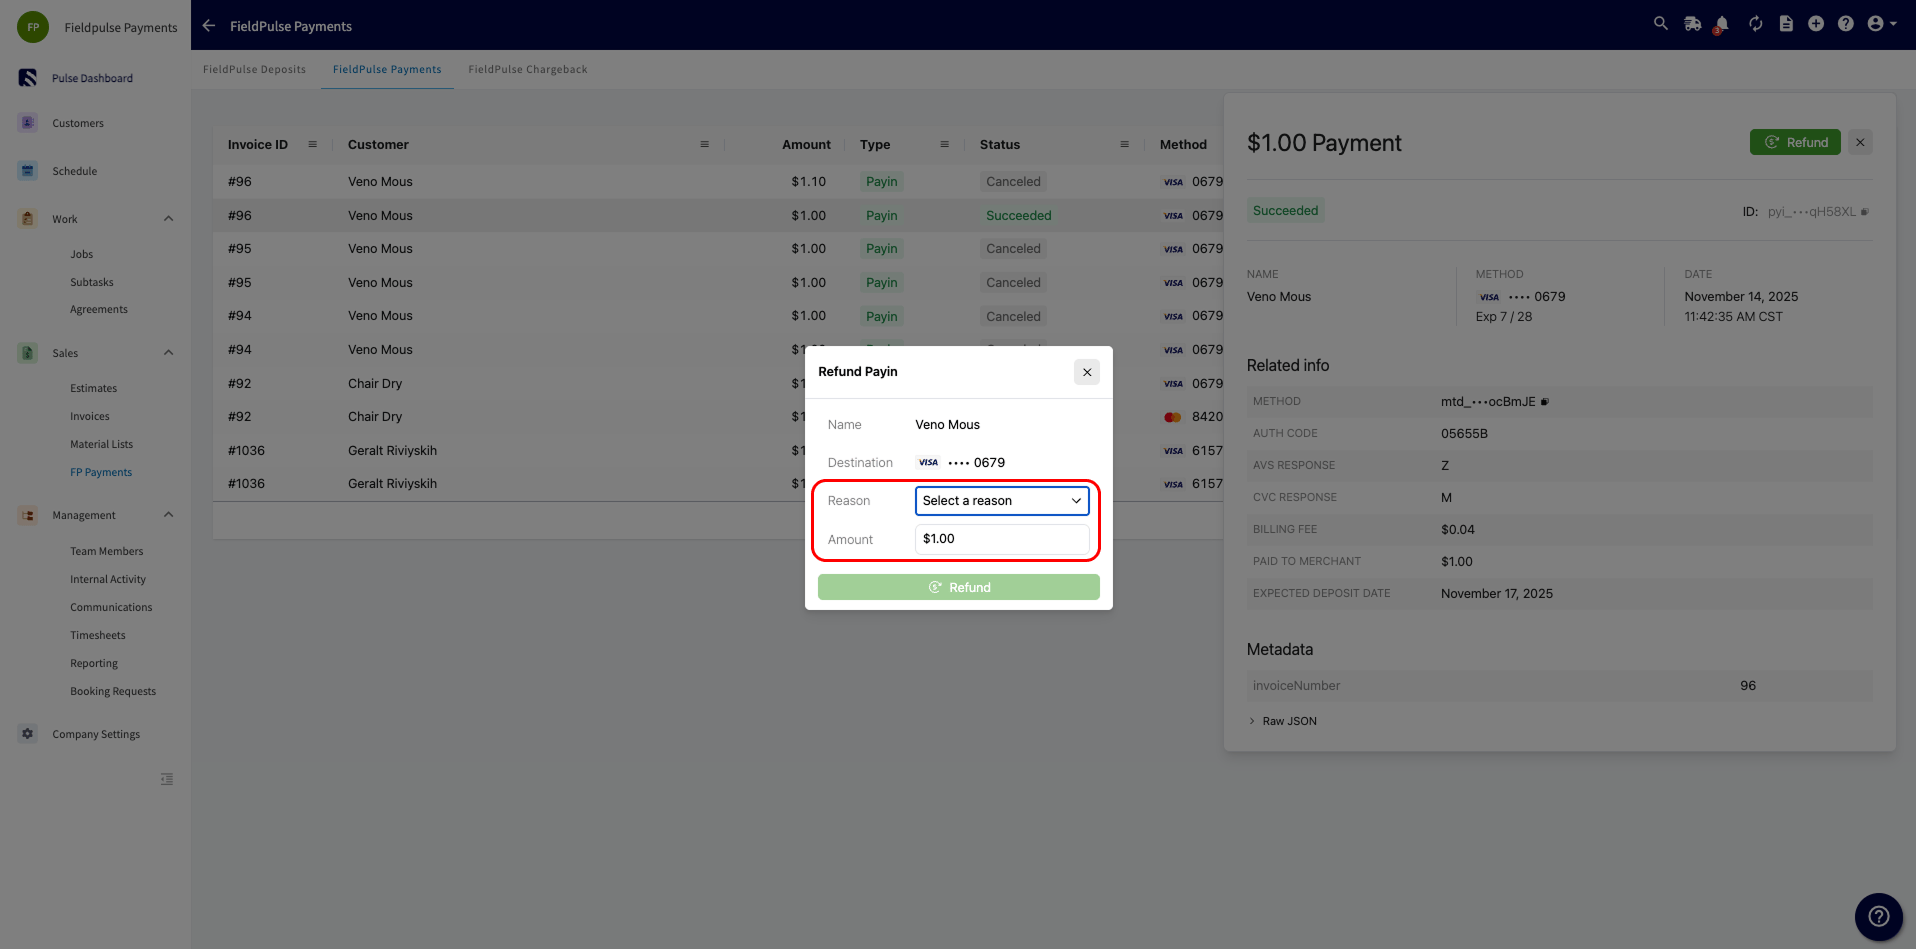
- In the Refund Payin pop-up, select a reason and enter the amount you want to refund.
Refund transaction line items
Each refund appears as its own line item in the payments section, displayed below the payment it applies to. A payment with multiple refunds shows multiple line items, each marked with a red number so refunds stand out at a glance. Refund line items make it easy to track how many refunds you have processed and which invoices or payments they are tied to, so you can monitor payments and minimize losses from refunds.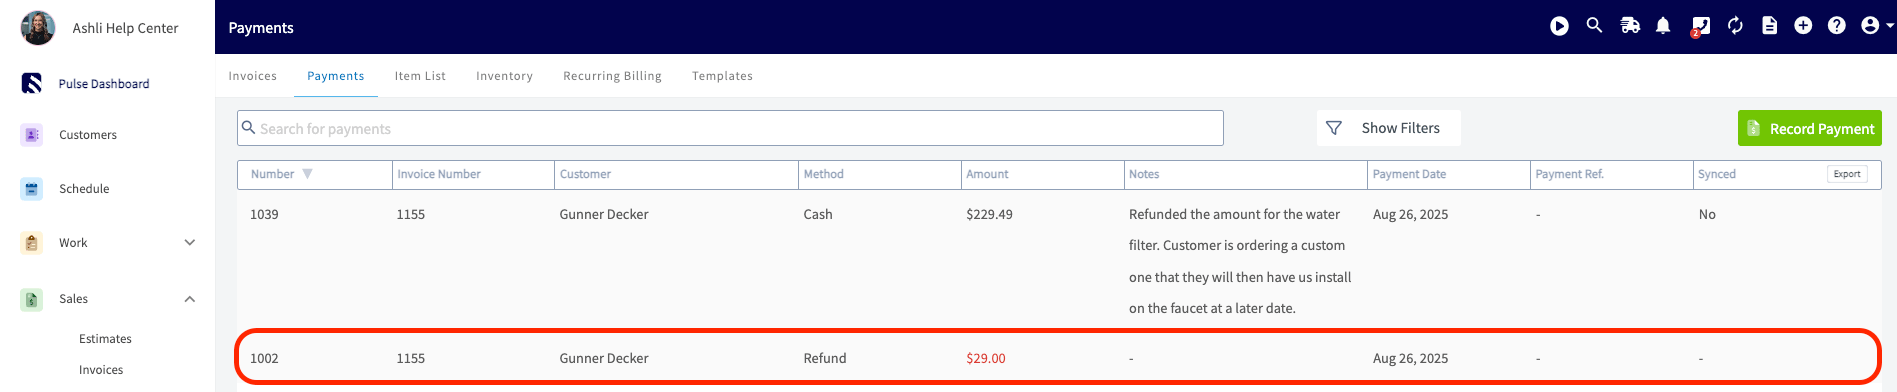
Still need help?
Reach the FieldPulse support team at support@fieldpulse.com or through the chat feature in the bottom-right corner of your screen.Related articles
- How to Collect Payments: 3 Methods
- FieldPulse Payments Chargebacks Overview
- FieldPulse Payments Overview
- FieldPulse Deposit and Payment Status Details