
Who uses this: Administrators only — creating a user account requires access to Company Settings, and only administrators have it. Availability: All regions.Adding a new user creates a login for one person and sets what that person can reach in FieldPulse. When the office and the field disagree about who can see what, work stalls — giving each person the right role from the start prevents that. User Roles and Permissions Details covers what each role can do.
Overview
A user account uses the person’s email address as their login ID. You create the account in Company Settings > User Accounts, enter the person’s details, assign a role, and add the person to one or more teams. The role dropdown offers four choices — Team Manager, Service Agent, Limited Agent, and Assignment User — and you grant Administrator access by selecting Team Manager and turning on the Assign as Company Admin toggle.Video walkthrough
Watch the adding new users walkthrough for a full run-through. The written steps below stand on their own.Before you begin
- Confirm you are an administrator. No other role can create a user account.
- Have the person’s first name, last name, and email address ready — all three are required. Each user needs their own name, email address, and password, and FieldPulse ties an email address to only one user account.
- Decide which role fits the person before you start, since the role sets what they can access. See User Roles and Permissions Details.
- If you want the person on a specific team, create that team first — see How to Create a Team. Every user joins the default team automatically.
On web
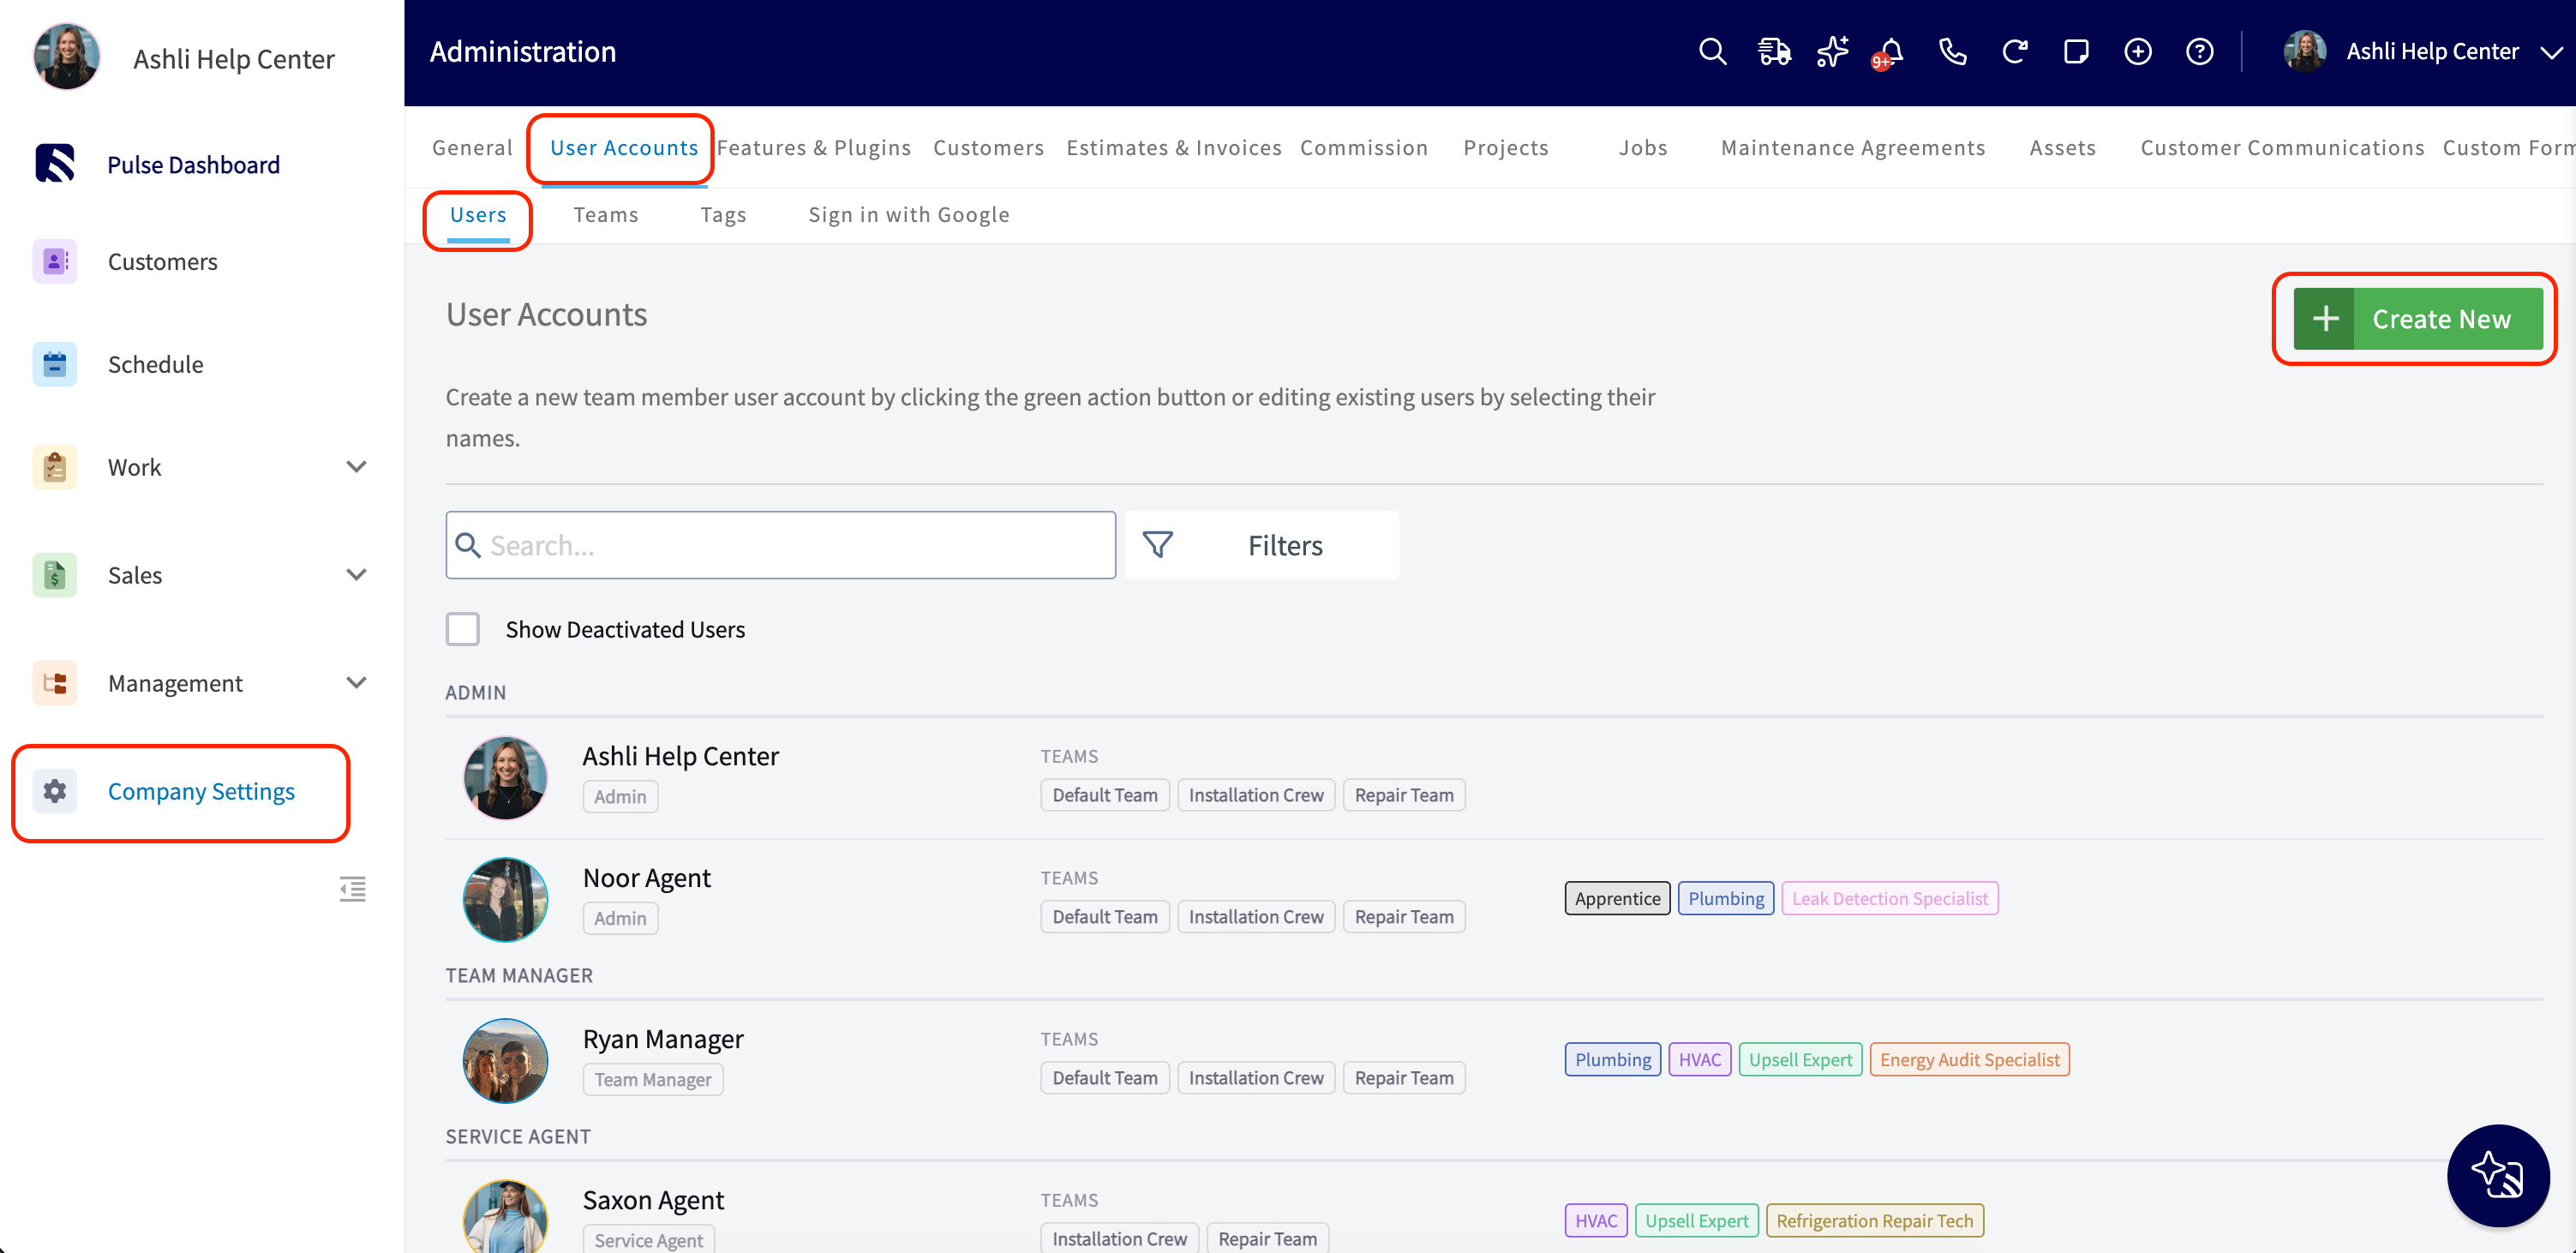
Open the new user form
- Select Company Settings from the left-side menu.
- Select User Accounts.
- Select Create New.
Fill in the user’s details
Enter the basic information for the new user: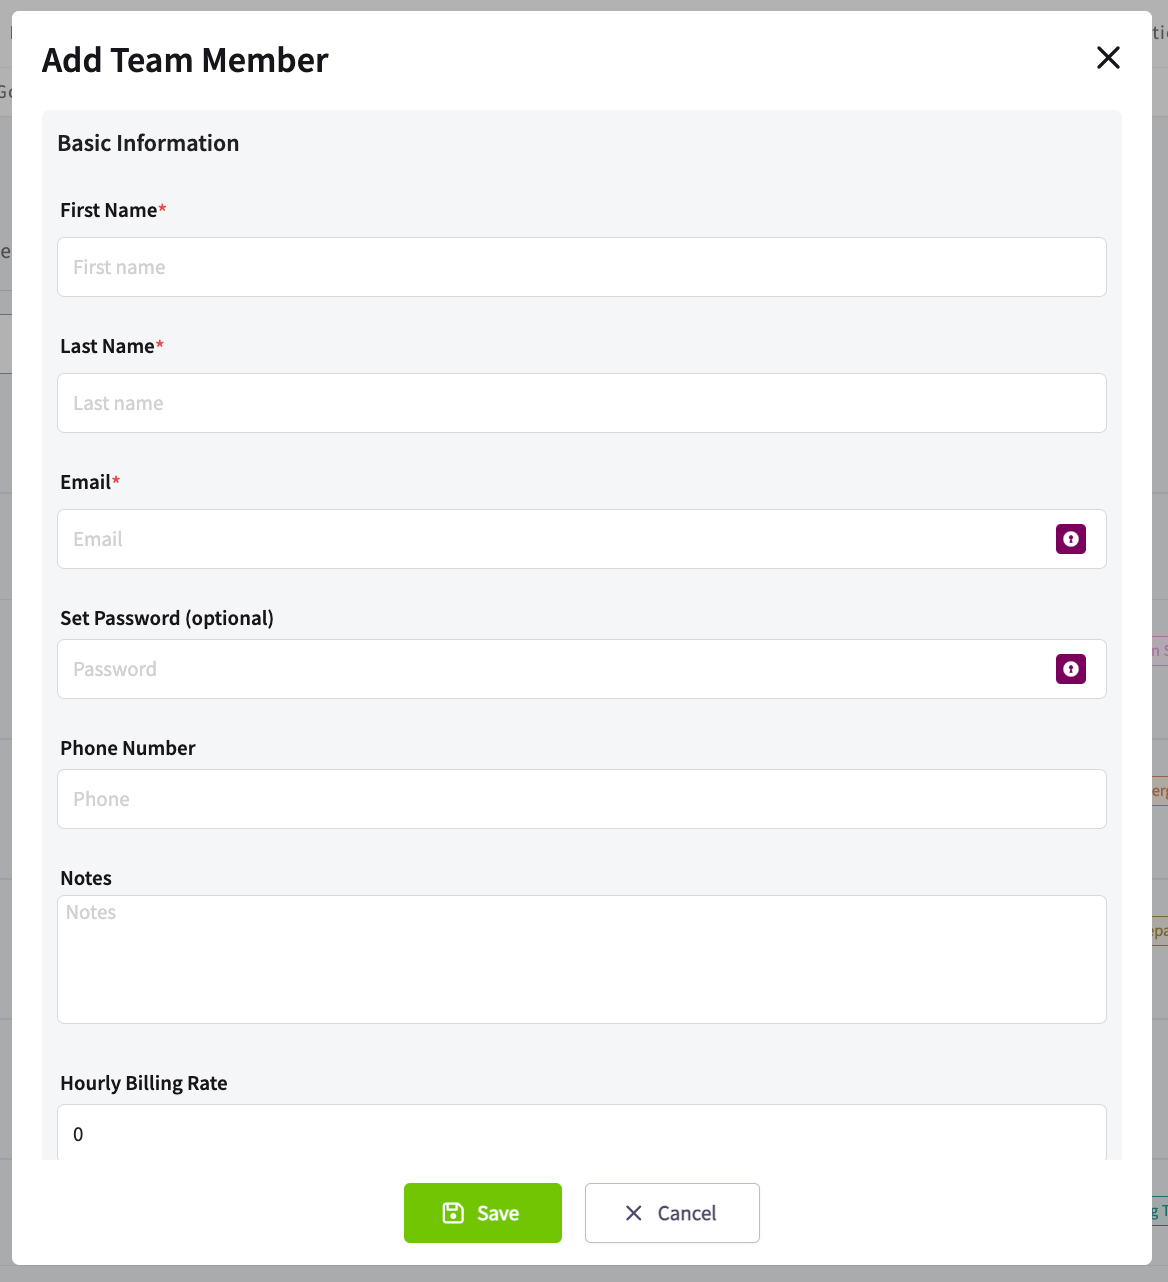
Set commission eligibility
- Turn on Eligible for Commission if this user earns commission on invoices.
- Choose a Commission Calculation Method per Invoice, or leave it set to Company Default Commission.
Add tags (optional)
- Select Add Tags.
- Select the skills and certifications this person carries.
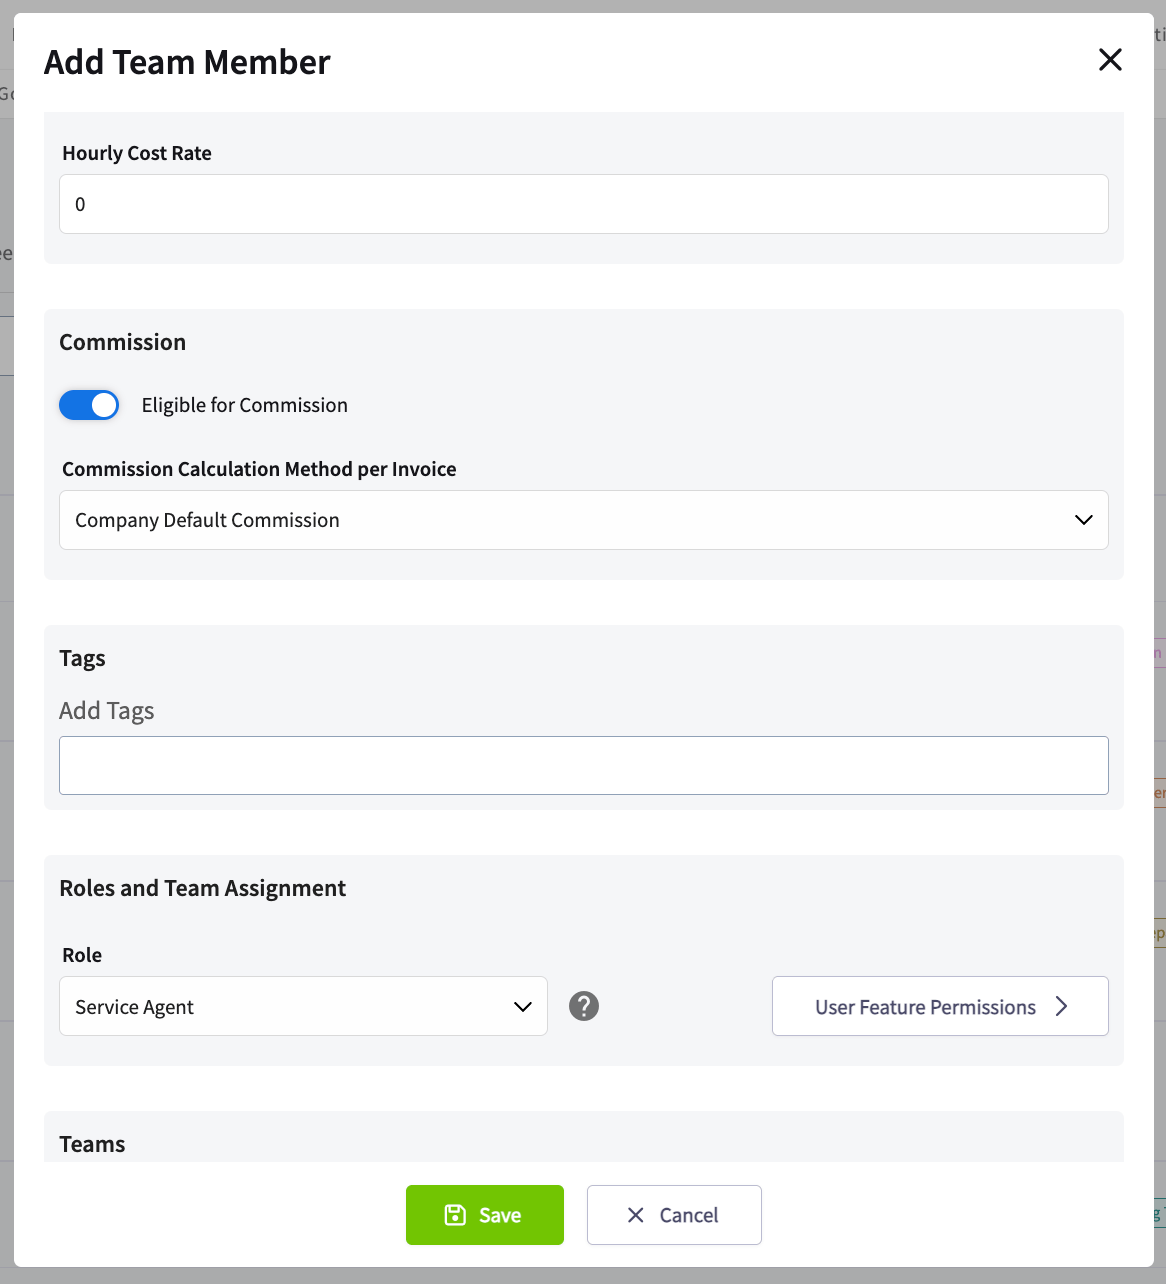
Assign a role
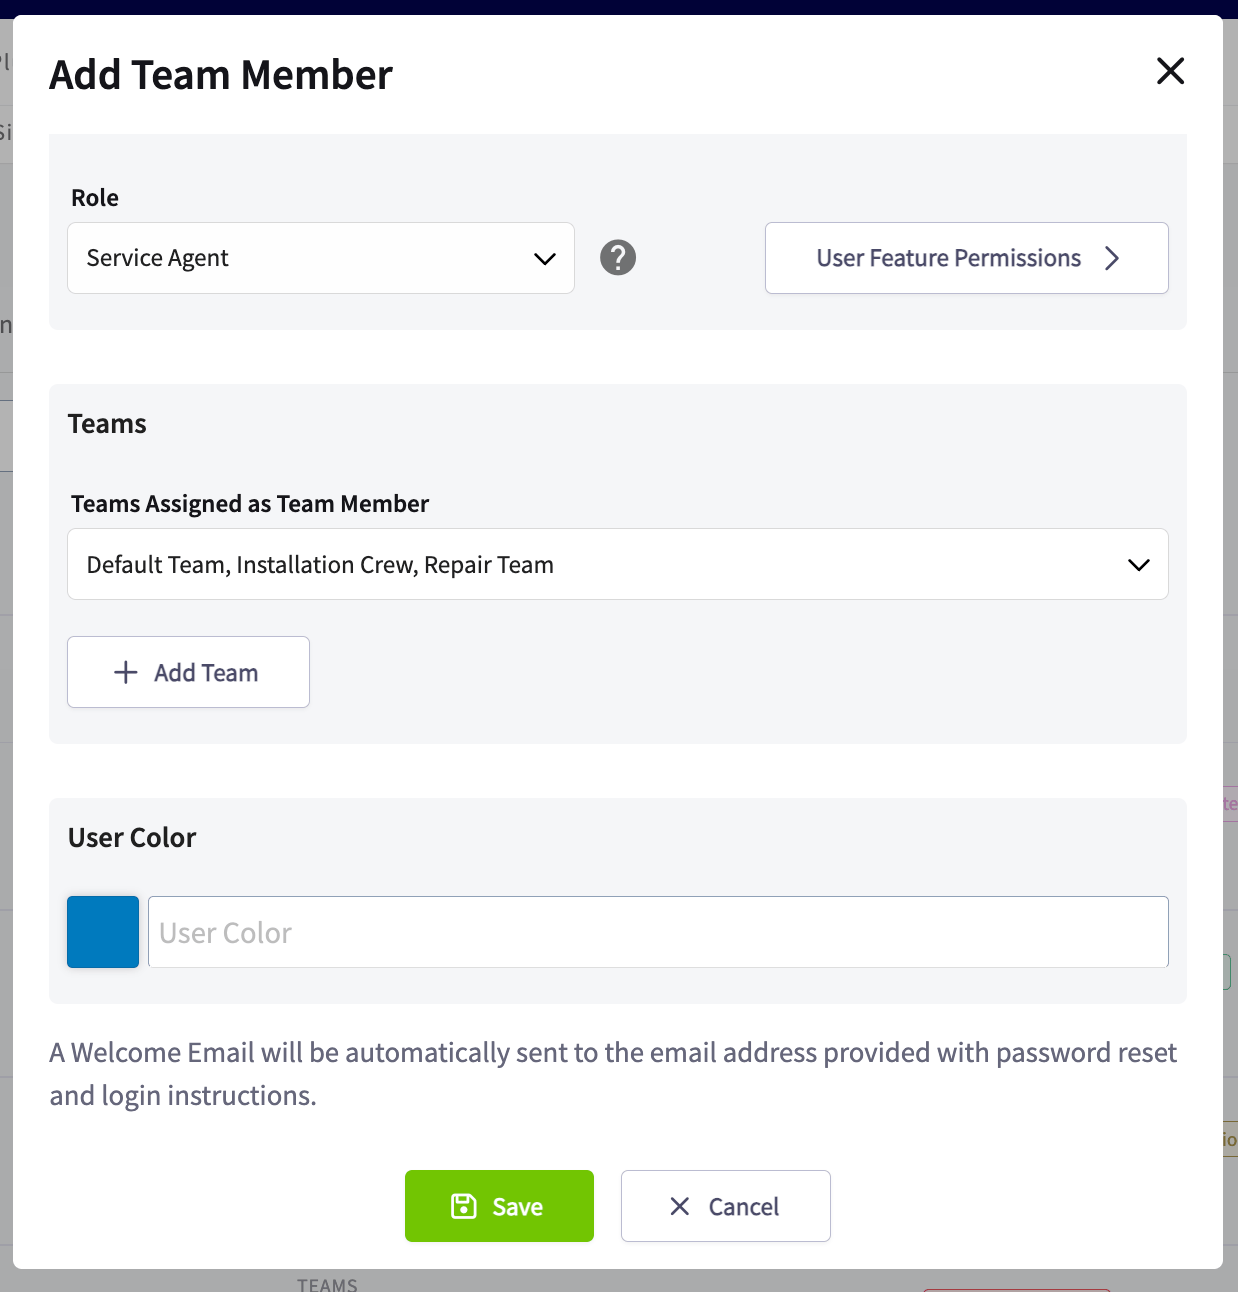
Select the person’s role. The role sets the person’s baseline access to features and company data:
There is no standalone Administrator option in the role dropdown. To make someone an administrator, select Team Manager, then turn on Assign as Company Admin. See User Roles and Permissions Details for exactly what each role can do.
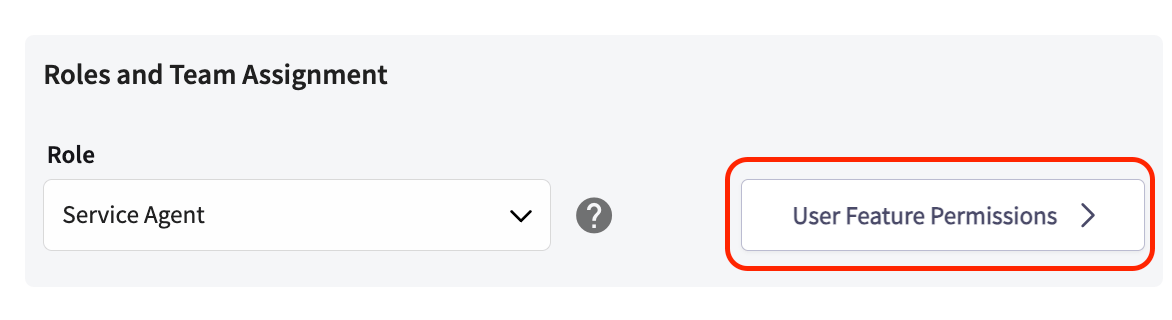
Fine-tune permissions (optional)
- Select User Feature Permissions, next to the Role dropdown.
- Turn individual capabilities on or off for this person.
Add the user to a team
- Go to Teams Assigned as Team Member.
- Select each team this user belongs to.
- Select + Add Team to assign the user to additional teams.
Set the user color
- Under User Color, choose the color that represents this user on the schedule and dispatch views.
Save the account
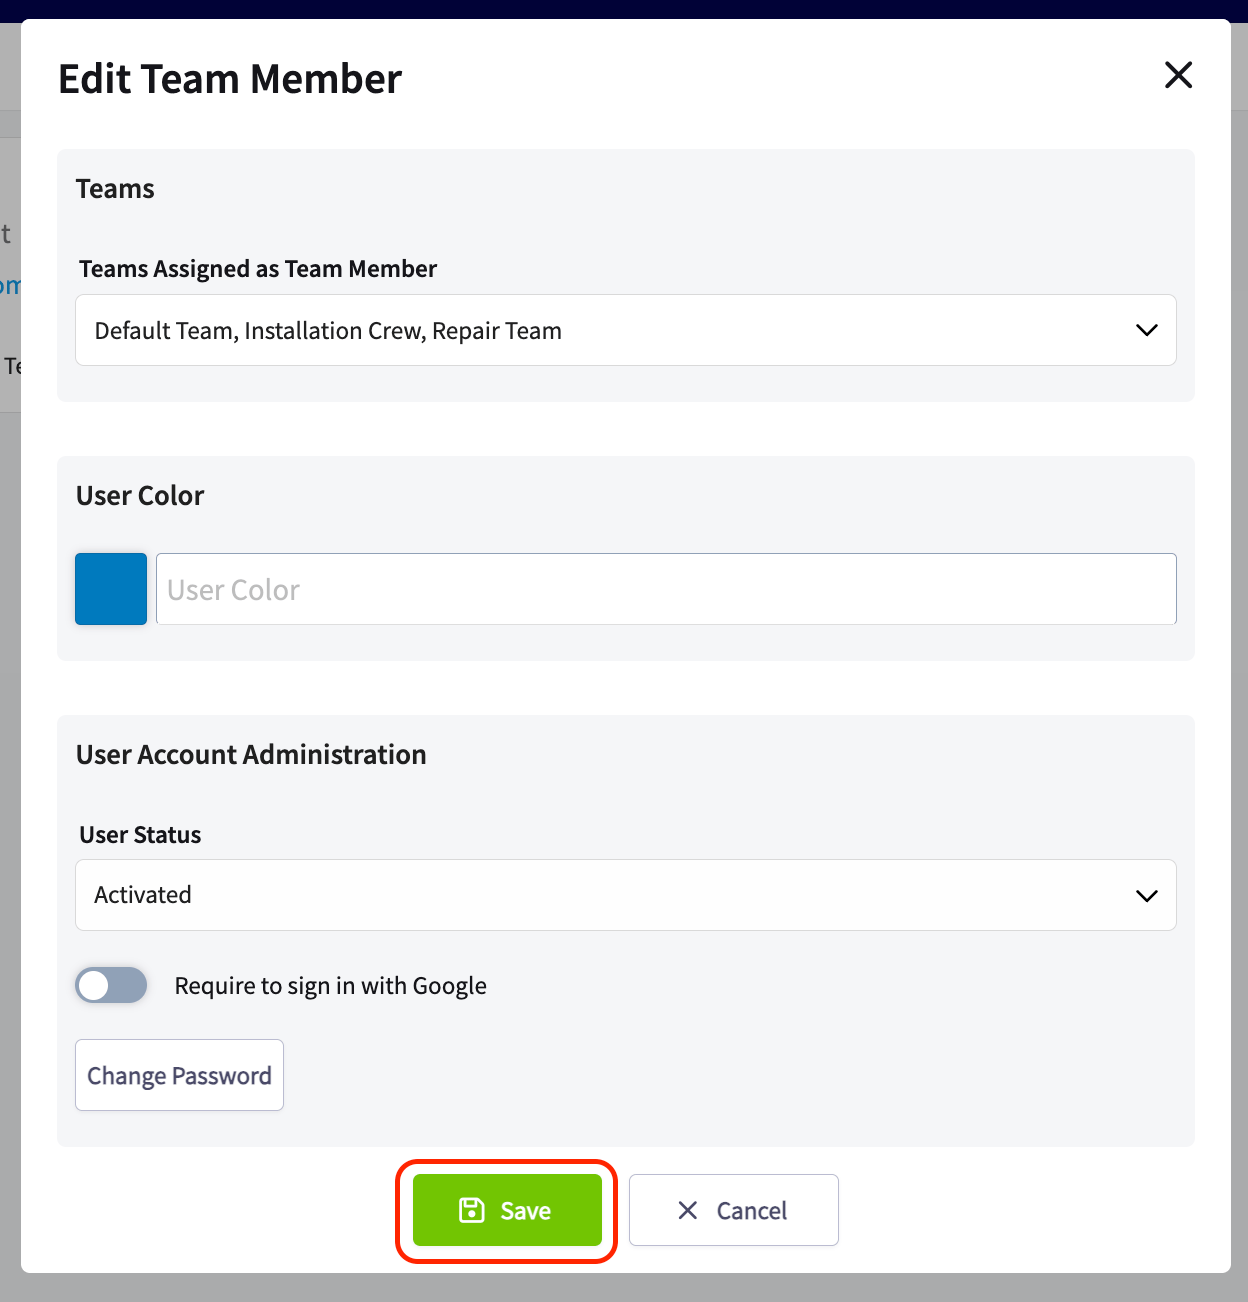
- Select Save.
Save a permission template
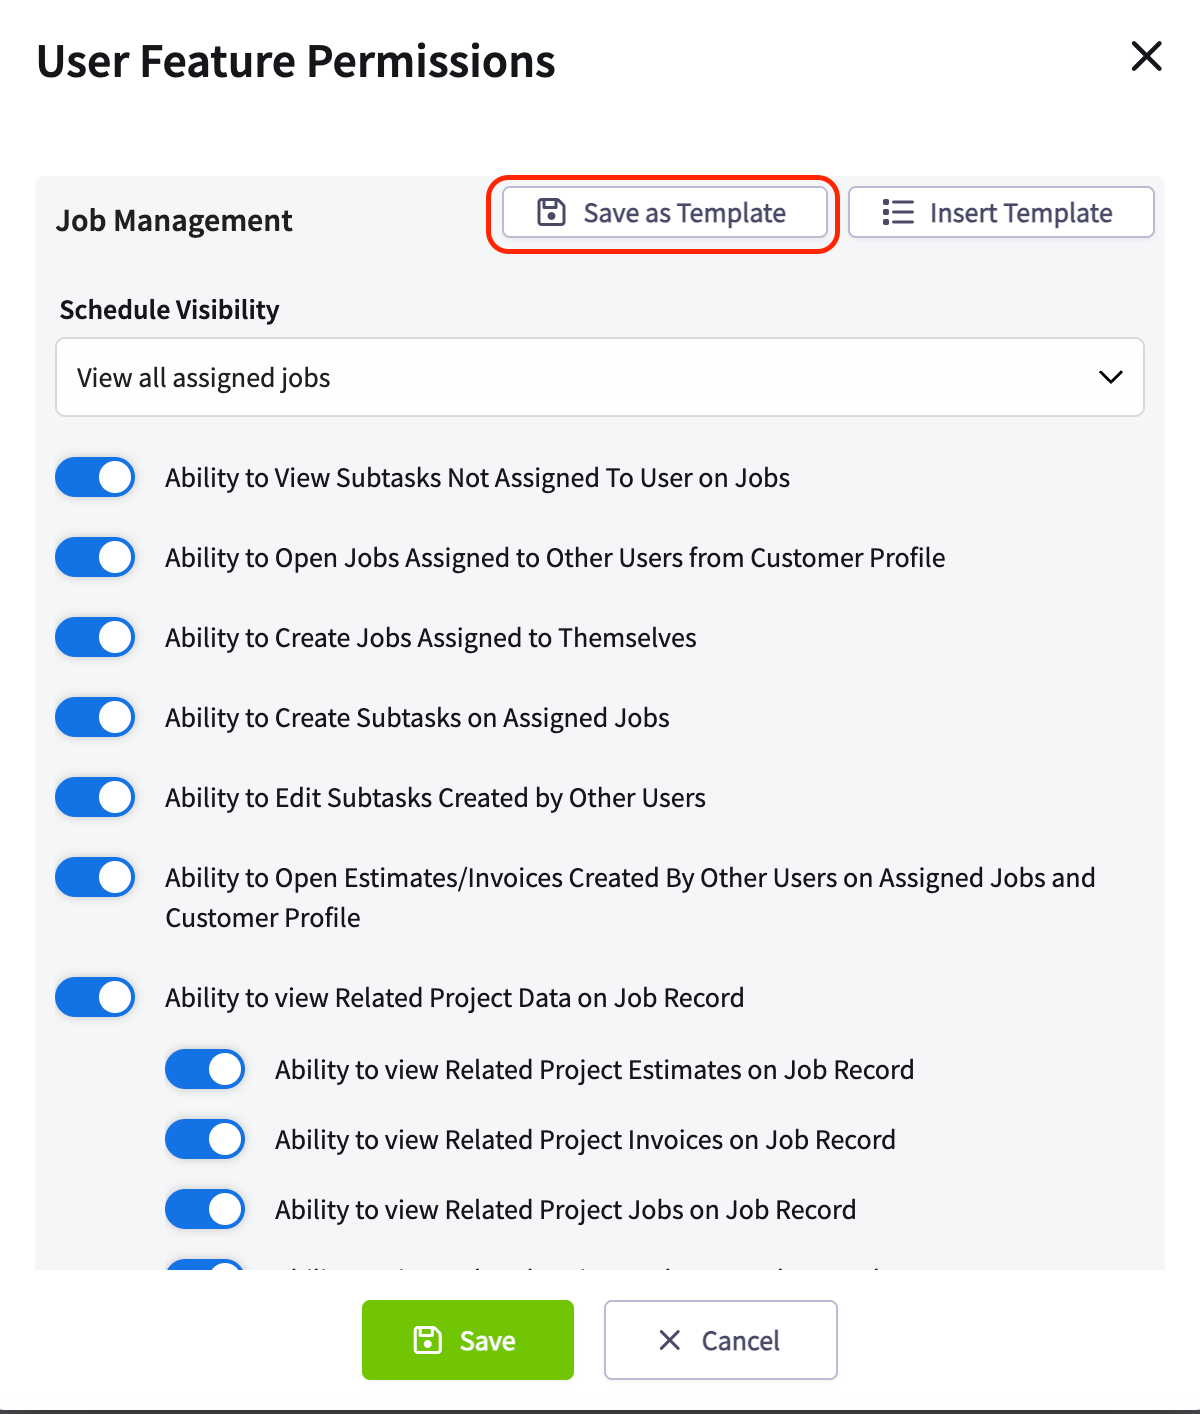
Permission templates save one user’s Feature Permission configuration so you can apply it to other users in one click. Instead of working through every toggle and dropdown each time you onboard a technician or a manager, you set the permissions once, save them as a template, and reuse the template as many times as you need.- Go to Company Settings > User Accounts and open the user you want to save the configuration from.
- Select Edit, then select User Feature Permissions.
- Select Save as Template.
Insert a permission template
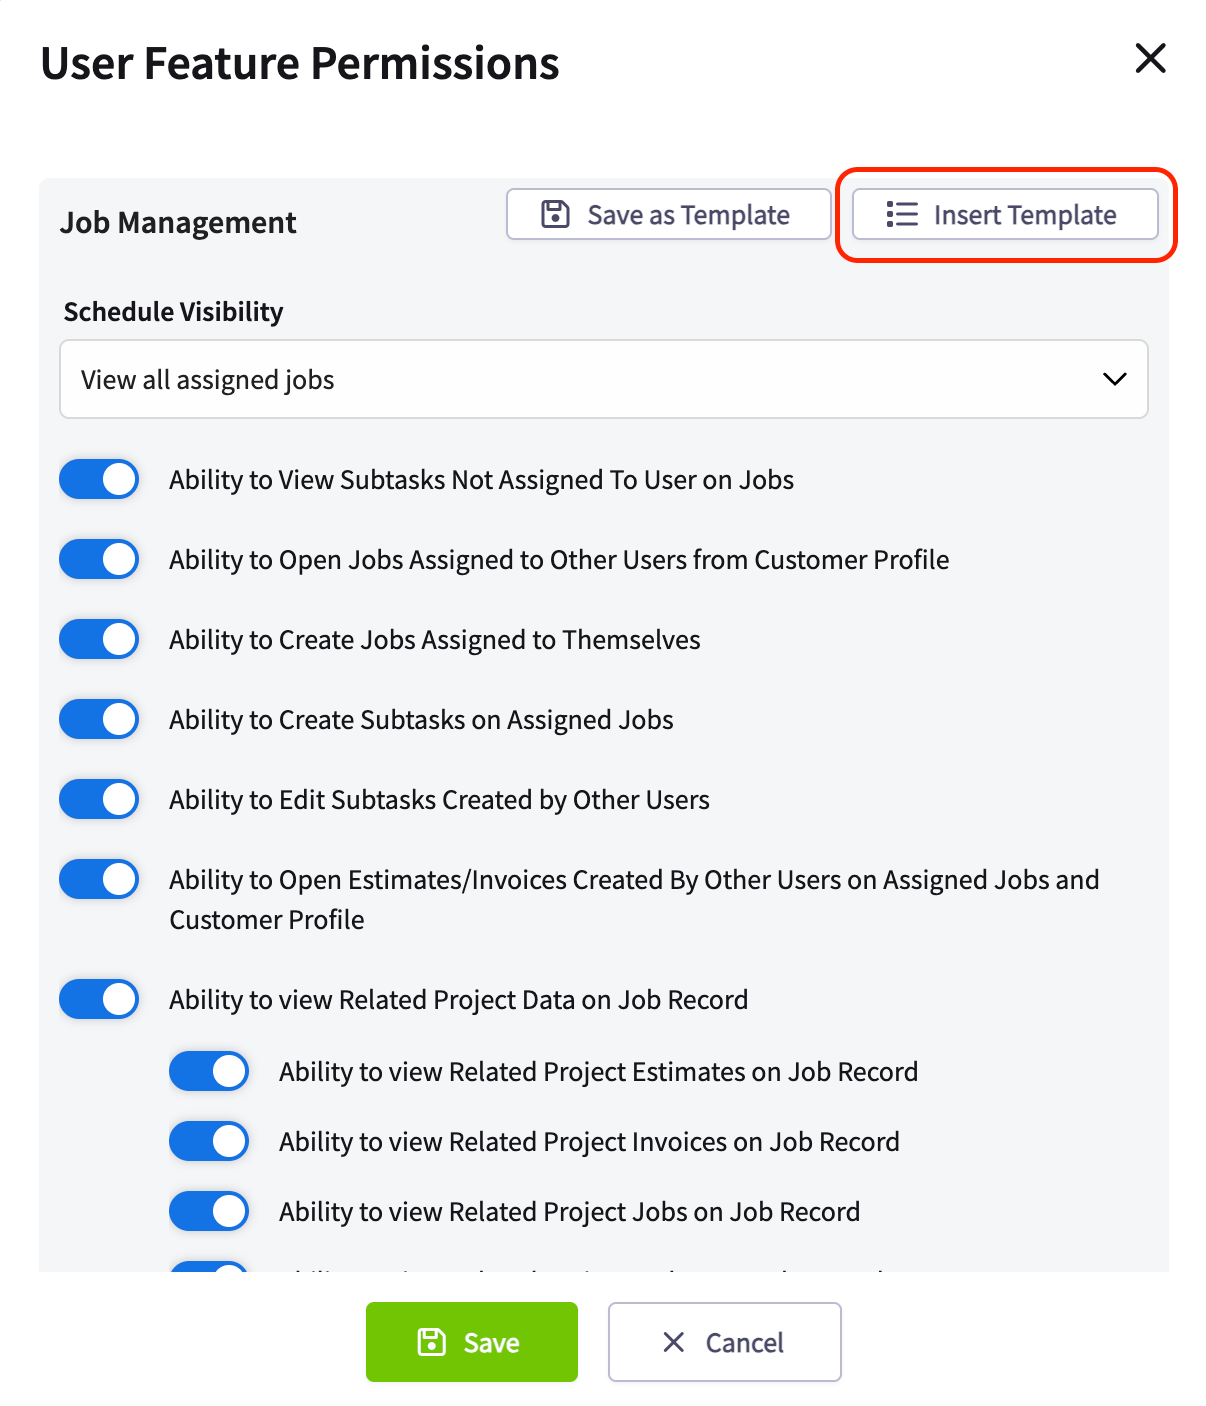
Once you have at least one template saved, you can apply it to any other user with the same role type.- Open a user and select User Feature Permissions.
- Select Insert Template to open the dropdown.
- Select the template name you want to apply.
Where tags show up
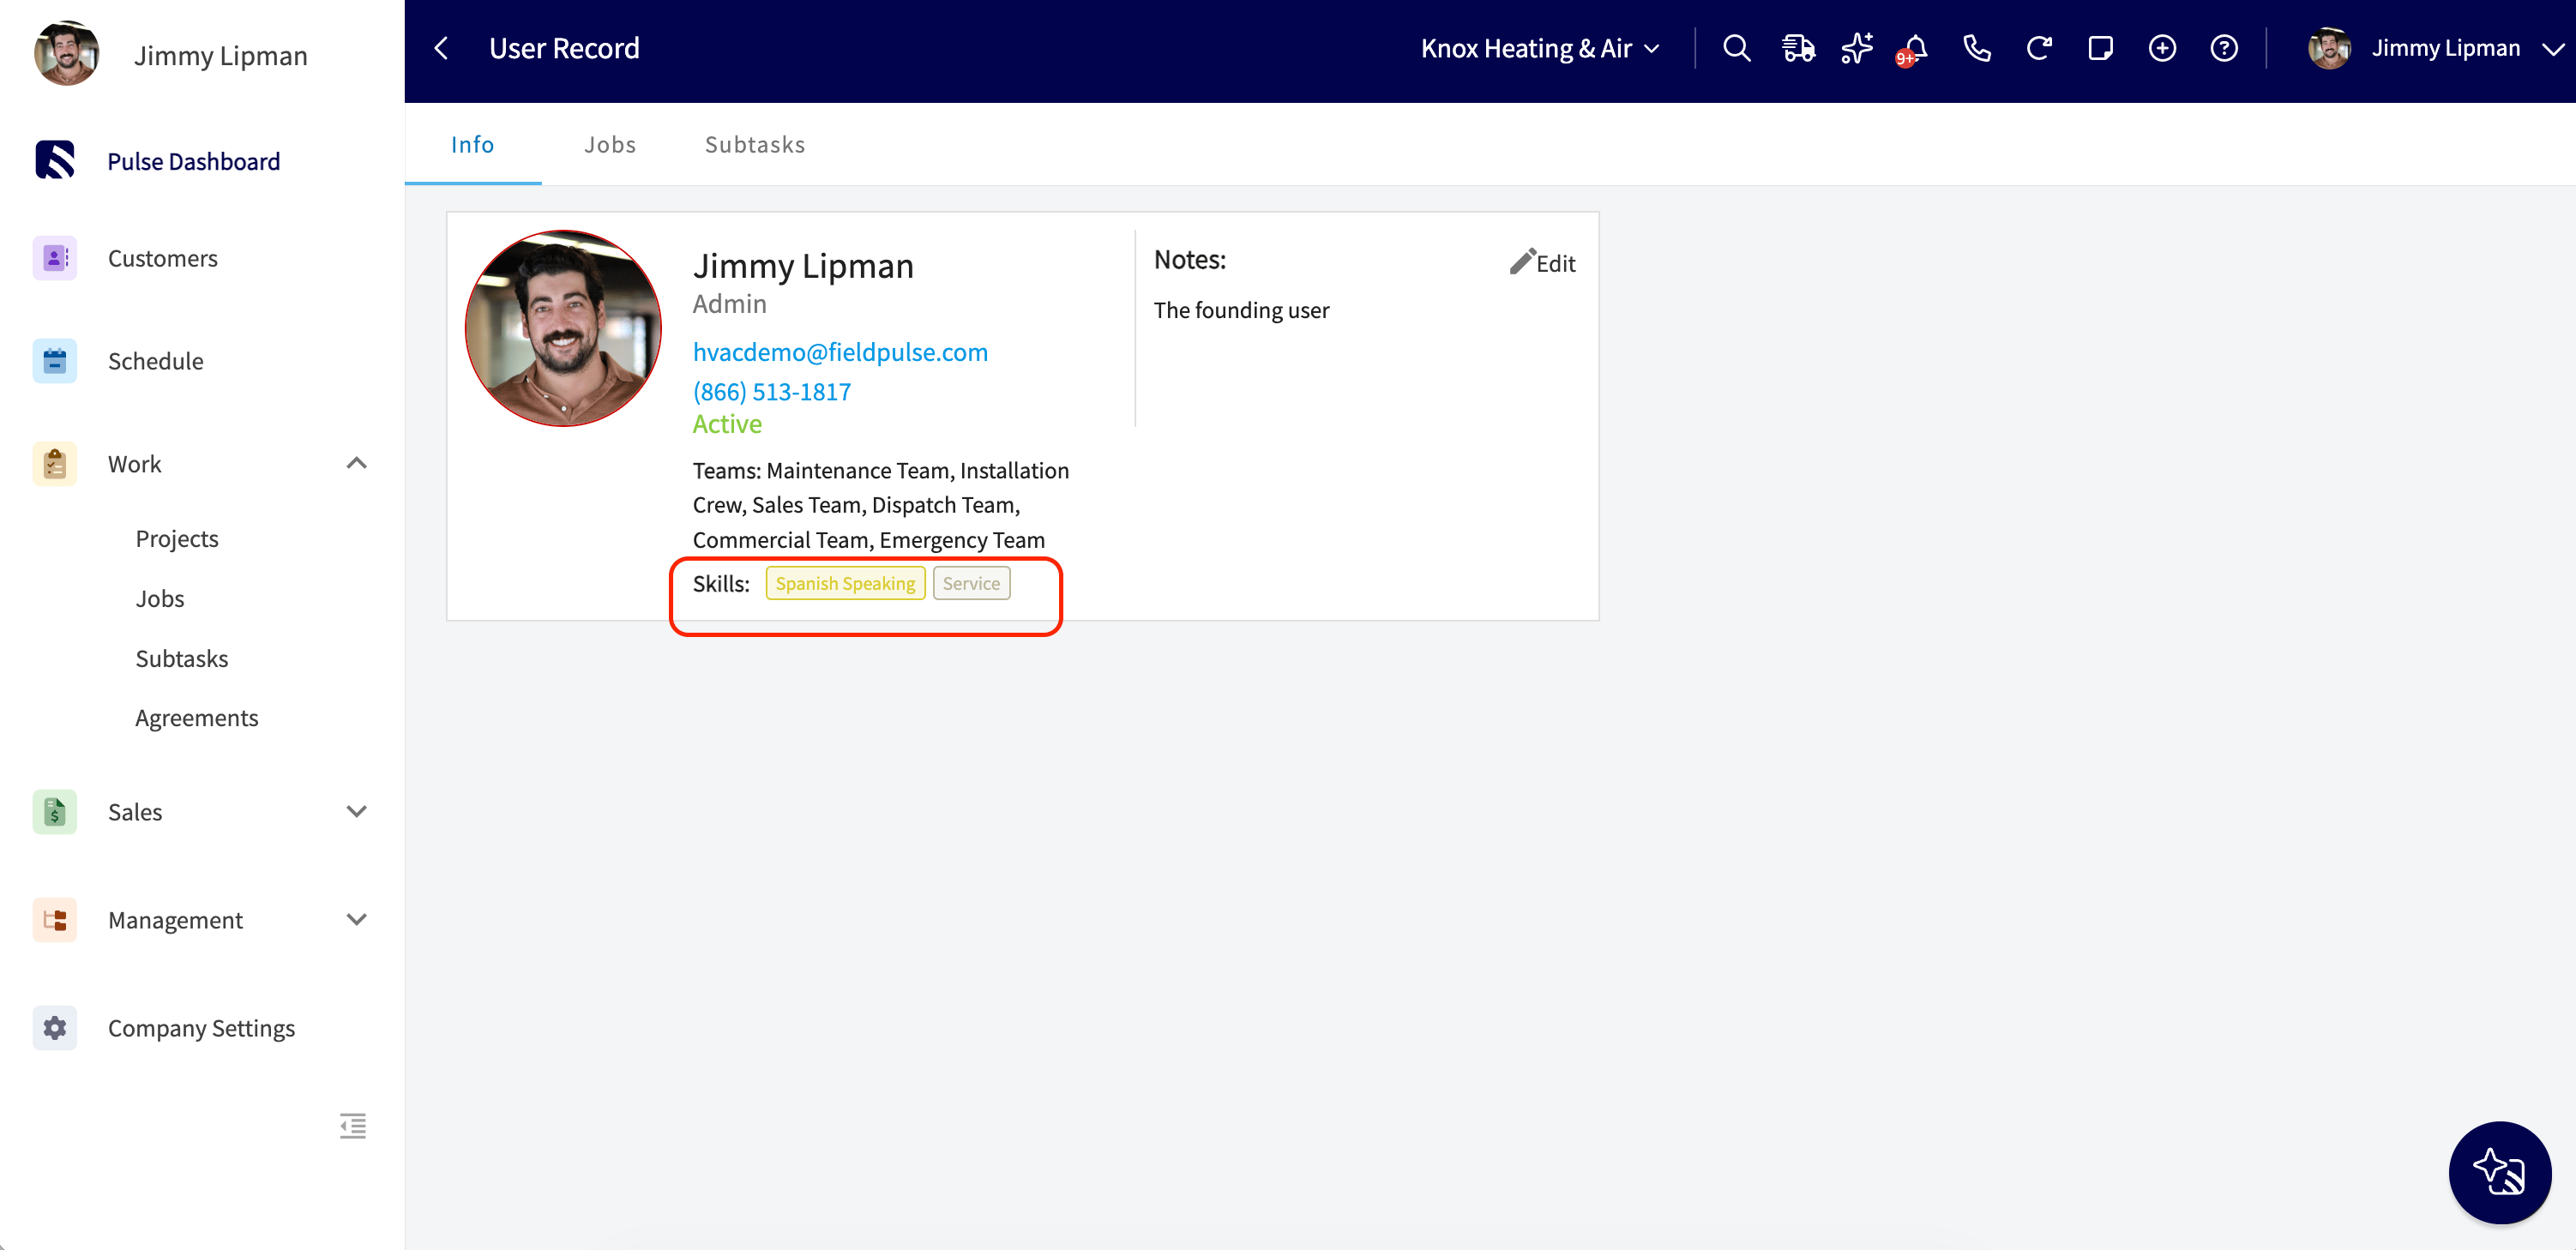
Once a user has tags assigned, those tags are visible and searchable everywhere you decide who works a job.- User record — tags display read-only under the Teams line on the user’s Info tab.
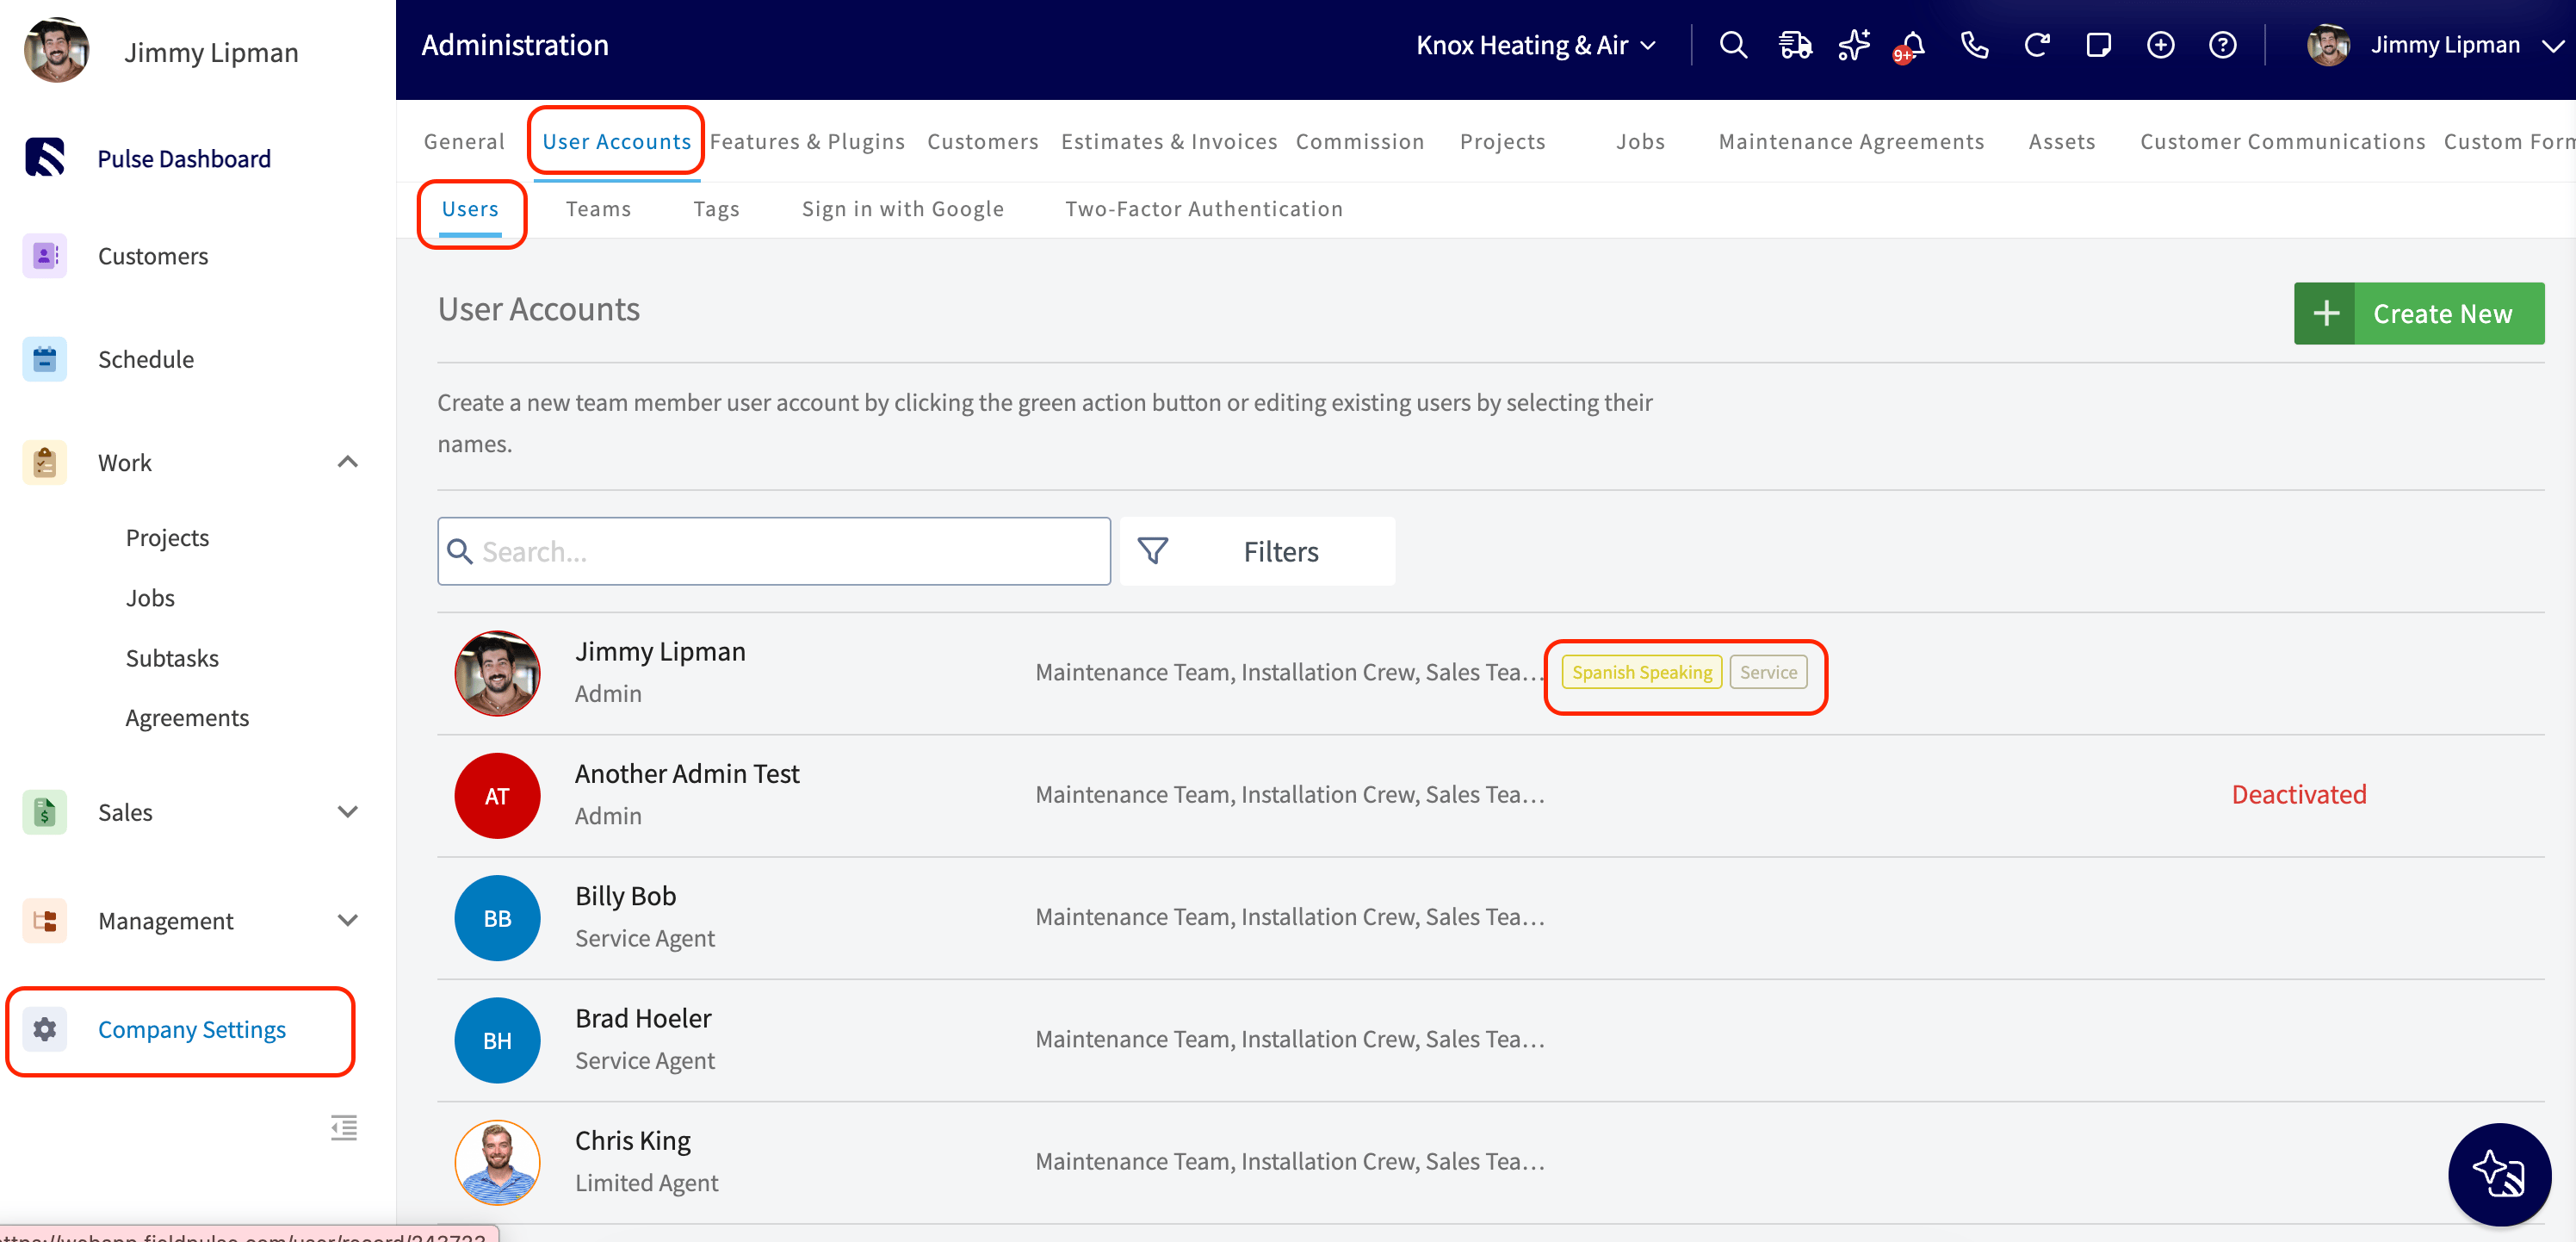
- User Accounts list — a Tags column shows each user’s tags, and a filter next to the search bar narrows the roster by team, by tag, or by both.
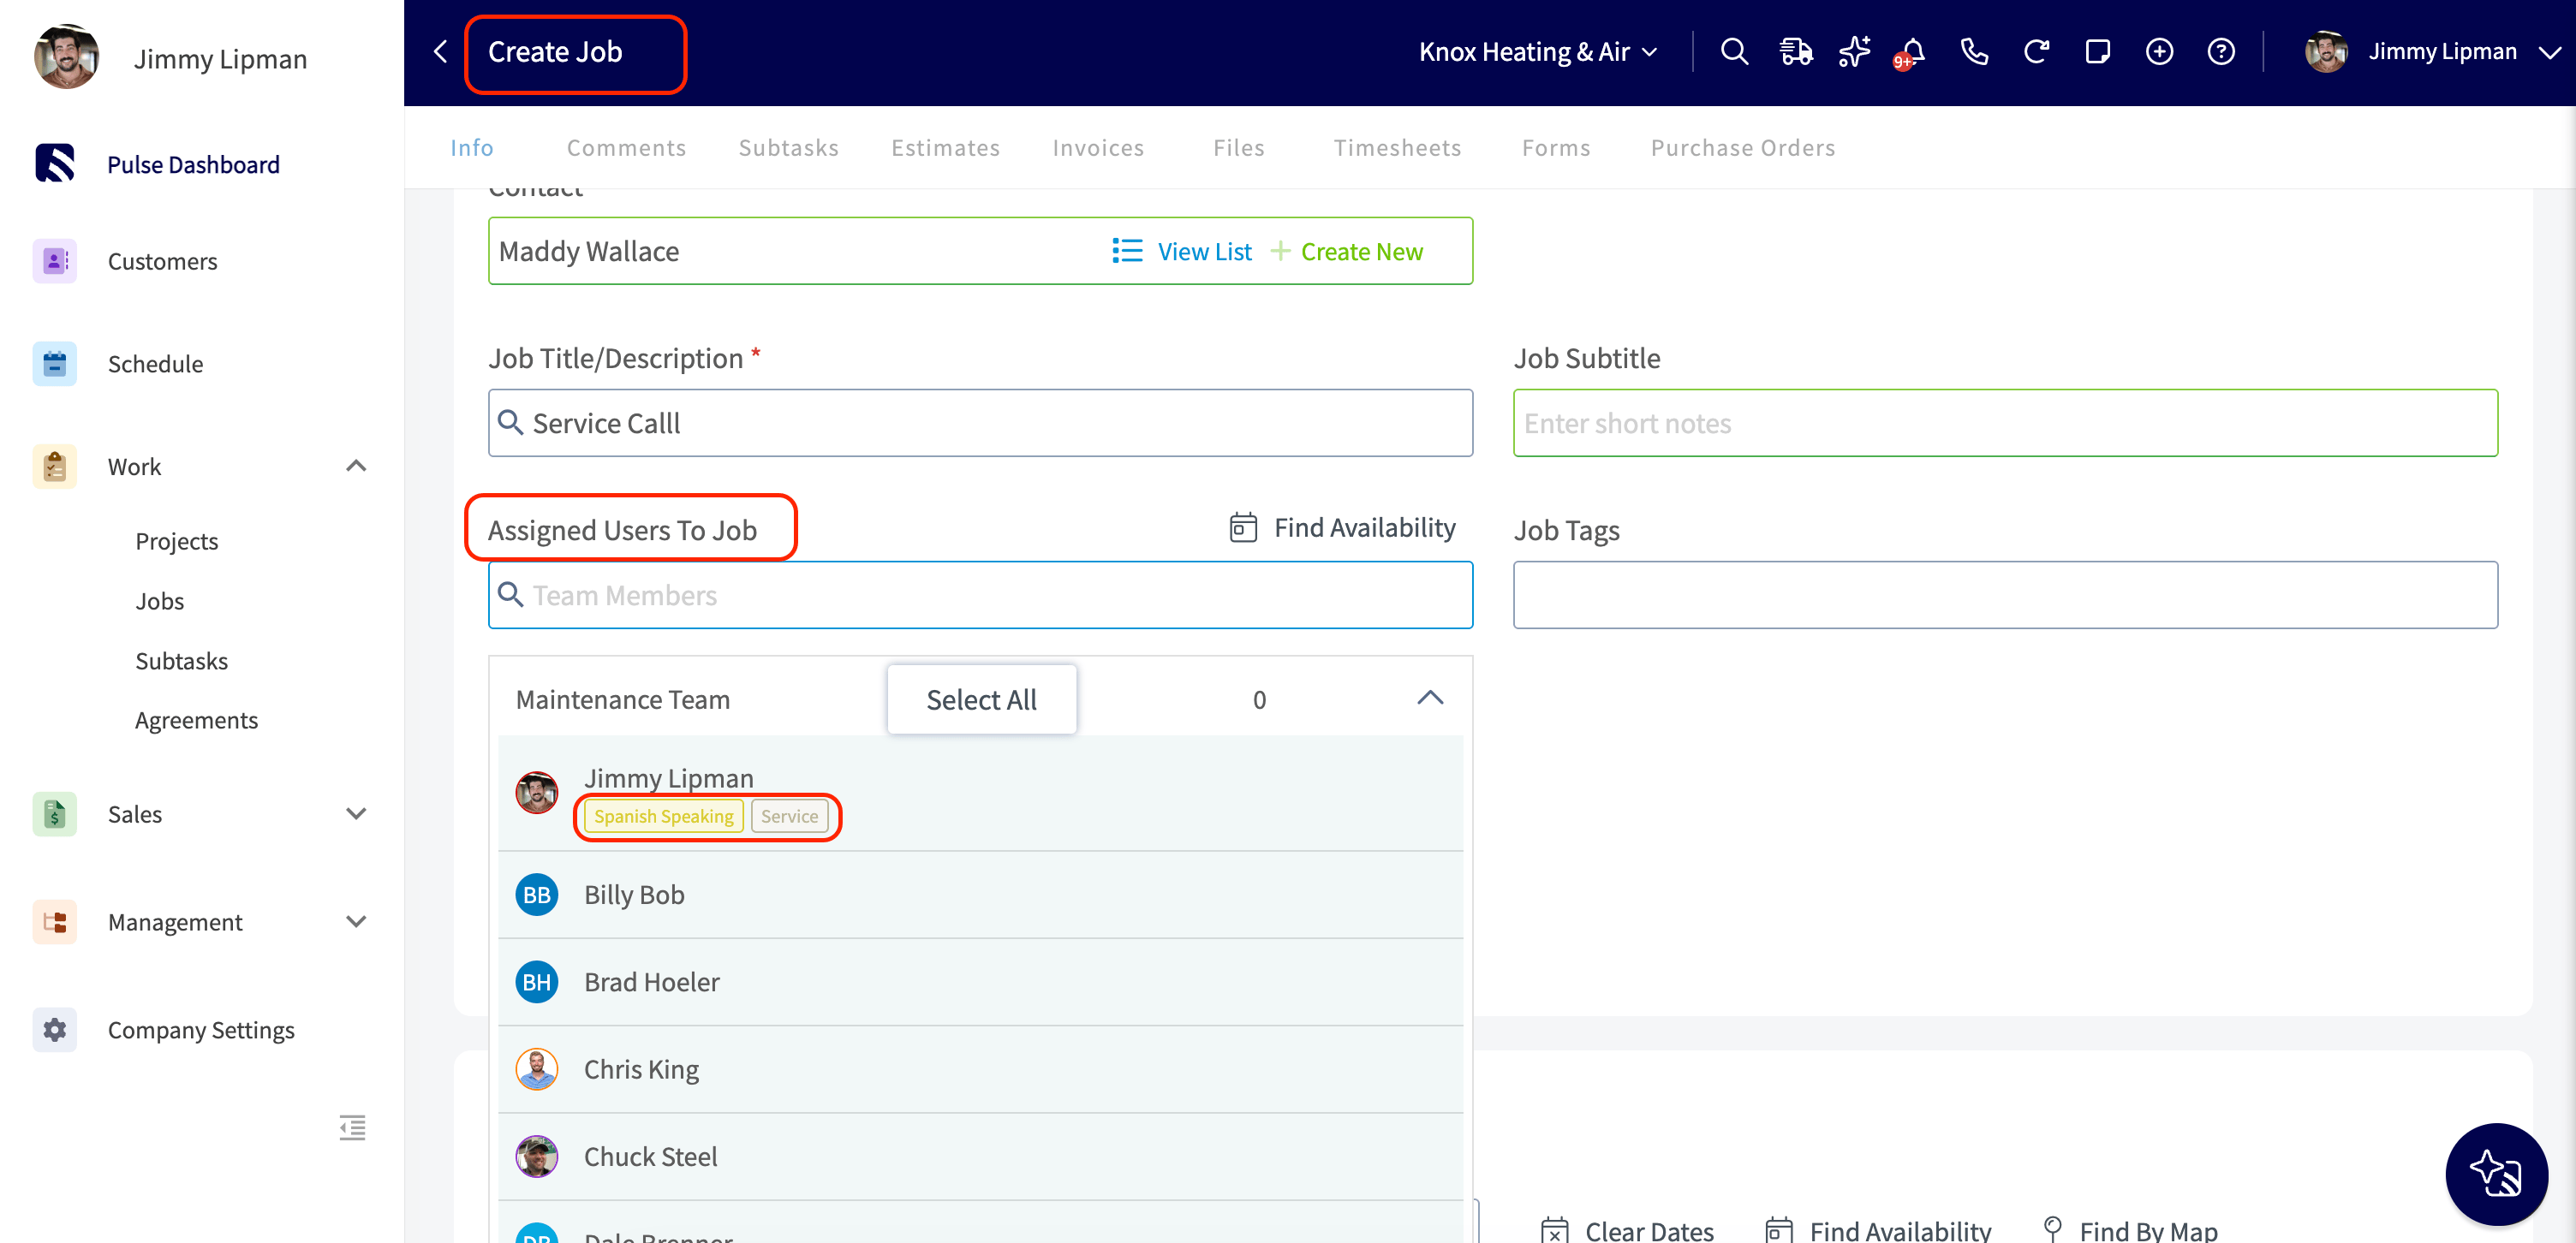
- Create Job and Edit Job — the Assigned Users to Job dropdown shows each technician’s tags inline, and the search box matches on name or skill, so typing “hvac” surfaces every technician tagged HVAC.
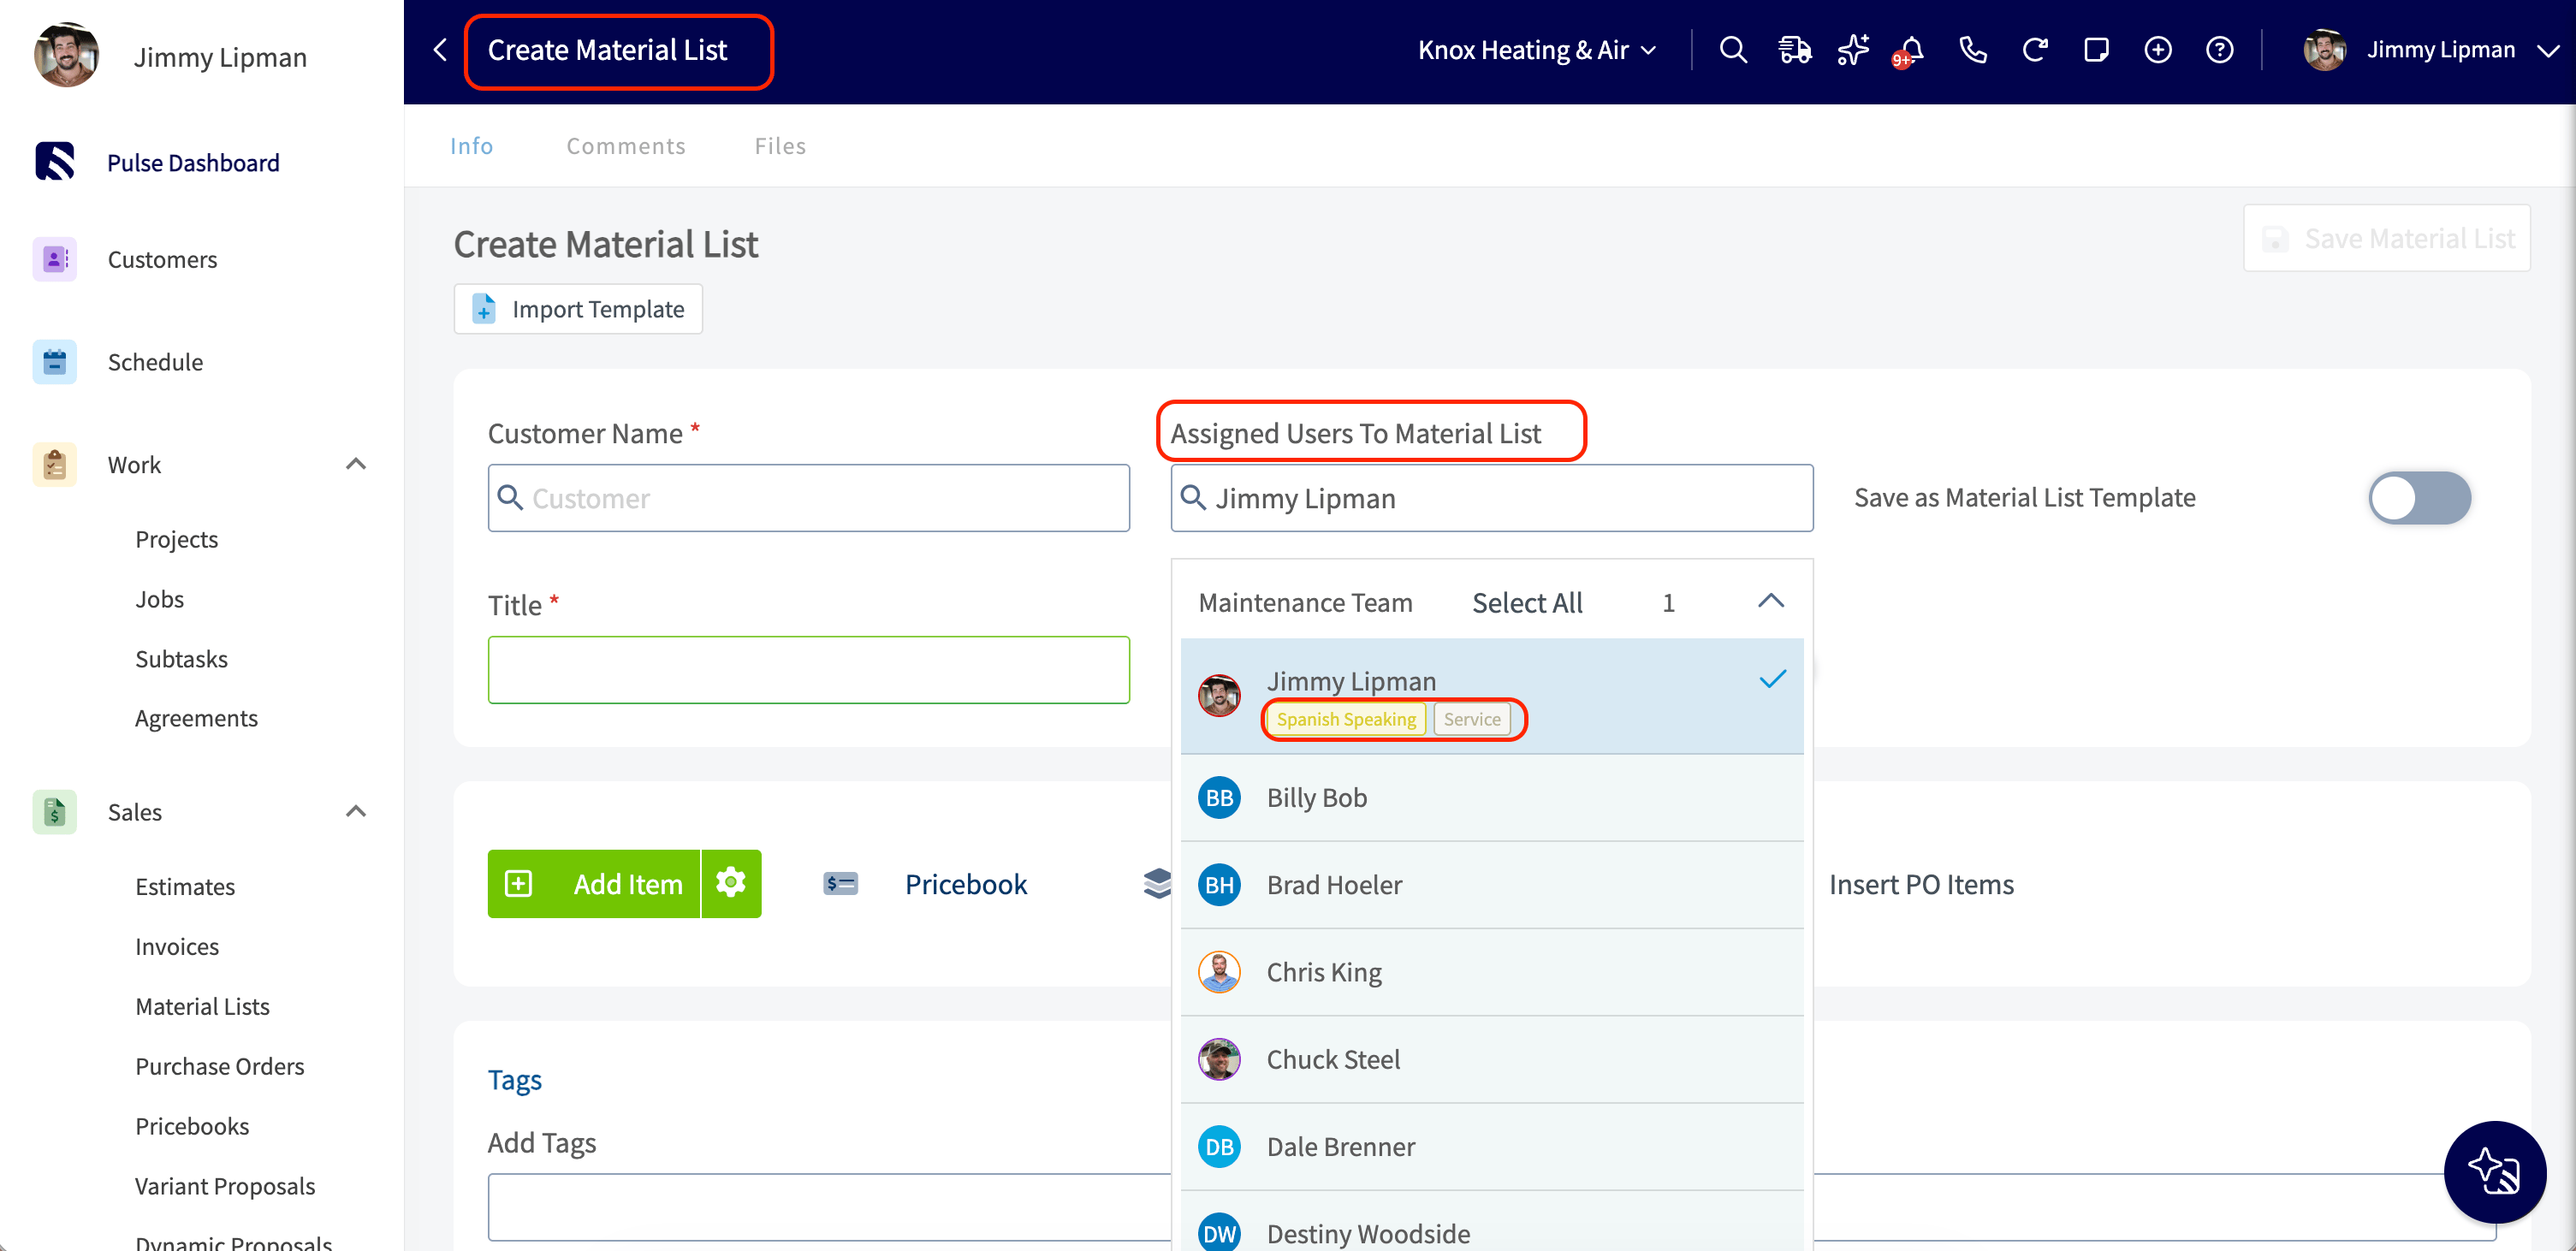
- Material lists — the Assigned Users to Material List field works the same way, with tags inline and search by name or skill.
- Dispatch Day view — a Filter by Skill control sits beside the team filter, so you can narrow the schedule to only the technicians who carry a required certification.
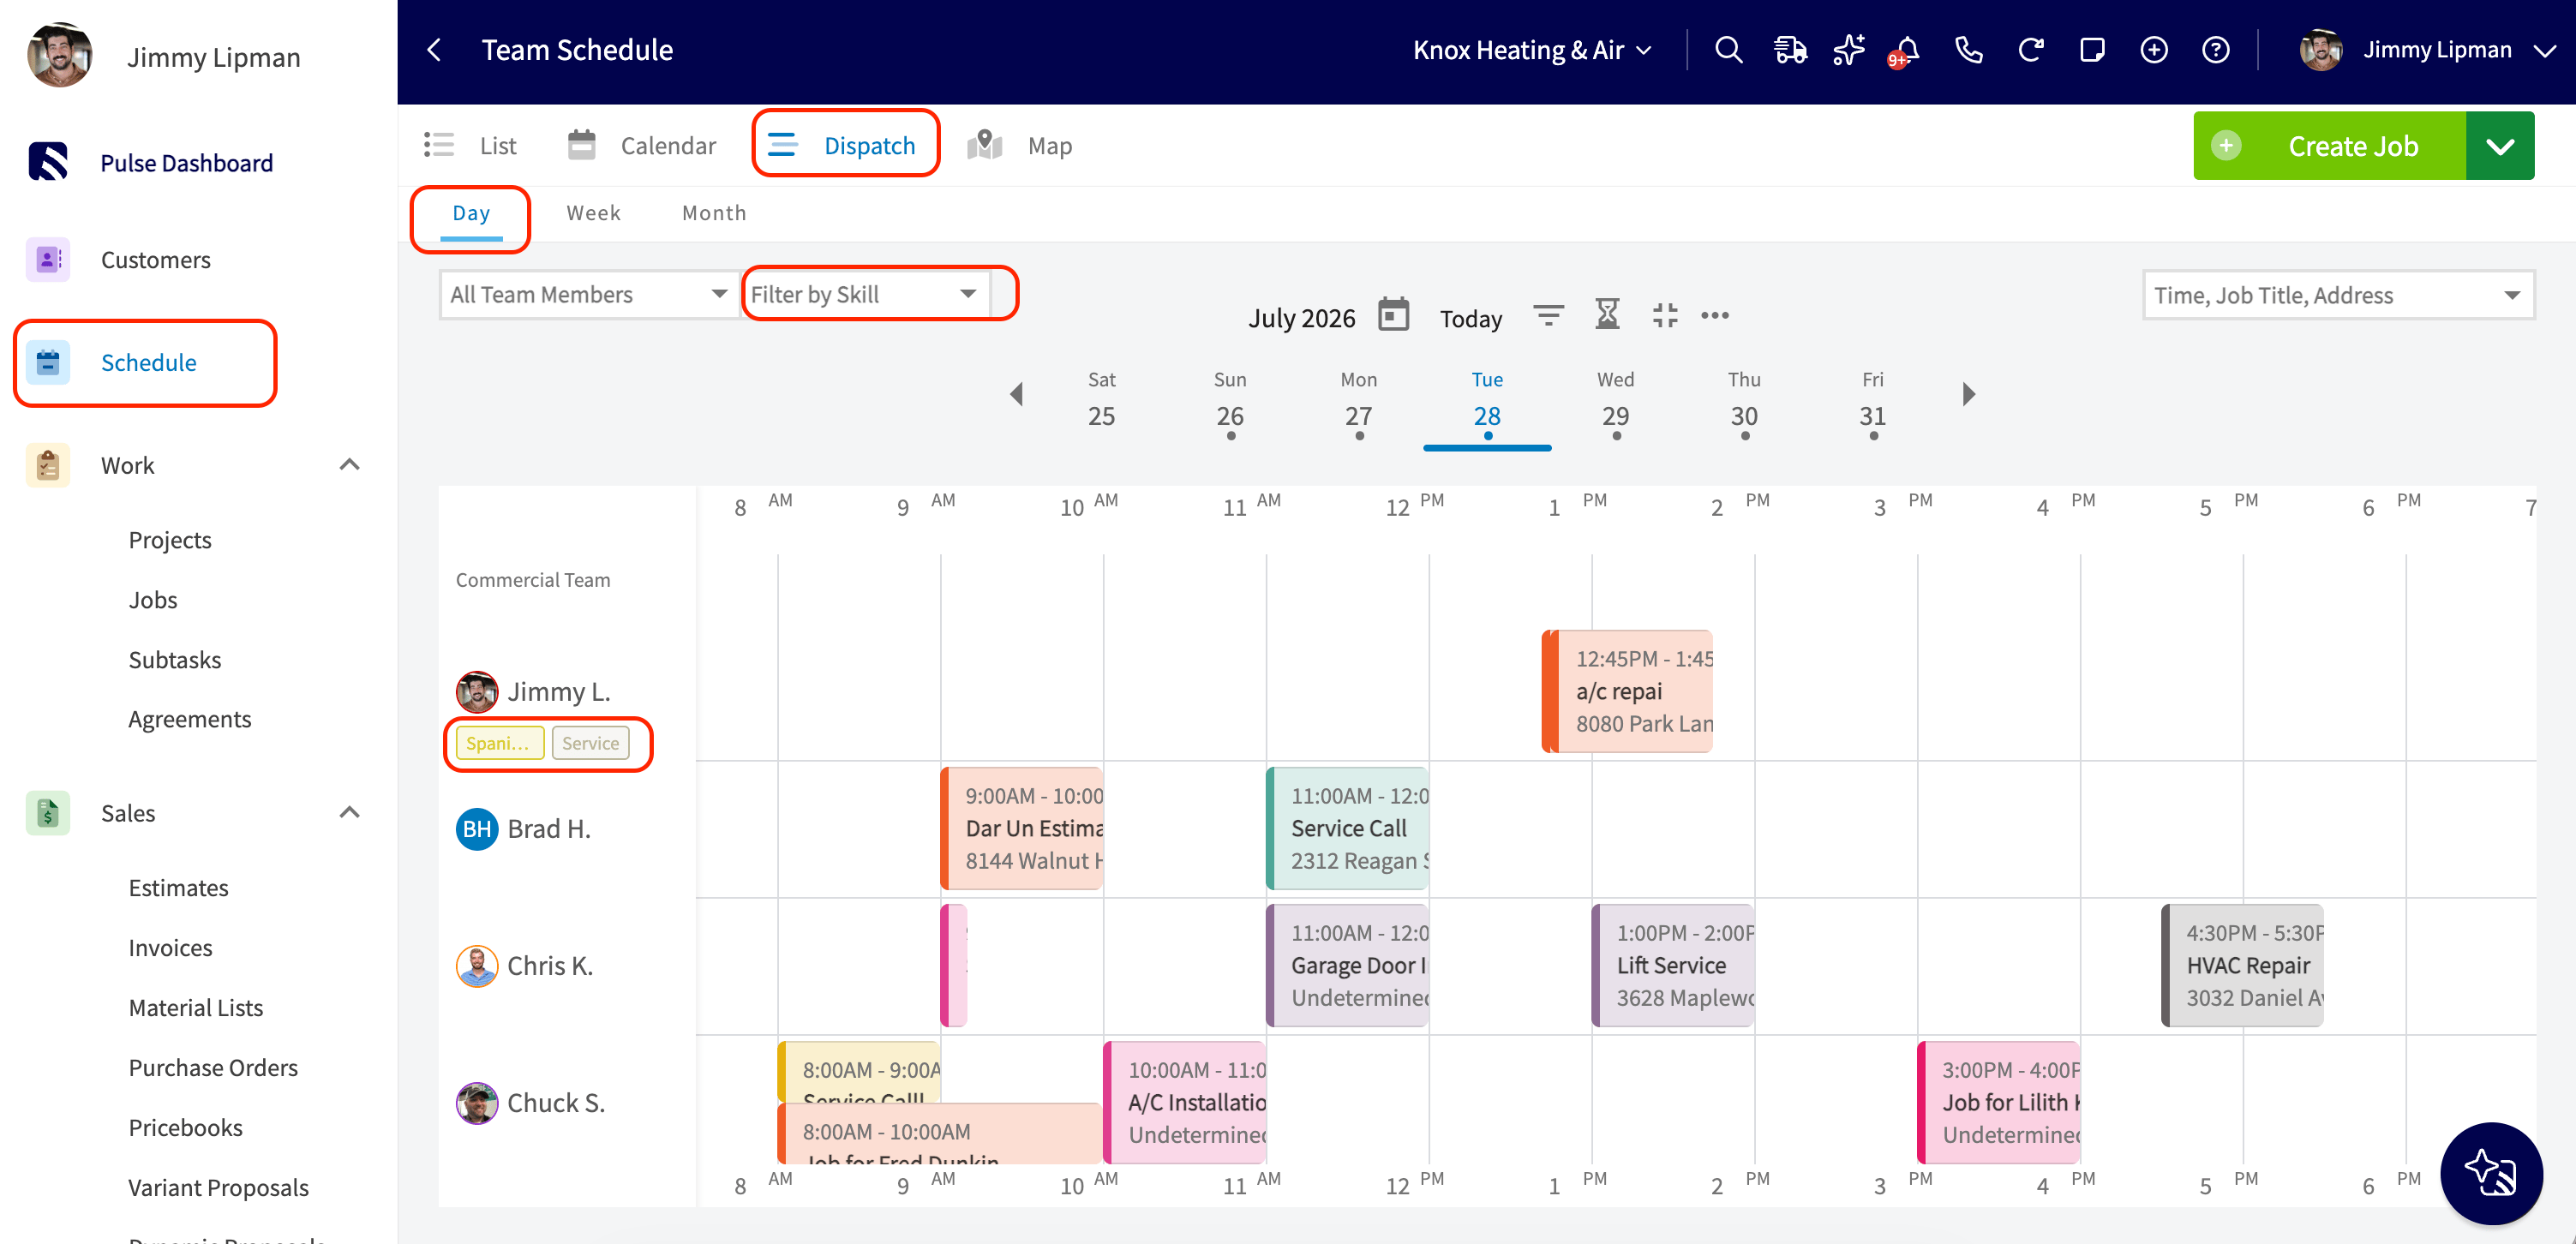
These are read-only displays and searches. To add, edit, or remove a user’s tags, go to the user’s edit view or Company Settings > User Accounts > Tags.