
Who uses this: An admin sets up the connection on the computer running QuickBooks Desktop; the sync then runs on its own. Availability: Requires QuickBooks Desktop + the sync connector.Syncing with QuickBooks Desktop connects the two systems through the QuickBooks Web Connector, a small application that runs on the same Windows computer as QuickBooks Desktop. Setup runs from requesting access to setting the sync to auto-run — and once it is on, the connector must stay open for records to keep flowing.
Overview
The QuickBooks Desktop connection is not a self-serve toggle: you request access from FieldPulse first, then FieldPulse enables the integration for your account. After that, you turn on the integration in Company Settings, download a connection file, add it to the QuickBooks Web Connector, and set the connector to run the sync every minute. Because the connection is local to the Web Connector, the computer’s sleep mode must stay off and the connector must stay open.Before you begin
- Finish the prep first. Confirm your version, disable sleep mode, turn off estimate/invoice triggers and notifications, and set the Web Connector user’s permissions — all in Setting Up QuickBooks Desktop Before Syncing.
- Work on the computer that runs QuickBooks Desktop. The Web Connector installs there, and the setup file downloads to that device.
- Have QuickBooks Desktop in single-user mode.
Set up the sync
- Request access to sync with QuickBooks. Contact the FieldPulse support team through in-app chat or at support@fieldpulse.com. The team schedules a call with you to initiate the sync. You cannot connect until FieldPulse enables it.
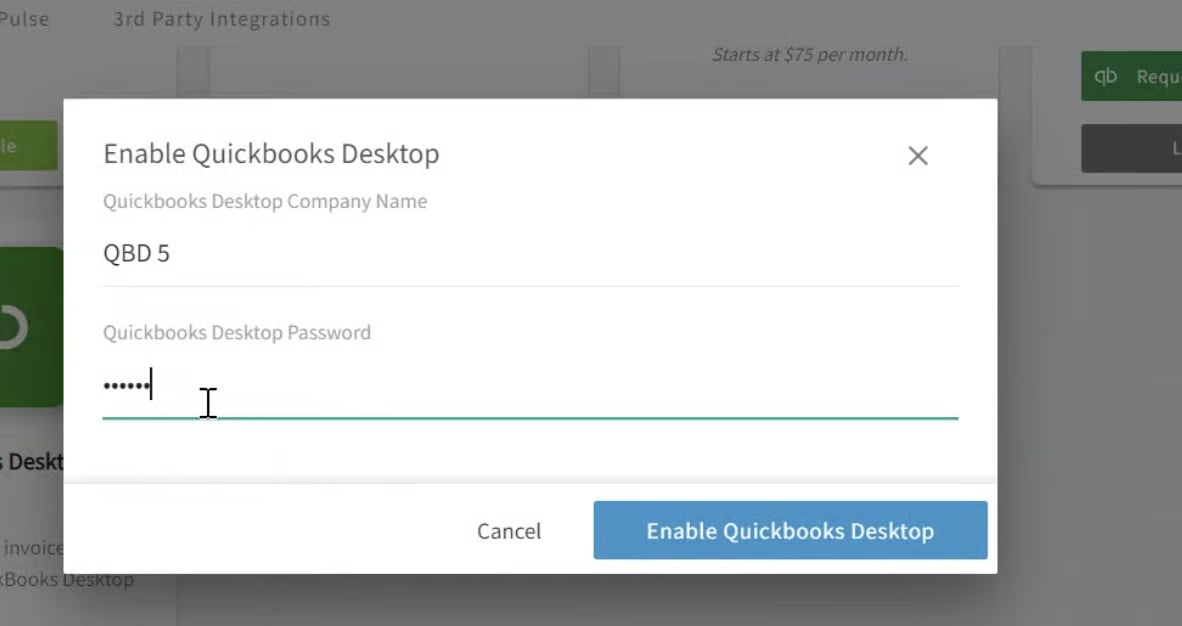
- Turn on the integration in Company Settings. Once FieldPulse has enabled the connection, go to Company Settings, open the Features & Plugins tab, and find the QuickBooks Desktop tile.
-
Enter your company name and create a password. FieldPulse downloads a connection file to your device.
-
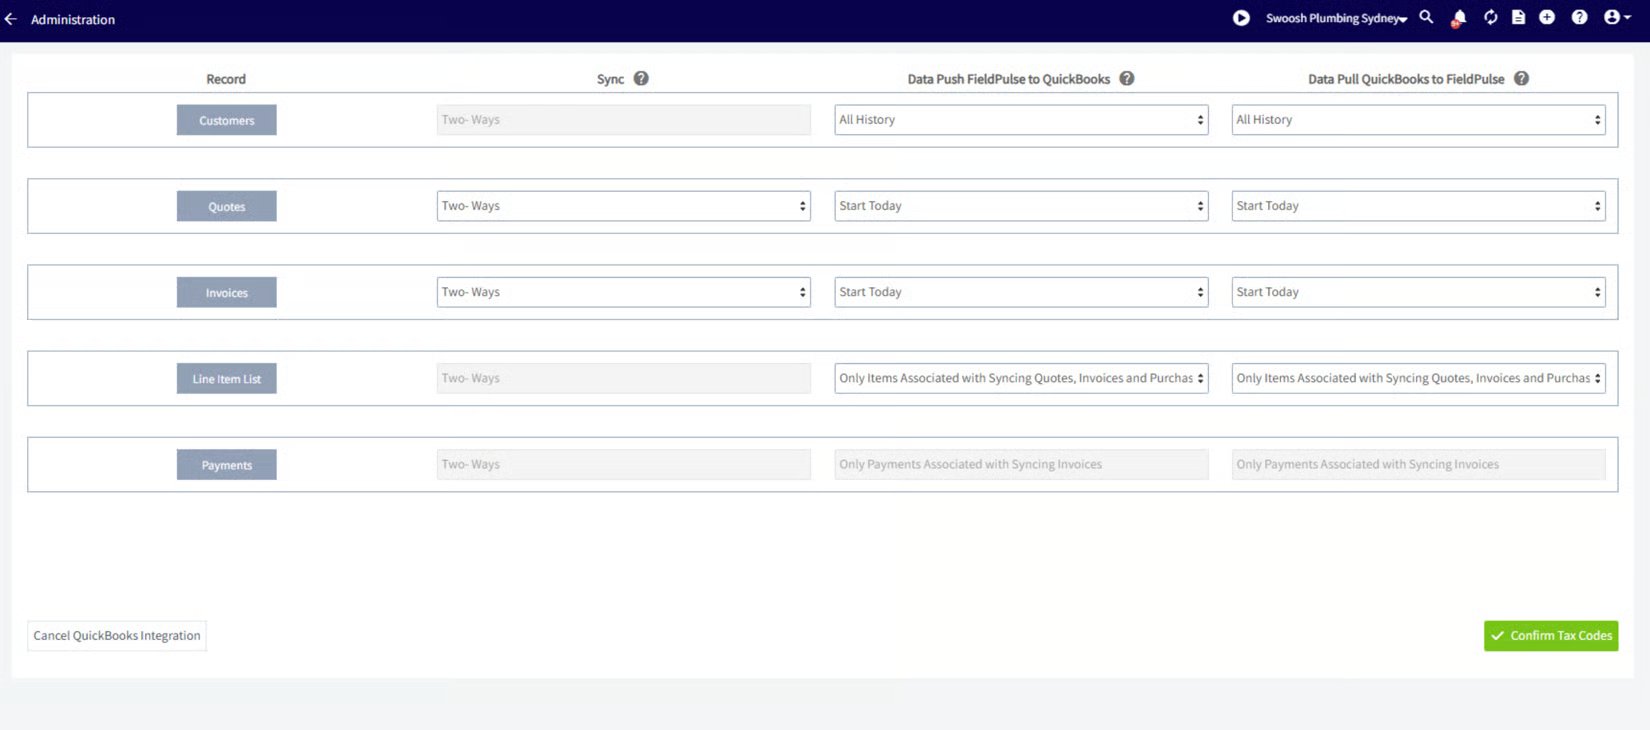
Select the sync type and date range. Choose one-way sync (FieldPulse to QuickBooks) or two-way sync for estimates and invoices, and set the specific date or period of records to exchange.
-
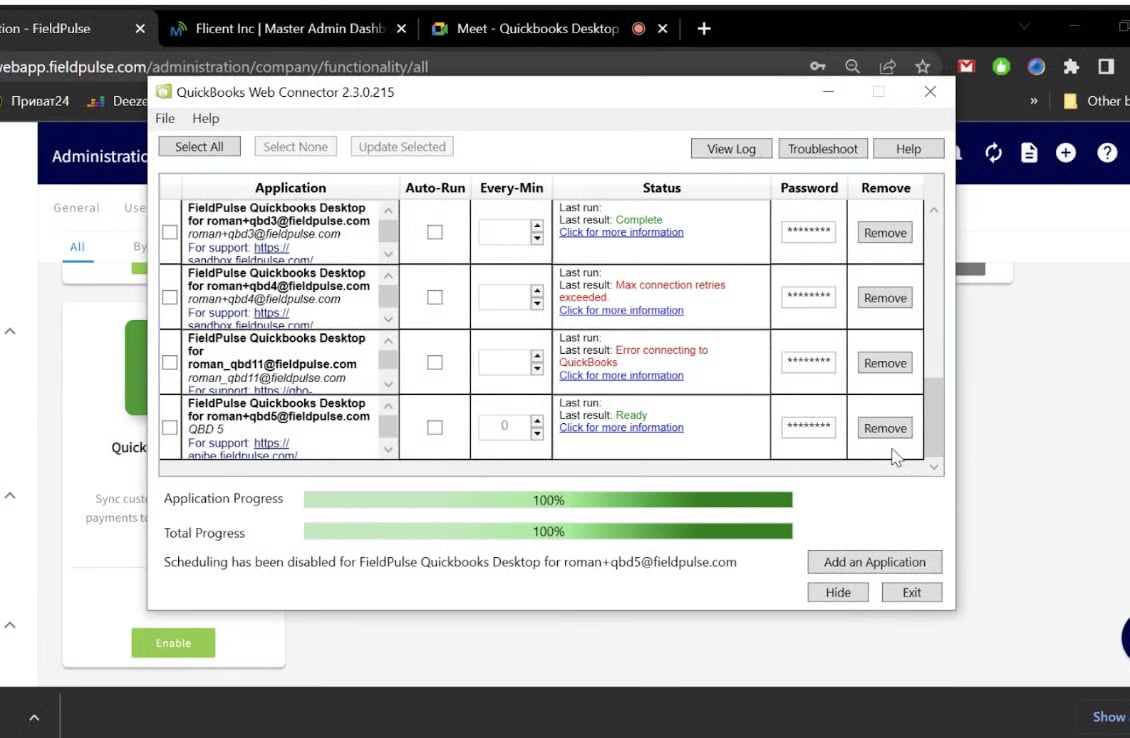
Download and start the QuickBooks Web Connector. In the Web Connector, select Add an Application, then select the file FieldPulse downloaded in step 3.
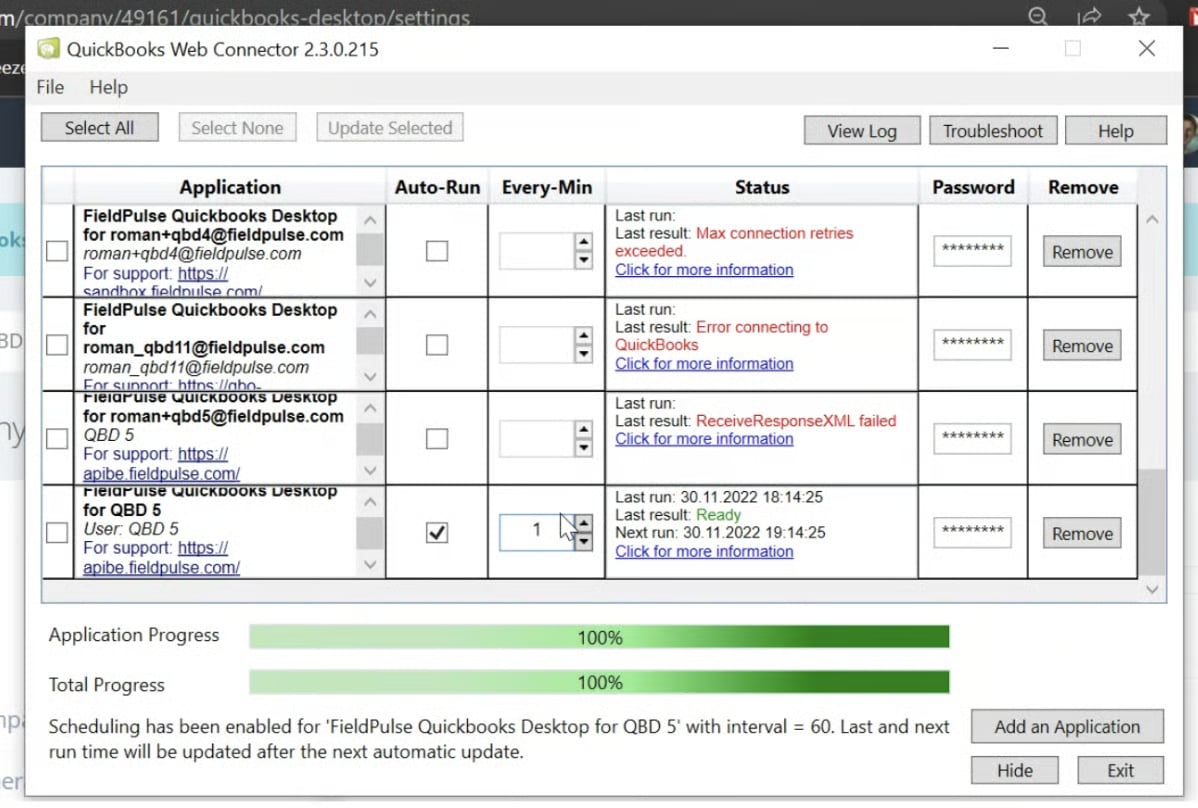
- Set the sync to auto-run every 1 minute. In the Web Connector, set the run interval to every minute, then select Update Selected. The sync begins.
Related articles
- Setting Up QuickBooks Desktop Before Syncing — the prior step
- How to Manage QuickBooks Desktop After Syncing — the next step
- QuickBooks Desktop Overview
- Troubleshooting QuickBooks Desktop Sync Errors