
Who uses this: Anyone bringing an existing job list into FieldPulse — the job import runs from Company Settings. Availability: All regions.Importing jobs loads your existing jobs into FieldPulse in bulk instead of recreating them one at a time. Export your jobs from your old system to Excel, Google Sheets, or CSV, add them to the Mass Job Import template, and upload the file.
Overview
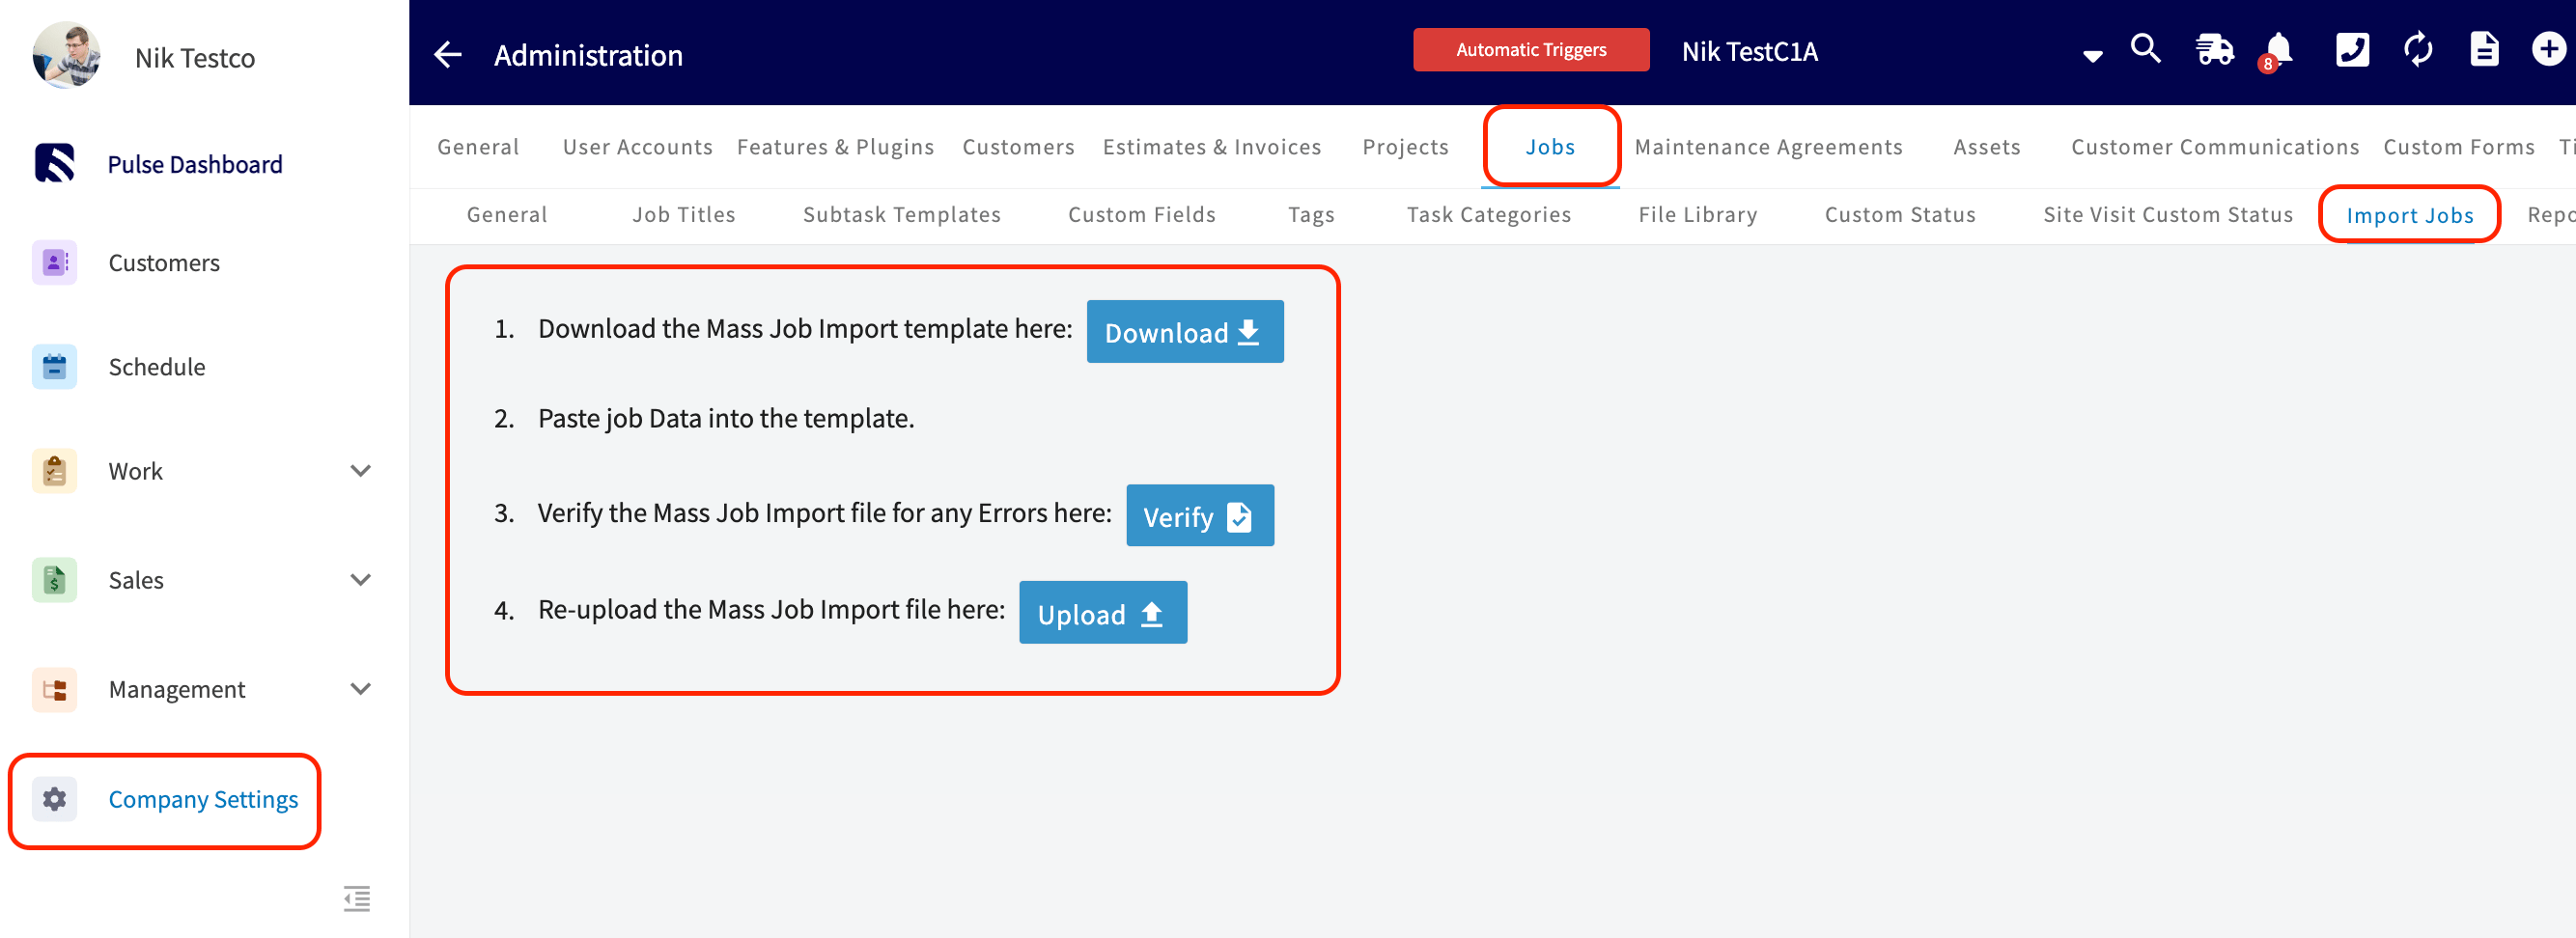
You import jobs from Company Settings > Jobs > Import Jobs. FieldPulse gives you the Mass Job Import template to fill in, checks your data for errors before anything is saved, and imports the file once every record is valid. If a job belongs to a customer who is already in FieldPulse, the template has two columns that tie the job to that existing customer.Before you begin
- Have your existing job data ready in a spreadsheet (Excel, Google Sheets, or CSV) so you can copy it into the template.
- If you don’t have Excel, use Google Sheets instead — see How to Self-Import Data With Google Sheets.
- If you’re importing jobs for customers who are already in FieldPulse, have those customer records in place first so you can fill in the existing-customer columns — see How to Import Customers.
Import your jobs
- Go to Company Settings, then select the Jobs tab.
-
Select Import Jobs, then follow the on-screen prompts and select Download to download the Mass Job Import template.
- Fill in the template with your job data. Keep the column headers and structure exactly as they are so the importer can read your data — do not rearrange or rename columns.
-
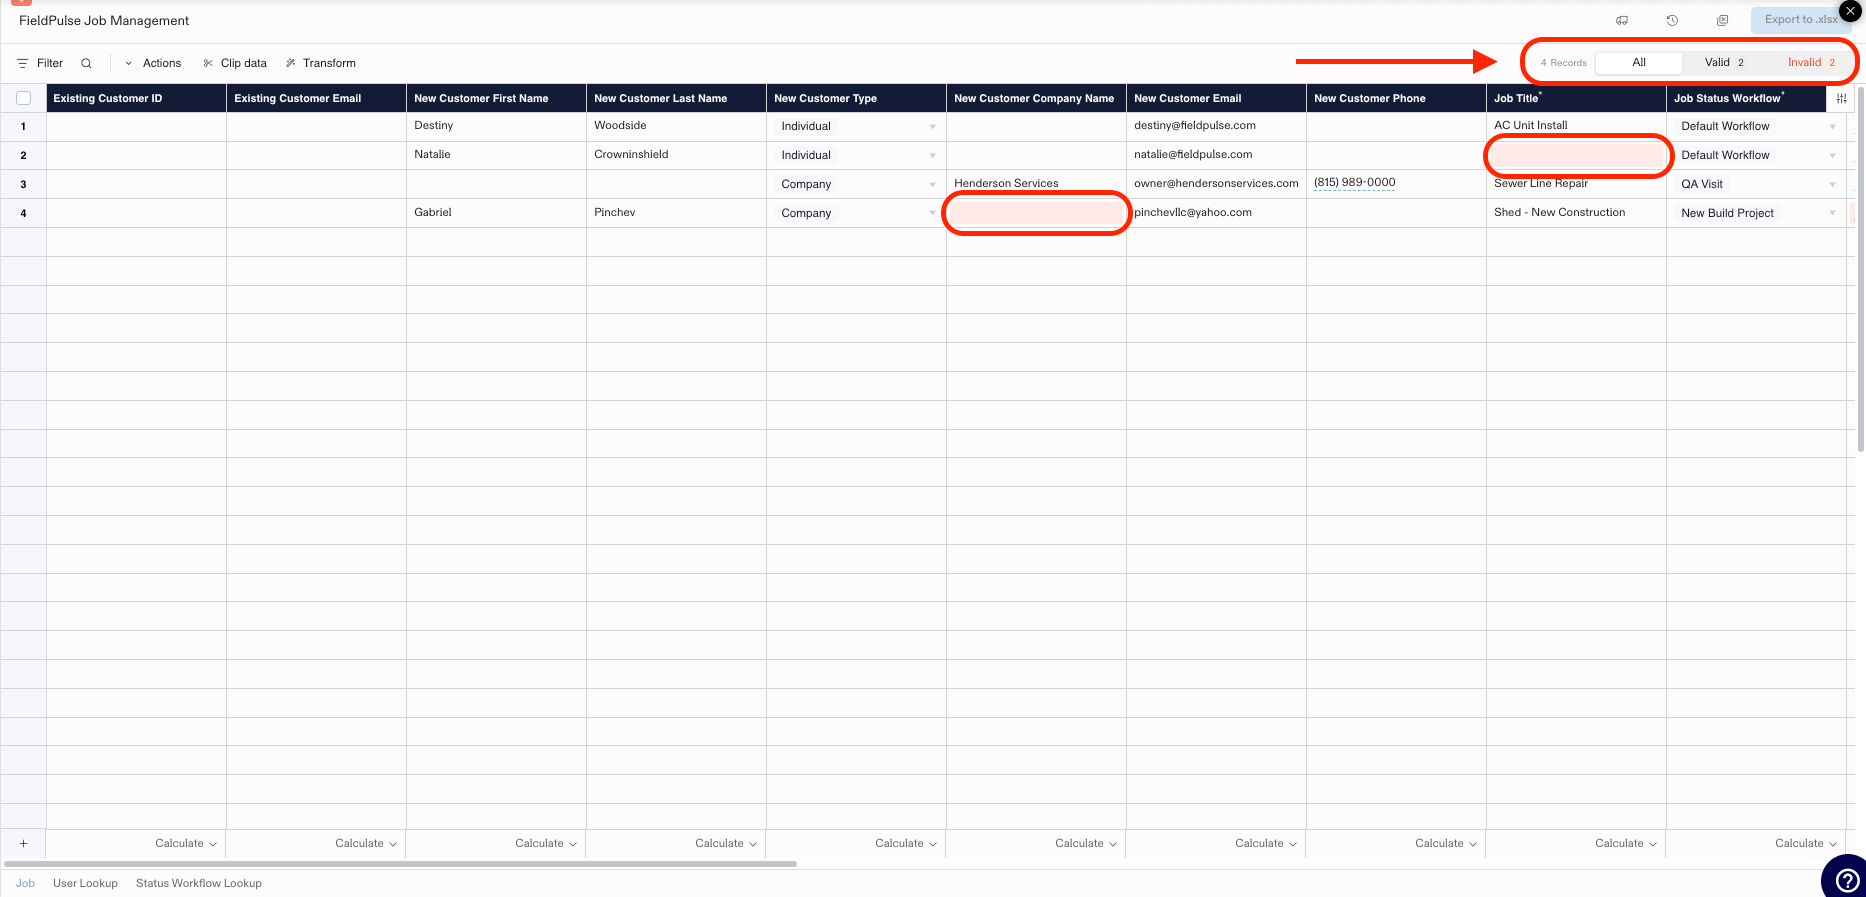
Select Verify to check the completed file. FieldPulse flags any errors or missing required fields in red and shows a running count of valid and invalid records in the top-right corner.
-
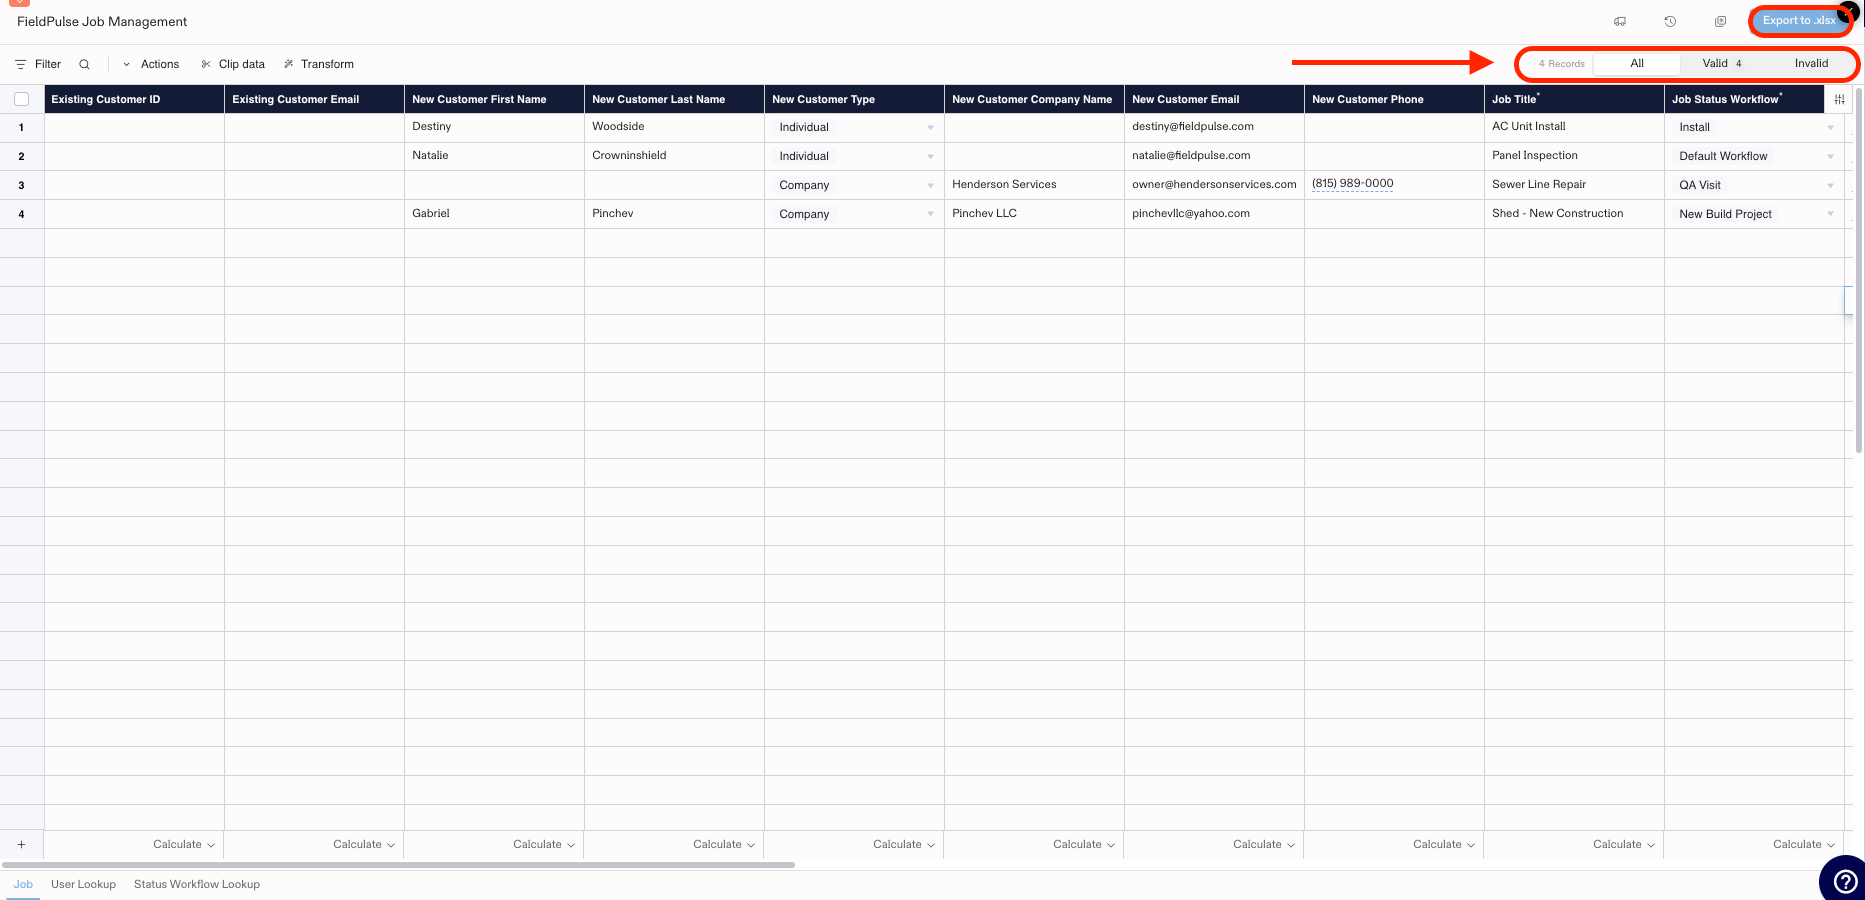
Fix the flagged fields until every record shows as Valid, then select Export to .xlsx.
- Re-upload the verified file with the Upload button to finish the import.
Link jobs to existing customers
The first two columns of the Mass Job Import template — Existing Customer ID and Existing Customer Email — connect a job to a customer who is already in FieldPulse. Fill them in only for jobs that belong to an existing customer. If none of the jobs you’re importing belong to existing customers, leave both columns empty.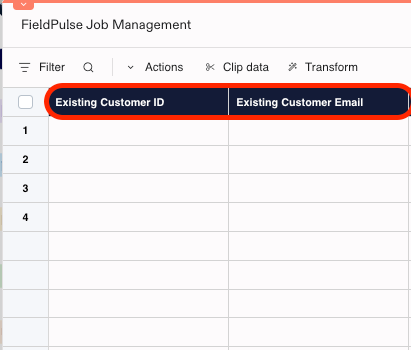
Still need help?
Reach the FieldPulse support team at support@fieldpulse.com or through the chat feature in the bottom-right corner of your screen.Related articles
- How to Import Data into FieldPulse
- How to Import Customers
- How to Self-Import Data With Google Sheets
- How to Create a Job