
Who uses this: Admins — serialized item imports run from Company Settings. Availability: All regions. Self-import is included with your subscription at no extra cost.Importing serialized inventory bulk-loads your serialized items into FieldPulse so they’re ready to add to estimates and invoices — no need to enter each unit by hand. Download the Mass Serialized Item Import template, fill it in, verify it, and upload it.
Overview
You import serialized inventory from Company Settings > Estimates & Invoices > Item List — the same place you import your standard item list. FieldPulse gives you the Mass Serialized Item Import template to fill in, checks your data for errors before anything is saved, and imports the clean records.Before you begin
Have your serialized item data ready in a spreadsheet so you can copy it into the template. If you don’t have Excel, use Google Sheets instead — see How to Self-Import Data With Google Sheets. Item Name, Hub, and Serial Number are the template’s required columns — each one is marked with an asterisk in the header row. Follow these field rules so your items pass verification the first time:- Item names must be unique.
- SKUs must be unique and can be alphanumeric.
- Do not use equations in the Unit Cost or Unit Price fields — enter plain numbers.
- Do not put spaces after the commas in the Tags field.
- Serialized items are Product - Inventory items. Serialized inventory applies only to line items whose Item Type is Product - Inventory, not Service or Product - Non Inventory — see Serialized Inventory Overview.
Import your serialized inventory
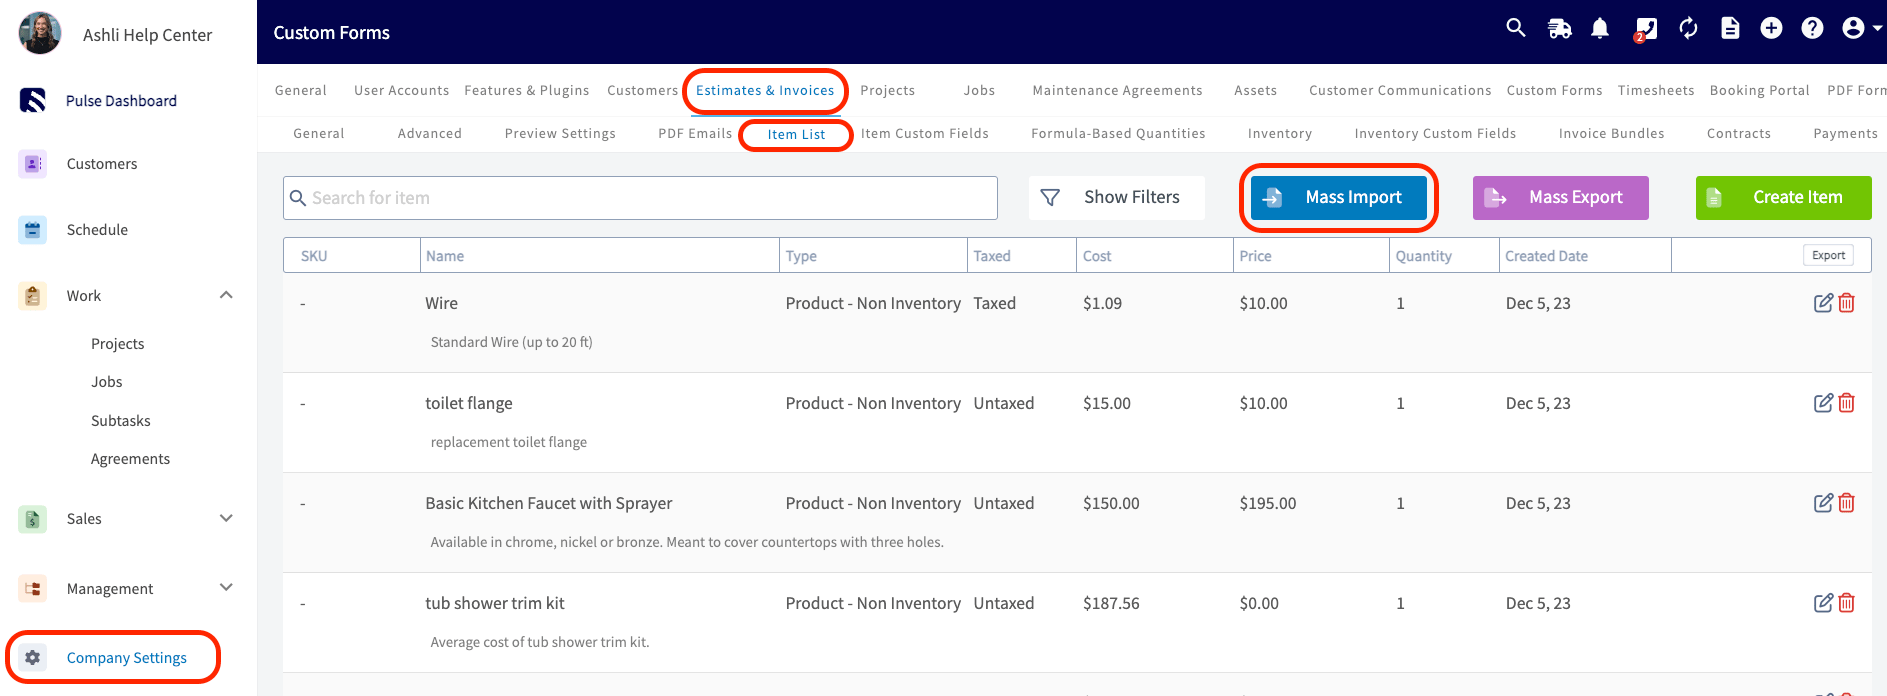
- Go to Company Settings, then select Estimates & Invoices.
-
Select Item List in the sub-header, then select Mass Import.
-
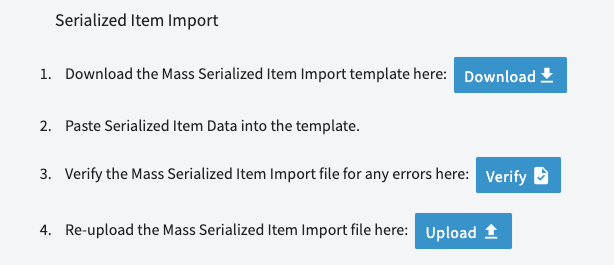
In the Serialized Item Import prompt, select Download to download the Mass Serialized Item Import template.
- Paste your serialized item data into the template, following the field rules above. Keep the column headers and structure exactly as they are — do not rearrange or rename columns.
-
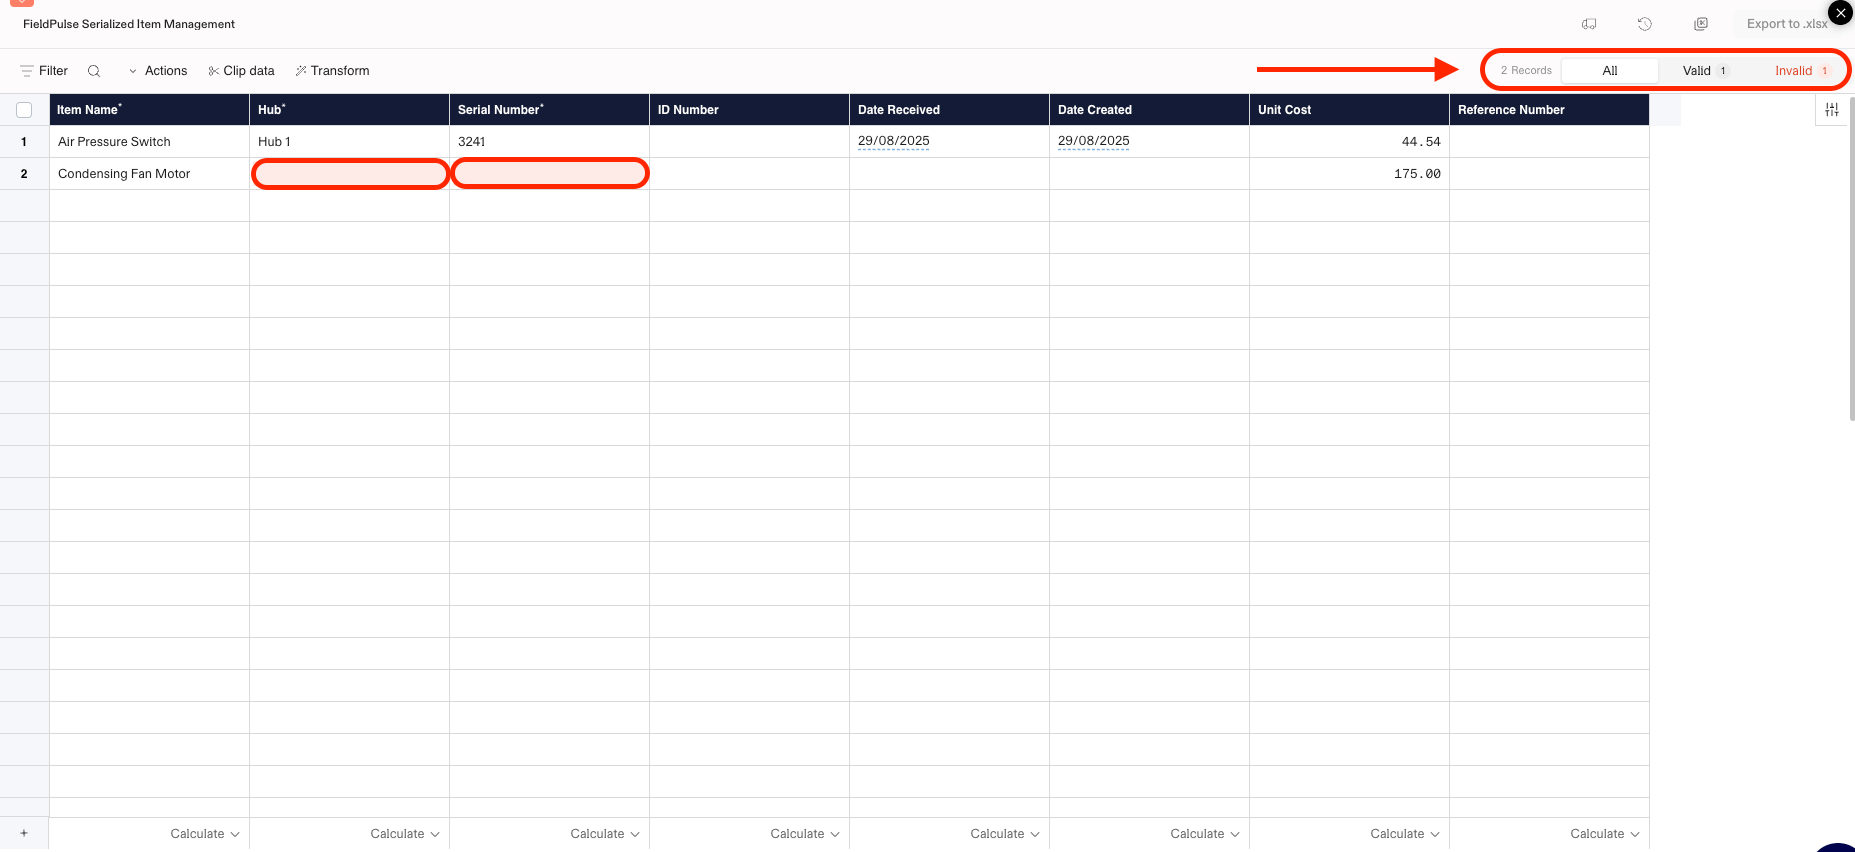
Select Verify to check the completed file for errors. FieldPulse flags any errors or missing required information in red and shows a count of valid and invalid records in the top-right corner.
-
Fix the flagged fields until every record shows as Valid, then select Export to .xlsx.

- Re-upload the verified file with the Upload button to finish the import.
Related articles
- How to Import Data into FieldPulse
- How to Import Your Item List
- Serialized Inventory Overview
- How to Self-Import Data With Google Sheets