Who uses this: Anyone with access to Company Settings > Custom Forms builds a form’s fields; your team fills them in on the record. Availability: All regions · Custom Forms must be enabled under Company Settings > Features & Plugins — contact FieldPulse for pricing.This is the reference for the building blocks of a custom form — the field types you drag onto the form, the related-record fields that pull values off the record the form is attached to, the formulas that calculate a number for you, and the conditional logic that shows a field only when it applies.
Overview
You add fields to a form by dragging them from the Drag a field onto the form palette on the right side of the form editor. Most field types collect input directly from the person filling out the form. Related-record fields instead import values that already exist on the linked customer, job, estimate, invoice, project, maintenance agreement, or asset. A Number Field can calculate its own value from a formula, and any field can be set to appear only when an earlier answer matches a condition. For how to create a form and arrange fields on it, see How to Create a Custom Form.For a full breakdown of every setting available on a form — name, font sizes, offline availability, record attachment, permissions, and default email and SMS messaging — see Custom Form Settings Details.
Field types
A custom form supports eleven field types. Each one below shows what it collects and the options you can set on it.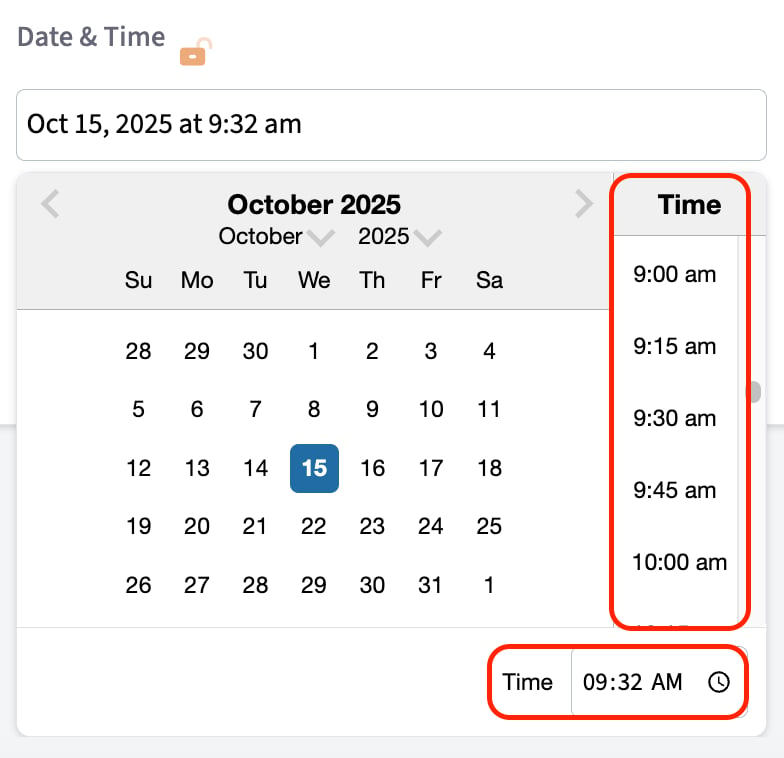
Related-record fields
Related-record fields pull details that already exist on the linked record into the form, so your team does not retype them. If a customer has multiple locations or contacts, you specify which one’s information fills the field.
For more detail on adding related field values to a form, see How to Link Custom Forms to Jobs.
Field formulas
A field formula lets a Number Field calculate its own value from other number fields and constants, so nobody has to work the math out by hand and type the answer in.-
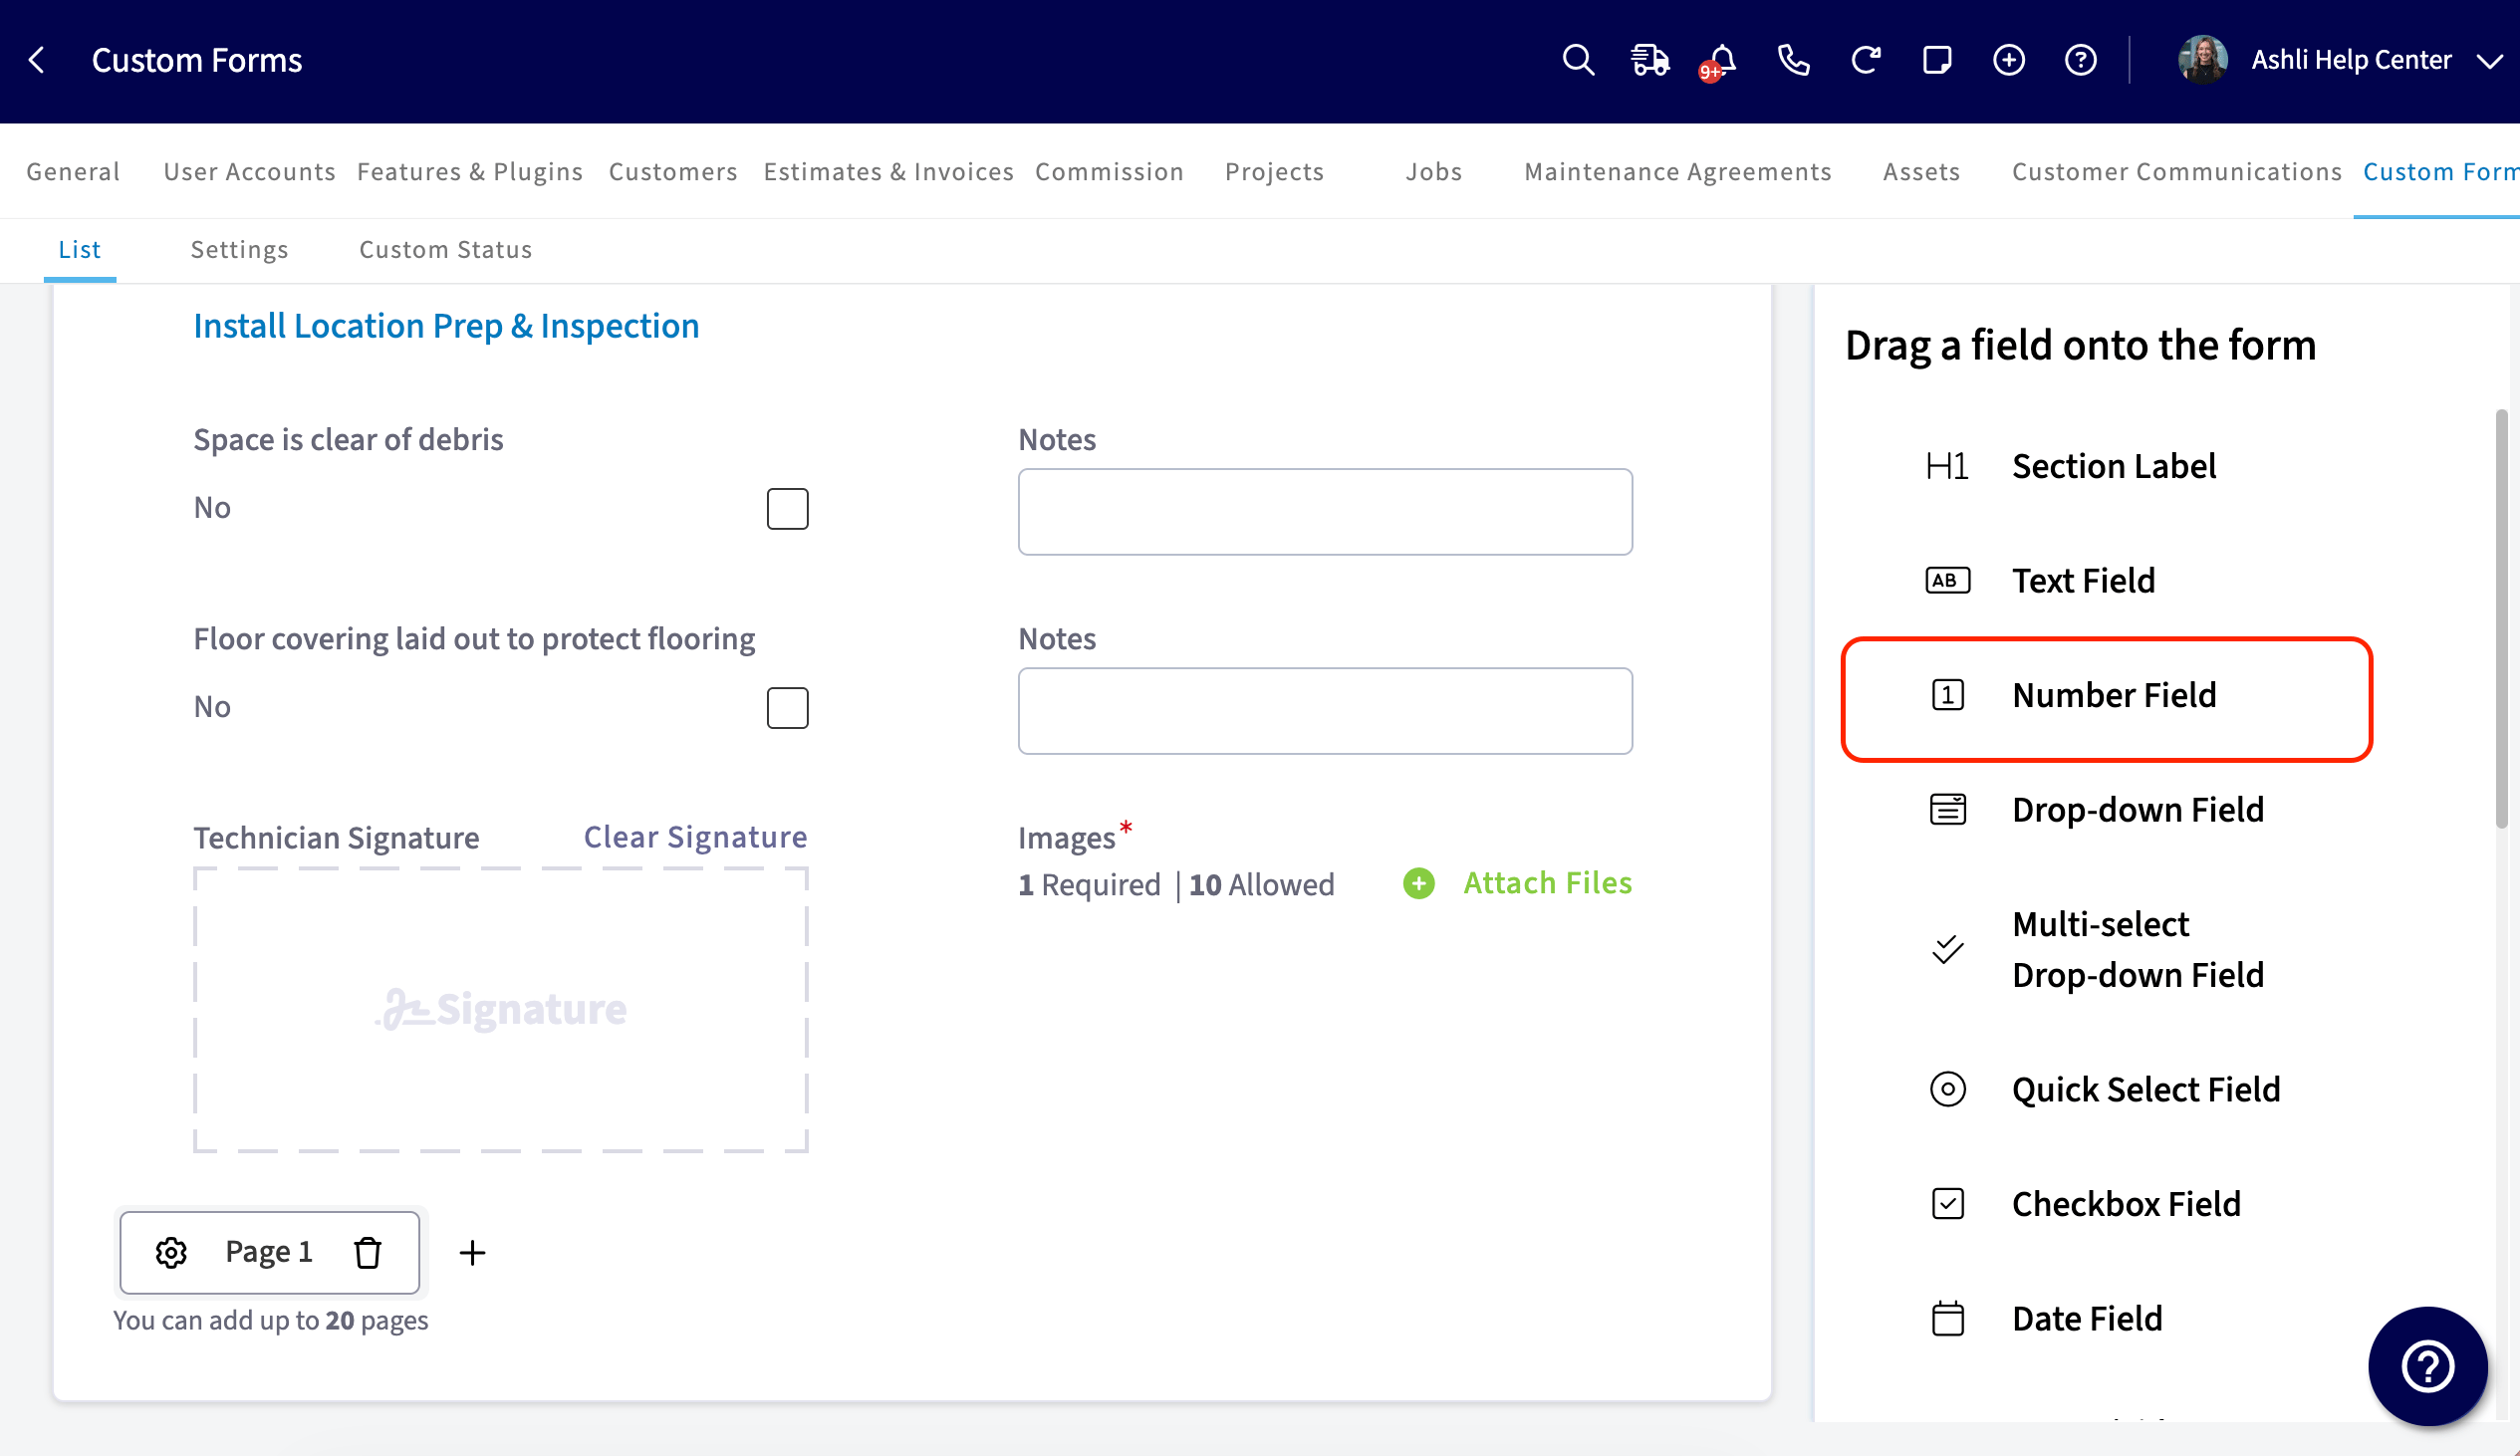
Select a Number Field on your form to open its settings.
-
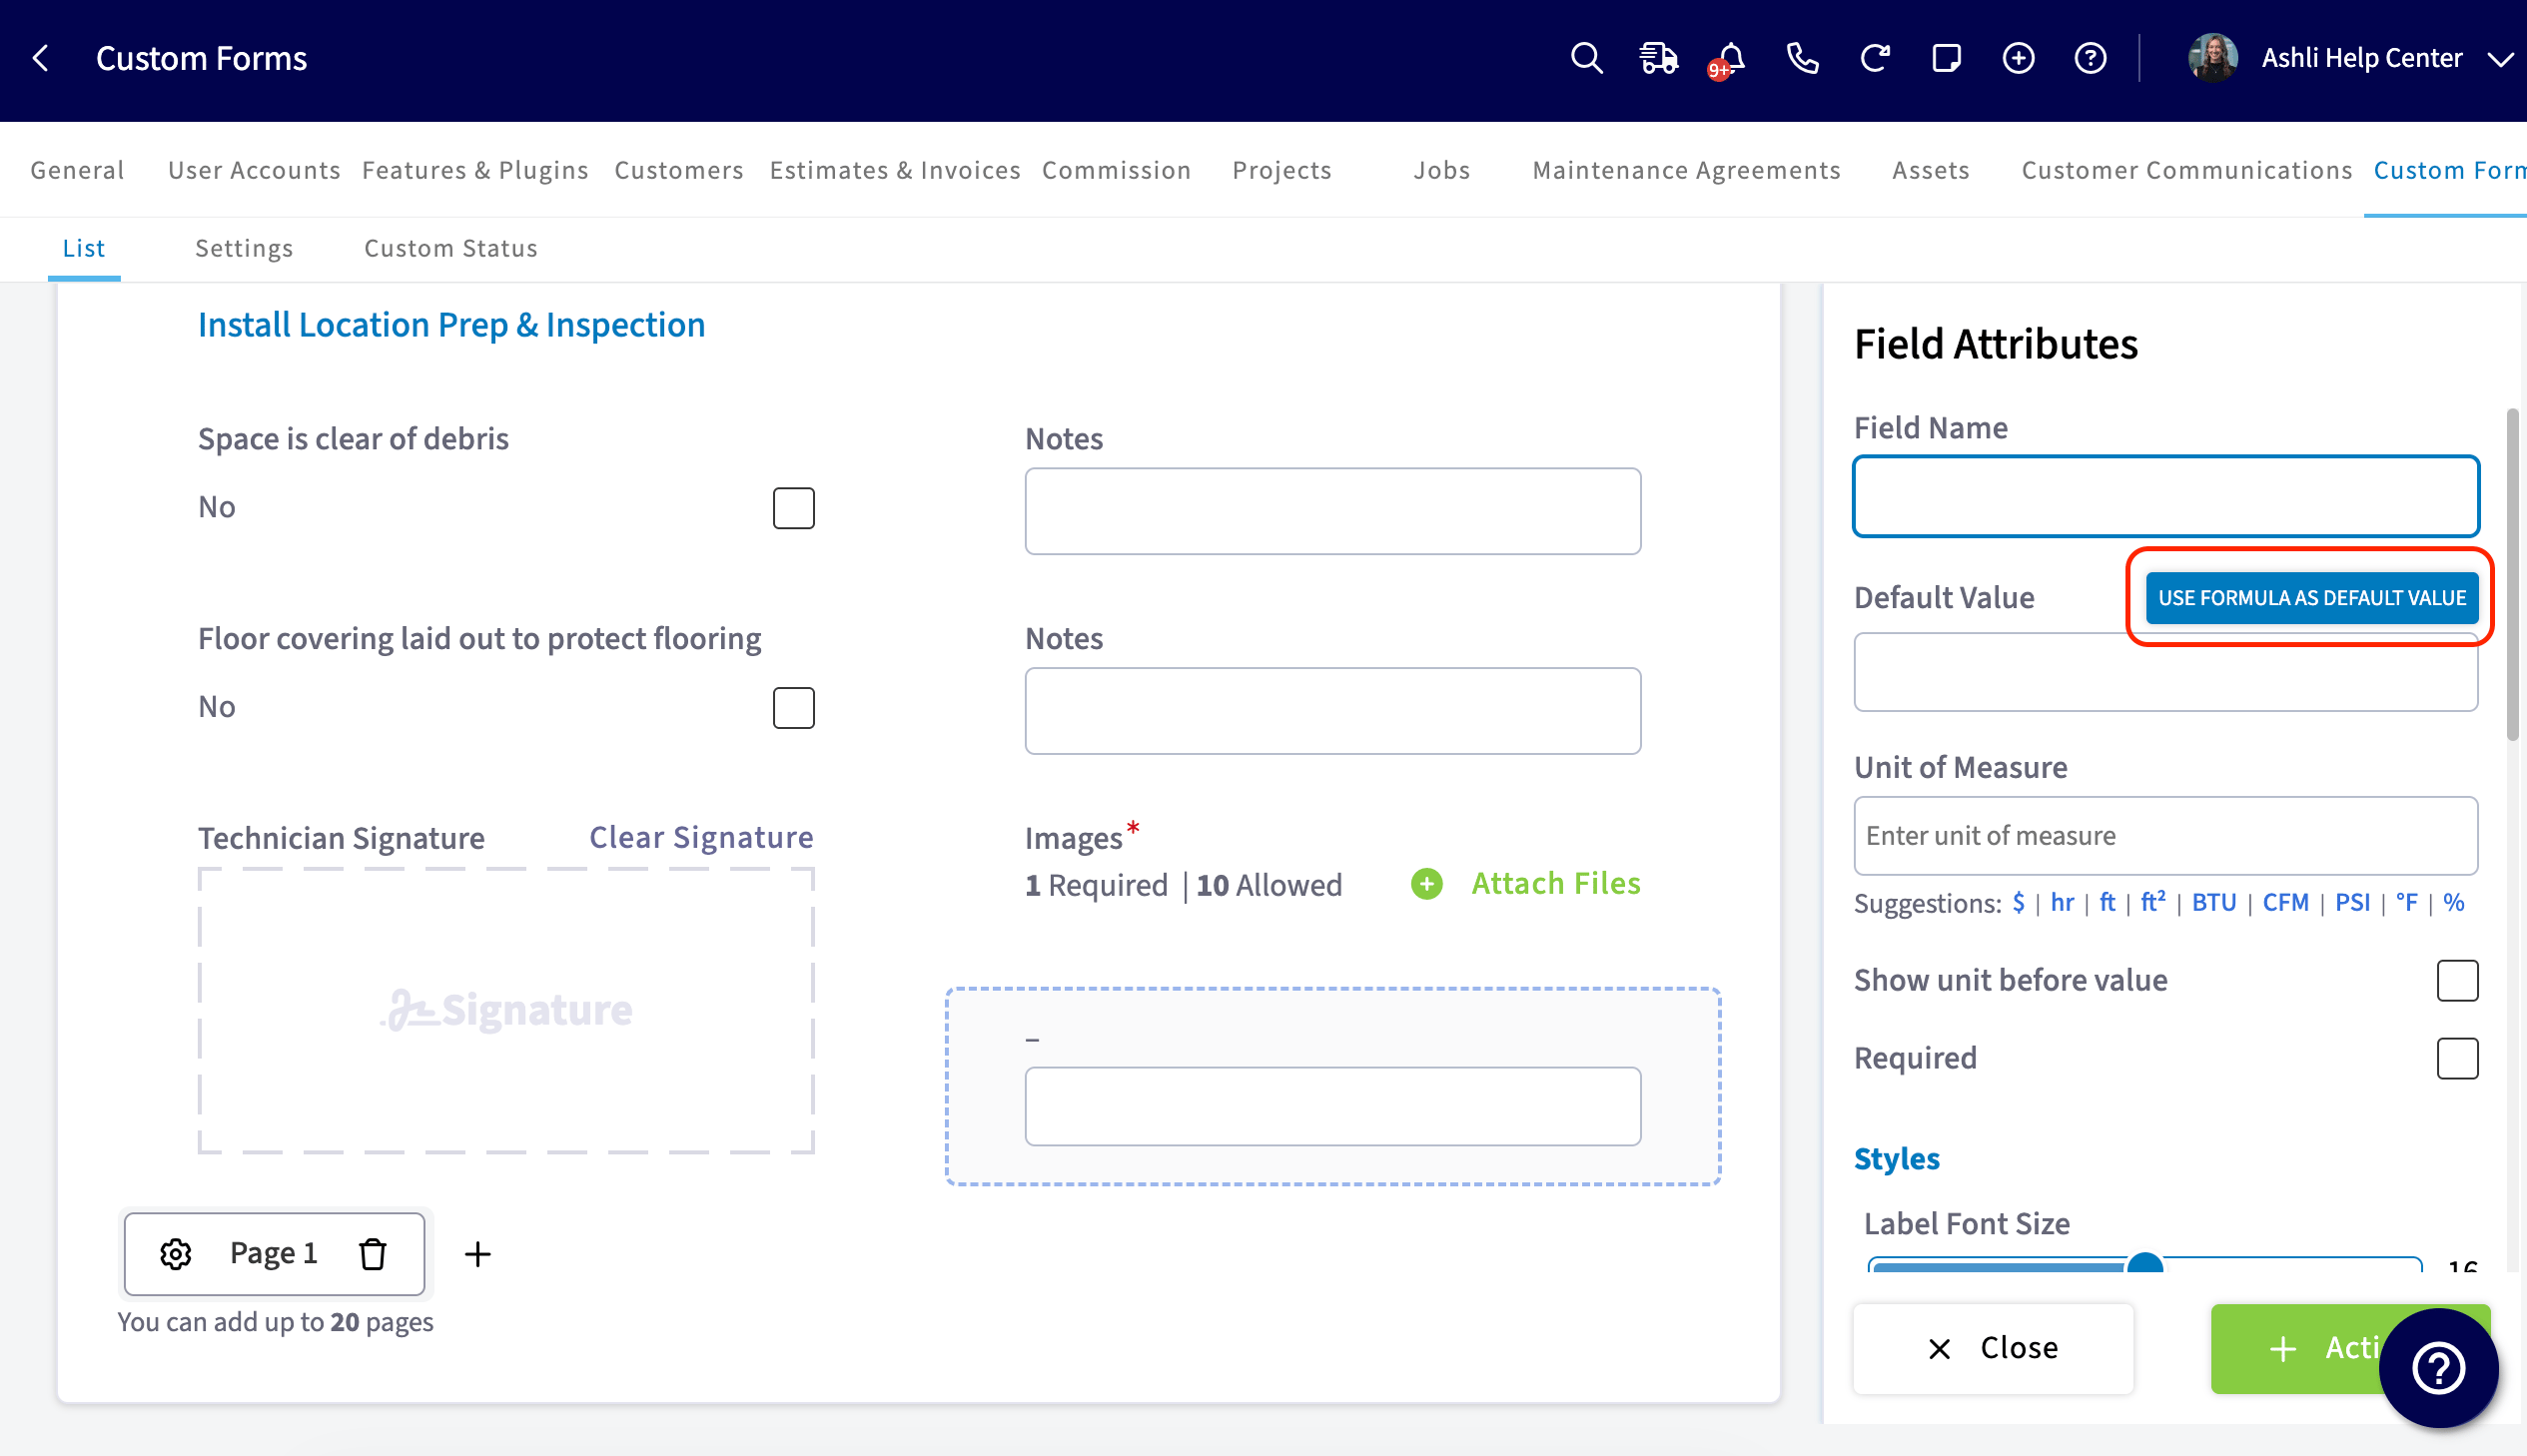
Select Use Formula as Default Value above the Default Value field.
-
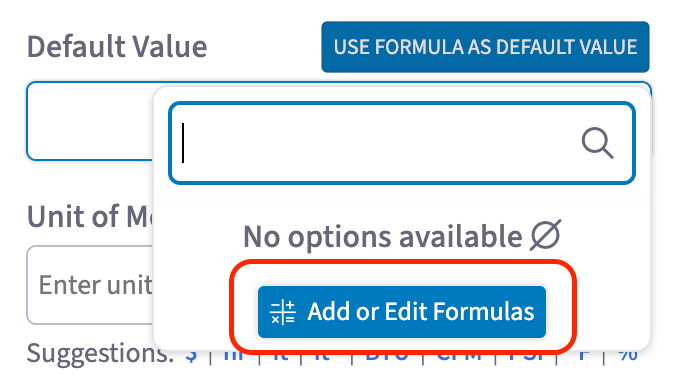
In the Default Value selector, choose an existing formula or select Add or Edit Formulas.
-
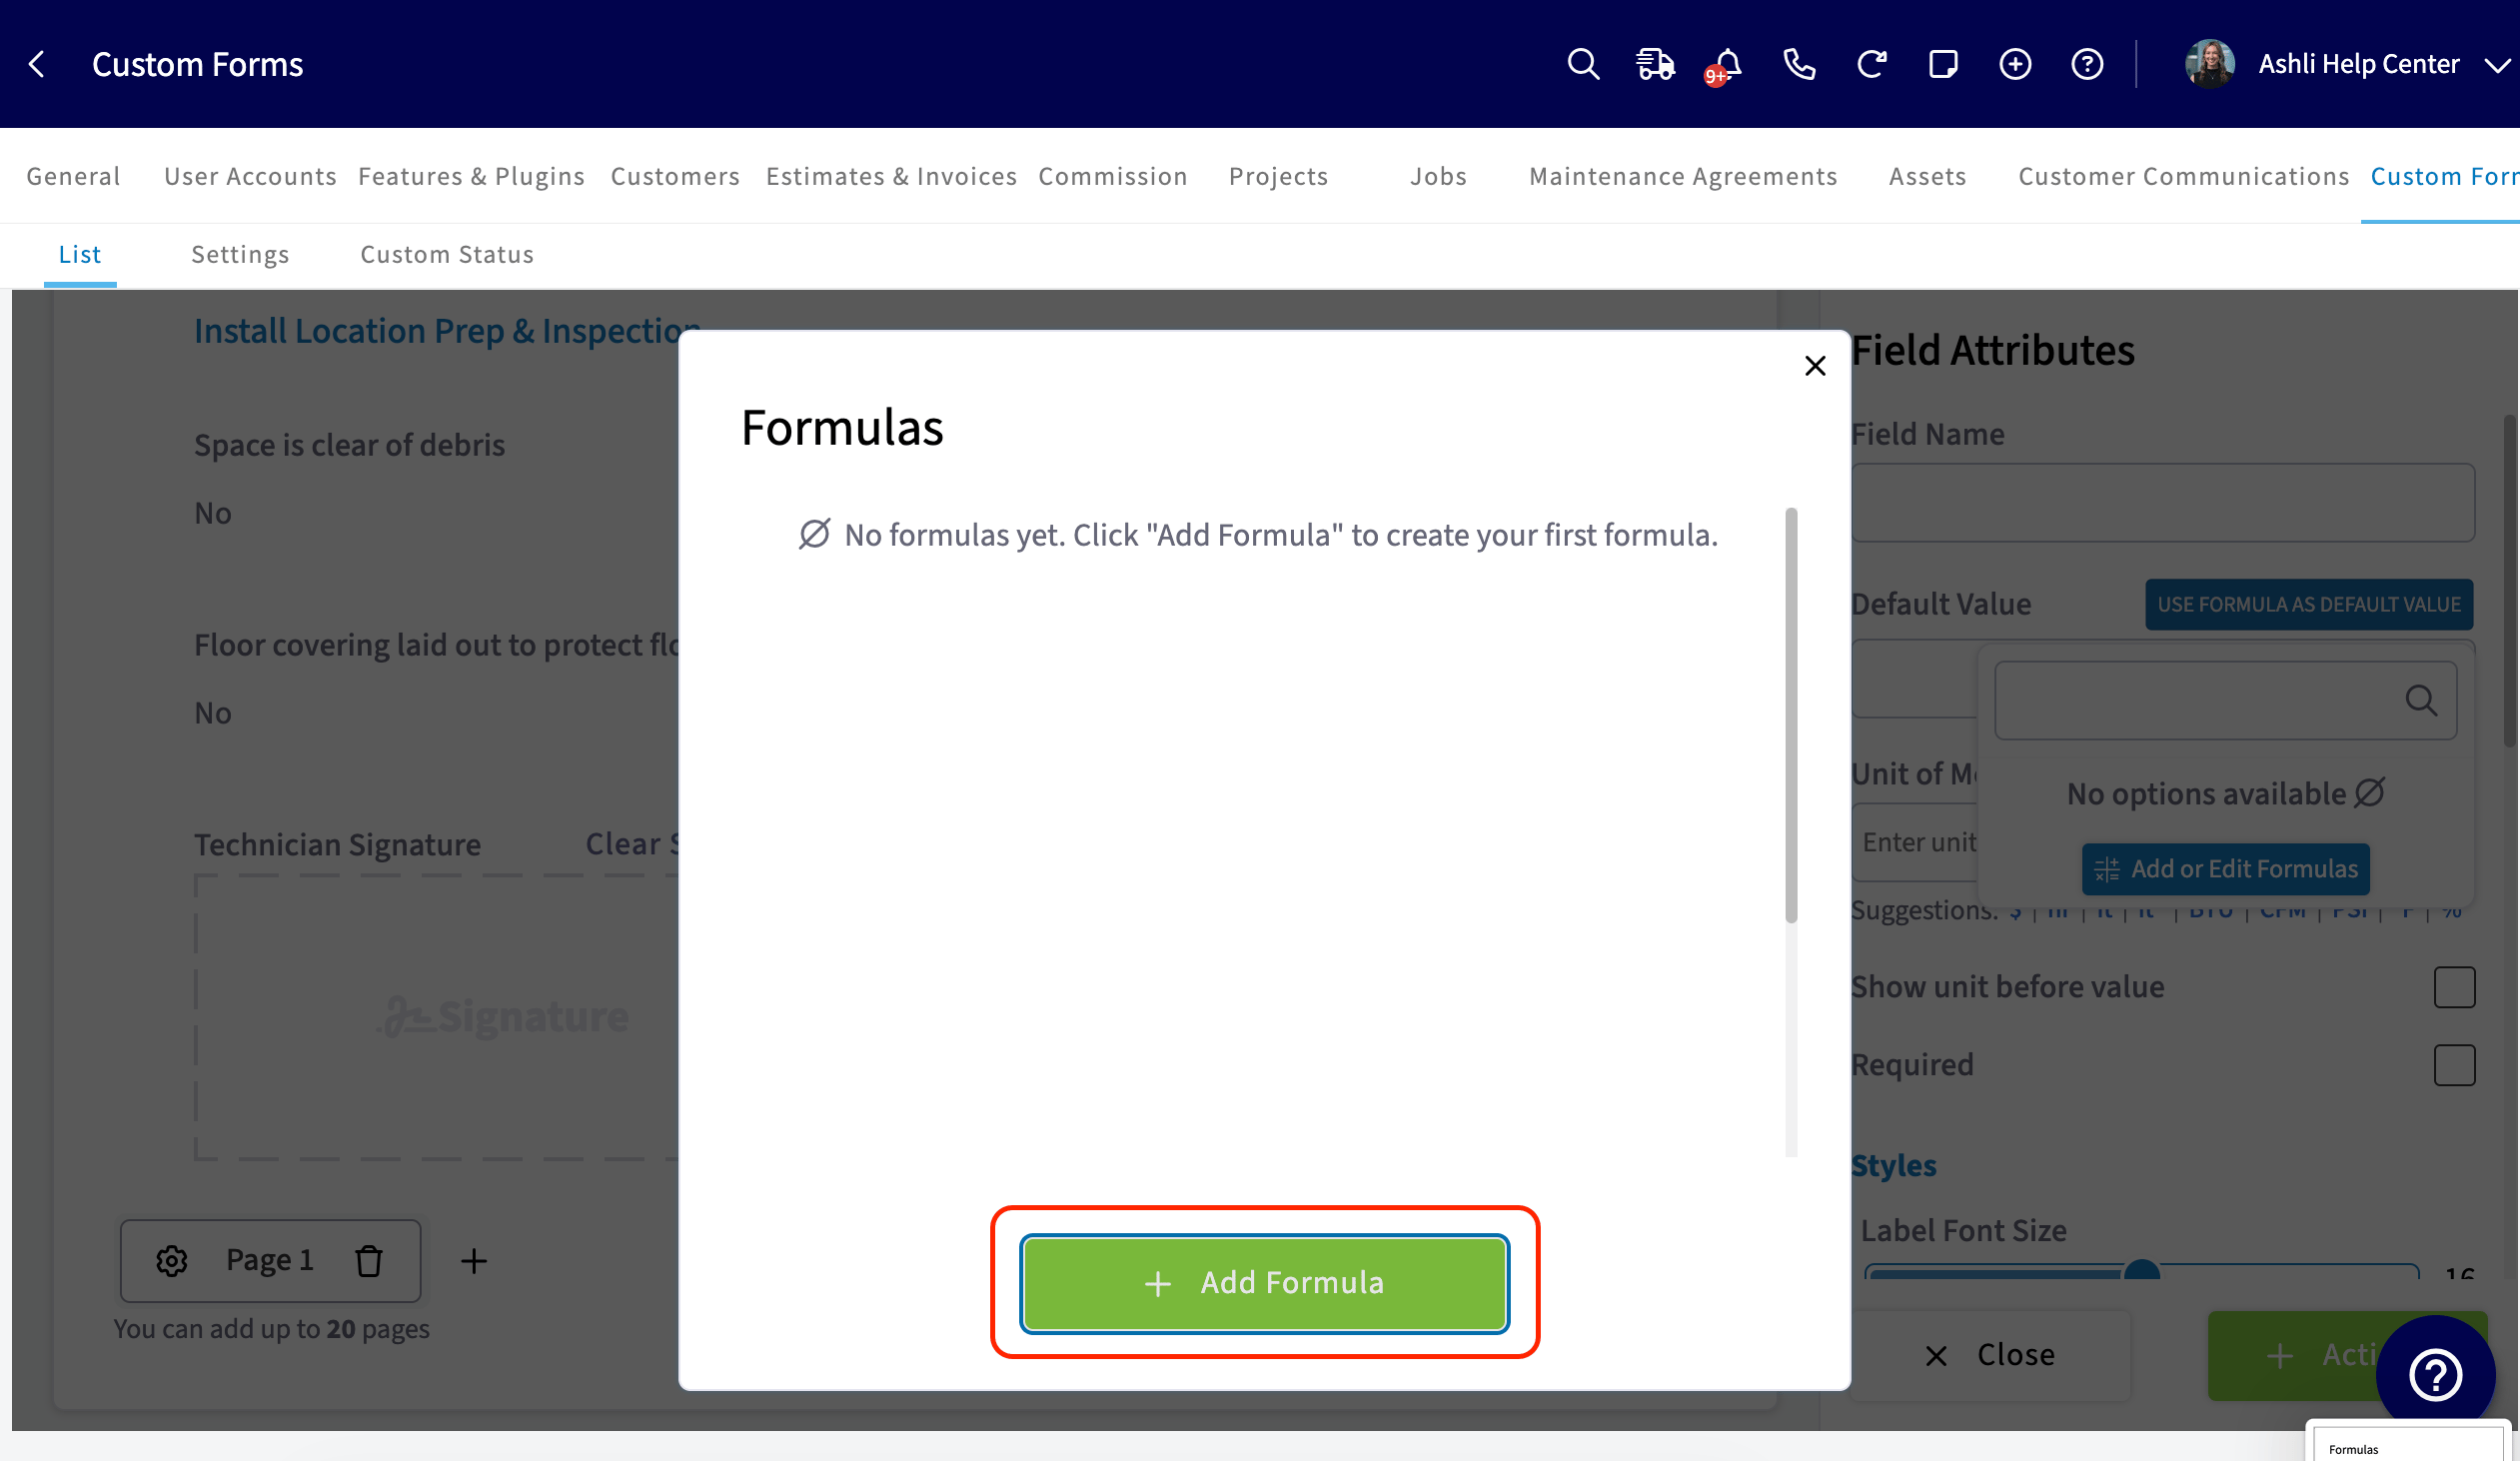
In the Formulas modal, select Add Formula and give the formula a name.
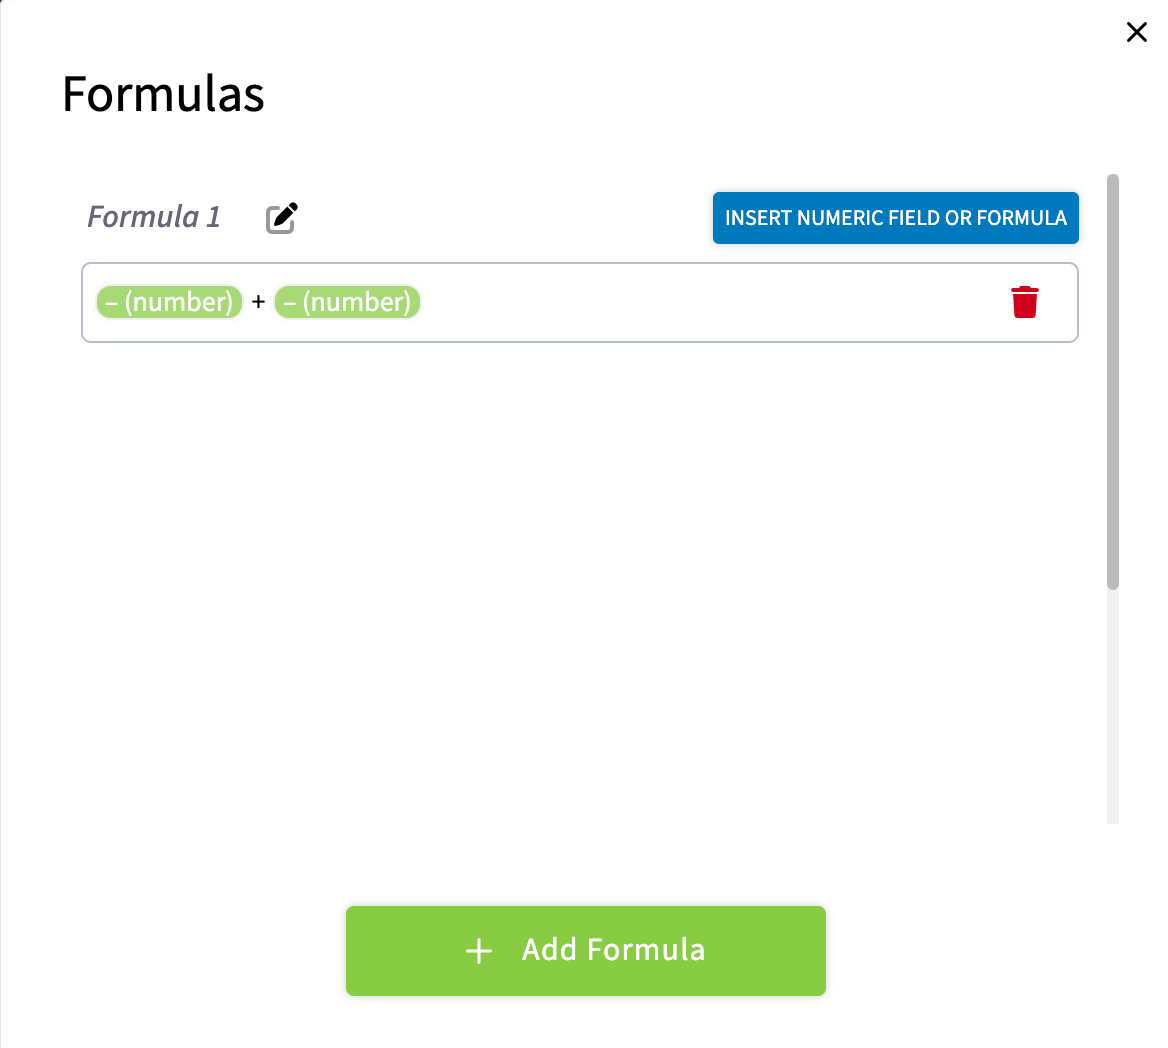
- Select Insert Numeric Field or Formula to bring other number fields or existing formulas in as variables.
-
Connect the variables with arithmetic operators — add, subtract, multiply, divide. You can multiply a field by a set constant, and a formula can reference another formula so calculations build on each other.
- Save the formula and close the modal.
- Select the formula as the Default Value for the field.
Conditional logic
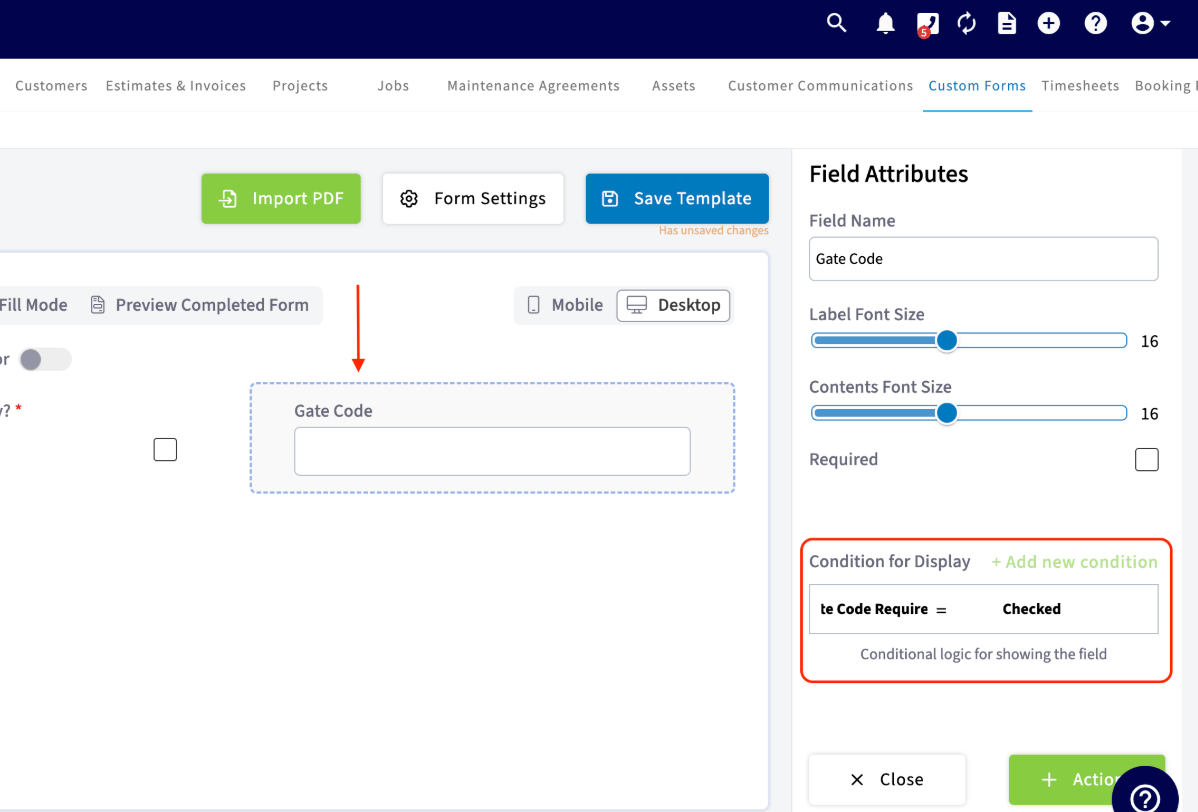
Conditional logic makes a field appear or change based on an answer given earlier in the form, so the form asks only for what applies. In the example below, a Gate Code field appears only when the Gate Code Required for Entry? checkbox is checked.- Select the field you want conditional logic to control — here, the Gate Code field.
-
Under Condition for Display, select Add new condition.
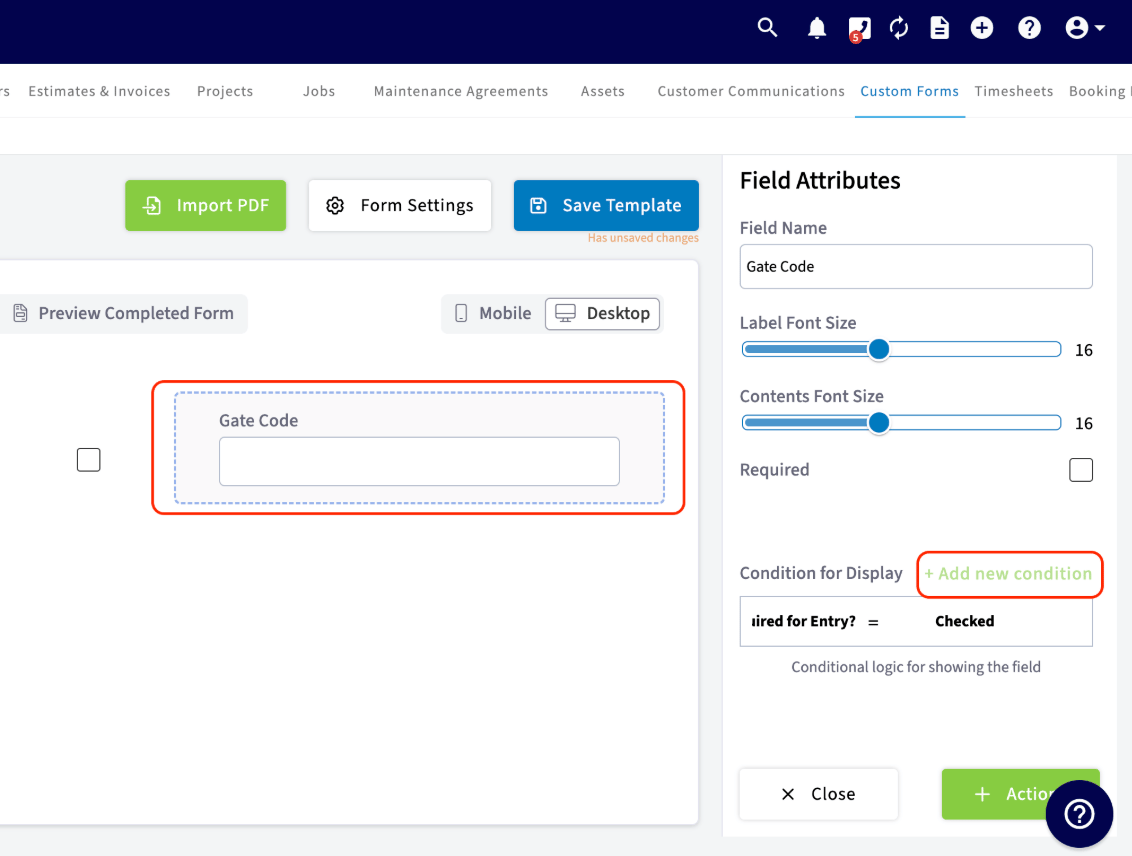
- Choose the field the condition depends on — here, Gate Code Required for Entry? — and the value to match. The values you can choose from depend on the type of field you picked.
- Set the condition. In this example it reads Gate Code Required for Entry? = Checked, so the Gate Code field displays for the person filling out the form once that box is checked.
Notes & limitations
- A custom form holds a maximum of 20 pages. The web app paginates every 10 pages; the mobile app paginates every 4 pages. See How to Create a Custom Form.
- Image/Video fields accept jpg, pdf, mp4, and png files, and each field allows between 1 and 10 files.
- Quick Select holds up to 5 options.
- A Number Field with a formula is read-only while someone fills out the form.
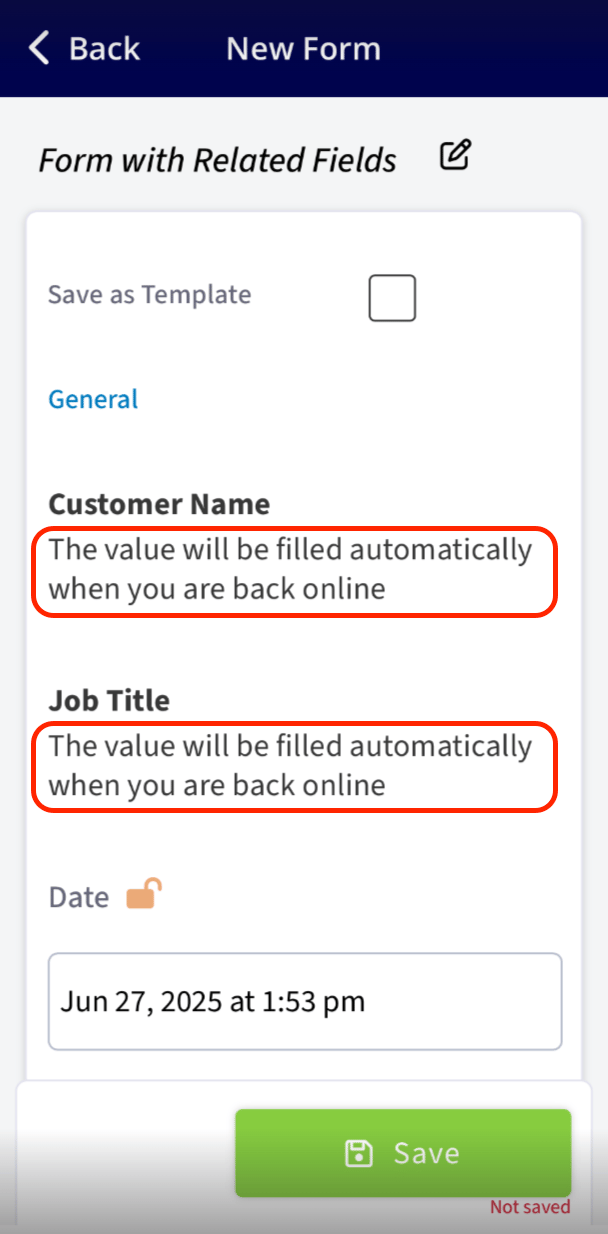
- In Offline Mode, related-record fields do not populate on their own. The field shows the message The value will be filled automatically when you are back online, and the value fills in once the device reconnects. See Custom Forms Offline Mode Details.