
Who uses this: Admins and Founding Users have full access; Team Manager and Service Agent access to the item list and its inventory hubs is set per user with the Ability to View Item List permission in Company Settings > User Accounts. Availability: All regions.Serialized inventory tracks each individual unit by a unique serial number instead of counting units as an interchangeable quantity. Generic quantity tracking tells you how many air conditioners are on the shelf; serialized inventory tells you which specific air conditioner went out on which invoice, which gives you detailed monitoring and traceability for every unit you hold. Serialized inventory applies only to line items marked Product - Inventory, never to a Service item or a Product - Non Inventory item.
Overview
Serialized inventory turns one tracked item into a list of individually numbered units. You import or create the serial numbers under the inventory hub that holds them, add a specific serial to an invoice when a tech uses that unit on a job, and — for equipment you install and service later — create an asset record from the invoice line. Once the invoice is paid, that serial number is removed from your inventory.Video walkthrough
Watch the serialized inventory walkthrough for a run-through of the feature. The written steps below cover every stage on their own.Before you begin
- Confirm the item type. Serialized inventory can only be applied to a Product - Inventory line item, not to a Service or a Product - Non Inventory item. See Setting Up Item List & Inventory.
- Set up your inventory hubs. Each serial number is added under a hub, so the hubs where these units live need to exist first. See Inventory Hubs Overview.
- Have your serial numbers ready. To bring in a large batch at once, use the mass import tool instead of adding units one at a time. See How to Import Serialized Inventory.
How it works
Serialized inventory follows one path: load the serial numbers onto a Product - Inventory item, attach a specific serial to the invoice for the job it went out on, and turn that serial into an asset record when the unit is equipment you will service later. The sections below cover each stage.Import serialized inventory in bulk
The mass import tool loads serialized inventory items into FieldPulse in one upload rather than one at a time, and the imported units are then available when you create estimates and invoices. Follow How to Import Serialized Inventory to prepare and upload your file.Create serialized inventory
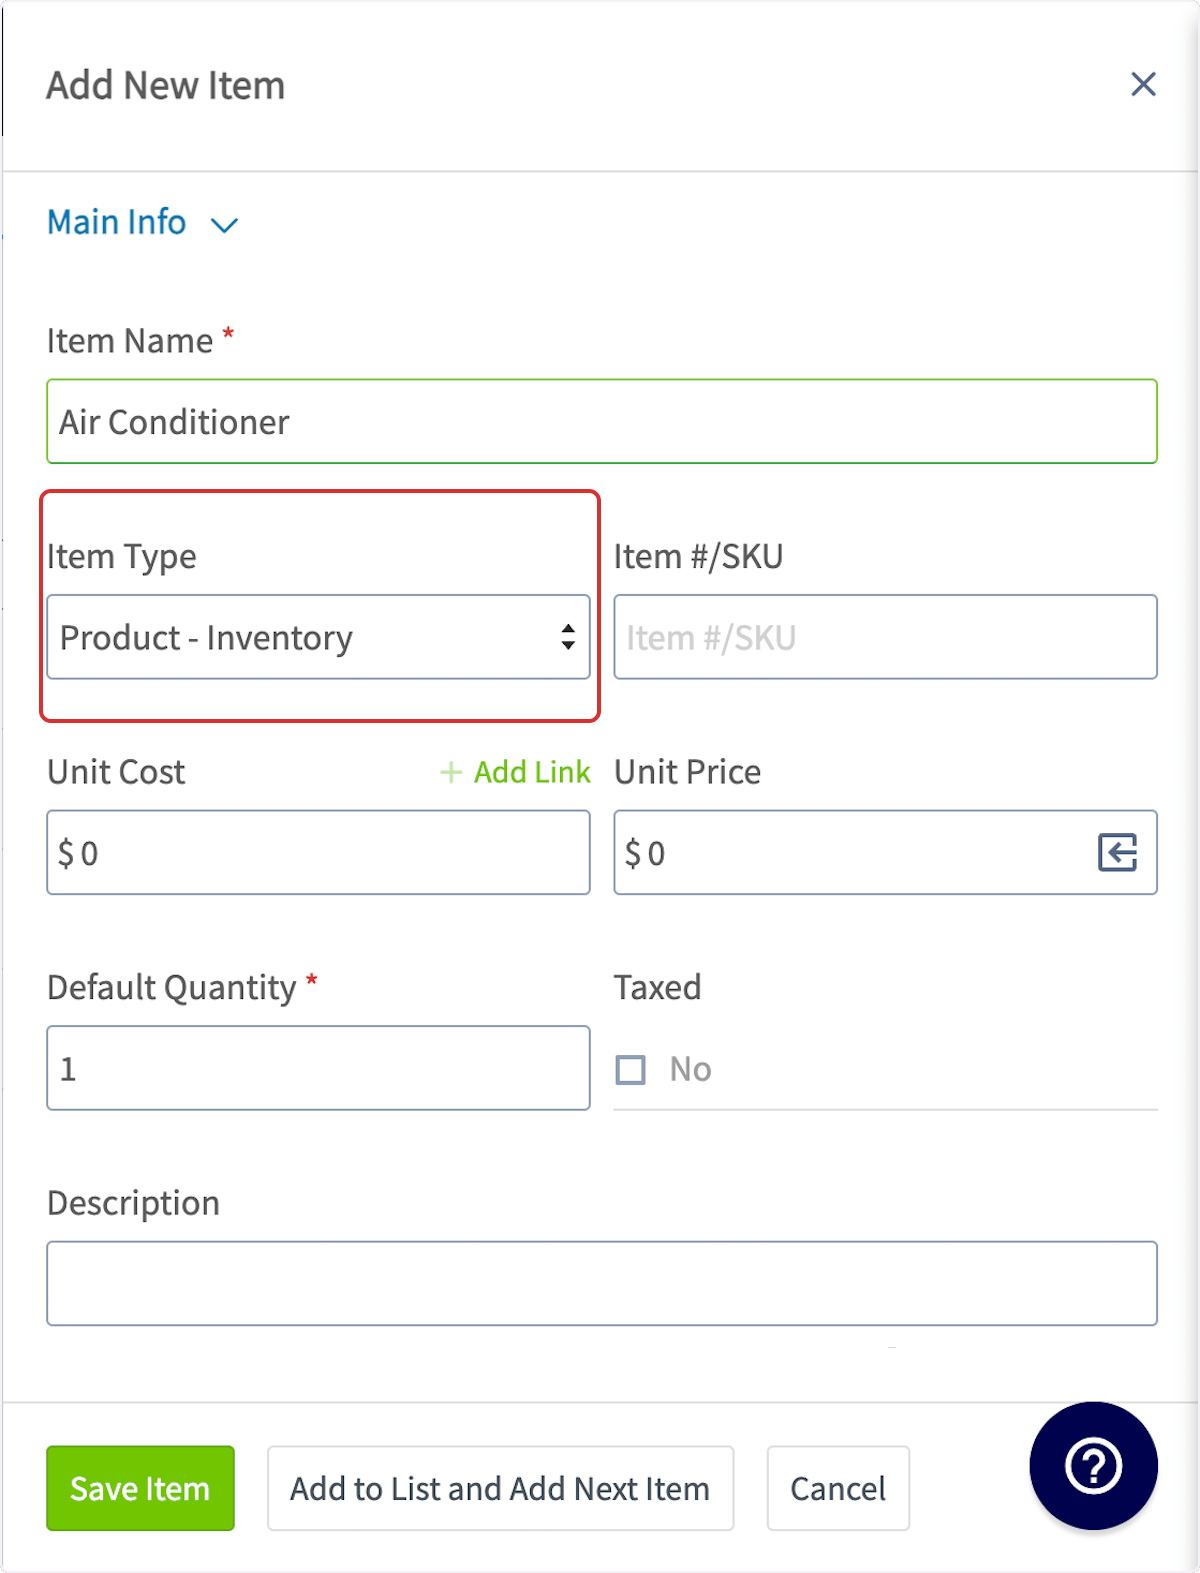
- Create a new line item, or open an existing one to edit it.
-
Set the Item Type to Product - Inventory.
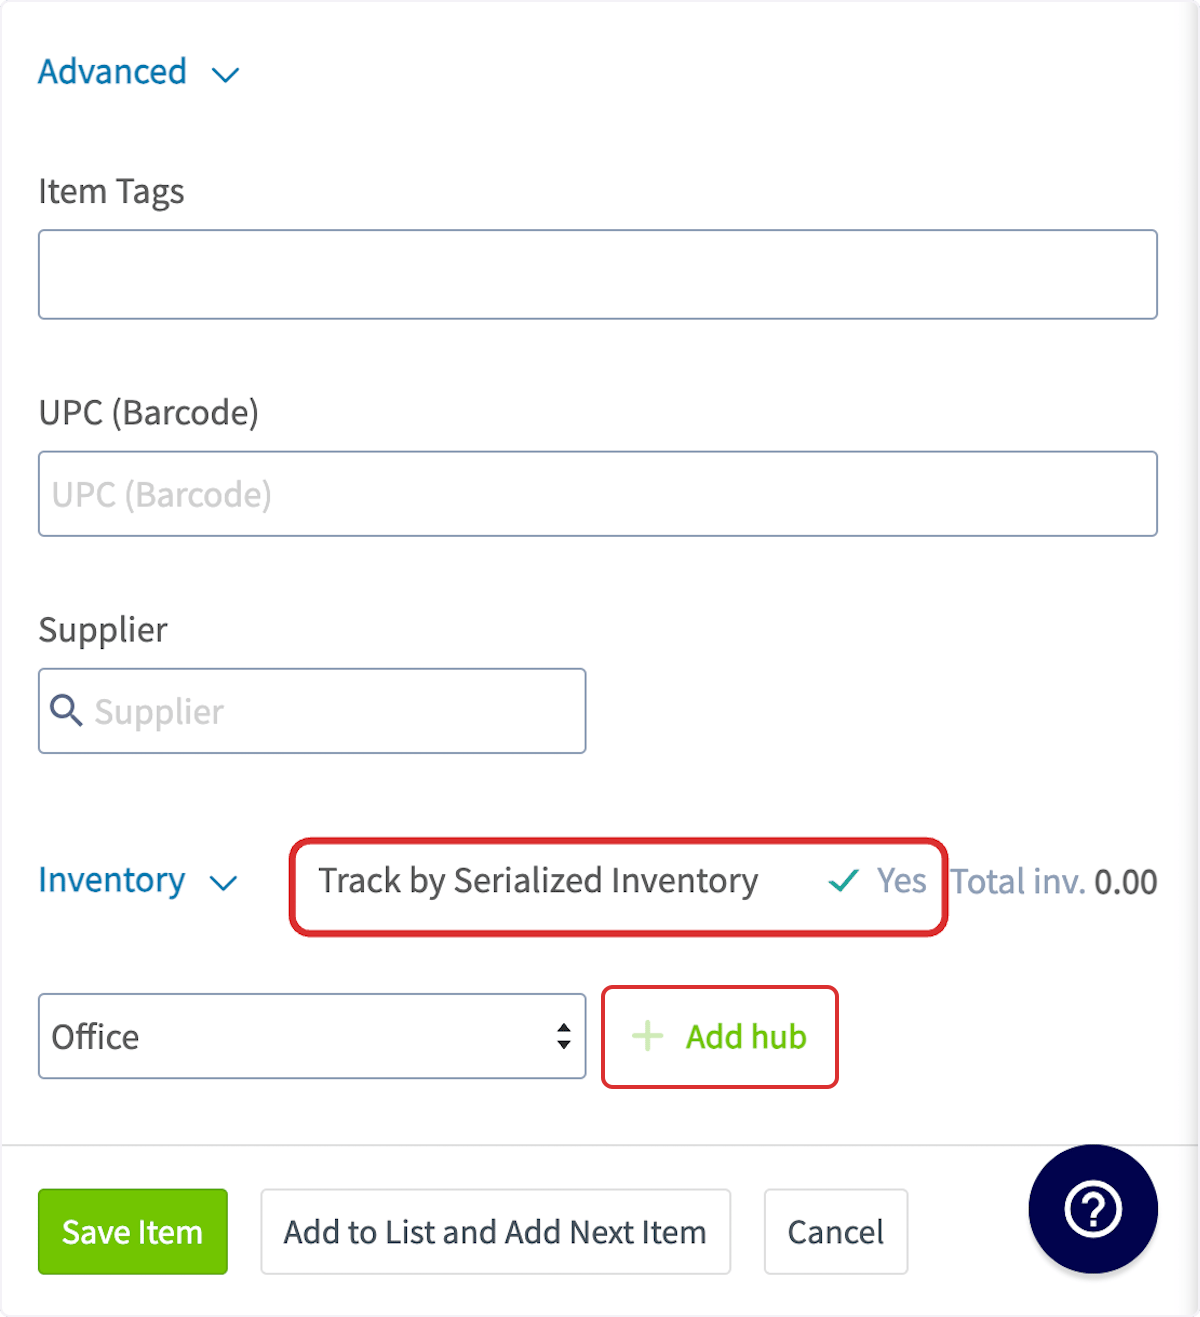
- Scroll down to Inventory and turn Track by Serialized Inventory on.
-
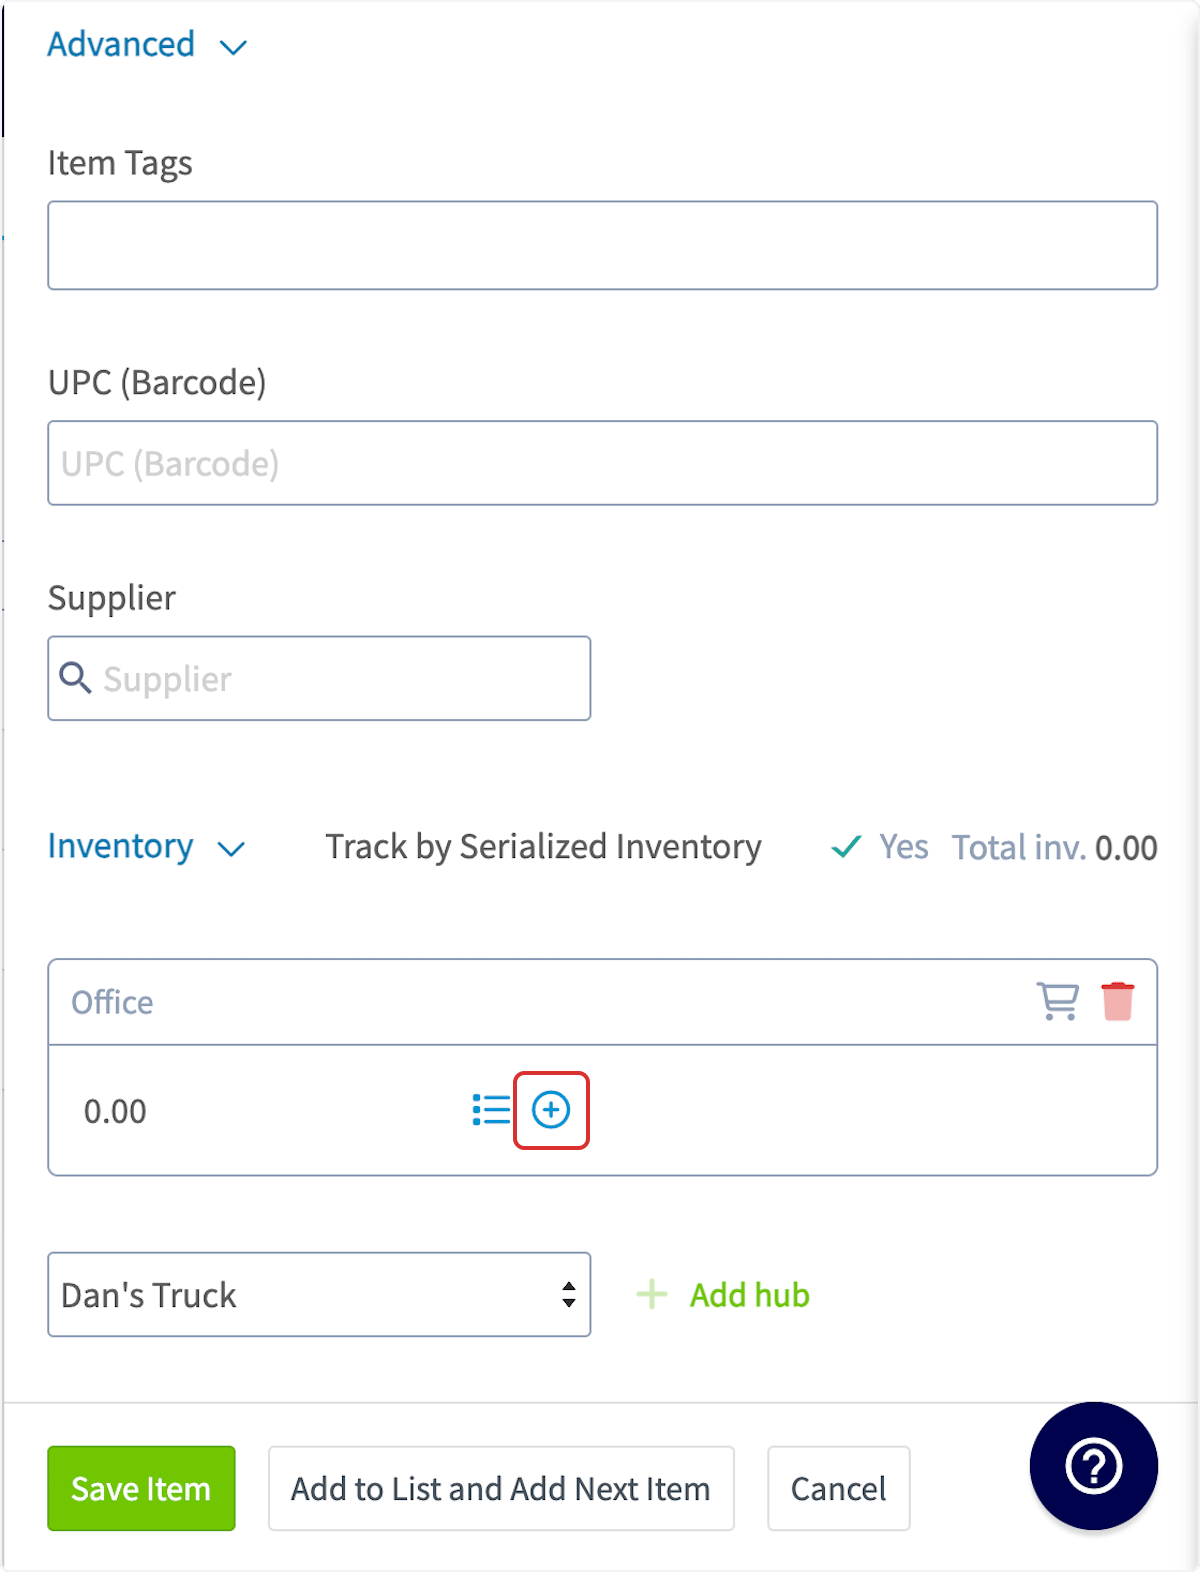
Add the hub or hubs where the units are stored with Add hub. You can use a single hub or multiple hubs.
-
Select the plus icon next to the name of the hub where the unit is located.
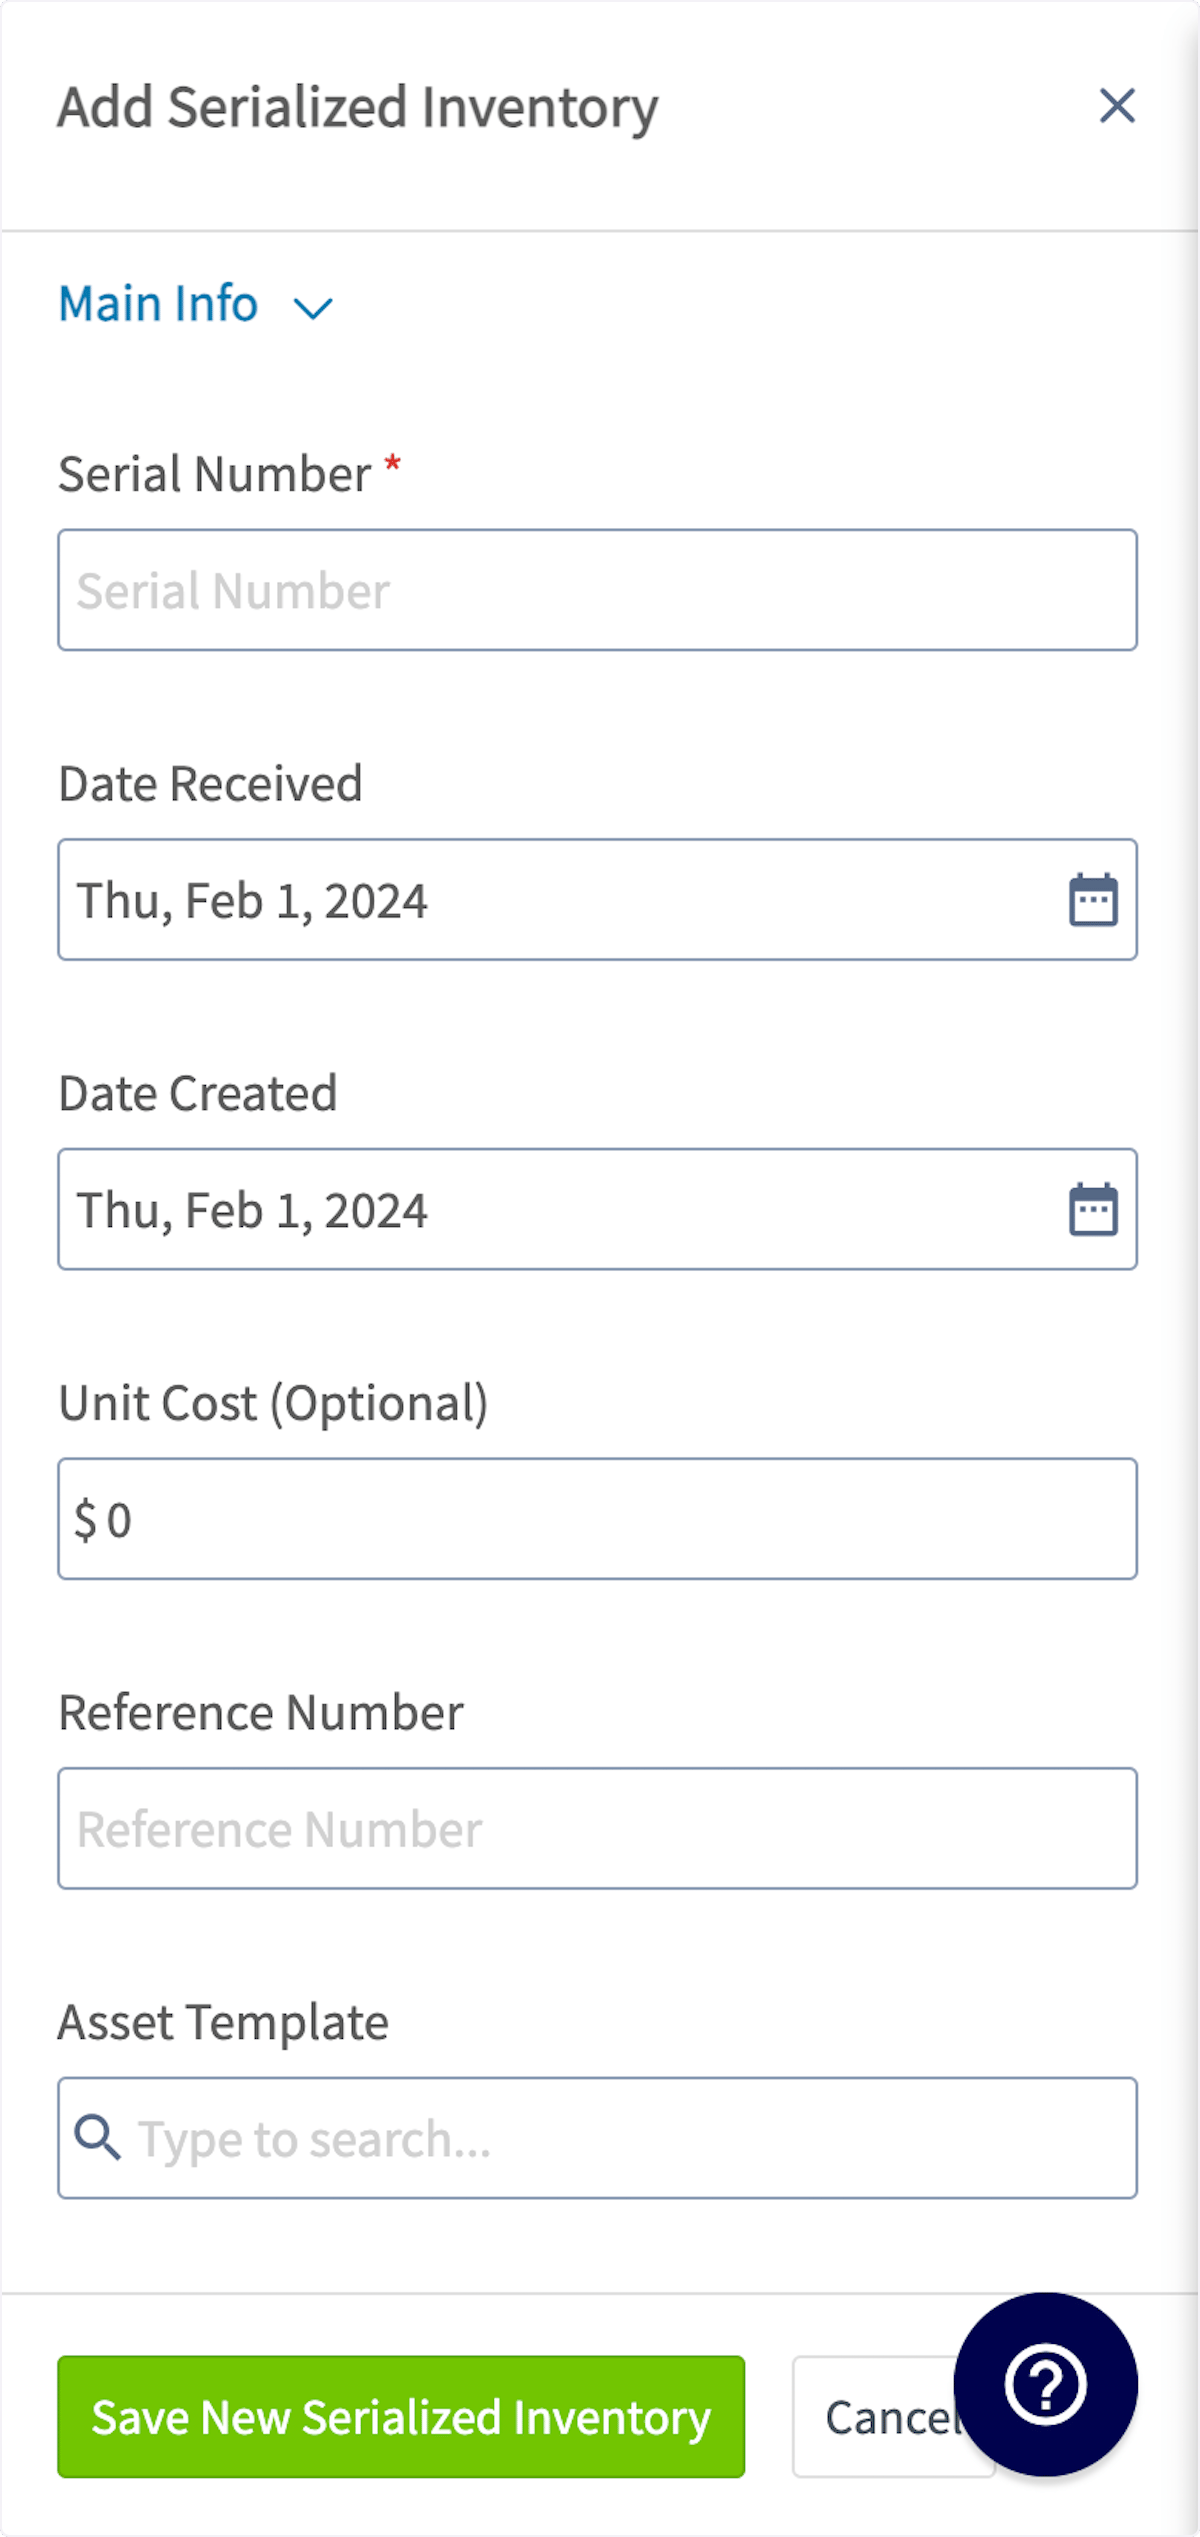
- Enter the Serial Number, which is required. You can also add the Date Received, Unit Cost, Reference Number, or an Asset Template.
-
Select Save New Serialized Inventory.
- To add another unit, select the plus icon again and enter the next serial number.
- Select Save to save the line item.
Add serialized inventory to an invoice
-
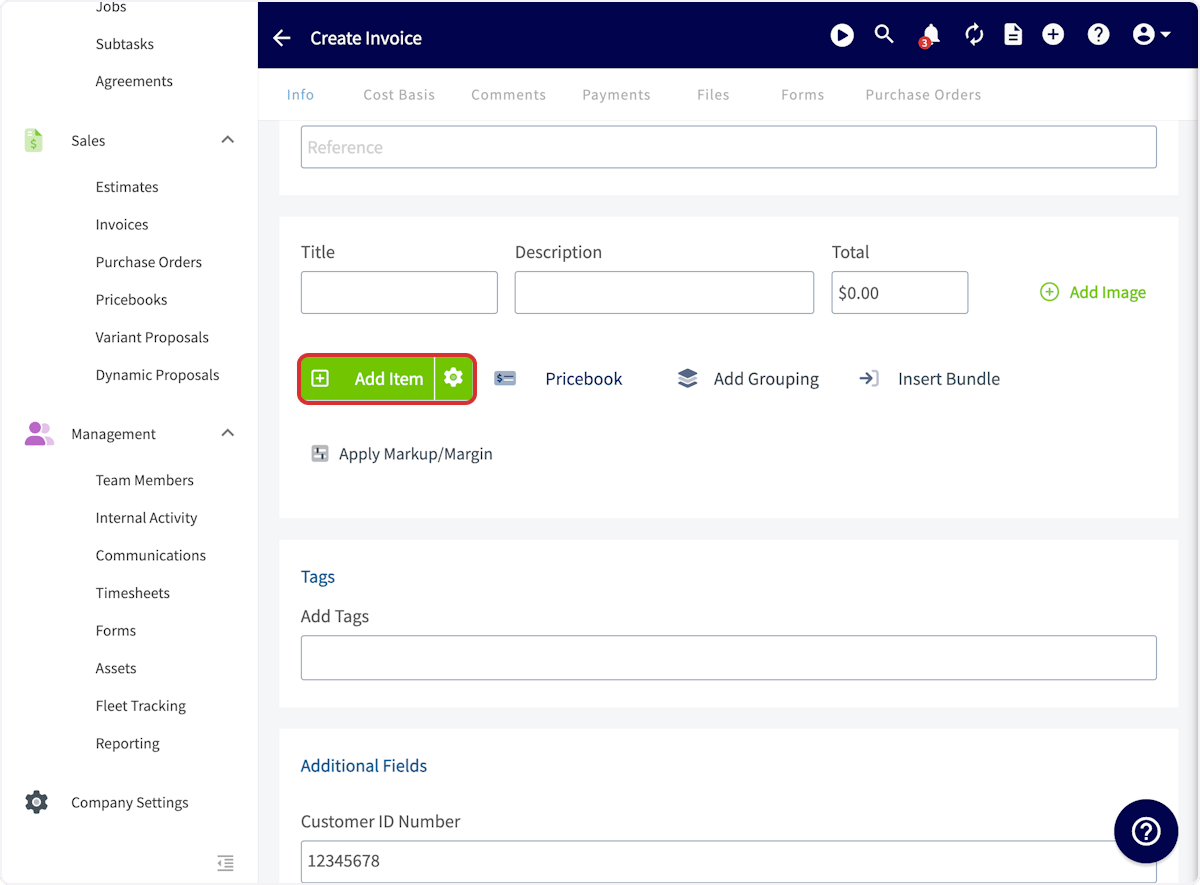
Create a new invoice, then select Add Item.
-
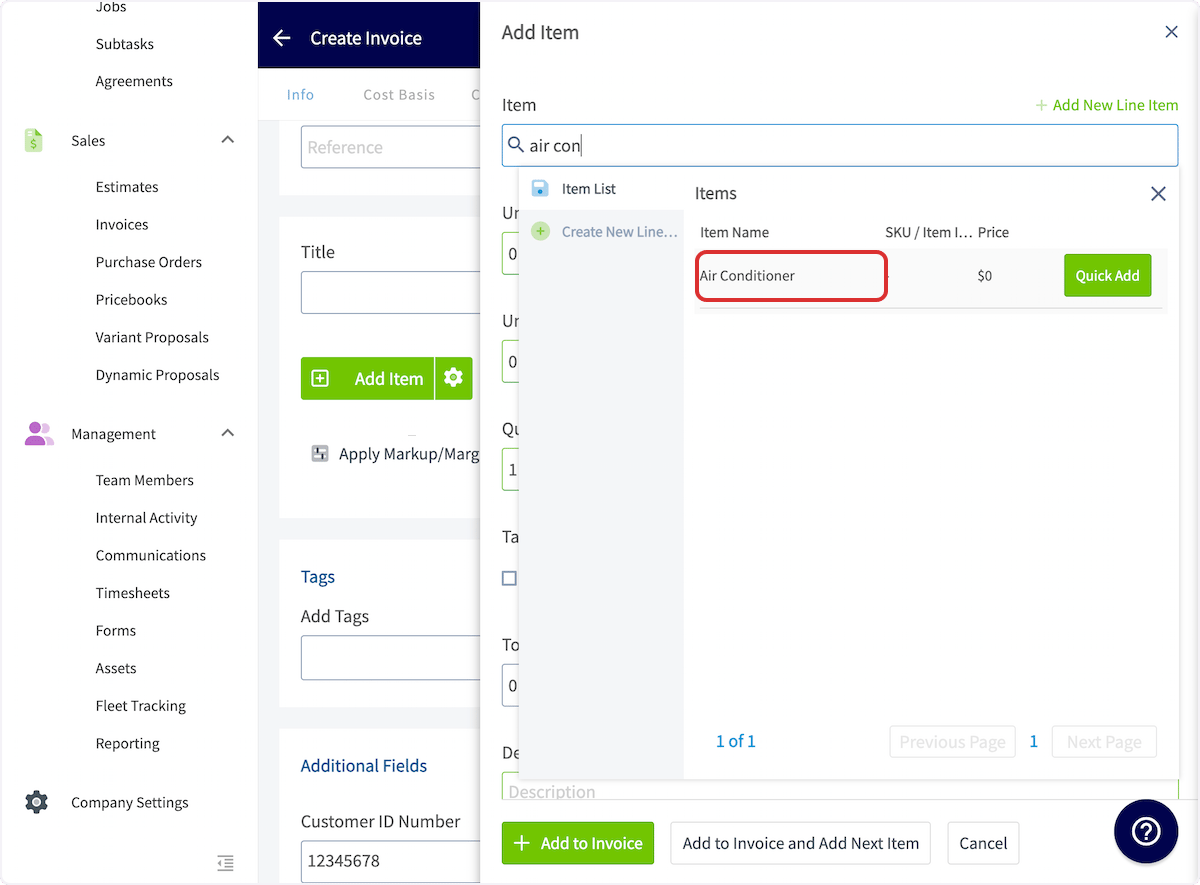
Search for and select the serialized inventory item.
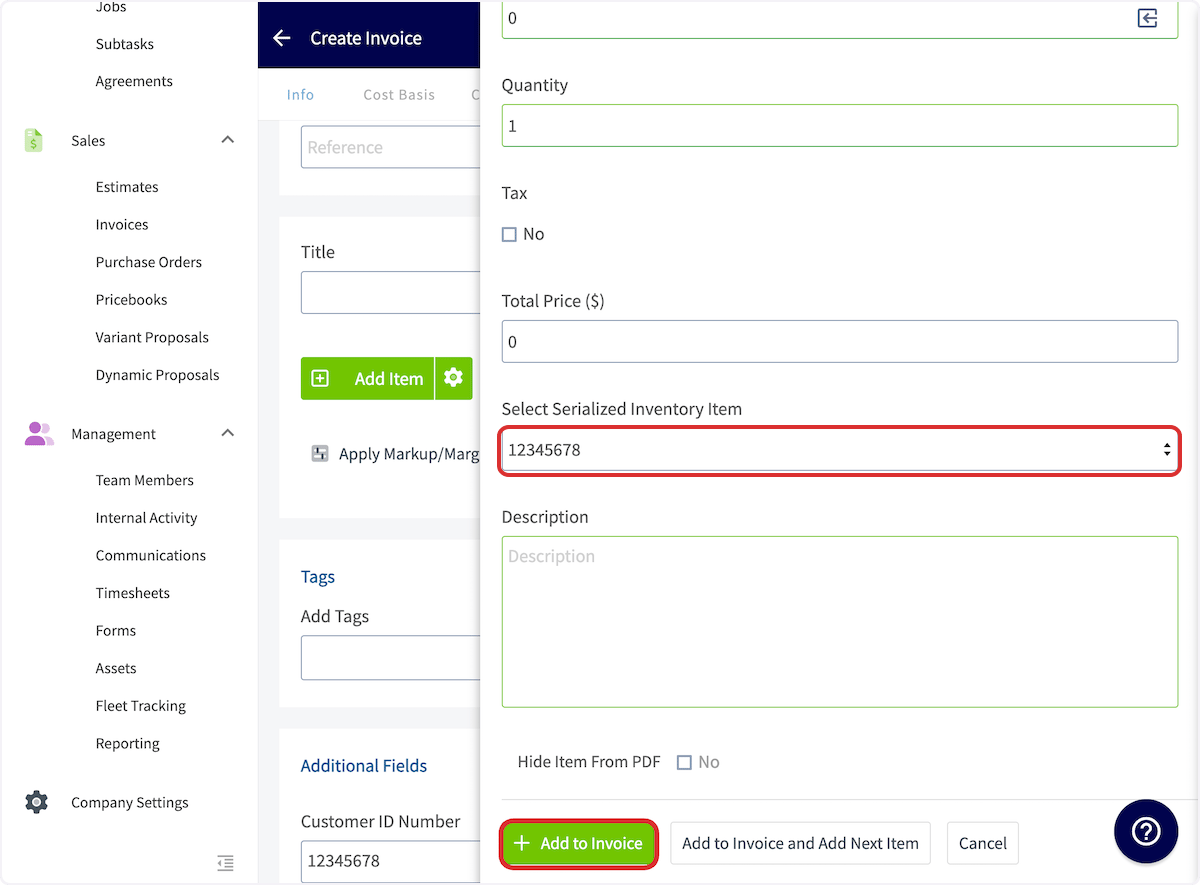
- Scroll down to the Select Serialized Inventory Item field and select the serial number of the unit used on the job.
-
Select Add to Invoice.
Create an asset from a serialized inventory item
After you add a serialized inventory item to an invoice, you can create an asset record directly from the invoice without navigating away.- Open the invoice that contains the serialized inventory item.
- Scroll down to the serialized item you need to create an asset from.
-
Select Create Asset next to the line item to generate an asset record from that serialized item.
