Overview
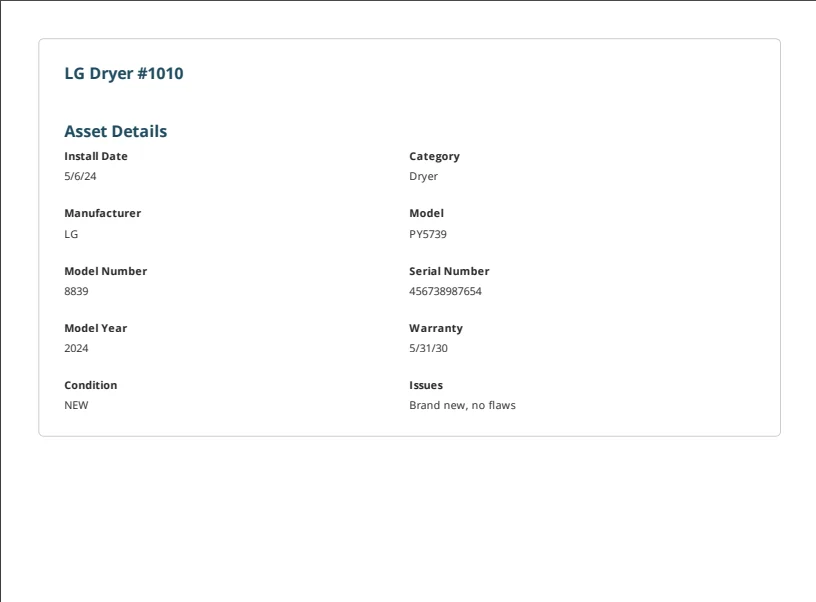
With our Asset Management feature, you’ll be able to track all of your information on customers’ assets for maintenance agreements. Record and store details like model name, installation date, warranty information, and more, as well as add photos, comments, and files for internal use. But it doesn’t stop at the customer. You can also use this feature to track the equipment used by your business with the same level of detail as customer assets, and manage it directly through the FieldPulse app.Enabling Asset Management
To begin using Asset Management, you’ll first need to enable it. Start by clicking on Company Settings and selecting Features & Plugins. Navigate to Assets and select Enable. Now you’re ready to begin creating and tracking your assets!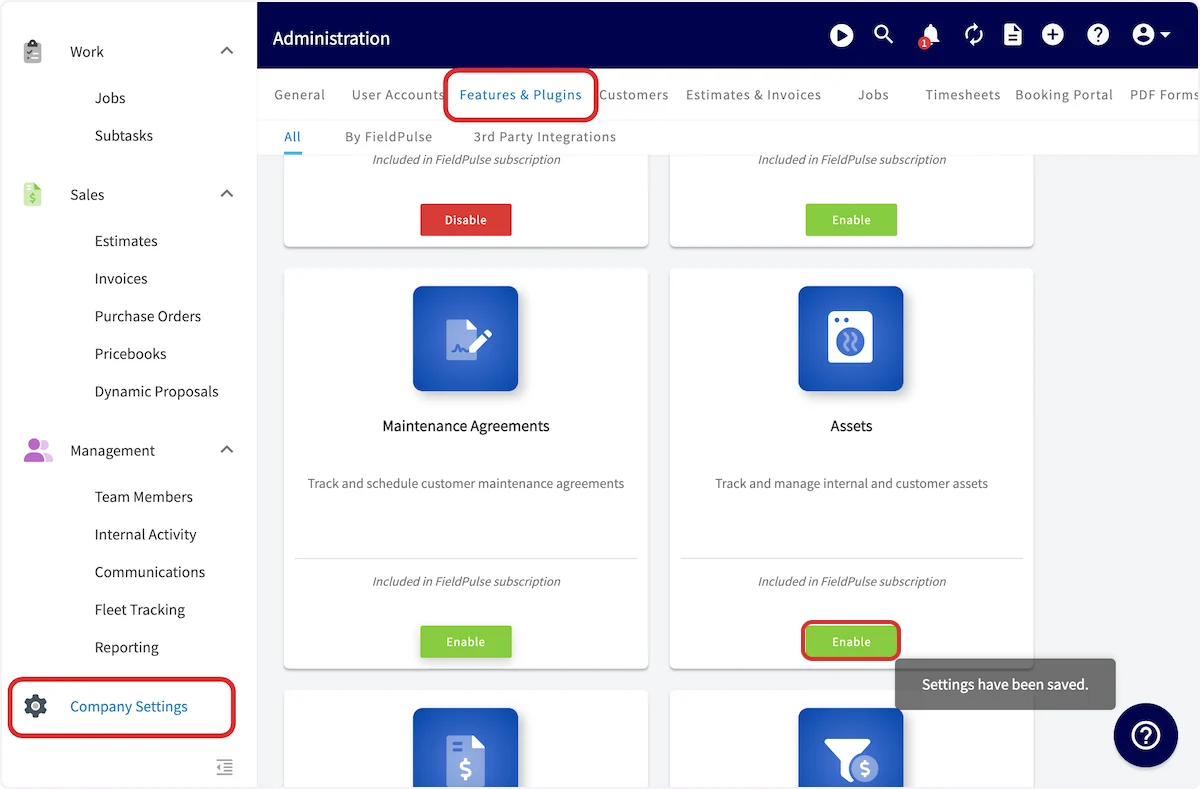
Creating an Asset
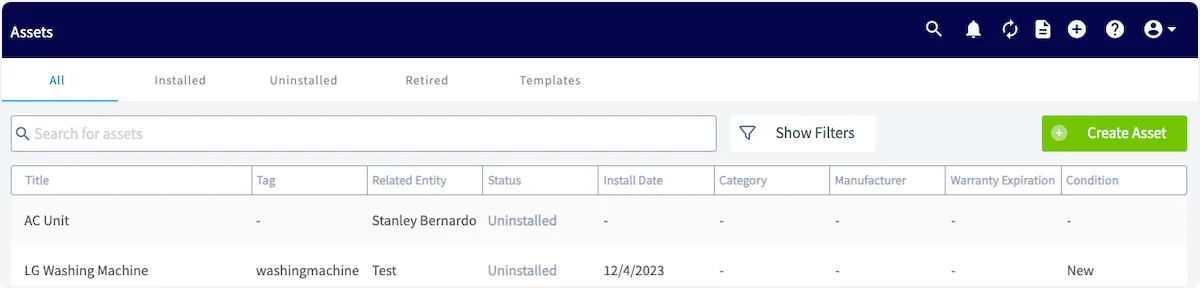
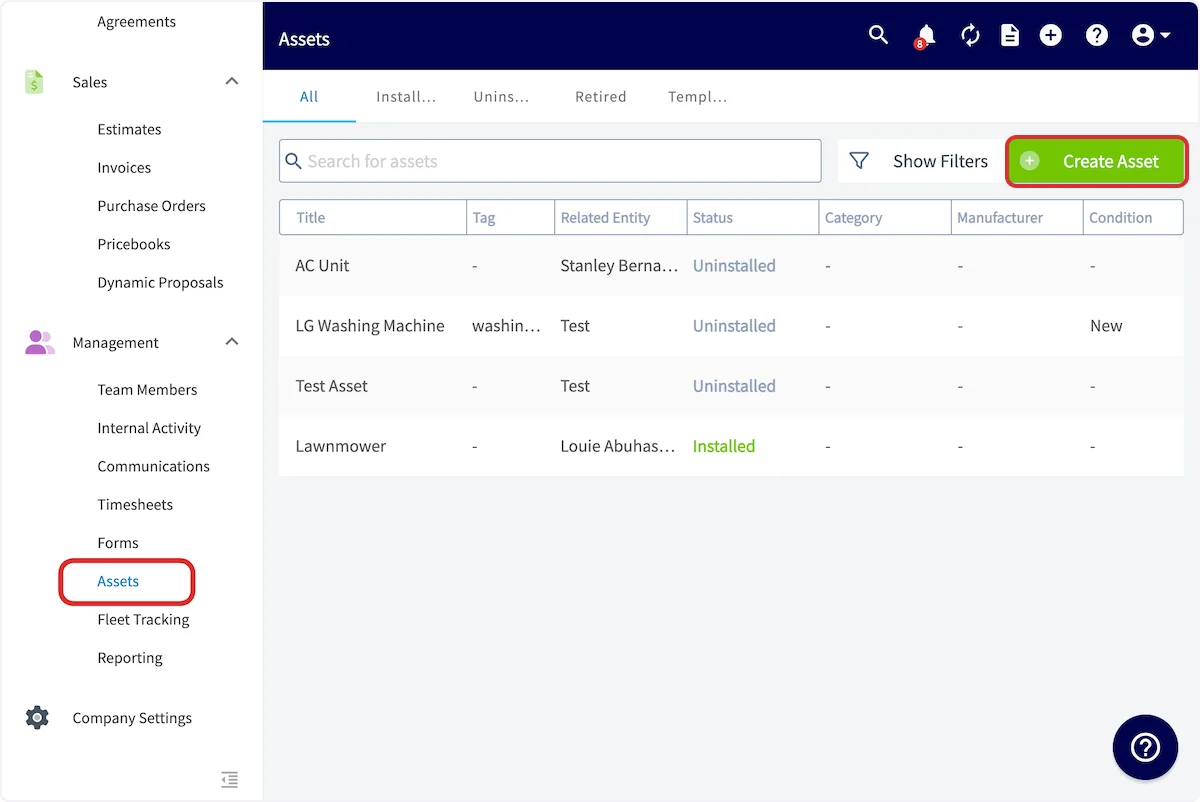
To create an asset, click Assets on the left-side of your screen.
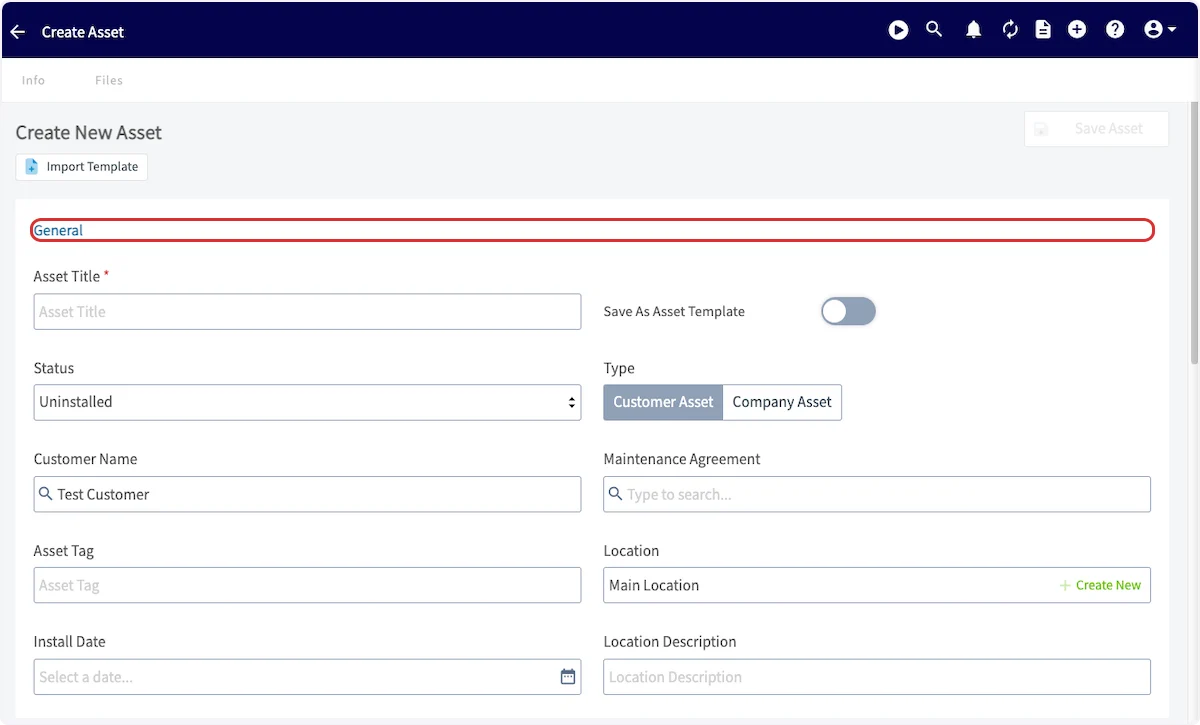
34.0522, -118.2437) or Degrees, Minutes, Seconds (e.g., 34°03'08"N, 118°14'37"W) formats. The status of the asset can also be changed between Uninstalled, Installed/In Use, or Retired.
Additionally, add asset tags to categorize/sort your assets easily. Search for and attach an existing maintenance agreement. Select your install date (if applicable) and type a location description (if necessary).
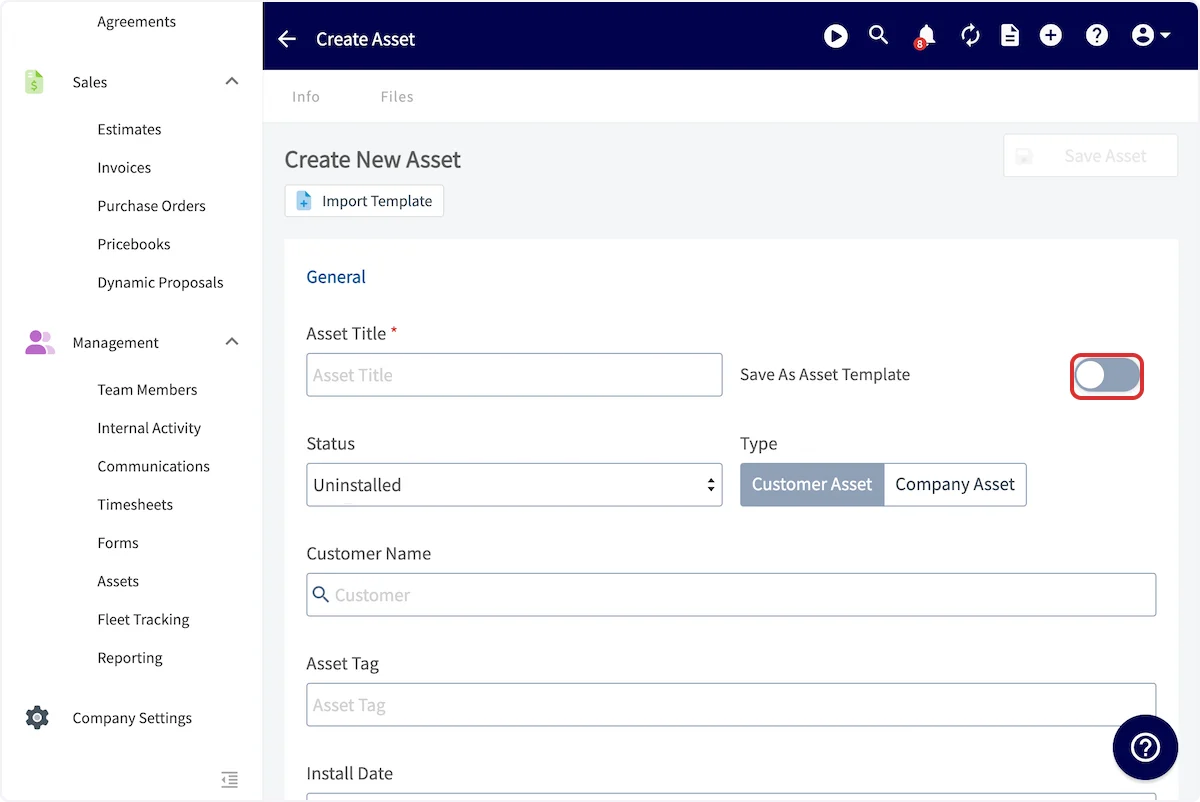
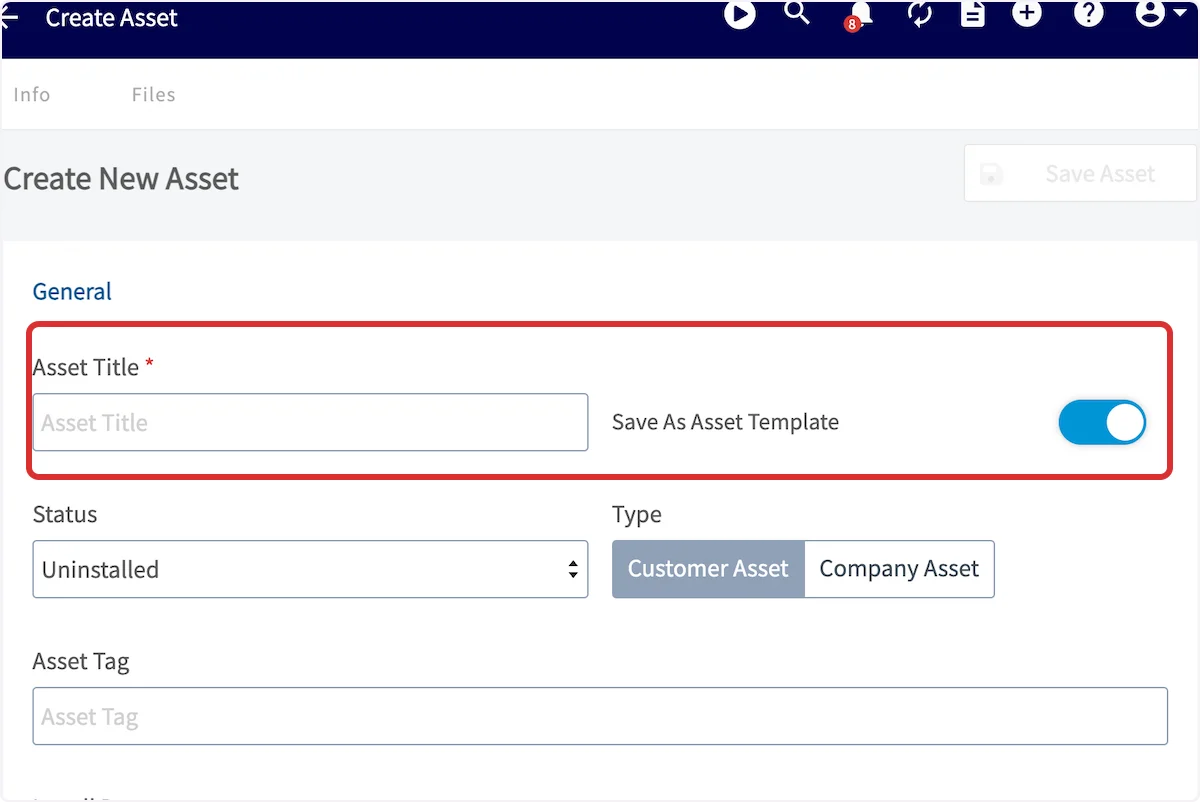
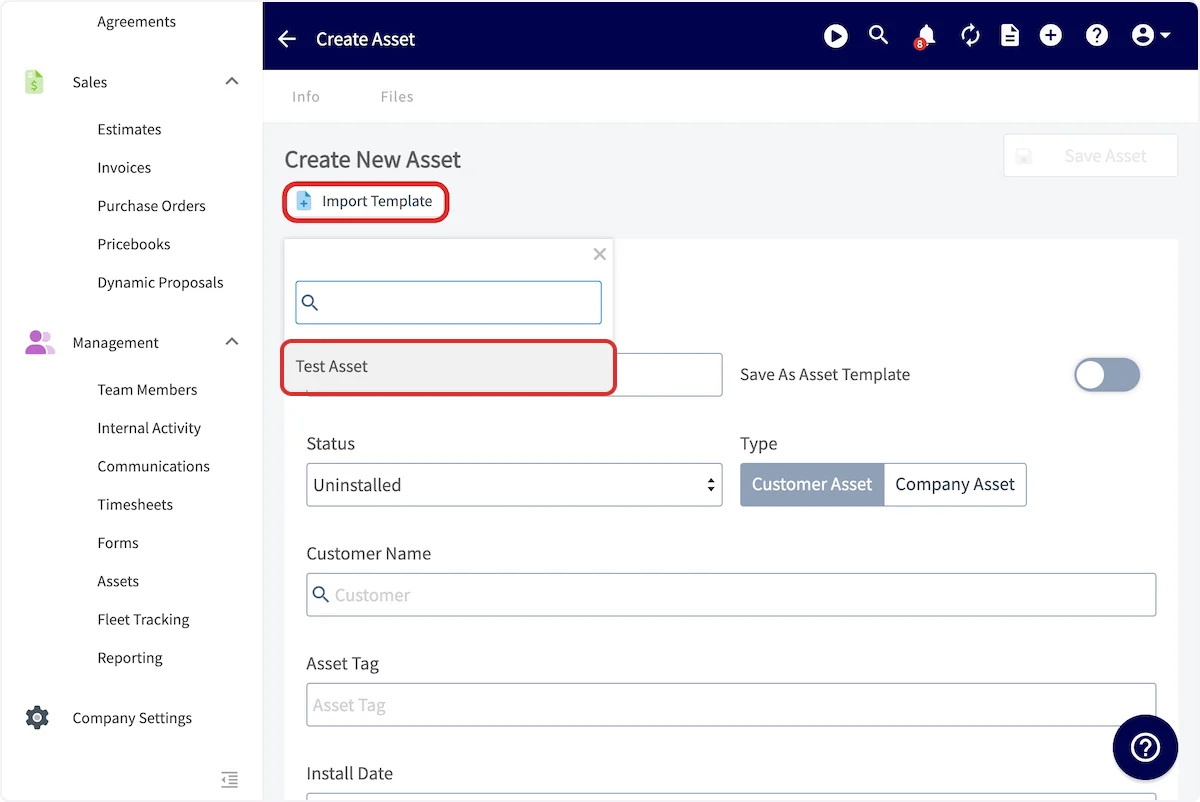
If you expect to use a similar asset many times, toggle on Save As Asset Template to make creating future assets more efficient! (Note: To use a template in the future, select Import Template).

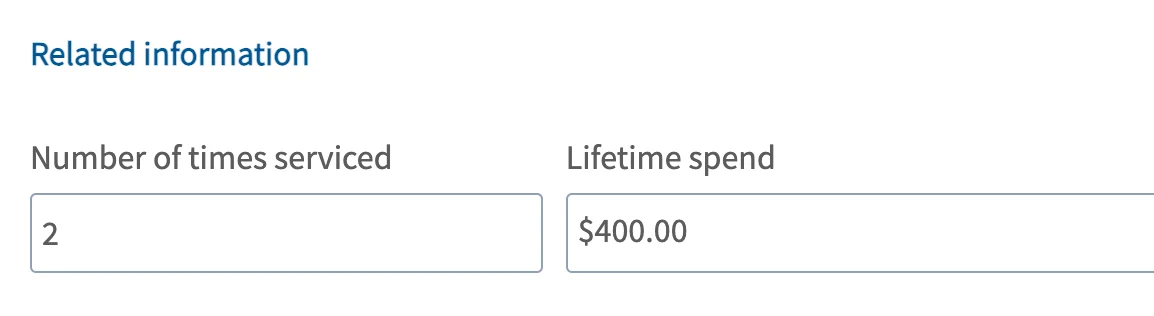
- Number of Times Serviced – Automatically counts the total number of Jobs and Site Visits records linked to the Asset.
- Lifetime Spend – Sums the invoice value from completed Jobs tied to the asset (excludes Draft and Void invoices).
Asset Templates
When creating a new asset, users can effortlessly insert pre-built templates. These templates act as a solid foundation, which users can easily modify details to ensure accuracy and relevance. To create an asset template, begin by navigating to Assets in the left-side menu then clicking Create Asset.
Attaching / Linking an Asset
Job Record
To attach an asset to a job, create a new job or edit job record. Just above the Save Job button, you can attach an existing asset (Select Asset) or create a new asset to attach (Add Asset).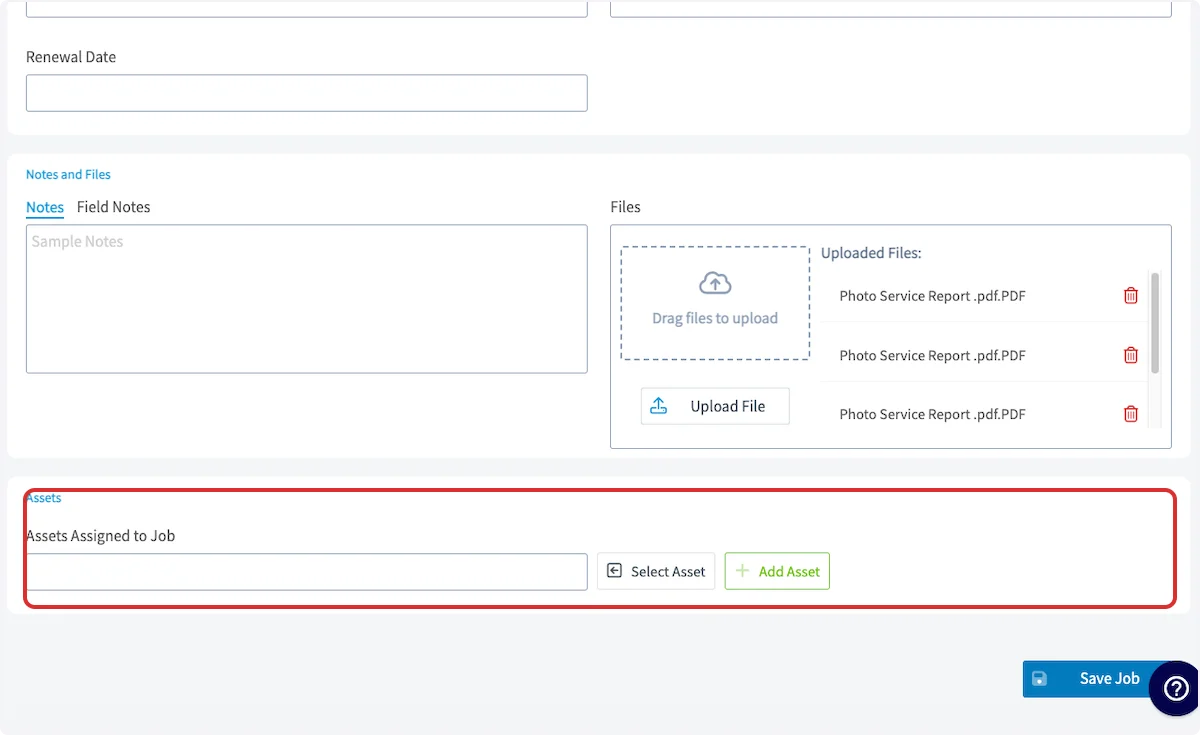
Customer Record
To attach an asset to a customer, open their customer record. Select the Asset tab at the top of the screen.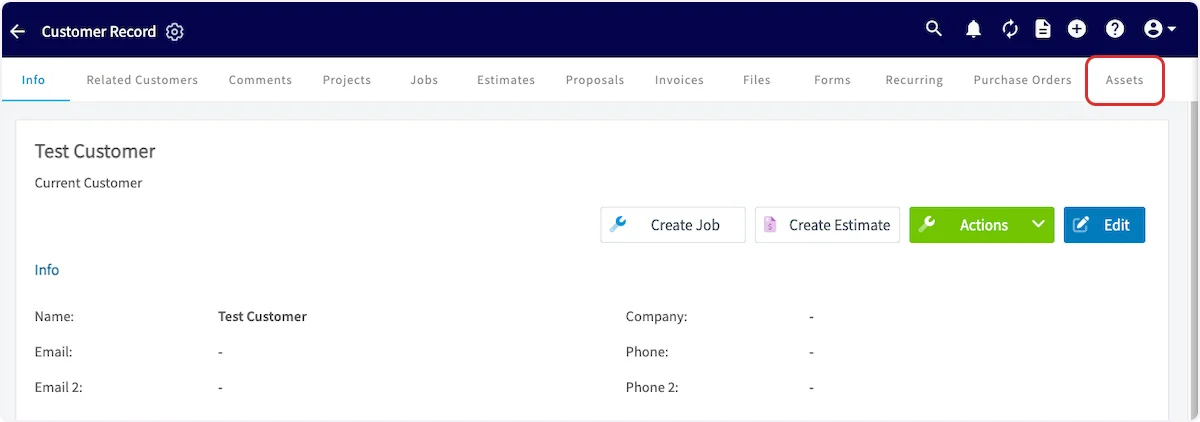

Maintenance Agreement Record
To attach an asset to a maintenance agreement, open the record then select the Asset tab at the top of the screen. By clicking the green Actions button, you have the option to create a new asset or connect an existing asset.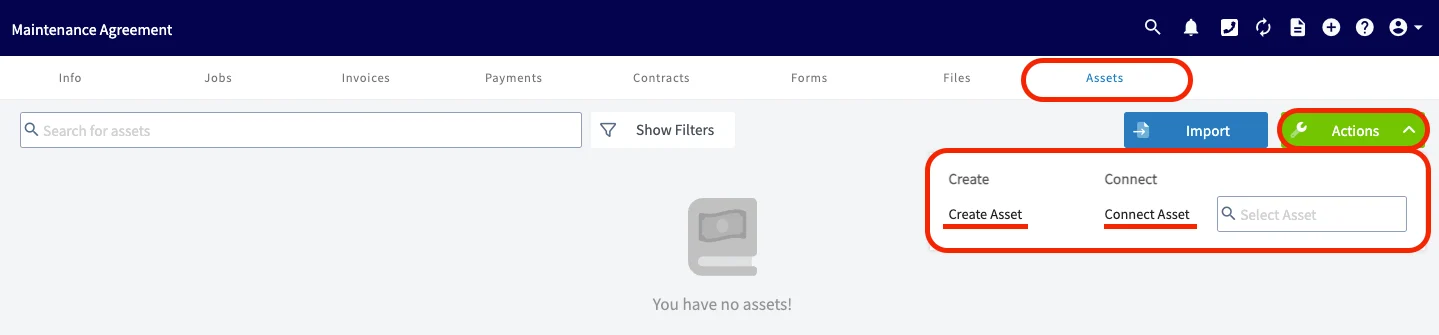
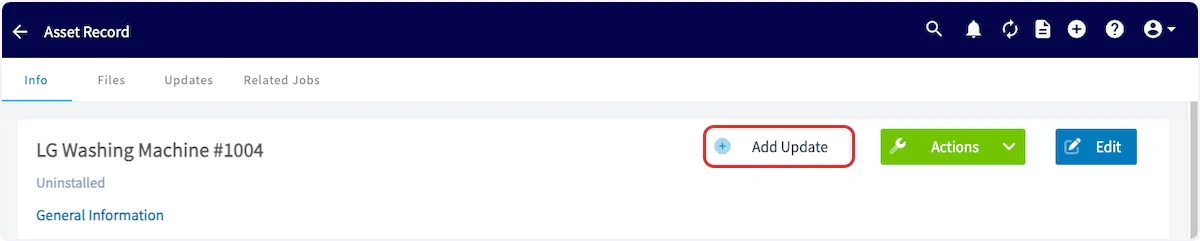
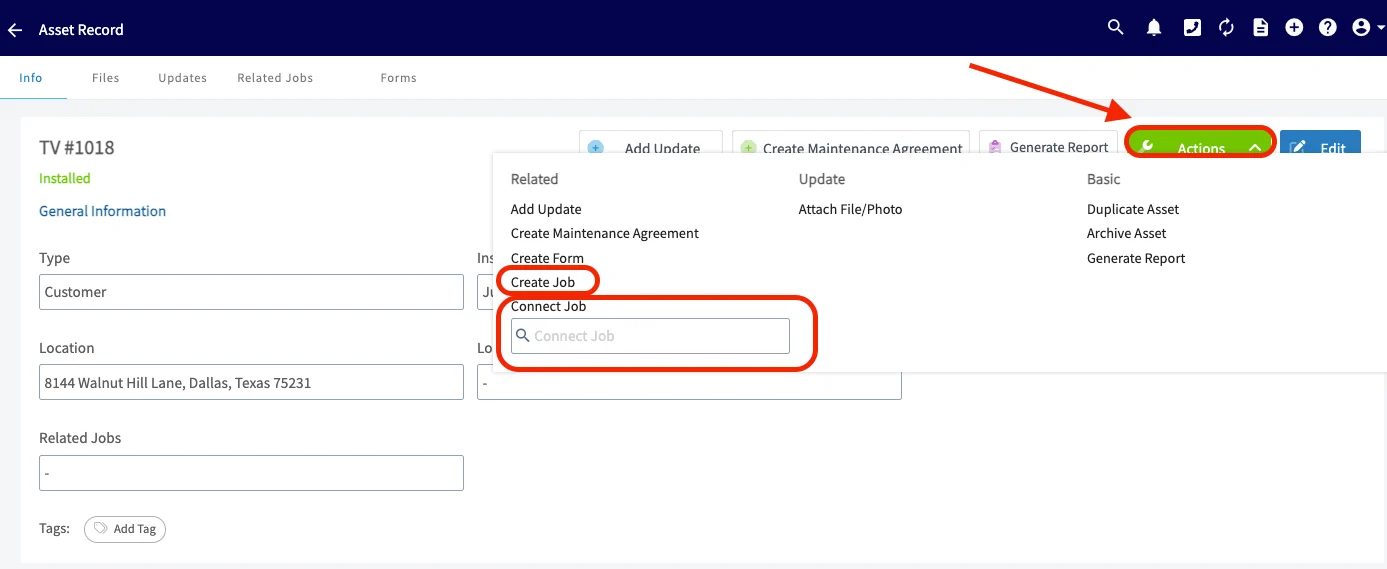
Creating or Connecting Jobs from the Asset Record
To help streamline workflows, two additional actions are available on your asset records: Create Job and Connect Job.- Create Job: Opens the job creation page with the asset automatically linked to the job. If there’s a maintenance agreement linked to the asset, it will also be linked to the job.
- Connect Job: Allows you to search and select an existing job. If a customer is selected, it will only search that customer’s jobs. Once selected, the asset and any linked maintenance agreement will automatically be connected to the job.
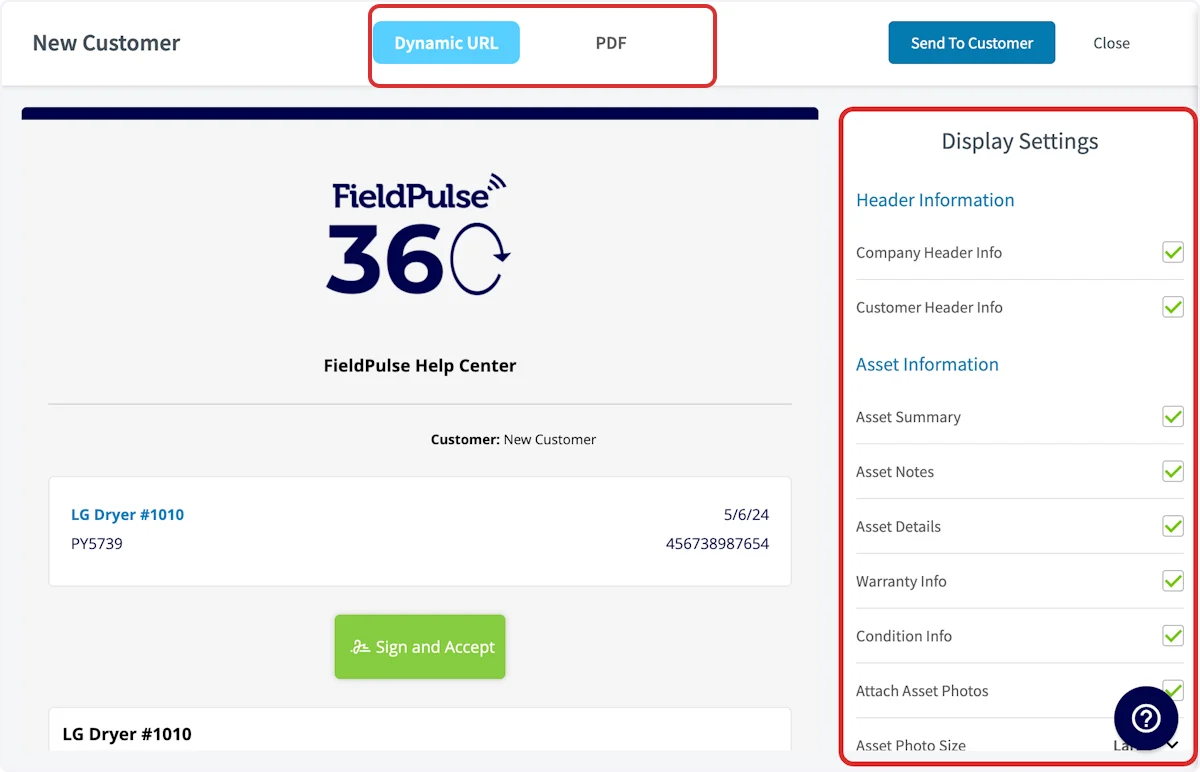
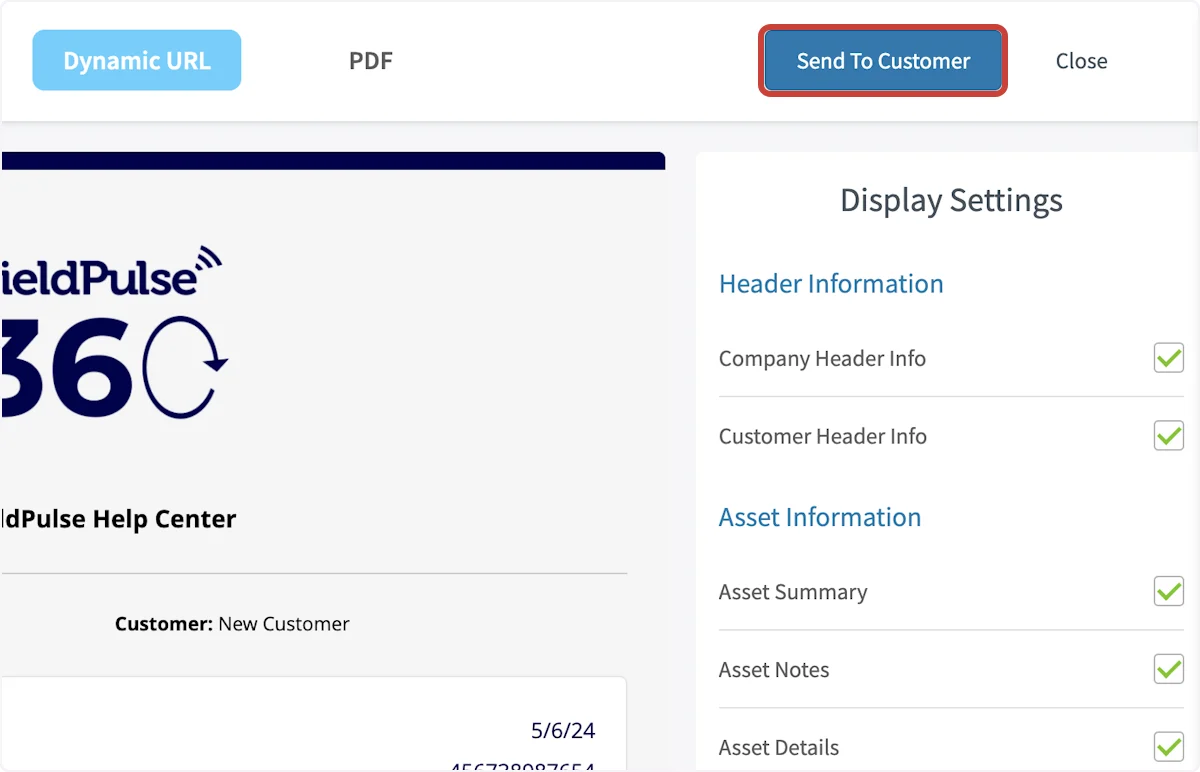
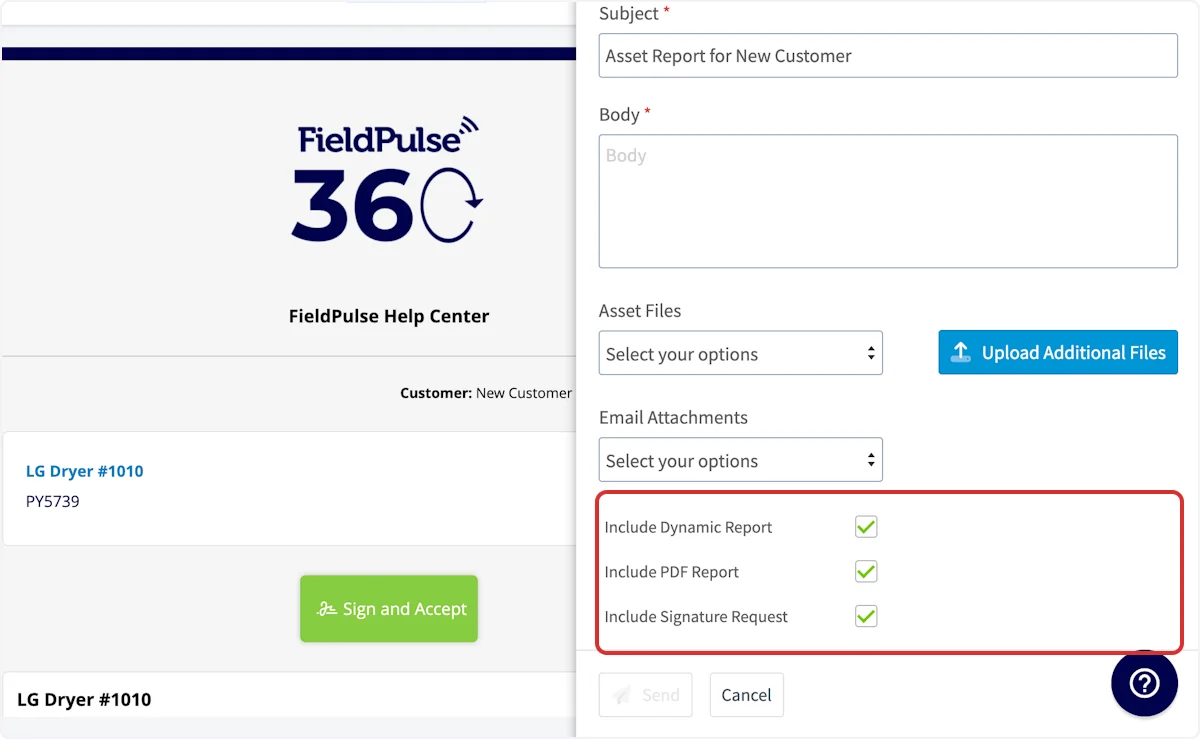
Dynamic Asset Reports
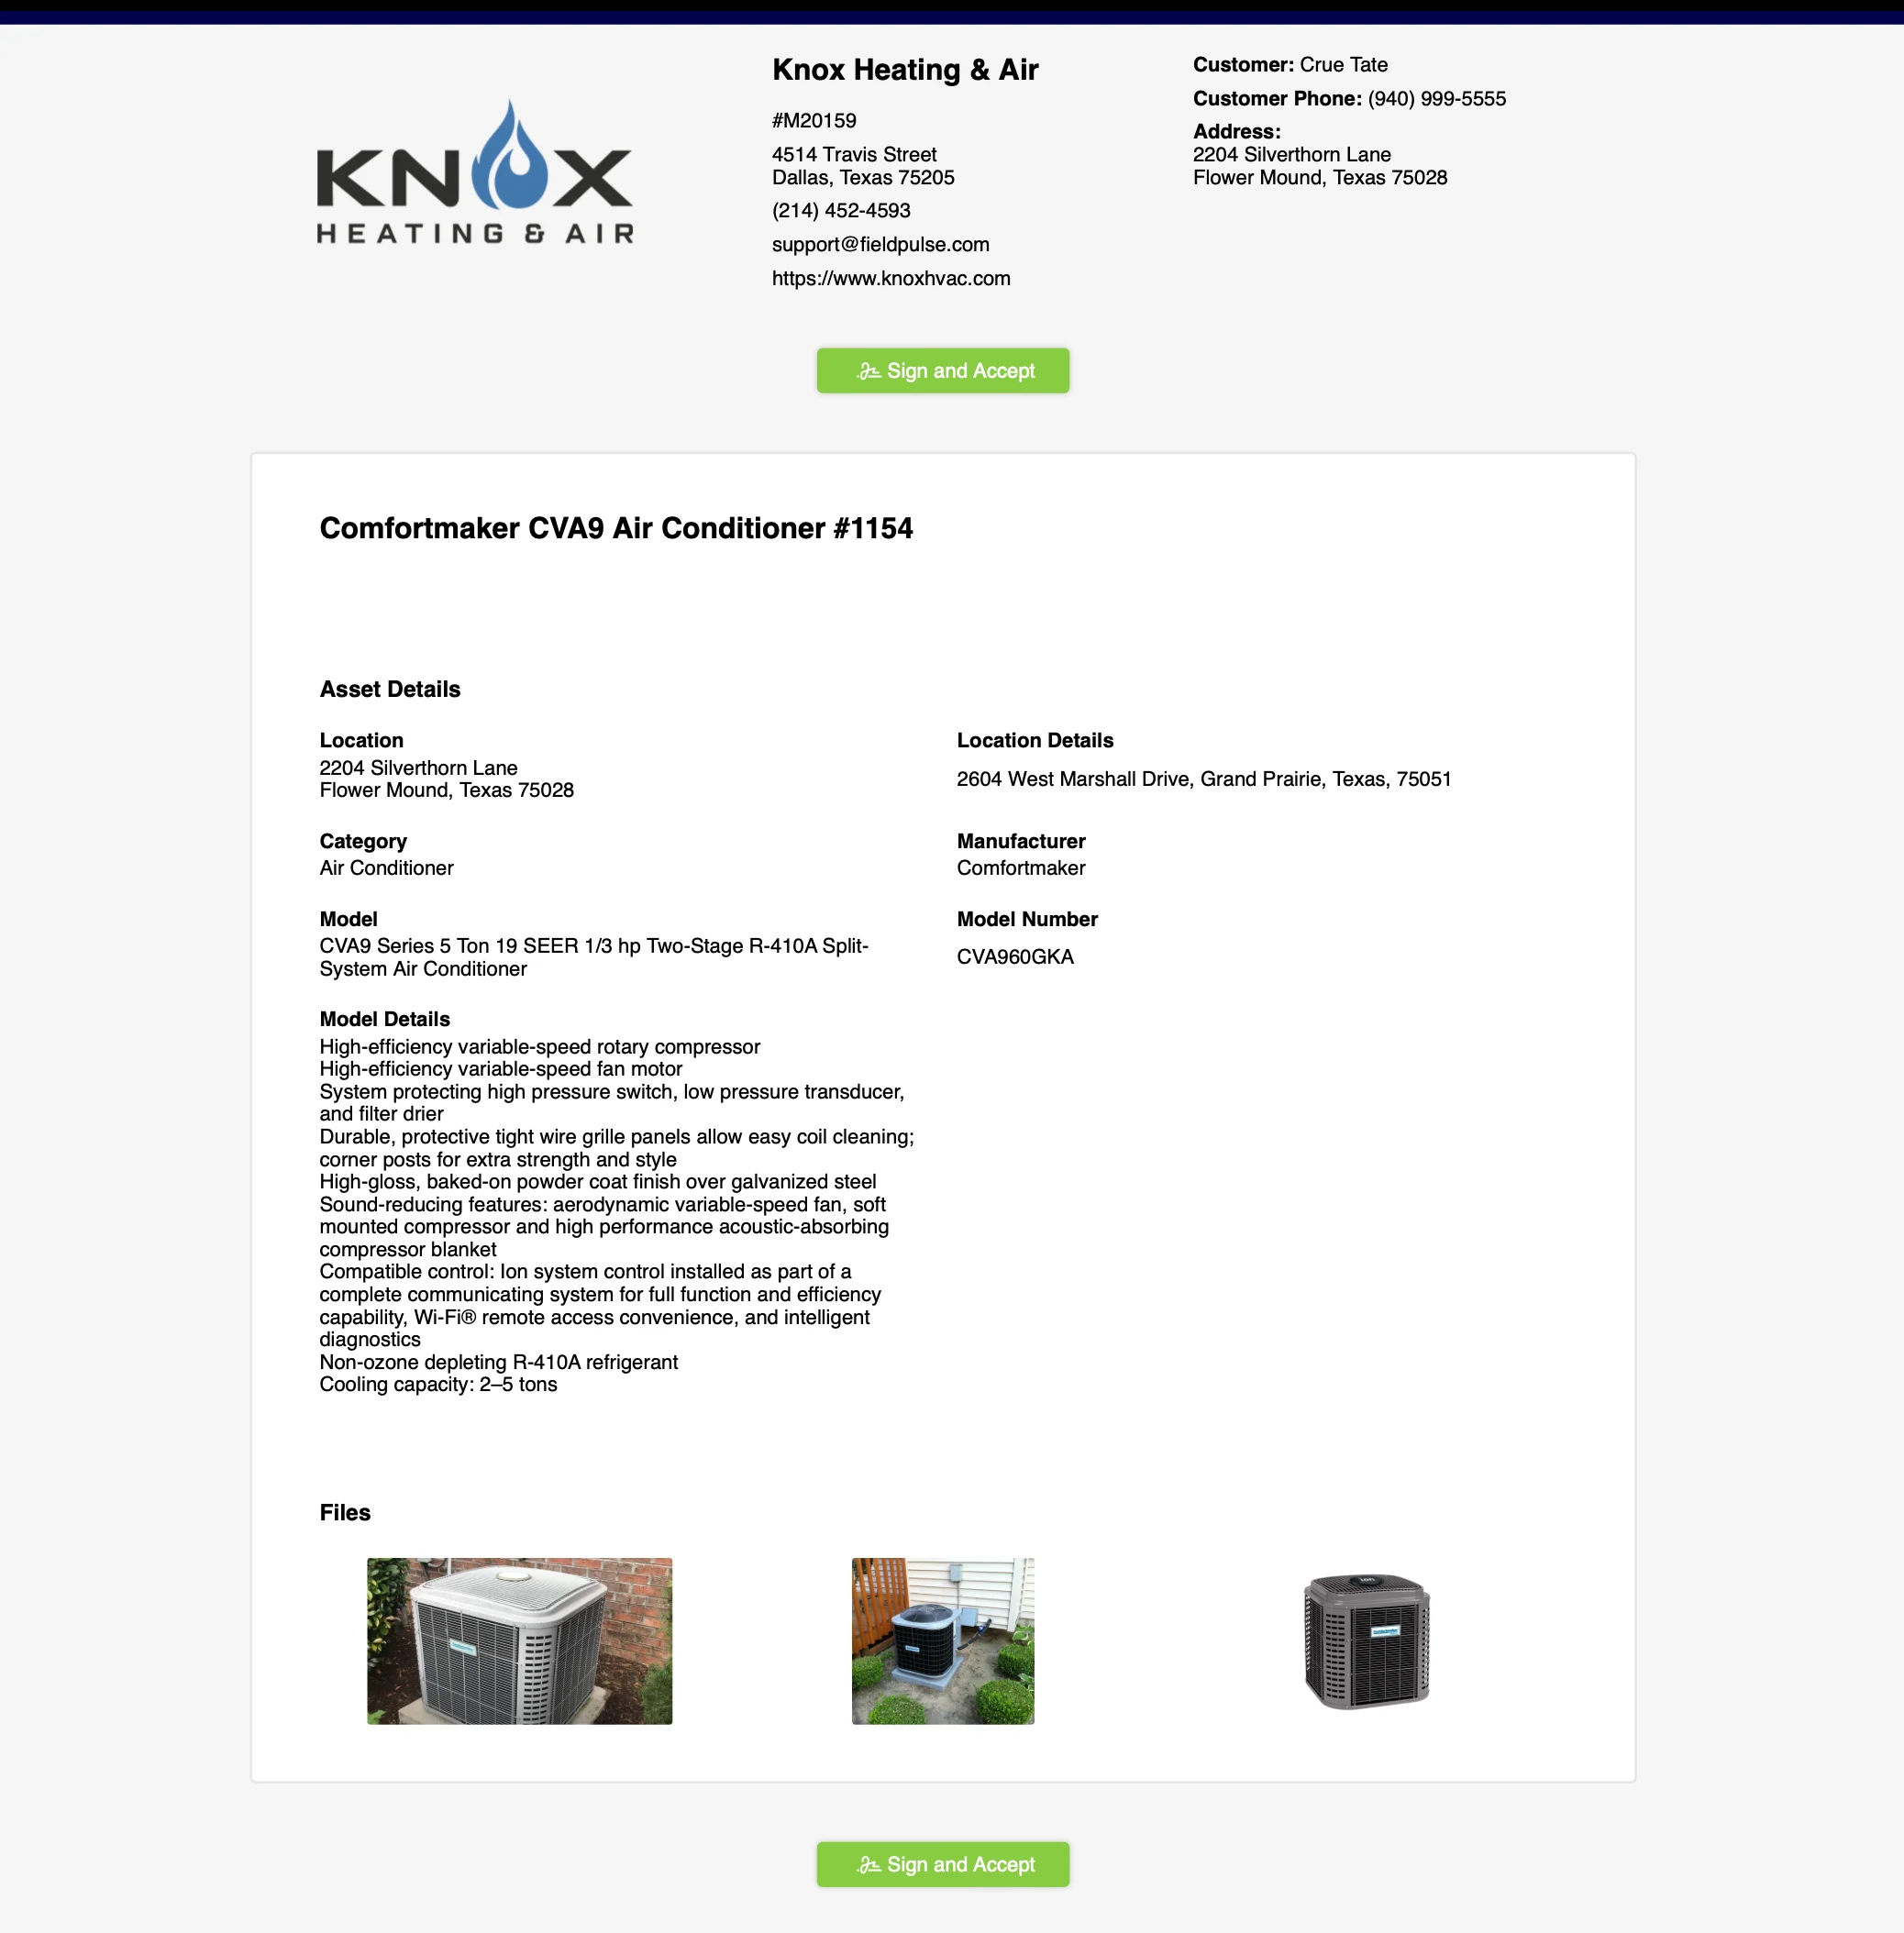
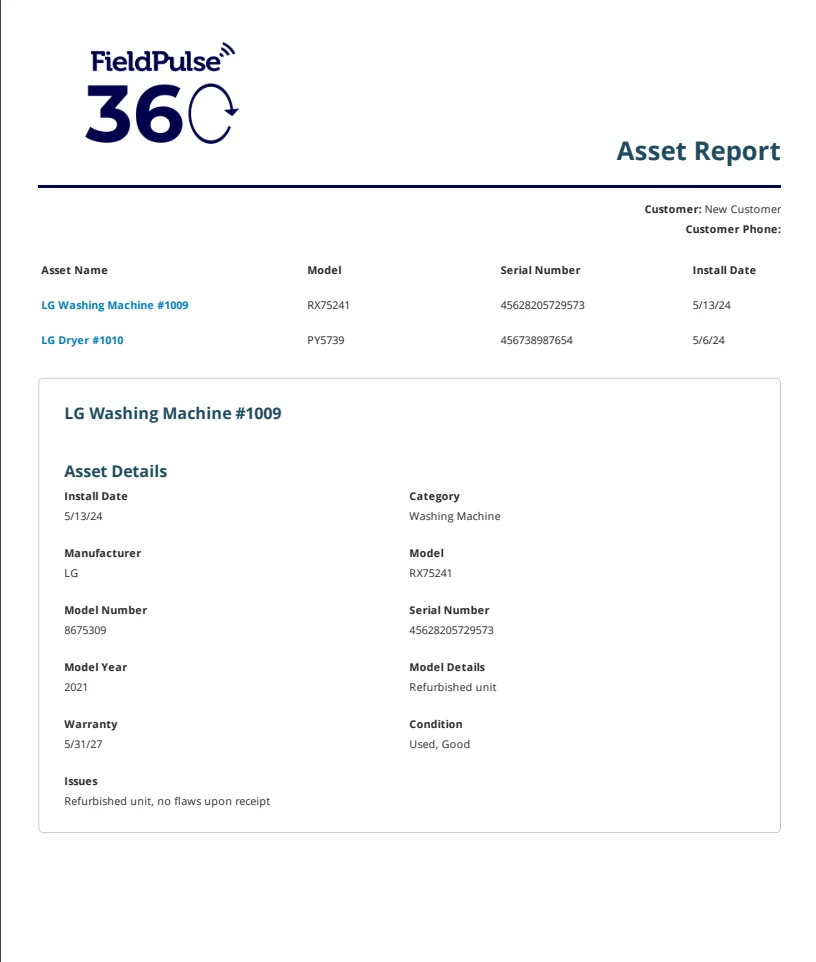
Utilize the data from your asset records to generate a dynamic report and/or PDF! Combine multiple assets into a single, professional summary report for customers offering a comprehensive overview of services rendered and ensure you showcase relevant information while hiding unnecessary details with customizable display options. This report can be shared with customers and linked to dynamic estimates/invoices.🚀 FieldPulse Pro Tips:
- Generate an Asset Report after finishing a new equipment installation. This provides your customers a useful reference, helping them easily identify who to reach out to if any issues arise in the future.
- Enhance communication by adding company-branded contact stickers to the installed equipment. This way, your customers will have quick access to your information whenever they need assistance!
Single Asset Reports
Begin by navigating to the asset record for which you’d like to create a dynamic asset report, then select Generate Report.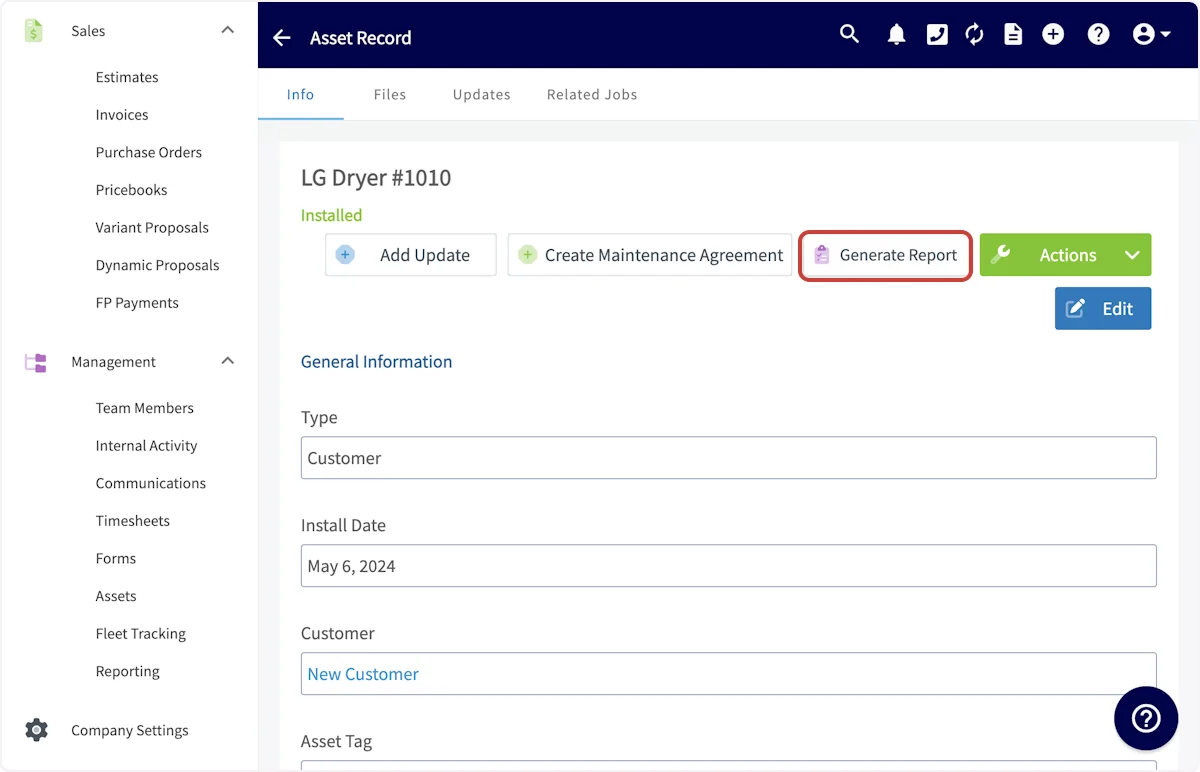
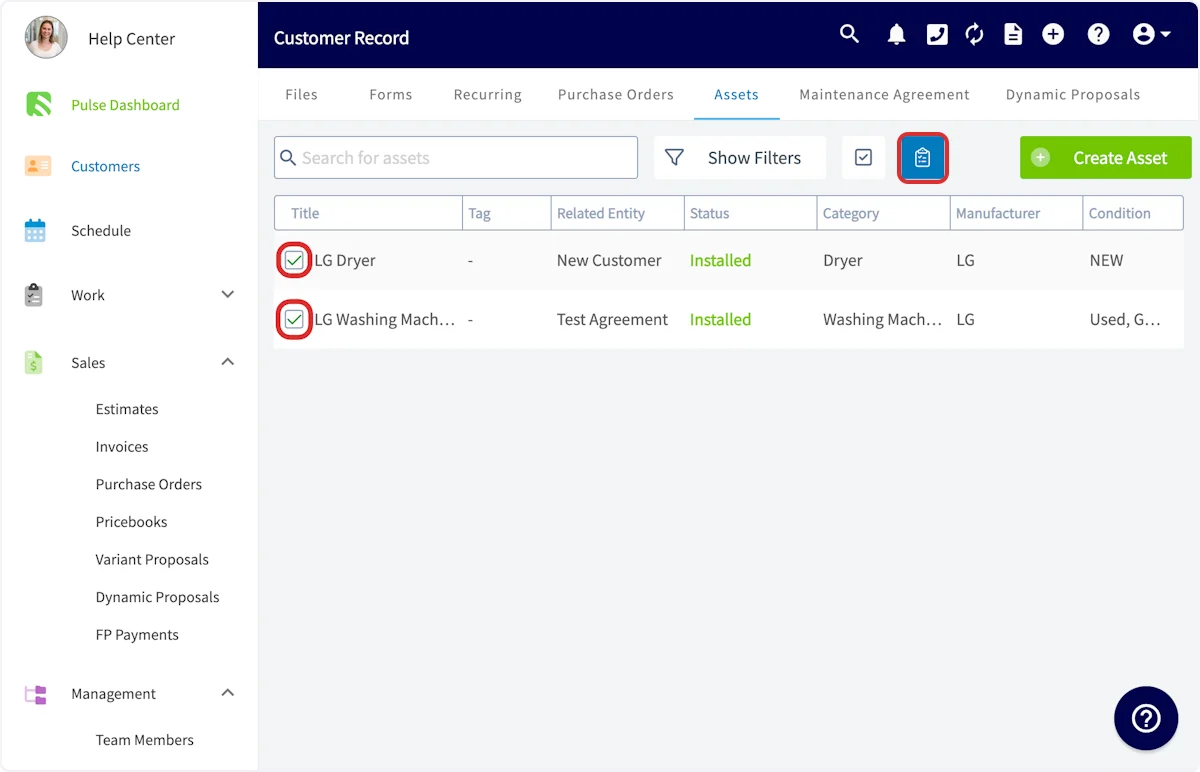
Multi-Asset Reports
To create a report for multiple assets, begin by navigating to the customer record associated with those assets. Select Assets from the top menu, then click the checkbox icon.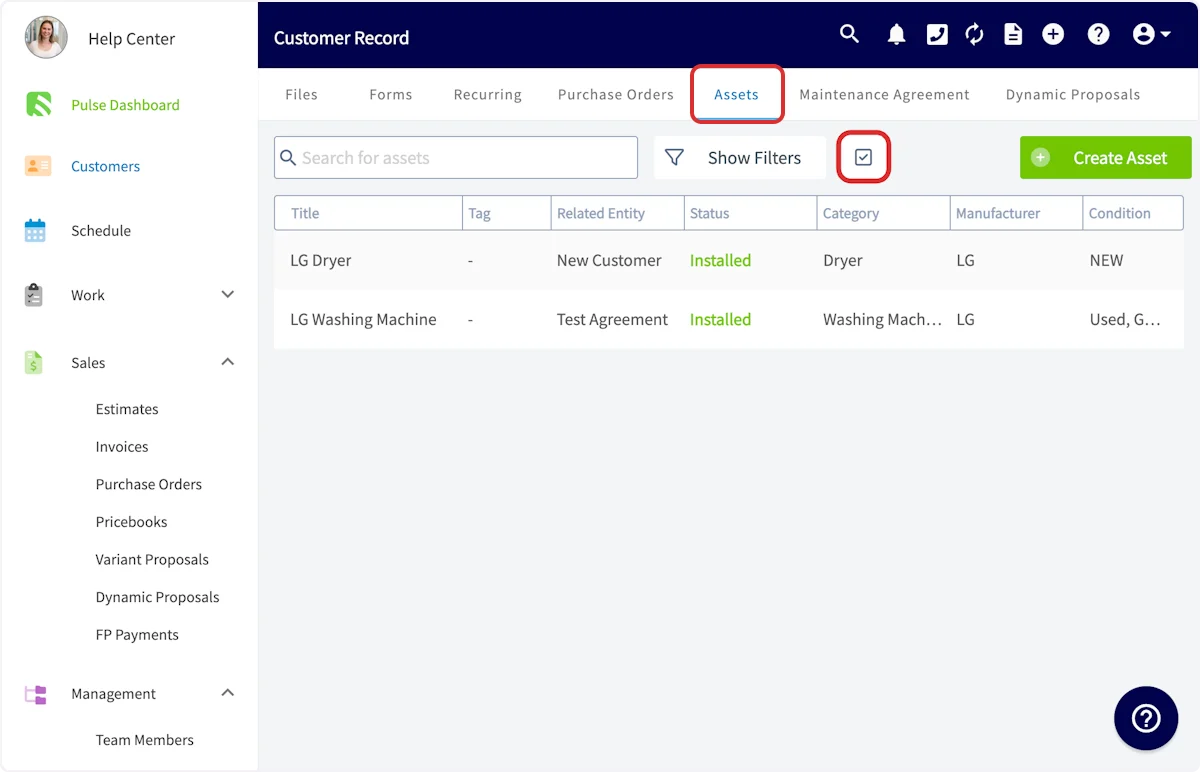
Asset Scanning
You can scan the barcodes associated with your Assets!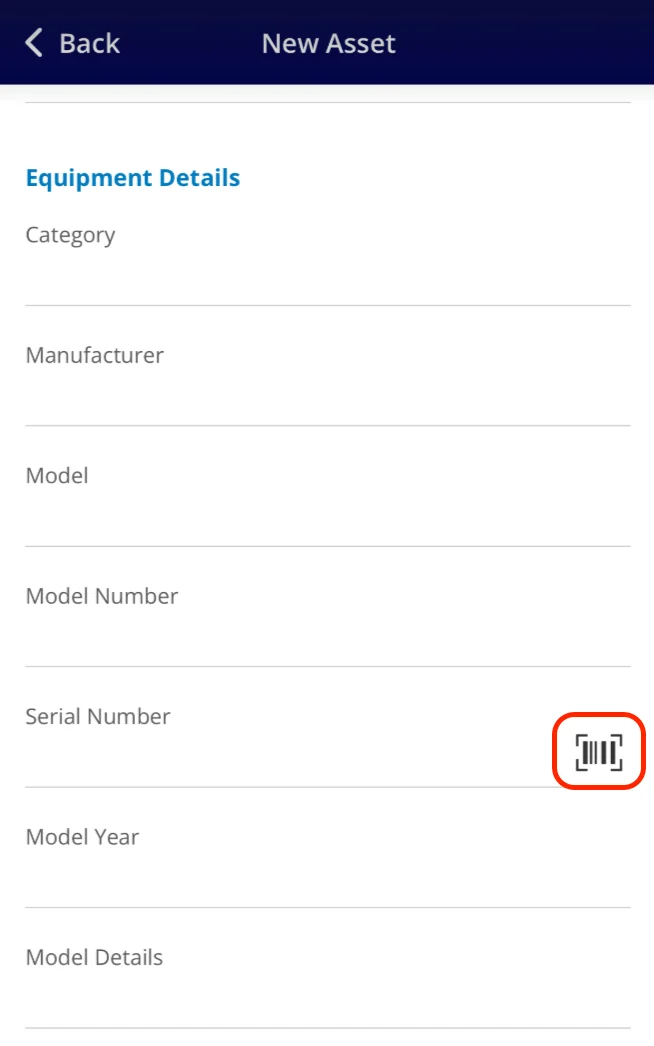
Removing an Asset From a Job
If you need to remove an Asset linked to a Job record, you can do so by clicking Edit on the Asset record. Click into the Related Jobs field and from here you can remove the Job related to this Asset by clicking the red trash icon or by clicking the Remove Job button.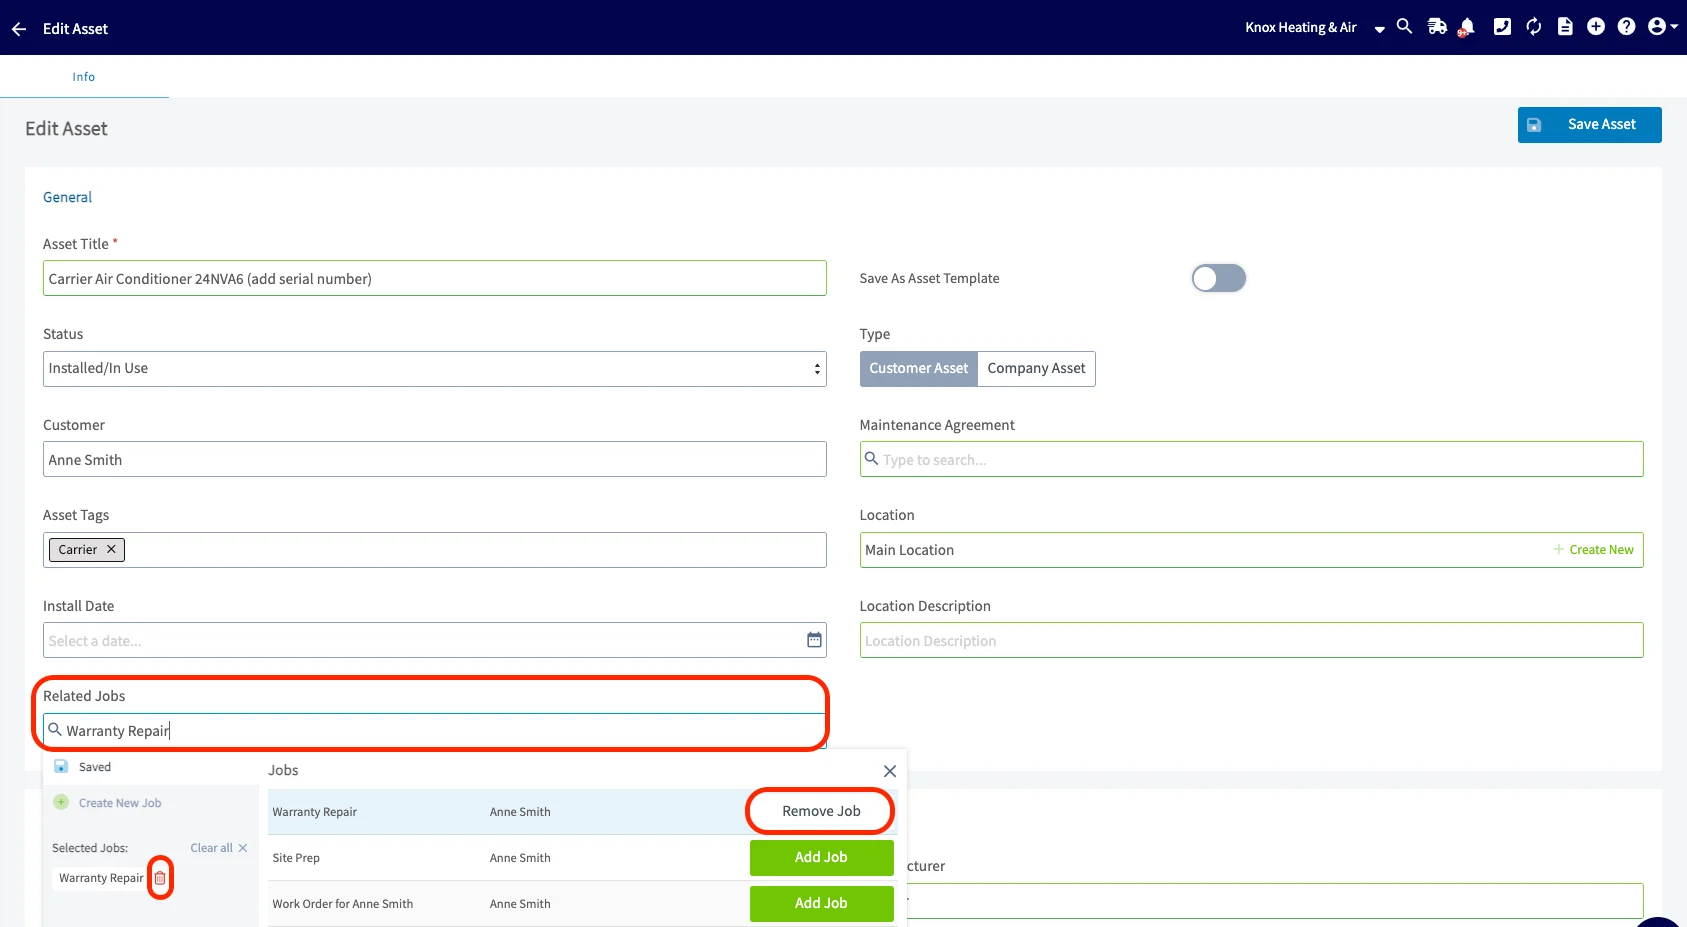
Transferring Asset Ownership
Setting Up Transfer Permissions
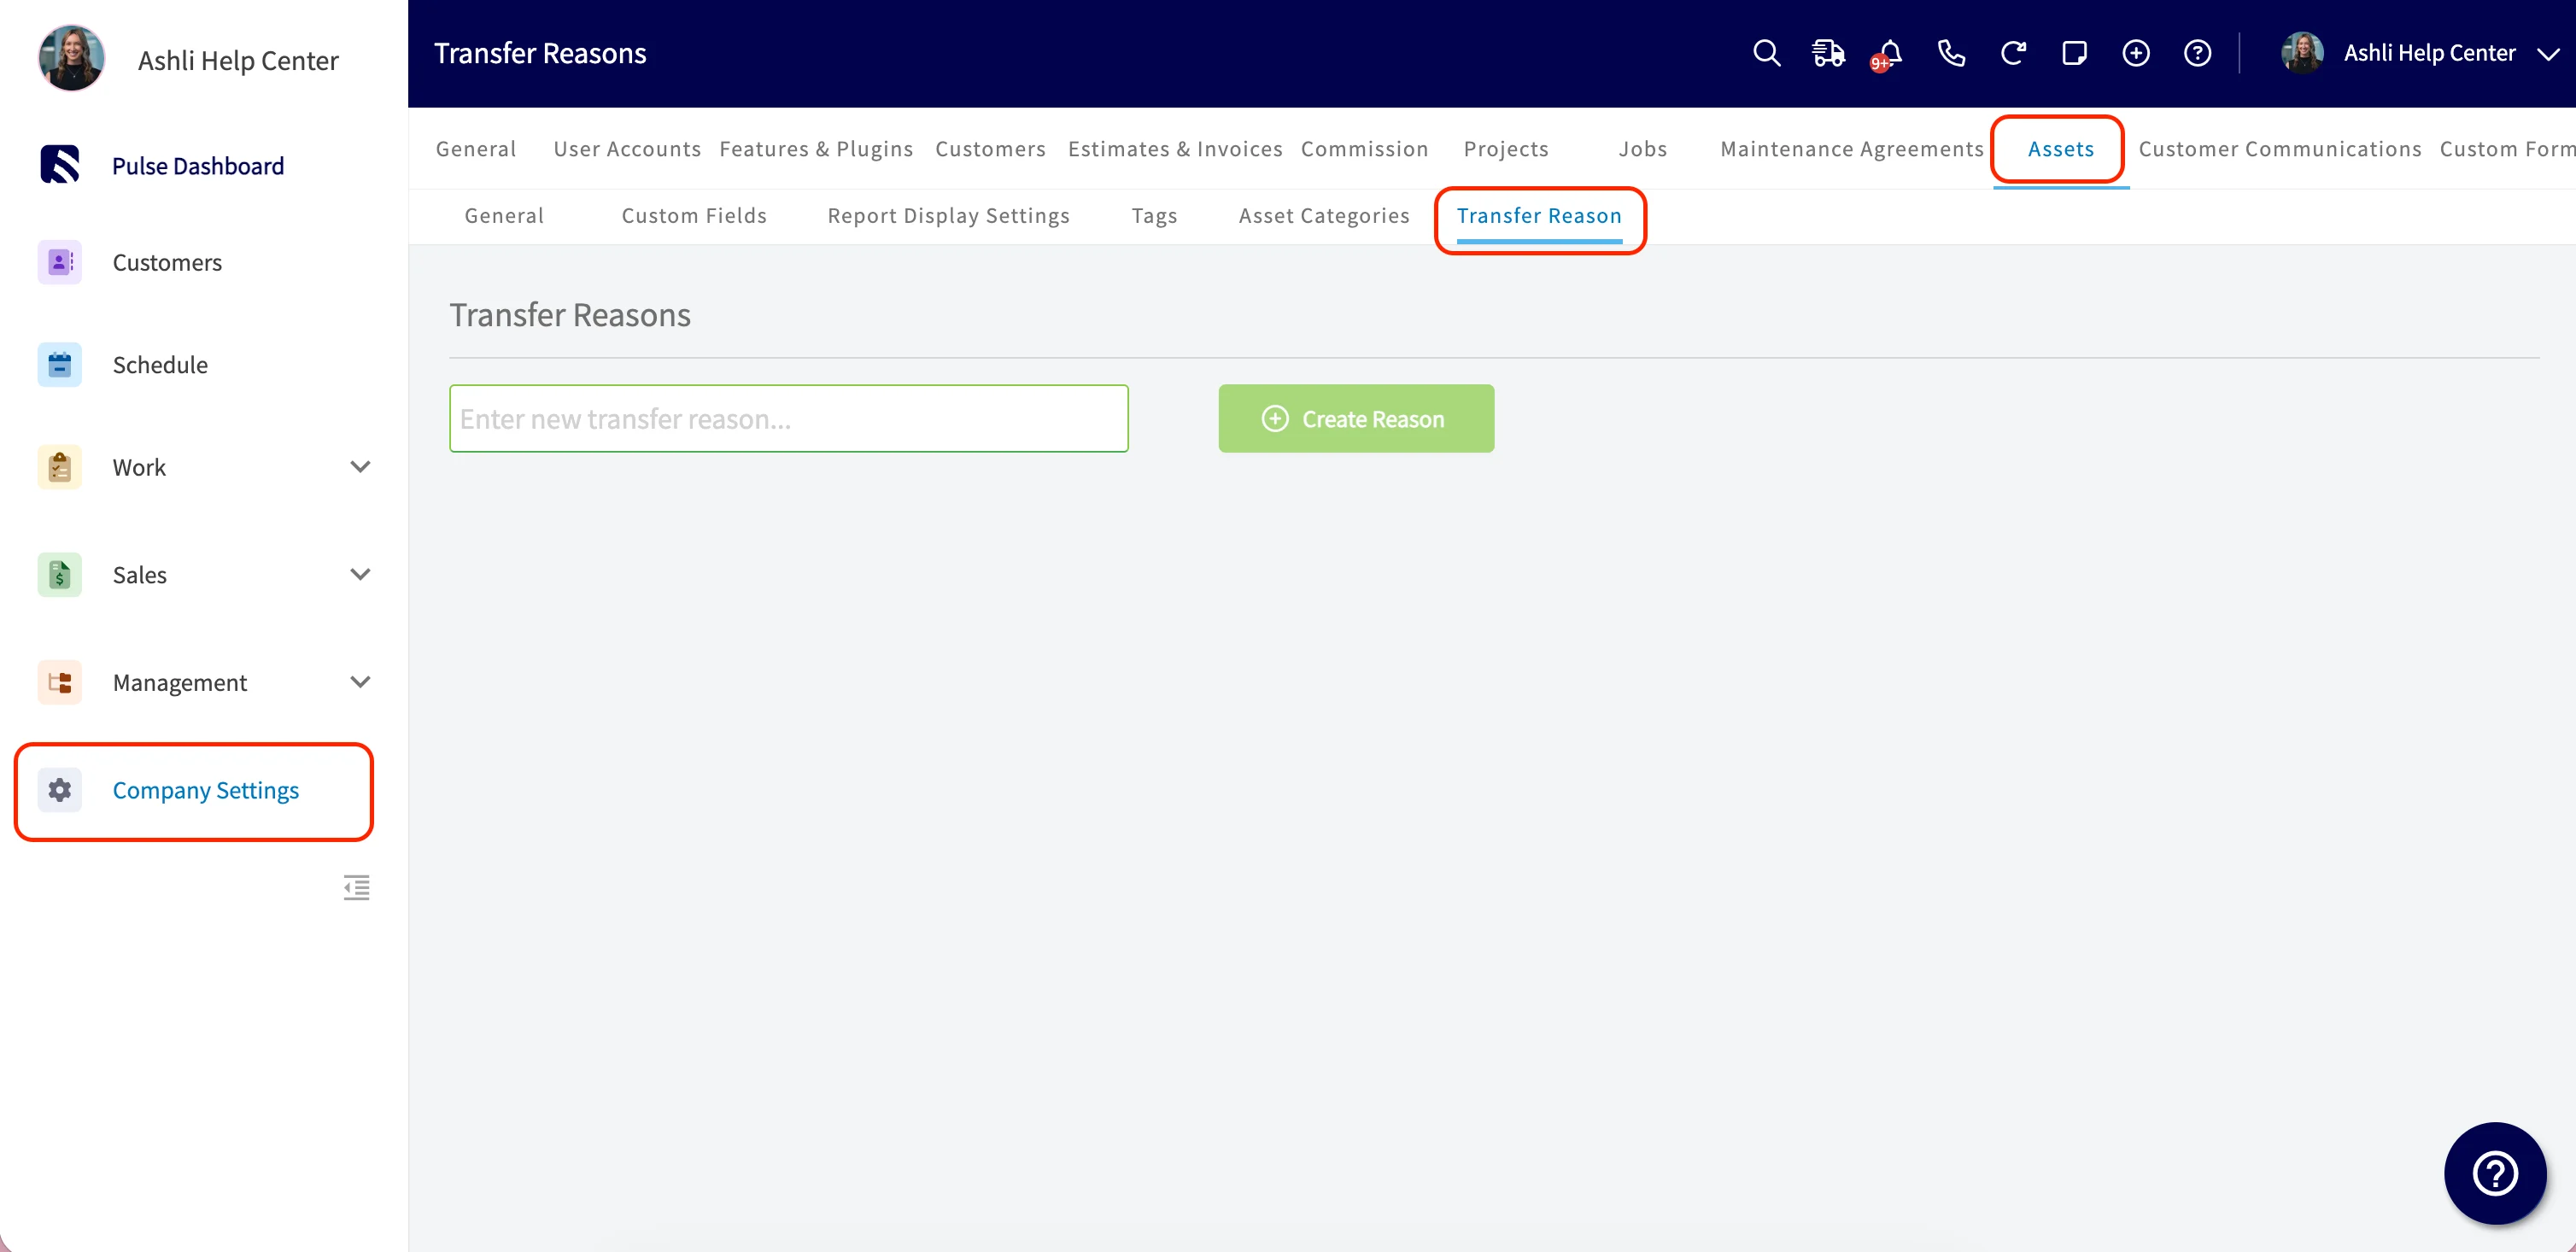
Before your team can transfer assets, choose which roles have access. Here’s how: Step 1: Go to Company Settings → Assets → General. Step 2: Under Ability to Transfer Assets, select the roles you want to give access to.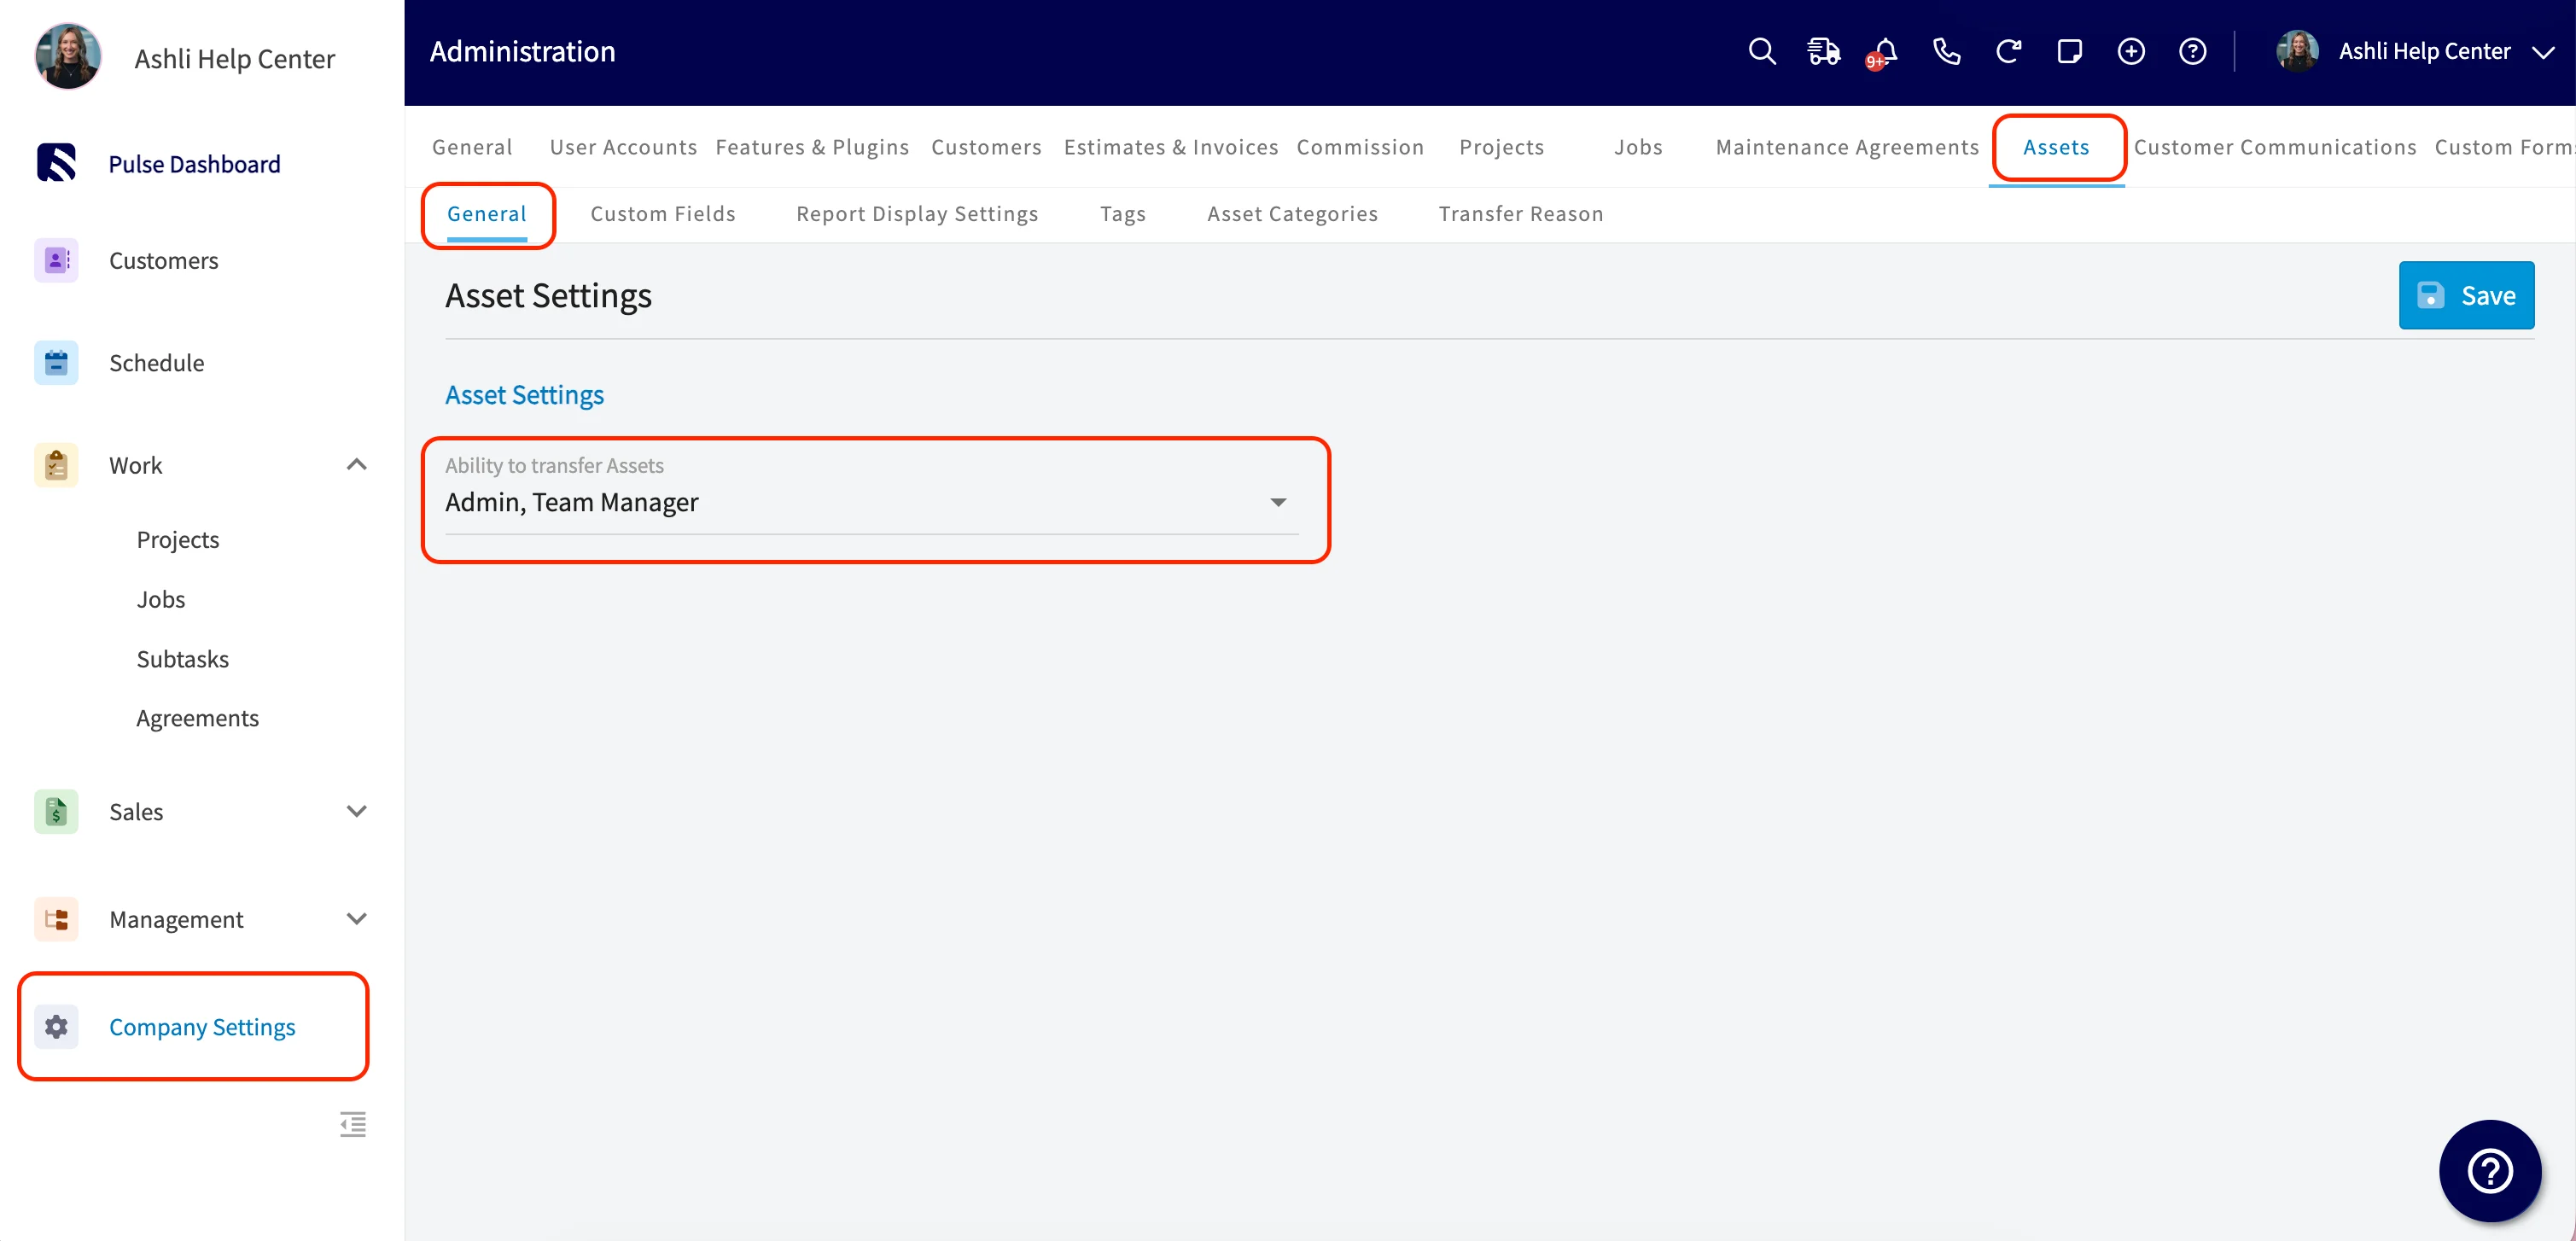
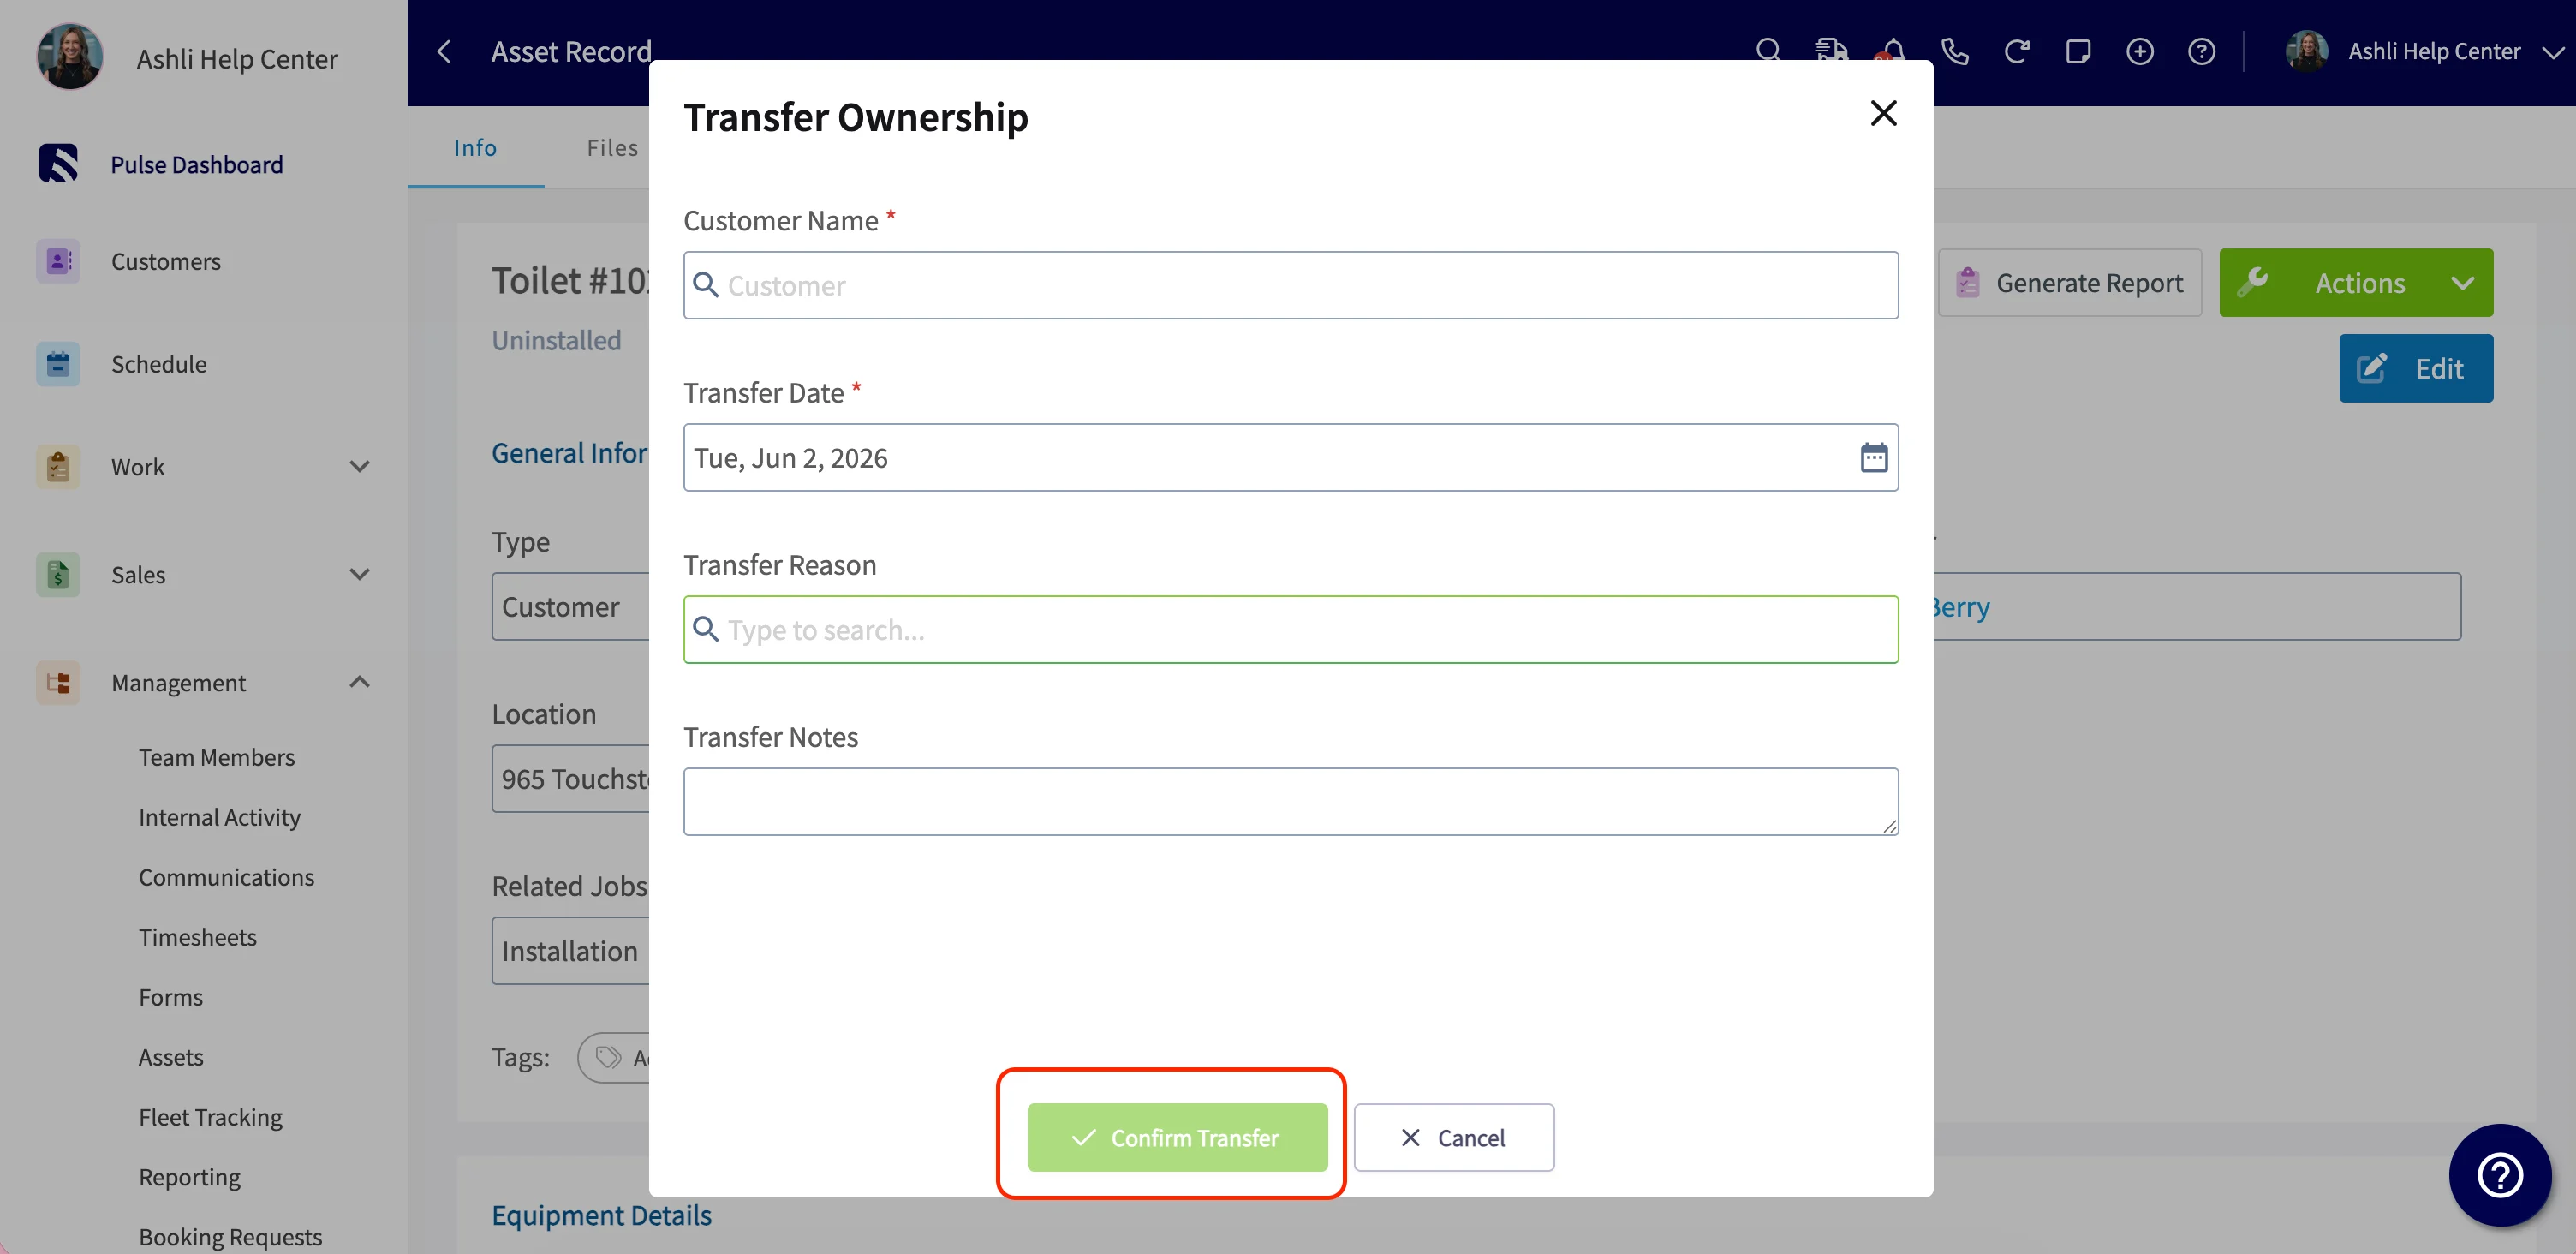
- Change of Ownership (Home Sale)
- Builder to Homeowner Transfer
- Landlord to Tenant Transition
- Tenant Turnover
- Property Management Change
Transferring an Asset
Asset Ownership Transfer is available for Customer Assets only. The action shows up on the asset record once a customer is linked. Here’s how to transfer one: Step 1: Open the Asset Record you want to transfer. Click Actions → Transfer Ownership.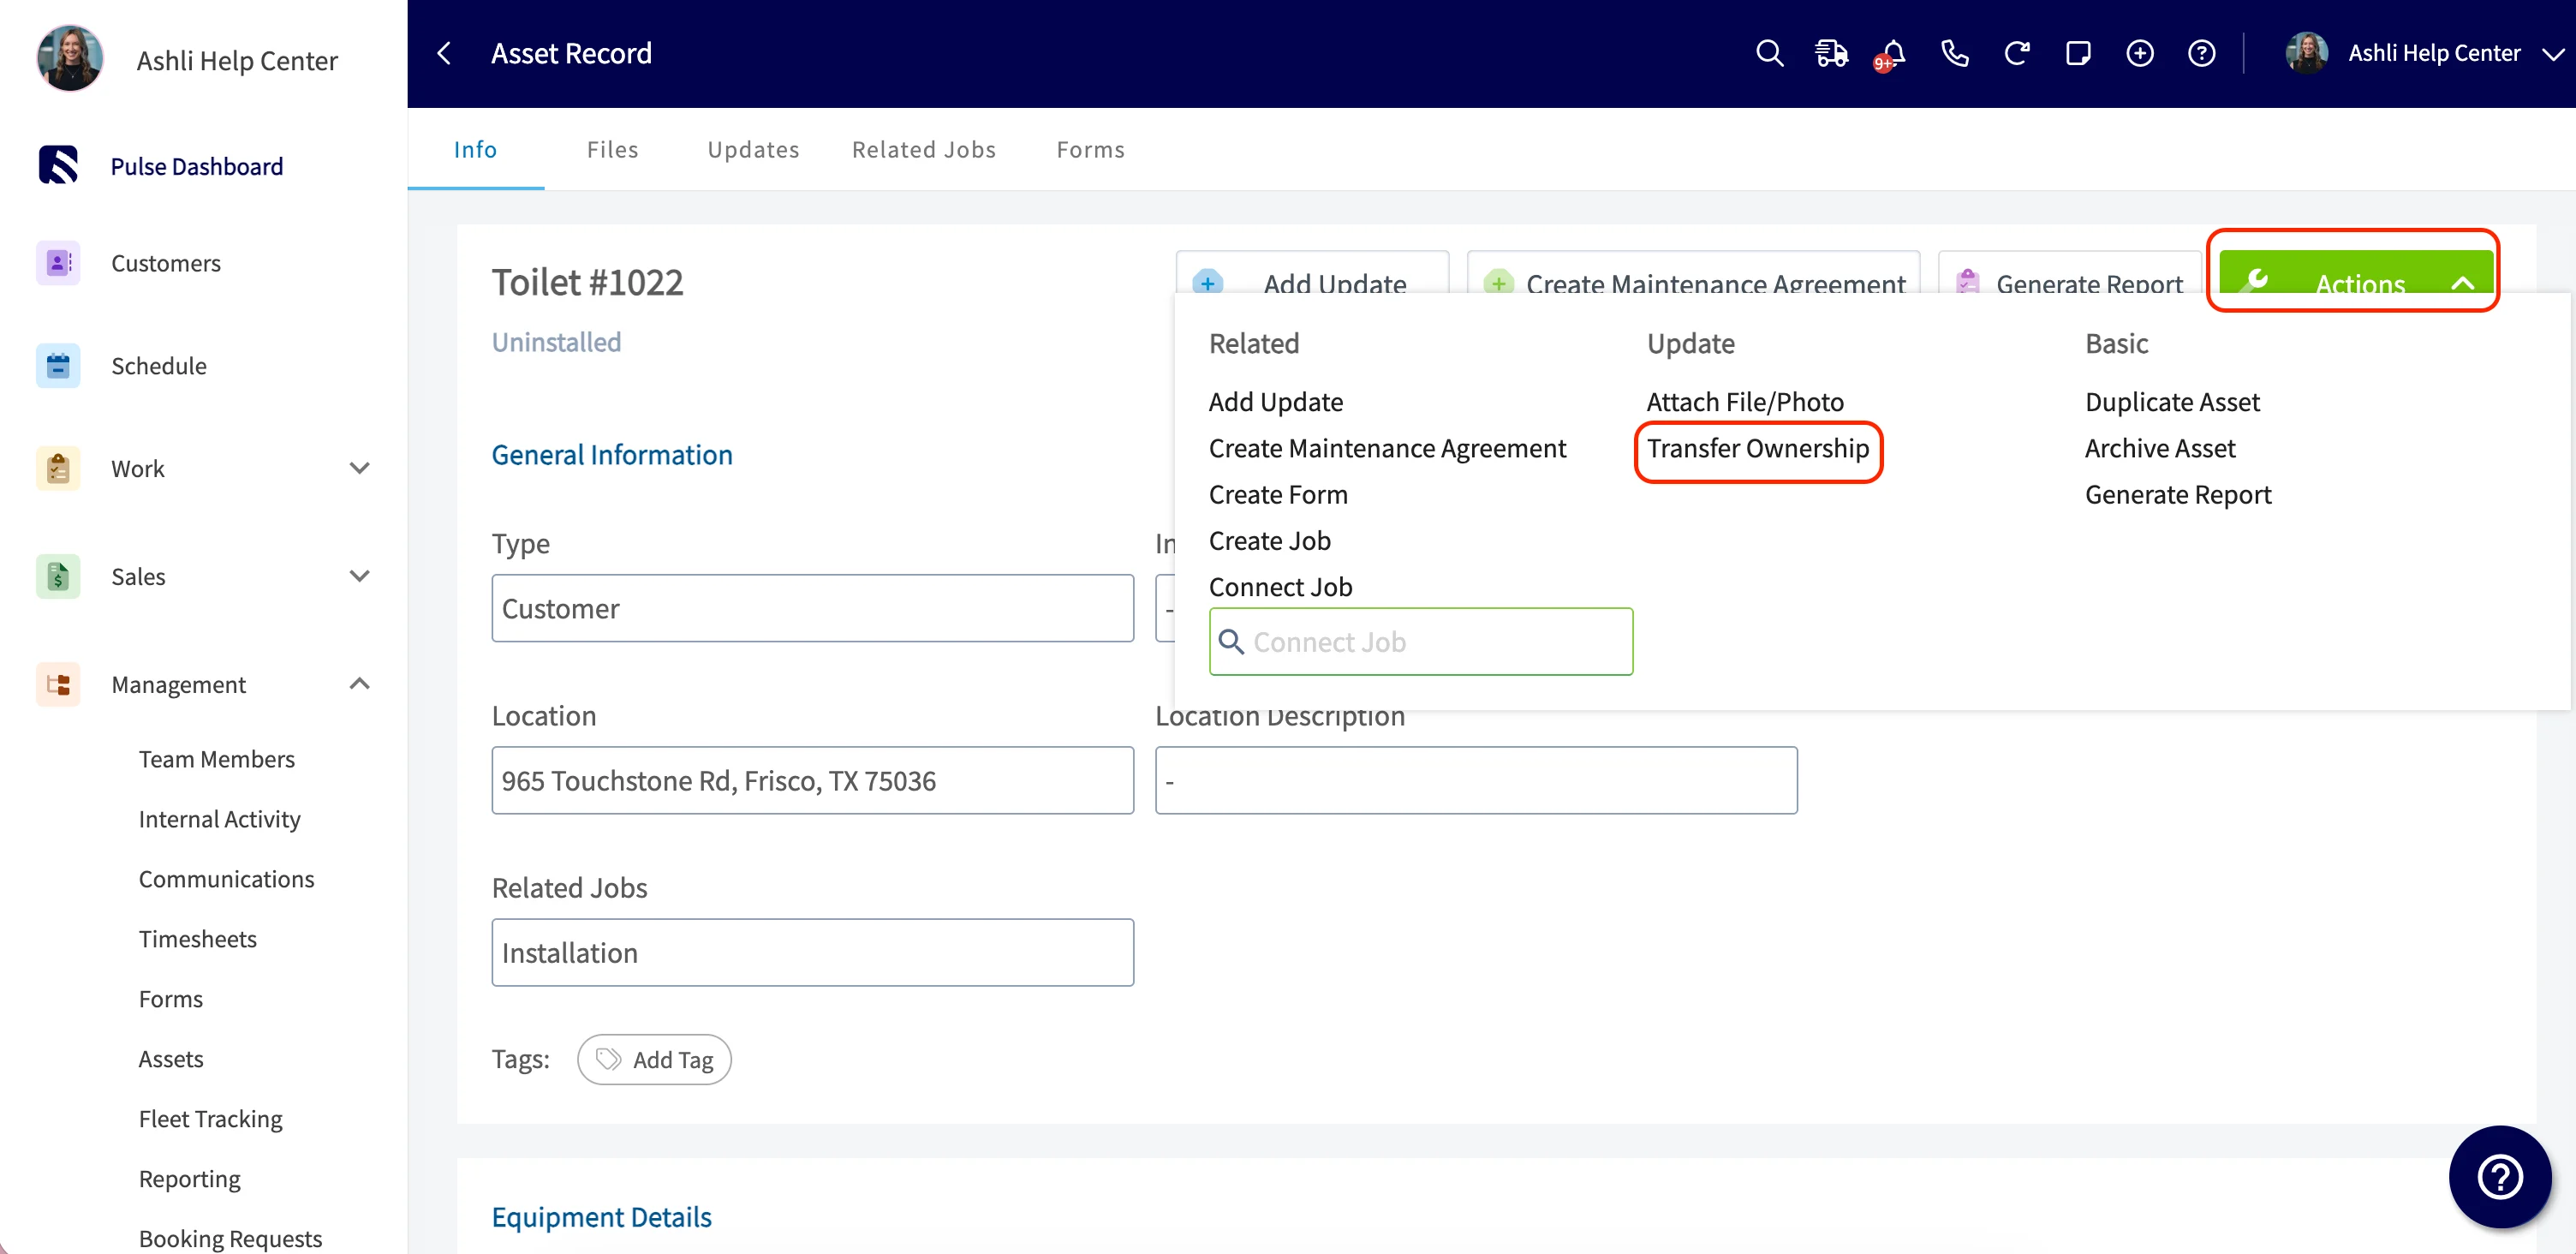
Reviewing an Asset’s Ownership History
Every completed transfer is logged on the asset record itself. Open the asset and look for the Ownership History section. This section only appears once the asset has at least one logged transfer. Each entry shows:- From Customer
- To Customer
- Transfer Date
- Transferred By
- Reason
- Notes
FAQs
Can I archive assets? Yes, you can! To archive an asset, click on the Asset Record you want to remove. Then, click the green Actions button in the top right corner of your screen. From there, select Archive Asset.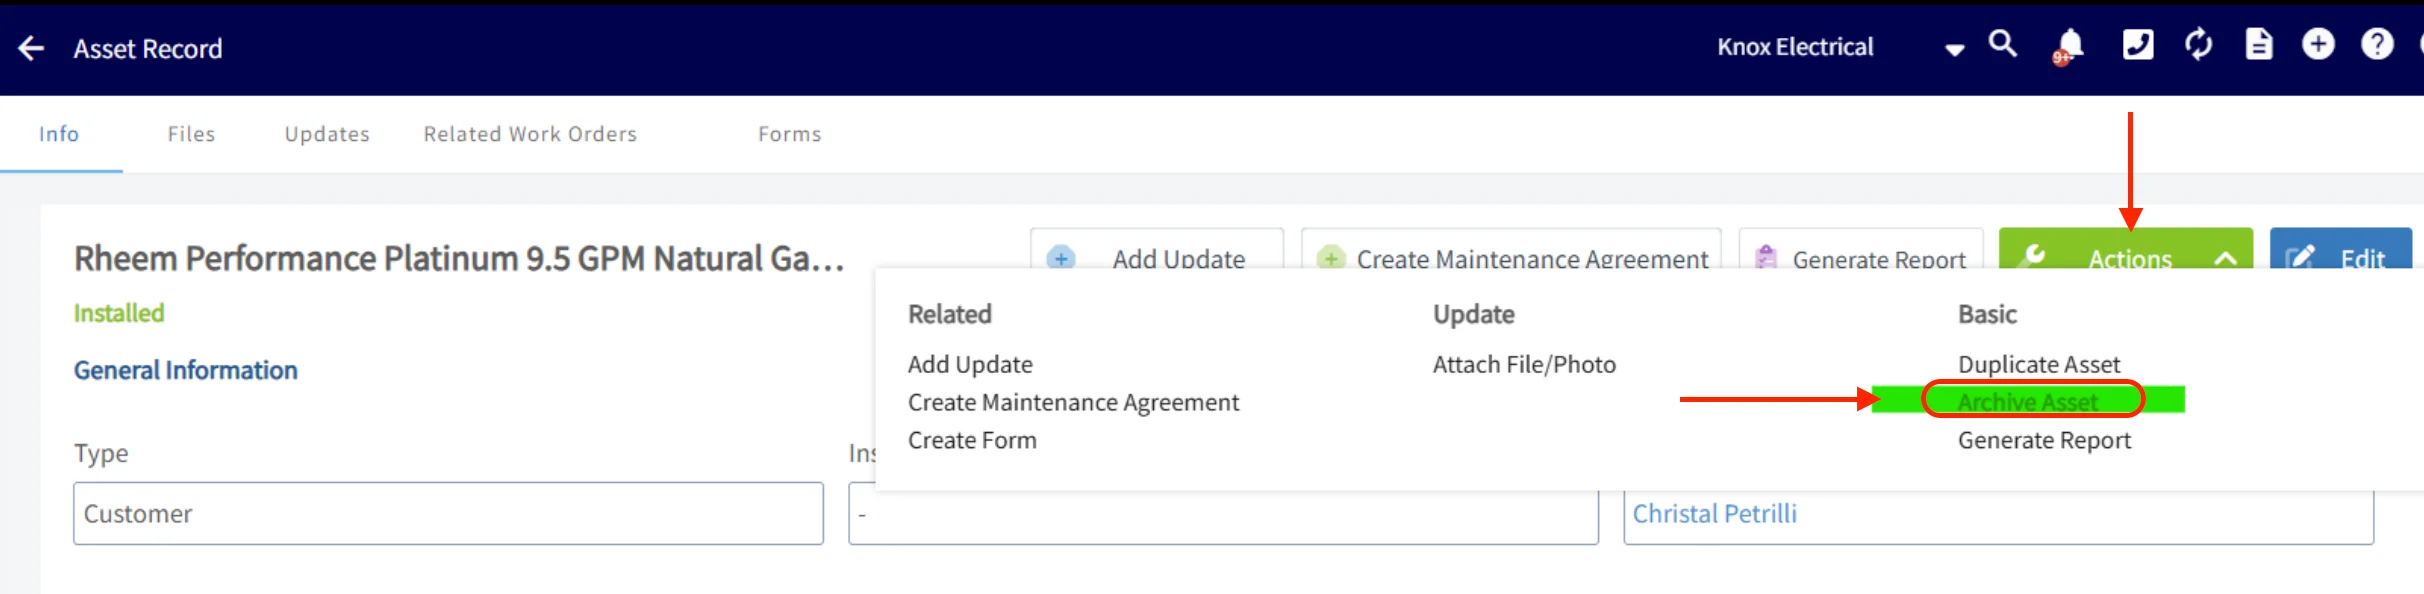
Video Tutorial
Have additional questions? Contact us at support@fieldpulse.com or use the chat feature in the bottom right corner of your screen.