
Who uses this: Administrators create the fields — Company Settings is Administrator-only; each field’s own visibility is set for the Managers and Service Agent roles. Availability: All regions.An inventory item custom field stores extra data on an inventory item record — the kind of detail a warehouse needs but a standard item record does not capture, such as where a part physically sits. When a tech knows a part is in the building but cannot say which aisle, shelf, or bin, the search costs real time. You create each inventory item custom field once in Company Settings, set the order the fields appear in, and choose which roles can see each field.
Overview
An inventory item custom field is a field you define in Company Settings that appears on your inventory item records to store and display any data you want to track. These fields appear only on inventory items, in addition to your Setting Up Item Custom Fields. A common use is recording the exact location of an item within your storage area, the way items are organized at a hardware store:- Aisle — the aisle where the item is located.
- Shelf — the specific shelf the item sits on.
- Bin — the bin or container that holds the item.
Custom fields in FieldPulse have a character limit of 250 characters.
Before you begin
- Decide who should see each field. Every inventory item custom field carries role-based visibility, so know whether the field is for Managers, Service Agent, or both before you create it.
- Plan the options for any Drop-down field in advance. You add the options while you create the field.
- Know the difference from Setting Up Item Custom Fields. Item custom fields appear on every item in your item list; inventory item custom fields appear only on inventory items and show in addition to them.
- Confirm your inventory items are set up. See Setting Up Item List & Inventory.
Step-by-step setup
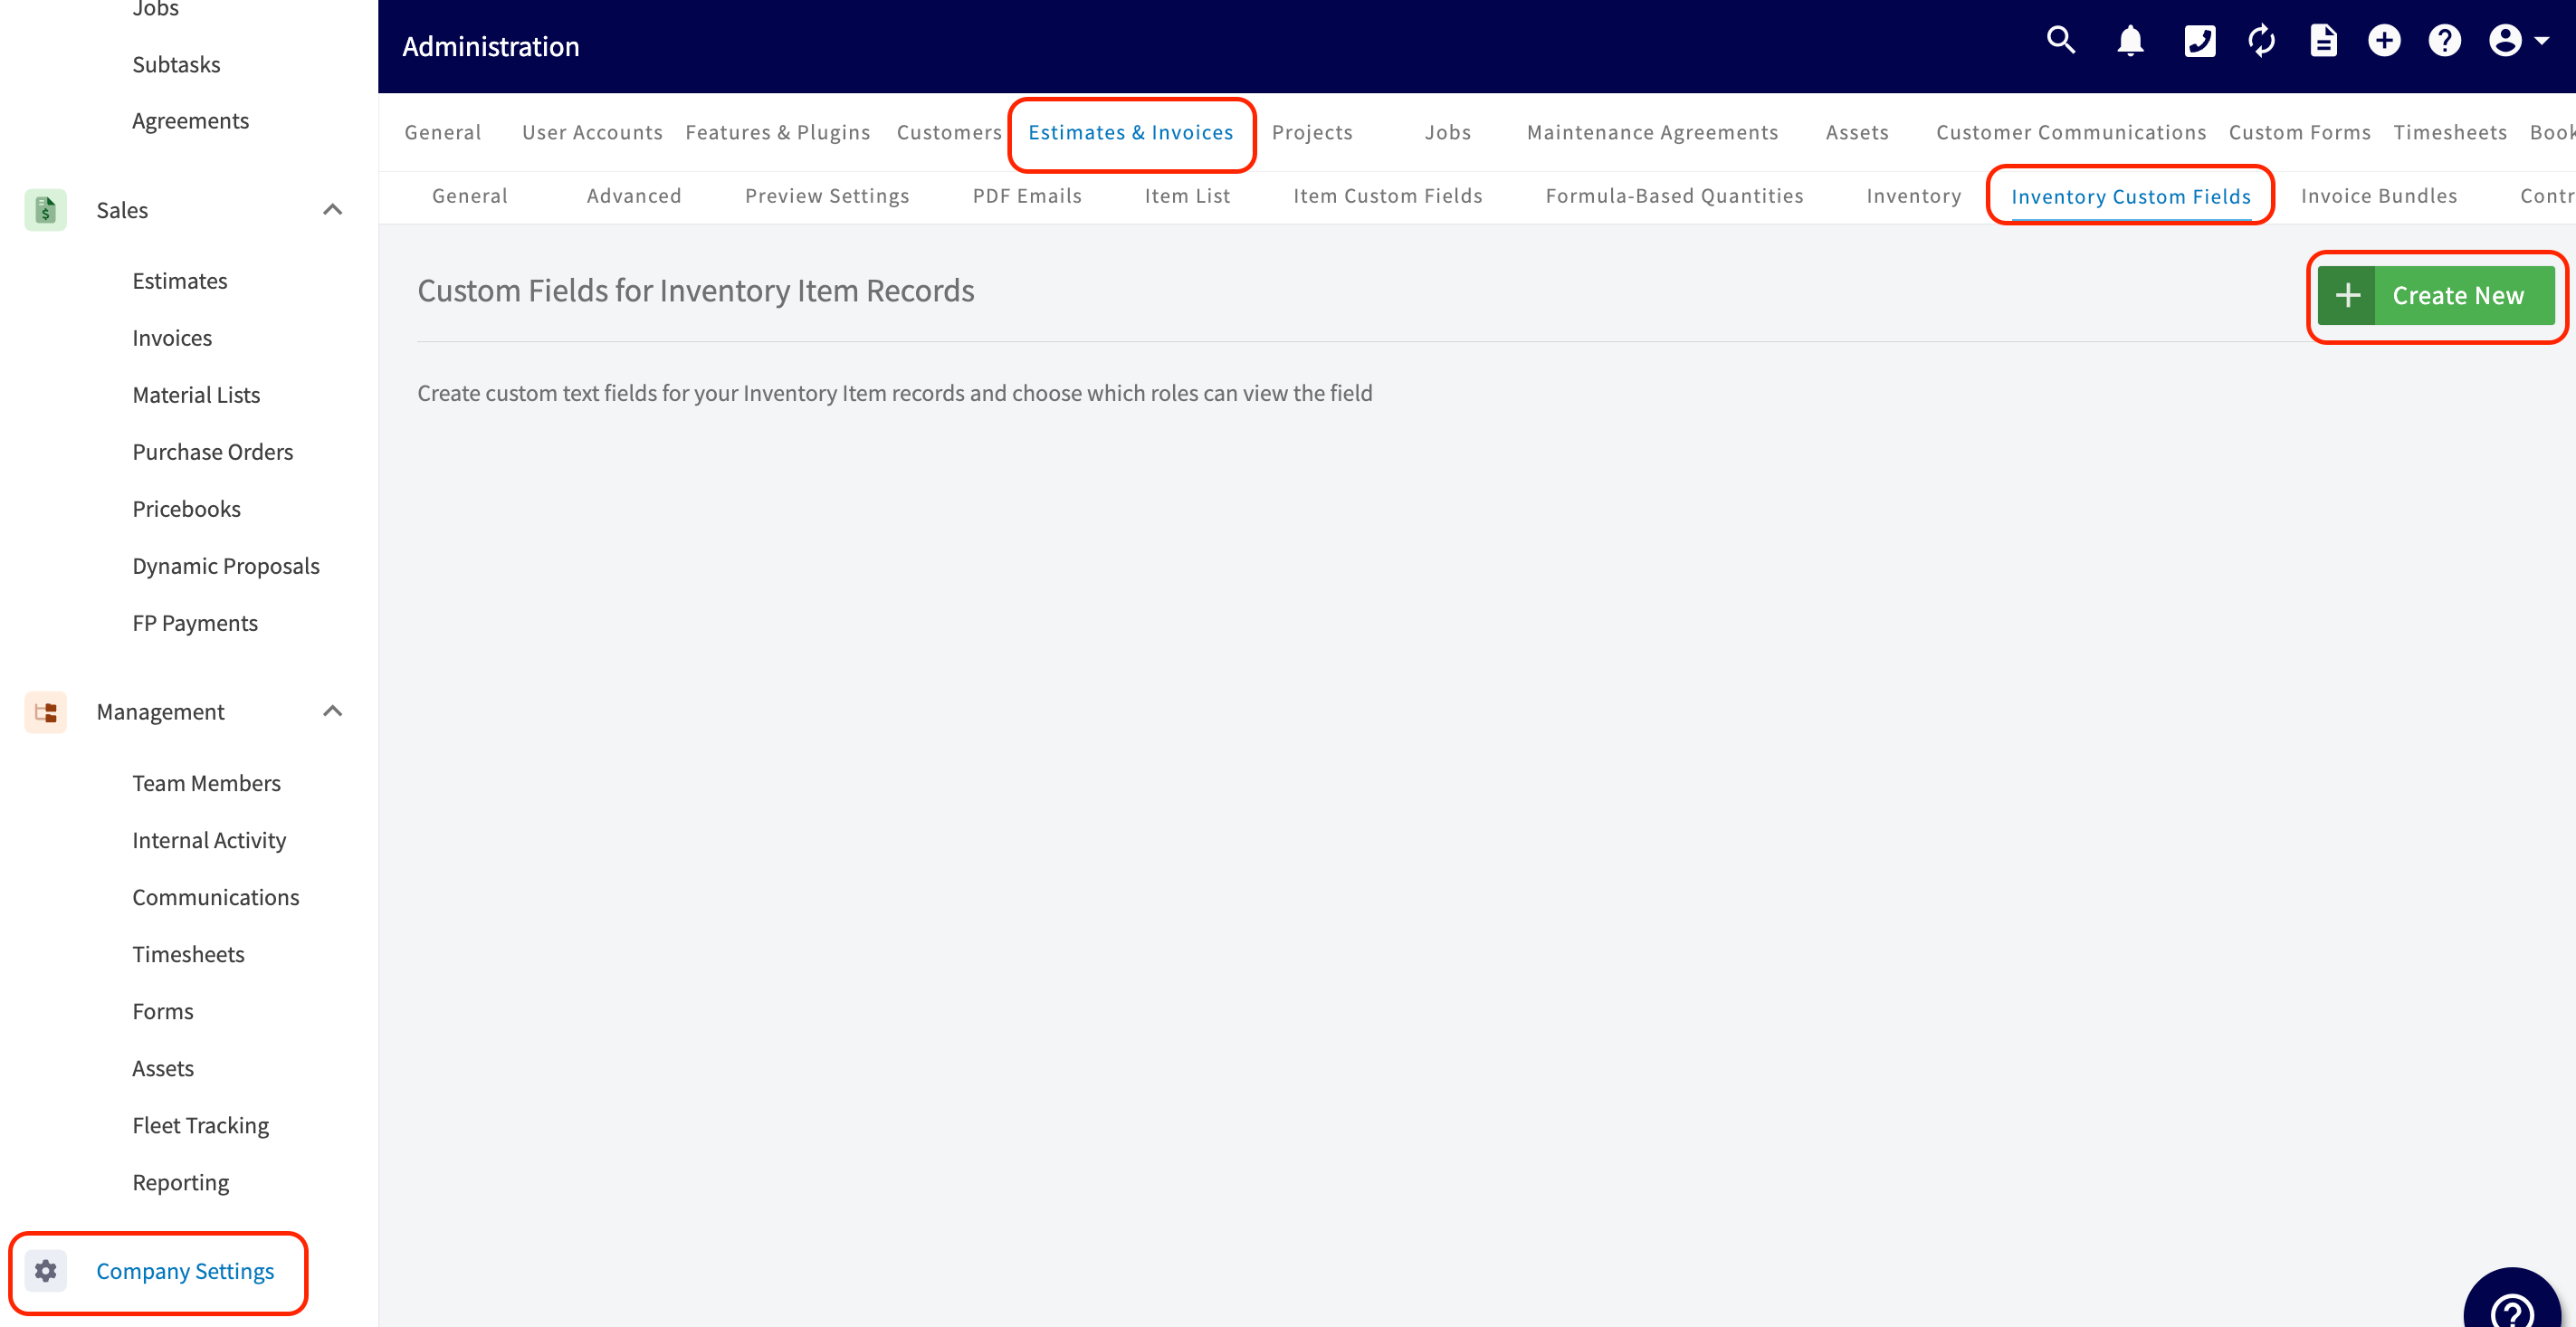
- Go to Company Settings.
- Select Estimates & Invoices.
- Select the Inventory Custom Fields tab.
-
Select Create New.
-
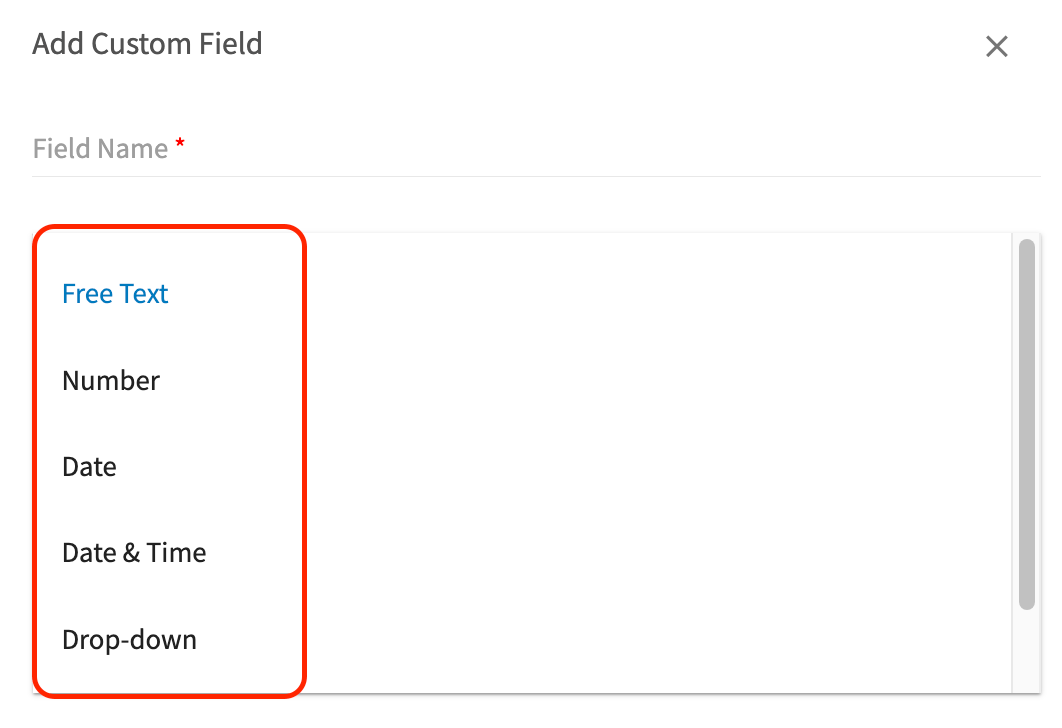
In the Add Custom Field window, enter the Field Name.

-
Select a Type from the dropdown. See the Settings reference below for what each type stores.
-
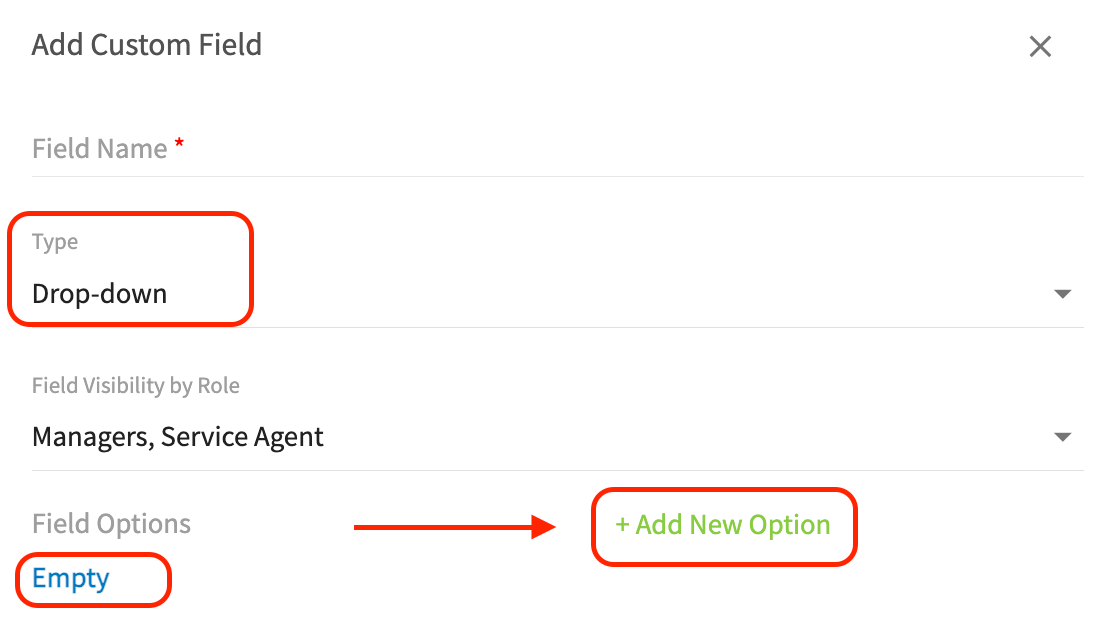
For a Drop-down field, select + Add New Option.
-
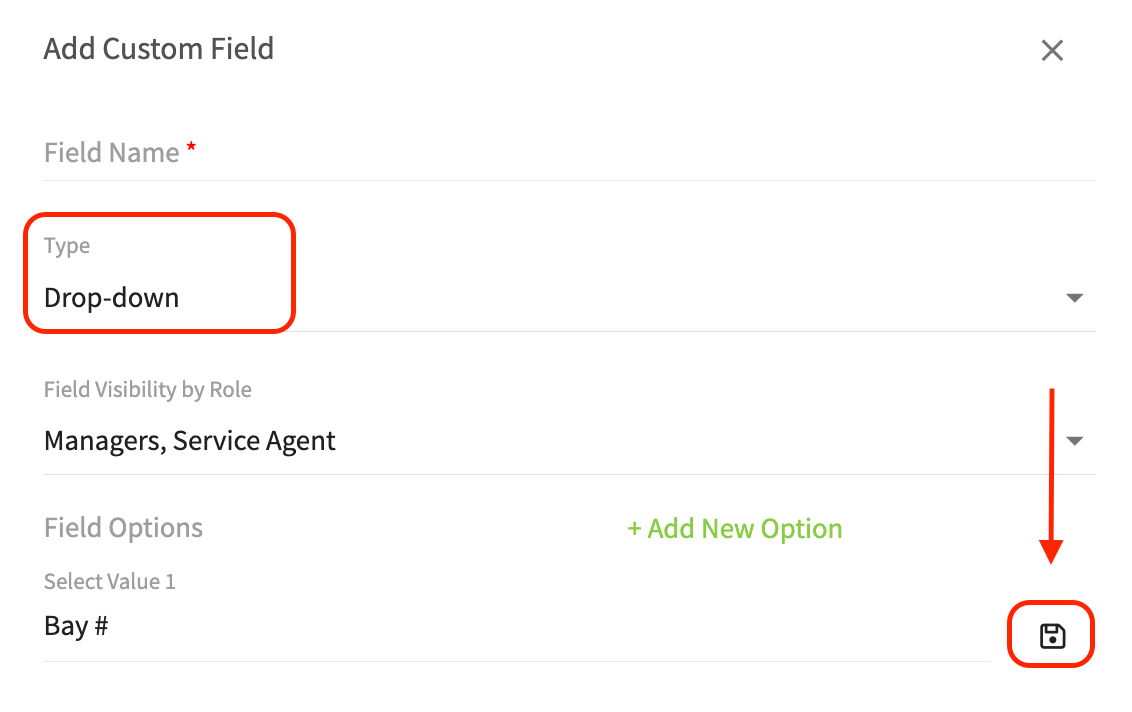
Enter the option name and select the save icon to keep it. Repeat for every option you need.
-
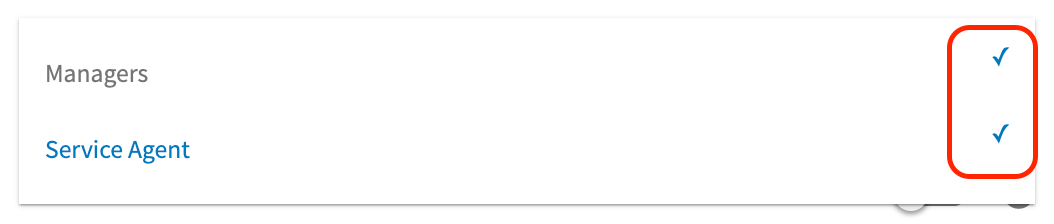
Set Field Visibility by Role by checking or unchecking Managers and Service Agent.
- Save the field.