
Who uses this: Admins have Full Reporting access, and Team Managers can be given it. Service Agents and Limited Agents do not have Full Reporting access. Availability: All regions · Custom Forms must be enabled for your account under Company Settings > Features & Plugins — contact FieldPulse for pricing.A custom forms report is built from the Forms tab in raw data reporting, and it reports on any Custom Forms template in your account. You pick the form template, set the date range, and load the responses your team submitted to that template into one table.
Overview
The Forms tab is one of the record types in FieldPulse’s raw data reporting, and it reports on one custom form template at a time. Select the template from the Form drop-down, set the created date range, choose the columns you want, and load the data. Custom forms can stand on their own or be attached to records such as jobs, estimates, and invoices, so the report’s Related columns carry the customer, job, invoice, project, asset, or maintenance agreement each response is attached to. For the parts of the reporting flow that are the same on every record type — filters, groupings, saving a report, and exporting to CSV — see How to Use Raw Data Reporting.To learn more about custom forms, see the Custom Forms Overview.
Before you begin
- Turn on custom forms for your account. See Setting Up Custom Forms.
- Build the form template you want to report on. See How to Create a Custom Form.
- Check that your role has reporting access. An Admin has Full Reporting access; a Team Manager needs Full Reporting access turned on.
Choose the form
- Select Reporting under the Management tab in the left-side menu.
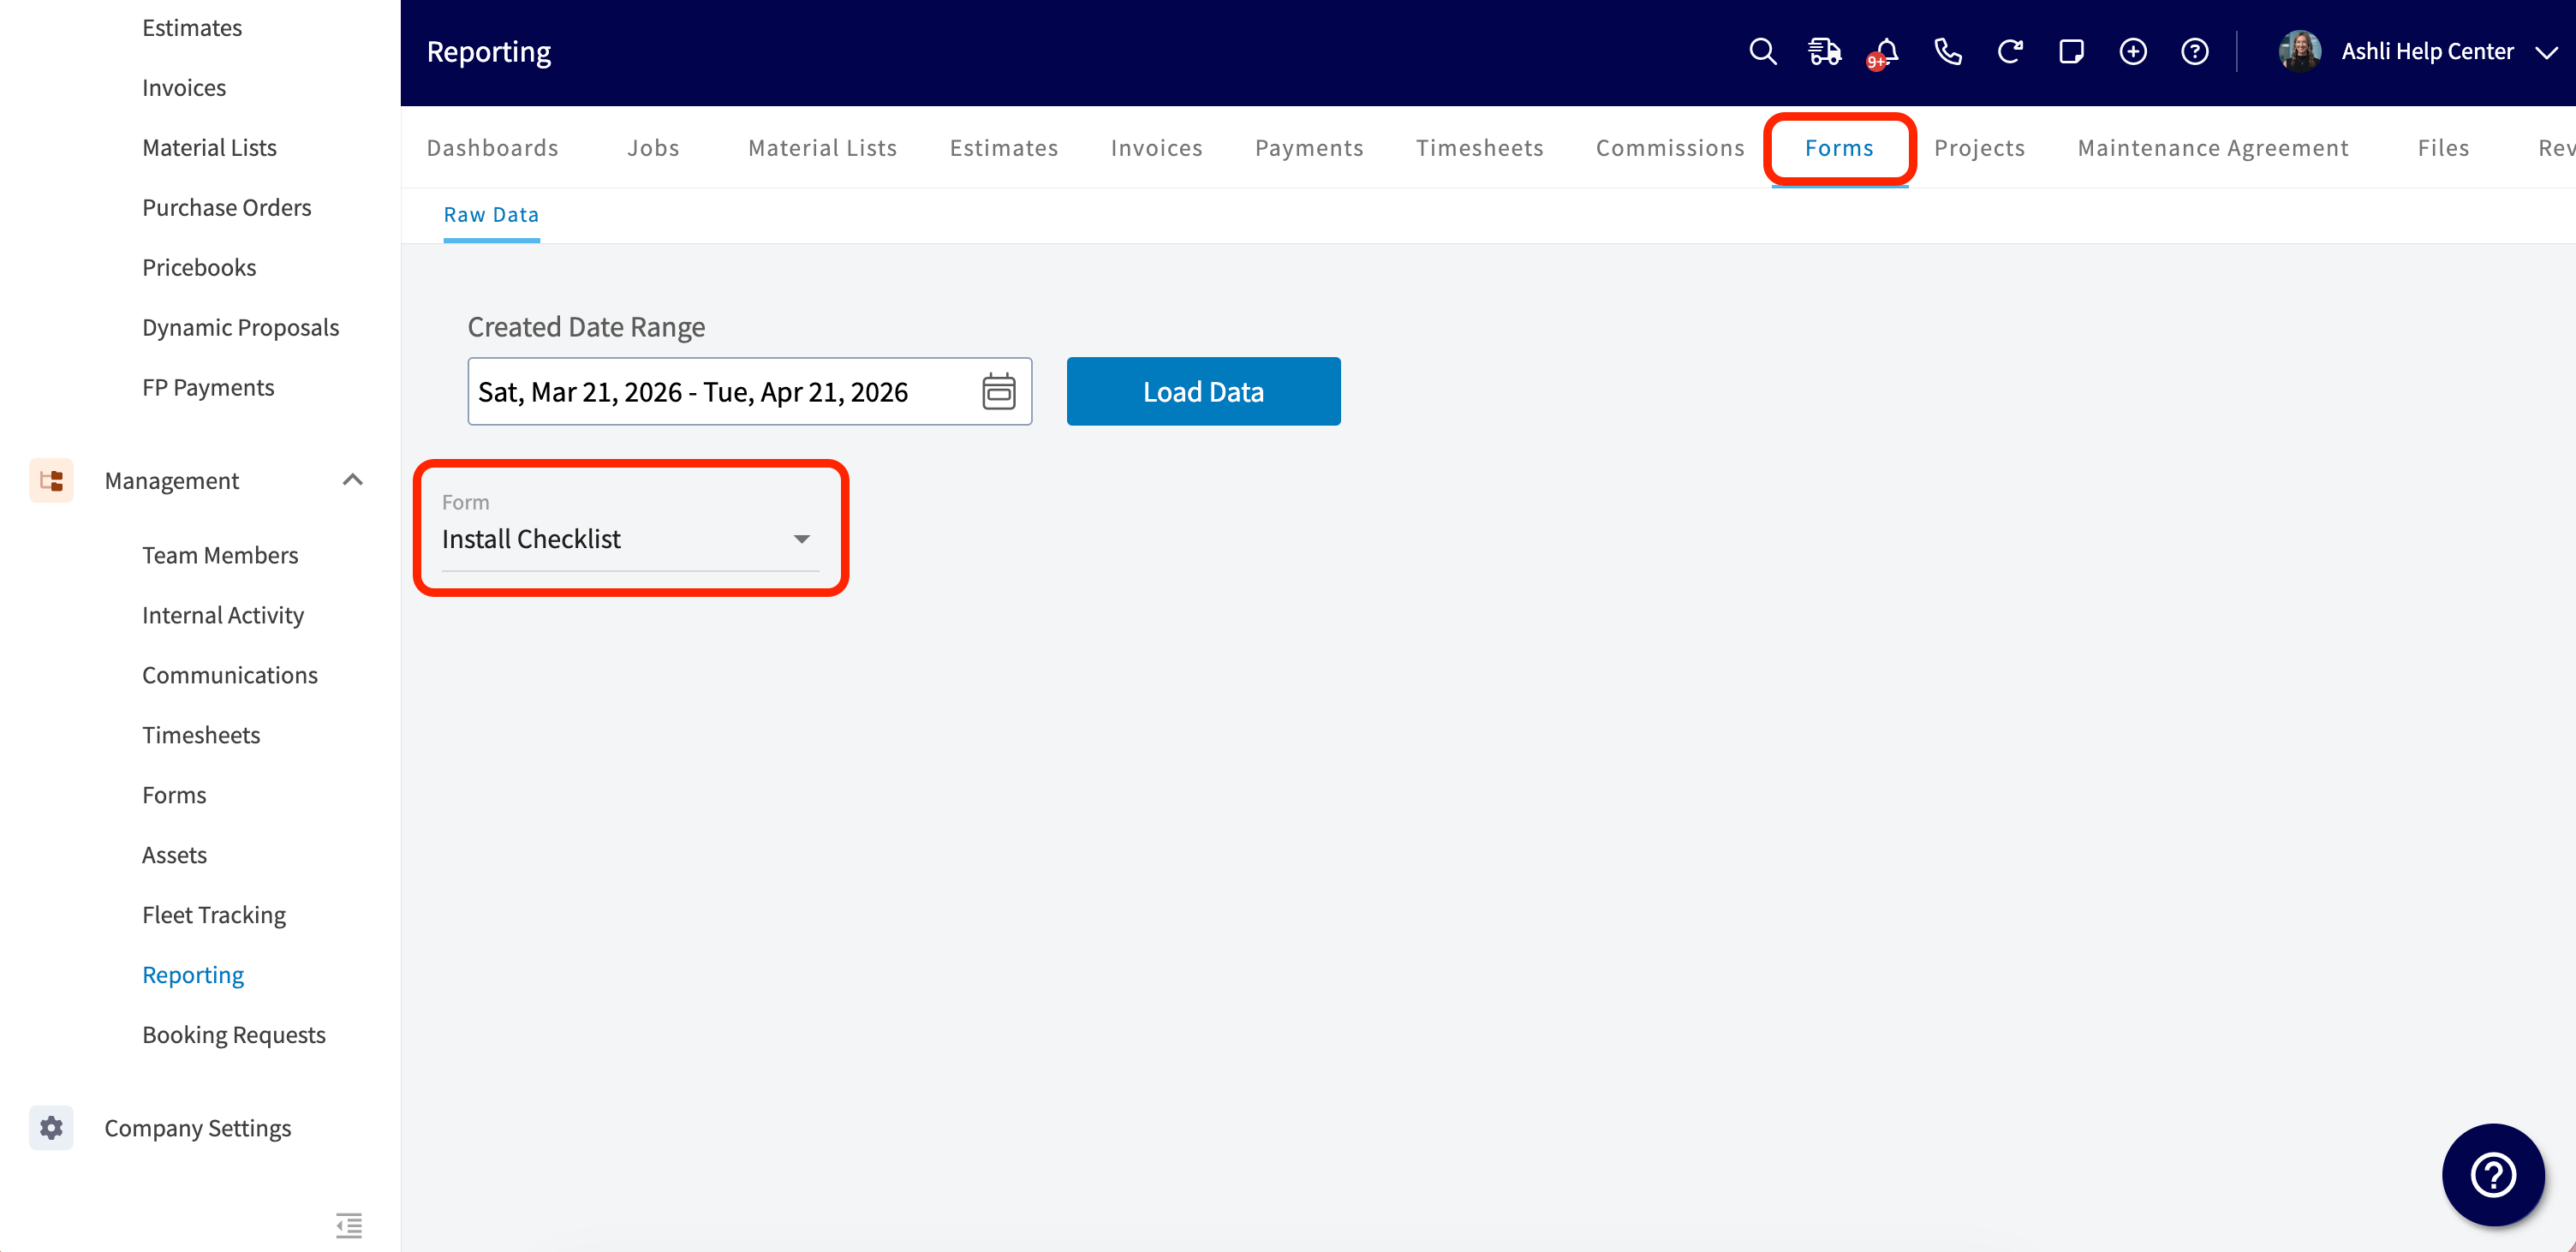
- Select the Forms tab, then select Raw Data.
- Select the form you want to report on from the Form drop-down.
Set the date range
Select the calendar icon in Created Date Range to choose the start date for the reporting period or pick a preset range, then select Load Data.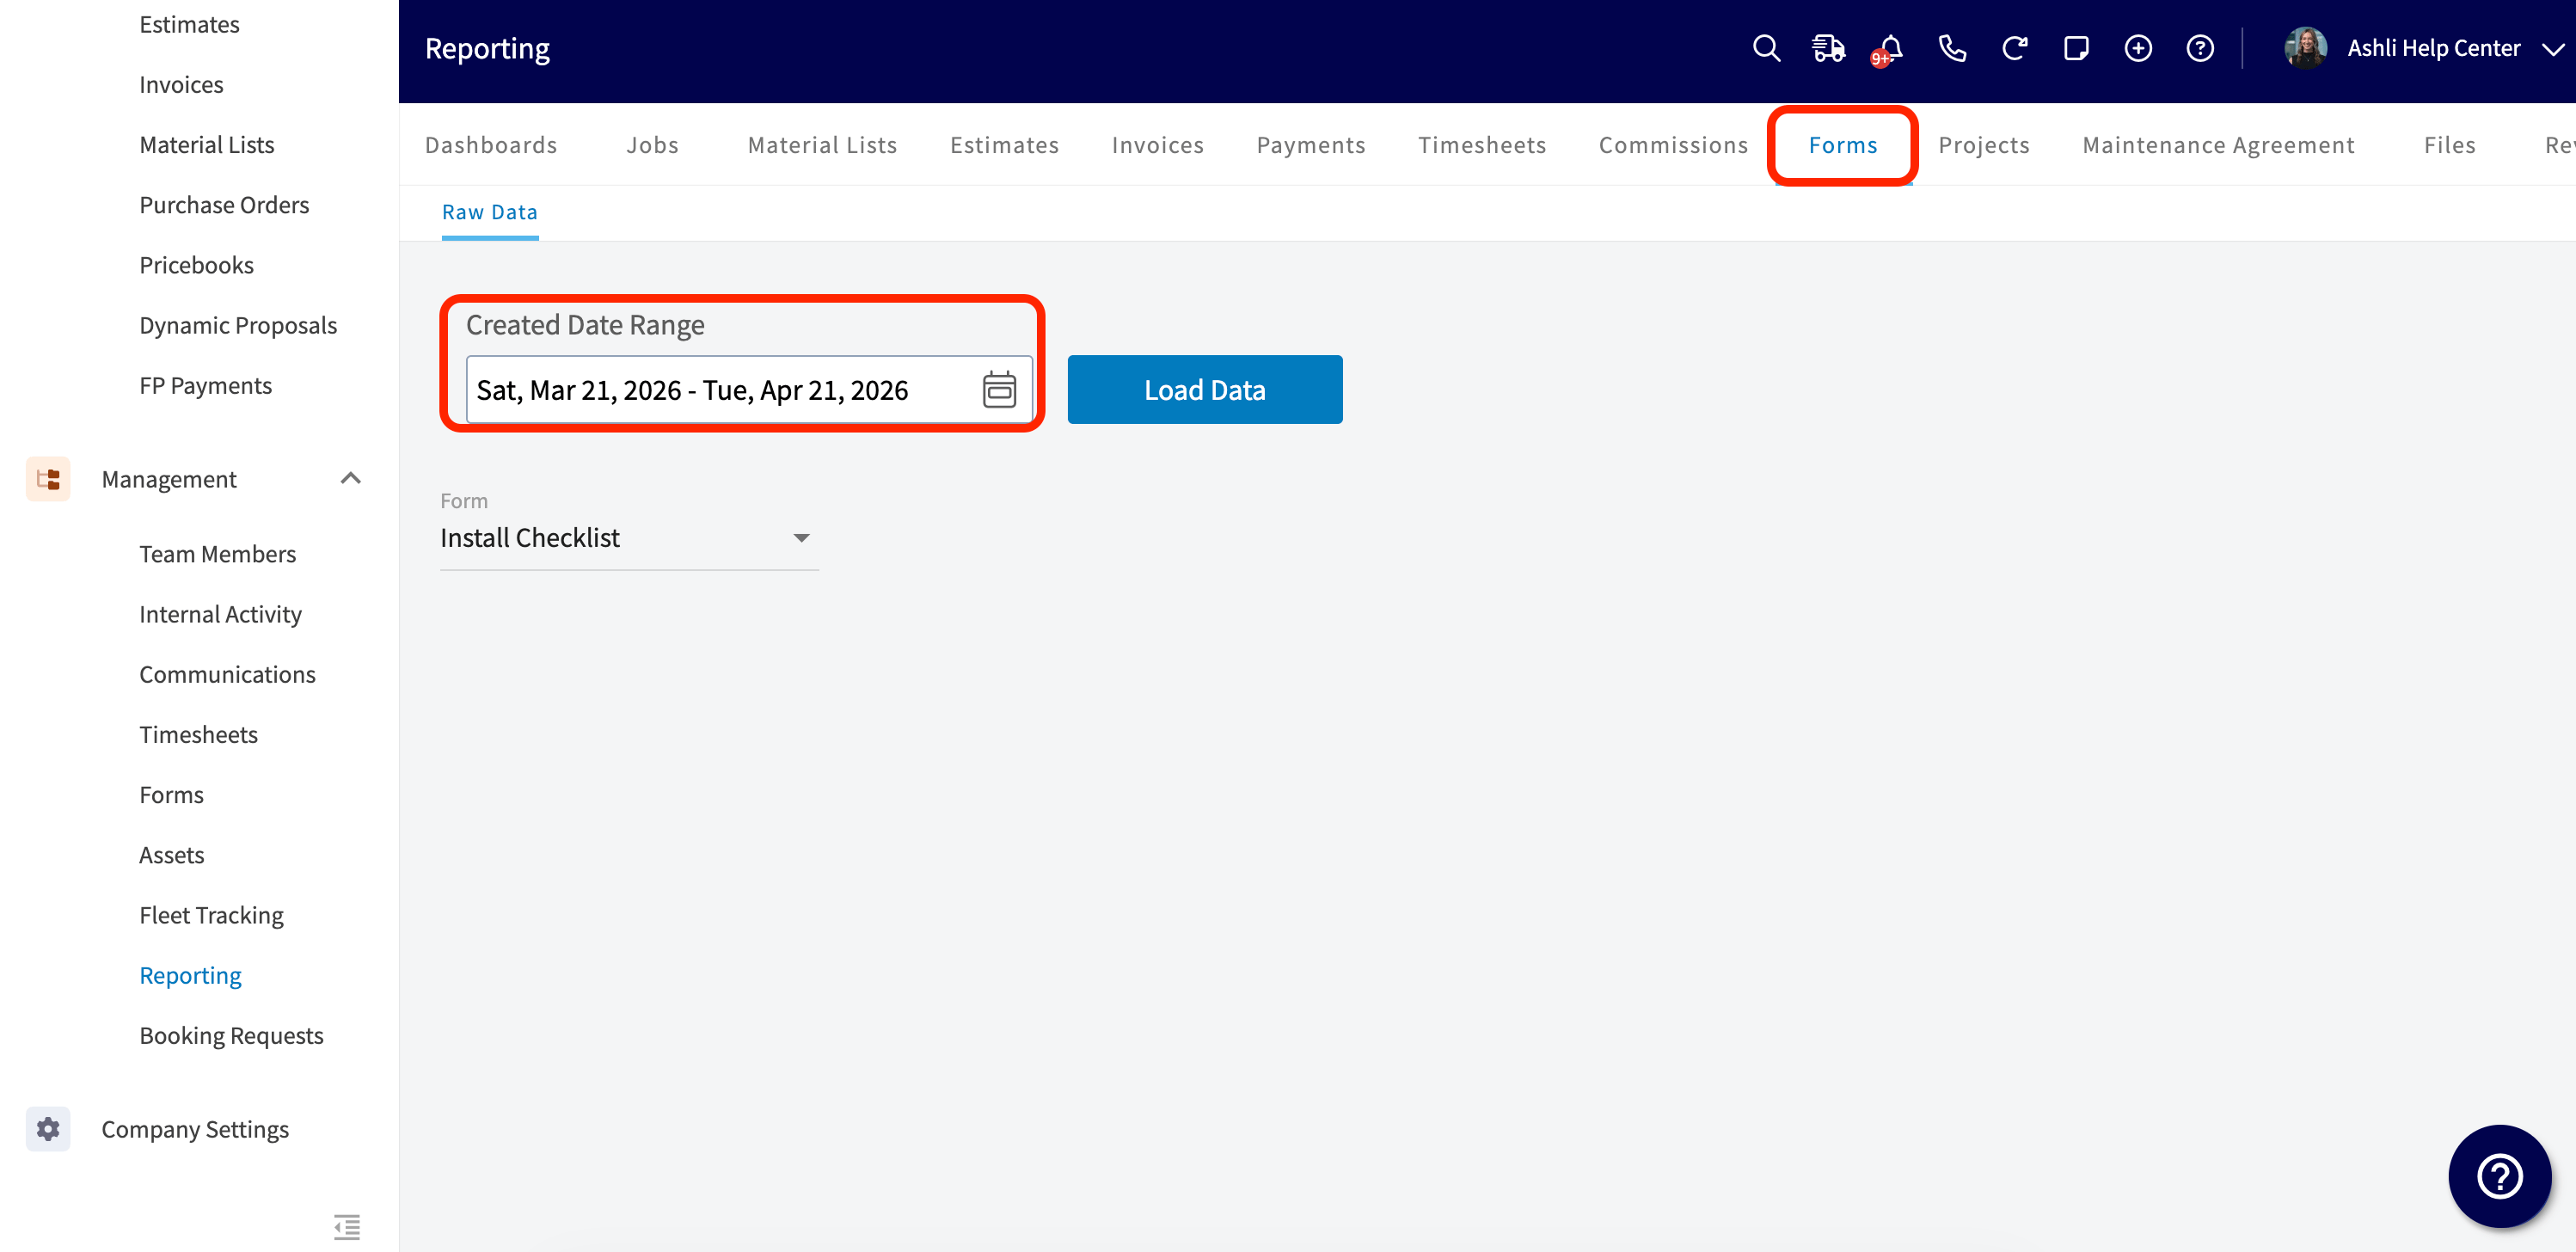
Choose your columns
Select Columns to choose which fields appear in the report table.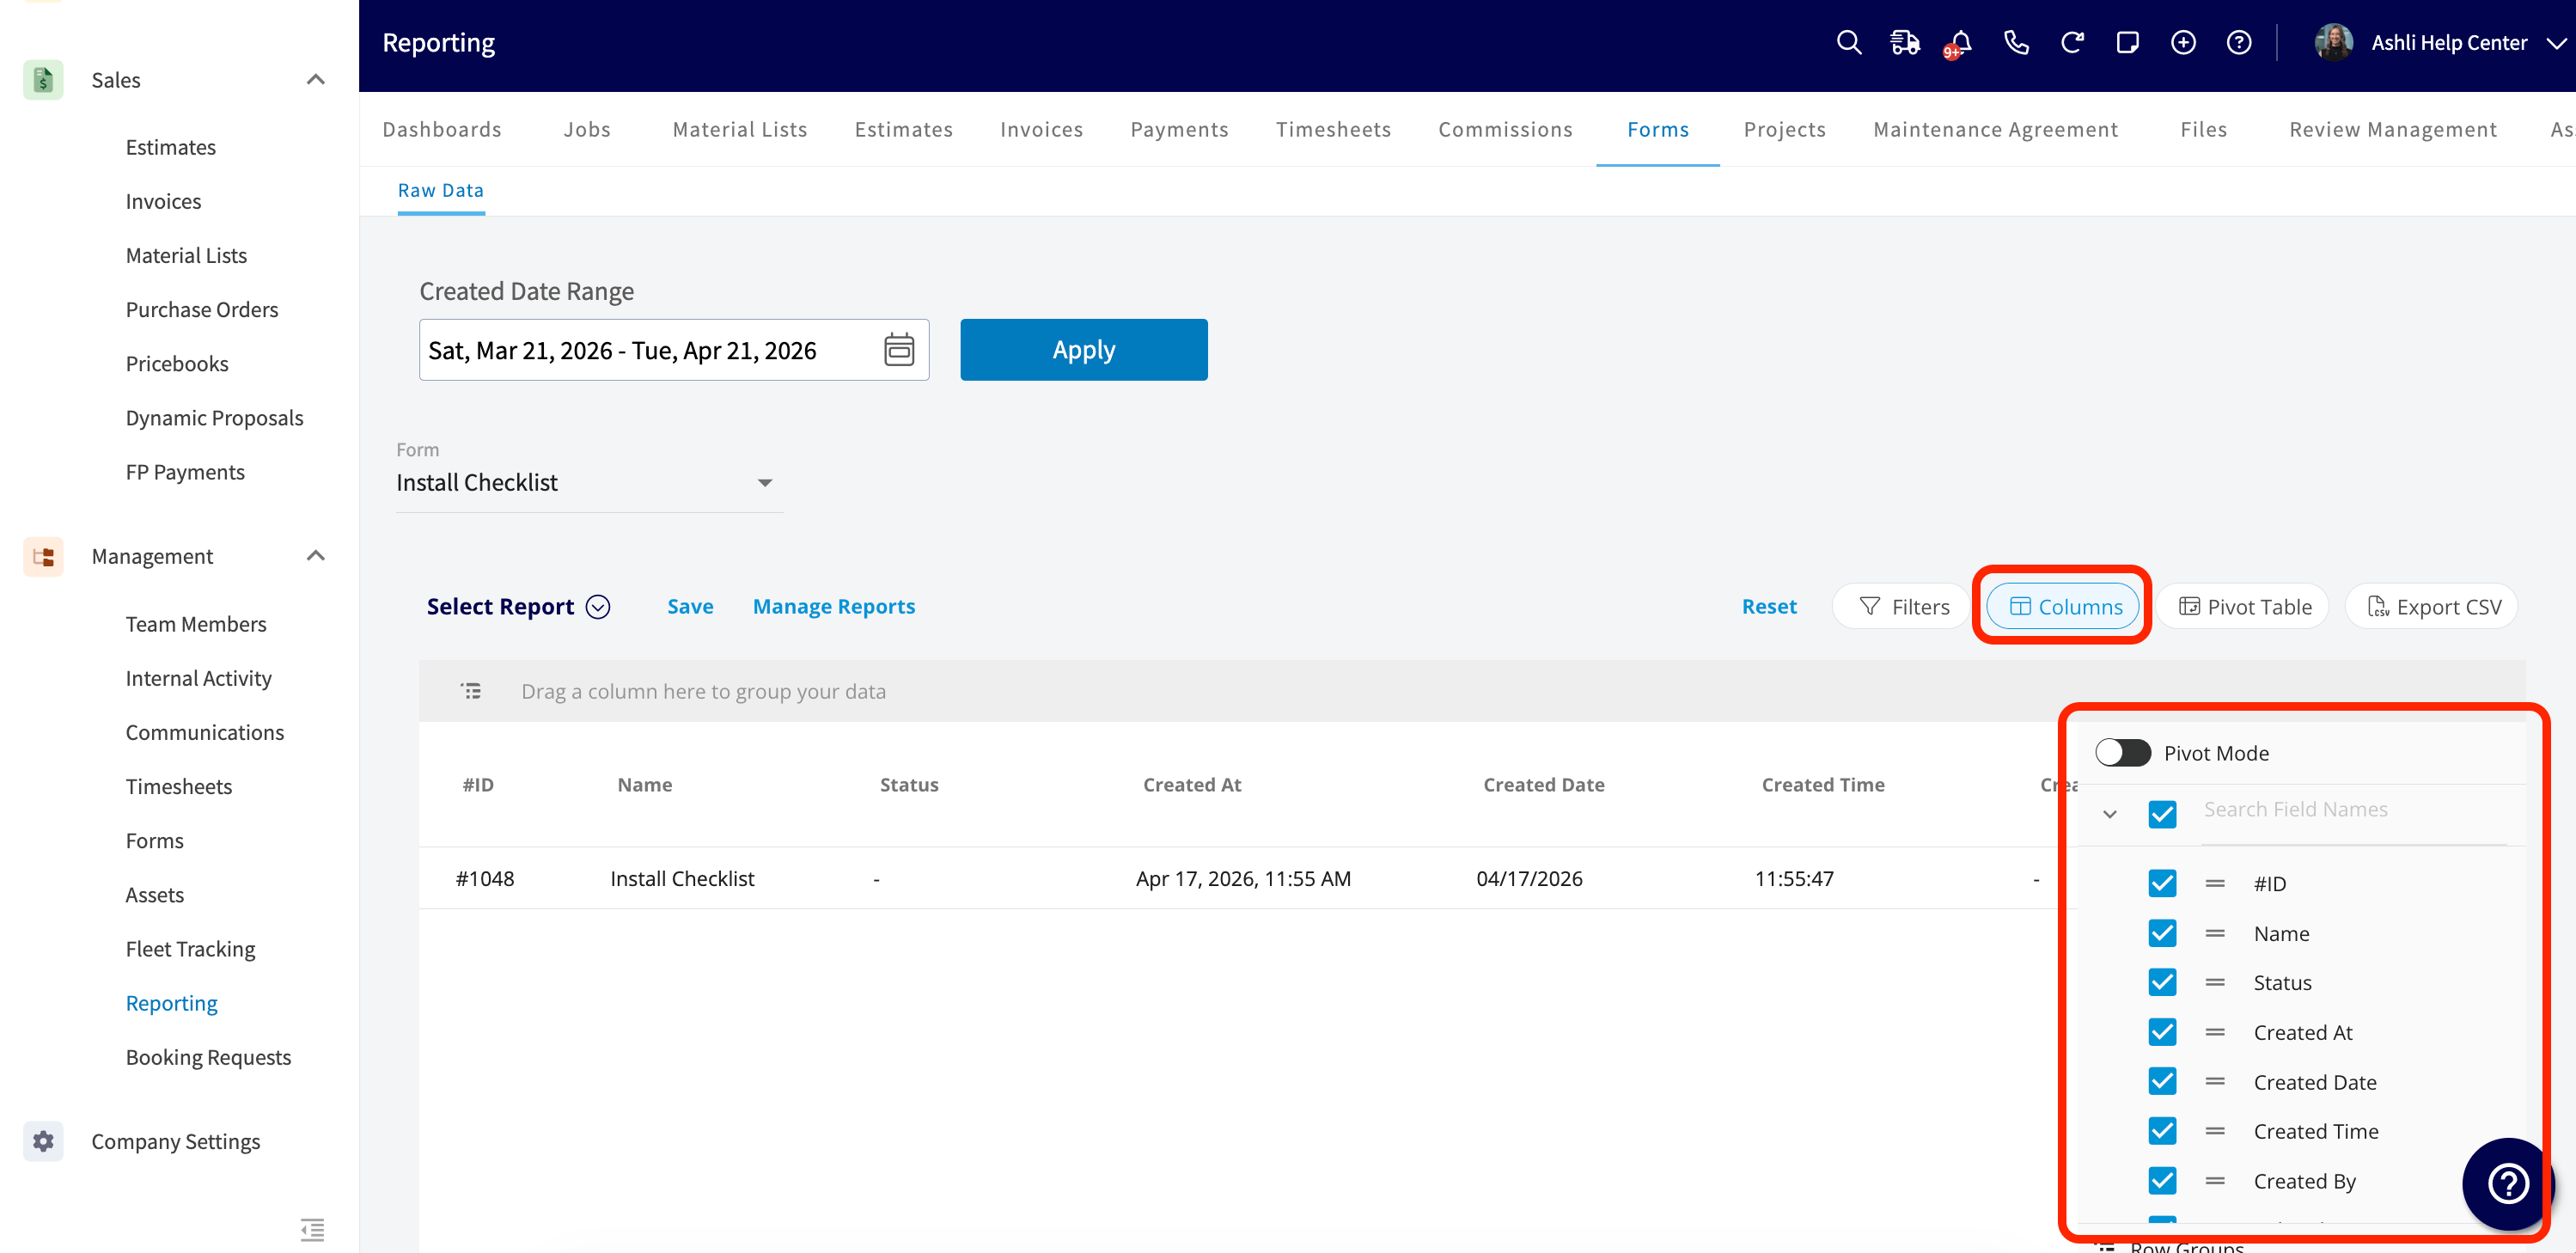
Tips
- The Related columns tie each response back to the customer, job, invoice, project, asset, or maintenance agreement the form is attached to, which is what makes a form response readable from the office after the tech has moved on.
- To see who submitted each response and when, keep the Created By, Created Date, and Created Time columns in the report.
FAQs
Can I save a custom forms report to use again?
Yes. Select Save as Report, then Save as New to store the report under Select Report, or Save as Widget to add it to your Pulse Dashboard. See How to Use Raw Data Reporting for the full saving flow.Can I narrow a custom forms report to specific responses?
Yes. Select Filters to filter the report on any field on the record, the same way filters work on every other raw data report.Can I export a custom forms report to a spreadsheet?
Yes. Select Export CSV to download the report currently displayed on your screen as a CSV file to your device.Related articles
- How to Use Raw Data Reporting
- Custom Forms Overview
- How to Create a Custom Form
- How to Link Custom Forms to Jobs