Use the Invoices > Inventory tab to create reports based on inventory data including supplier data, tags, unit cost, and more. Some common inventory reports include inventory by supplier and inventory items by hub.

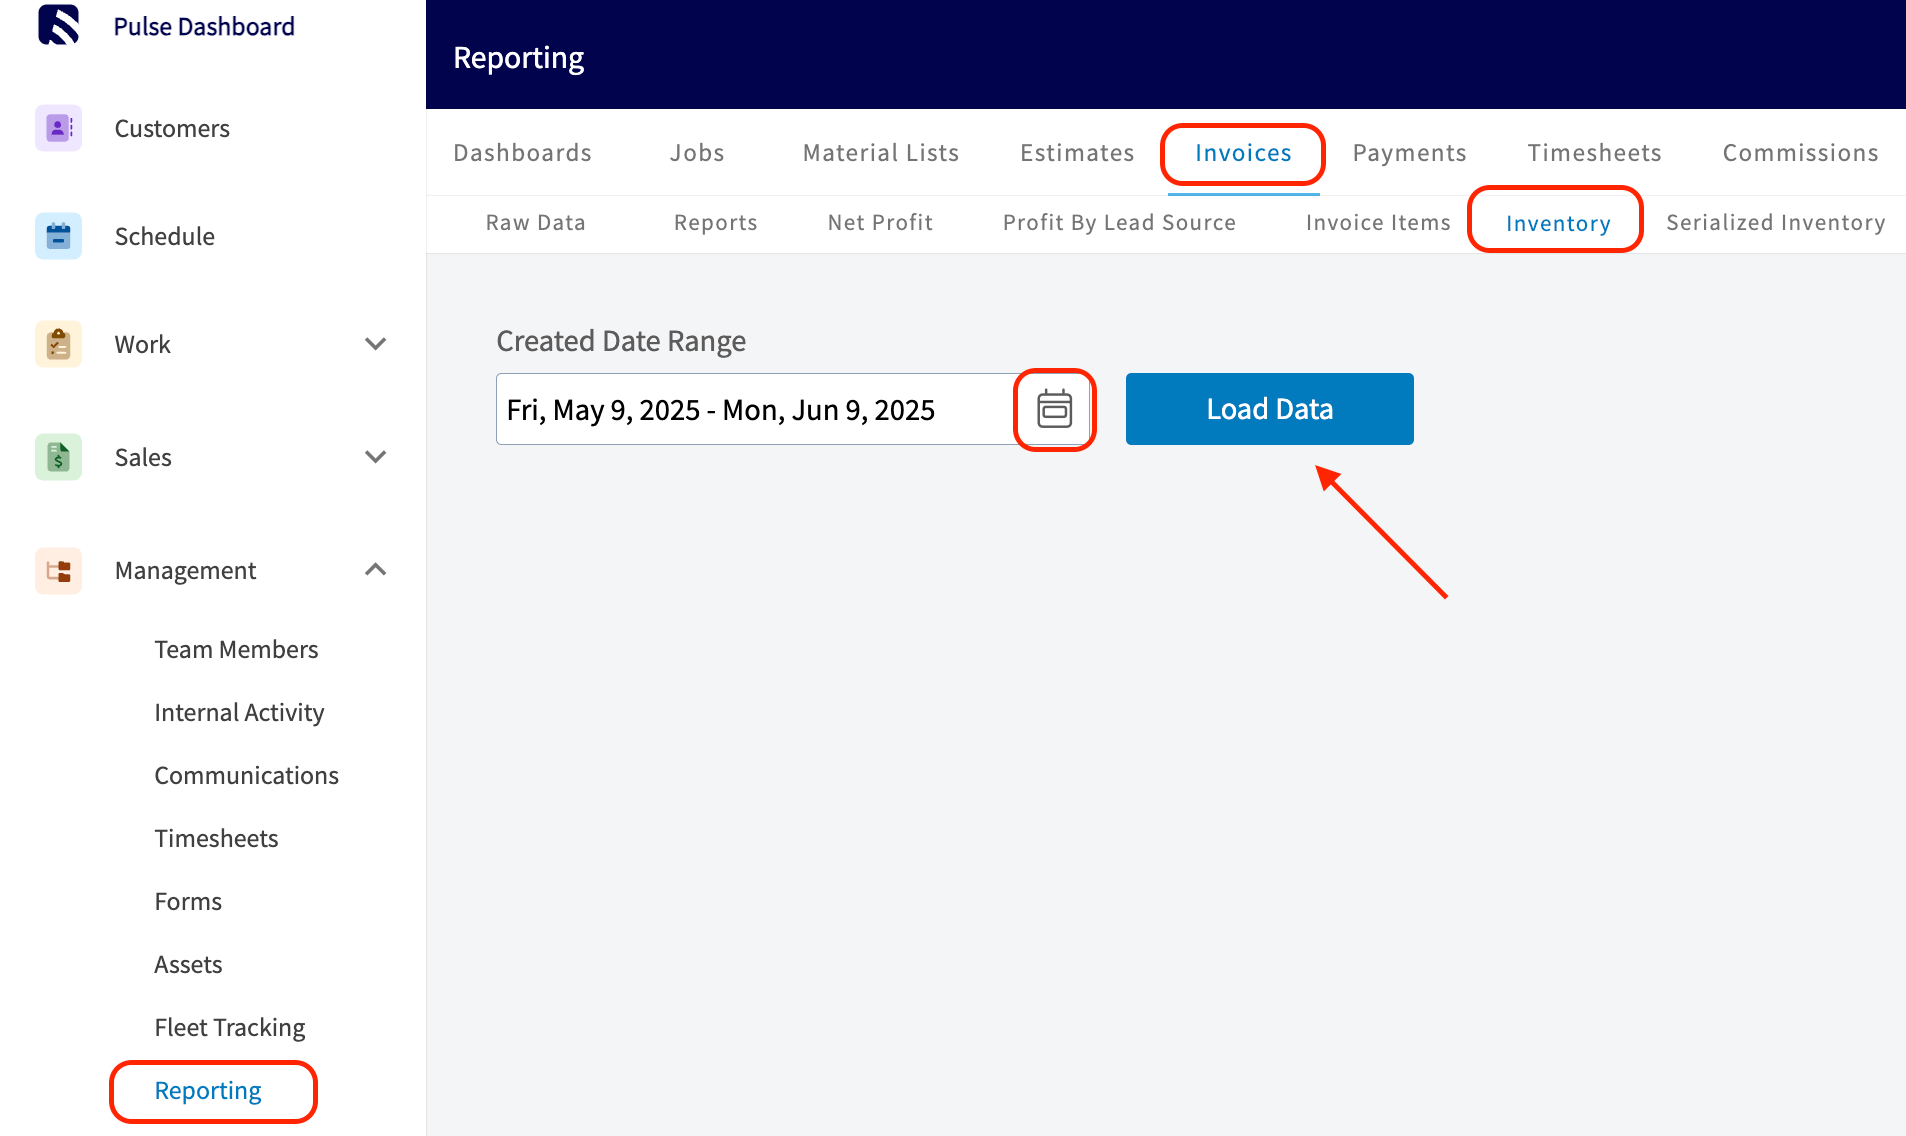
Create an Inventory Report

Date Range

Begin by selecting the start date range for which you’d like to report on. Click on the calendar icon to select a date range and click Load Data.
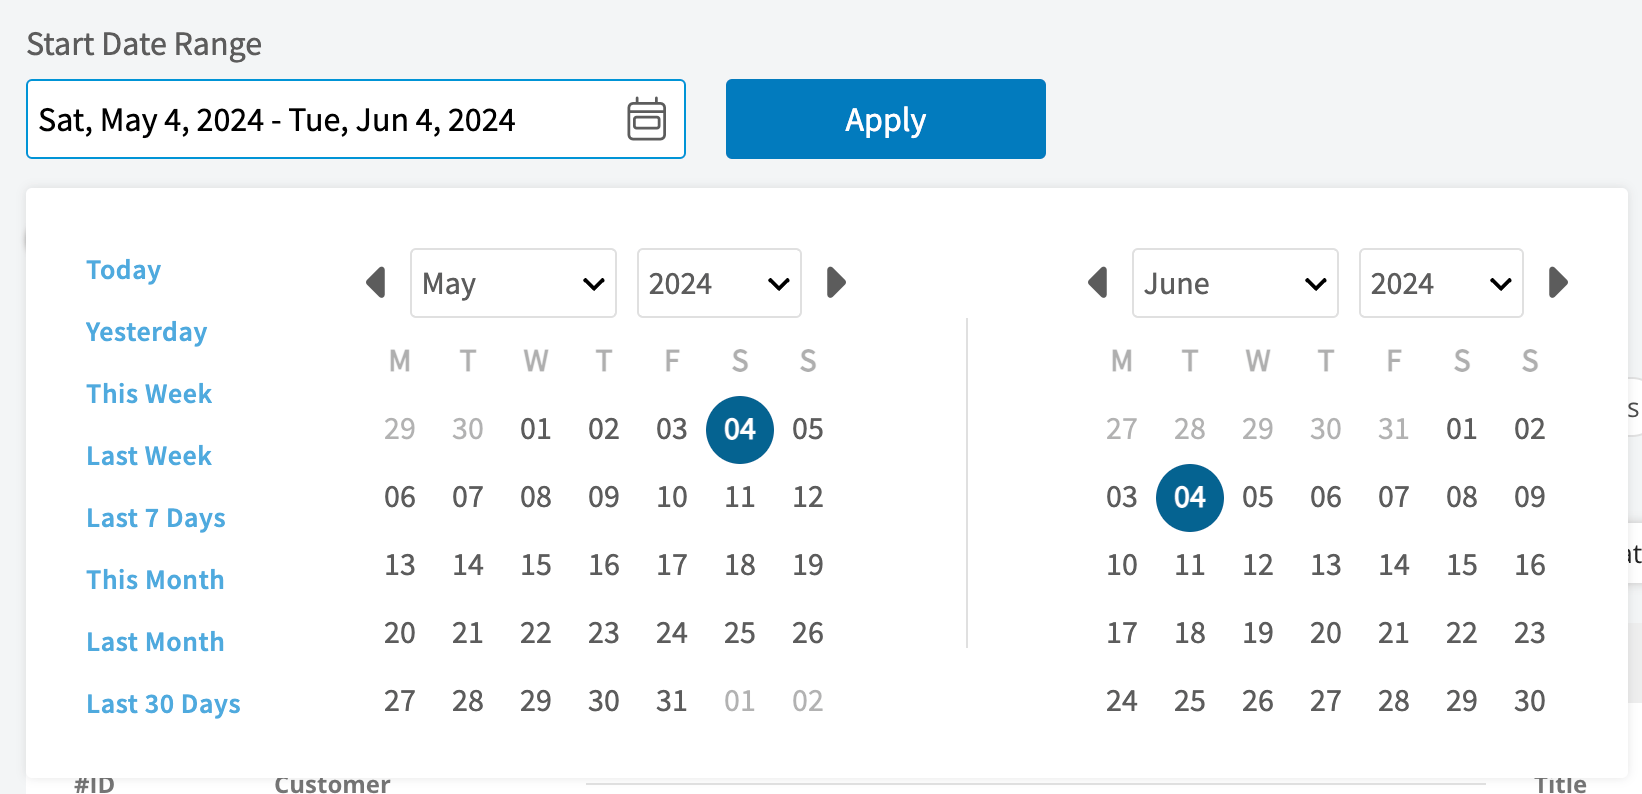
  • Today: From 12:00 AM to the current time
  • Yesterday: Previous day from 12:00 AM to 11:59 PM
  • This Week: From Monday through Sunday of the current week
  • Last Week: Previous week
  • Last 7 Days: Previous seven days, including today
  • This Month: From the first of the current month to the current day
  • Last Month: Entire month before the current month
  • Last 30 Days: Previous 30 days, including today
  • Custom: Use the calendar to select start and end dates

Columns

Click on Columns Select the columns to include in your report by clicking Columns. The inventory report includes these columns by default:
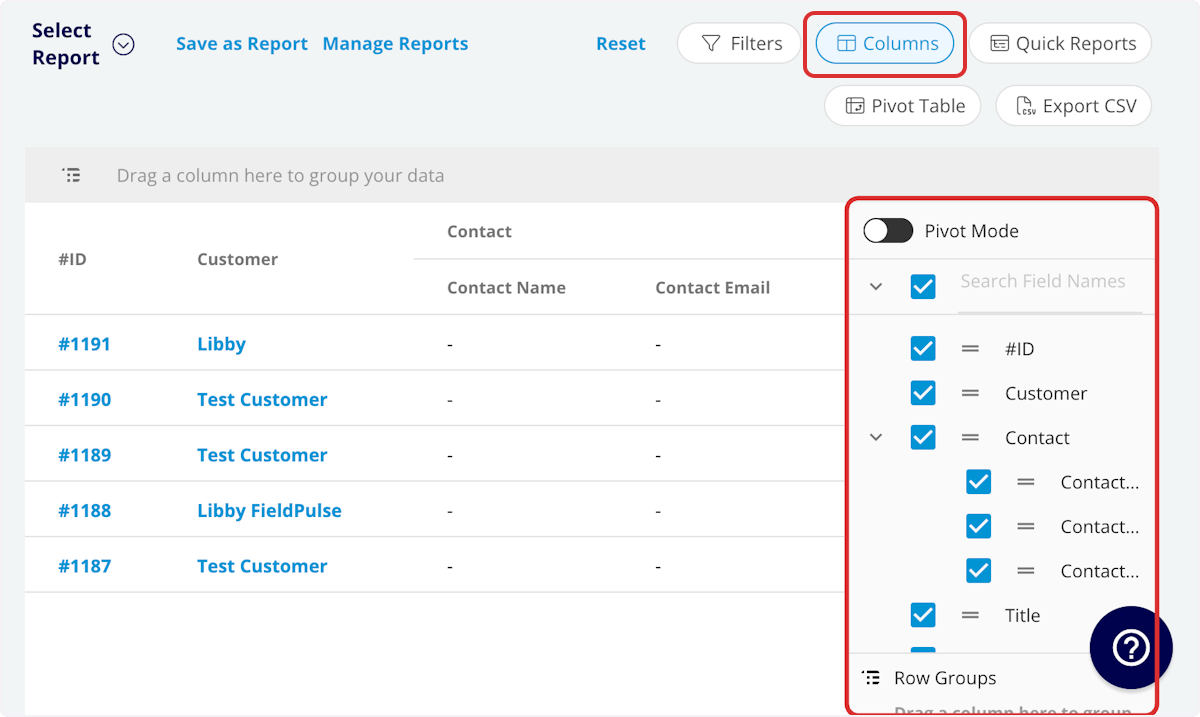
  • Item Name: Line item name
  • Description: Line item description
  • SKU: Item #/SKU
  • Type: Product - Inventory
  • Unit Cost: Unit cost
  • Unit Price: Unit price
  • Quantity: Default quantity
  • UPC: UPC/barcode
  • Tags: Tags on line item
  • Created At: Date and time the line item was created
  • Supplier Name: Linked supplier
  • Hub Name(s): Quantity stored at each hub

Filters

Click on Filters Before running the report, set filters to narrow your results. From the Filters icon, select how you want to filter the report:
  • Item Name: filter by contents
  • Description: filter by contents
  • SKU: filter by contents
  • Type: filter by contents
  • Tags: filter by contents
  • Created At: filter by date
  • Supplier Name: filter by contents
  • Hub Name(s): filter by contents
When filtering by contents, you will need to choose an operator and then enter values to filter the data. Use the table below to learn more about each operator.
OperatorRetrieves DataExampleData Retrieved
EqualsEqual to a specified valueCreated By - Equals Tom GauseFor all records created by Tom Gause only
Not EqualDifferent from a specified valueTag - Not Equal to HVACFor all records except those using the HVAC tag
Less ThanLower than a specified value#ID - Less than 1144For all records below #1144
Less Than or Equal ToLower than or equal to a specified valueJob Date/Time - Less than or equal to 12/13/2023For jobs scheduled before or on 12/13/2023
Greater ThanGreater than a specified valueJob Duration - Greater than 60 minutesFor jobs in the In Progress status type for over 60 minutes
Greater Than or Equal ToGreater than or equal to a specified valueJob Date/Time - Greater than or equal to 1/1/2024For jobs scheduled on or after 1/1/2024
In RangeIncluding and between two specified values#ID - Between 1225 and 1236For all estimate records with #IDs between 1225 and 1236
Starts WithBegins with a specified valueTitle - AnnualFor all job records beginning with Annual
Ends WithEnds with a specified valueLocation - TXFor all job locations ending with TX
BlankNo values are in the fieldSubtitleFor all job records with blank subtitles
Not BlankValues in the fieldNotesFor all job records with values in the notes field

Common Inventory Reports

Inventory by Supplier

Use this report to view all inventory sorted by the linked supplier. Columns: Customize to your needs, but must include Item Name and Supplier Group by: Supplier

FAQs

Is there a way to view the inventory assigned to each technician’s van? Yes! Navigate to Company Settings > Estimates & Invoices > Inventory. You can also use our Reporting tool to see your inventory by hub. Navigate to Reporting > Invoice > Inventory > the select your desired date range. You can then choose to export this data as a CSV file or save the data as a widget.
Have additional questions? Contact us at support@fieldpulse.com or use the chat feature in the bottom right corner of your screen.