
Who uses this: Admins have Full Reporting access, and Team Managers can be given it. Service Agents and Limited Agents do not have Full Reporting access. Availability: All regions.Build a job report from the Jobs tab in raw data reporting. It pulls job records — status, schedule, durations, assigned users, and the totals on the related estimate and invoice — into one table you can filter, group, and export.
Overview
A job report answers questions about the work itself and the money attached to it, because the job record carries the customer, the schedule, the crew, the durations, and the related estimate and invoice totals. Use it to see profit margin on completed jobs, sort jobs by customer lead source, or compare the time you scheduled against the time the job actually took. Common job reports include jobs by lead source, job profit margin, and job duration. Building a job report follows the same path as every other raw data report — set a date range, choose the columns, set filters, then read the table. Job reporting is part of FieldPulse’s dashboards and reporting. For the parts of the reporting flow that are the same on every record type — saving a report, adding it to your dashboard, and exporting to CSV — see How to Use Raw Data Reporting.Video walkthrough
Video walkthrough: Creating a job report from the date range through columns and filters
Before you begin
- Create the jobs you want to report on. See How to Create a Job.
- Check that your role has reporting access. An Admin has Full Reporting access; a Team Manager needs Full Reporting access turned on.
Set the date range
- Select Reporting under the Management tab in the left-side menu.
- Select the Jobs tab, then select Raw Data.
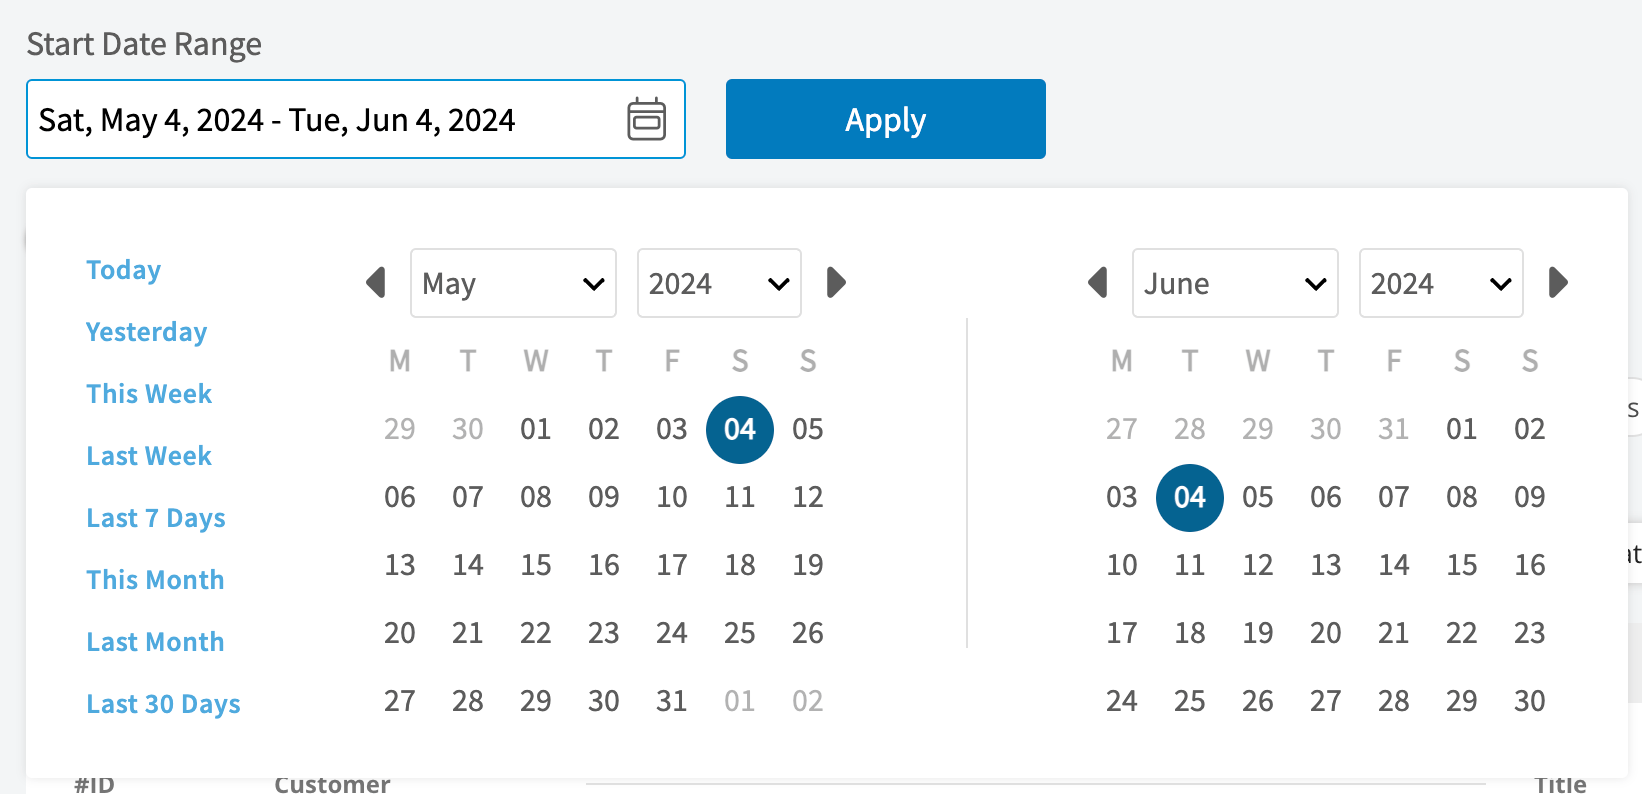
- Select the calendar icon and choose the start date range you want to report on.
- Select Load Data.
Choose your columns
Select Columns to choose which job fields appear in the report table and the order they appear in.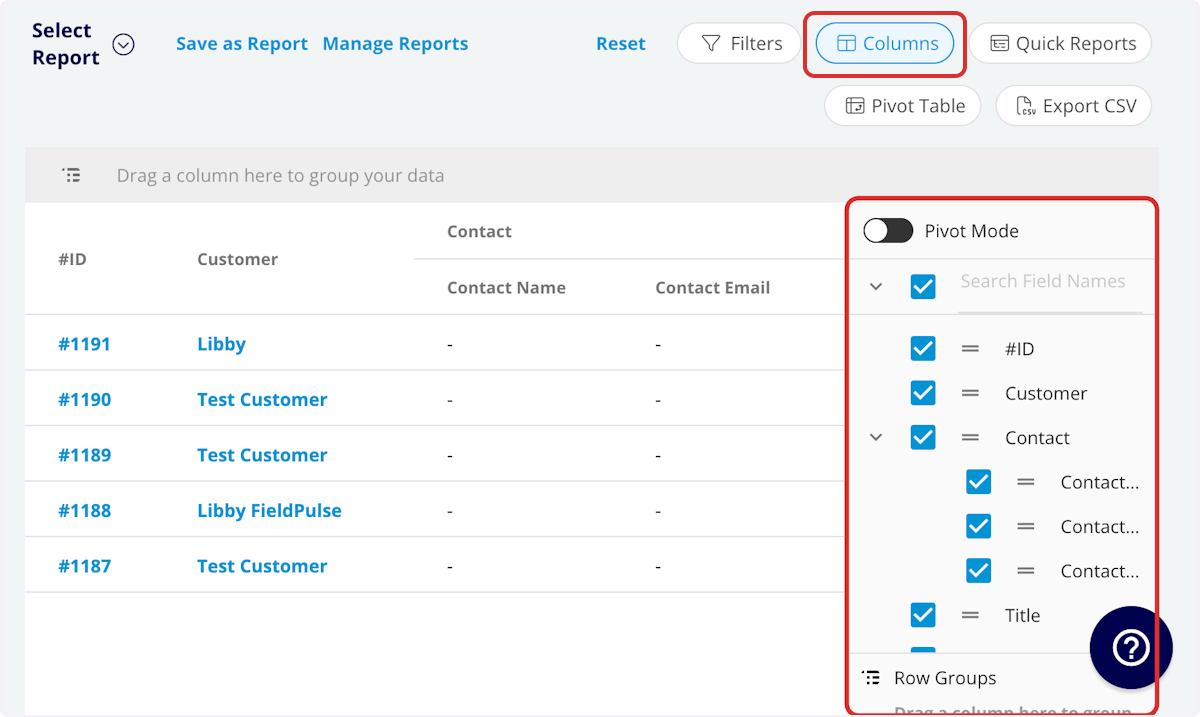
The report also includes a Clock In Date/Time column and a Clock Out Date/Time column.
Customer columns
The Customer group adds the customer-record fields to the job report:Job status workflow columns
The Job Status Workflow group adds a set of columns for each status in your custom status workflow:Set your filters
Before running the report, set filters to narrow the results. Select the Filters icon, then choose how you want to filter the report.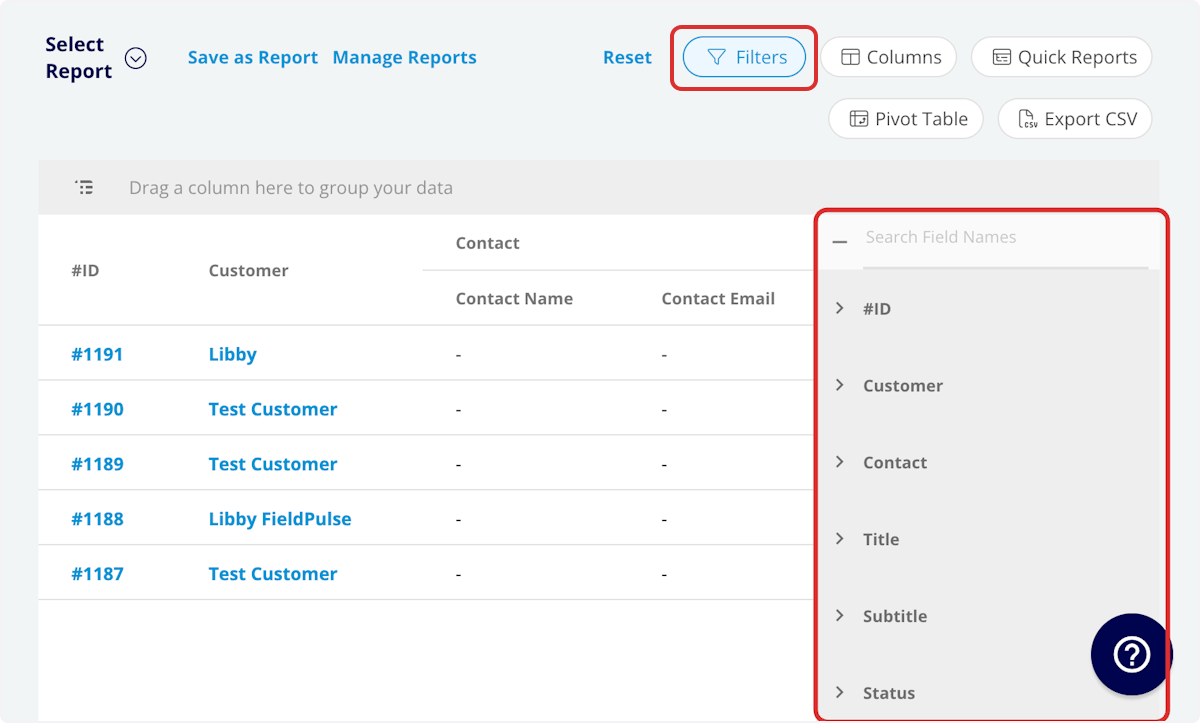
The Older Than, Within the Last, and Within the Next filters calculate dynamically from the current time in your timezone every time the report runs, so your saved reports never go stale.
Filter operators
When you filter by contents, choose an operator and then enter the values to filter the data on.Common job reports
These are the column, filter, and grouping combinations behind the job reports companies run most often.Job profit margin
Use this report to view your profit margin on completed jobs. Customize the columns to your needs, but include Invoice - Total Service Margin and Invoice - Total Product Margin, and set the Status filter to Completed.Jobs by lead source
Use this report to view your job data sorted by customer lead source. Customize the columns to your needs, but include Lead Source, and group by Lead Source.Job duration
Use this report to view scheduled job time against actual job duration on completed jobs. Customize the columns to your needs, but include Scheduled Duration or Scheduled Duration Decimal and Job Duration or Job Duration Decimal, and set the Status filter to Completed. Scheduled Duration is the time you booked the job for, and Job Duration is the time the job spent in the In Progress status type.Estimated vs. actual job duration
You can pull a report that compares the estimated (scheduled) duration of a job against the actual duration. The estimated duration is based on the time you scheduled the job for. The actual duration is based on the technician’s clock-in and clock-out times recorded in the timesheets for that job, which you can report on in How to Create Timesheet Reports.Technician punctuality
You can track technician punctuality by comparing the scheduled arrival window to when the technician actually started work. The scheduled arrival is the designated time frame set for the job. The actual arrival can be determined by tracking when the technician first updates the job status — for example, when they select On the Way or Started.The technician’s clock-in time is on a separate report, the timesheet report. Comparing the job’s scheduled arrival window to the time the technician selects a given custom status is the most direct way to evaluate late arrivals against the job schedule.
Video walkthrough: Building the common job reports, including profit margin, lead source, and duration
FAQs
Can I save a job report to use again?
Yes — either as a saved report you reopen from Select Report, or as a widget on your Pulse Dashboard. See How to Use Raw Data Reporting for the saving steps.Can I export a job report to a spreadsheet?
Yes. Export CSV downloads the report currently on your screen as a CSV file to your device. See How to Use Raw Data Reporting for the full export flow.Related articles
- How to Use Raw Data Reporting
- How to Create a Job
- Setting Up Job Costing
- How to Create Timesheet Reports
- How to Create Customer Reports