
Who uses this: Admins and Team Managers can create and send estimates and invoices; the permission is configurable for Service Agents and is not available to Limited Agents. Availability: All regions.An invoice is the bill you give a customer for the work you did — line items, materials, and labor — and the customer can pay it online or in person. The fastest way to create one is to convert an accepted estimate, which carries the customer, the job, and every line item into a new invoice. You can also build an invoice from scratch in the web app or the mobile app. See estimates and invoices for what the feature covers.
Overview
You can create an invoice two ways: convert an accepted estimate, or build a new invoice from a job record, a customer record, or the Invoices tab. Either way, you confirm the line items, set the final details, and save the invoice. You then finalize the invoice, which moves its status from Invoice Draft to Invoiced. Once an invoice reads Invoiced, you can accept payment against it, and the status changes to Paid when the customer pays in full.Before you begin
- Every invoice links to a customer. Starting from a job record or a customer record carries that link in automatically. Starting from the Invoices tab means linking the customer yourself.
- Your default due date, tax rate, and customer-facing PDF fields come from Company Settings. See Setting Up Default Estimate & Invoice Settings to set them before you invoice.
- Converting an estimate does not keep the original estimate record unless you turn on Keep an Estimate Record when Converting to an Invoice first. See Setting Up Default Estimate & Invoice Settings.
On web
Convert an estimate to an invoice
Converting an accepted estimate is the fastest way to create an invoice, because it transfers the customer and job information along with every line item.- Open the estimate record you want to convert.
-
Select Convert to Invoice.
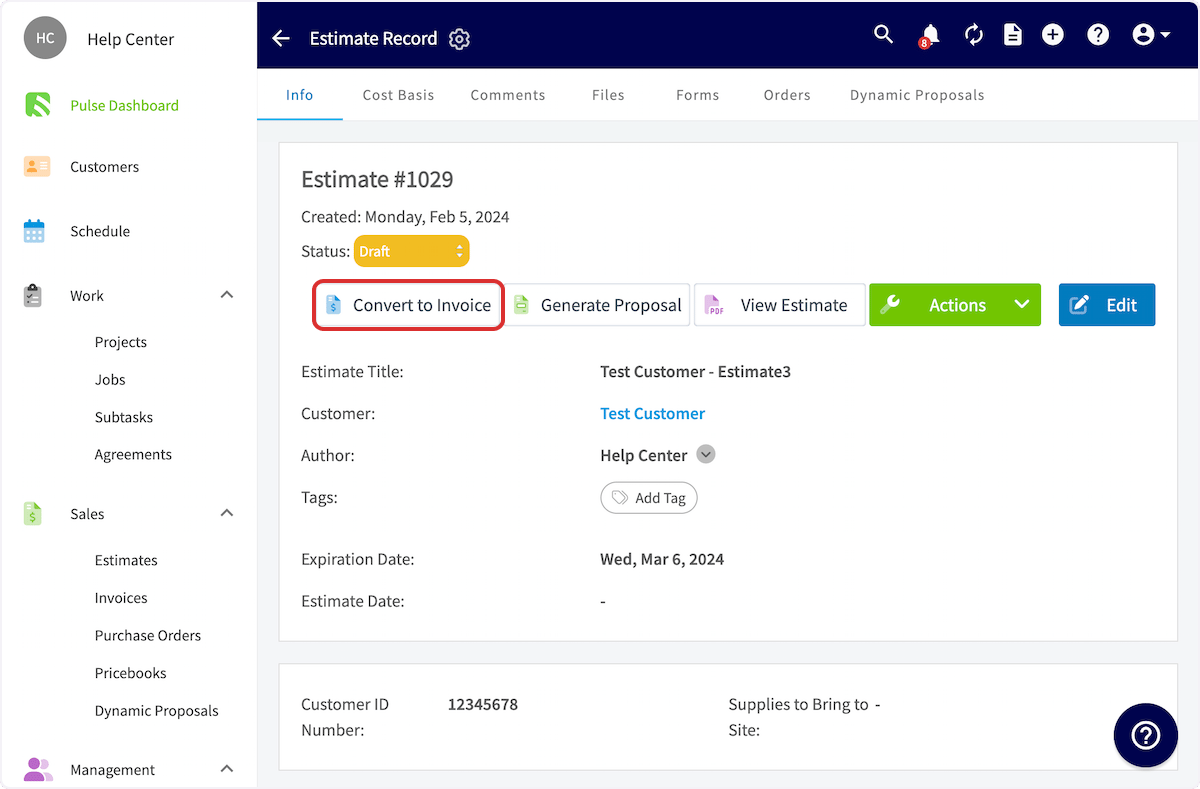 FieldPulse does not keep the estimate record when it is converted into an invoice record. To preserve the estimate, turn on Keep an Estimate Record when Converting to an Invoice in Setting Up Default Estimate & Invoice Settings before you convert.
 - Select Edit on the new invoice record to make changes — for example, to add parts you had to order or extra hours of labor. Follow the steps in Complete the invoice below.
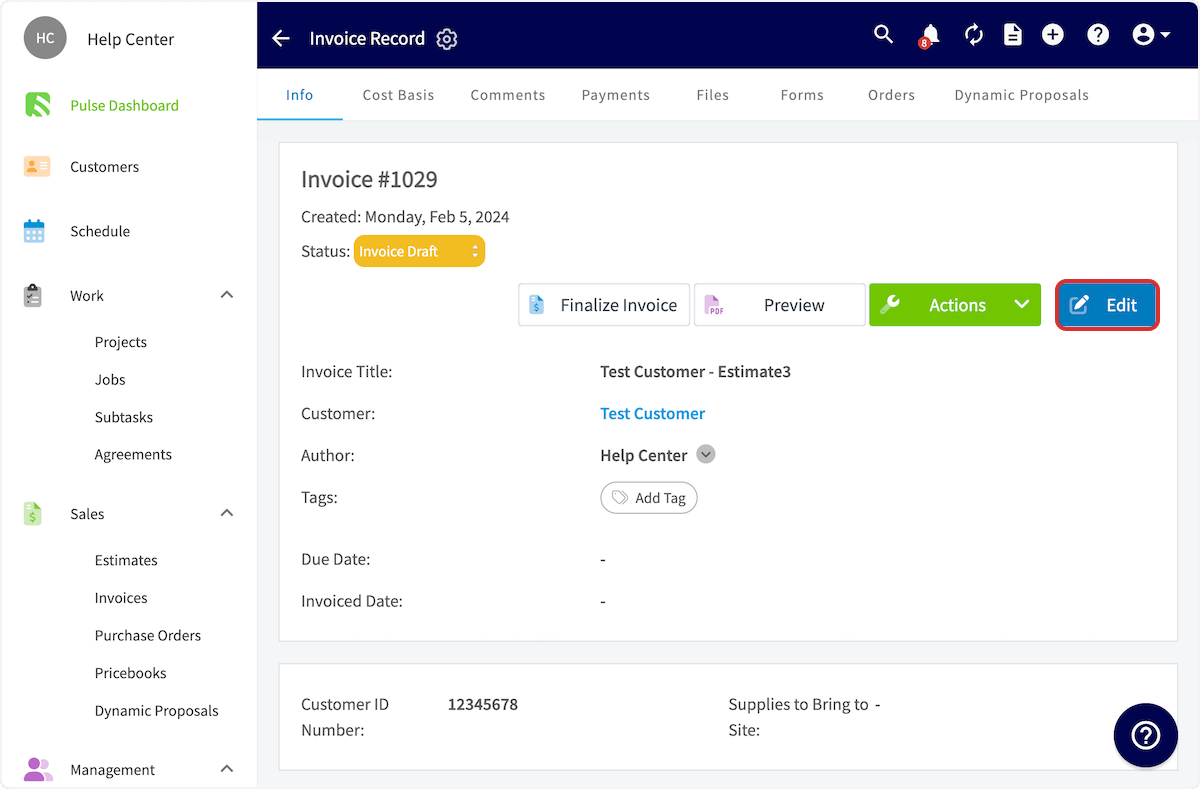
Choose where to start a new invoice
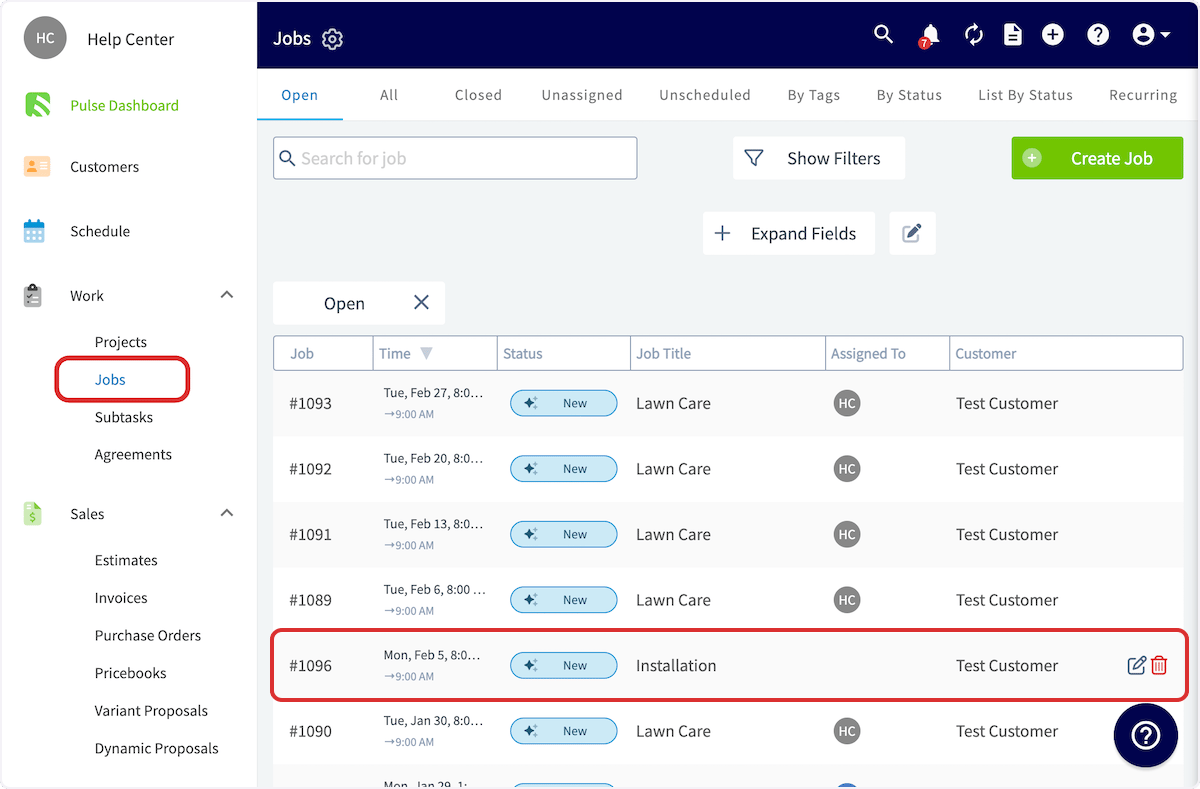
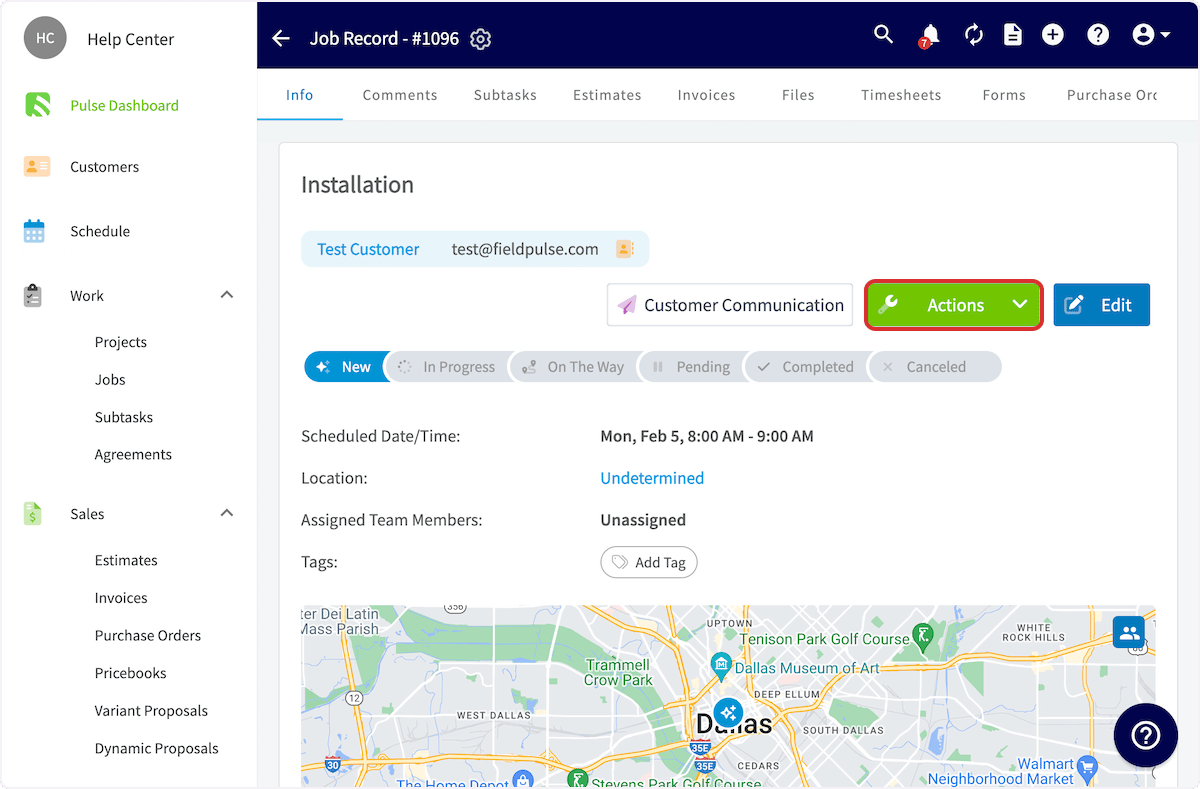
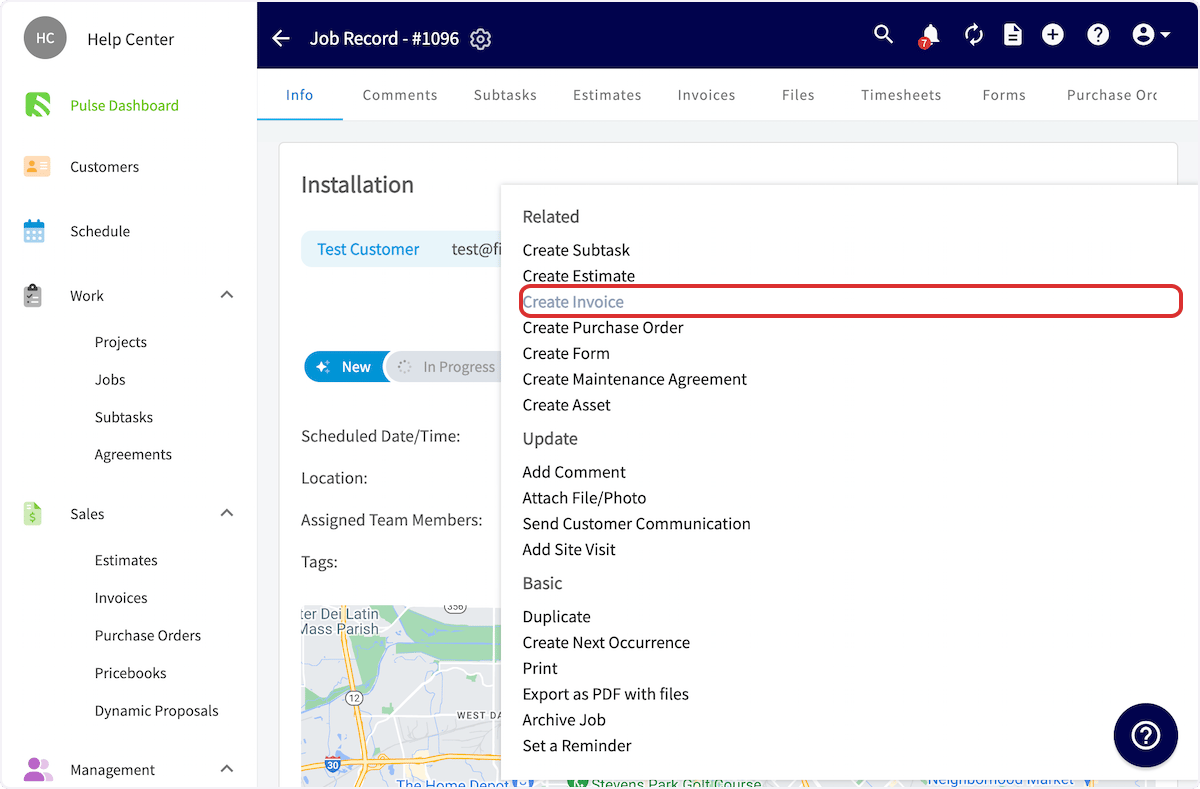
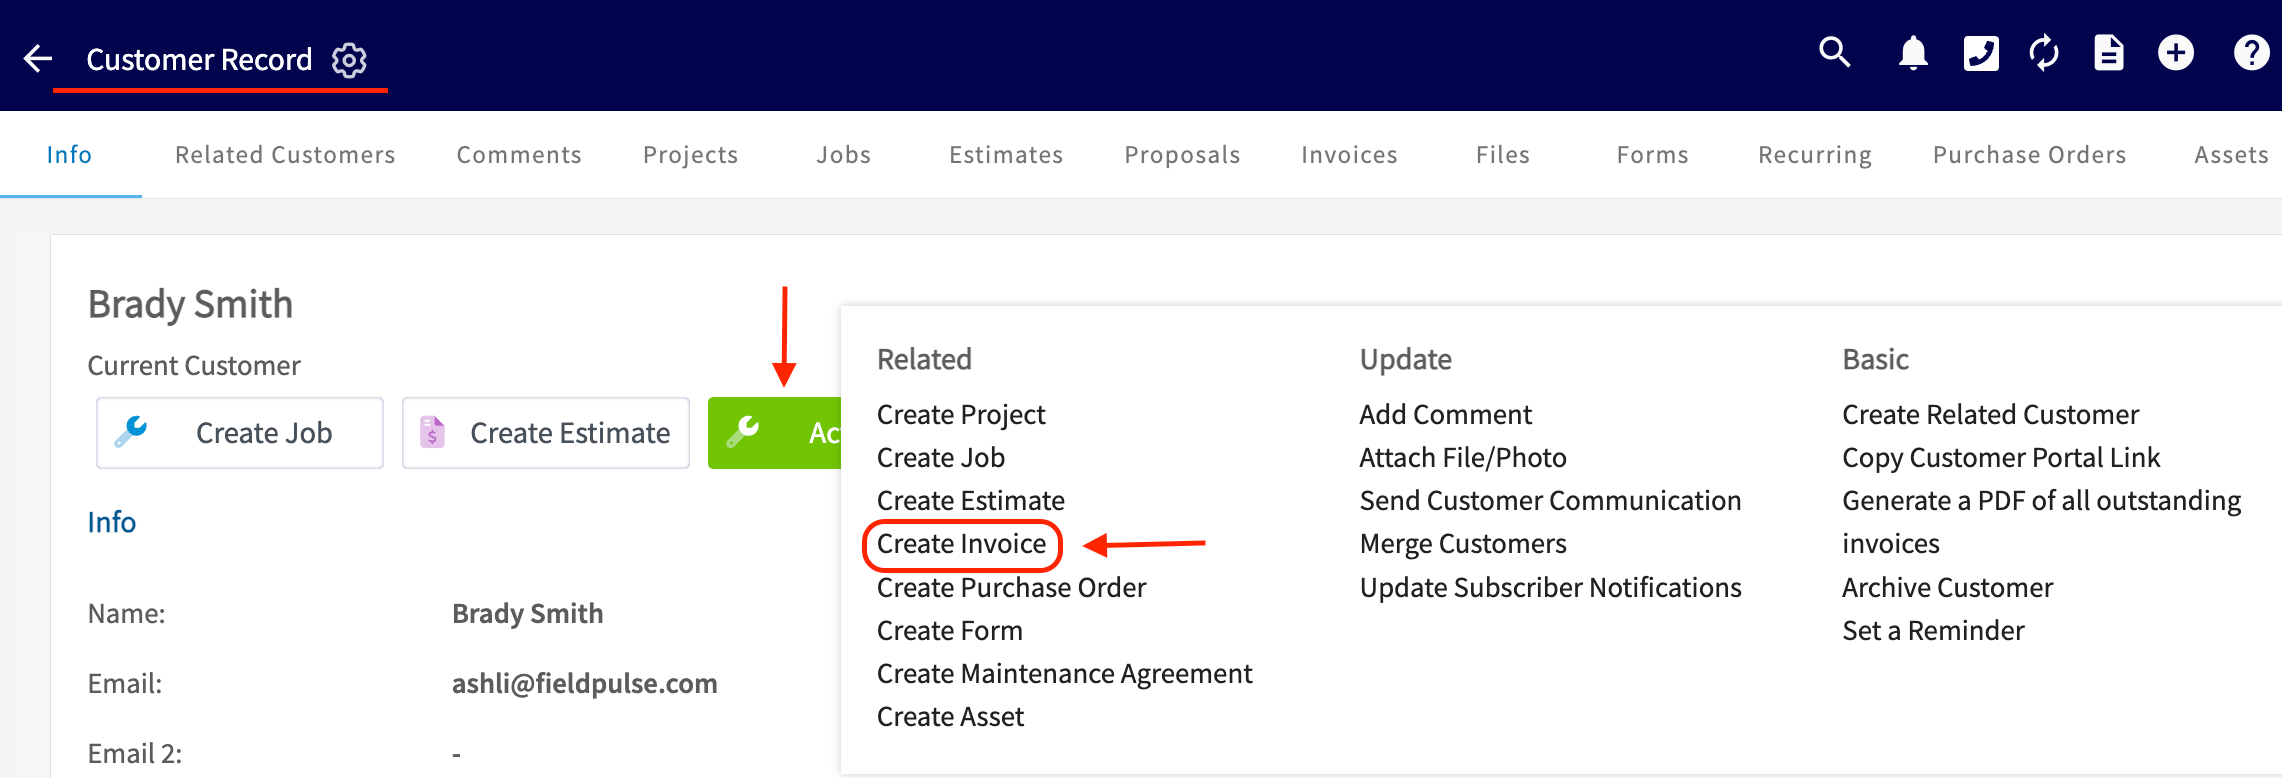
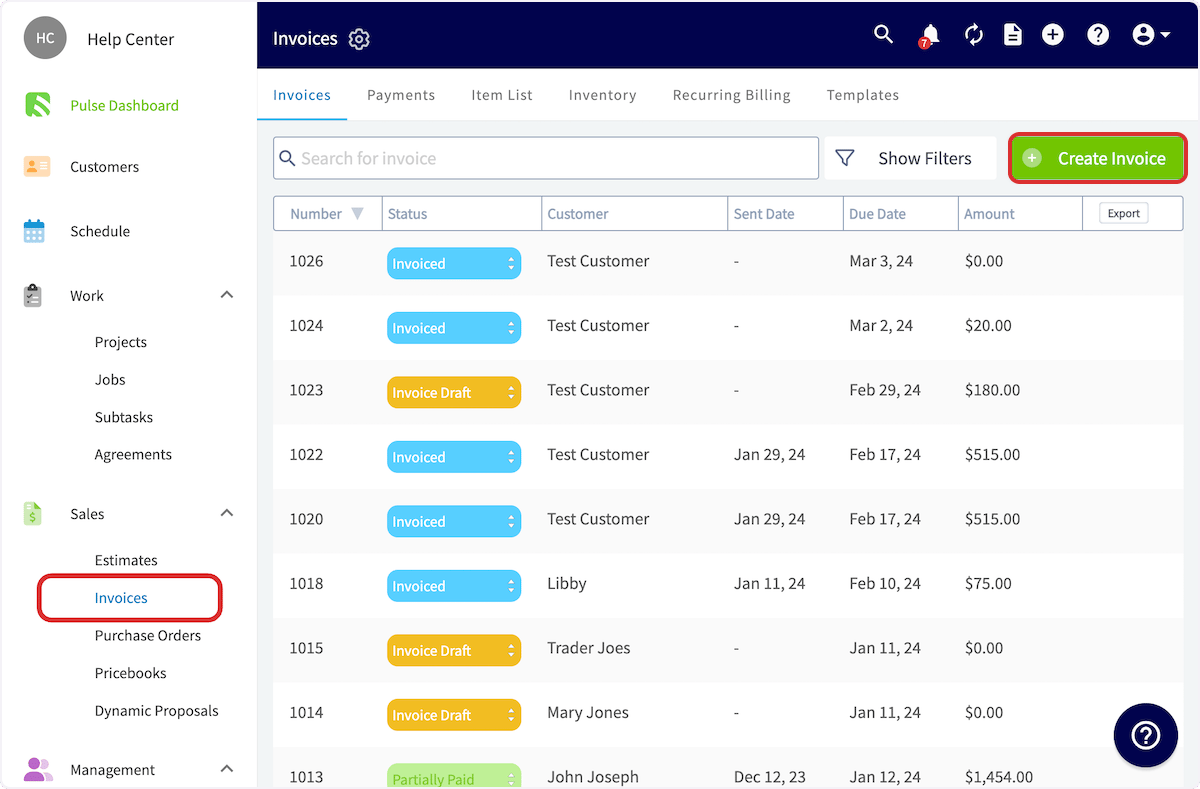
You can start a new invoice from three places in the web app. From a job record. Open the job record from the Schedule tab or the Jobs tab in the left-side menu.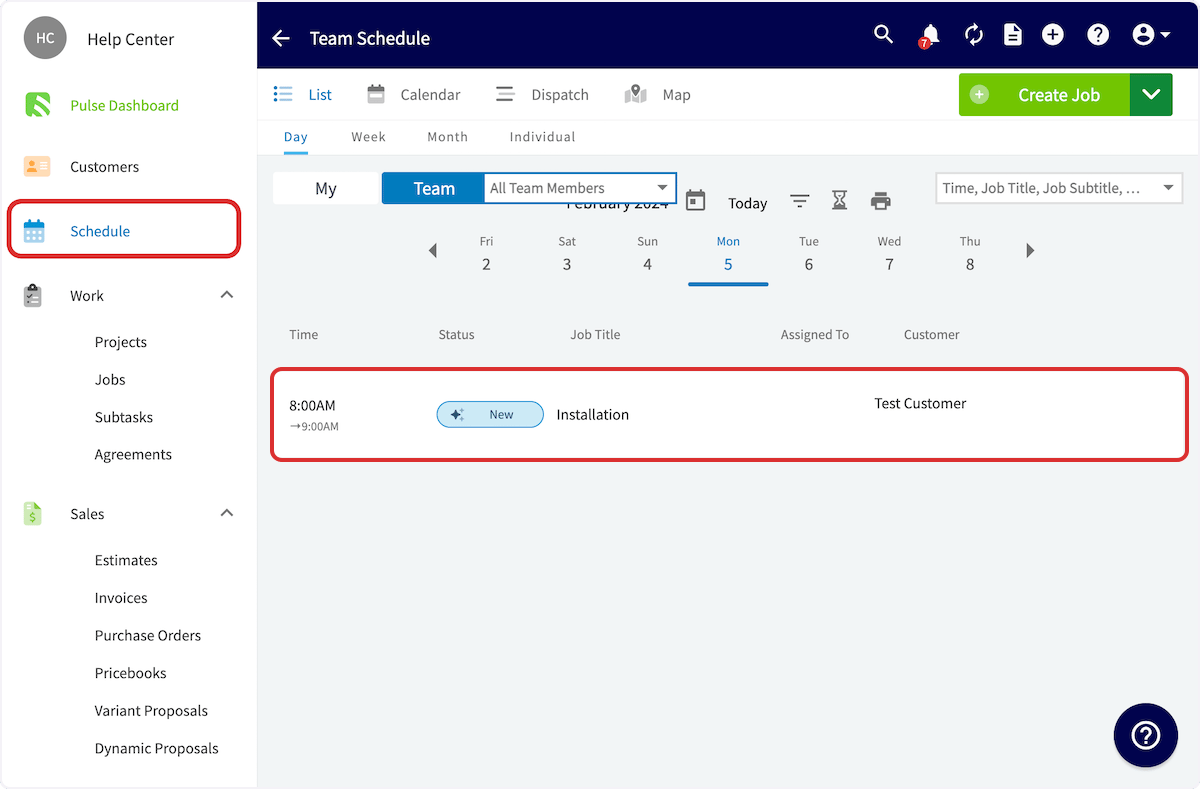
Complete the invoice
Fill in the invoice details on the Create a new invoice screen.-
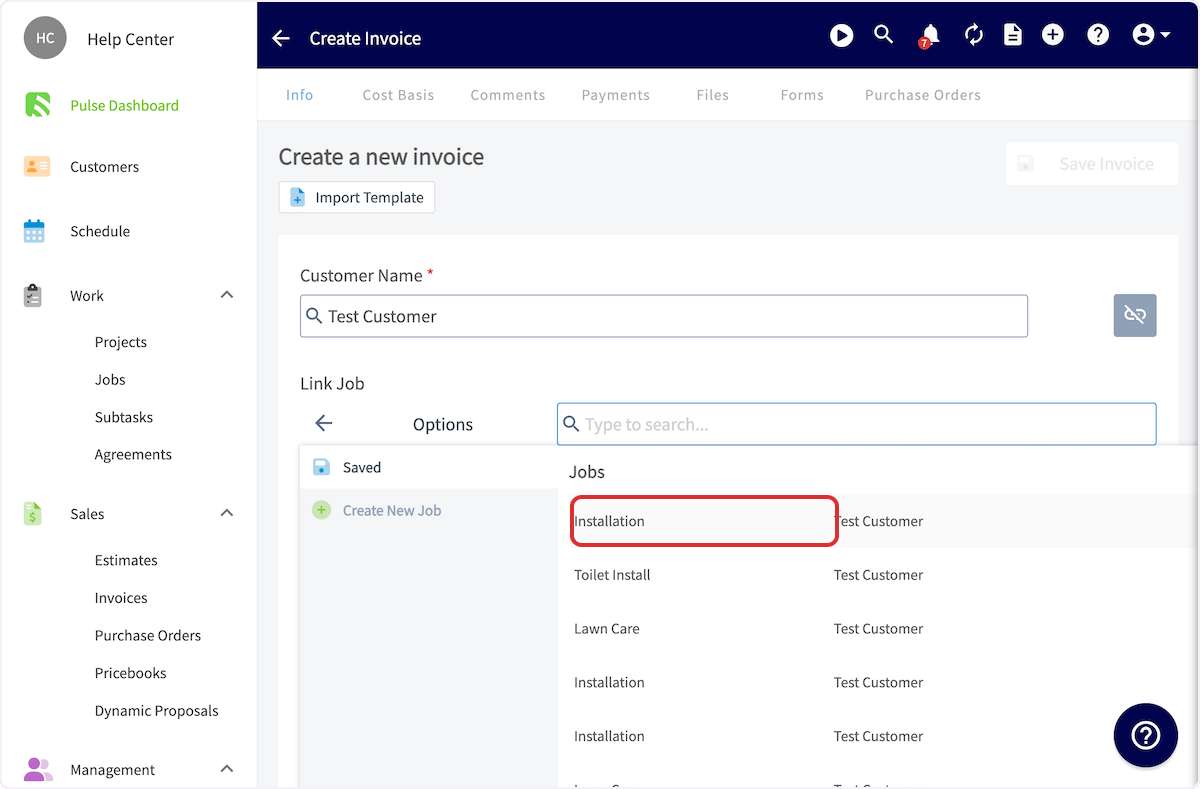
Confirm the customer and the linked job. Both fill in automatically if you started from a job record. If you started from a customer record or the Invoices tab, link the related customer and job yourself.
-
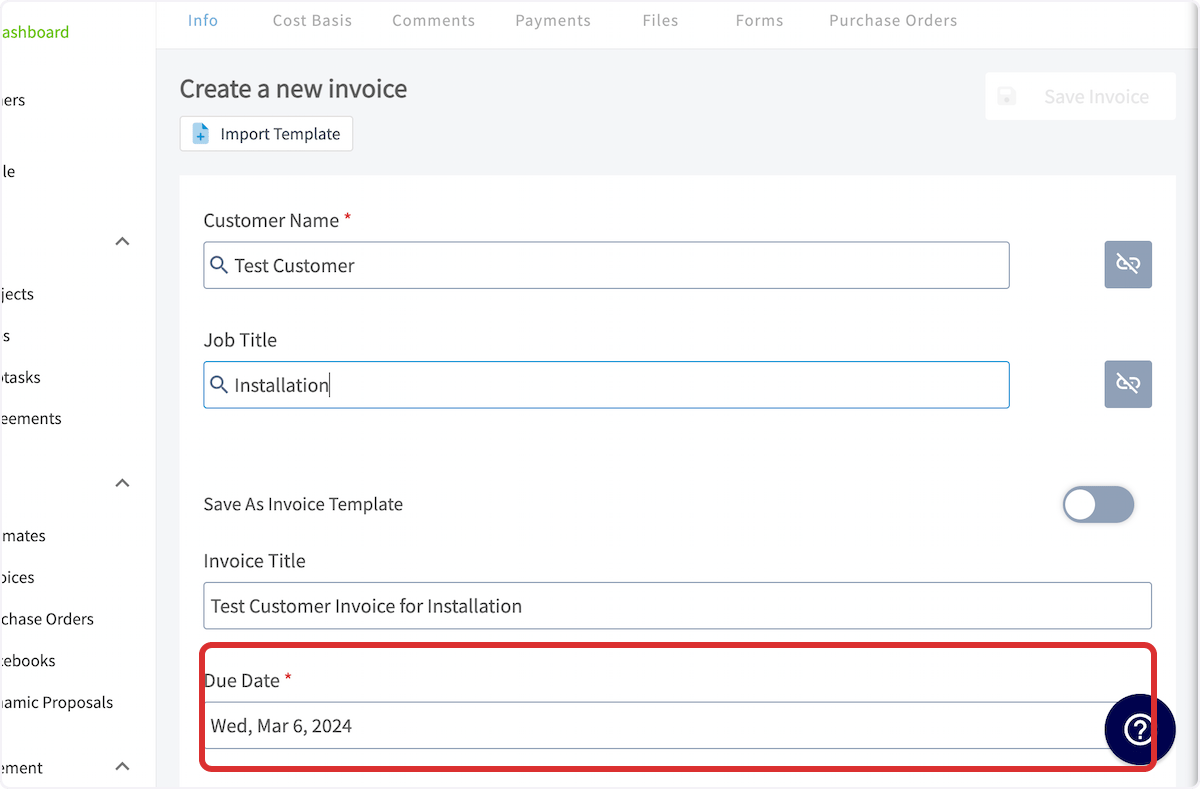
Set the Due Date. FieldPulse fills in the default from Company Settings, and you can select the field to change it on this invoice.
-
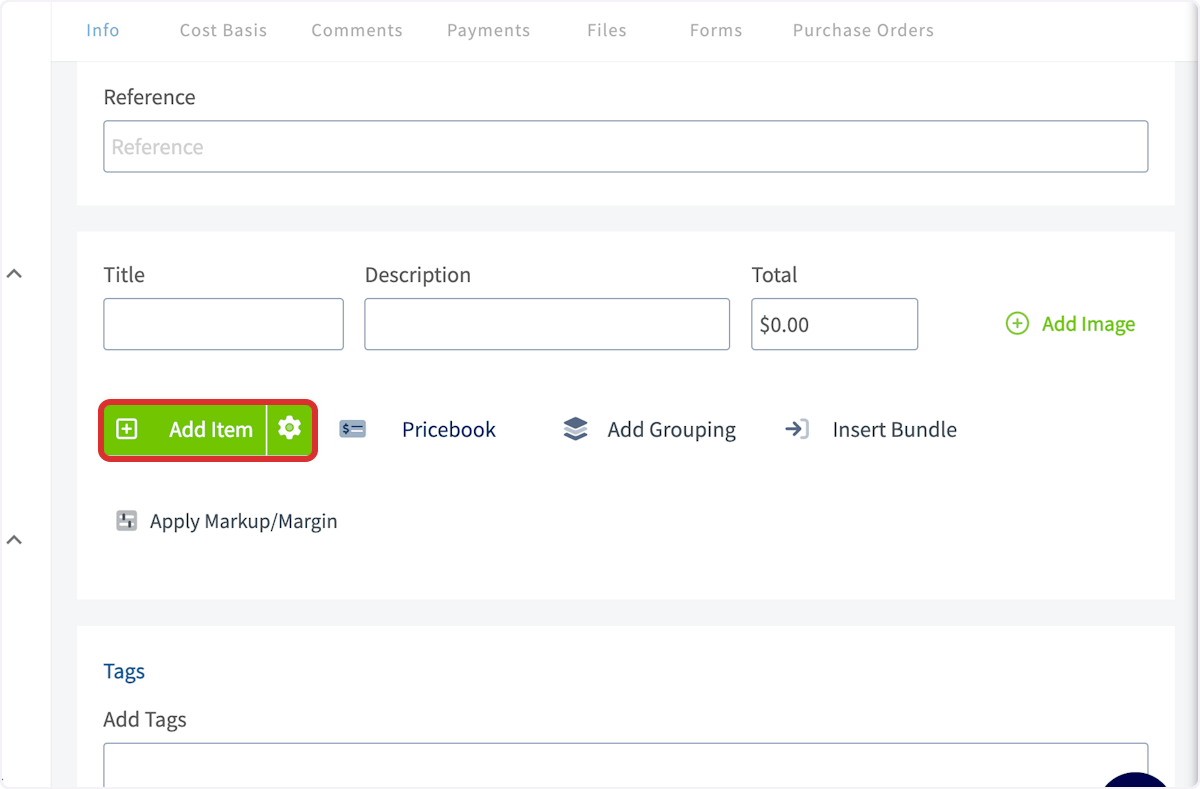
Select Add Item and start typing the name of a line item. Select the item when you see it in the list.
-
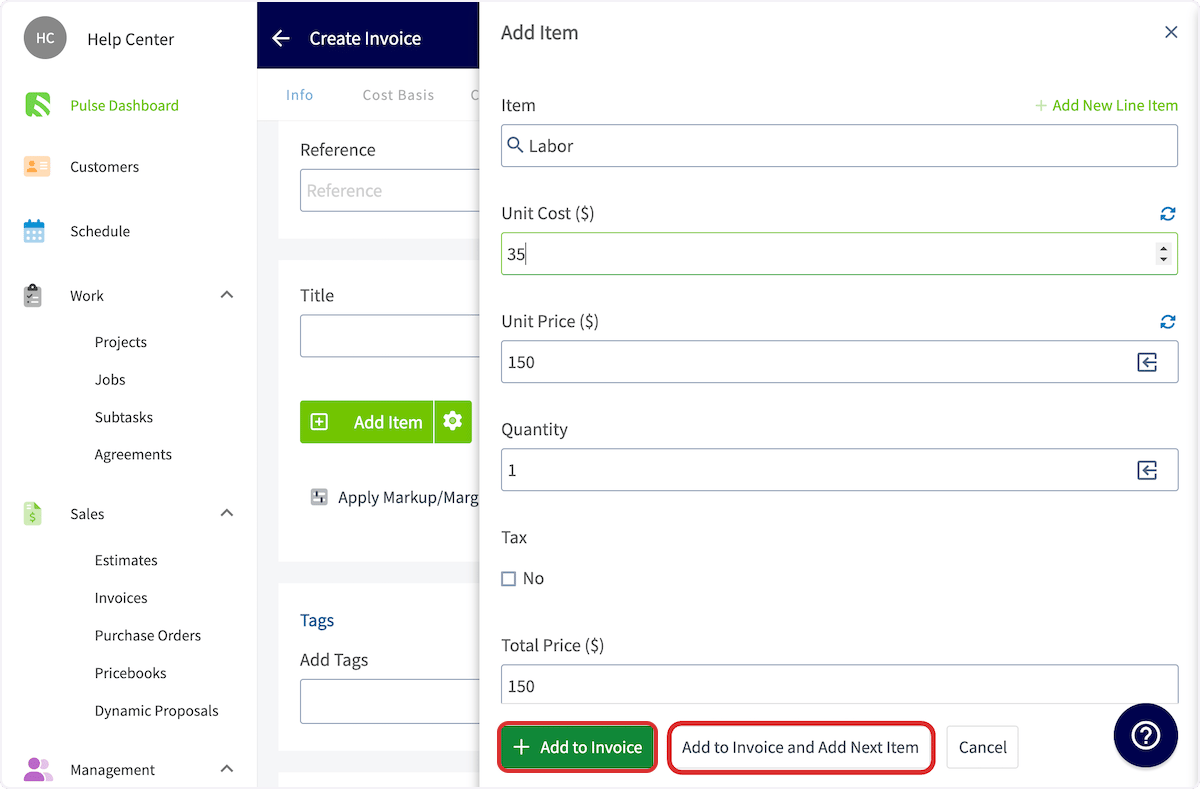
Fill in any missing details, then select Add to Invoice and Add Next Item if you have more line items to include, or Add to Invoice if this is your last one.
-
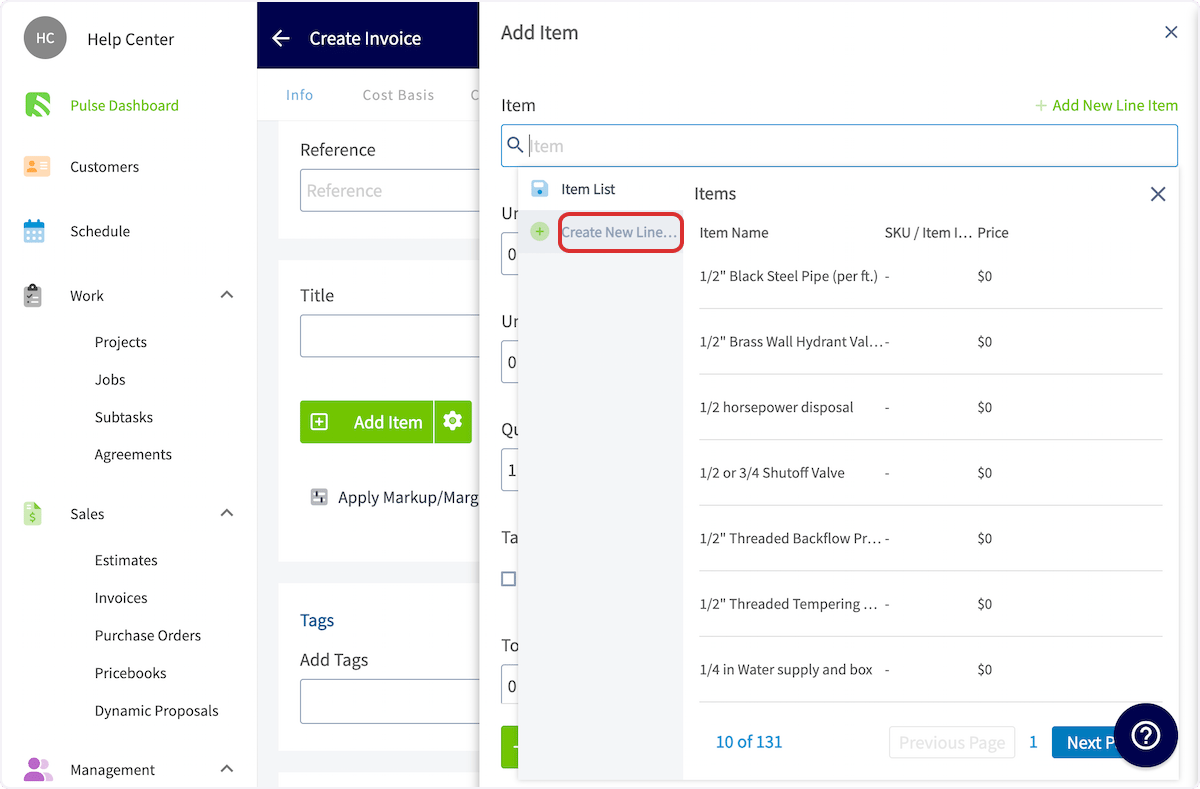
To add a line item that is not saved in your item list yet, select Create New Line Item.
-
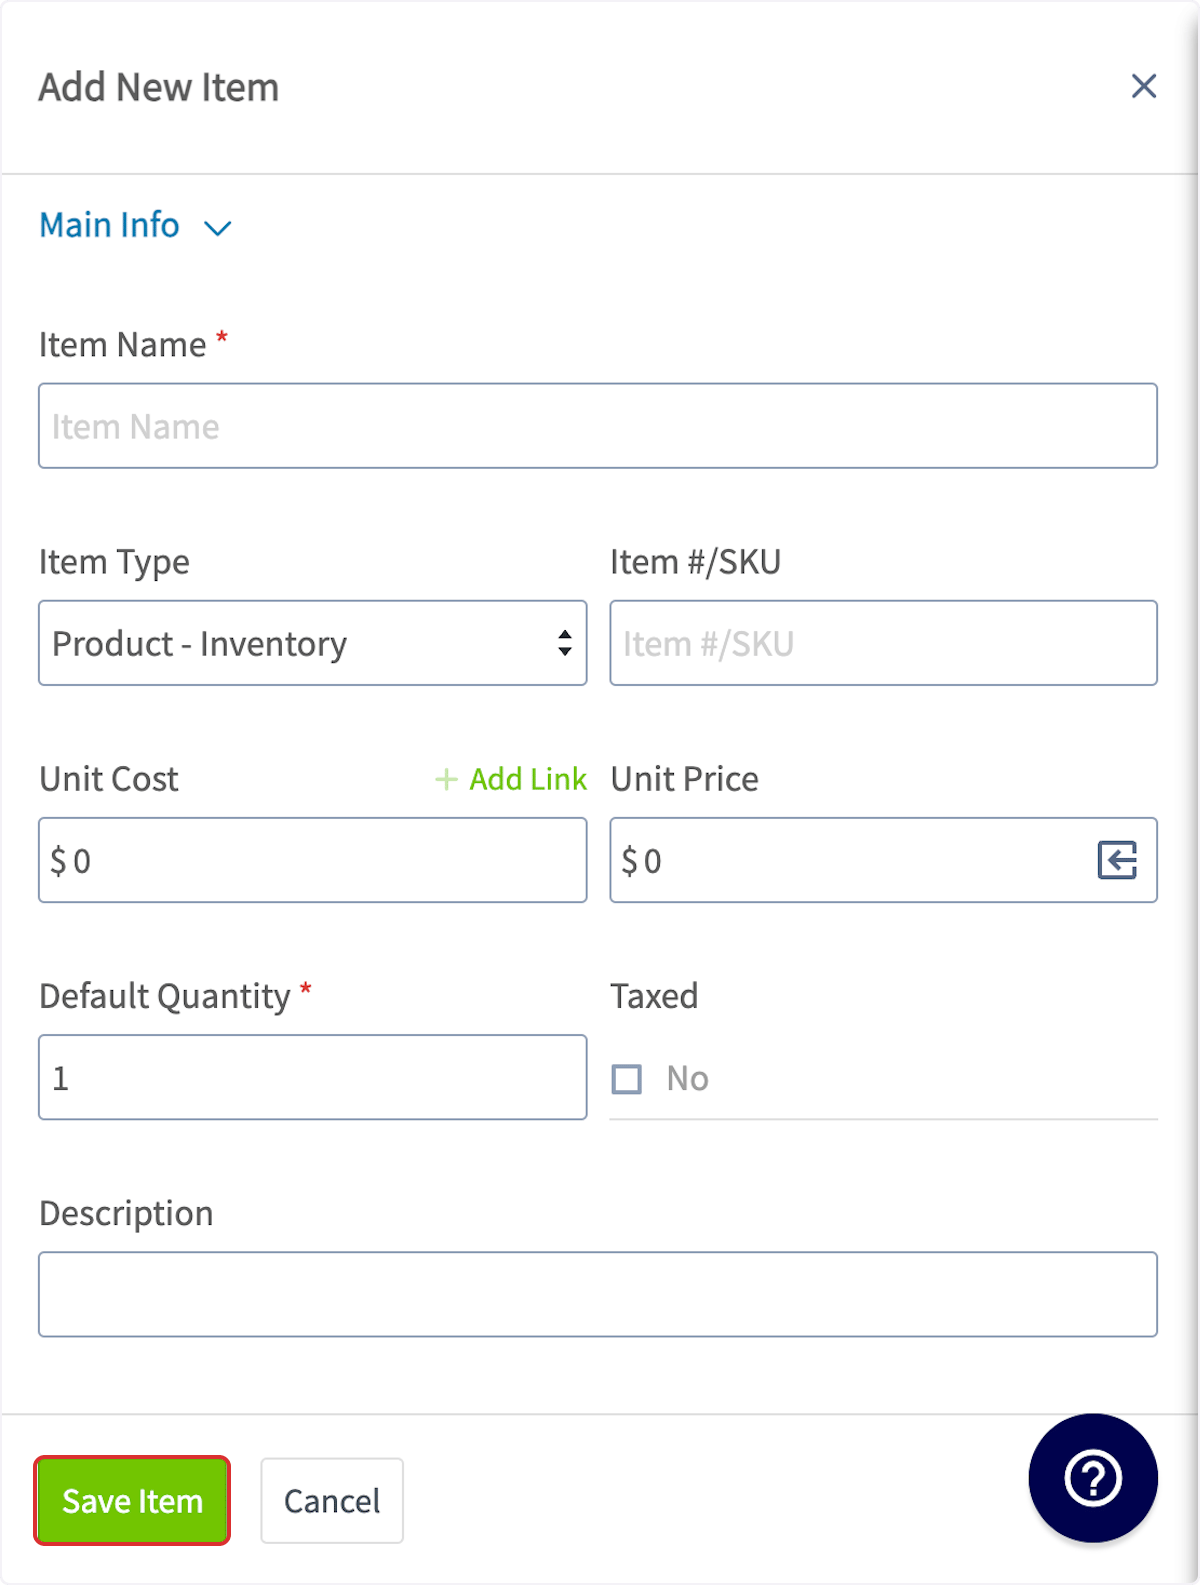
Enter the item name, item type, SKU, unit cost, unit price, and description, and decide whether to track inventory on the item. Select Save Item, then Add Item. FieldPulse saves the item to your item list and adds it to this invoice.
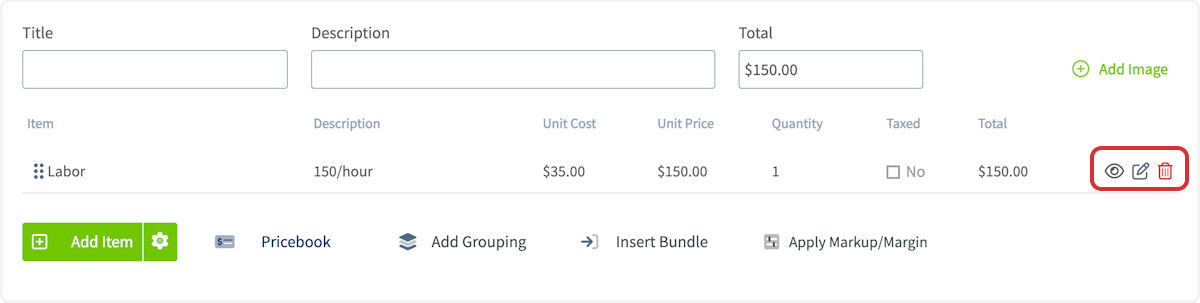
- Manage each line item with the icons on the right of its row: the eye icon controls whether the customer sees the item, the pen icon edits it, and the trash icon deletes it.
Set the final details
Once the line items are in place, add notes, attach files, attach a contract, and adjust the totals.-
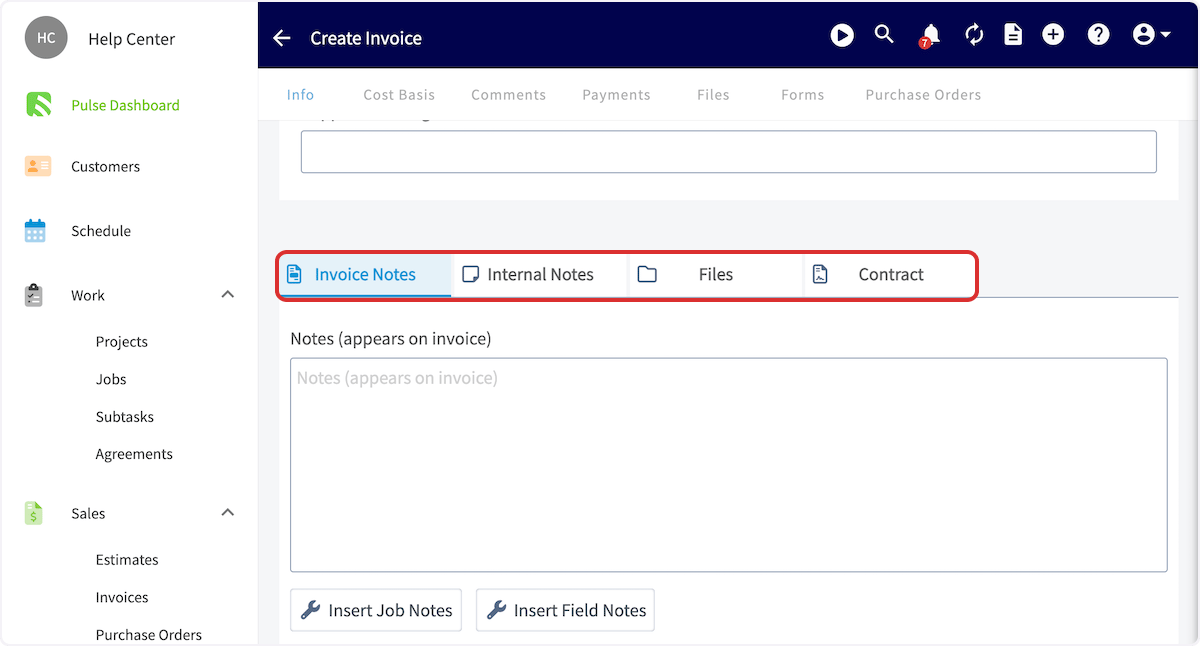
Add Invoice Notes by typing in the box on the Invoice Notes tab. These notes appear near the top of the invoice PDF and save when you save the invoice. For notes your customers should not see, use the Internal Notes tab.
-
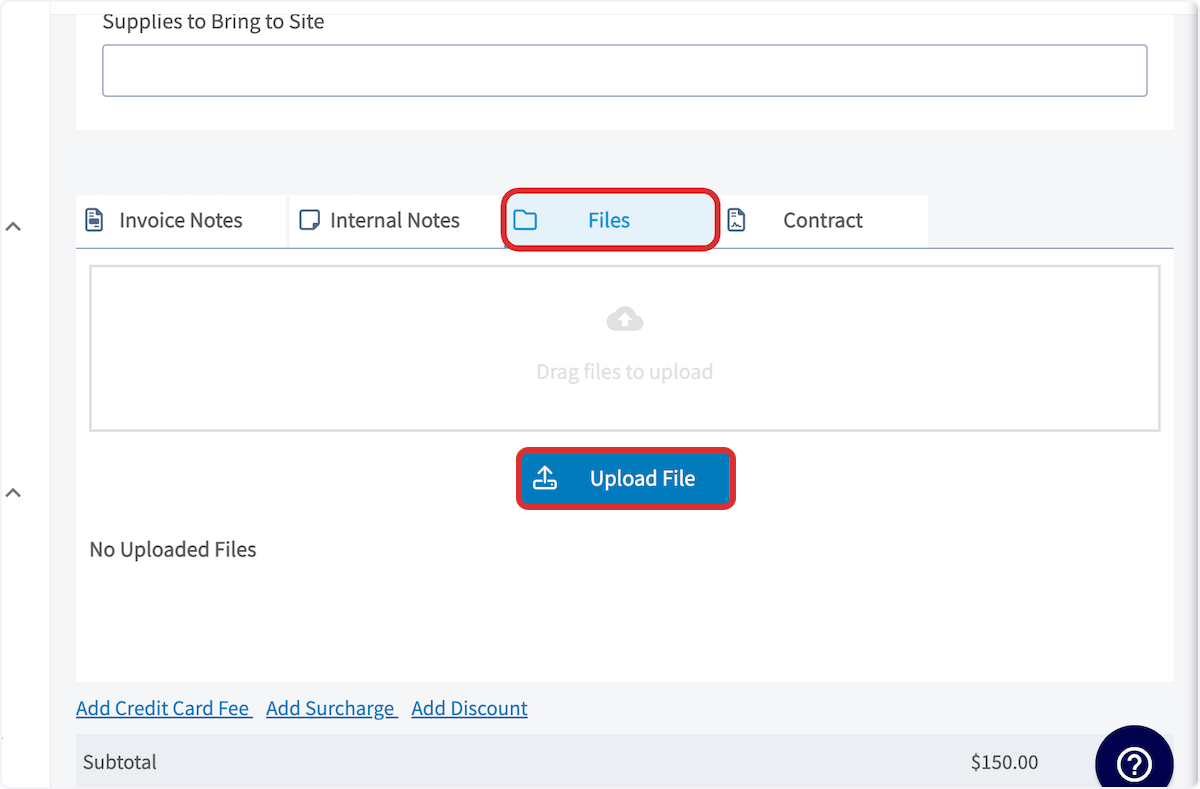
Select the Files tab and select Upload File to attach files or photos. See How to Attach Photos & Files to Estimates & Invoices.
-
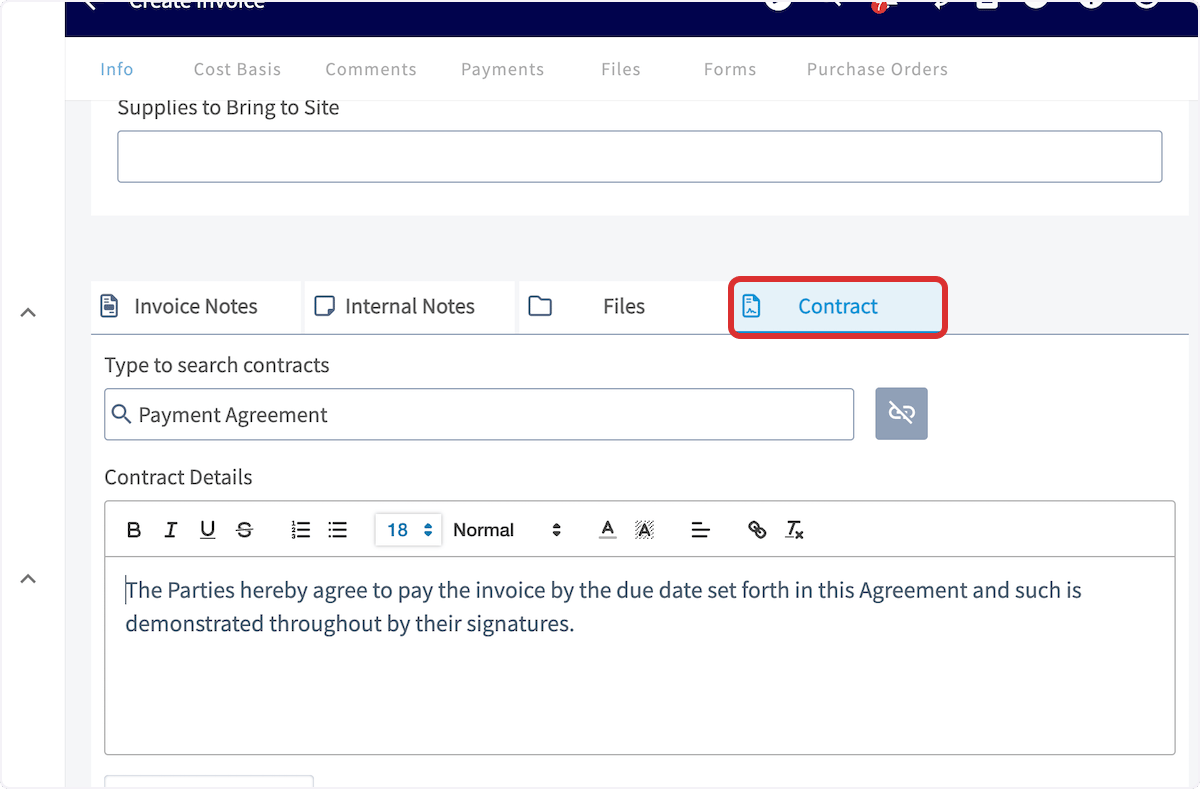
Select the Contract tab and choose the contract you want to attach. The contract text appears in the Contract Details editor.
-
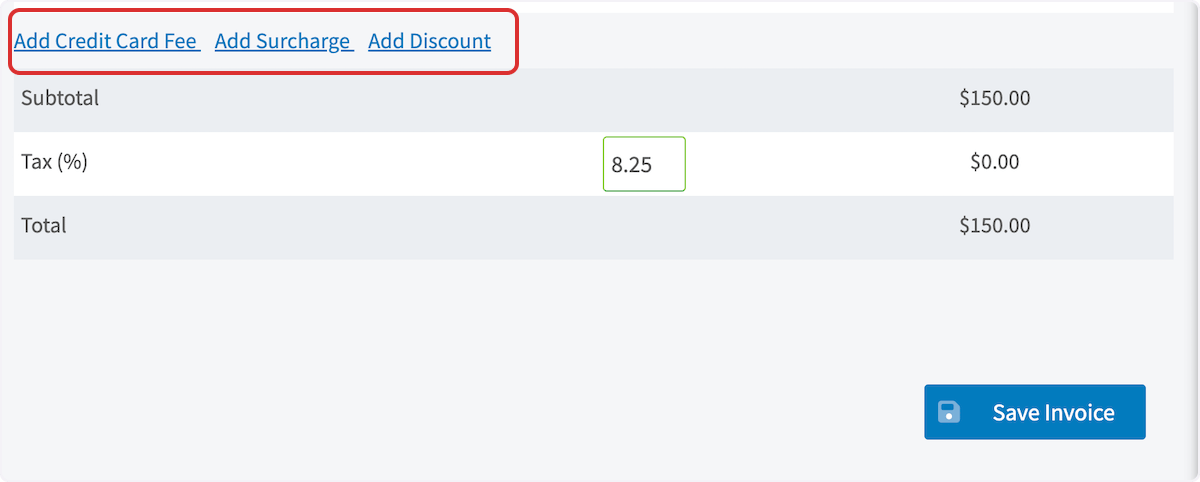
Review the subtotal and adjust the totals:
- Add Credit Card Fee — charge your customer a percentage or dollar amount for paying by card.
- Change the tax rate — the default tax rate from Company Settings applies, and you can change it on this invoice. Only line items marked as taxed have tax applied. See Setting Up Automatic Tax Rates & Tax Override.
- Add Discount or Add Surcharge — add or subtract a percentage or fixed amount from the invoice total.
Save, preview, and finalize the invoice
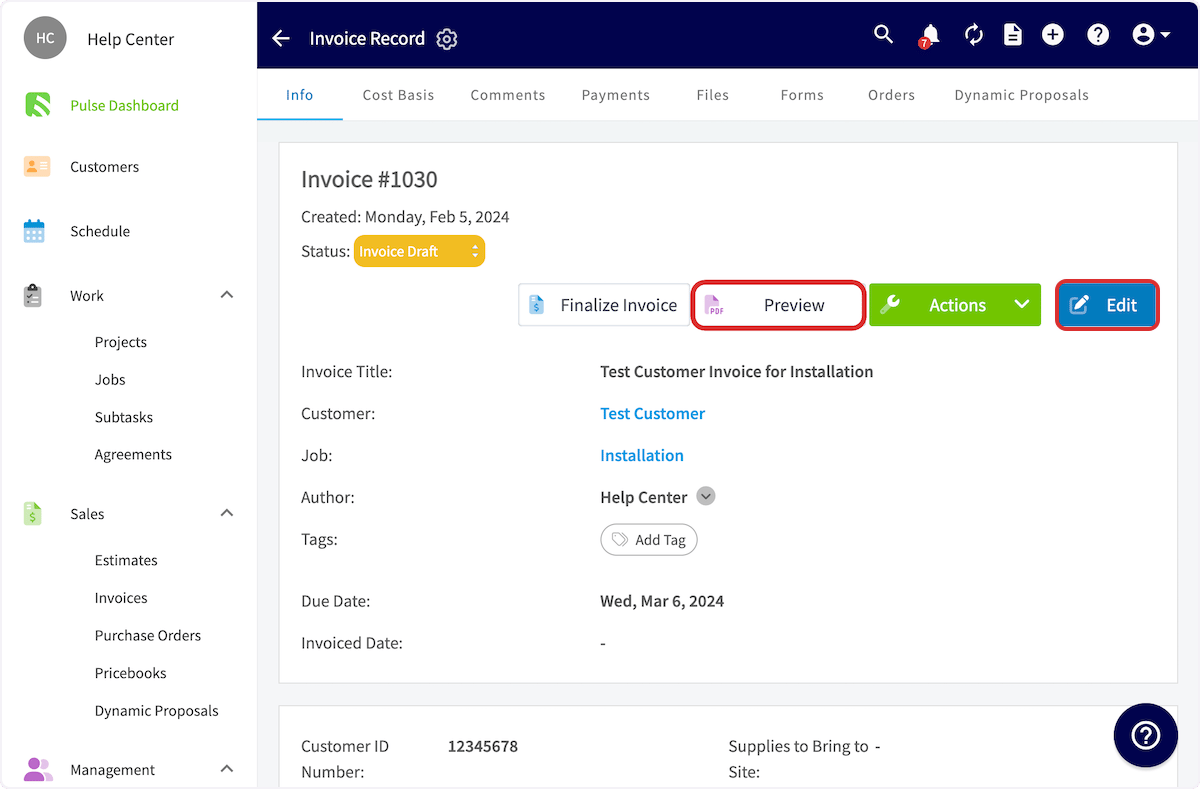
- Select Save Invoice. FieldPulse opens the invoice record. Select Edit if you need to change anything.
-
Select Preview to generate a preview of the invoice. From the preview you can send the invoice to your customer and adjust its appearance — see How to Send Estimates & Invoices to Customers.
-
Back on the invoice record, select Finalize Invoice to move the status from Invoice Draft to Invoiced.
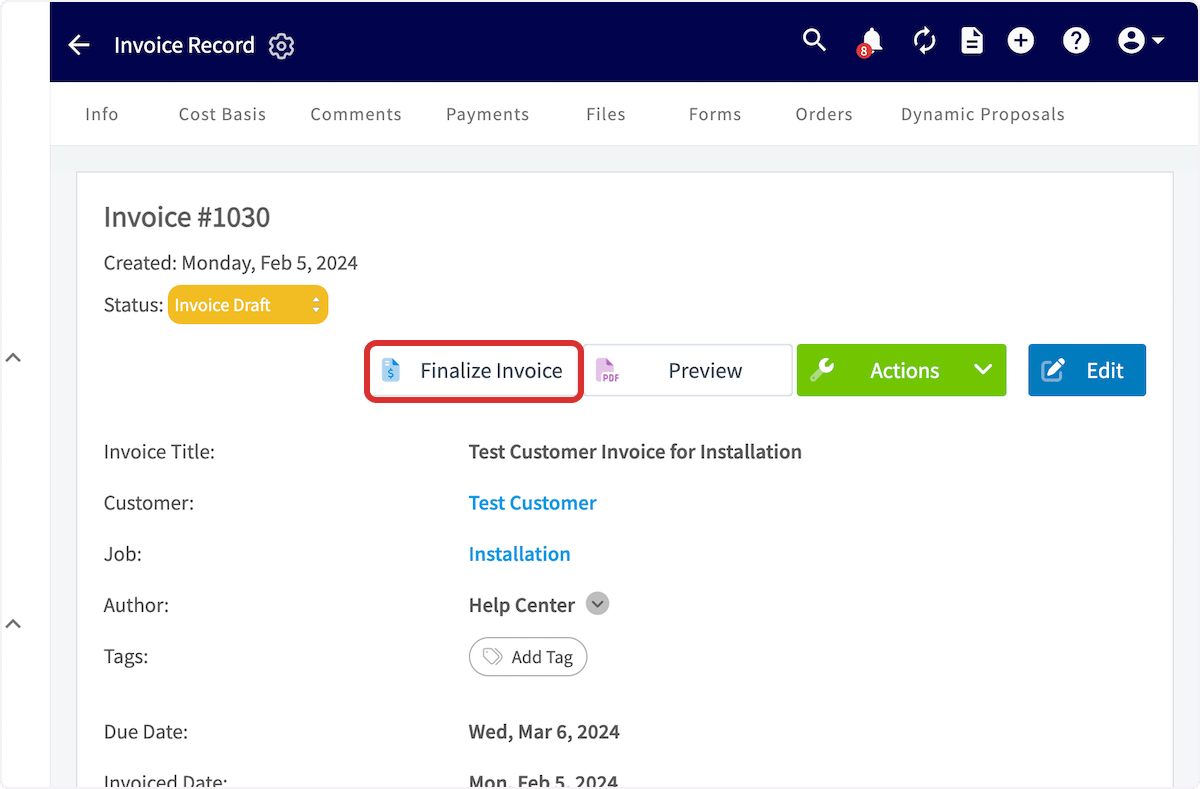
- Once the invoice status reads Invoiced, accept payment. When the customer pays in full, the status changes to Paid. See How to Collect Payments: 3 Methods.
Video walkthrough: creating an invoice in the web app
On mobile
Build a new invoice
-
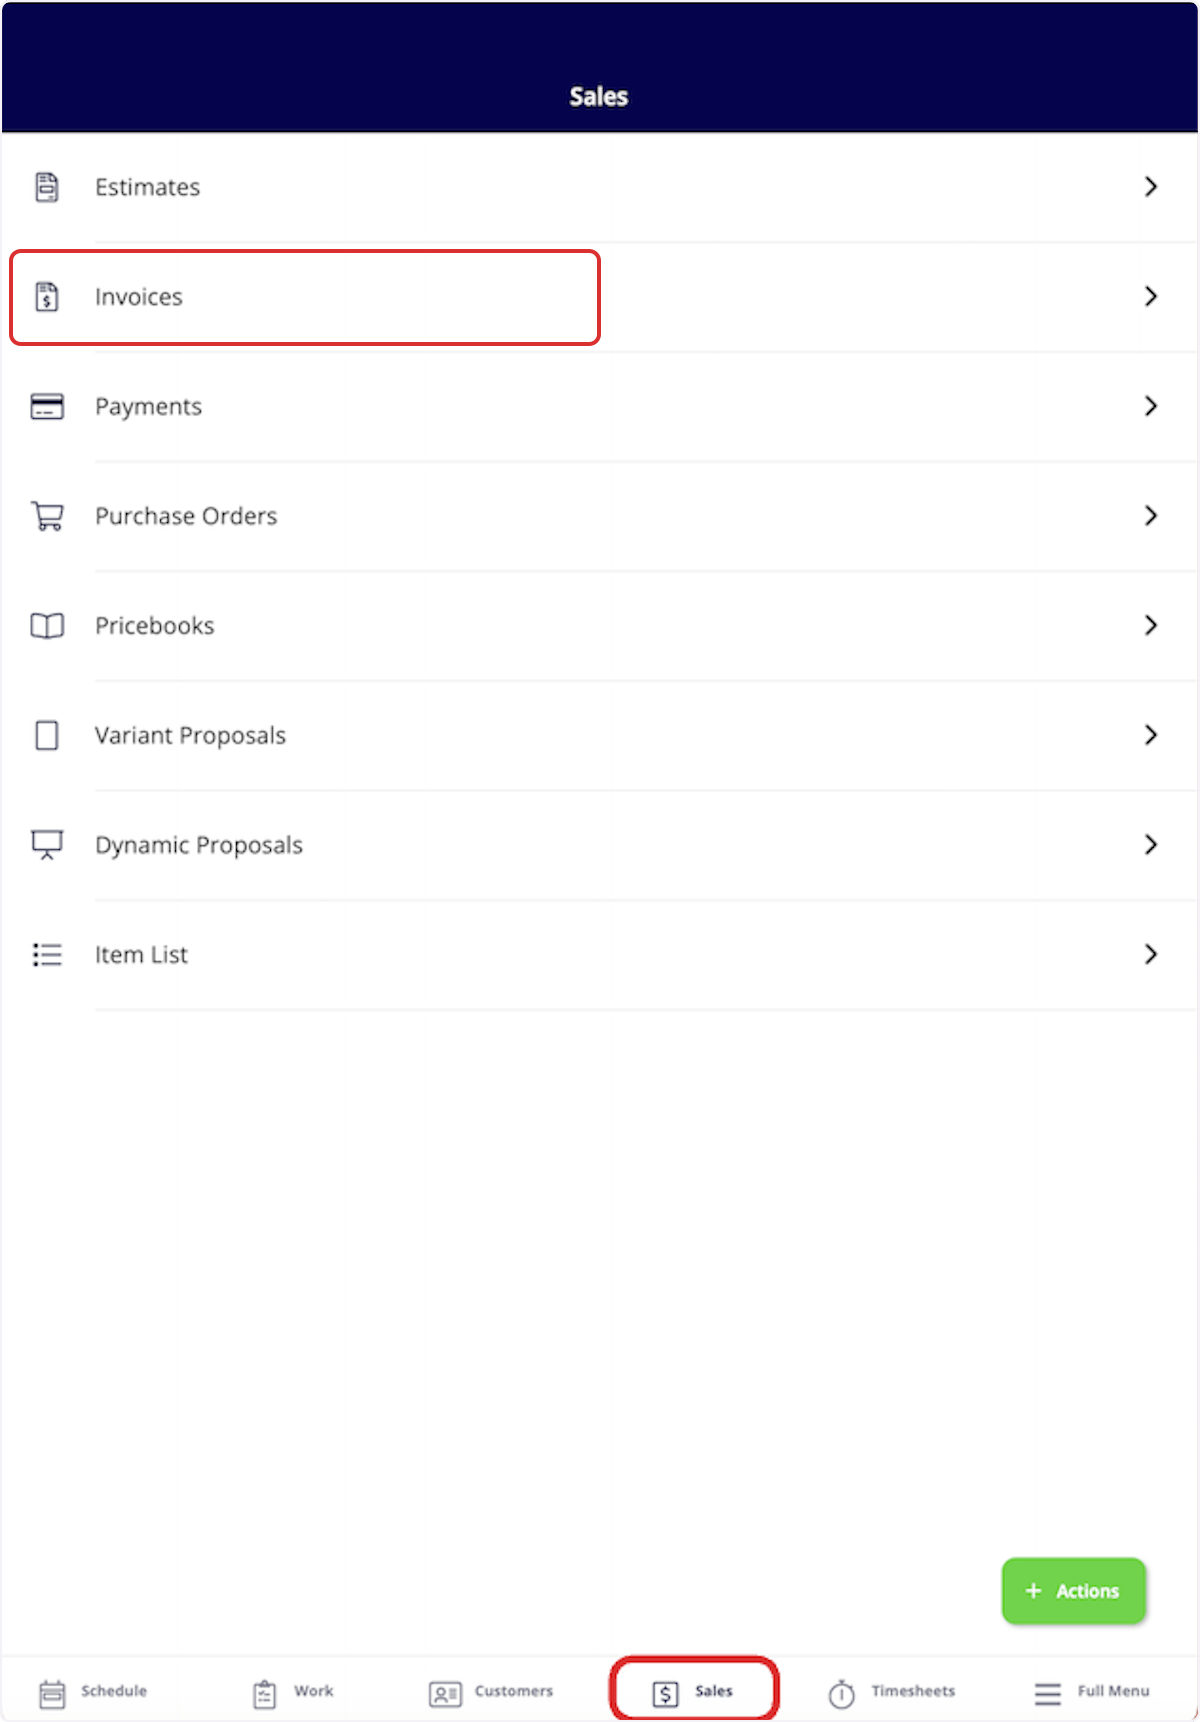
Select the Sales tab in the bottom menu, then select Invoices.
-
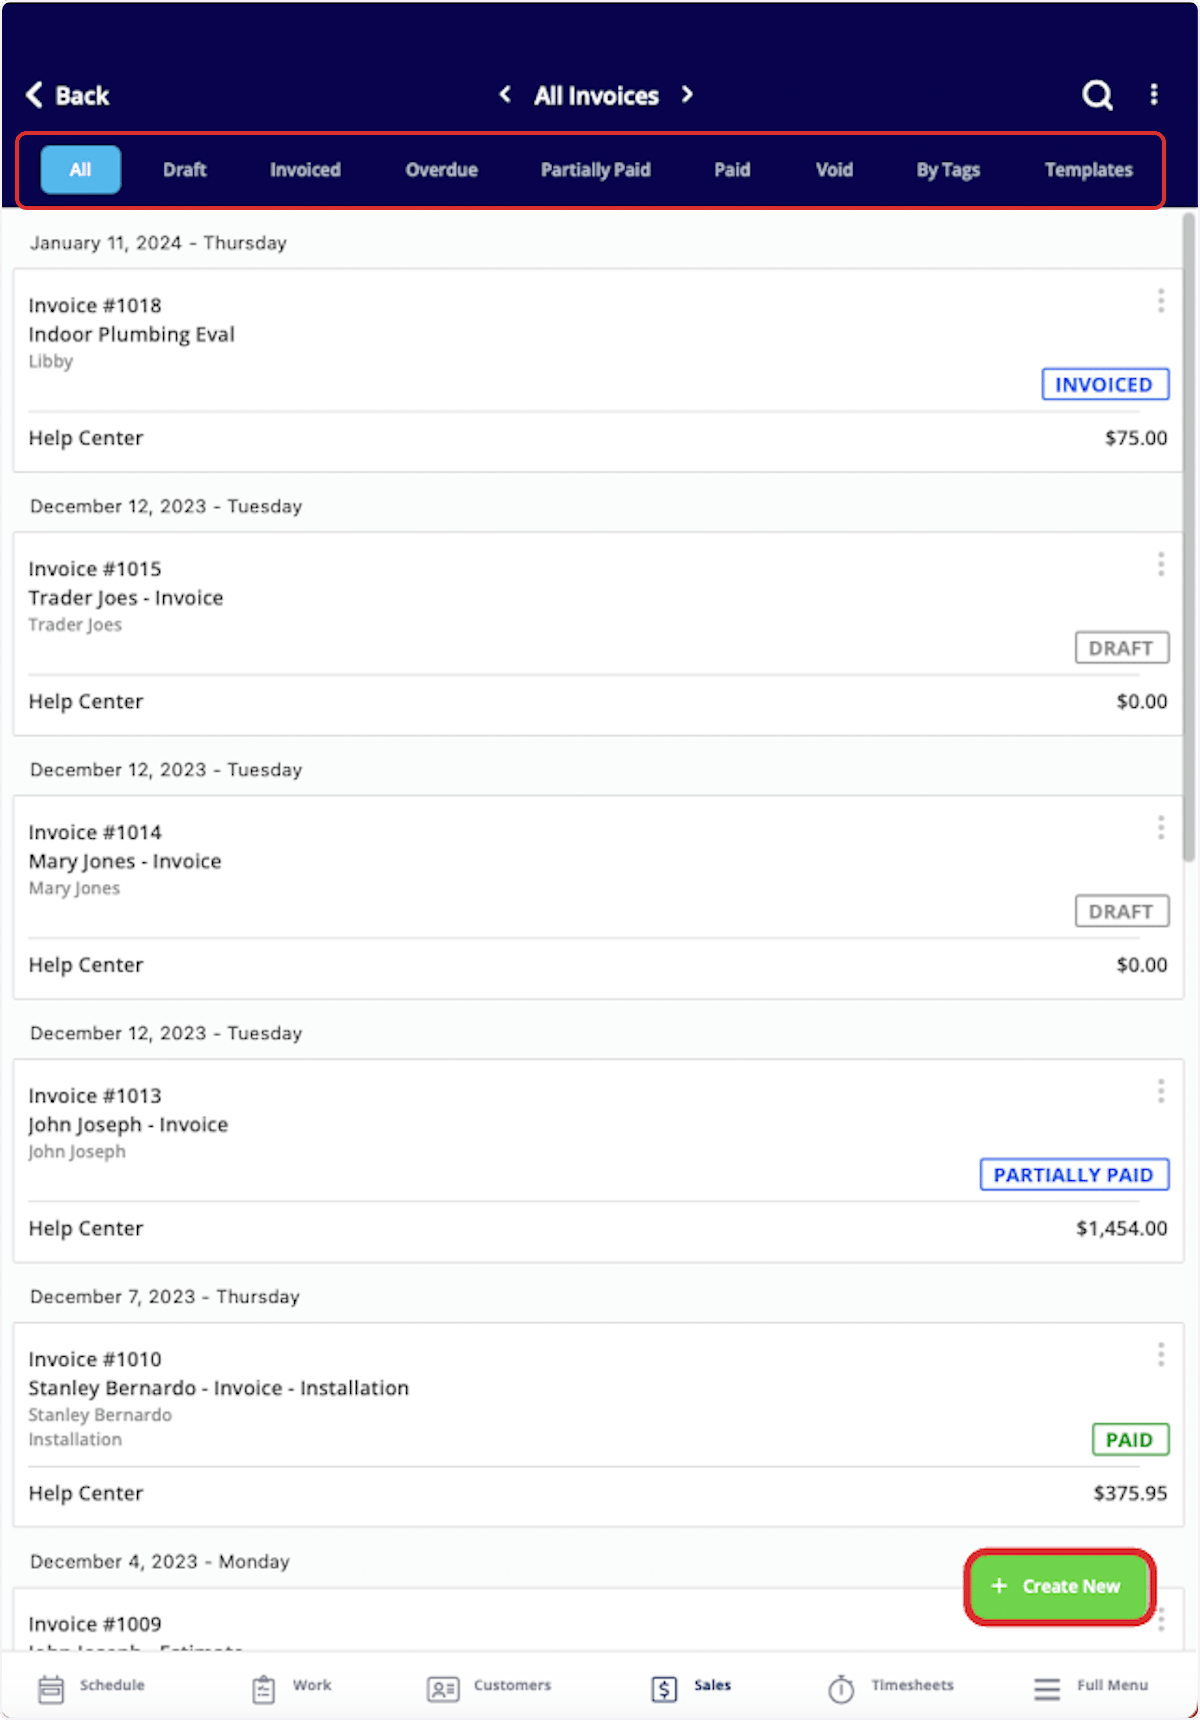
Sort your existing invoices with the menu at the top of the screen, then select Create New to build a new invoice.
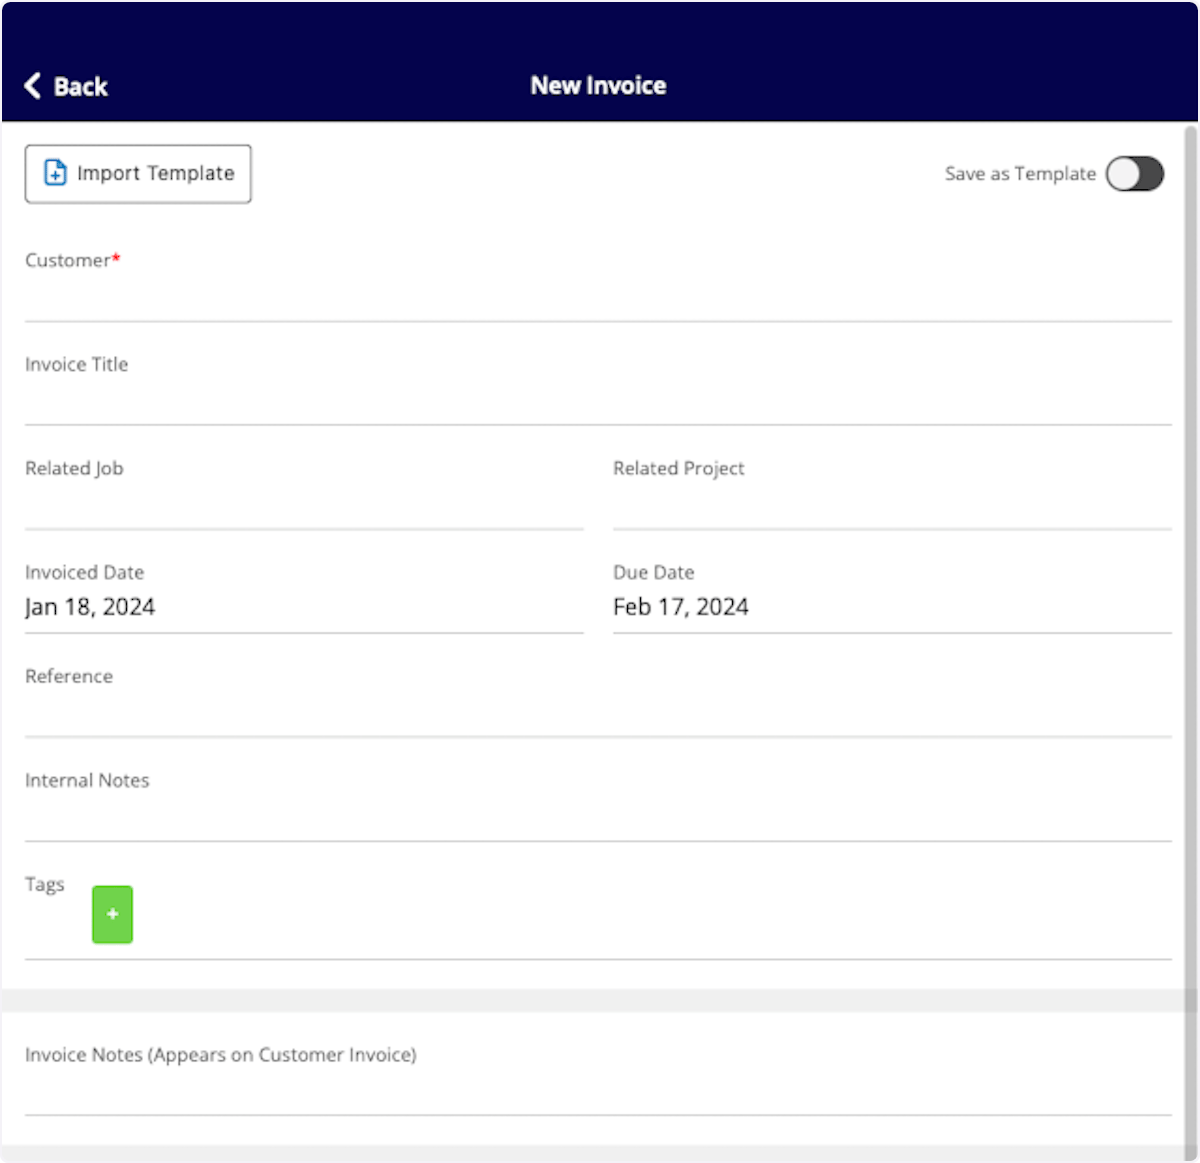
- Select Import Template to build the invoice from an existing template, or fill out the details to start from scratch. Turn on Save as Template if you expect to reuse this invoice. See How to Use Estimate & Invoice Templates.
- Select the customer to link to this invoice. If the invoice connects to an existing job or project, search for it in the Related Job or Related Project field.
-
Add internal notes and tags, and adjust the due date if you need to. To change your default invoice settings, see Setting Up Default Estimate & Invoice Settings.
-
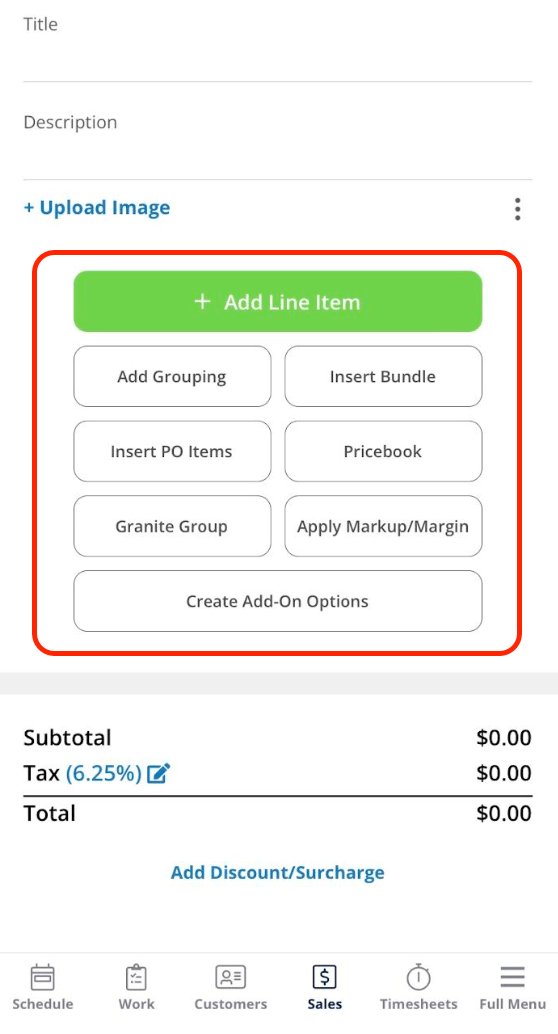
Add items to the invoice. The mobile app offers several ways to do this.
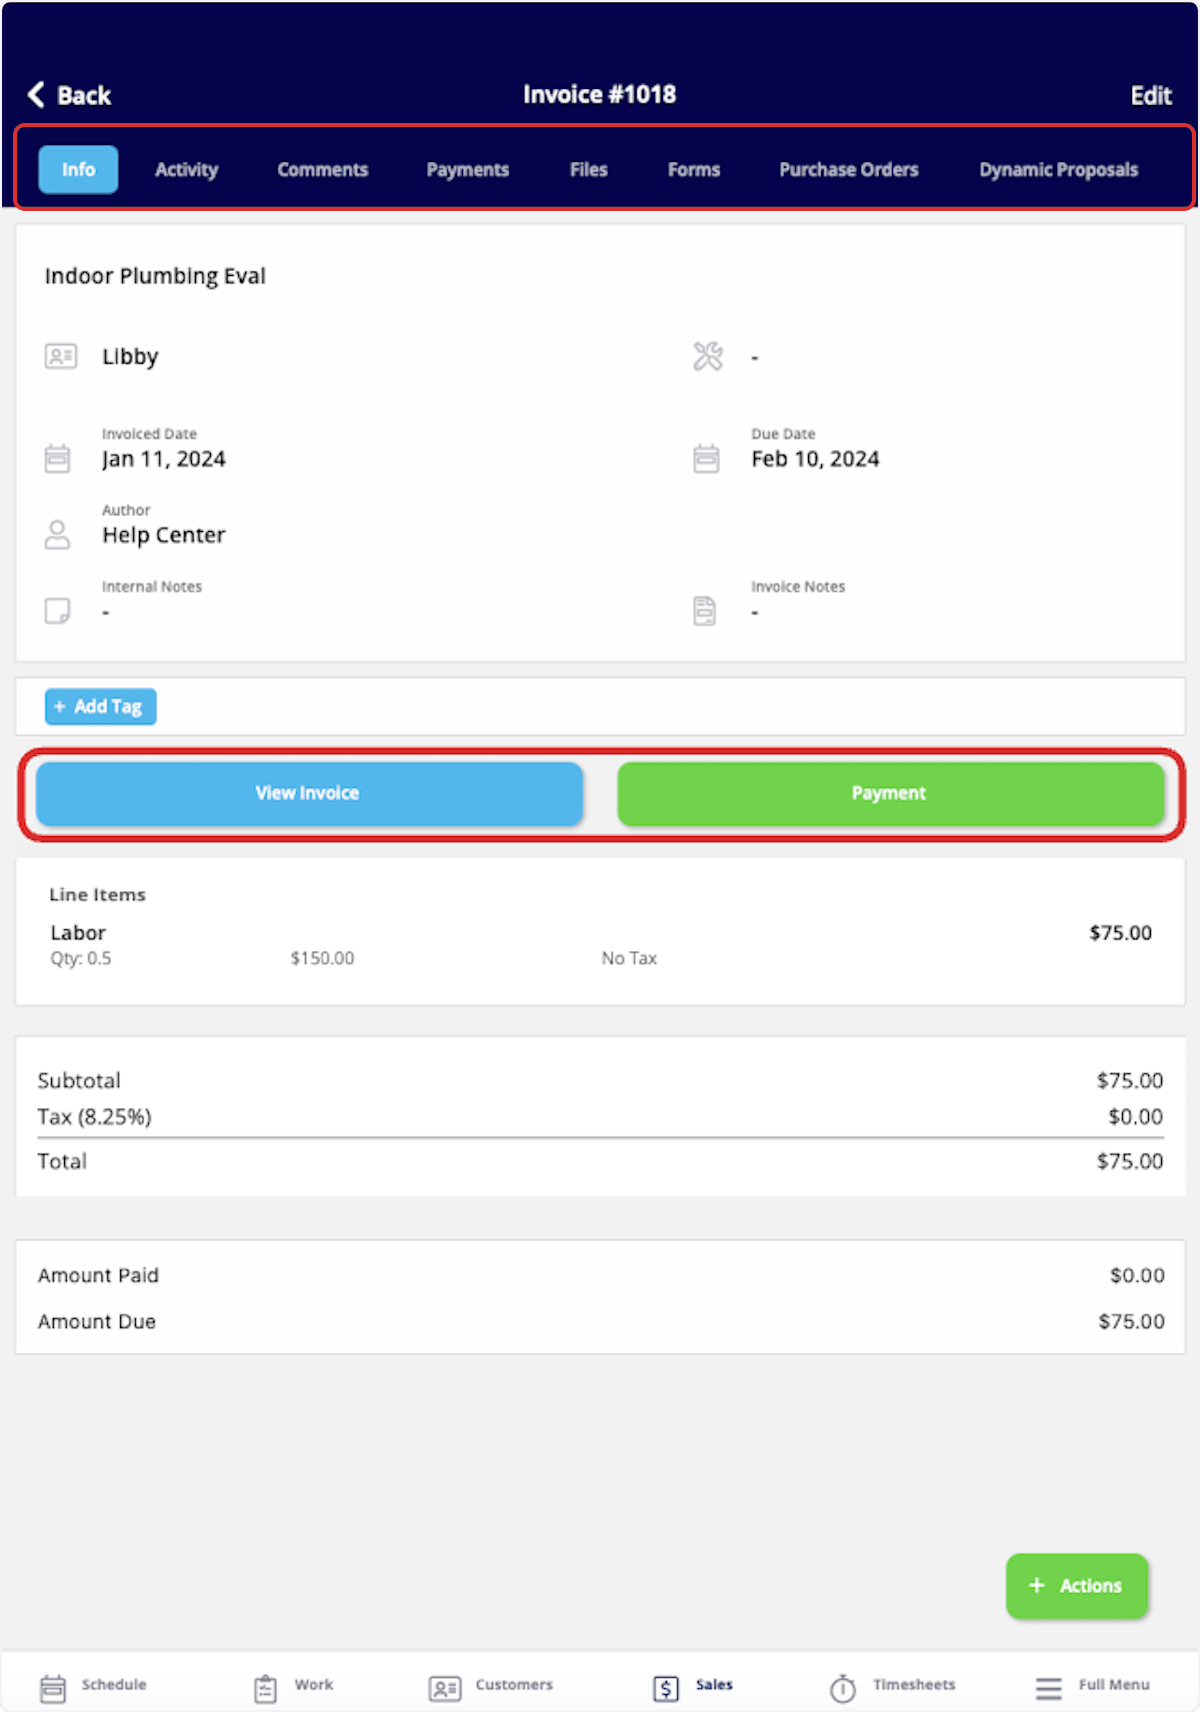
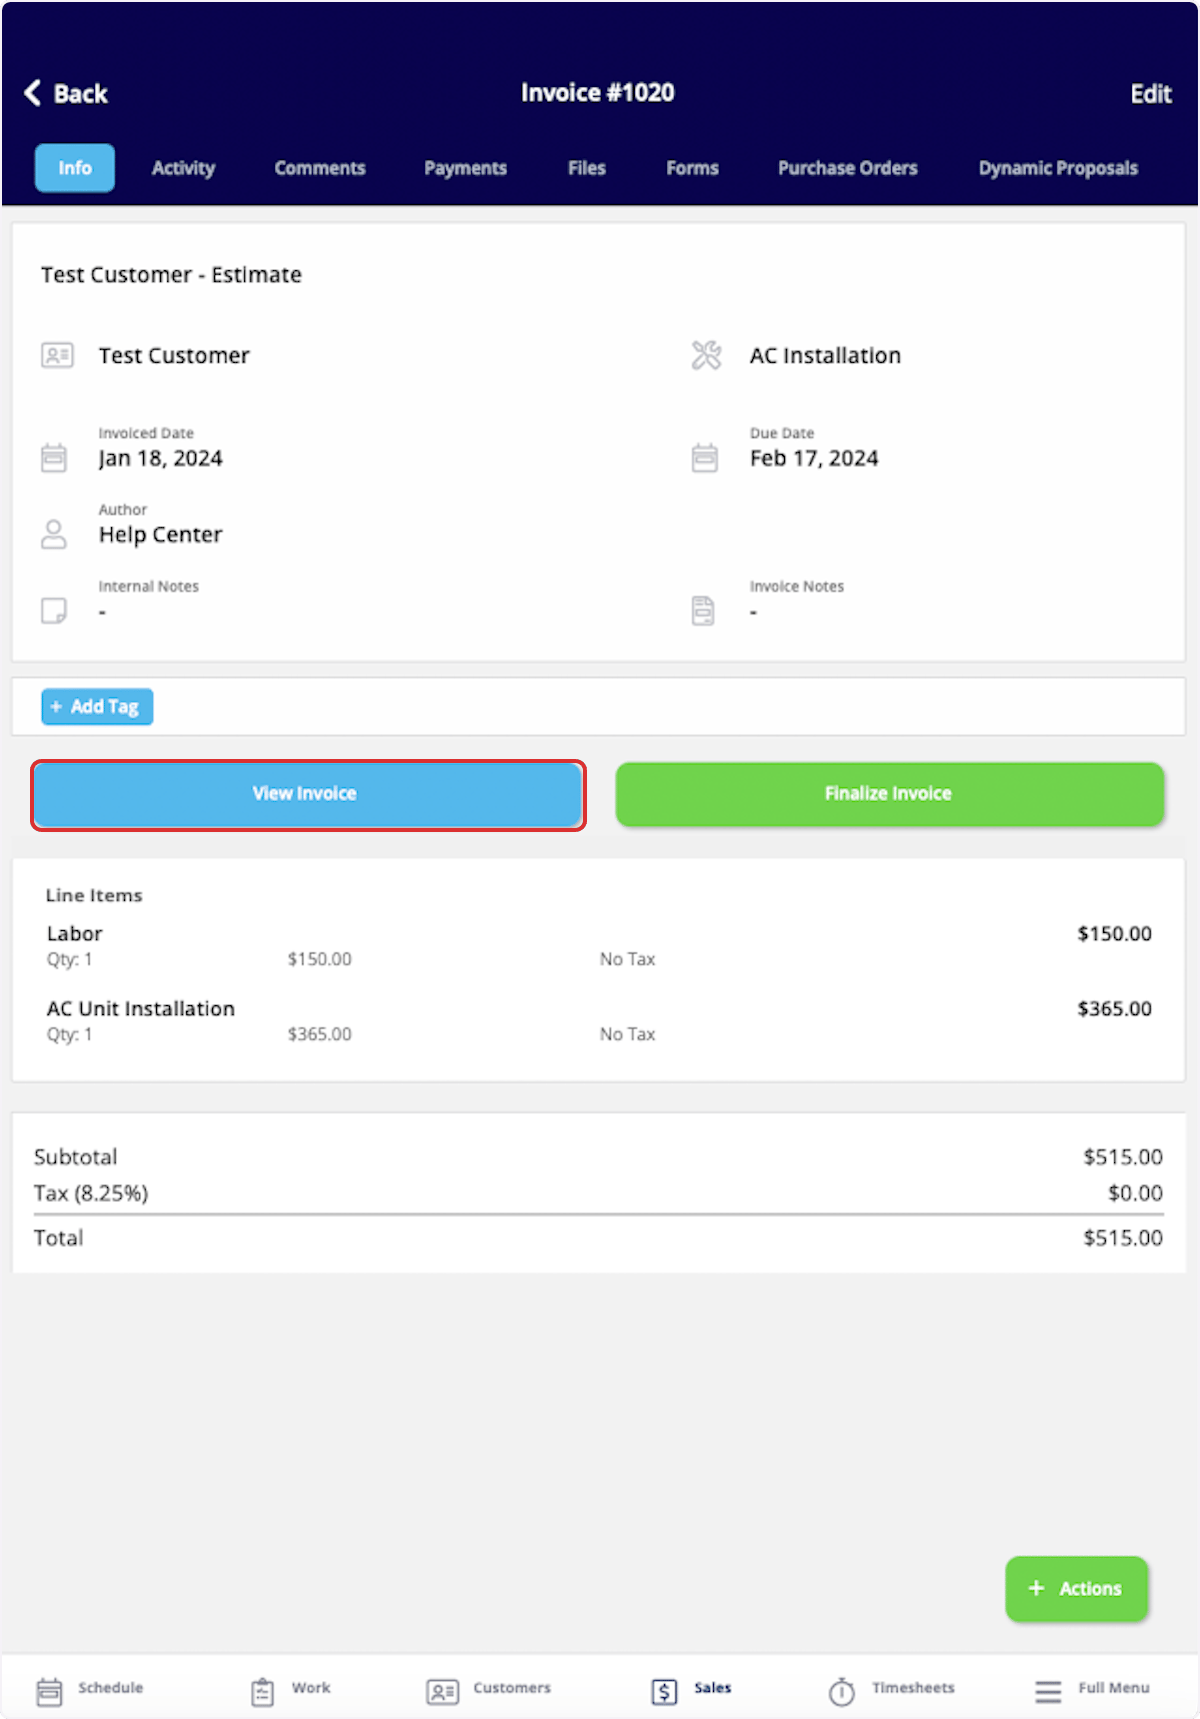
- Save the invoice to open the invoice record. Use the top menu to add related material to the invoice or view recent changes. Select View Invoice to show the invoice in person or email it to your customer, or select Payment to collect or mark payment on site — see How to Collect Payments: 3 Methods.
Convert an estimate to an invoice
When your customer accepts an estimate, converting it transfers all the estimate details into an invoice record.-
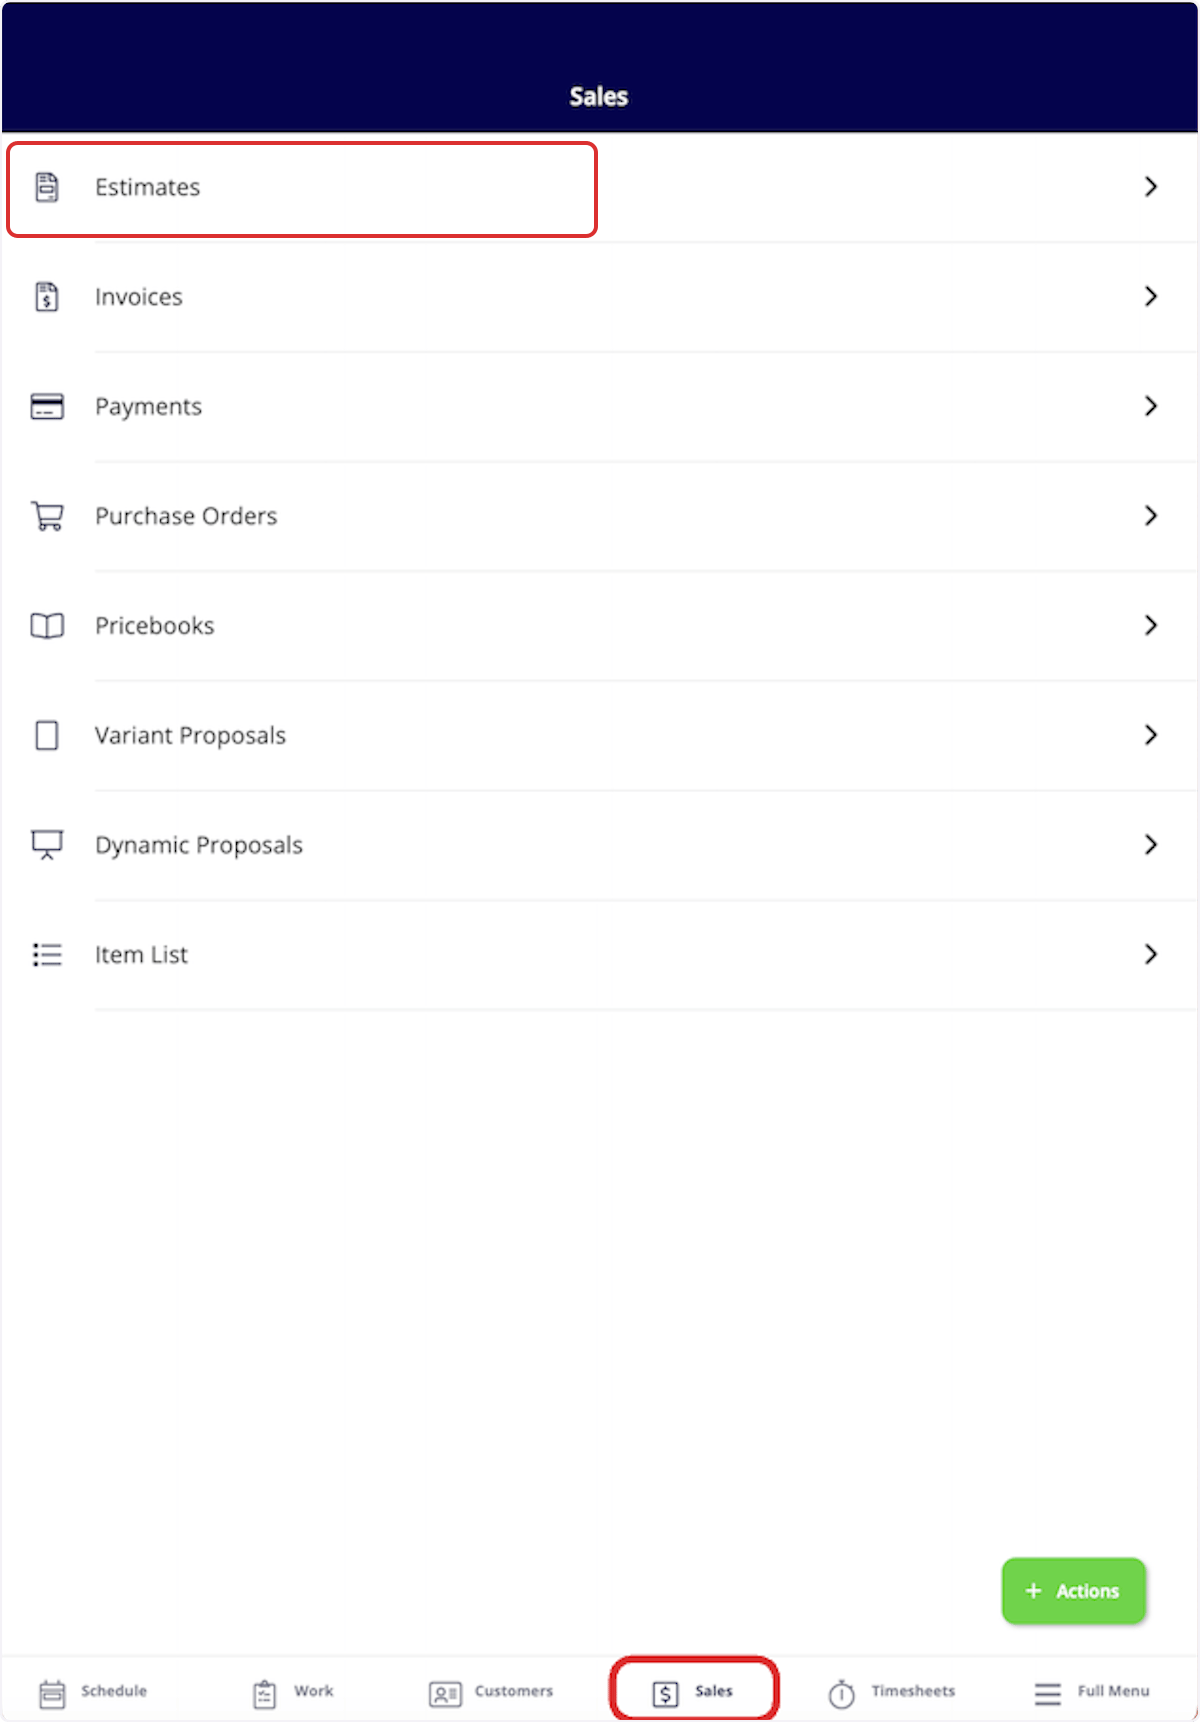
Select the Sales tab in the bottom menu, then select Estimates.
-
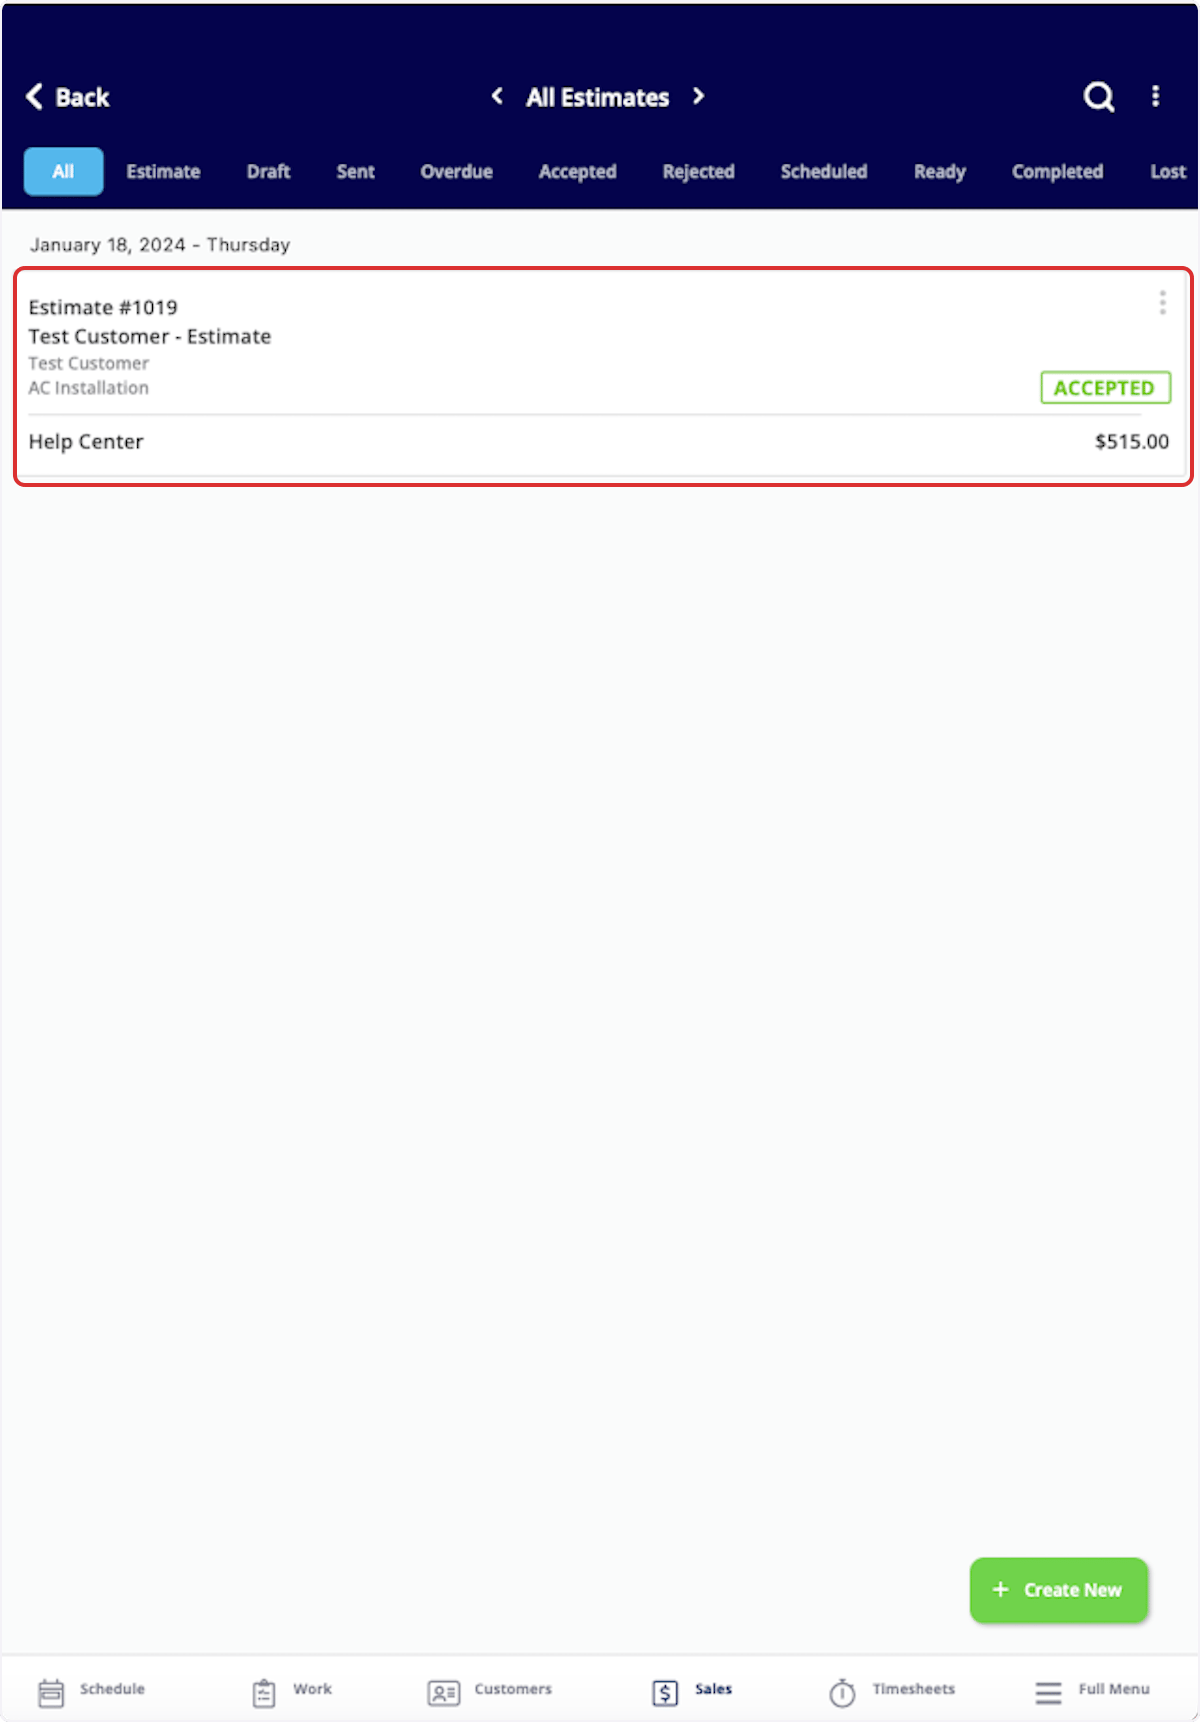
Select the estimate you want to convert.
-
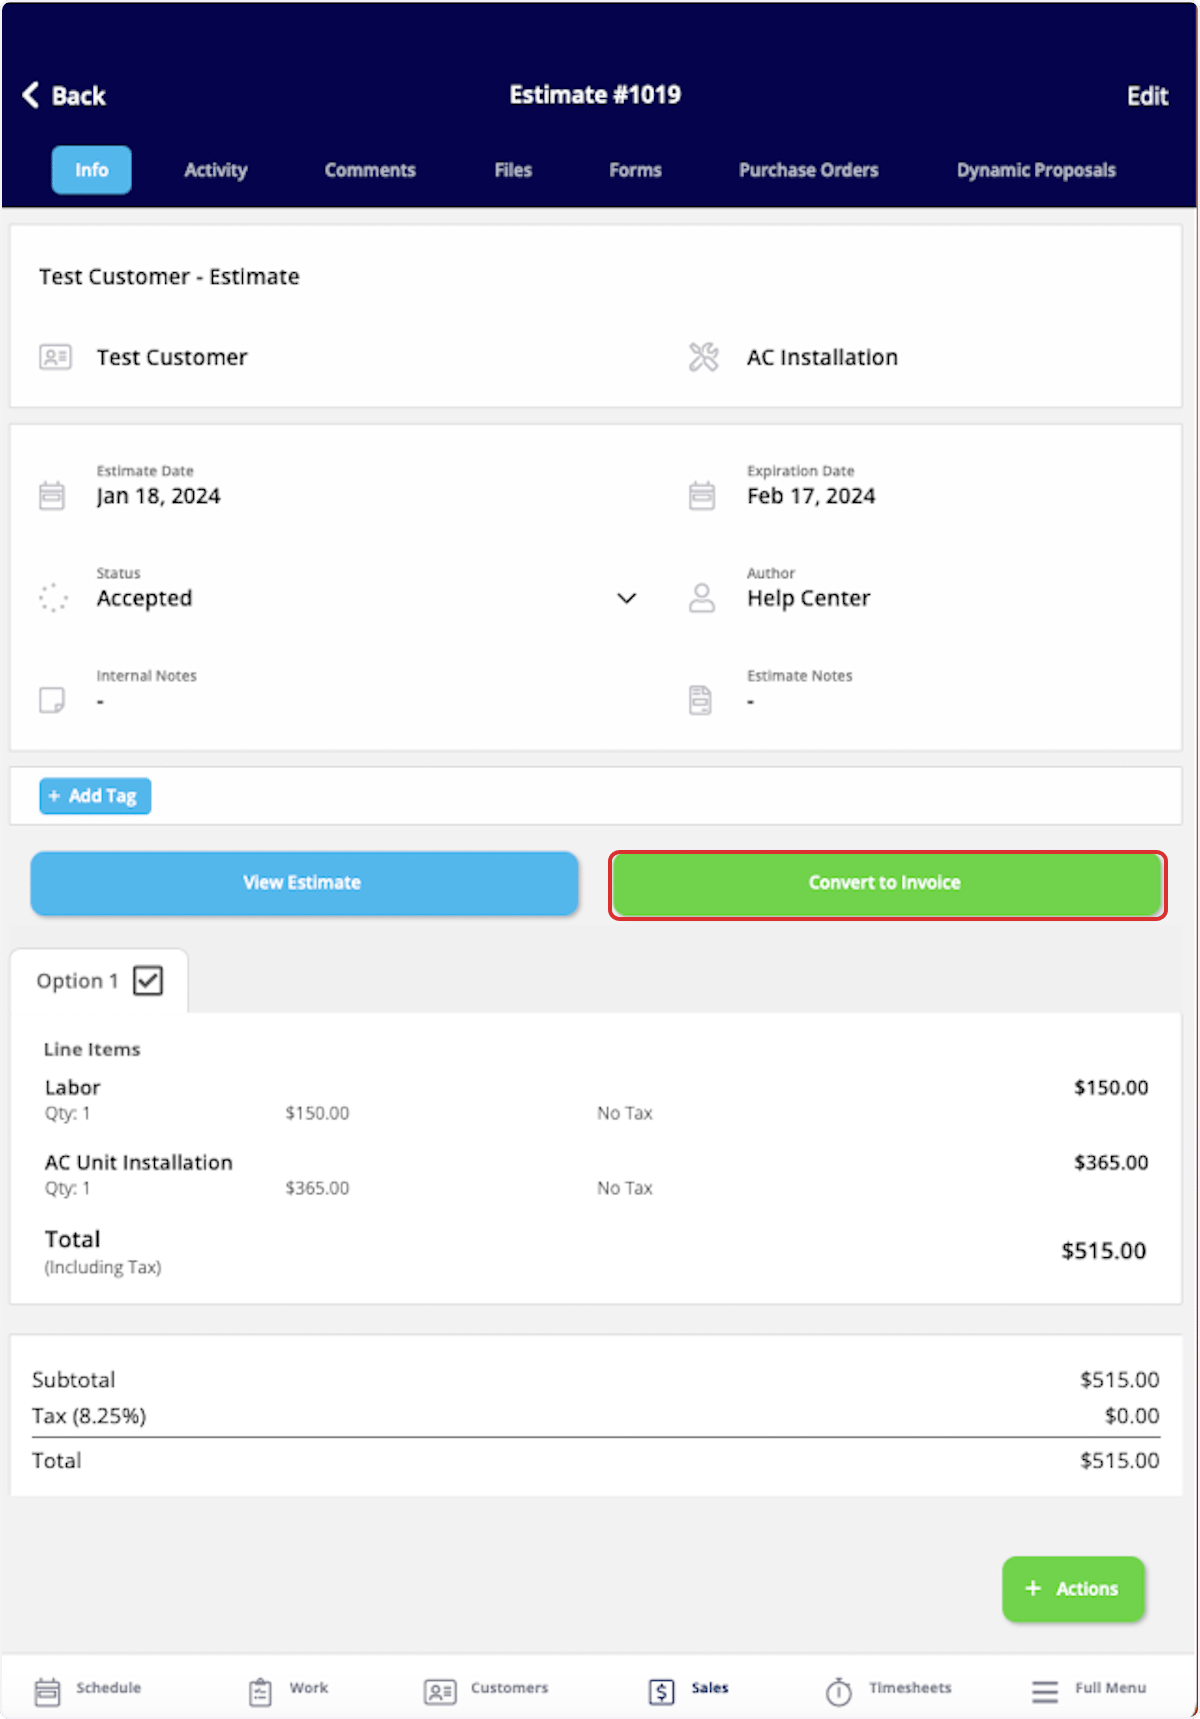
On the estimate record, select Convert to Invoice. The estimate record becomes an invoice record and no longer exists as an estimate, unless you turned on Keep an Estimate Record when Converting to an Invoice first.
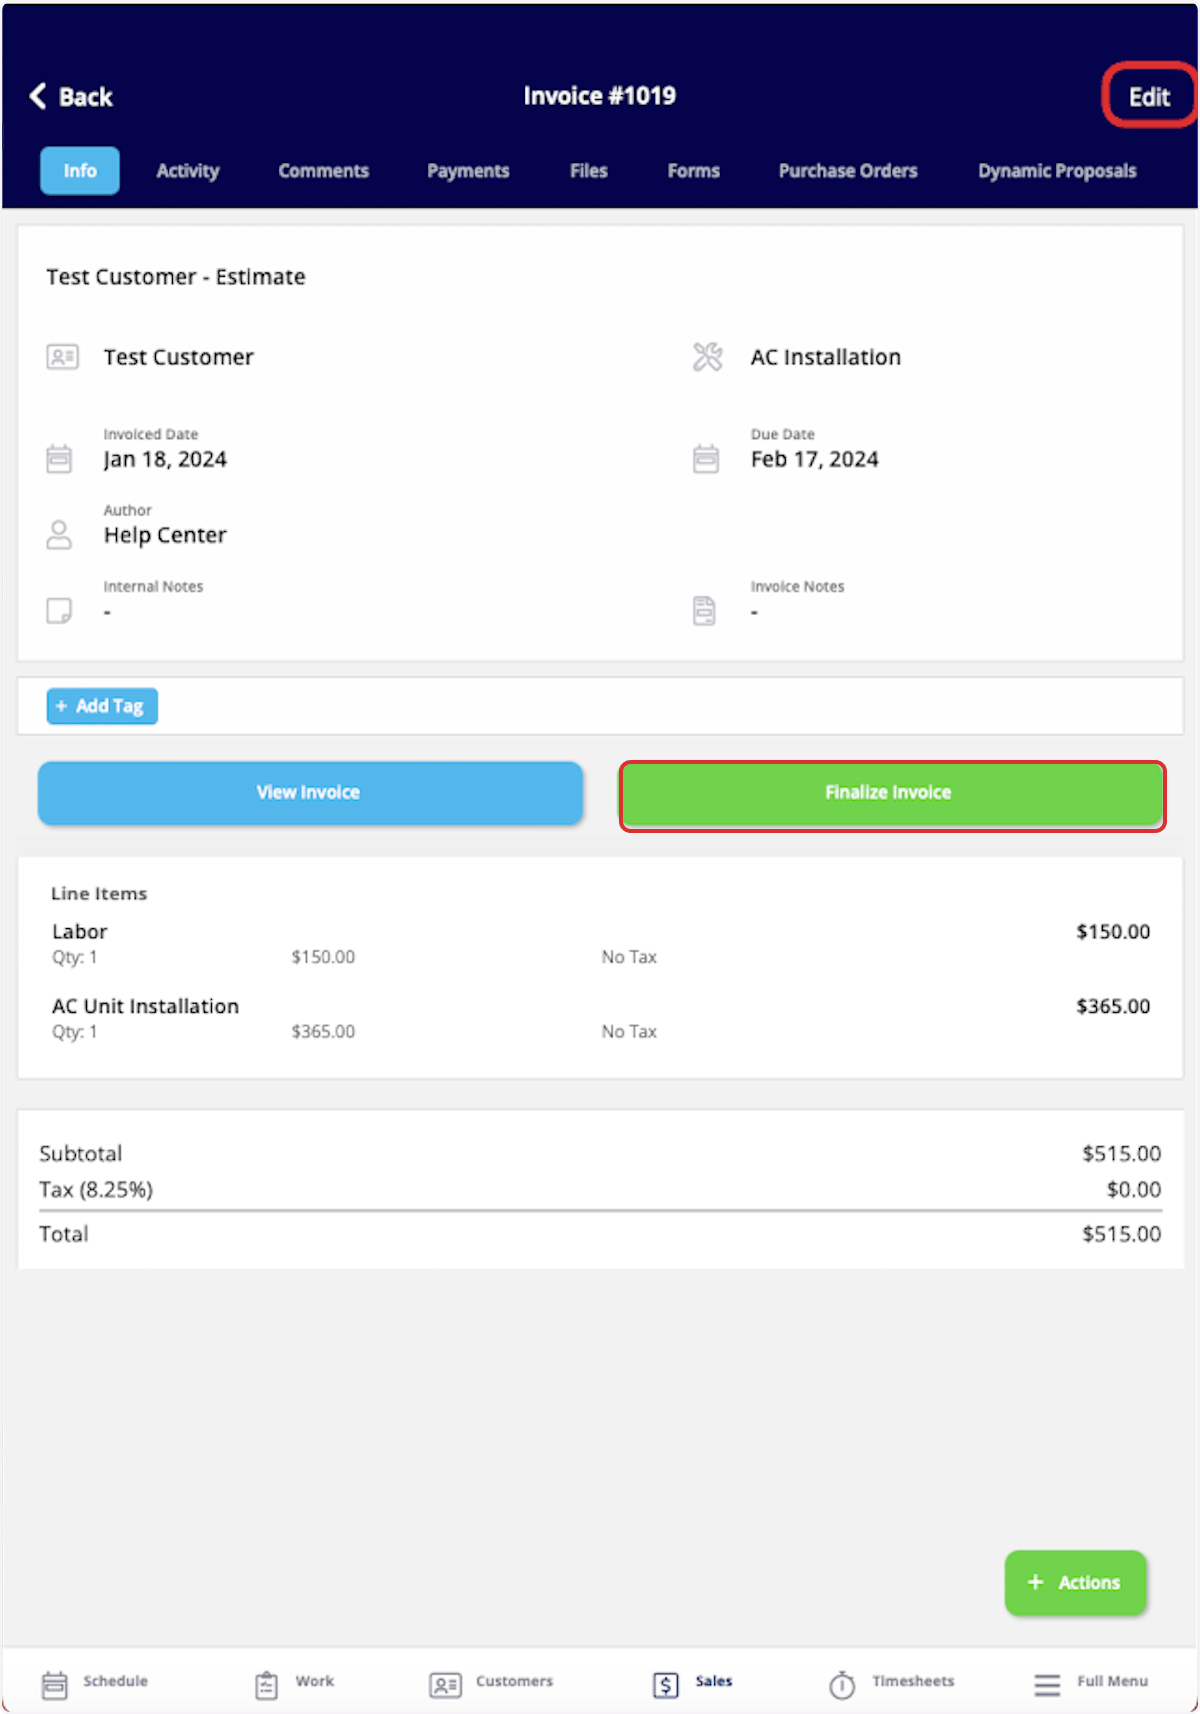
- Select Edit to make changes. When the invoice is ready, select Finalize Invoice.
Create an invoice from a job record
-
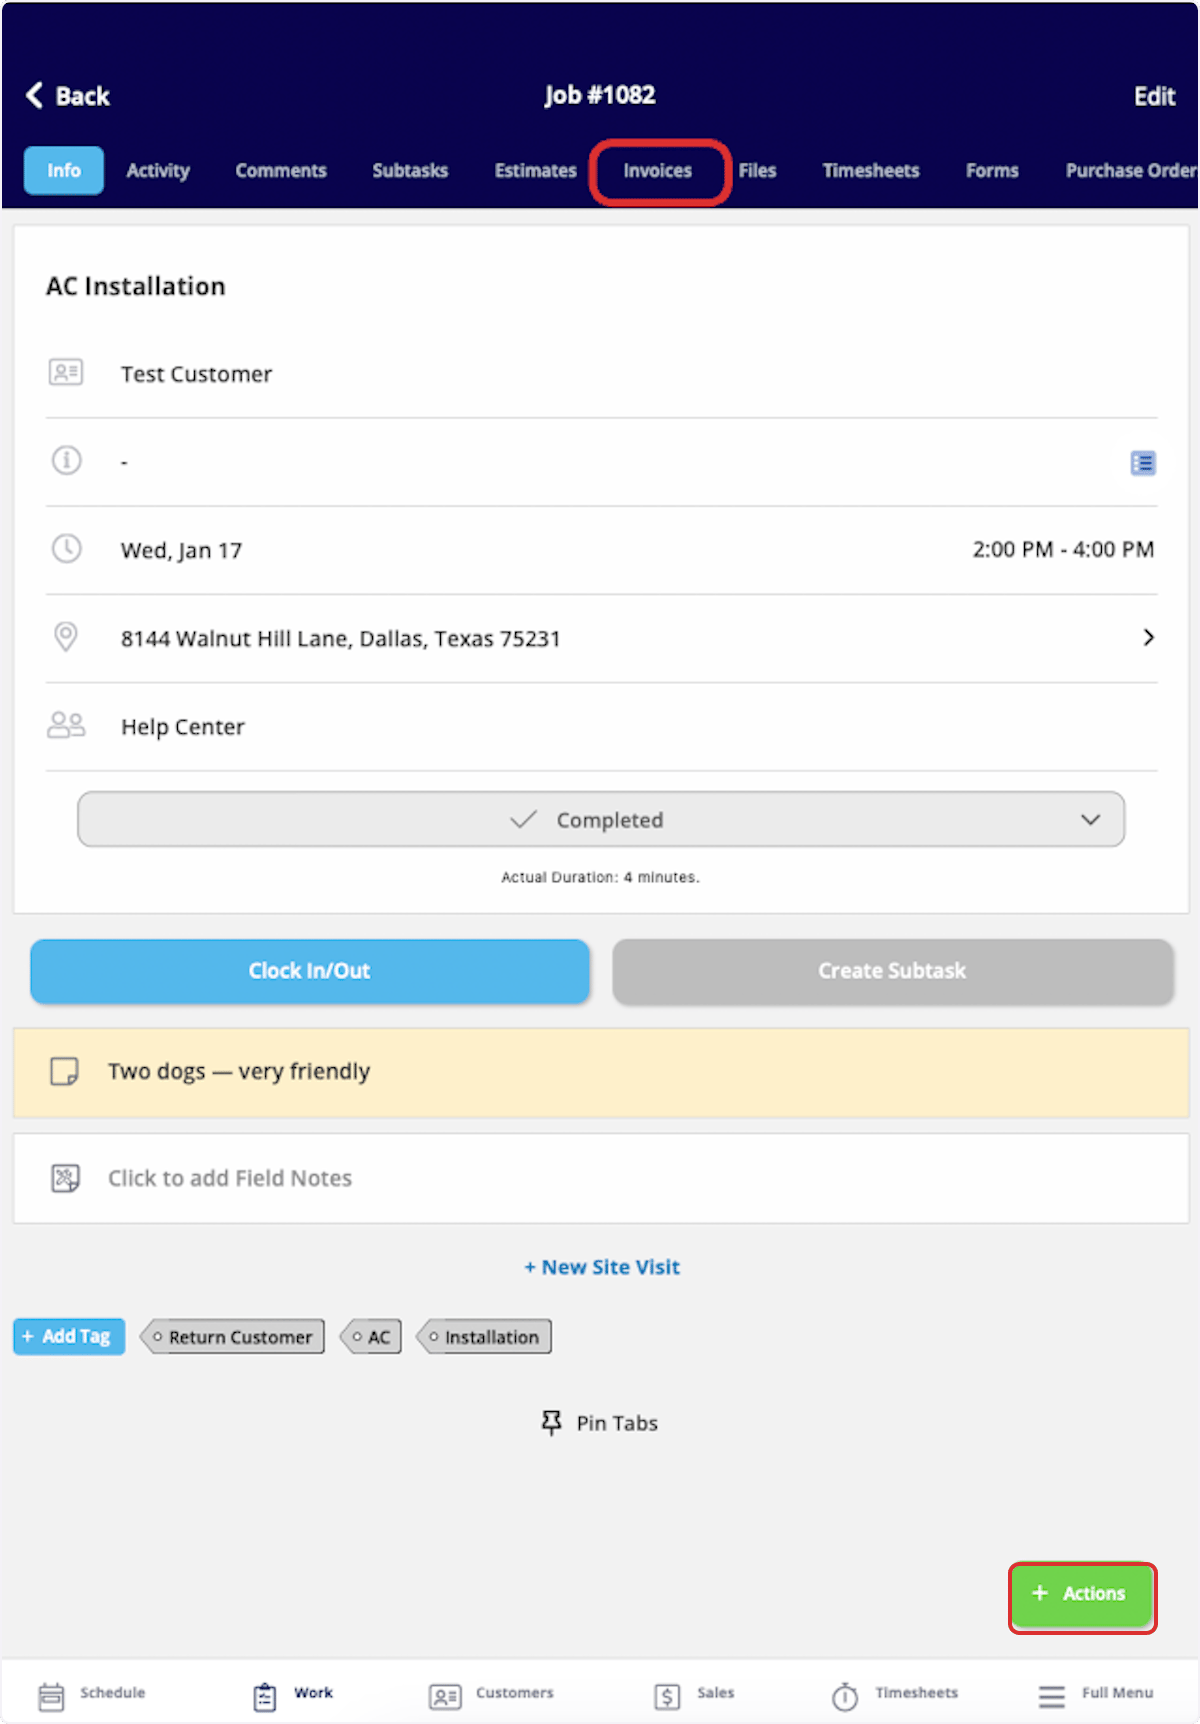
Open the job record. Select Actions, then Create Invoice, or select Invoices in the top menu and then Create Invoice.
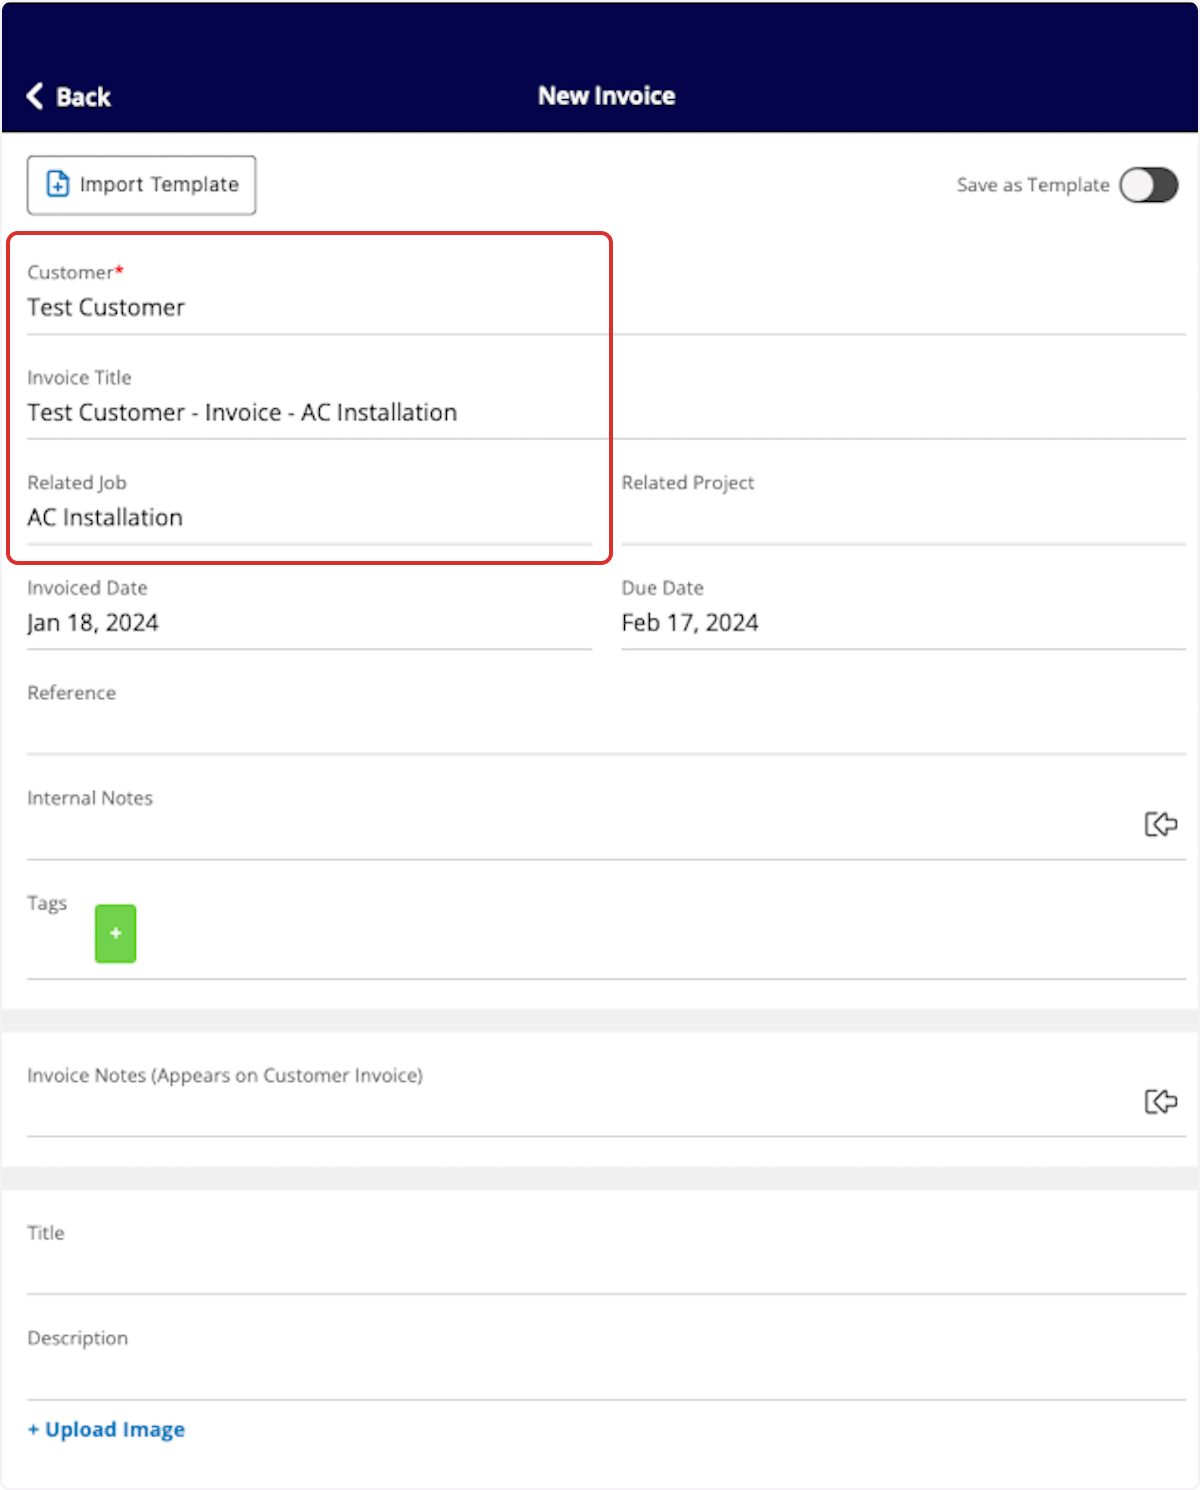
- Check the details. The customer name, invoice title, and related job are entered automatically because the invoice was created from the job record.
Preview, send, or present the invoice
-
On the invoice record, select View Invoice.
-
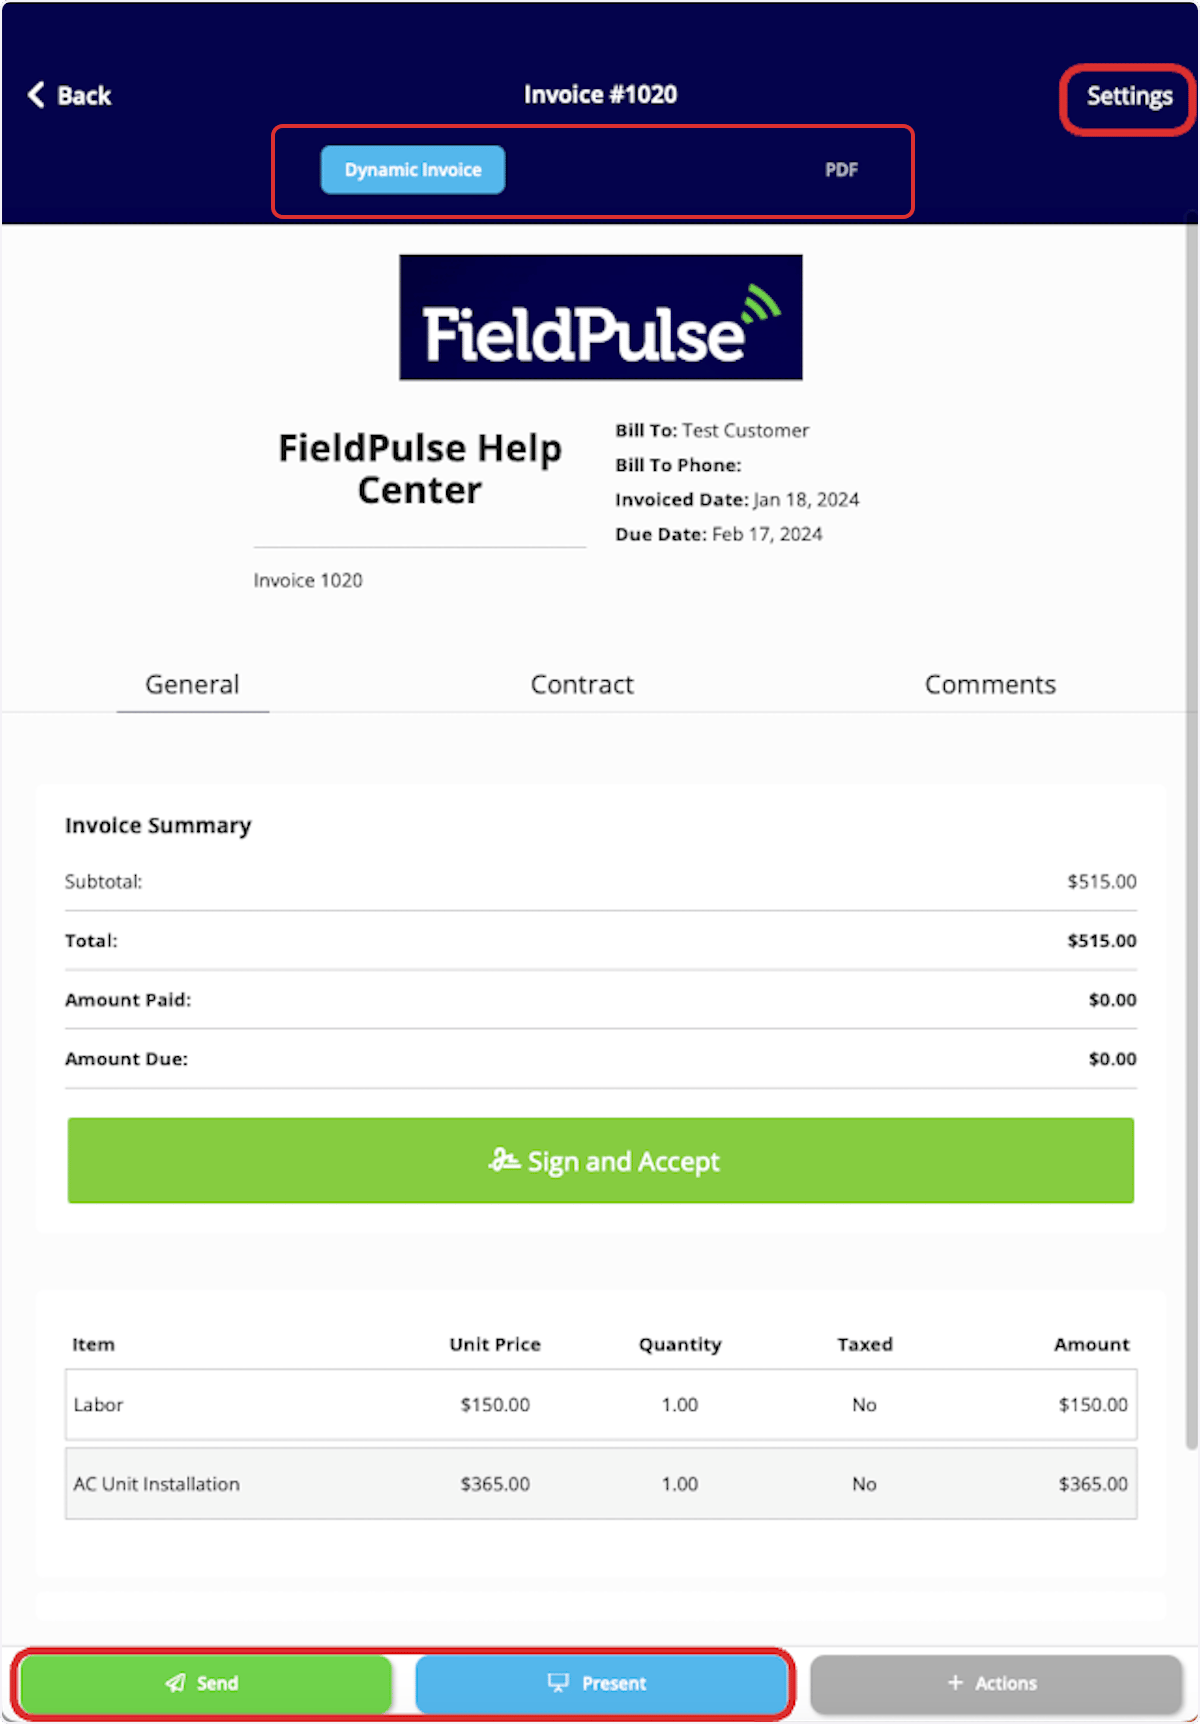
Choose the invoice view you want — Dynamic Invoice or PDF. Select Send to email the invoice to your customer, or Present to show your customer the invoice in person. See How to Send Estimates & Invoices to Customers.
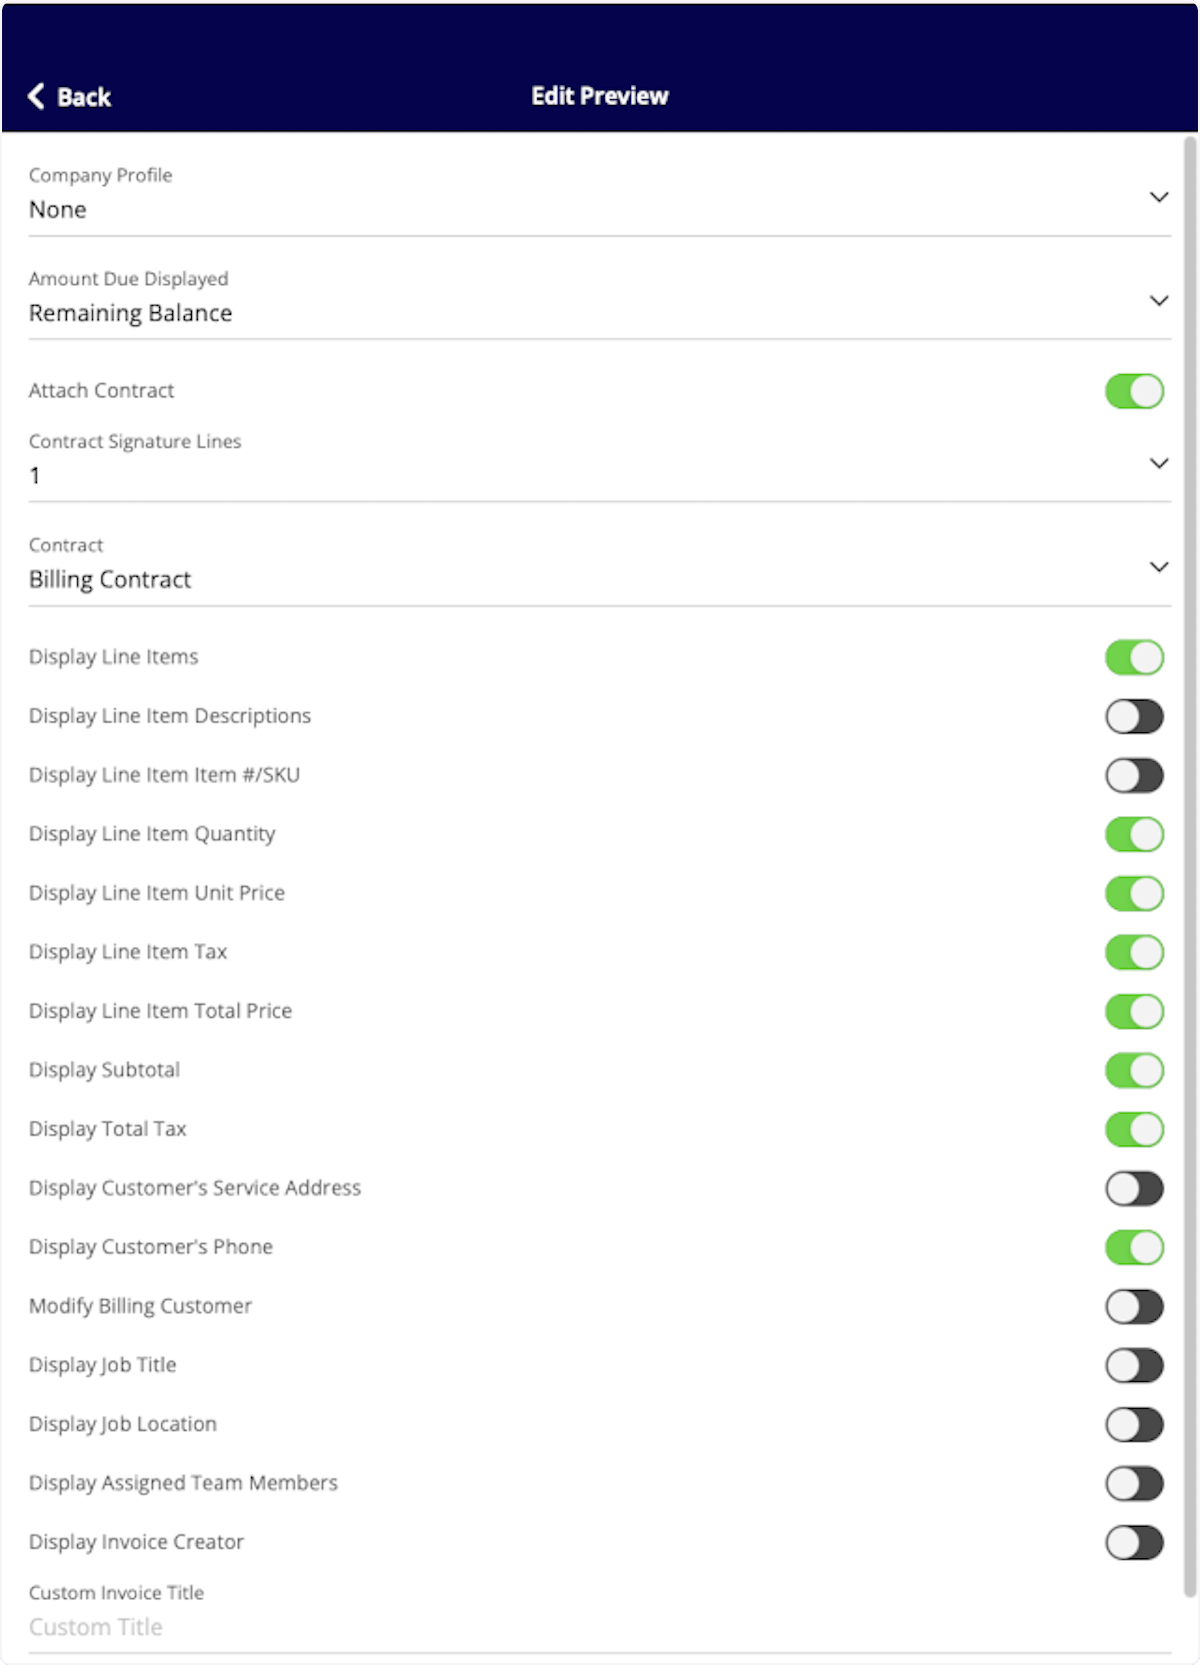
- Select Settings to change the invoice settings for this invoice. To change your account-wide defaults instead, see Setting Up Default Estimate & Invoice Settings.
Add an image to a line item
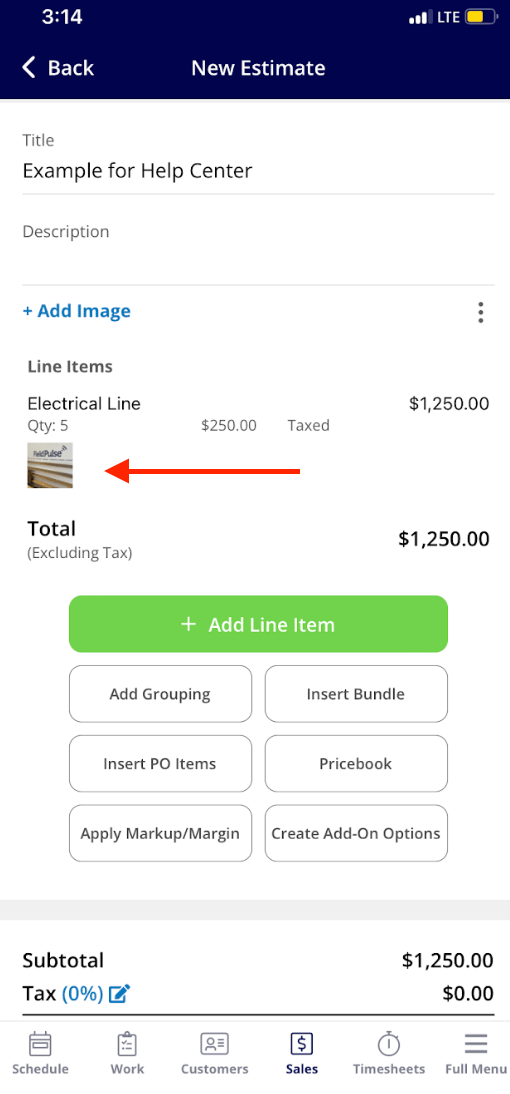
You can attach a photo to a line item on an estimate or an invoice from the mobile app.-
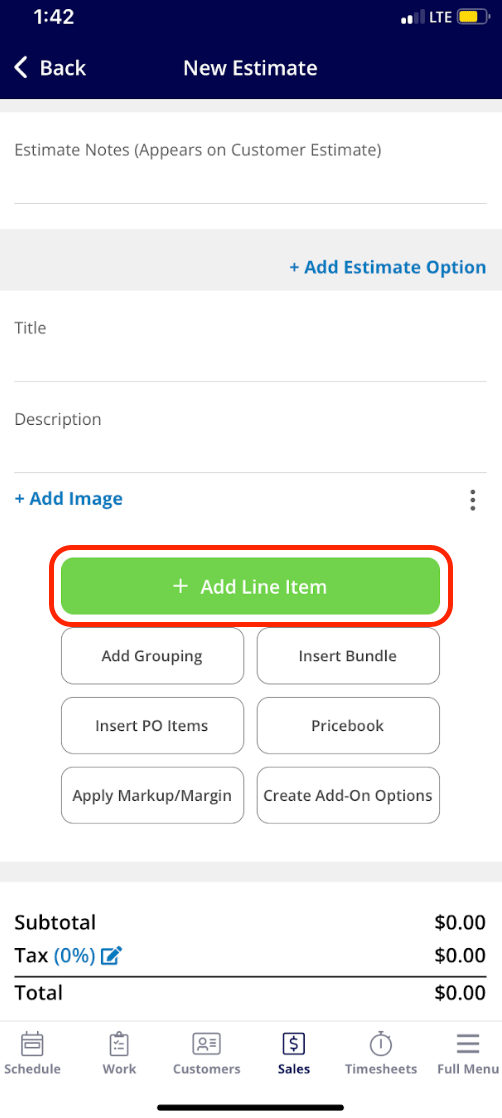
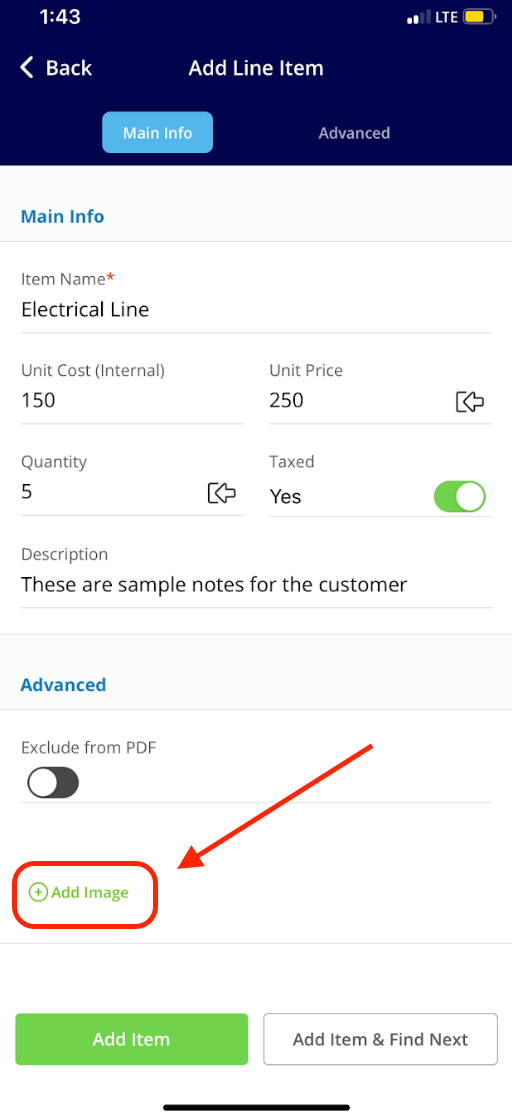
Open the record you want to add the line item and image to, then select the green Add Line Item button.
-
Select the line item you want to add, then select Add Image before choosing Add Item or Add Item & Find Next.
-
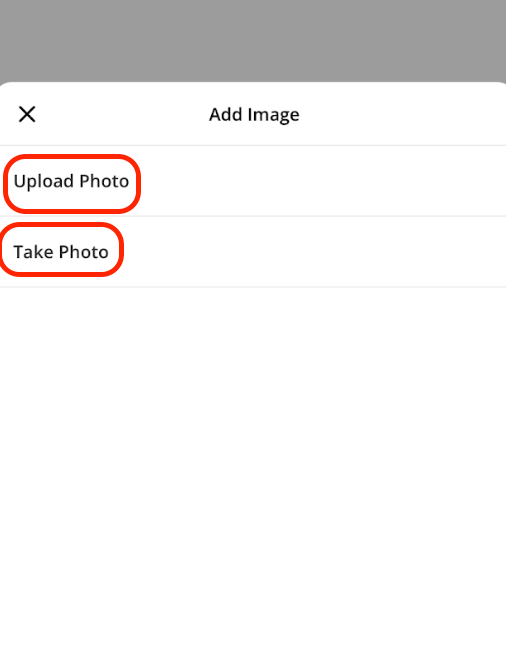
Choose Upload Photo to pick an existing image from your device, or Take Photo to open your camera and capture a new image for the line item.
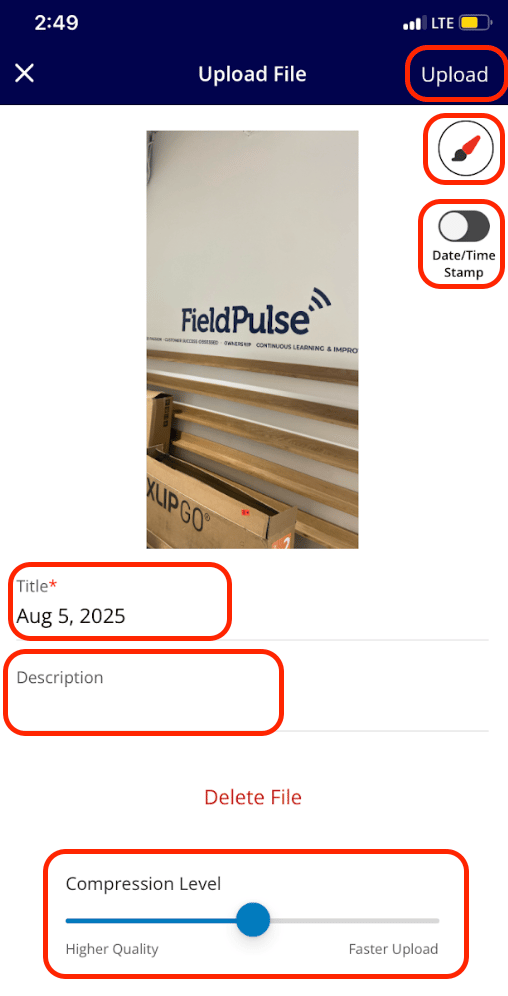
- Title the photo, mark it up, add a description, and adjust the compression level and date/time stamp. Select Upload in the top-right corner when you are done.
Scan a barcode to add an item
-
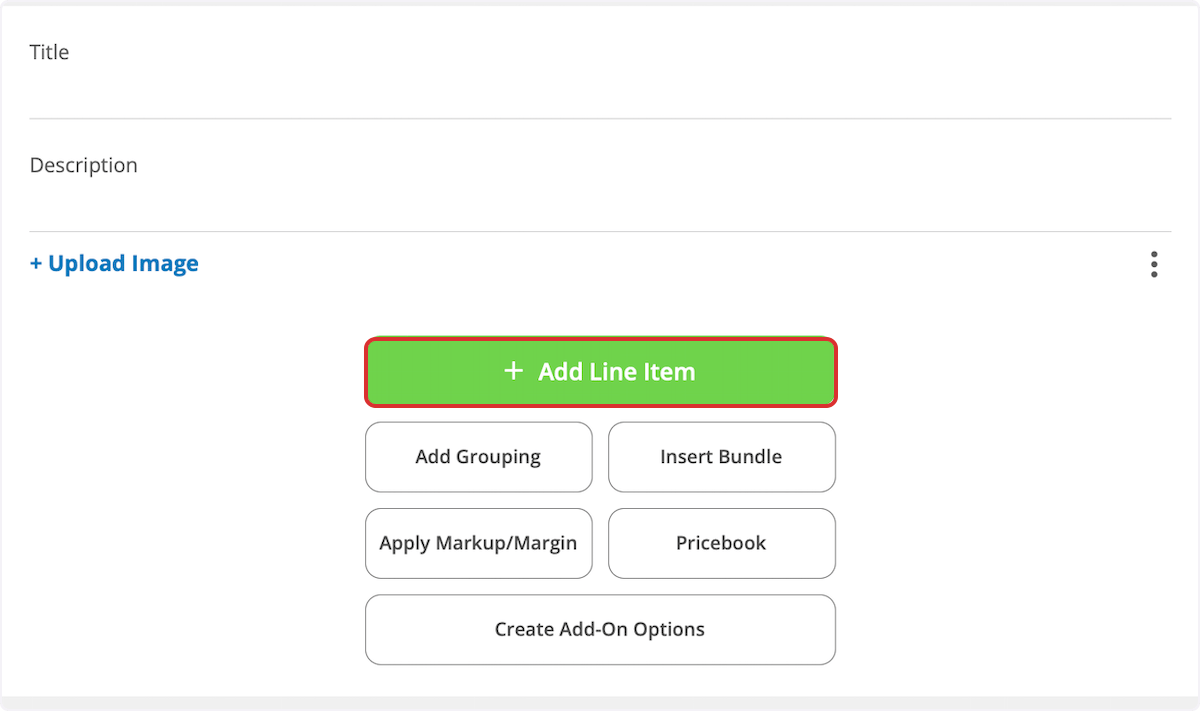
Open a new invoice in the mobile app, scroll down, and select Add Line Item.
-
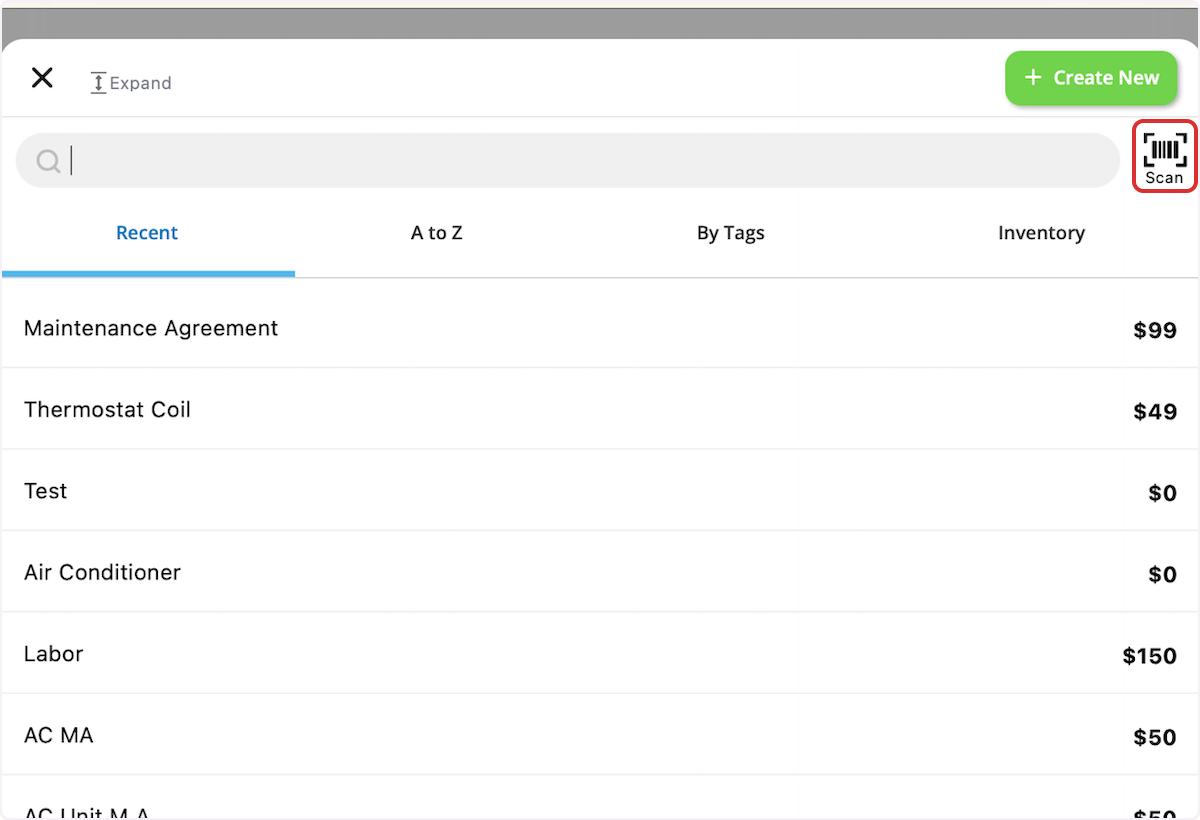
Select the Scan barcode icon at the right of the item search field.
-
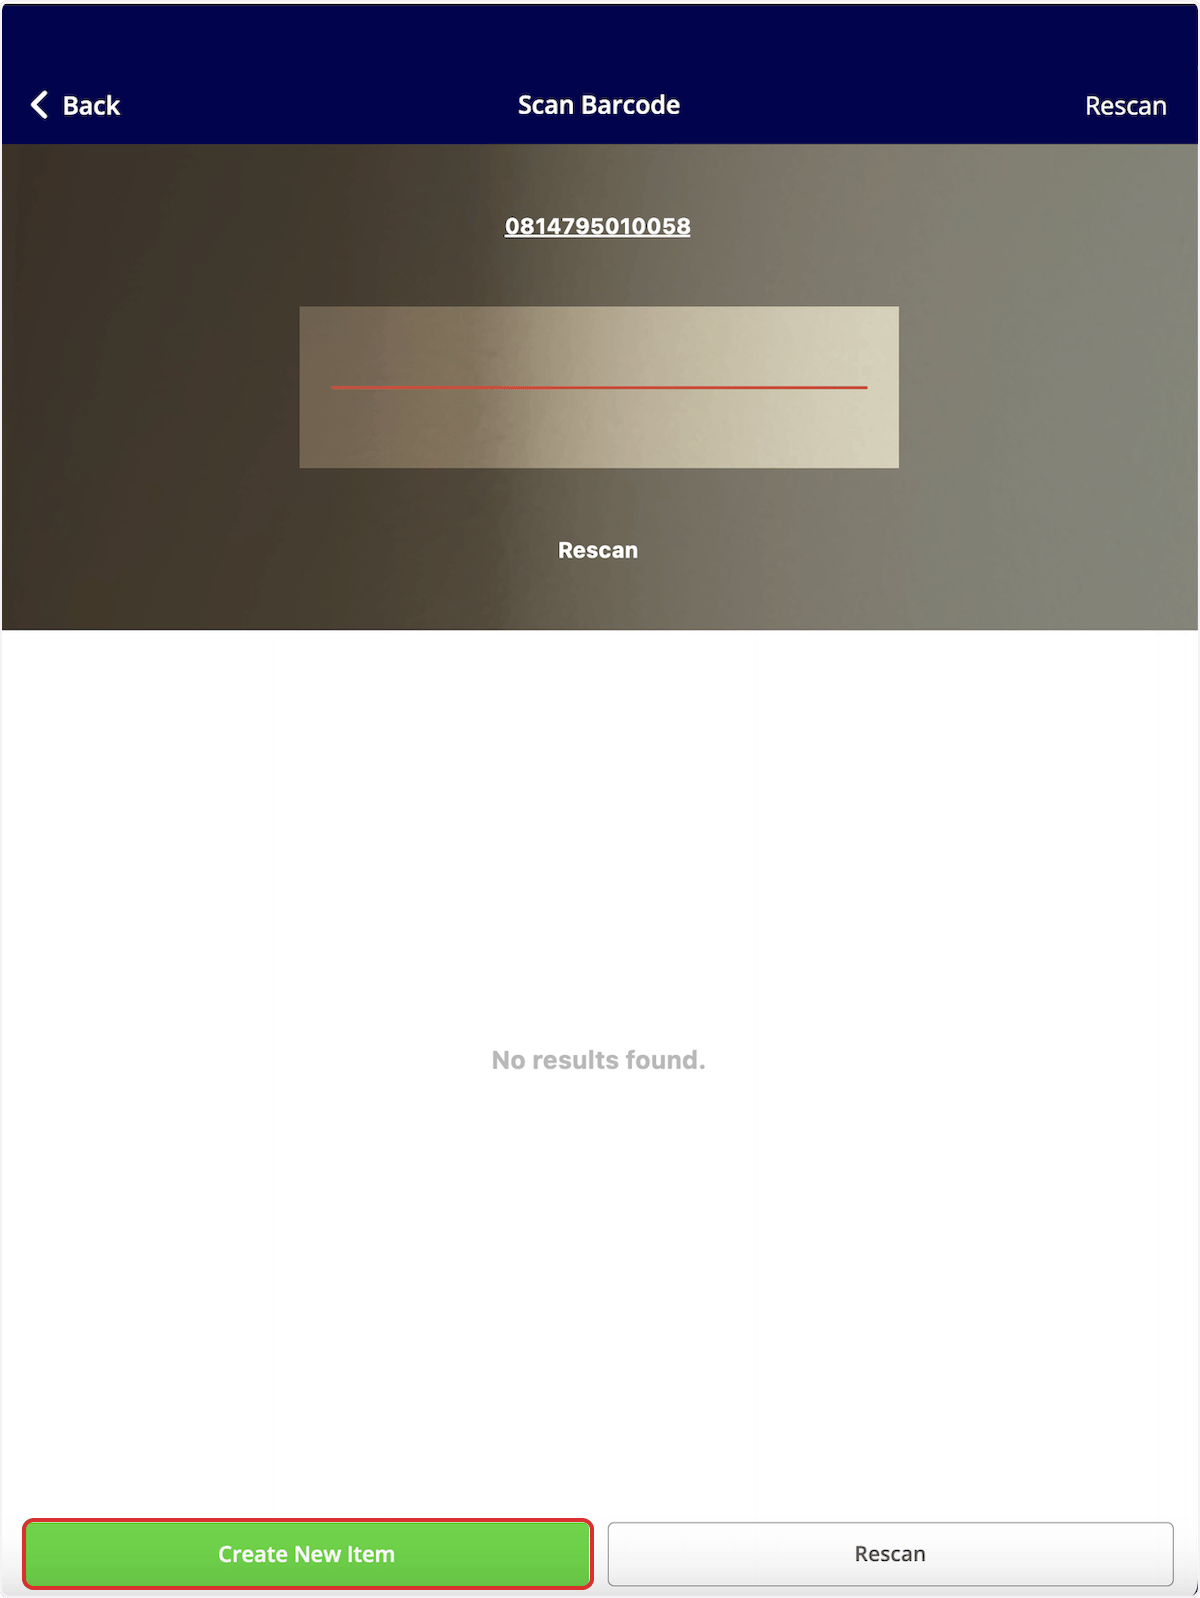
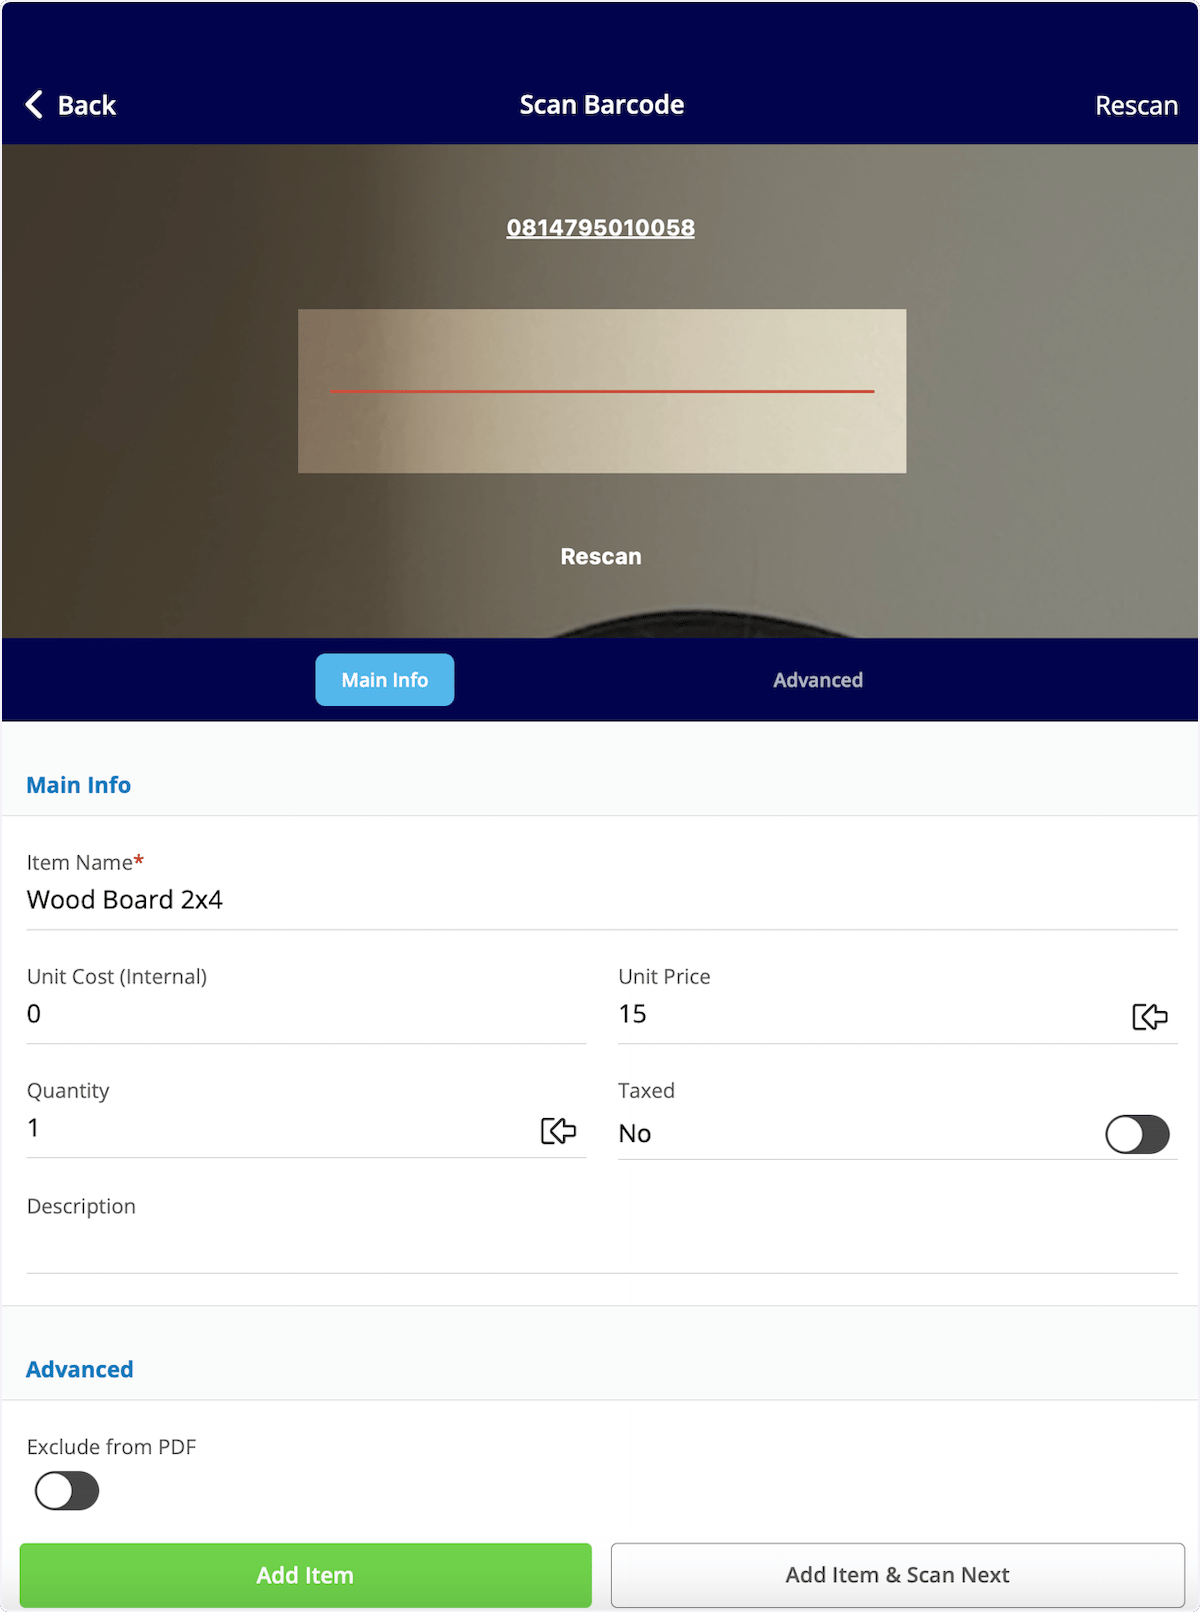
Scan the barcode with your device camera. If the barcode does not exist in your system, the screen reads No results found — select Create New Item.
-
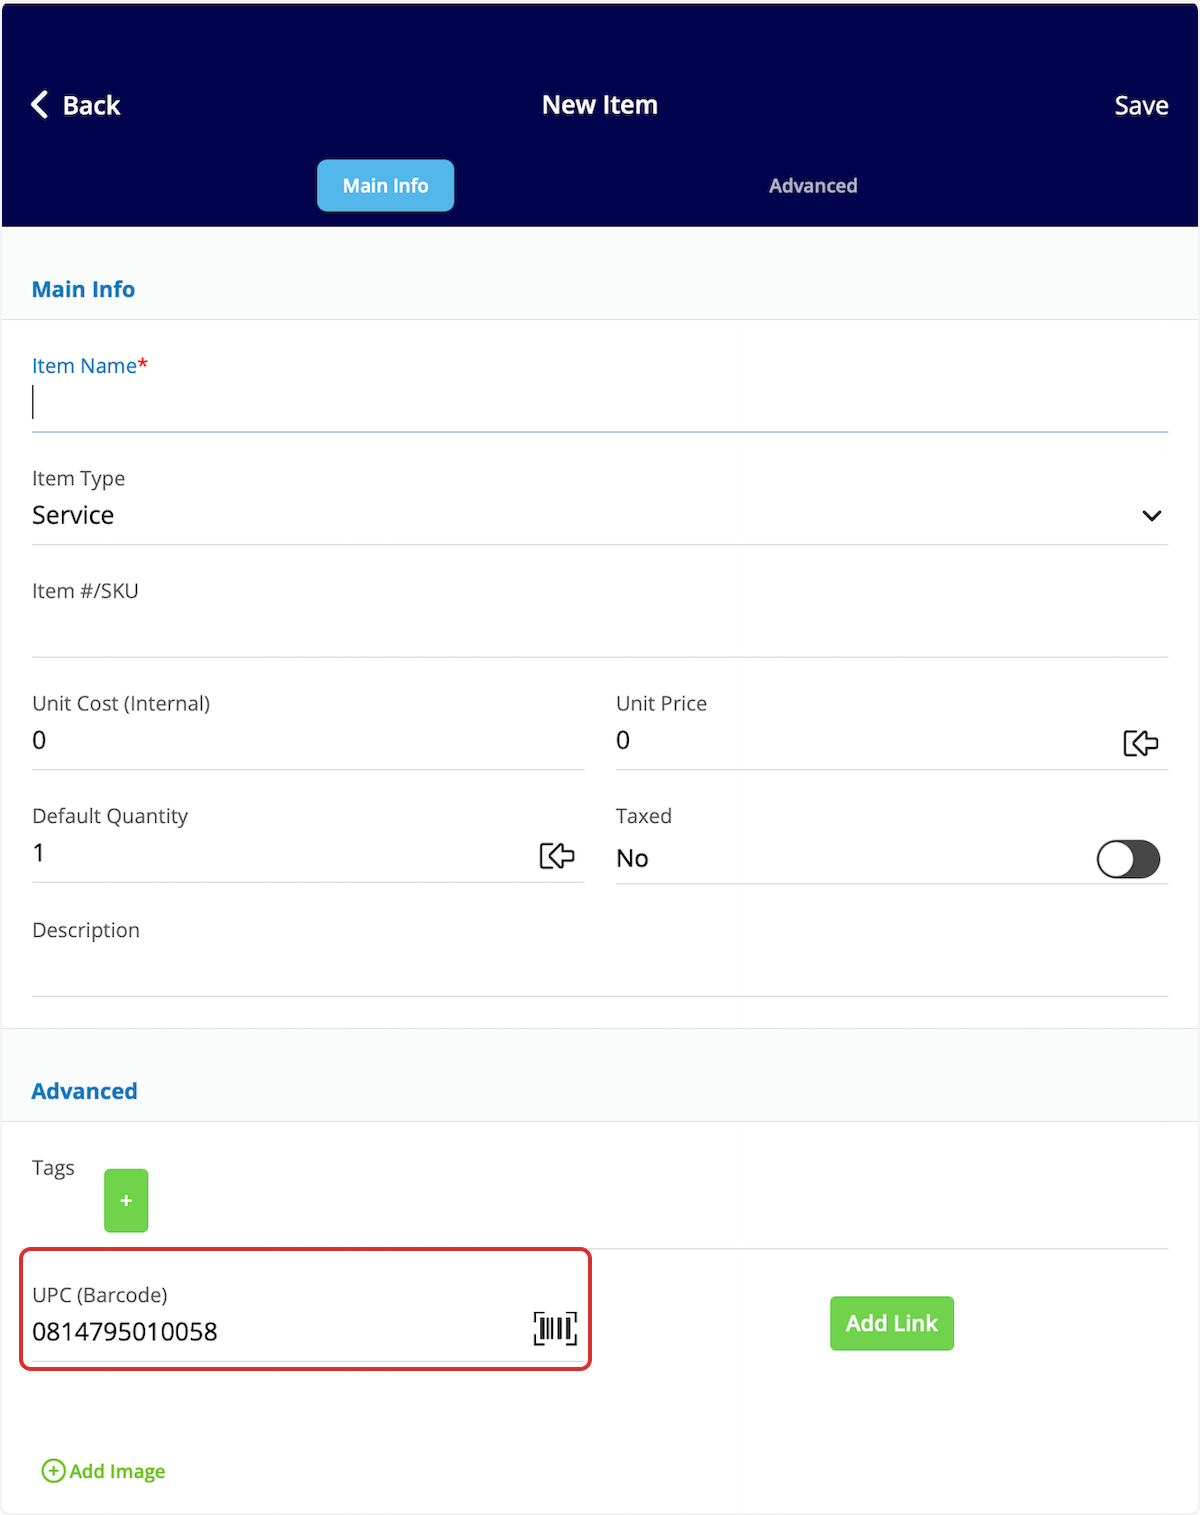
Enter the item name, item type, SKU, unit cost, unit price, and description. The barcode you scanned is filled in automatically in the UPC (Barcode) field. Save the item, then select Add Item. FieldPulse saves the item to your item list and adds it to this invoice.
- If you scan a barcode that is already in your system, the item details open so you can review or adjust them. Select Add Item to include the item in your invoice.
Video walkthrough: creating an invoice on the mobile app
Invoice statuses
FieldPulse updates each invoice’s status automatically and lists it on the right side of every record on the Invoices page. The statuses are Draft, Invoiced, Partially Paid, Paid, Overdue, and Void. Use the menu at the top of the Invoices page to sort your invoices by status.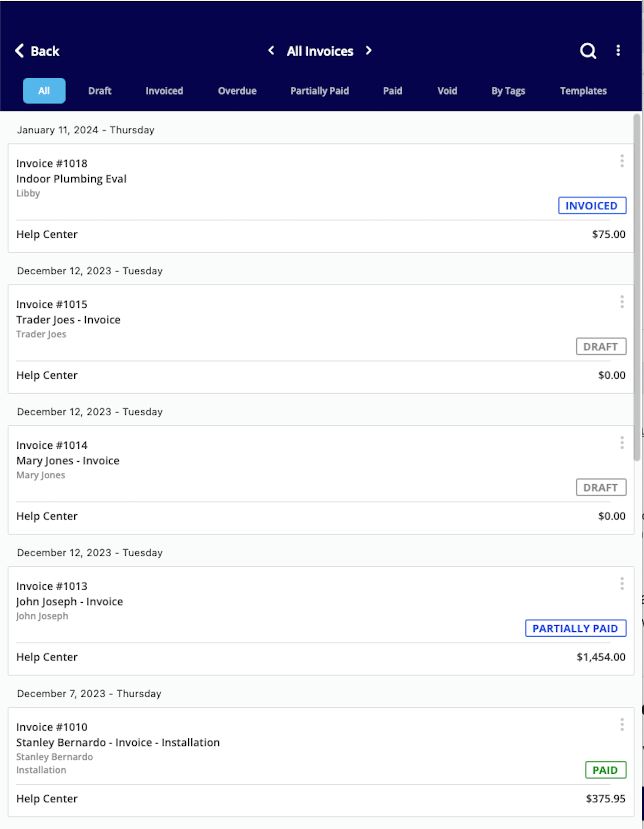
Still need help?
Reach the FieldPulse support team at support@fieldpulse.com or through the chat feature in the bottom-right corner of your screen.Related articles
- How to Create an Estimate
- How to Send Estimates & Invoices to Customers
- How to Add Labor to Estimates & Invoices
- Setting Up Default Estimate & Invoice Settings
- How to Use Line Item Bundles & Groupings
- Estimate & Invoice Customer Experience Overview
- How to Collect Payments: 3 Methods