
Who uses this: Admins — custom status workflows are built in Company Settings, which only the Admin role can view. Availability: All regions.A custom status workflow defines and labels the statuses an estimate or invoice moves through, from initial review to approval to job handoff, so the stages in FieldPulse match the stages your business actually works in. You build workflows once in Company Settings, and every estimate and invoice your team creates follows one.
Overview
A status workflow is an ordered set of statuses that an estimate or invoice can sit in. You can create more than one workflow — a separate flow for different job types or sales cycles — so each kind of work follows the process that fits it, and your team stays on the same track. Every status you create is assigned to a status bucket. The bucket is what FieldPulse and QuickBooks understand about the status, so a status named “Waiting on landlord” still maps to a corresponding category in QuickBooks and keeps your accounting accurate.
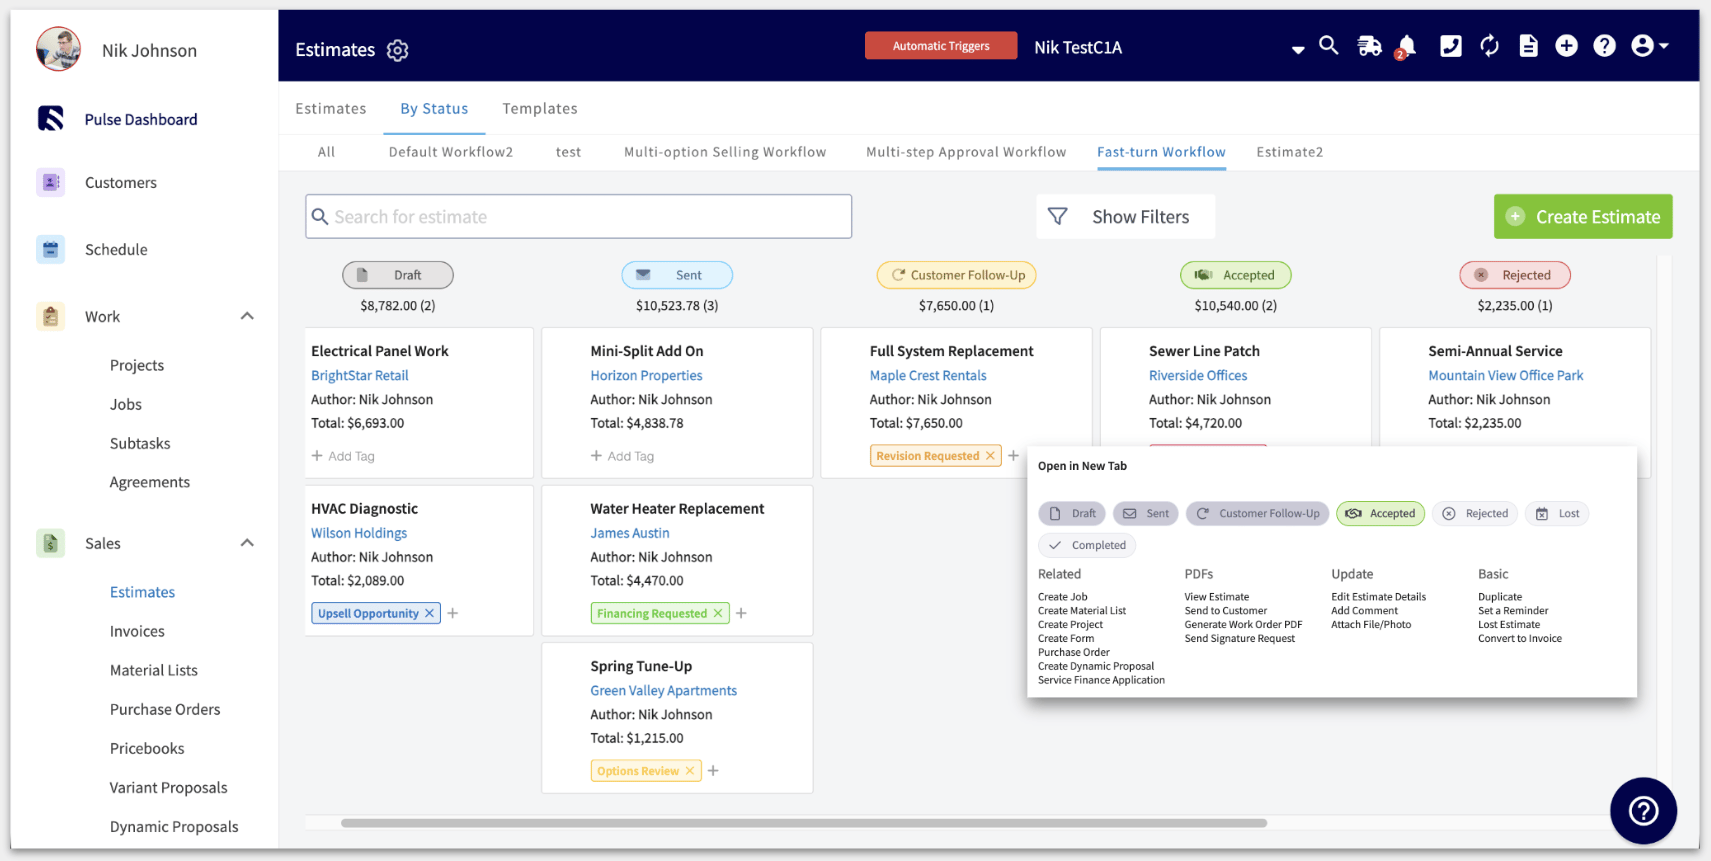
Once workflows are in place, the By Status subpage under Estimates and Invoices shows your records as a pipeline of status boards, with the total value of each status at the top of its column.
Before you begin
- Decide which statuses match your real sales pipeline first. Every status you create is assigned to a status bucket, and the bucket controls how that status maps to QuickBooks, so know which stage each status represents before you build the workflow.
- Look at the workflow your account already has. A default workflow was added to your FieldPulse account when you signed up, and you can build alongside it rather than replacing it.
Important QuickBooks note: Any estimate that syncs in from QuickBooks is assigned to the Default Estimate Workflow. You can edit the estimate afterward to reassign the workflow.
Step-by-step setup
1. Open the custom status settings
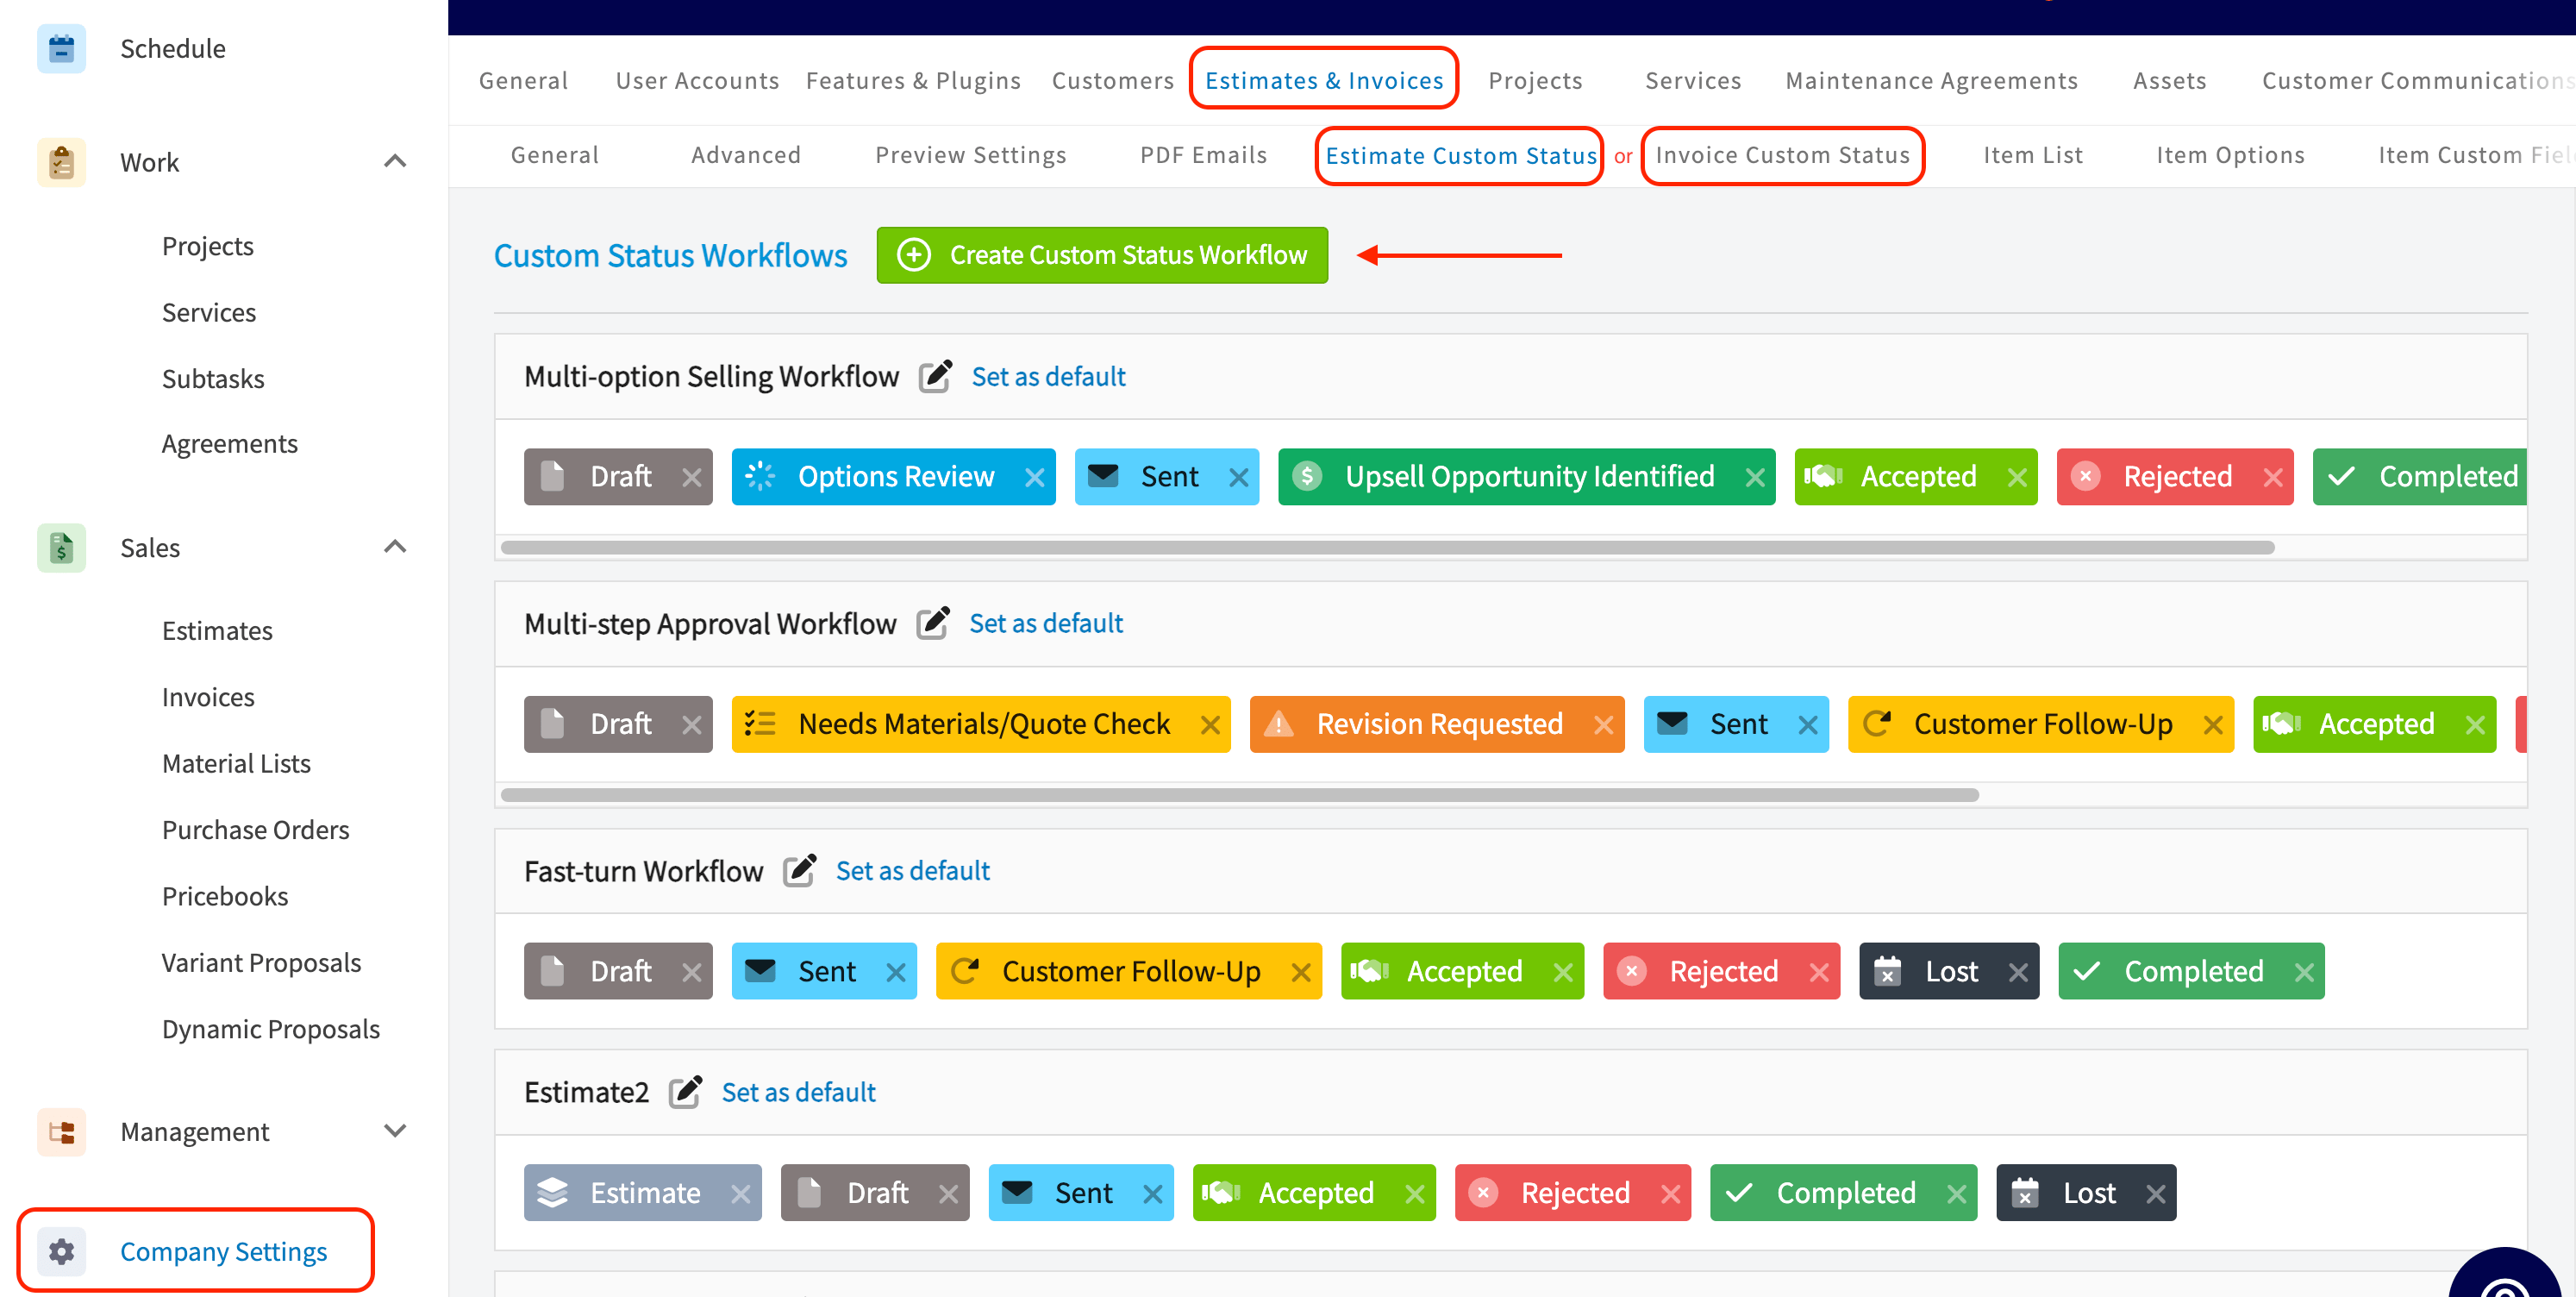
- Select Company Settings in the left-side menu.
- Select Estimates & Invoices in the header.
- Select the Estimate Custom Status tab or the Invoice Custom Status tab, depending on which record type you are building for.
2. Create the workflow
- Select Create Custom Status Workflow.
- Name the workflow.
- Add and label each status this workflow uses, assigning every status to a status bucket. The Settings reference below lists the buckets and what each one allows.
3. Set a default workflow
- Select Set as default next to the workflow you want new records to use.
4. Choose the invoice workflow a converted estimate follows
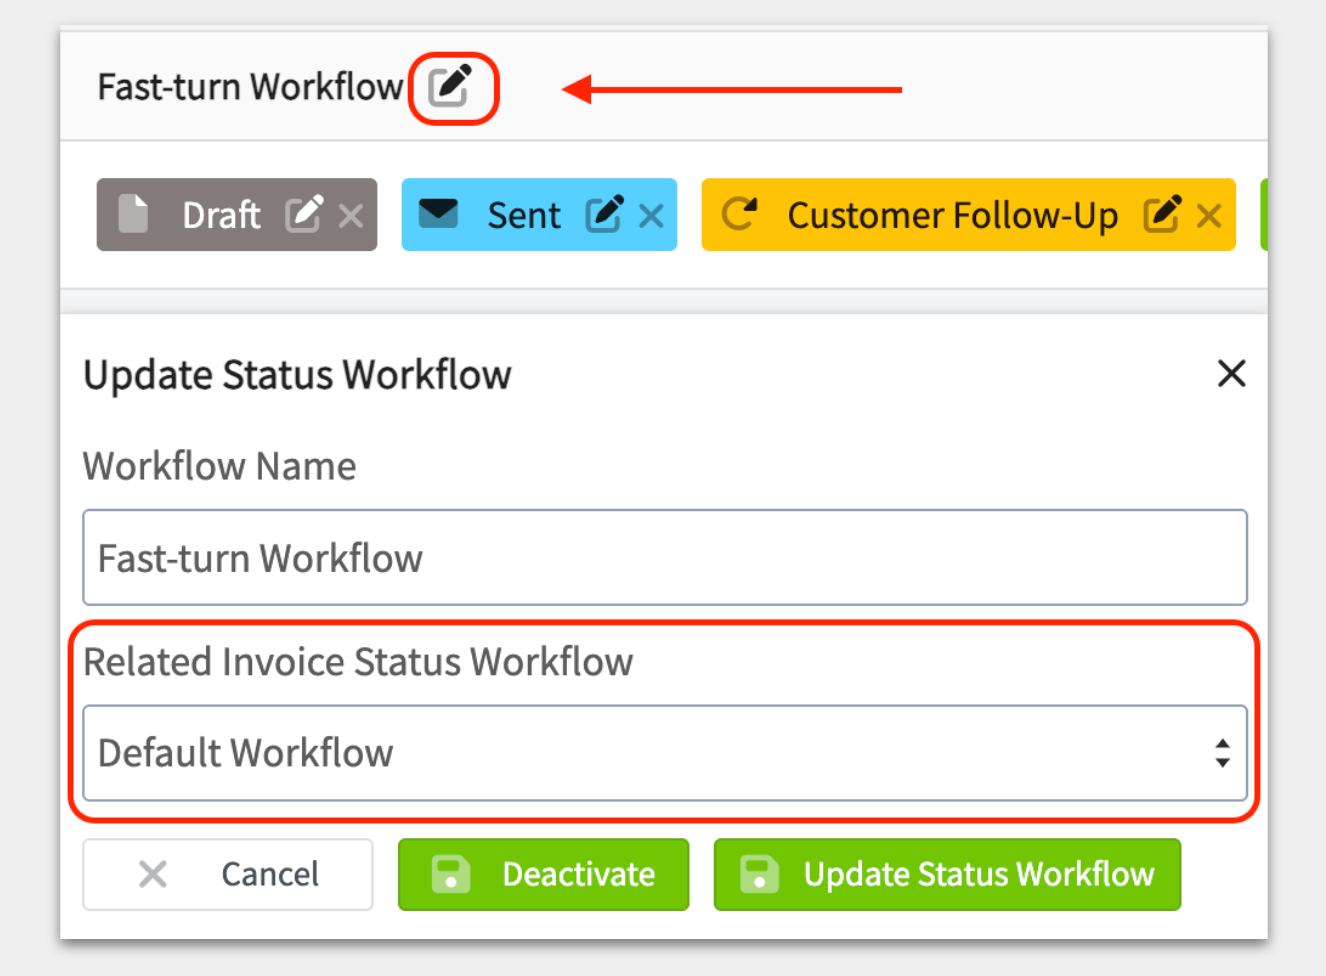
- On the Estimate Custom Status tab, select the edit icon next to the estimate workflow. The Update Status Workflow panel opens.
- Set Related Invoice Status Workflow to the invoice workflow you want converted estimates to follow.
- Select Update Status Workflow.
Settings reference
The custom status settings live on two tabs under Company Settings > Estimates & Invoices.Estimate status buckets
Estimate workflows have 12 status buckets. Each bucket sets whether a workflow has to include a status of that type, and how many statuses of that type the workflow can hold.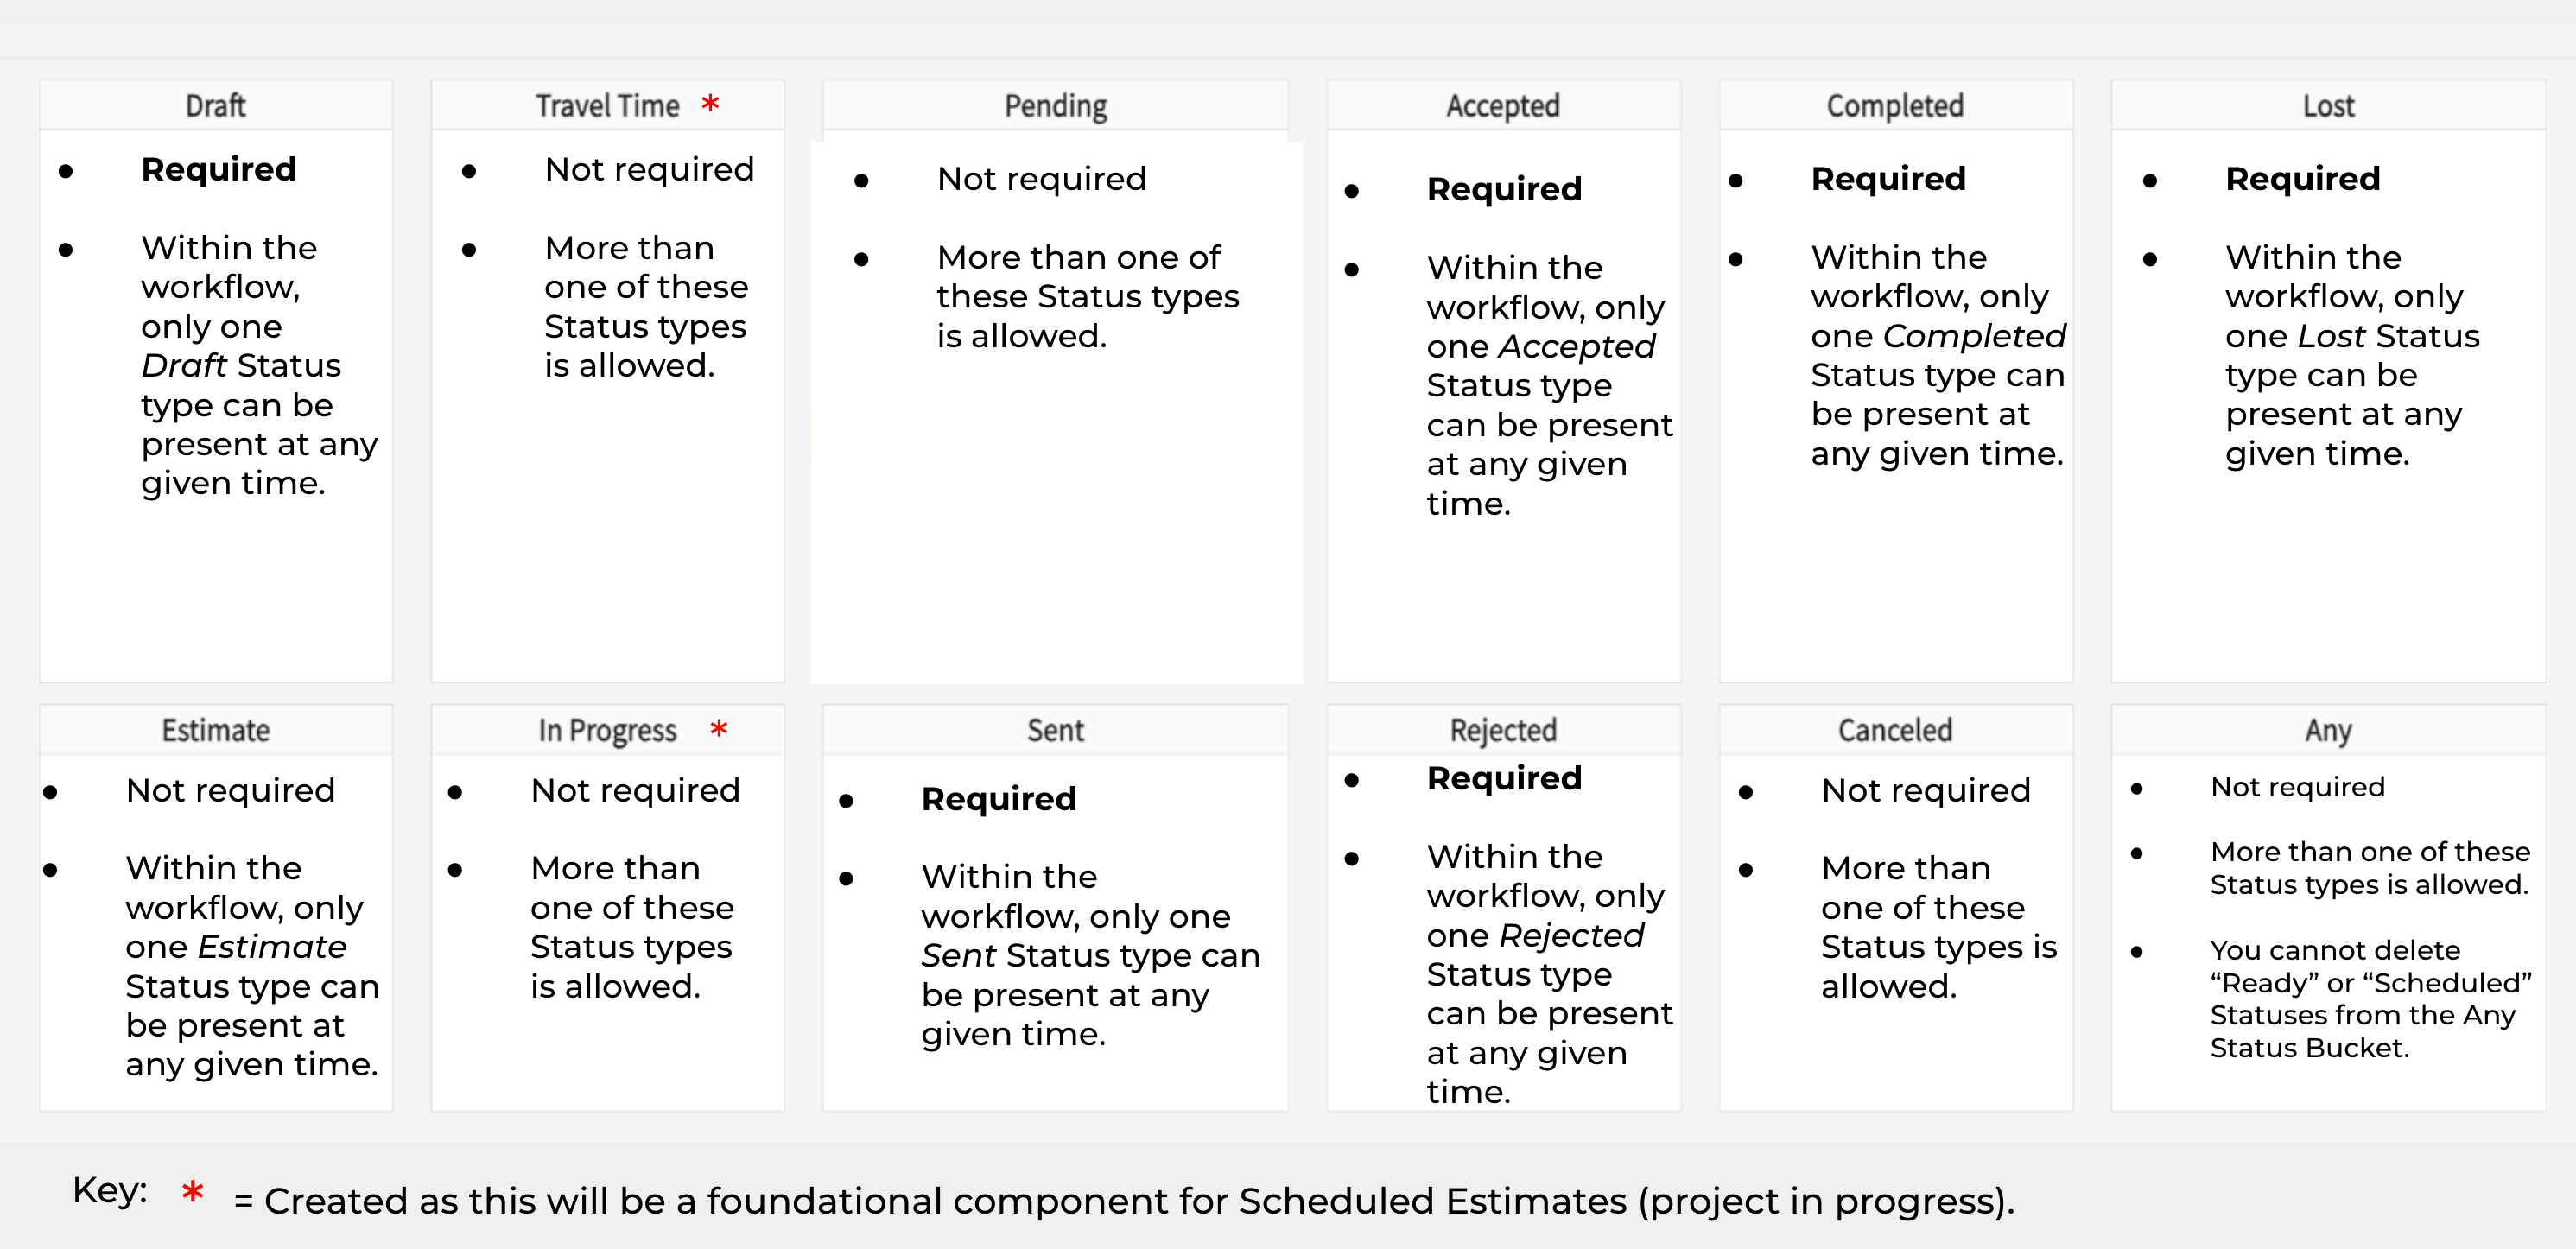
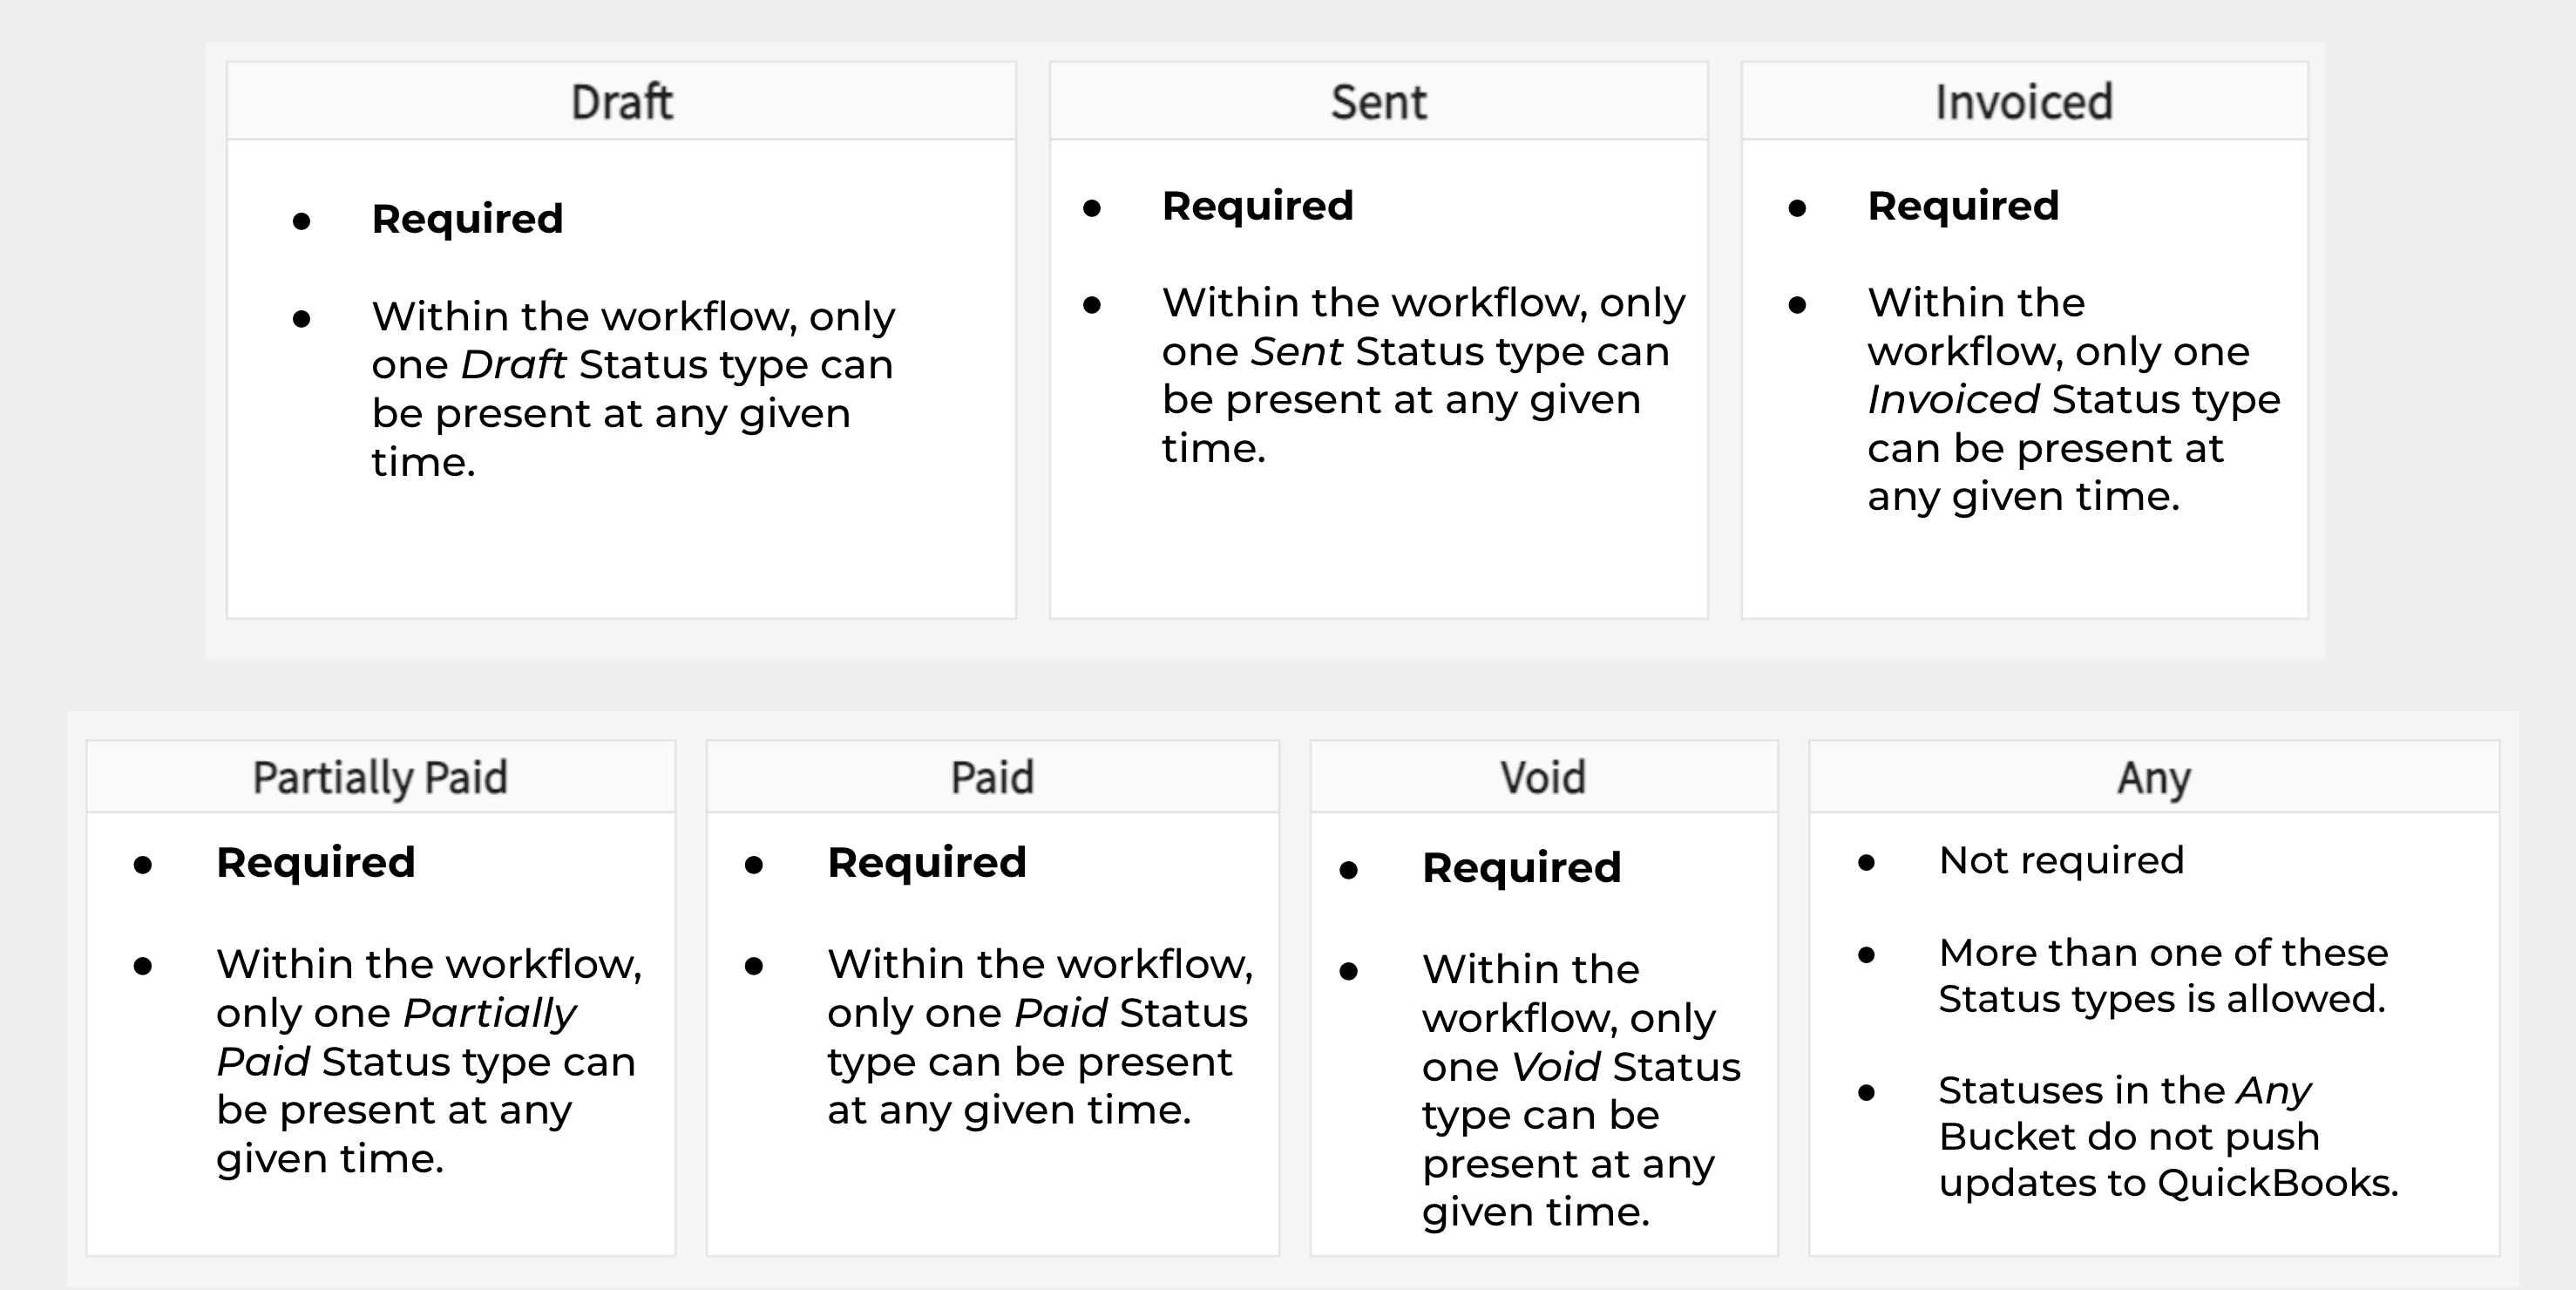
Invoice status buckets
Invoice workflows have 7 status buckets.You cannot remove or edit the names of the default invoice statuses in each bucket, but you can change the color and symbol for each status.
Track your records on the By Status board
The By Status subpage shows every estimate or invoice as a tile on a board, arranged in columns by status, so you can see at a glance what is progressing and what is stalled.- Select the Estimates or Invoices tab in the left-side menu.
- Select the By Status subpage at the top of the screen.
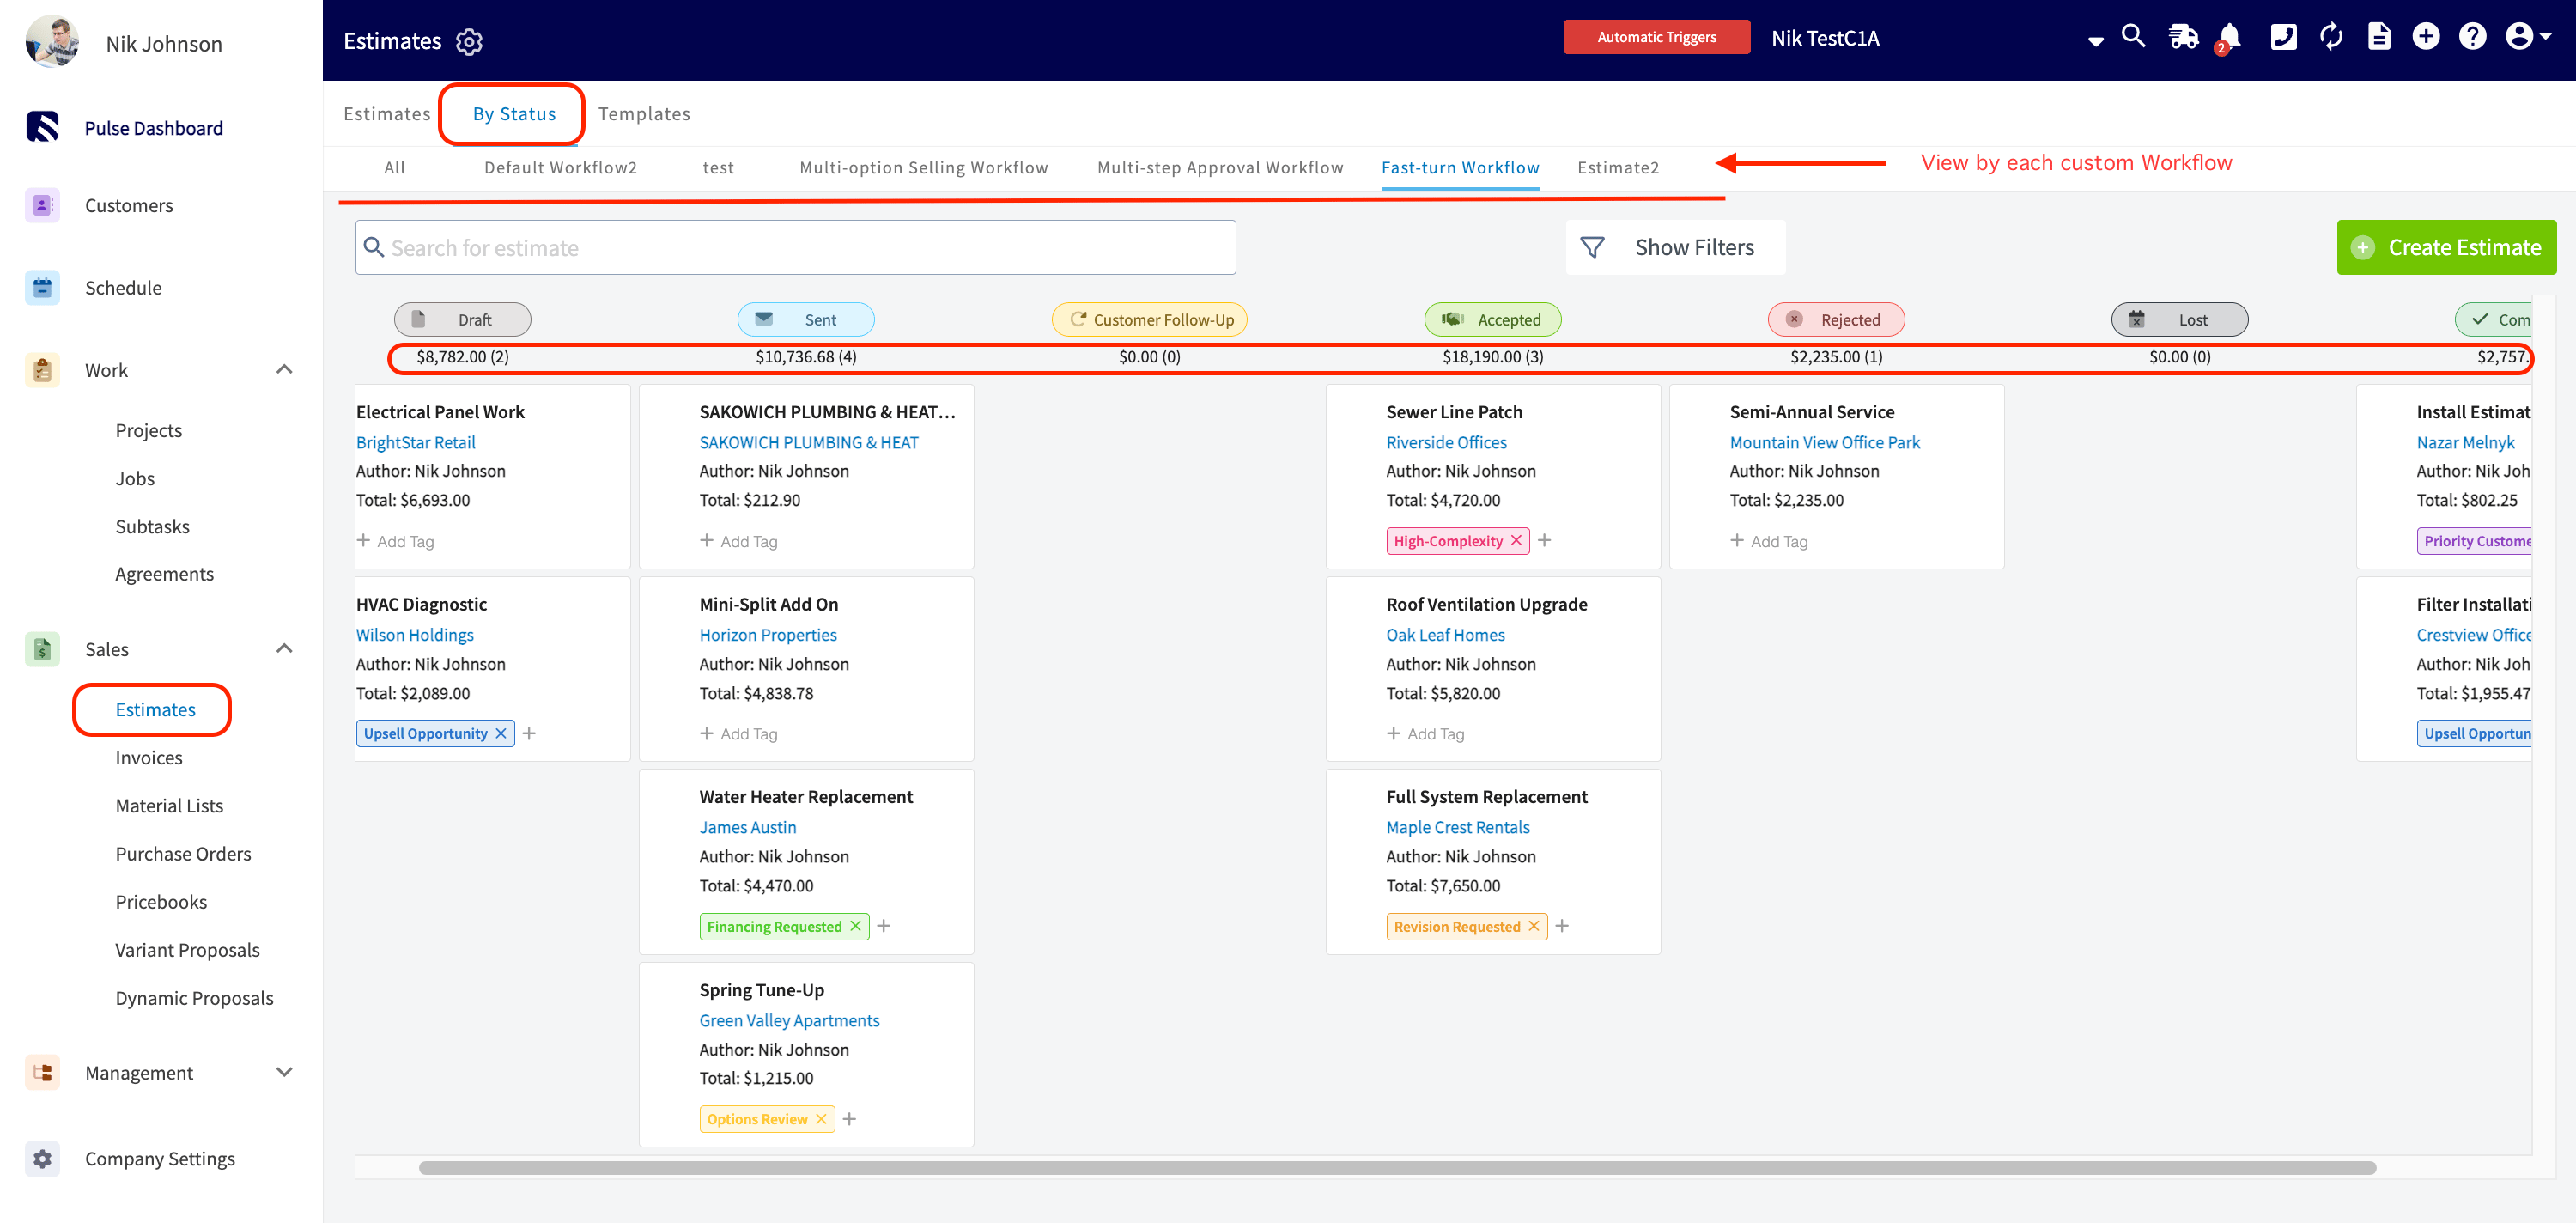
- Drag and drop. Rearrange tiles as needed.
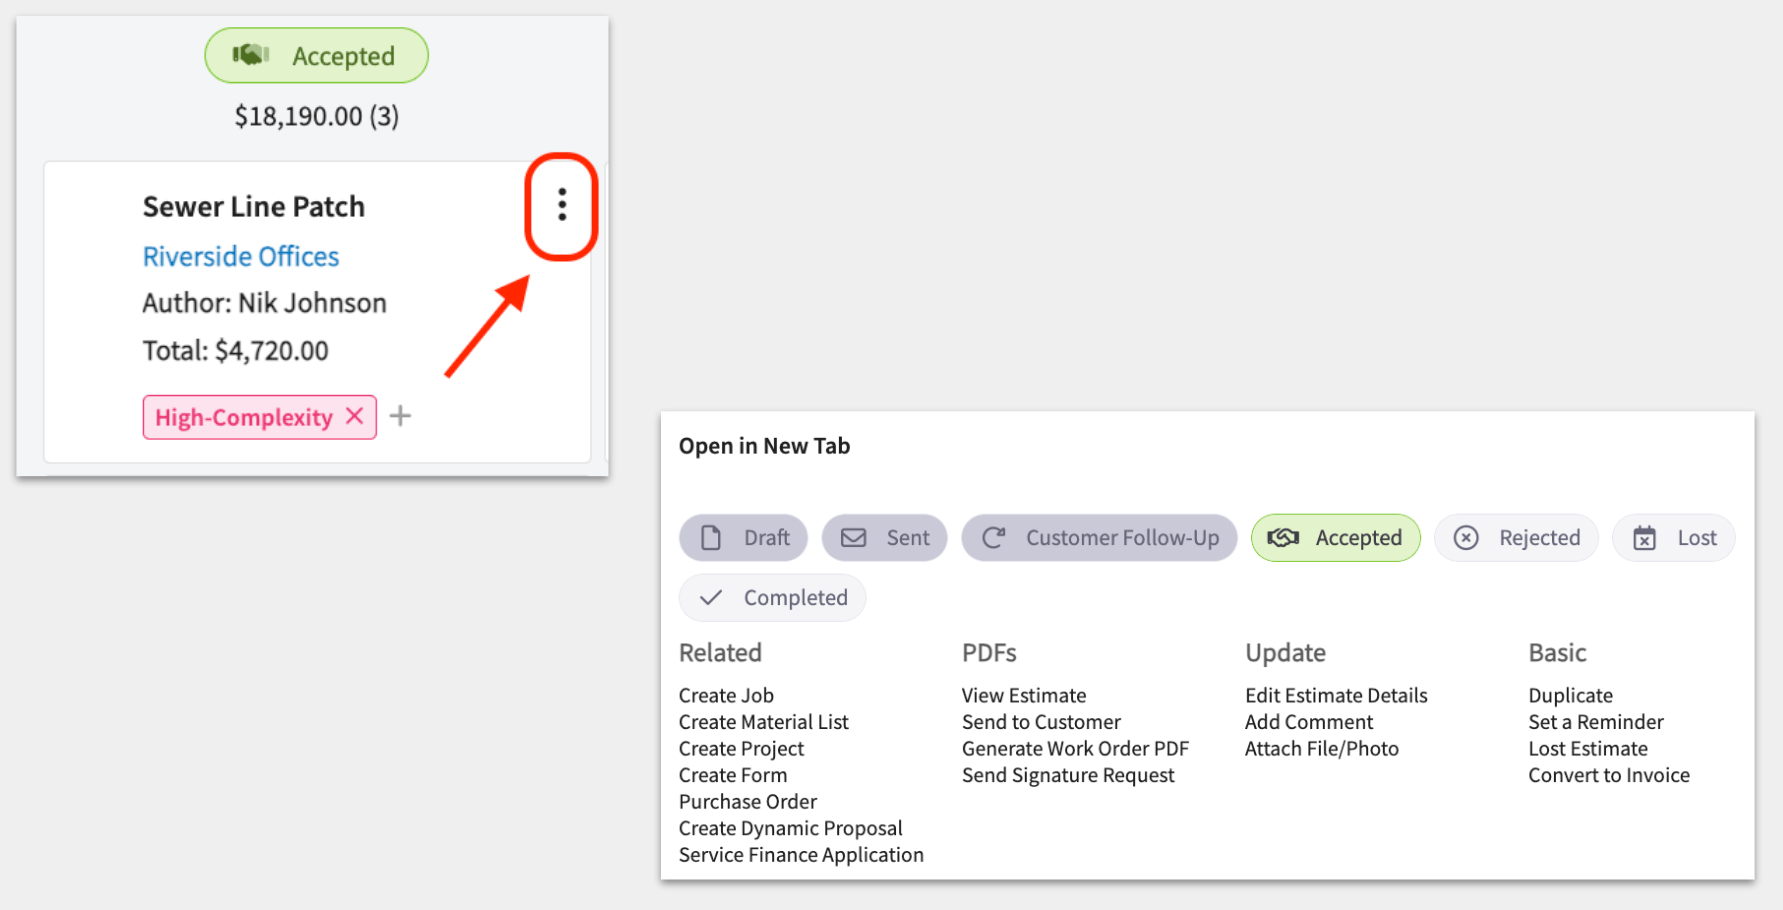
- The action menu. Select the three-dot icon on a tile to open it. The menu shows the workflow’s statuses as chips and groups the record’s actions under Related, PDFs, Update, and Basic — creating related records, viewing and generating PDFs, and making updates without leaving the board.
Send automatic messages when a status changes
You can send automatic email and text messages to a customer whenever an estimate or invoice moves into a particular status. Two automatic triggers cover custom status workflows:- When Estimate Status is changed to (Status)
- When Invoice Status is changed to (Status)
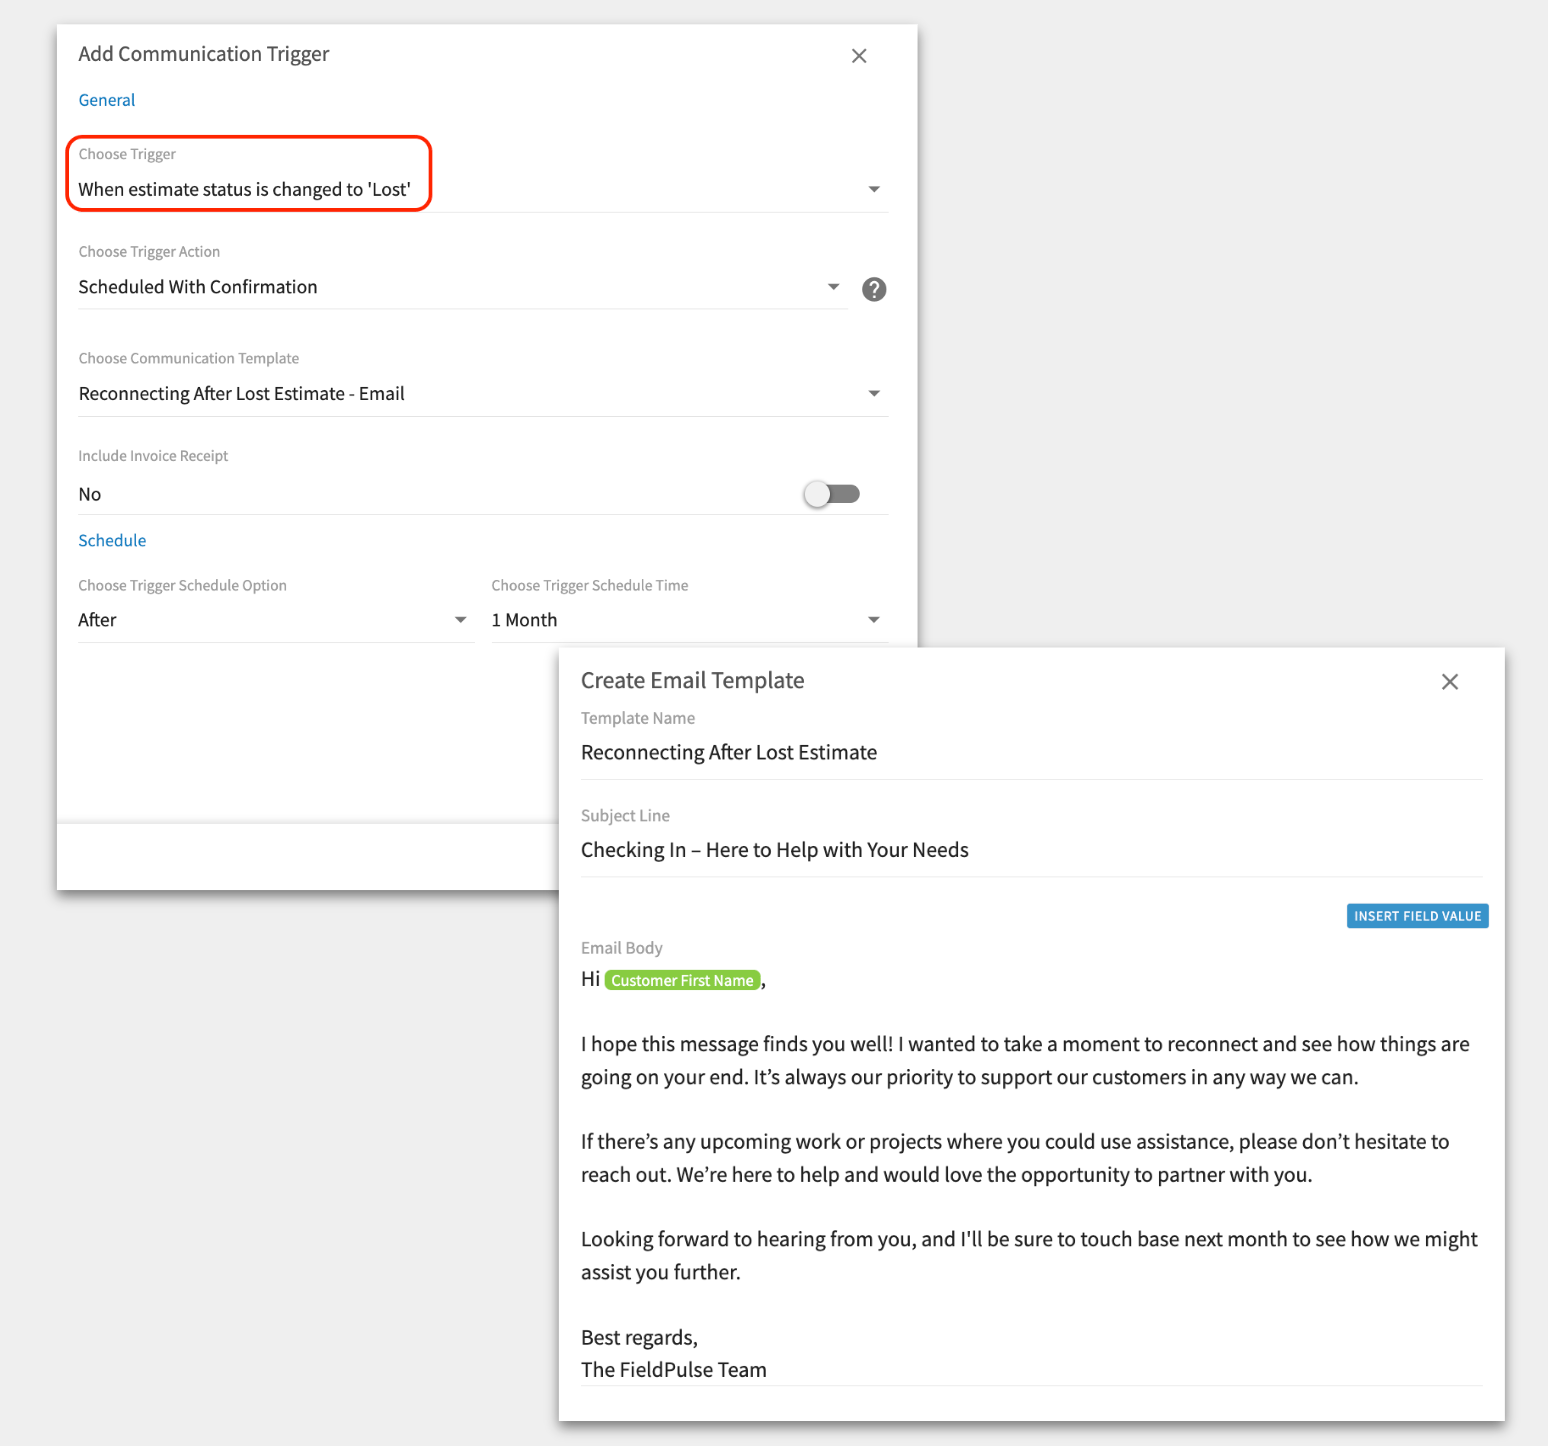
To learn more about customer communications and automatic triggers, see Setting Up Automatic Communication Triggers.
Report on custom statuses
Custom statuses and workflows are available as report columns, so you can filter and group records by the stages you defined.To learn more about reporting in FieldPulse, see How to Use Raw Data Reporting.
FAQs
Can an invoice show “Invoiced” after it has been sent to a customer?
Once an invoice is sent, its status updates to Sent, and Sent is what displays going forward until the invoice is paid or adjusted by hand. Invoiced marks the day the invoice was finalized, which is also used to calculate the due date from your Company Settings default terms, and that invoiced date stays on the record for reference.Still need help?
Reach the FieldPulse support team at support@fieldpulse.com or through the chat feature in the bottom-right corner of your screen.Related articles
- Setting Up Default Estimate & Invoice Settings
- Setting Up Record Locking on Estimates & Invoices
- Setting Up Automatic Communication Triggers
- How to Send Estimates & Invoices to Customers
- How to Create Estimate Reports
- How to Create Invoice Reports