
Who uses this: Tags are added while creating or editing a job. Deleting a saved tag from the whole account happens in Company Settings, which only Admins can see. Availability: All regions.When every job on the calendar looks the same, it is hard to tell a warranty call from a new install at a glance. A custom tag is a label you attach to a job, and each tag carries a color, so your schedule shows the kind of work in front of your team without anyone opening a record.
Overview
You create a custom tag on the job itself. Type the tag name into the Add Tags field on a job record, pick a color, and save the job. The tag then appears on the job record and as a color-coded dot on the schedule, and it joins the list of previously used tags so you can reuse it on any future job. Once jobs are tagged, the By Tags tab on the Jobs page filters the list down to a single tag.Video walkthrough
Video walkthrough: creating and using custom job tags
Add a tag to a job
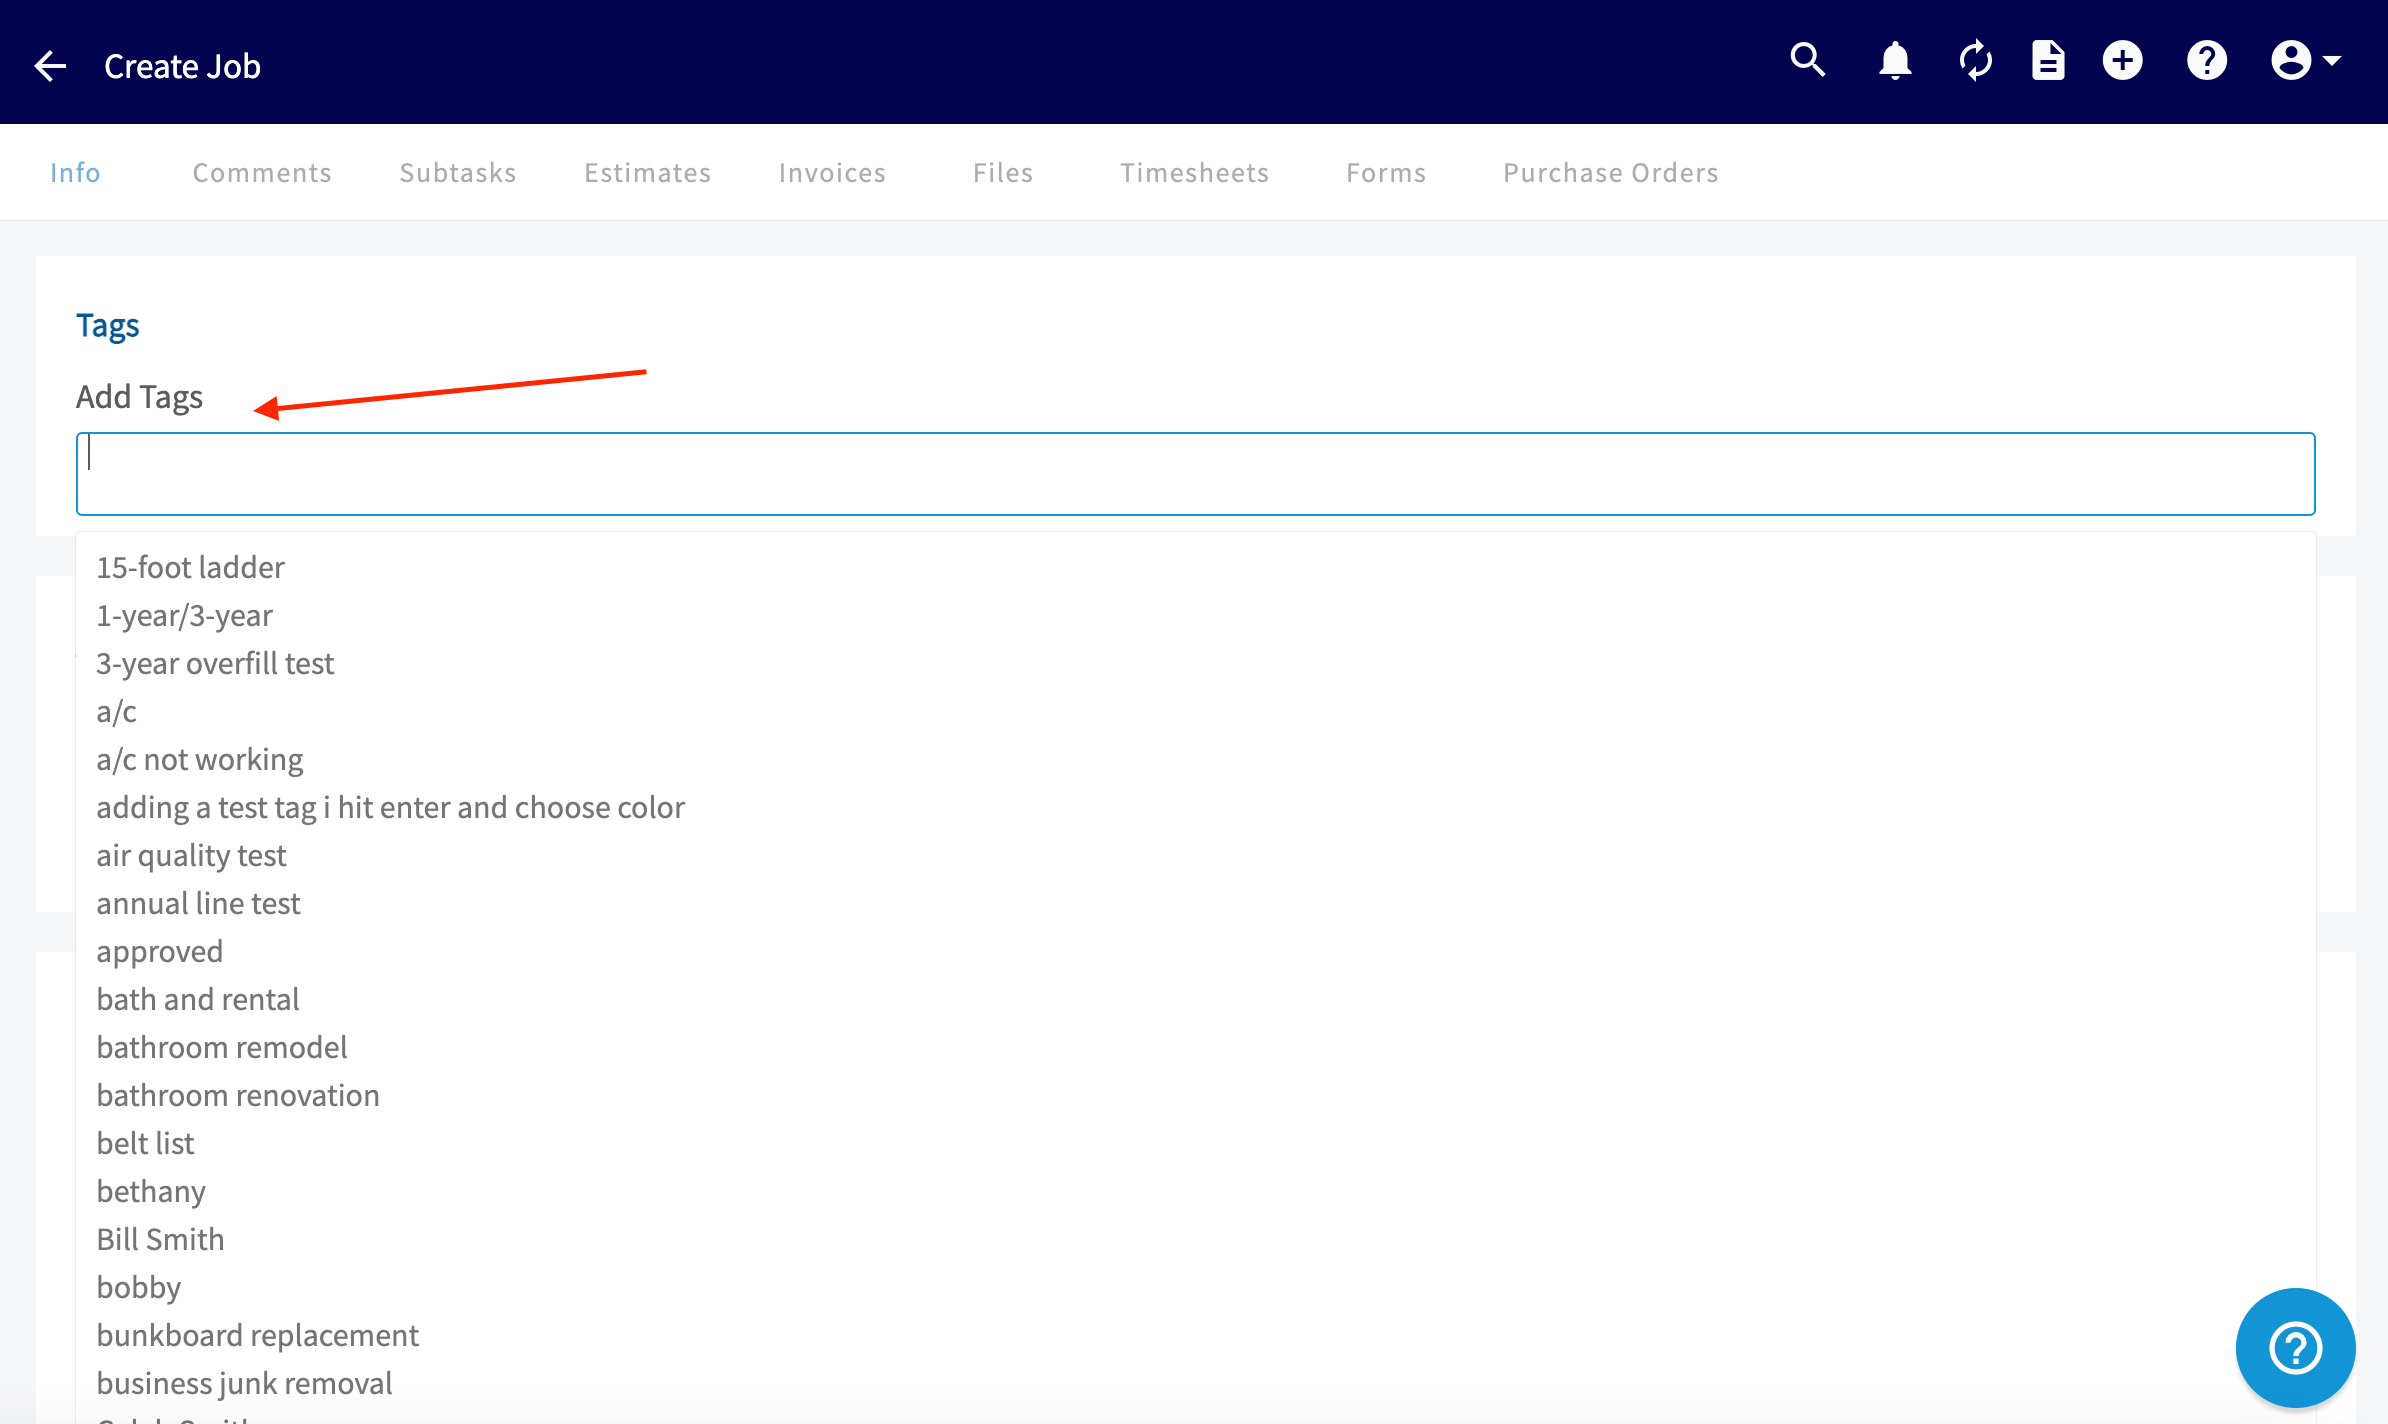
- While creating or editing a job, scroll to the Tags section and select the Add Tags field.
- Type the name of the tag you want to create.
- Press Enter to add the tag. Repeat for each additional tag you want on the job.
- Choose a color for the new tag.
- To reuse a tag you already created, select it from the list of previously used tags instead of typing a new one.
- Scroll to the bottom of the job and select Save Job.
Where tags appear
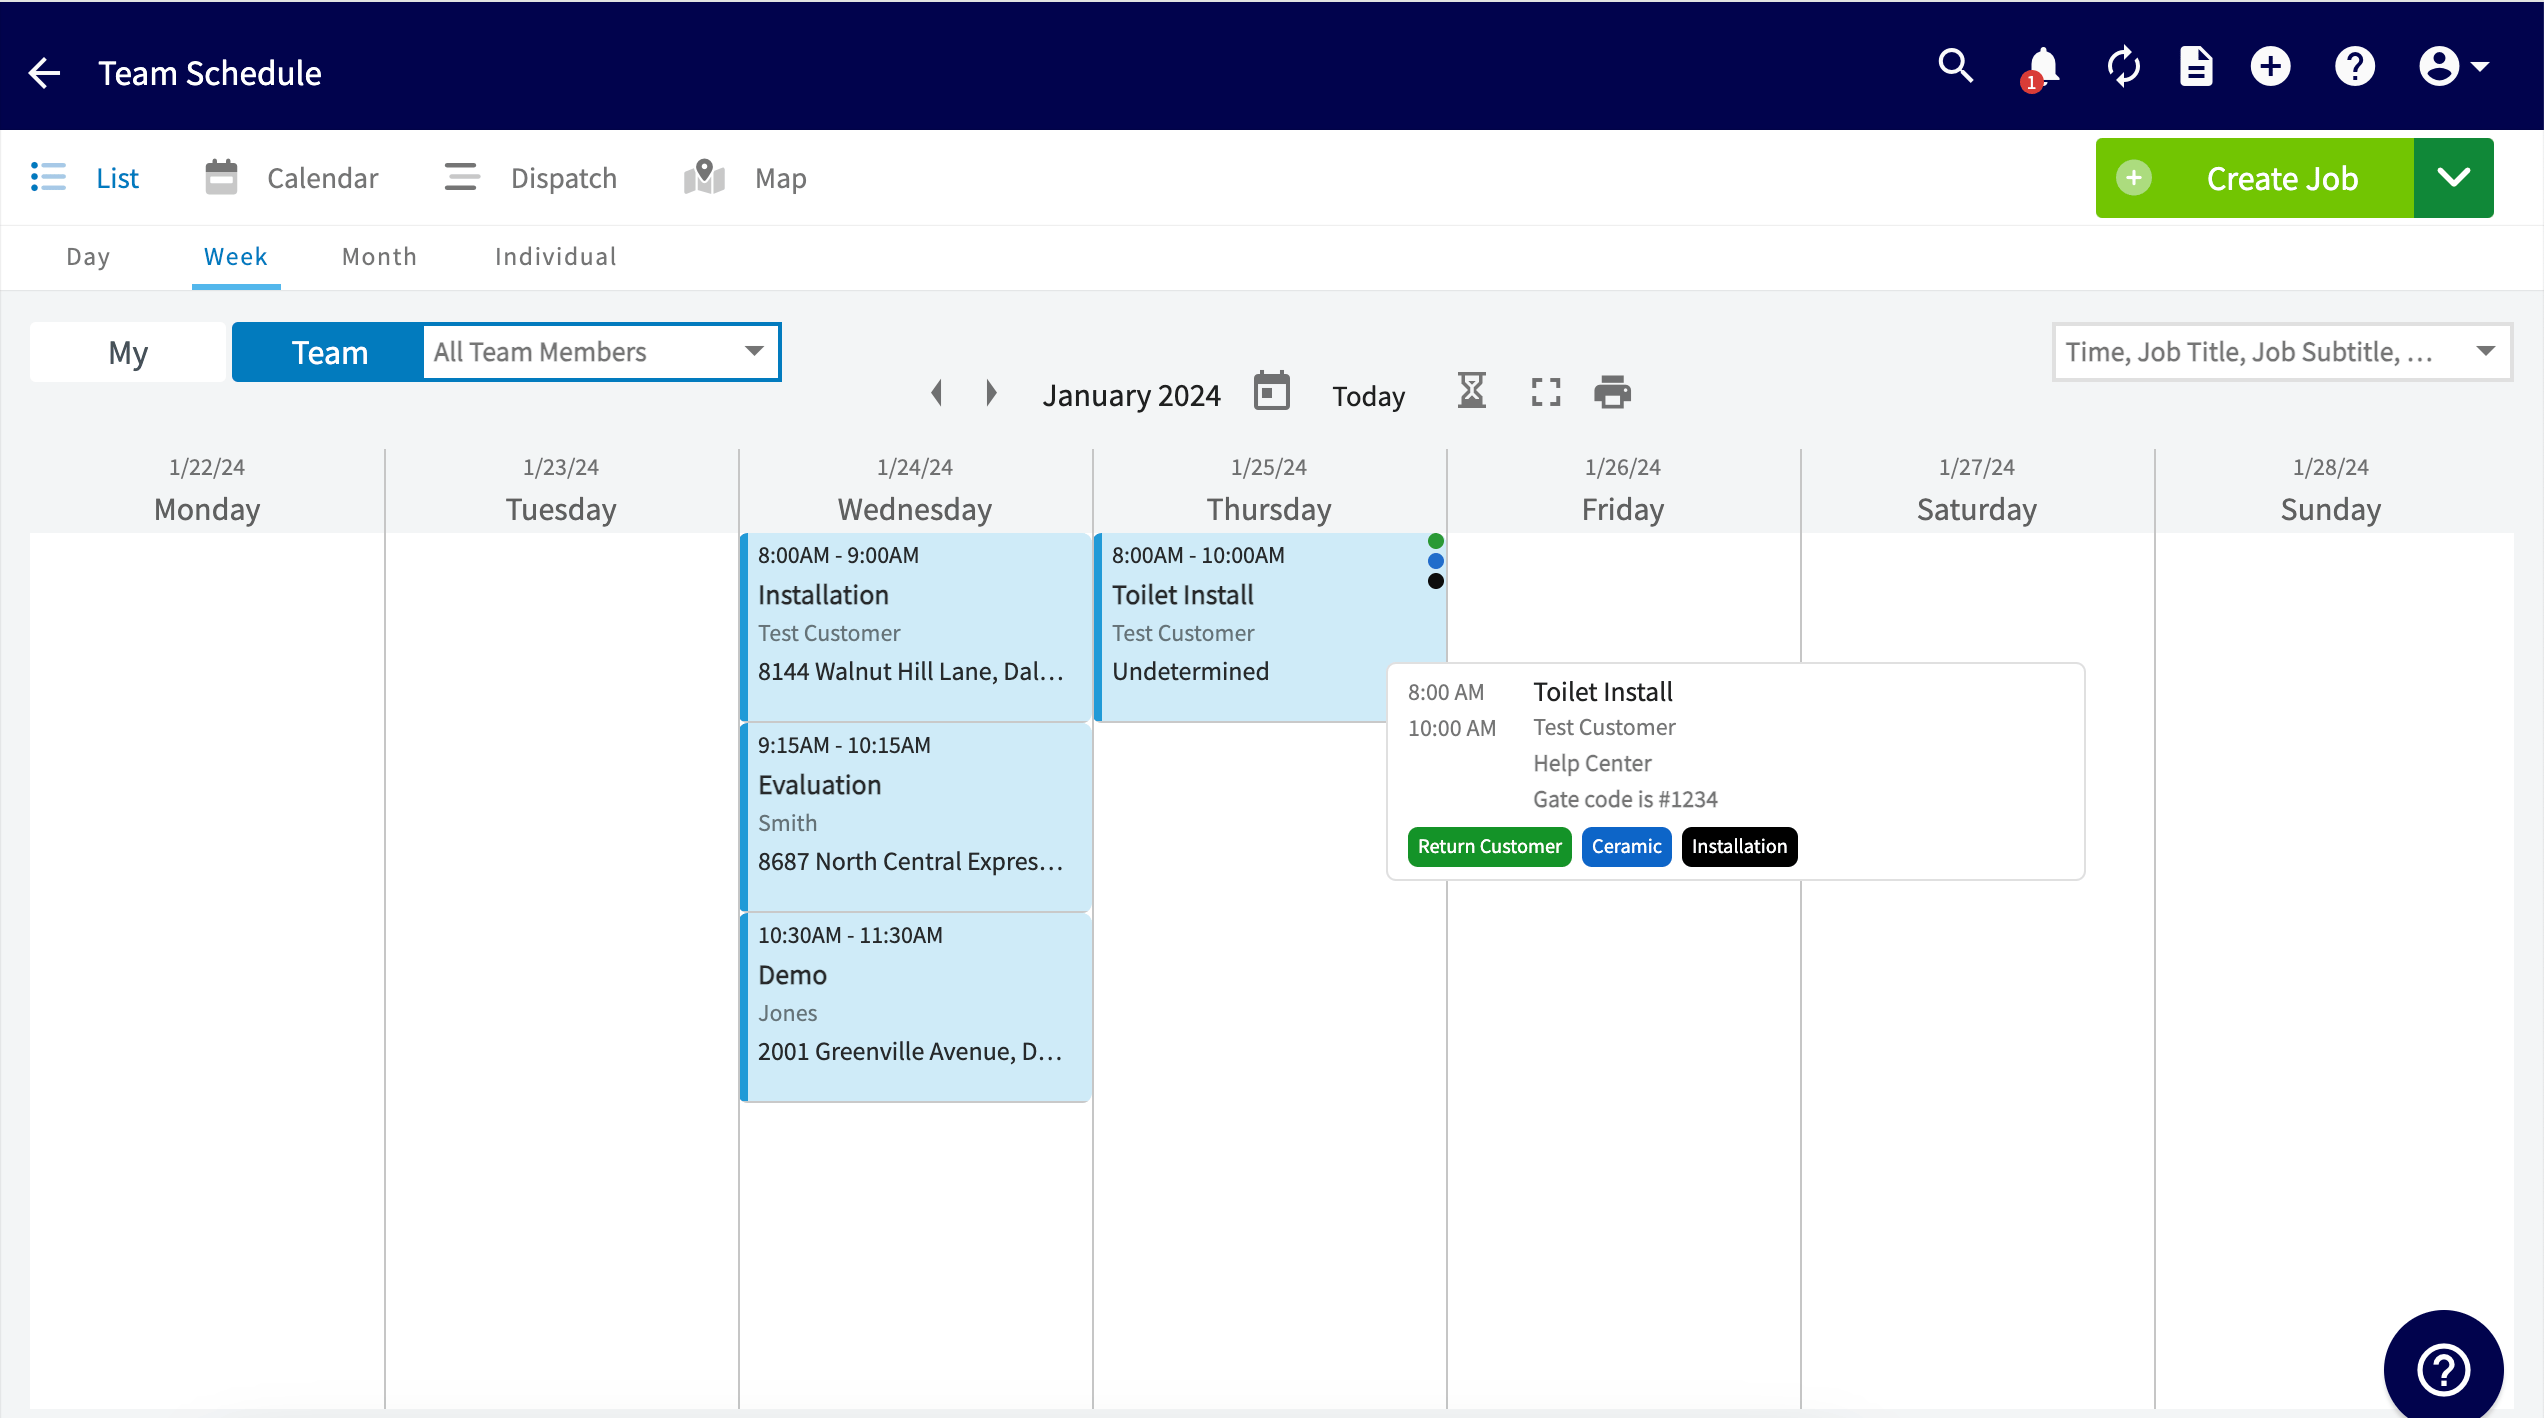
A tag appears in two places once the job is saved. The job record lists its tags alongside the job details, and the schedule shows one color-coded dot per tag on the job.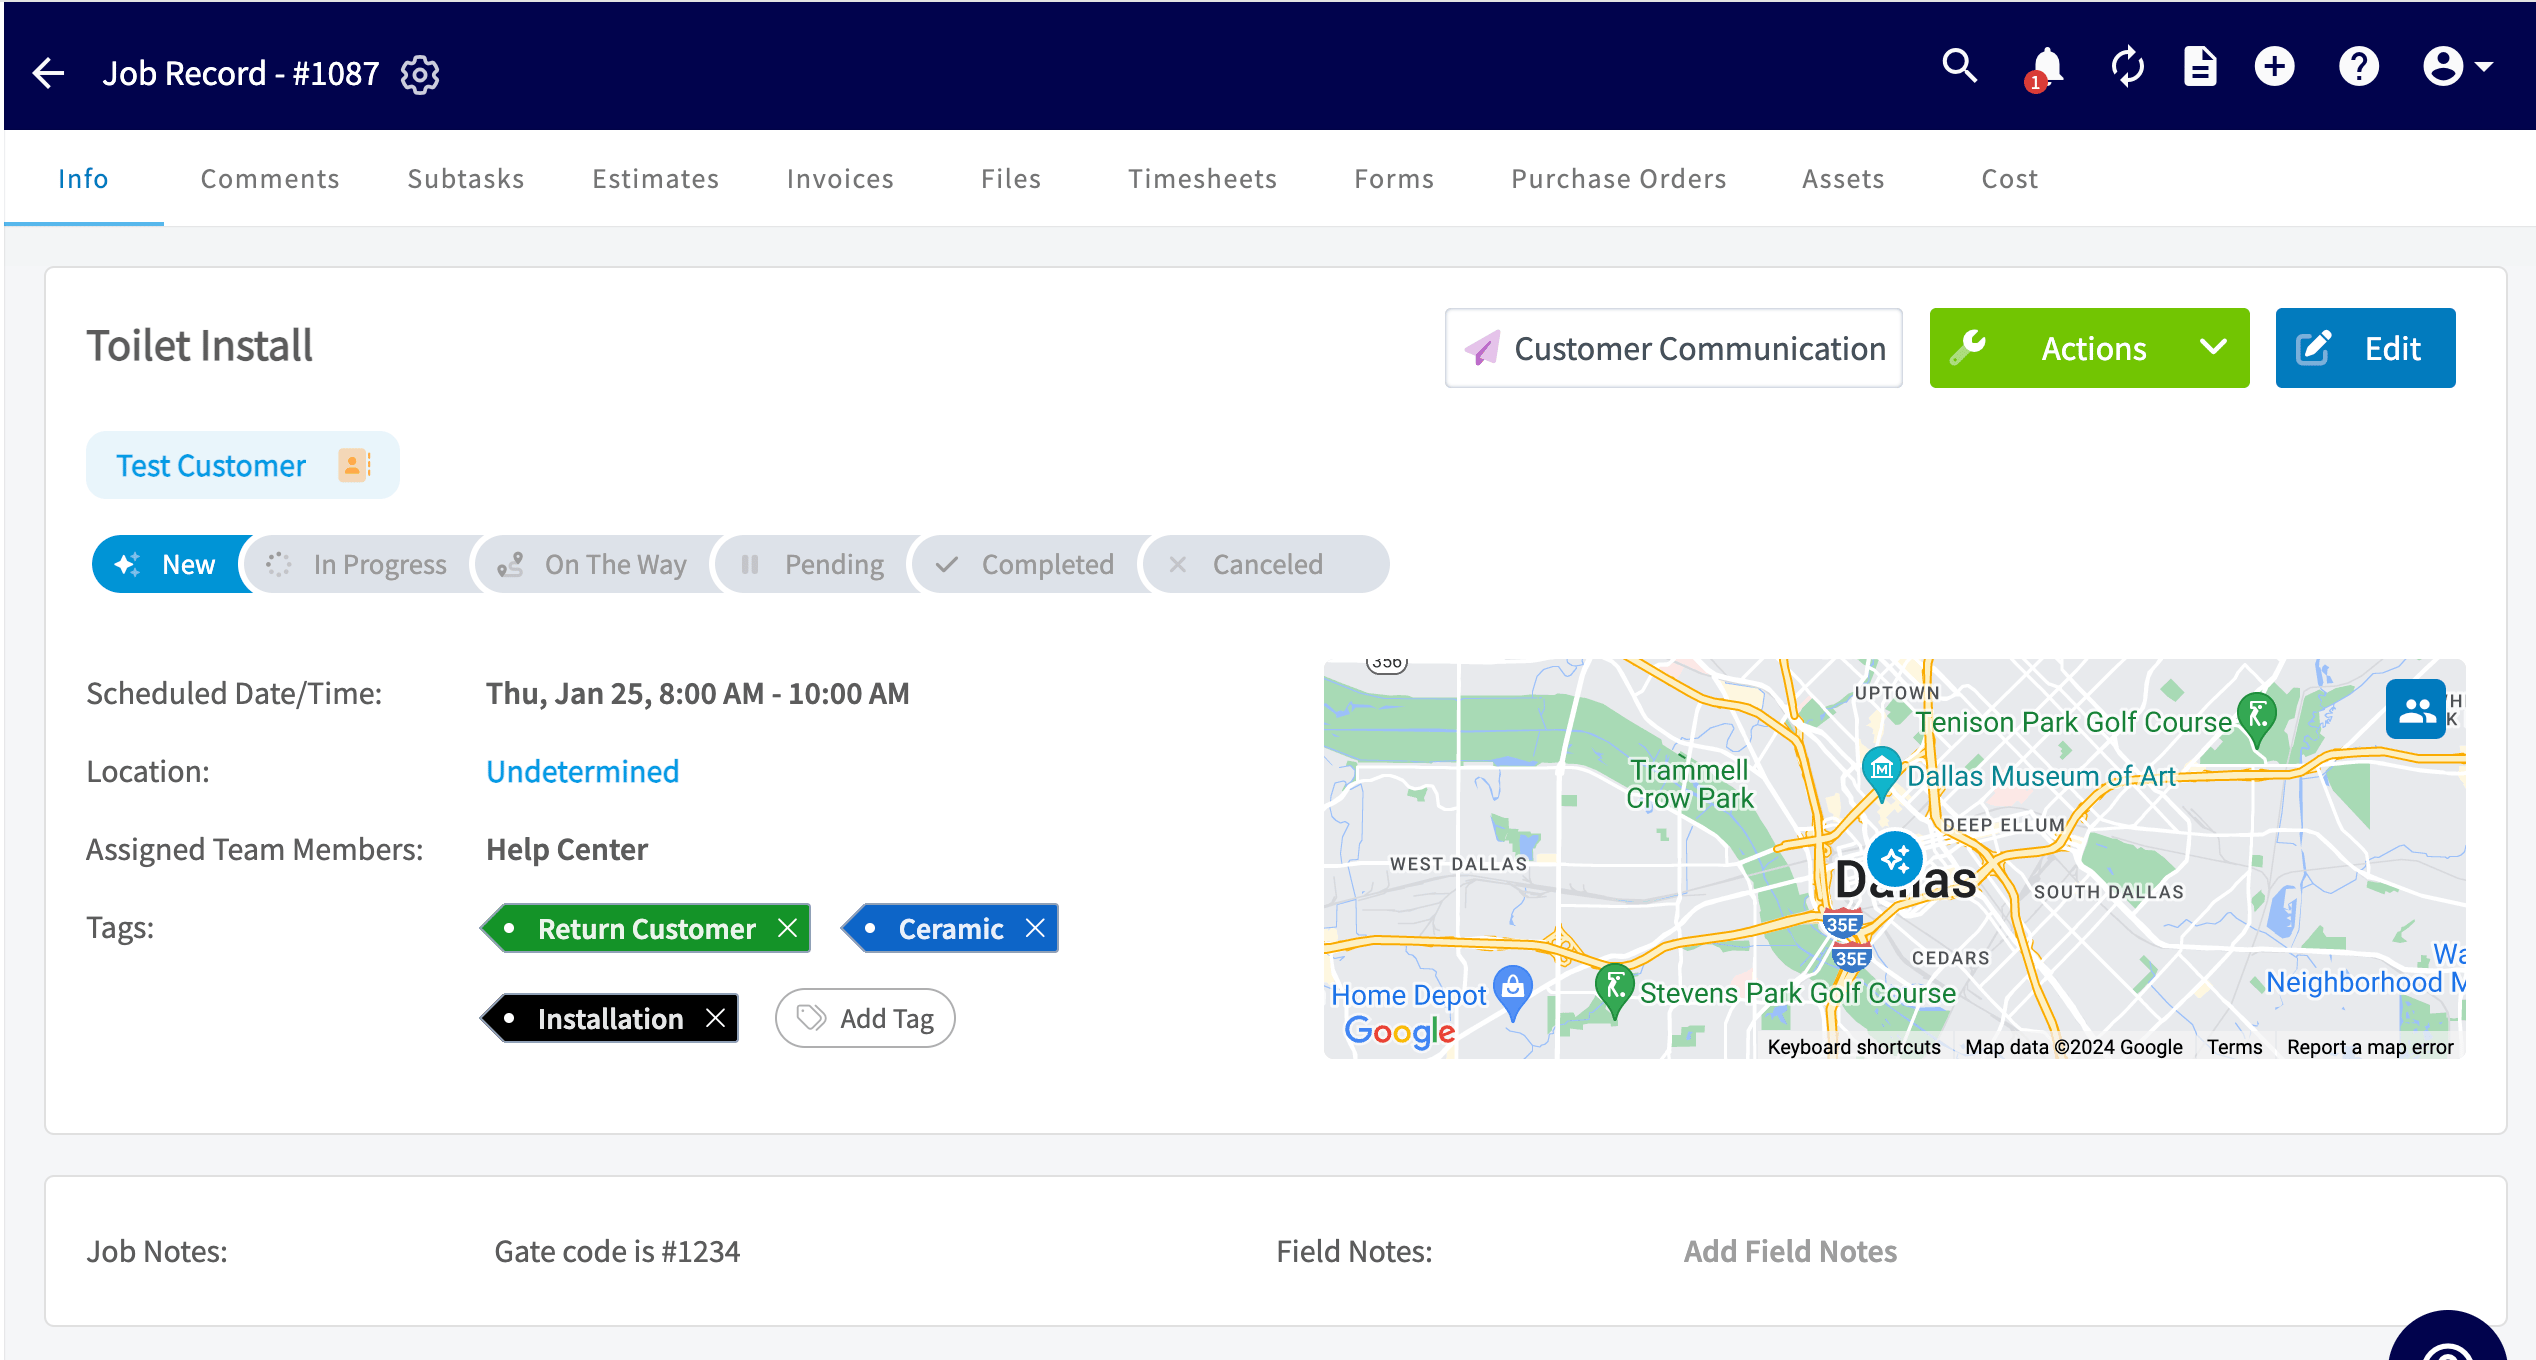
View jobs by tag
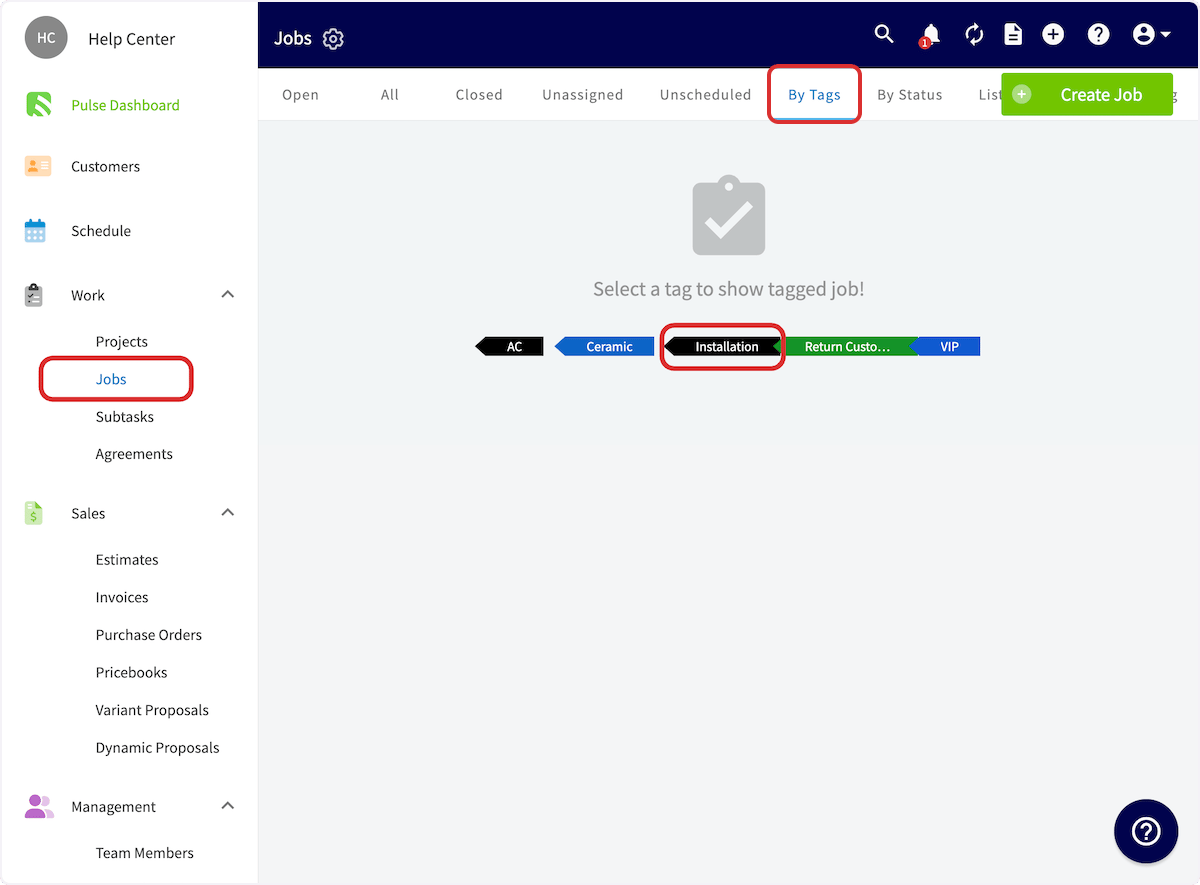
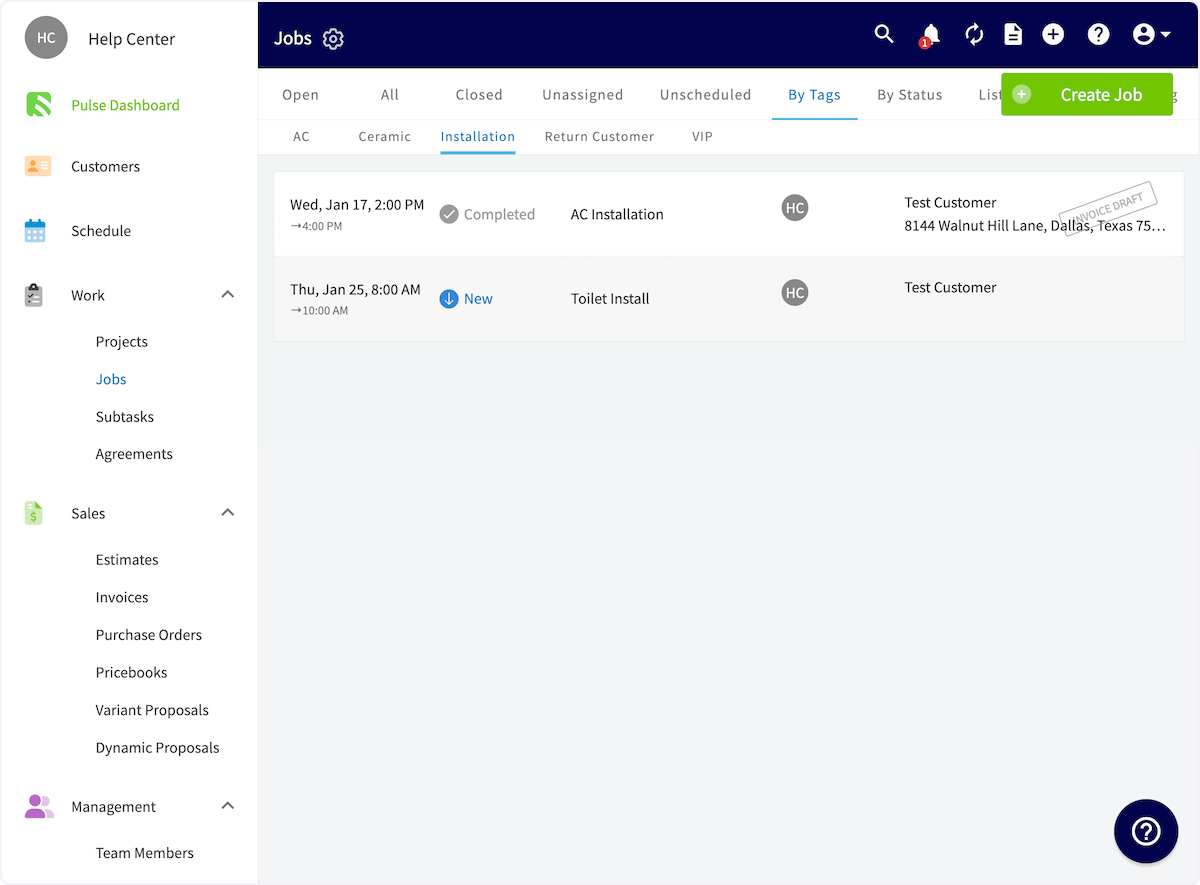
- Select Jobs under Work in the left menu.
- Select the By Tags tab.
- Select the tag you want to view.
Remove or delete a tag
Remove a tag from one job
Select the x next to the tag on the job record. The tag stays available for other jobs.Delete a tag from the tag list
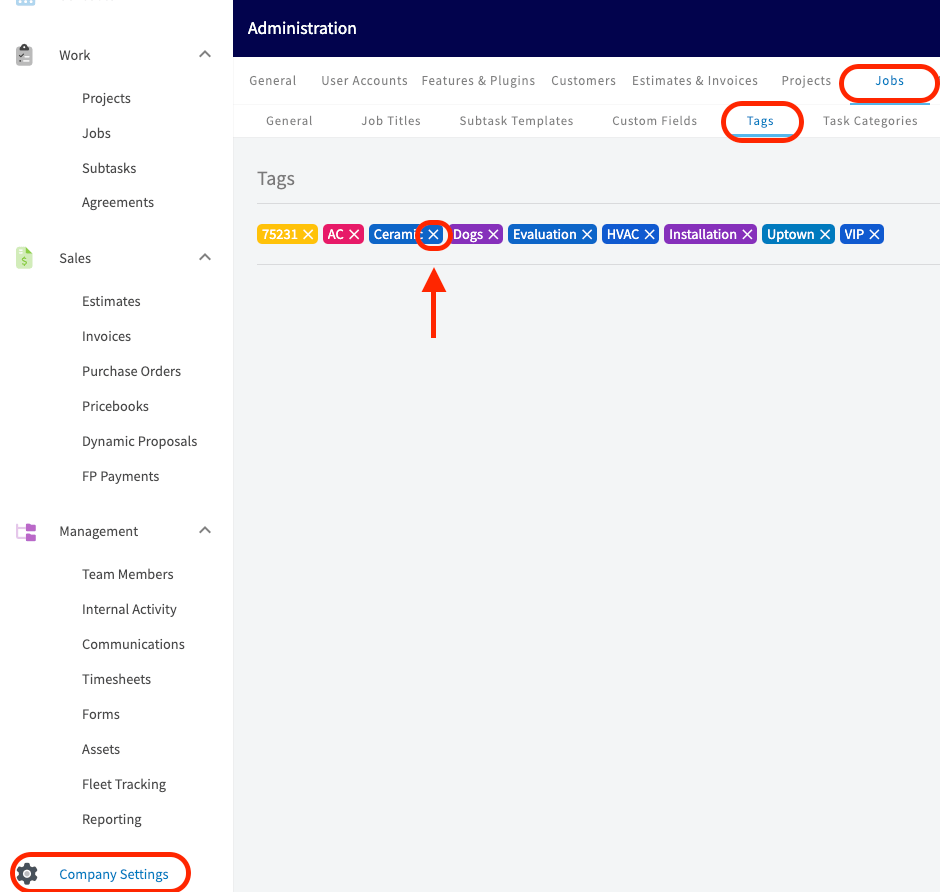
Deleting a tag in Company Settings stops it from appearing as an option on future job records.- Select Company Settings in the left menu.
- Select the Jobs tab.
- Select the Tags subtab.
- Select the x next to each tag you want to delete.
Still need help?
Reach the FieldPulse support team at support@fieldpulse.com or through the chat feature in the bottom-right corner of your screen.Related articles
- How to Create a Job
- Setting Up Custom Fields on Job Records
- How to Create Dynamic Job Reports
- How to Manage Files