
Who uses this: Admins share files, set file visibility, and move files between records in the web app; field team members work with files in the mobile app. Each file carries its own Can Service Agent See File? and Can Team Manager See File? toggles. · Availability: All regions.Photos, signed estimates, spec sheets, permits — files pile up fast on a job. FieldPulse keeps each one on the record it belongs to and lets you decide what the customer receives and what stays with the office.
Overview
You share a file with a customer from three places in FieldPulse: the file itself, a customer communication, or the preview of an estimate or invoice. A file uploaded to a record stays internal until you share it, and each file carries visibility toggles that decide which roles on your team can open it. You can also move files from a customer record to a linked job record, and group files into folders in the mobile app.Before you begin
- Files live on the Files tab of the record they belong to. On web, add one with Upload File or Import From File Library. In the FieldPulse mobile app, use Attach File, Upload Photo, or Take Photo.
- Most of the sharing paths below start from a file already stored in FieldPulse. Sending a customer communication or emailing an estimate or invoice can also upload a file straight from your device at send time.
On web
Share a file directly
- Select the file on the record to open it.
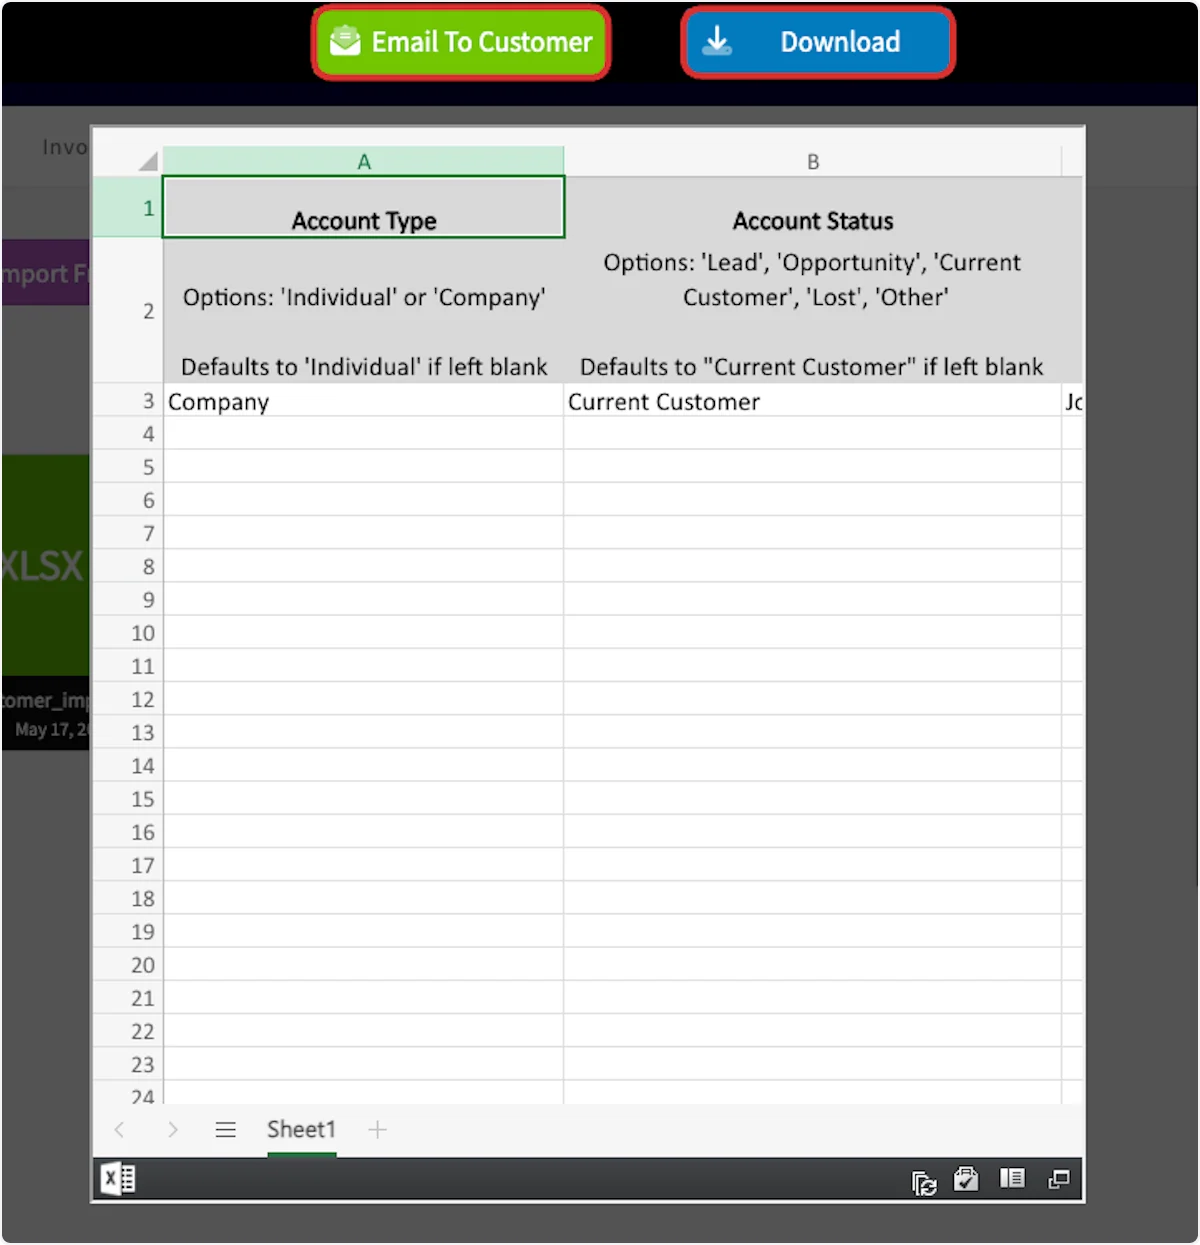
- Select Email To Customer to send the file to the customer, or Download to save it to your device.
Share a file on a customer communication
-
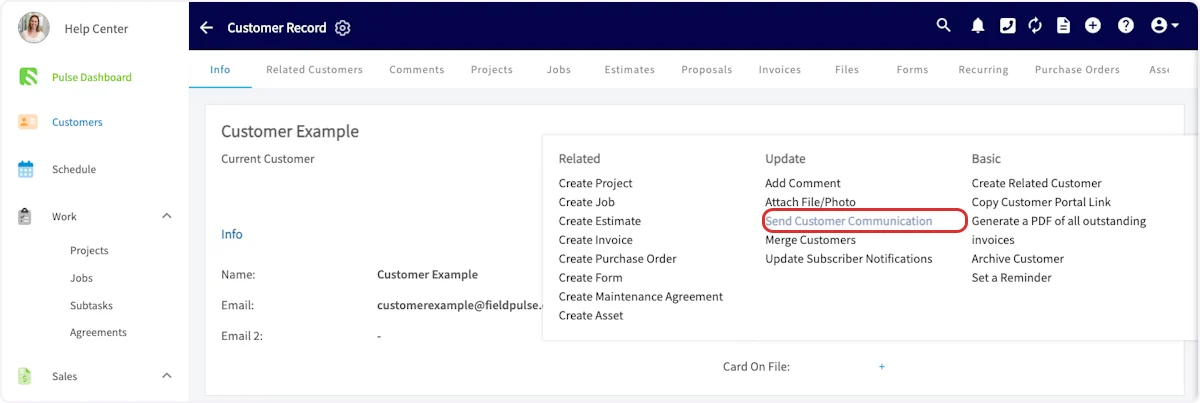
On the related record, select Actions, then Send Customer Communication.
-
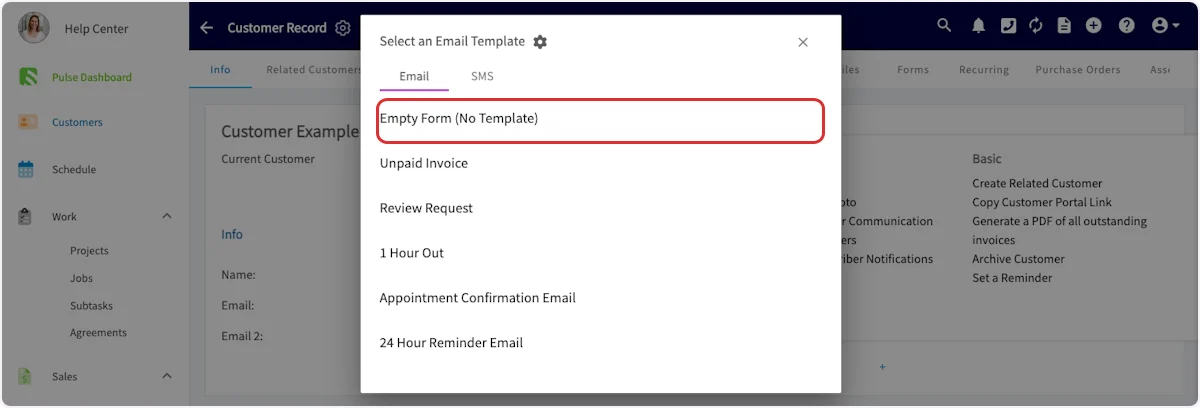
Choose the template you want to use, or select Empty Form (No Template).
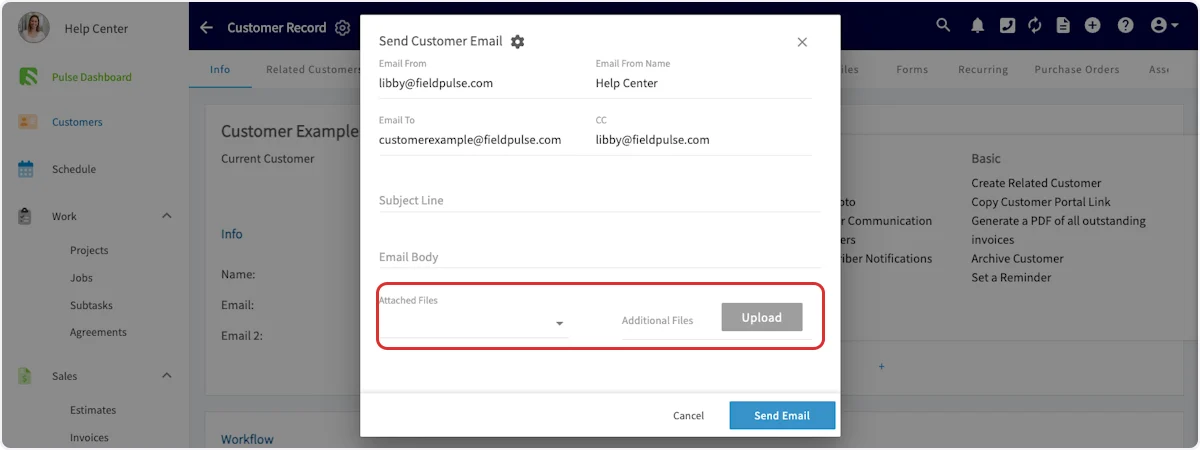
- Select Attached Files to attach files stored in FieldPulse, or select Upload next to Additional Files to add files from your device.
- Fill in the Subject Line and Email Body, then select Send Email.
Share files on an estimate or invoice
-
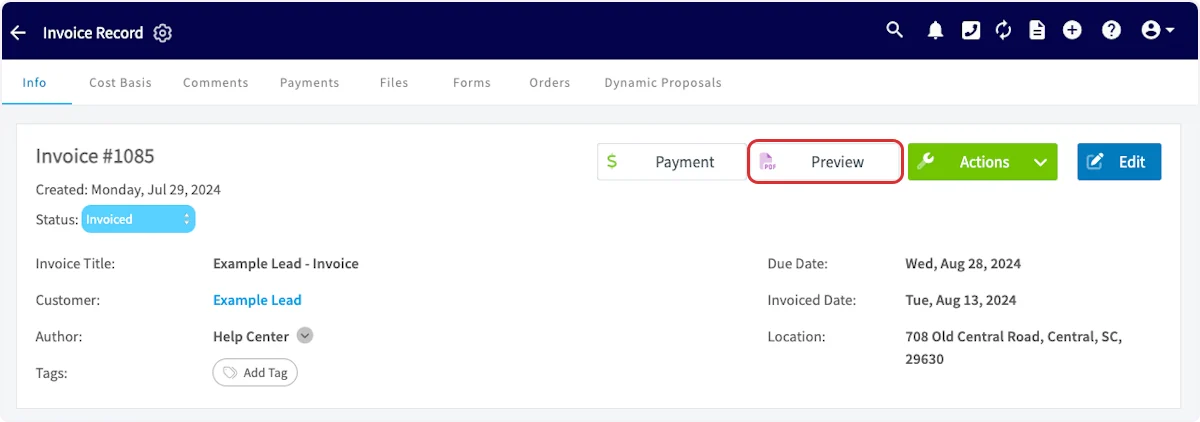
On the estimate or invoice record, select Preview.
-
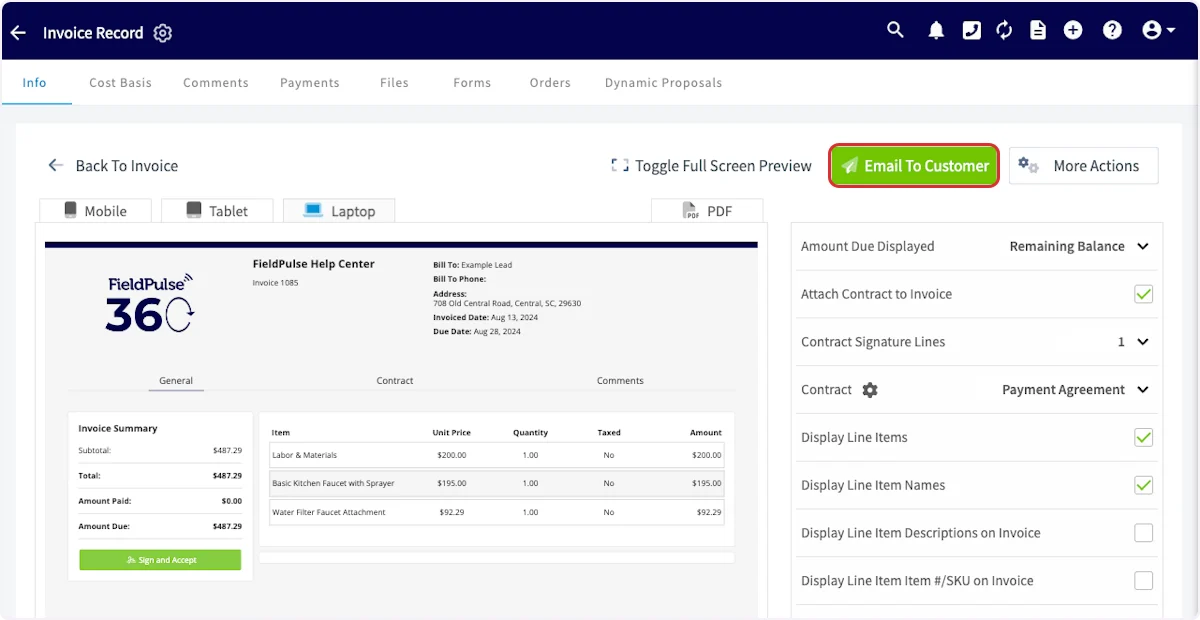
In the preview, select Email To Customer.
-
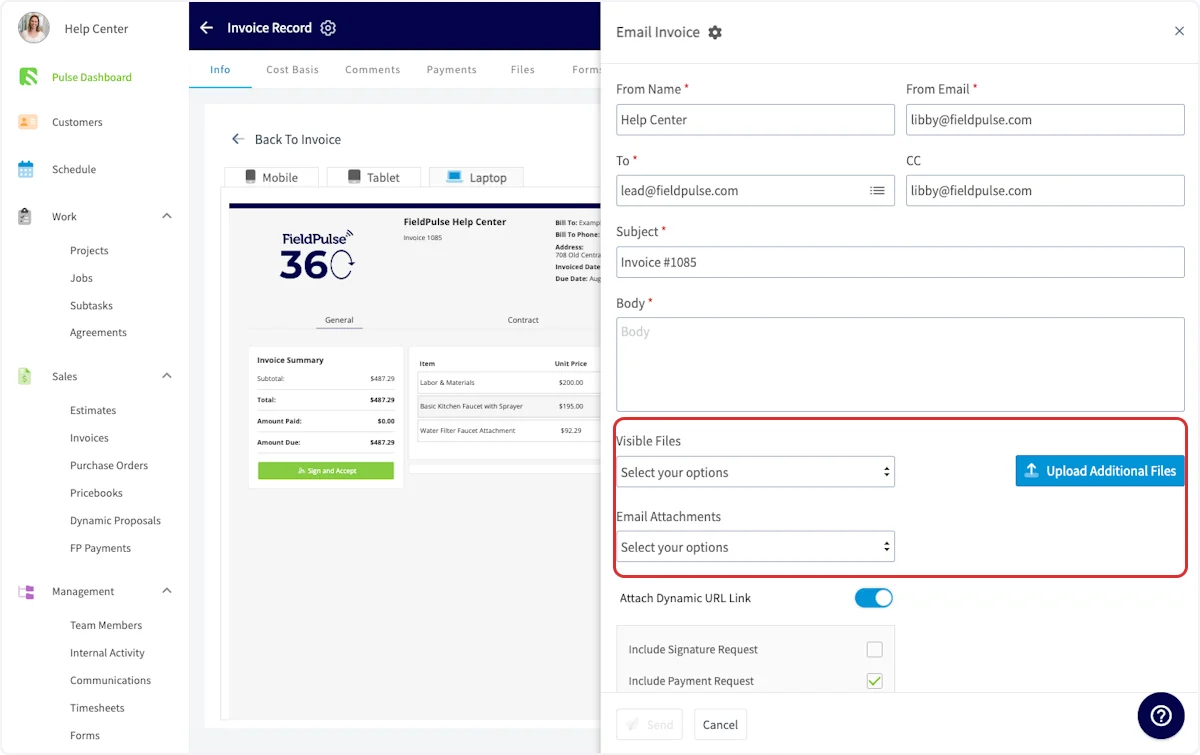
Choose how each file is included, then select Send.
- Visible Files — files stored in FieldPulse that display on the dynamic estimate or invoice.
- Email Attachments — files stored in FieldPulse that attach to the email.
- Upload Additional Files — files from your device that display on the dynamic estimate or invoice.
Control who on your team can see a file
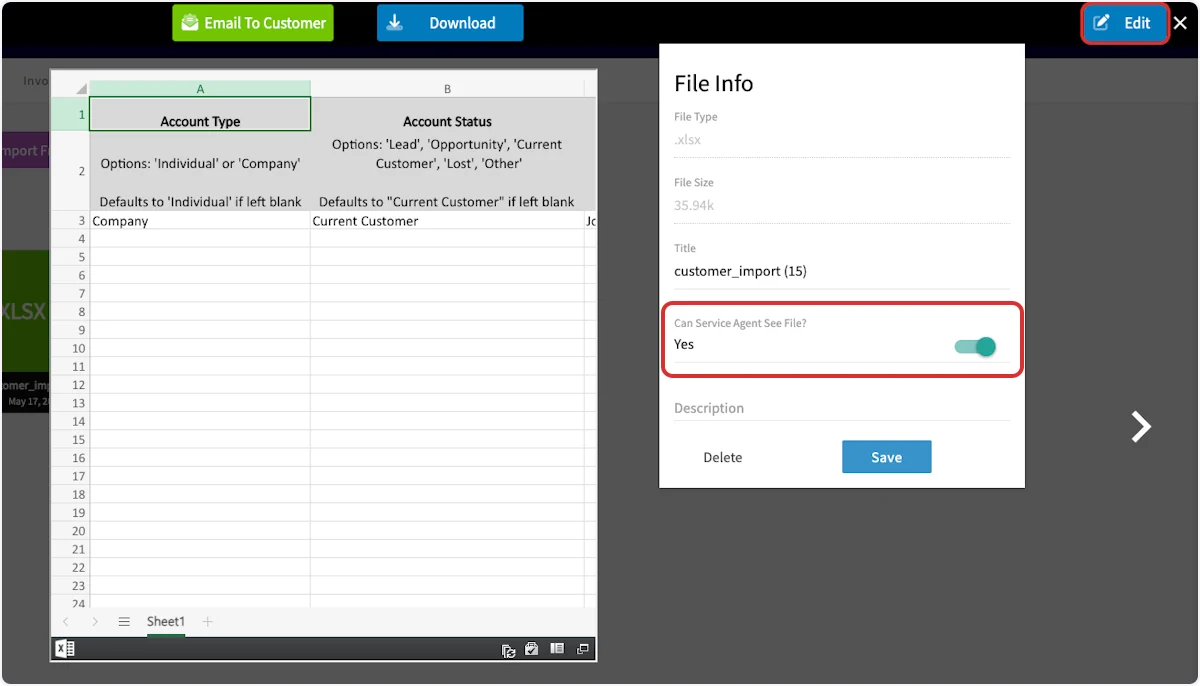
- Select the file to open it, then select Edit.
- Set Can Service Agent See File? and Can Team Manager See File? to control which roles can open the file.
- Select Save.
Move files from a customer record to a job record
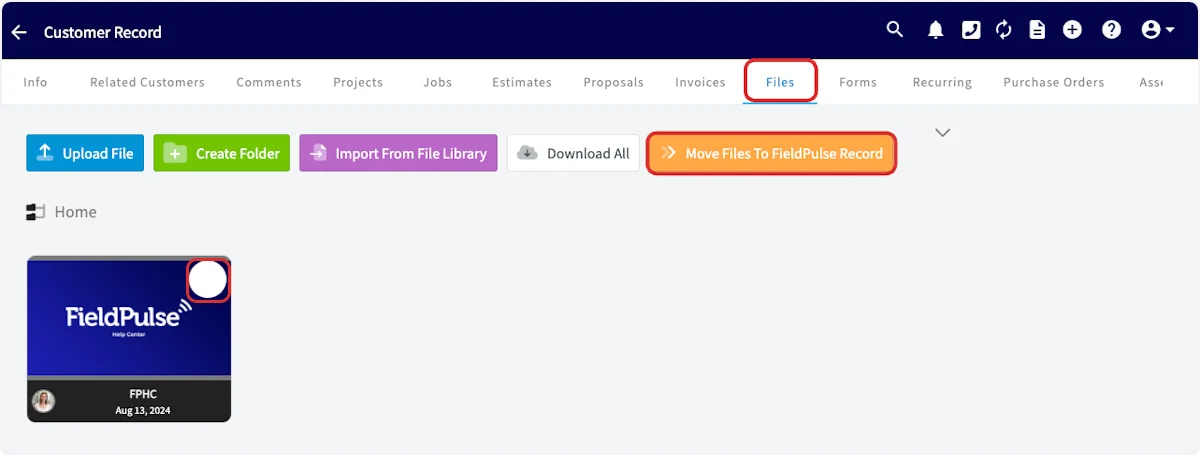
- Open the customer record and select the Files tab.
-
Select Move Files To FieldPulse Record, then select the files you want to move.
-
Select the Destination Record search box and choose the job record you want the files on.
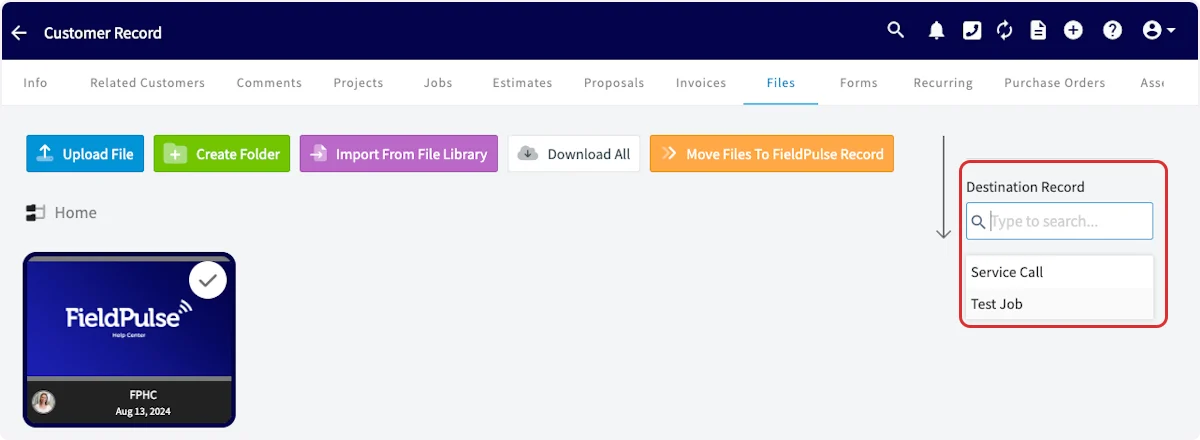 Only jobs linked to this customer appear in the destination list.
 - Choose Duplicate & Transfer Files or Move Files Only.
FieldPulse recommends Move Files Only, since any file on a job record already appears on the linked customer’s record.
On mobile
Create a file folder
-
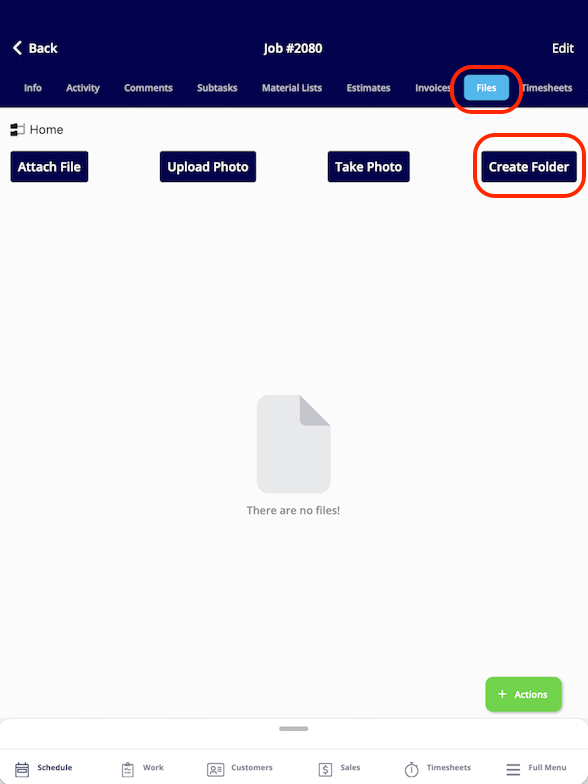
On any record, open the Files tab and tap Create Folder.
-
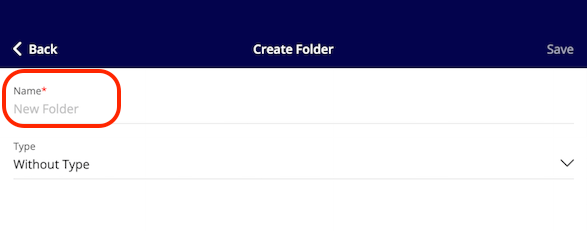
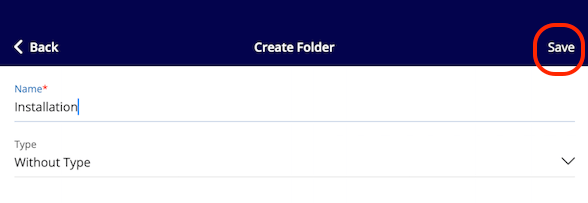
Enter a name for the folder in the Name field. A name is required before you can save.
-
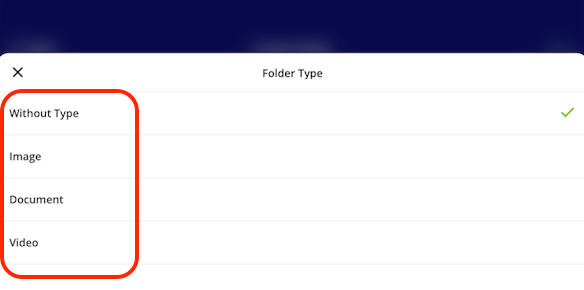
Tap the Type field and choose what the folder holds.
- Without Type — creates an empty placeholder folder.
- Image
- Document
- Video
- Tap Save. The new folder appears in the Files tab. To leave without creating the folder, tap Back.
What your customer sees
Where a shared file lands depends on the path you took to send it.- A file emailed from the file itself opens as a standard email attachment.
- A file attached through Send Customer Communication arrives in line with the template you chose.
- Visible Files appear inside the dynamic estimate or invoice when the customer opens the link.
- Email Attachments attach to the email that delivers the estimate or invoice.
Customers only see files you explicitly share. Files uploaded to a record stay internal by default.
Related articles
- How to Use Comments
- How to Create Dynamic Job Reports
- How to Attach Photos & Files to Estimates & Invoices
- How to View Photos and Files on Form PDFs
- How to Send Communications to Customers
- User Roles and Permissions Details