
Who uses this: Admins turn arrival windows on for the account in Company Settings, which only Admins can view; the Customer Arrival Window Visibility setting names the roles that can see and edit the window on a record. Availability: All regions.Your dispatcher schedules the tech for 8:00 AM, but you would rather tell the homeowner “between 7:00 and 11:00” so one slow first call doesn’t turn into a missed-appointment complaint. A customer arrival window is a second date and time range you set on a job, separate from the internal start and end times, and you can send that range to the customer in your customer communication templates.
Overview
The customer arrival window is its own Date, Start Time, and End Time row in the Dates section of a job record, sitting directly under the job’s internal date and times. The two sets of times are independent, so the job can start at 8:00 AM internally while the customer is told 7:00 AM to 11:00 AM. An arrival window helps to minimize the time customers spend waiting for service.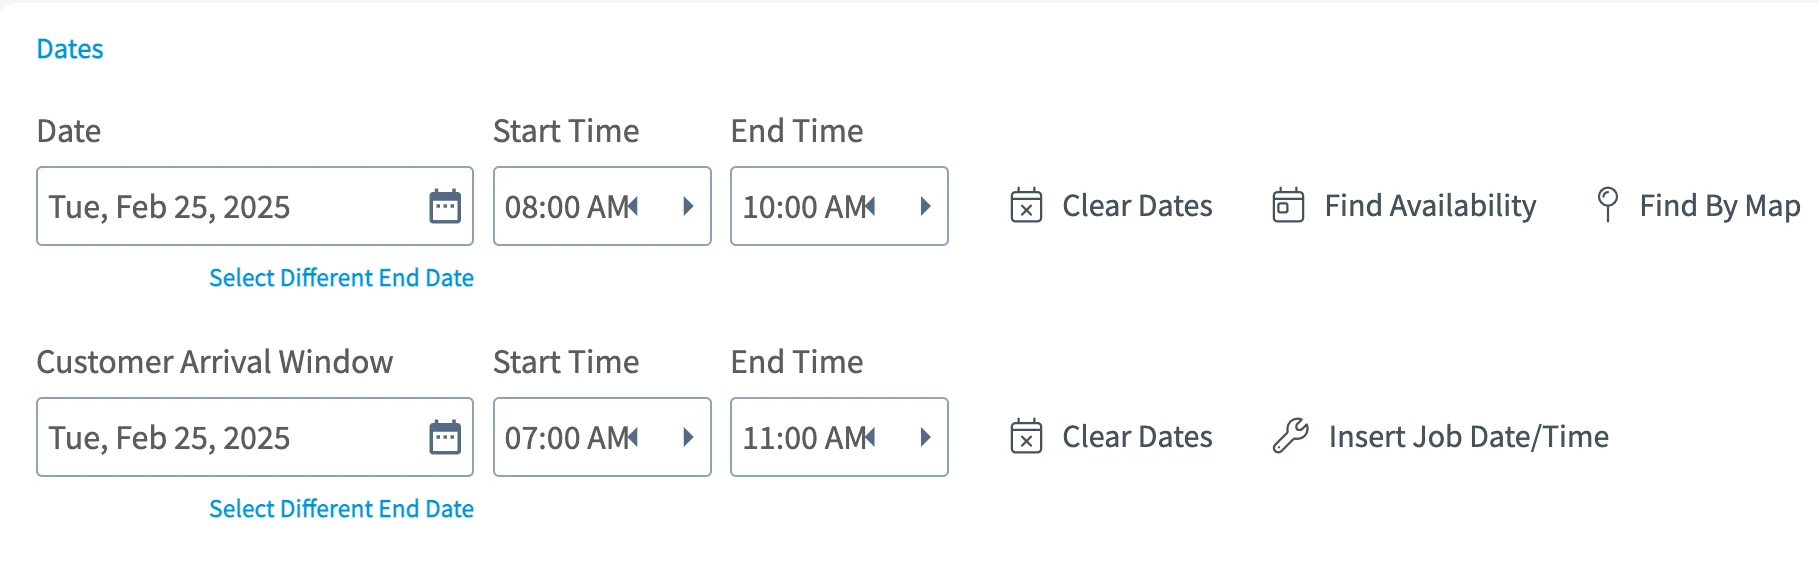
Before you begin
- All of the account-wide settings on this page live in Company Settings > Jobs > General.
- Decide which roles should see and edit the arrival window before you set Customer Arrival Window Visibility.
- To send the window to customers, you need an email or SMS template to put it in. See Setting Up Email & SMS Templates.
Step-by-step setup
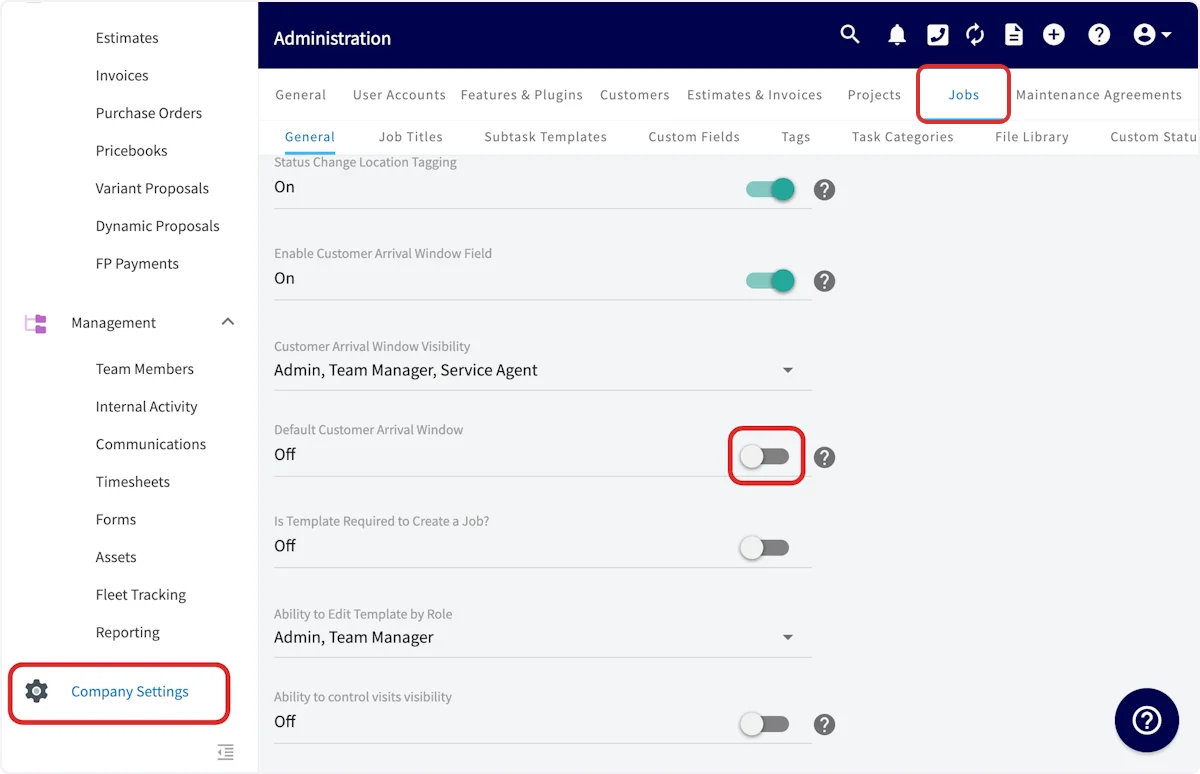
1. Turn on the arrival window
- Open Company Settings.
- Select the Jobs tab, then General.
- Turn on Enable Customer Arrival Window Field.
- Turn on Default Customer Arrival Window.
2. Choose who can see the arrival window
Use the Customer Arrival Window Visibility dropdown to pick the roles that can see and edit the arrival window on a record.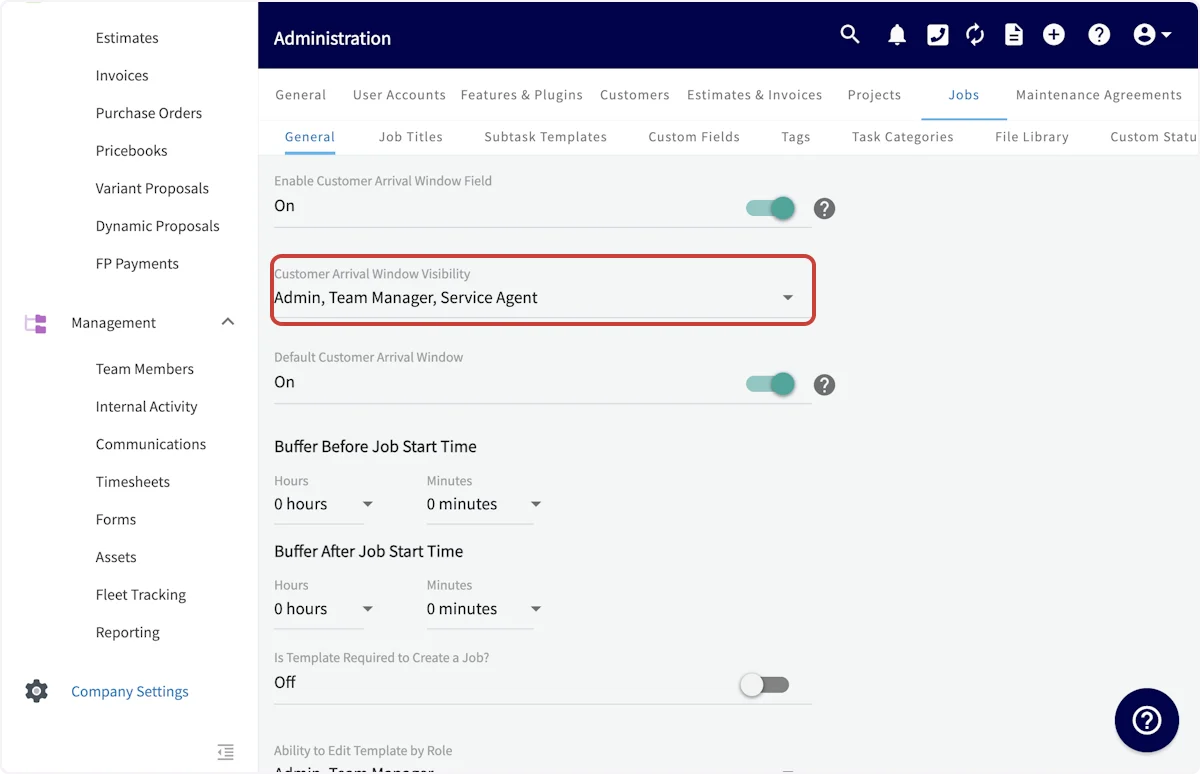
3. Set the default buffers
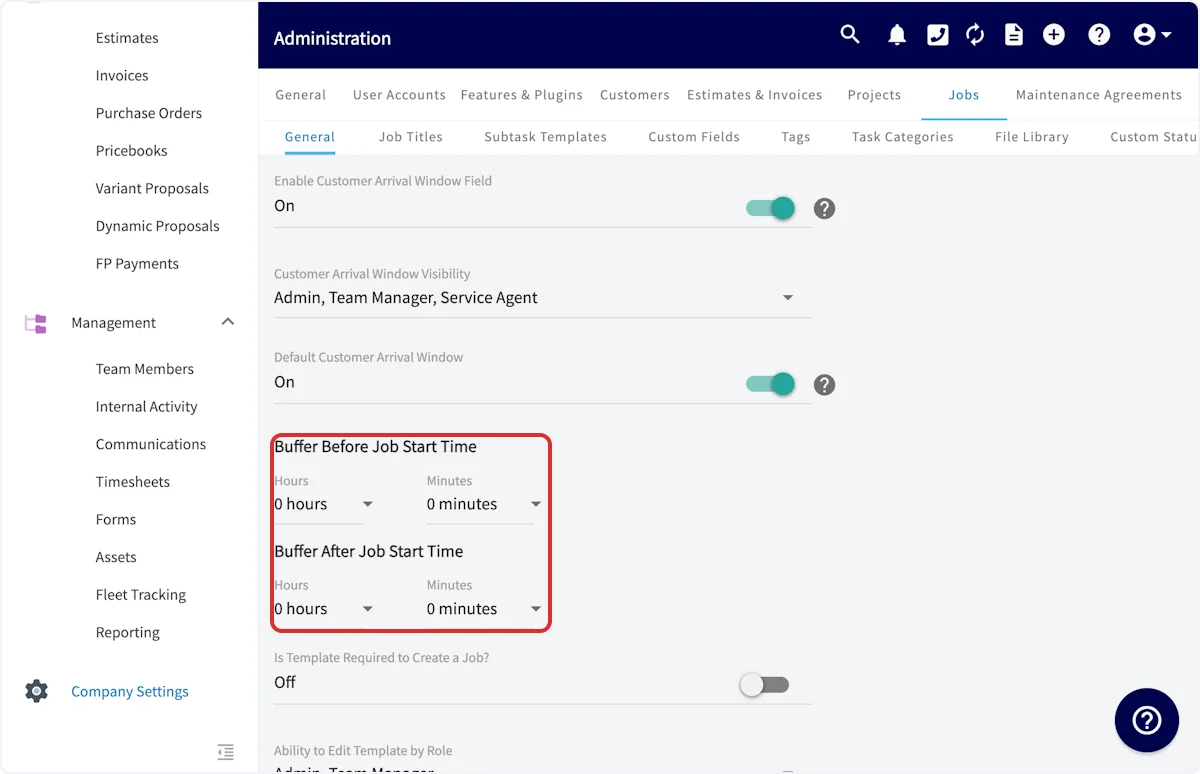
With Default Customer Arrival Window on, two buffer settings appear. Both are measured from the job’s start time, and together they form the standard window your records start with.- Set the Hours and Minutes for Buffer Before Job Start Time.
- Set the Hours and Minutes for Buffer After Job Start Time.
4. Add the arrival window to customer messages
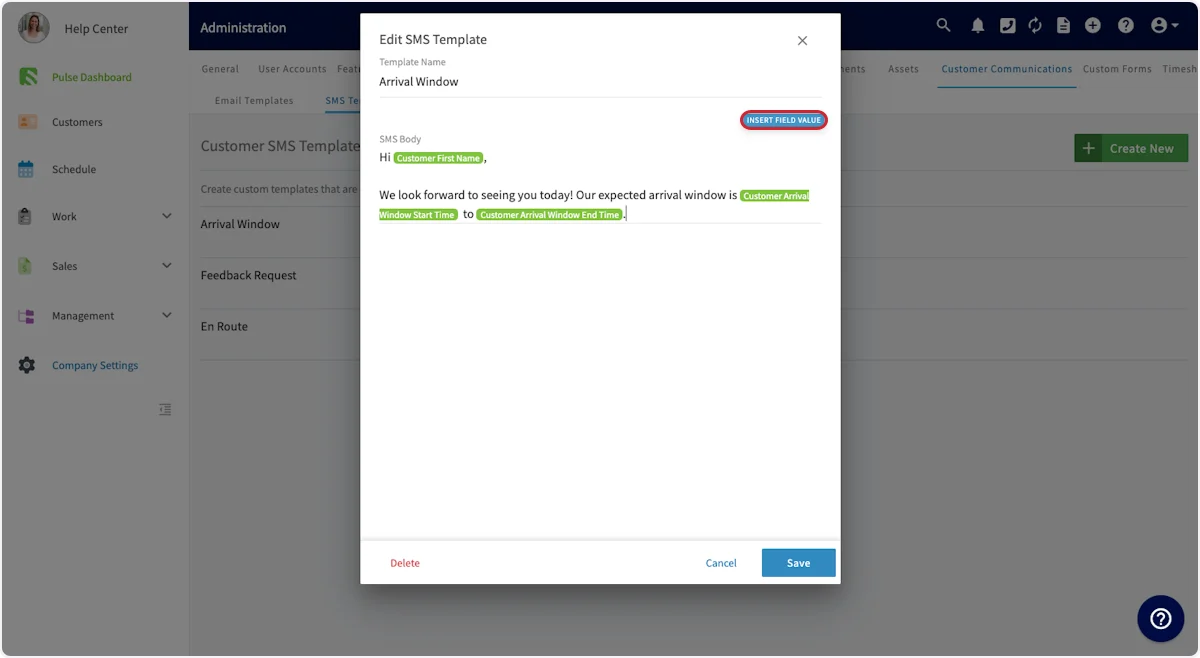
The arrival window reaches the customer through a customer communication template. Four field values carry it: the customer arrival window start date, start time, end date, and end time.- In Company Settings, open Customer Communications, then Email Templates or SMS Templates.
- Open the template you want to edit, or select Create New.
- Write the message body, and where the time range belongs, select Insert Field Value and choose the arrival window component you want.
- Select Save.
Settings reference
Still need help?
Reach the FieldPulse support team at support@fieldpulse.com or through the chat feature in the bottom-right corner of your screen.Related articles
- How to Create a Job
- How to Add Site Visits
- Setting Up Email & SMS Templates
- Setting Up Automatic Communication Triggers
- Customer Communications Overview