FieldPulse had default settings for your estimates and invoices to ensure consistency and reduce redundancies. You can change these settings to personalize the content and appearance of your estimates and invoices to better suit your business.Documentation Index
Fetch the complete documentation index at: https://fieldpulse.mintlify.app/llms.txt
Use this file to discover all available pages before exploring further.
General Settings
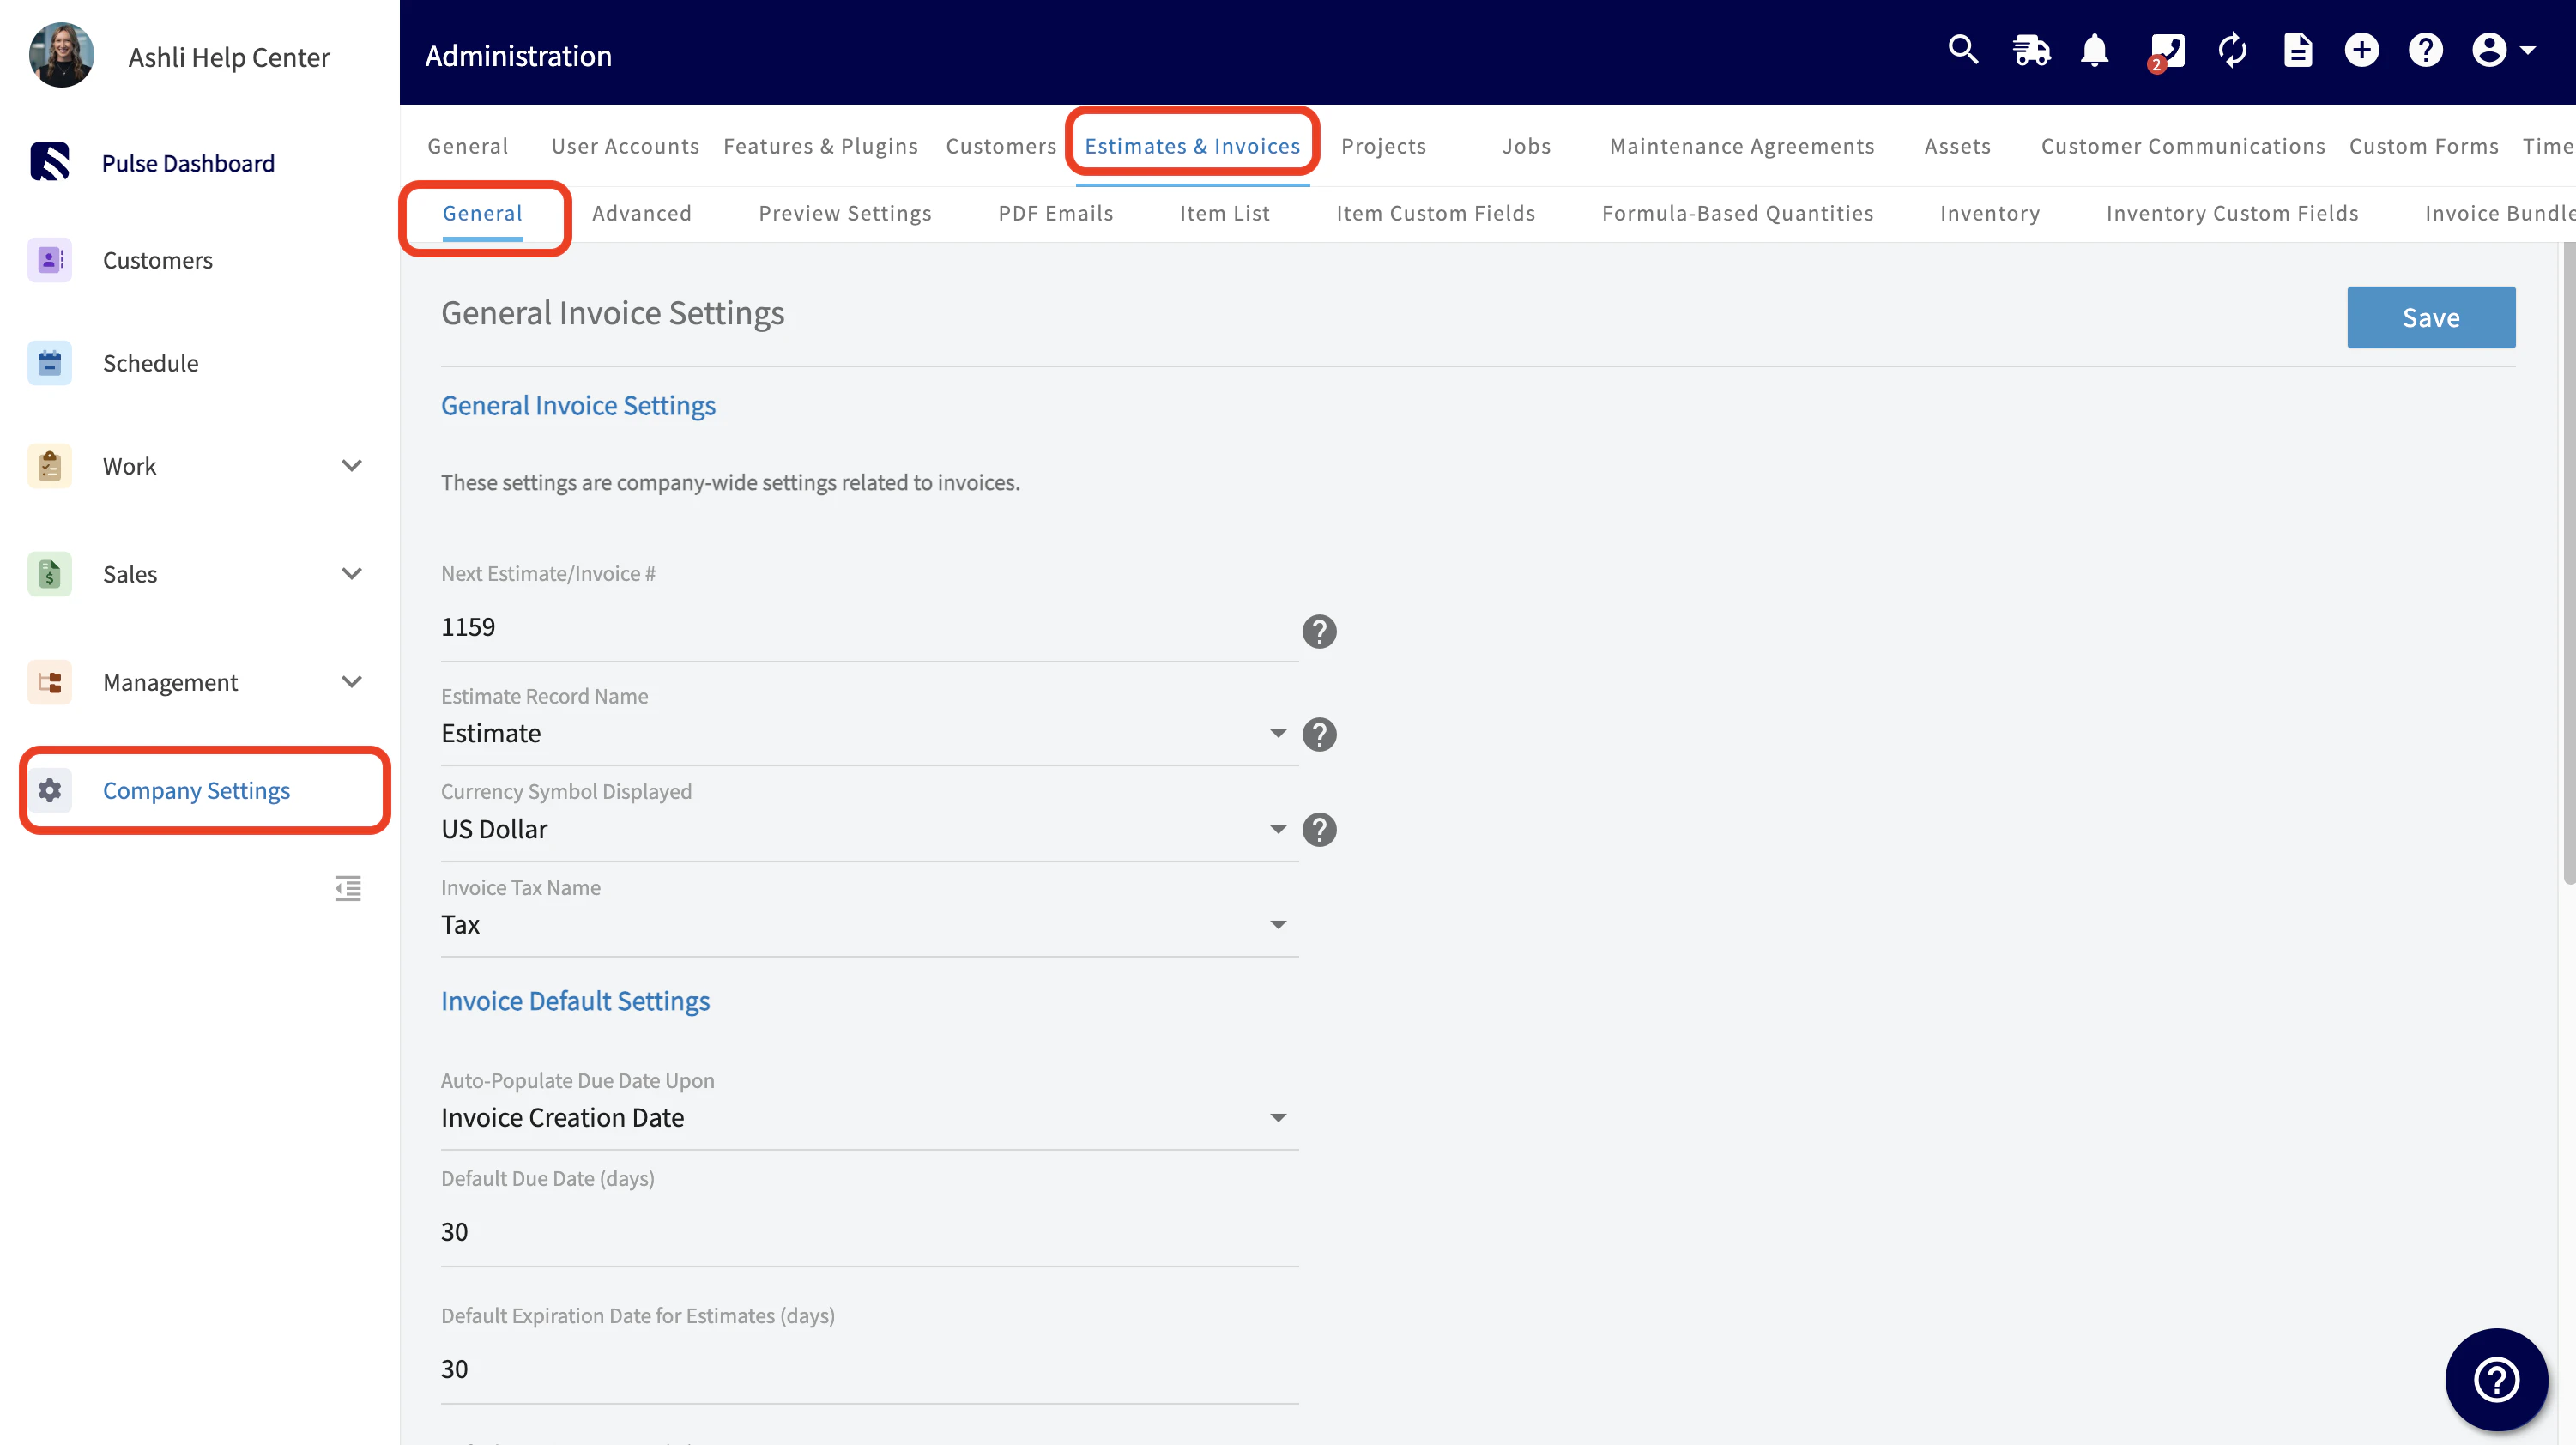
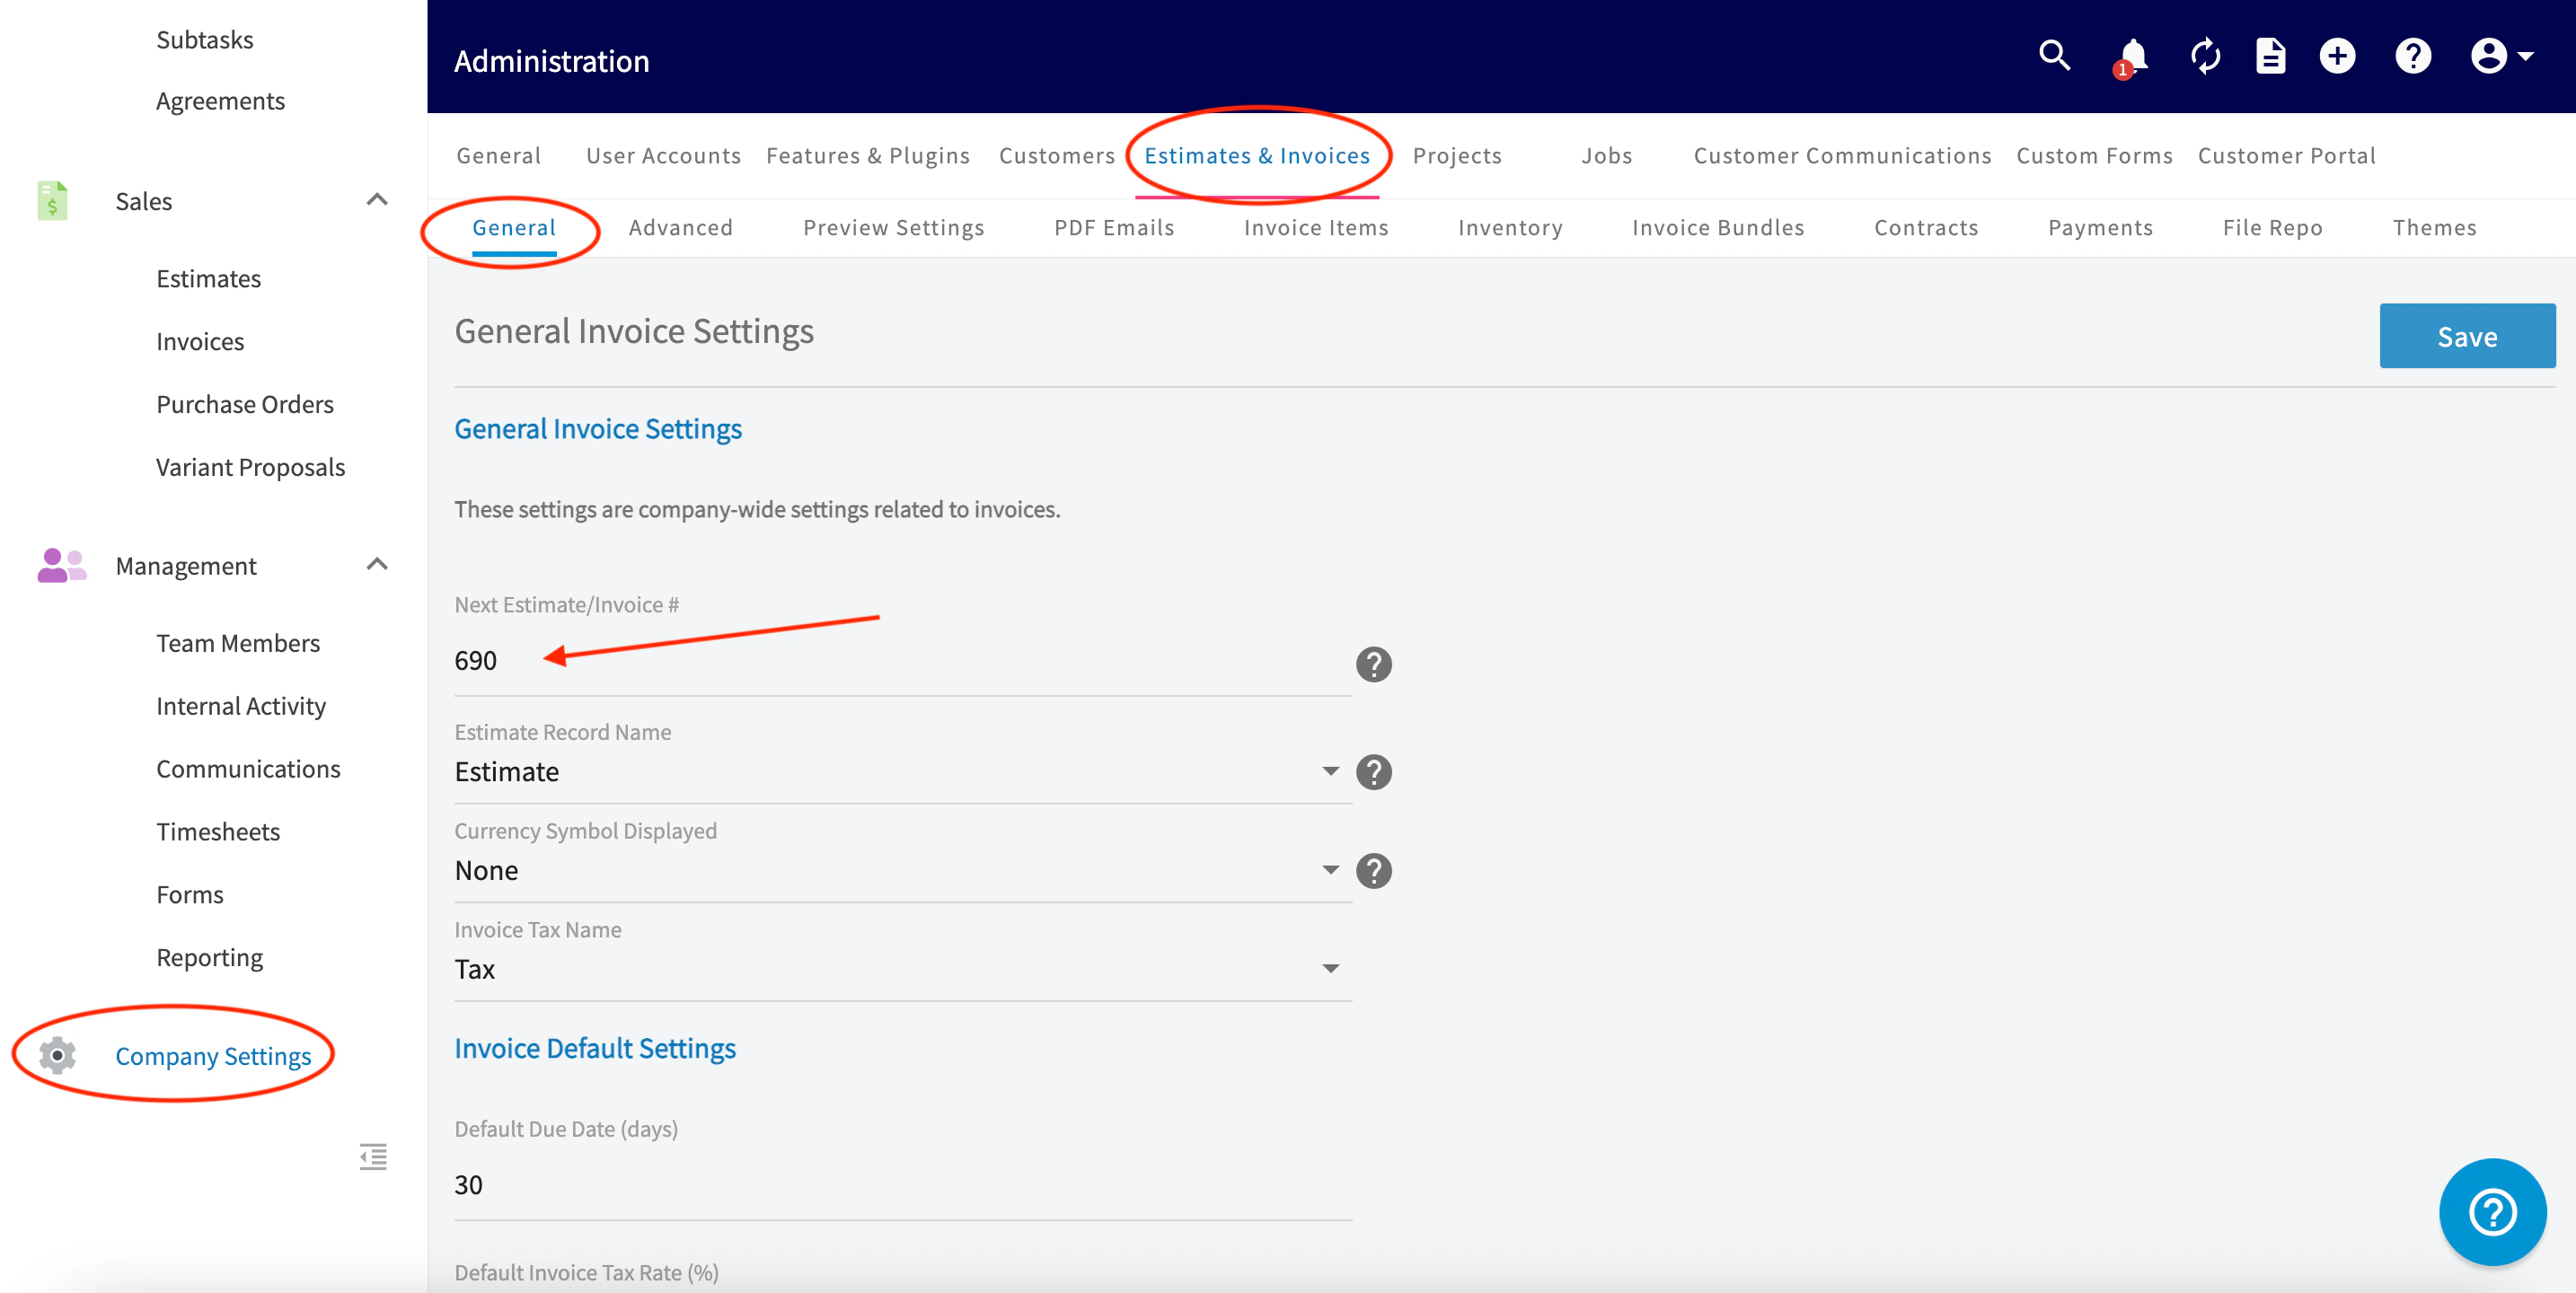
To access your estimate and invoice settings, click on Company Settings in the left-side menu, and then click Estimates & Invoices in the header. This takes you to the General Invoice Settings tab. On this page, you can set up the basics of how your invoices and estimates are displayed. You can choose the verbiage used for your estimates, as well as the currency and whether to display tax as Tax, HST, GST, or VAT.
You can also set up the default tax rate and control how due dates are auto-generated. The Auto-Populate Due Date Upon dropdown menu allows you to choose your preferred method for automatically setting a due date on invoices:
- Creation Date: The due date is set when the invoice is first created.
- Finalization Date: The due date is set when the invoice is finalized. This is recommended for most users for better accuracy, as it accounts for the time it takes to prepare the invoice.
- No Auto-Populated Due Date: No due date is automatically set; you must manually add one to each invoice.
Adding a Logo to Estimates & Invoices
While still on the General Invoice Settings tab, scroll down and toggle on Custom Company Logo. An upload button will appear, click it and choose your logo file from your computer. The selected logo will appear next to the upload button.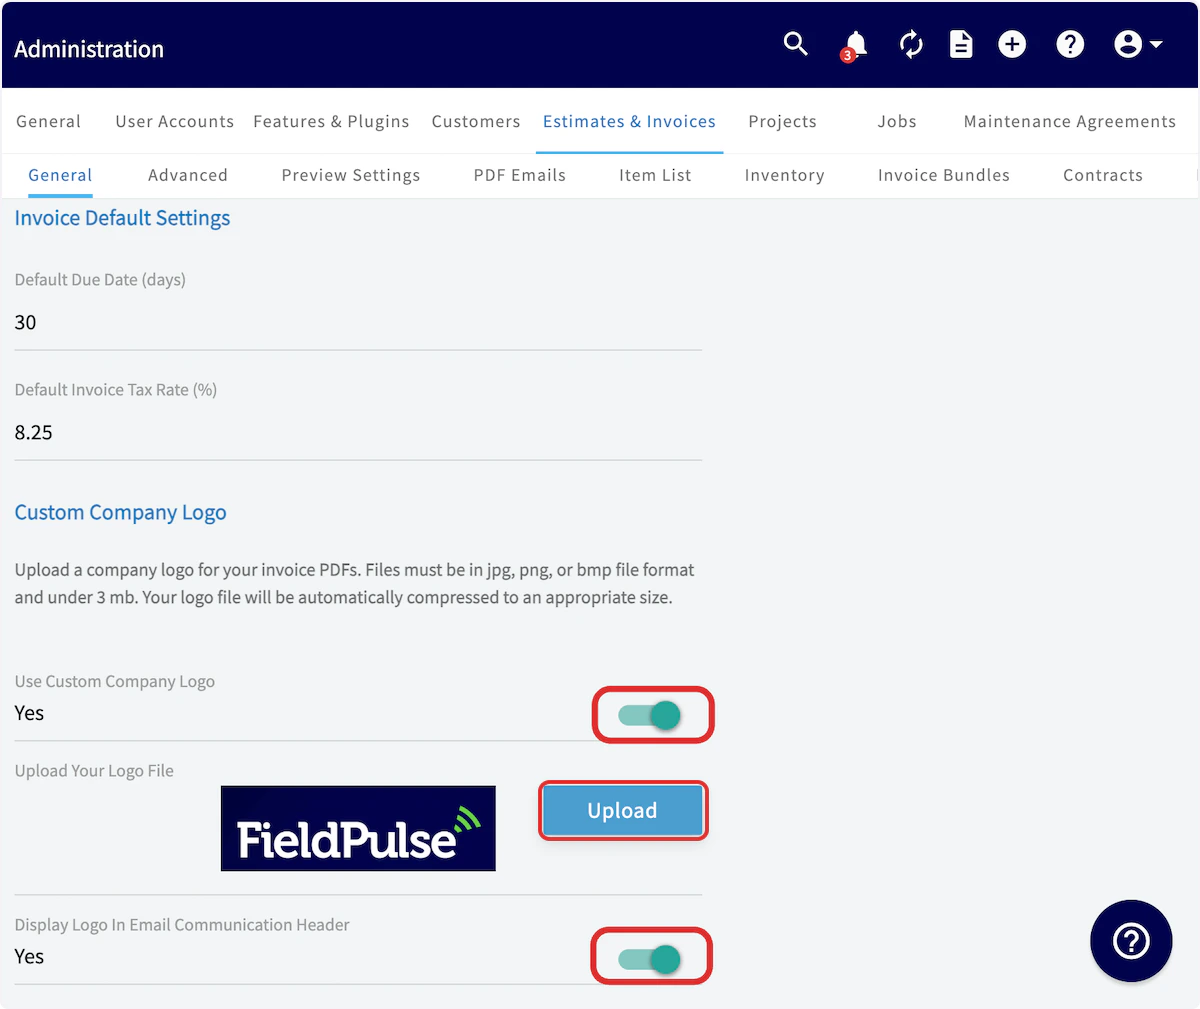
Estimate & Invoice PDF Font Size
You can select the default font size on all new estimate and invoice PDFs that you send out. Our system’s default is regularly 8 pt font. You can choose from the following font sizes: 8 pt, 10 pt, 12 pt, 14 pt, and 16 pt.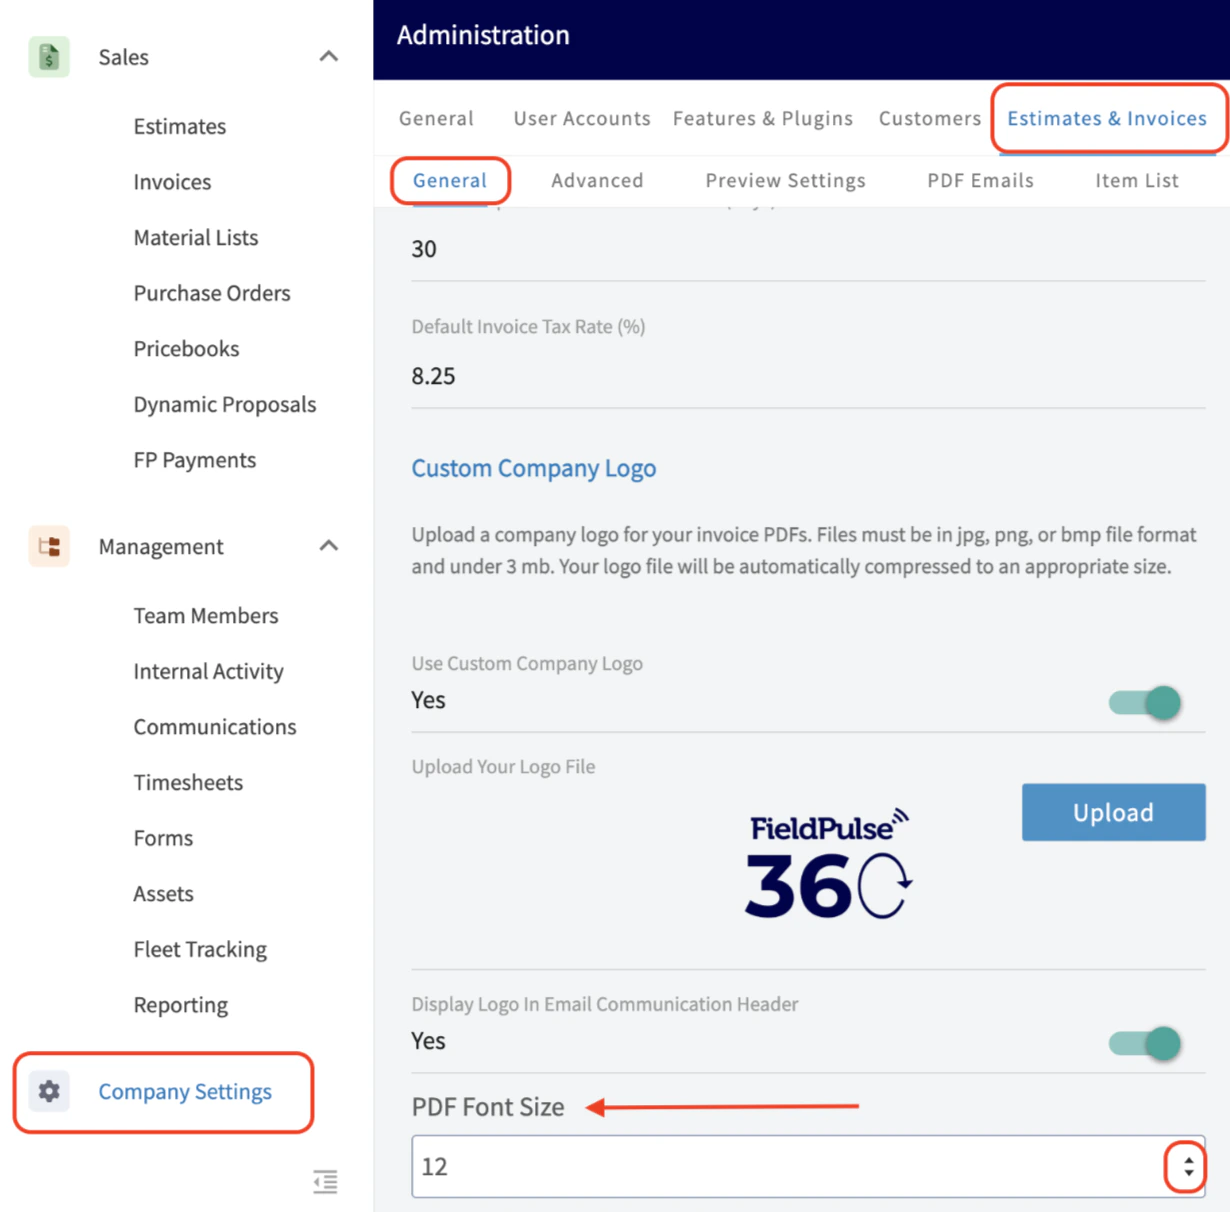
Advanced Settings
Click on Advanced under Estimates & Invoices for more invoice setup options.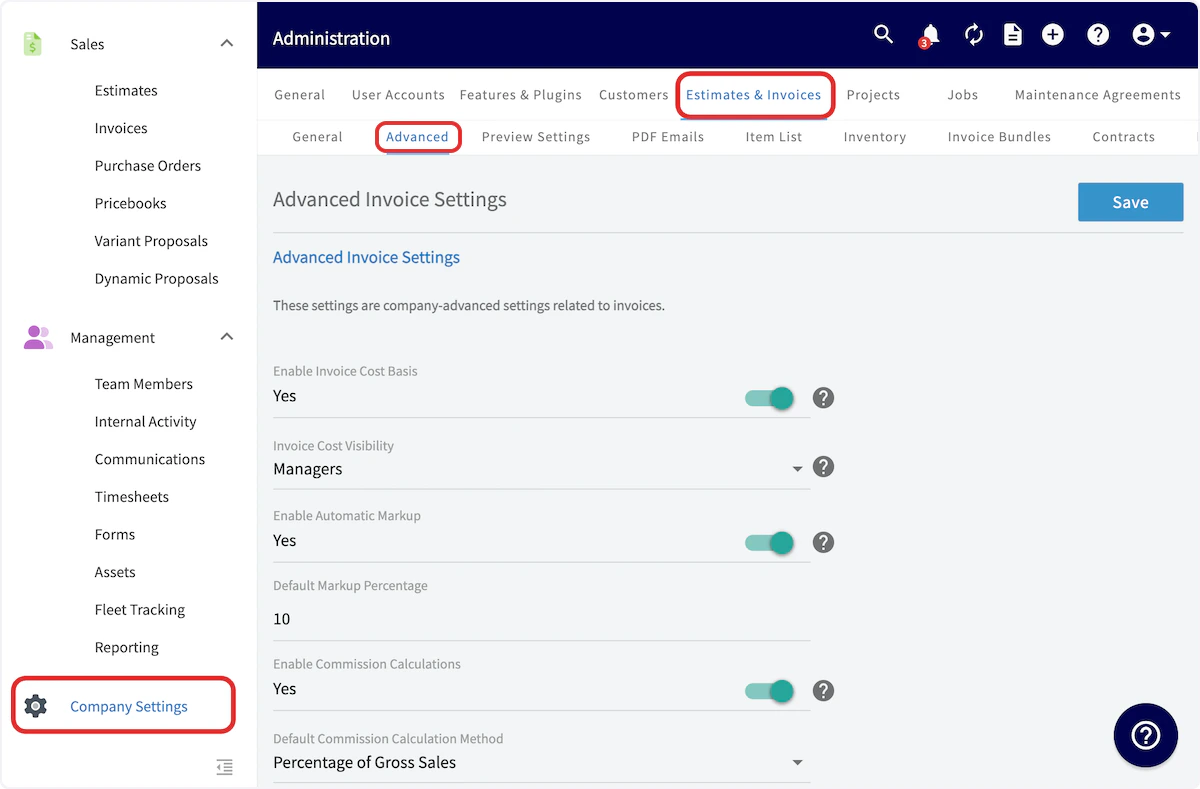
- Enable/Disable Invoice Cost Basis: This allows you to indicate the unit cost of invoice line items to determine your profit on a job. This line item cost is only displayed internally.
- Enable/Disable Automatic Markup: This allows you to apply a consistent markup on your line items based on unit cost and markup percentage to automatically set the unit price.
- Enable/Disable Commission Calculations: This allows you to automatically calculate and store commissions based on a fixed amount, percentage of gross sales, or a percentage of gross margin. Setting a default method and commission rate will automatically calculate it for each invoice, but this can be modified for each invoice.
- Enable/Disable Purchase Order Creation Based on Item Vendors
- Enable/Disable Keep an Estimate Record when Converting to an Invoice
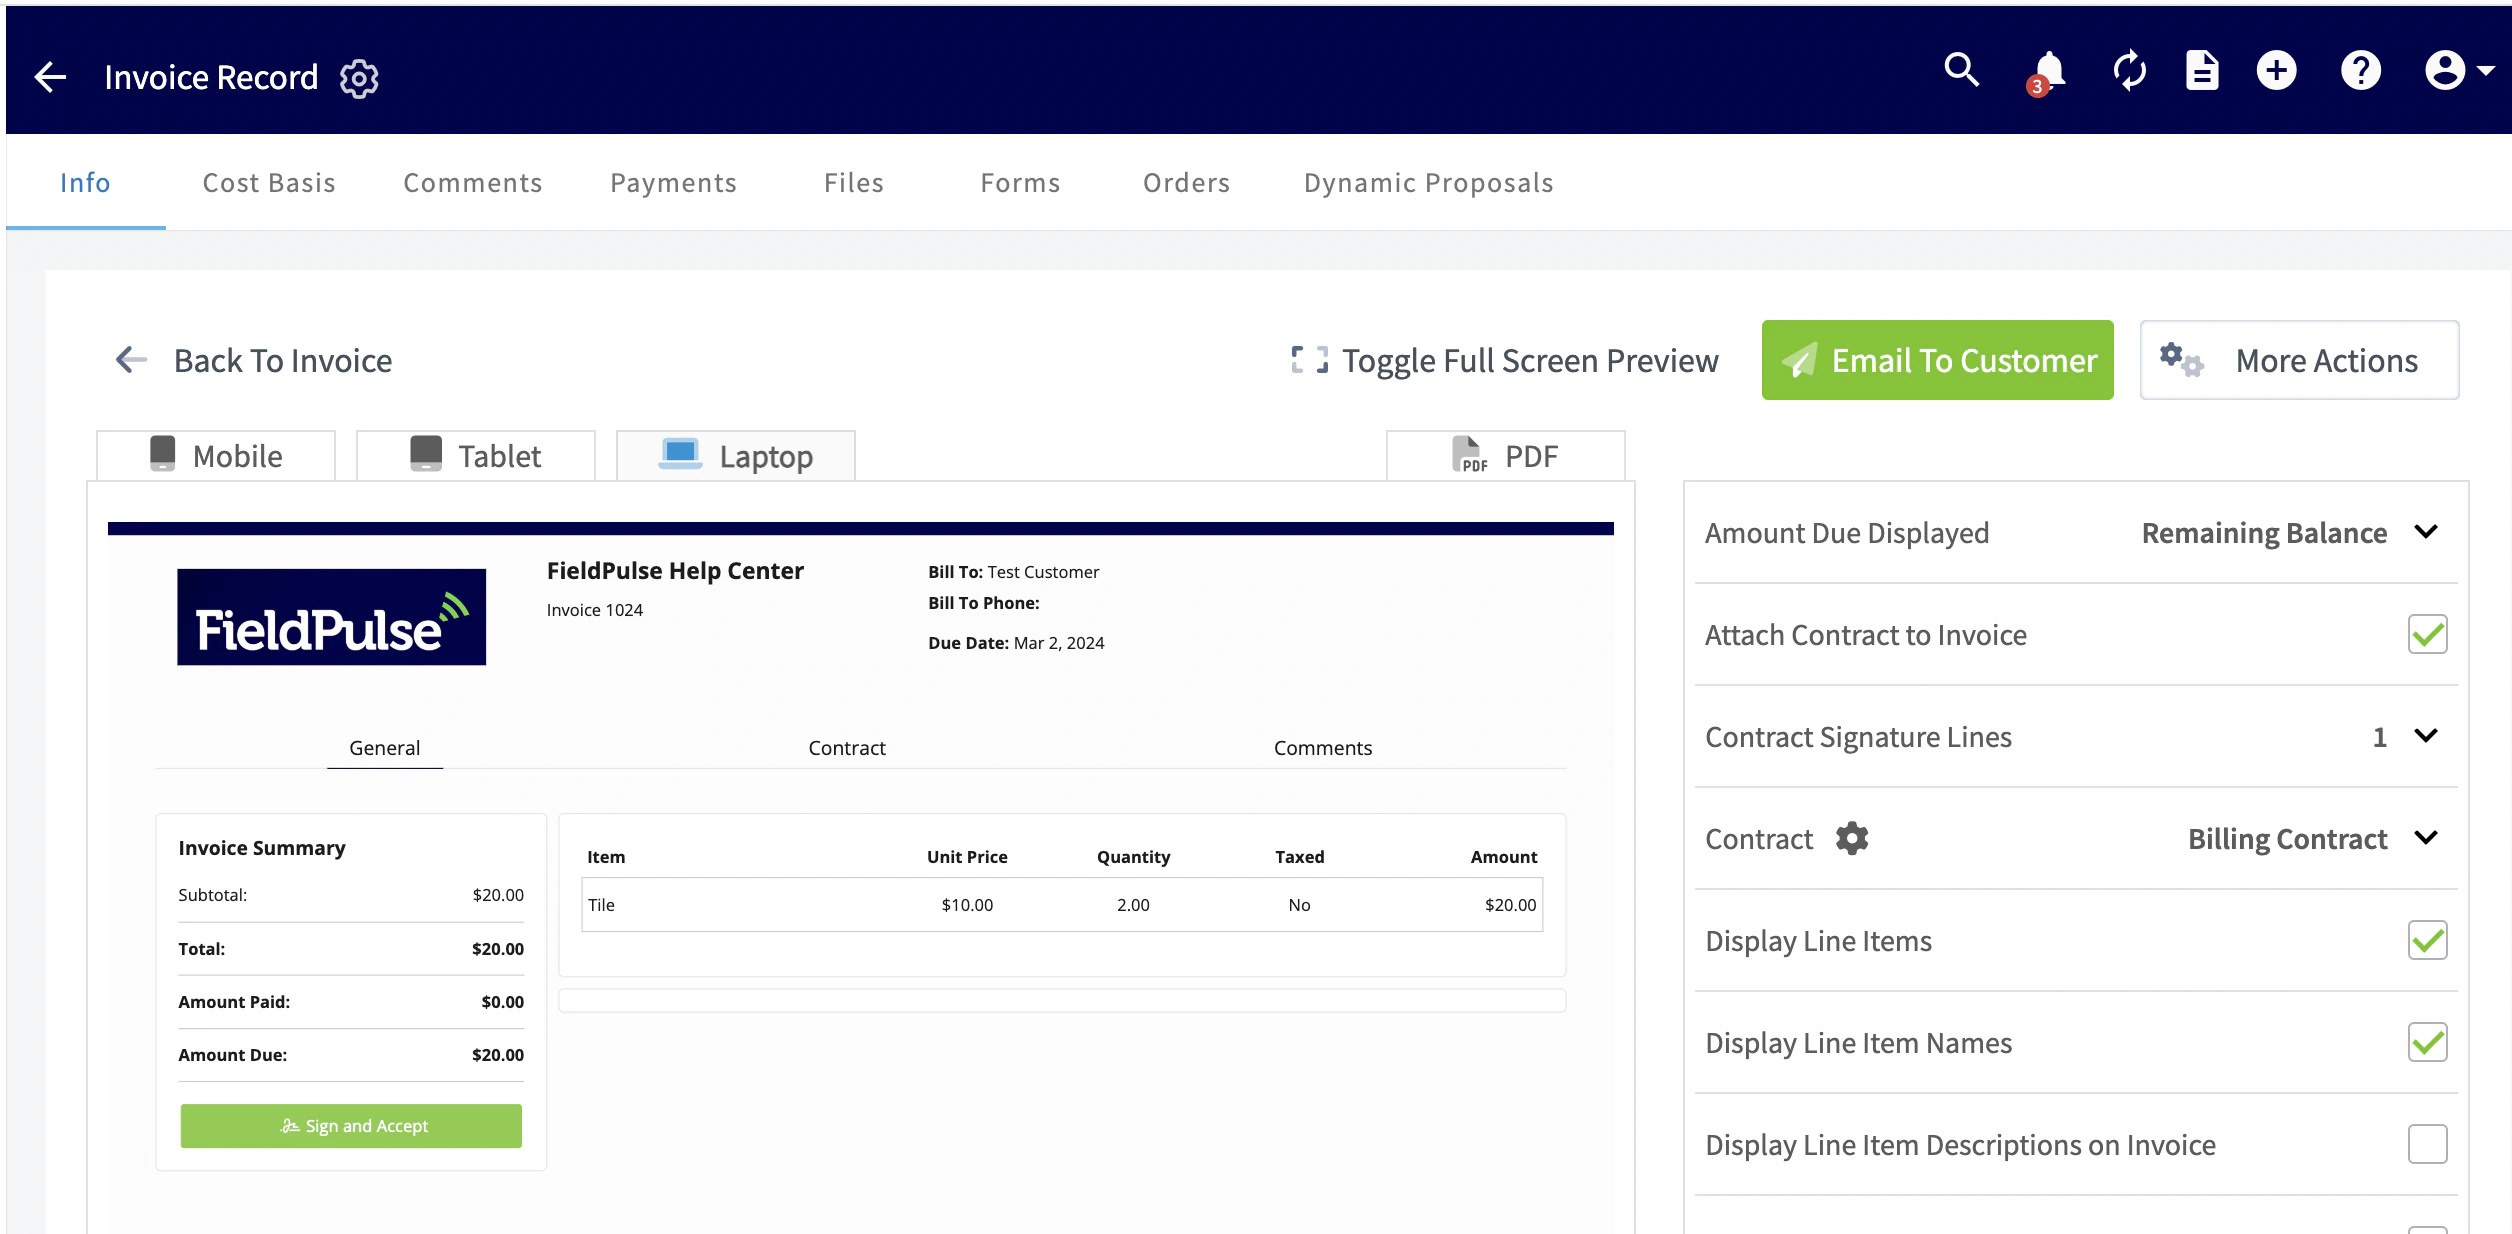
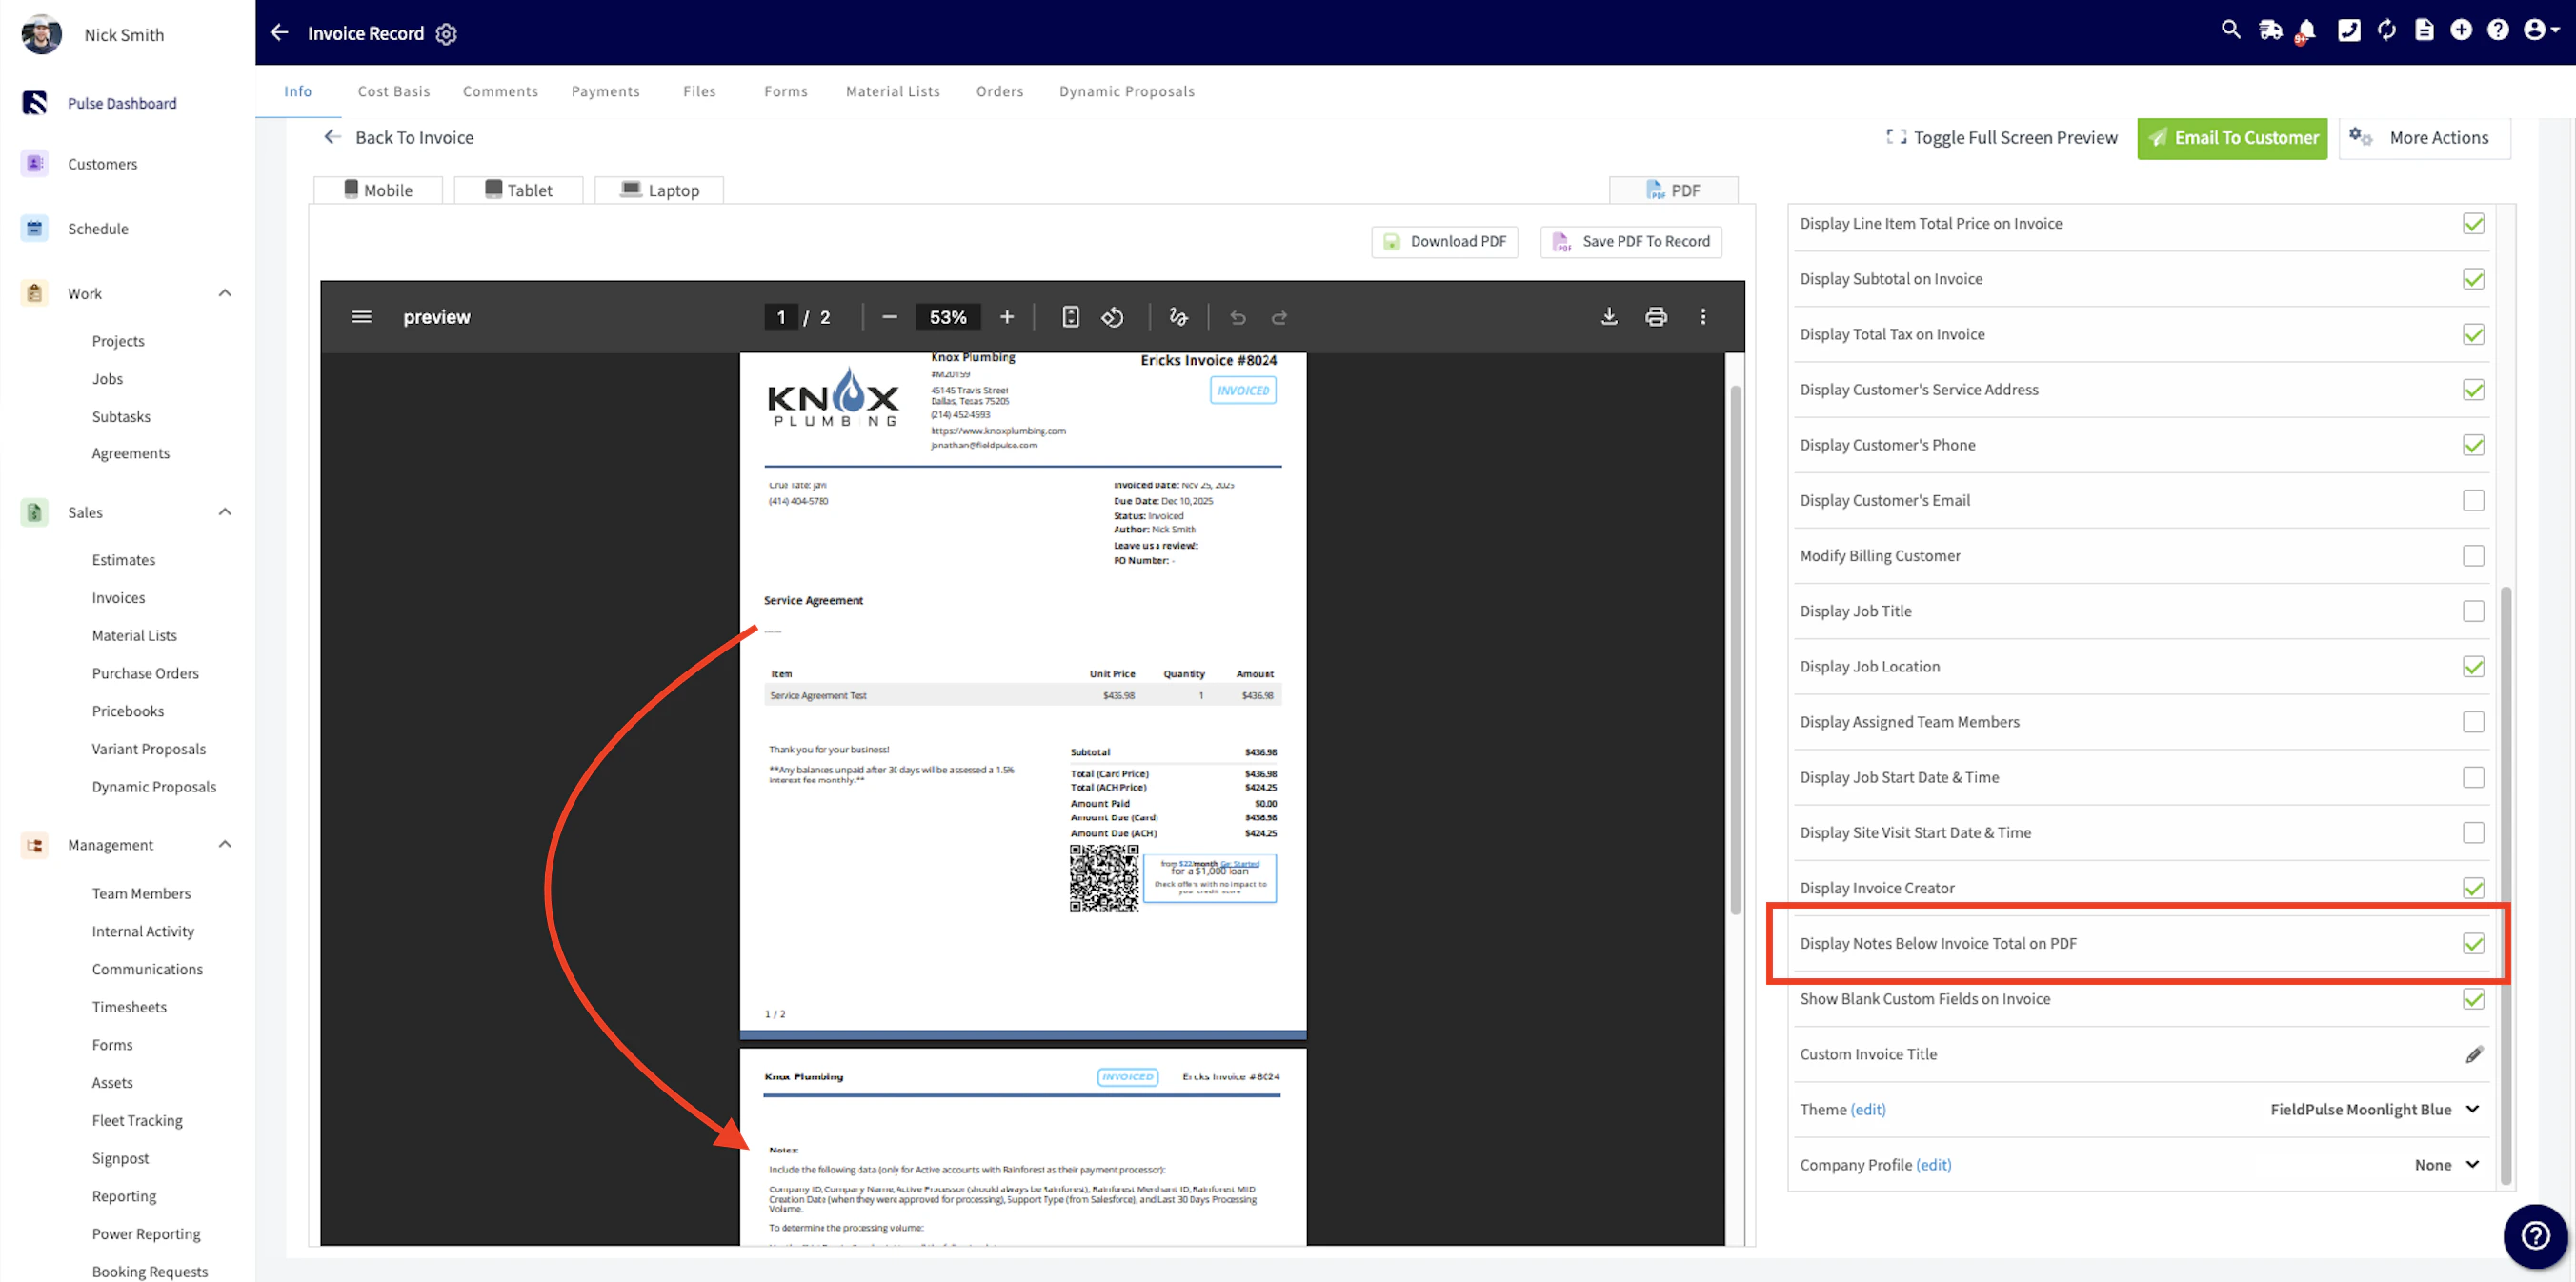
Preview Settings
Click on Preview Settings under Estimates & Invoices for more invoice setup options. In the first section you will enter your company information, as you want it displayed on the PDFs you send out to customers.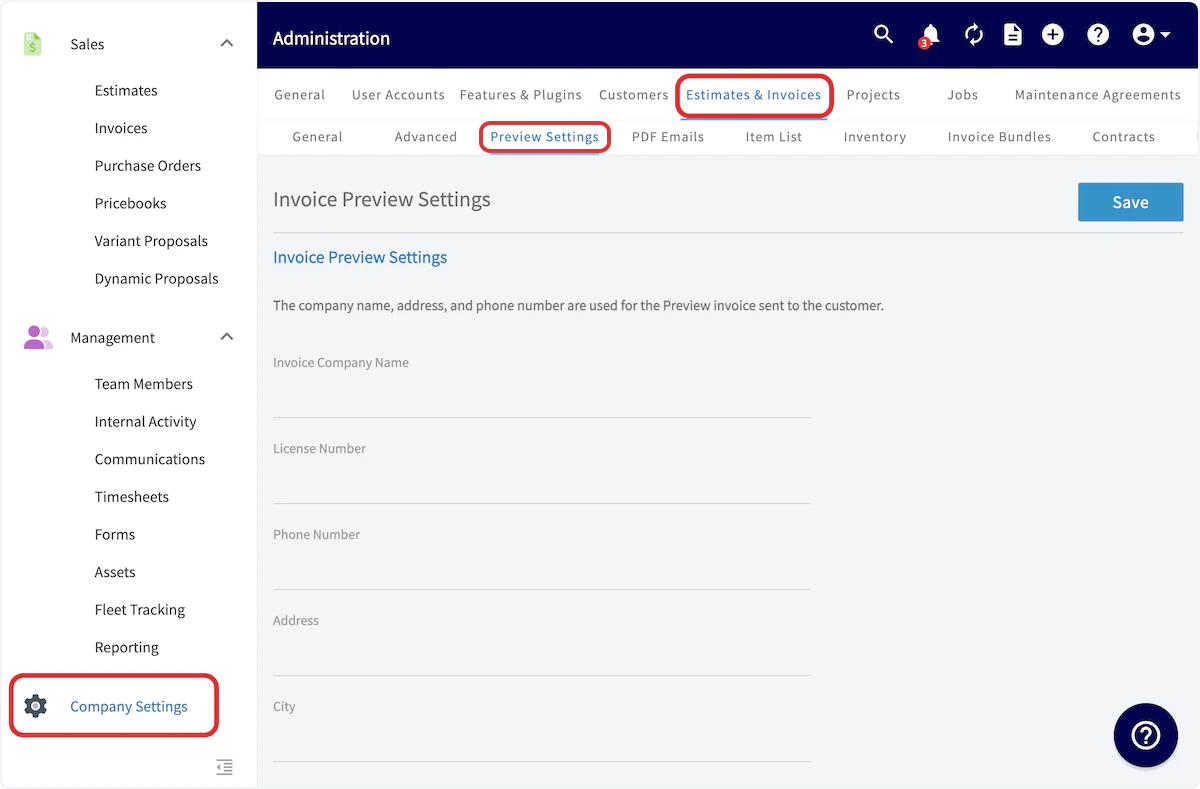
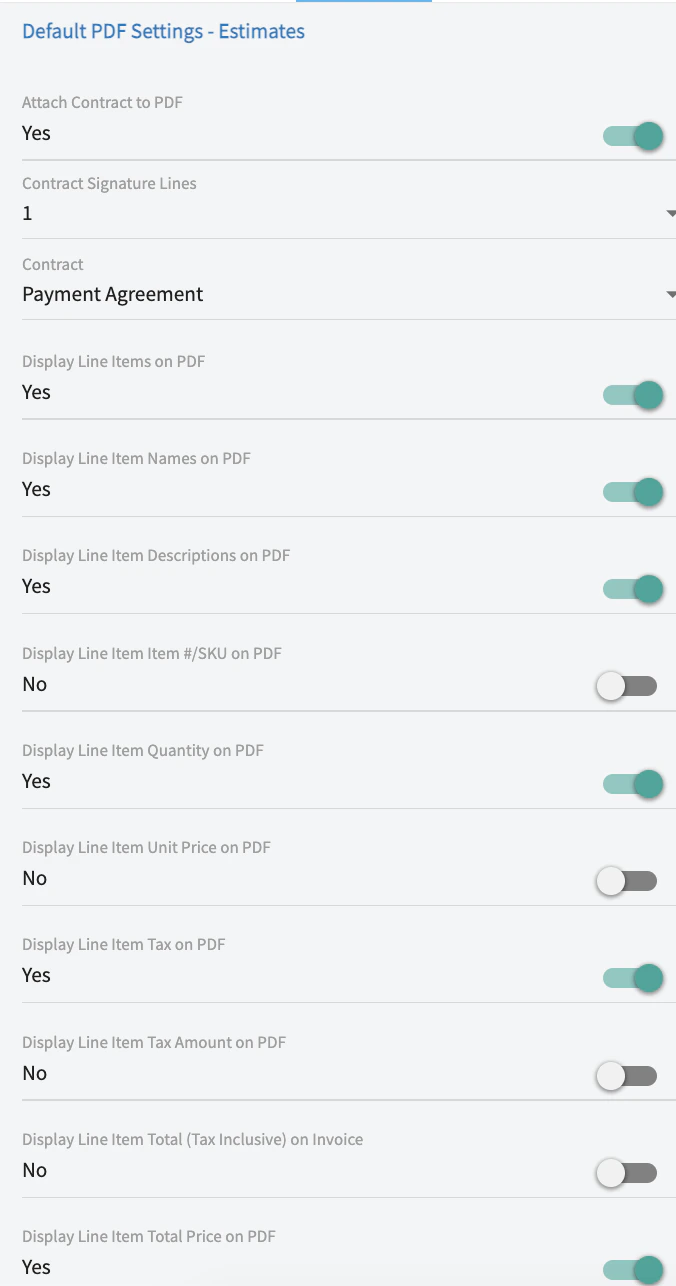
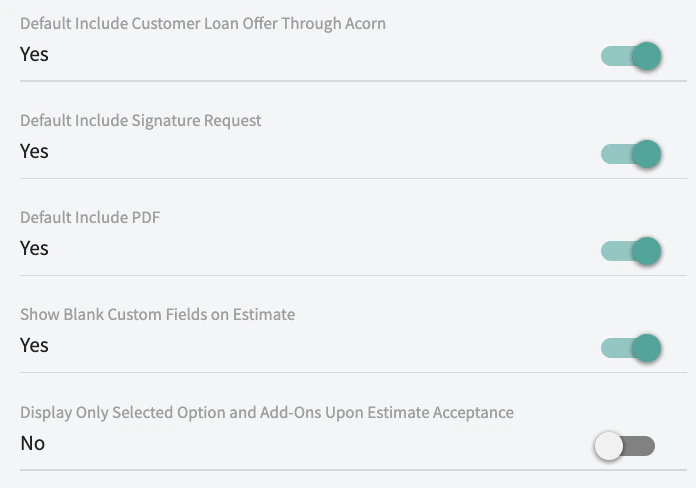
Default PDF Setting for Estimates:
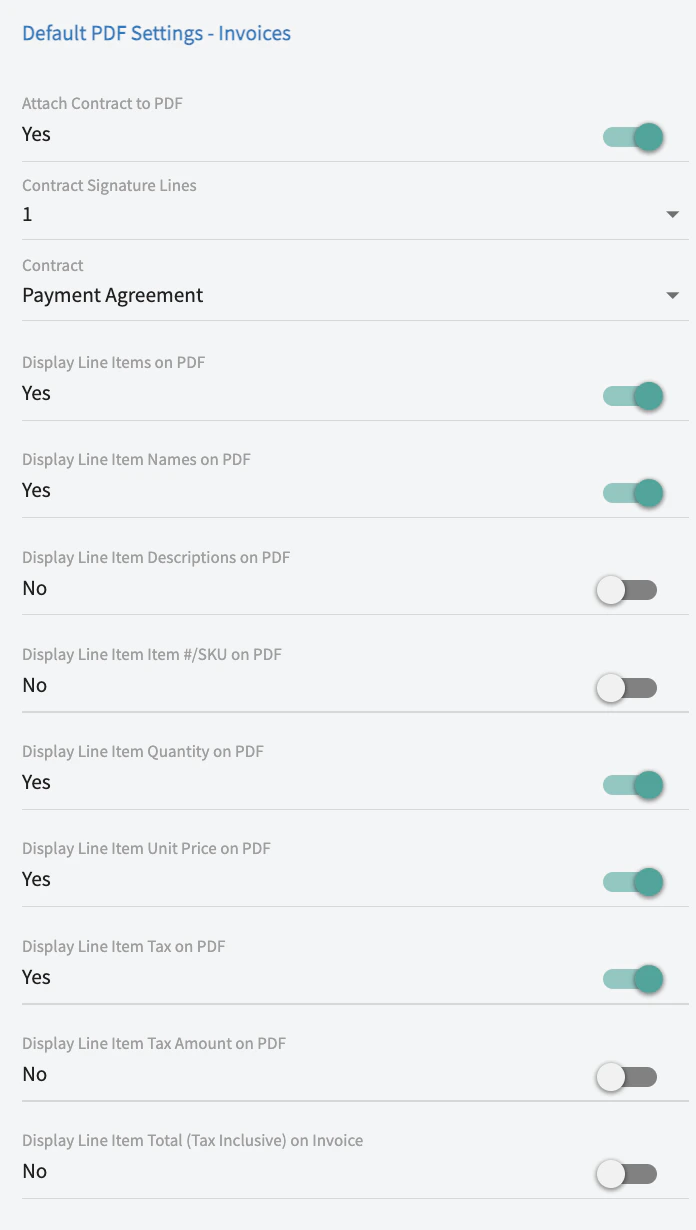
Default PDF Setting for Invoices:
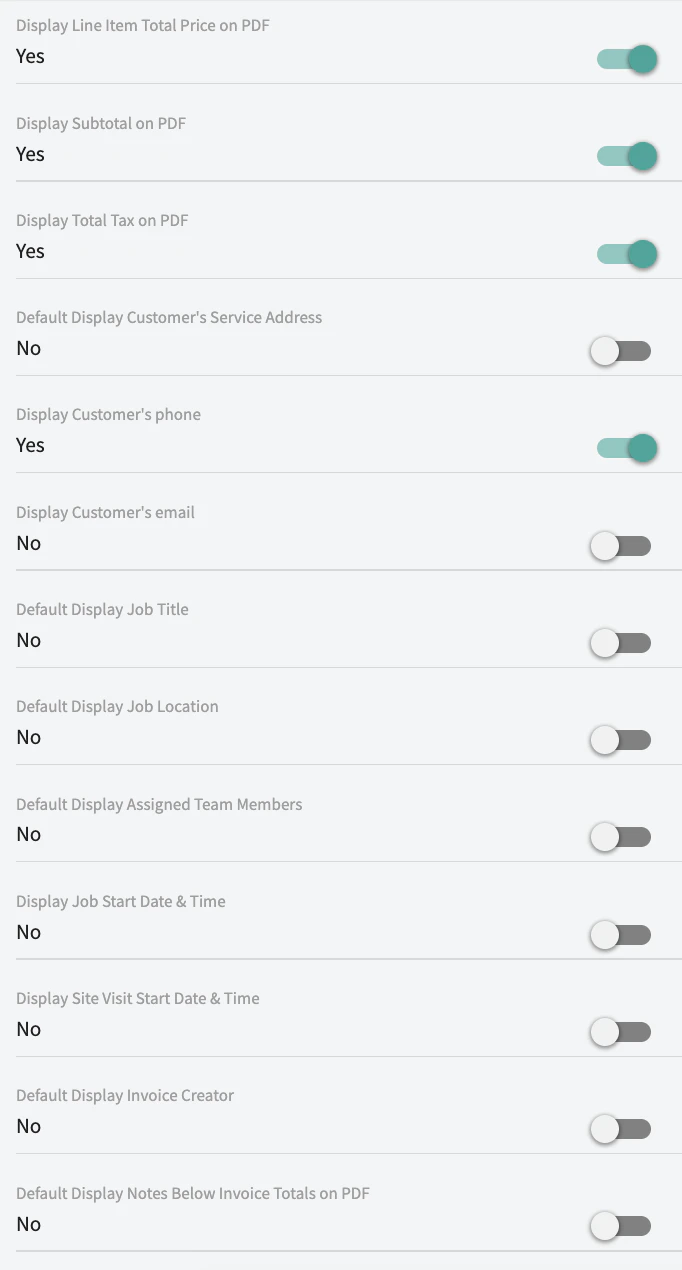
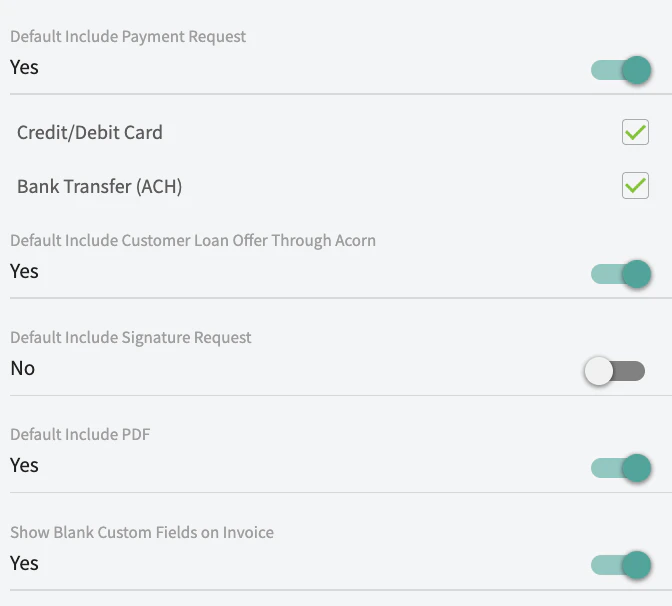
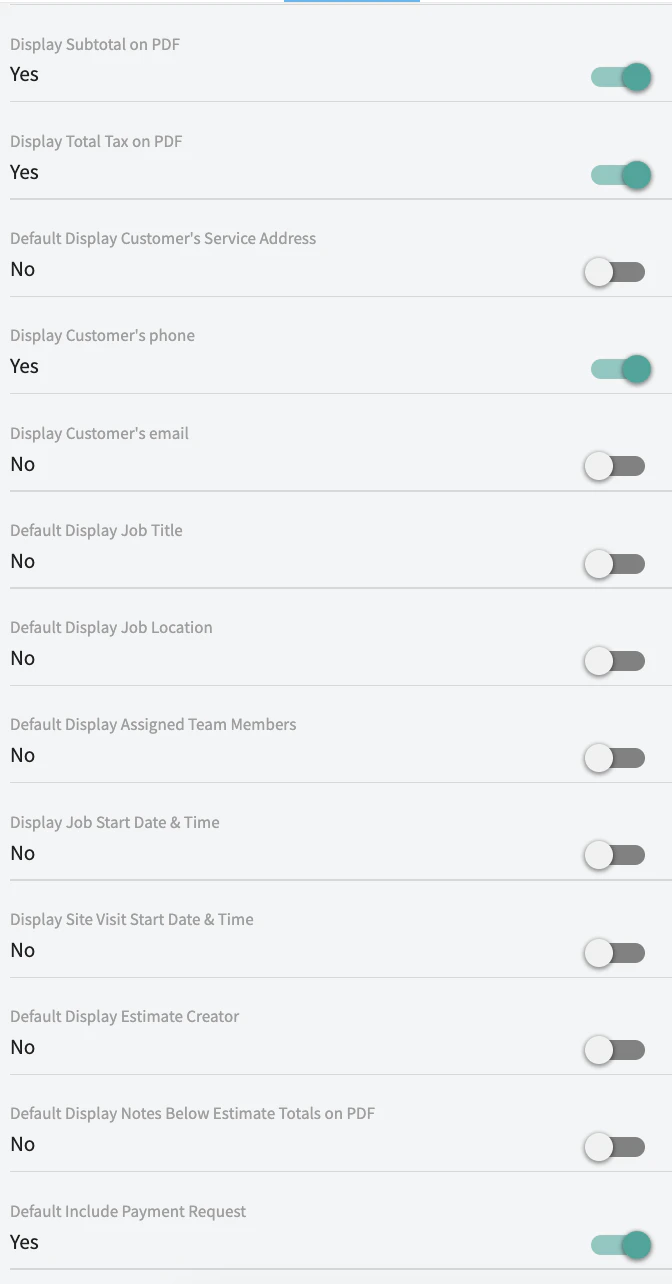
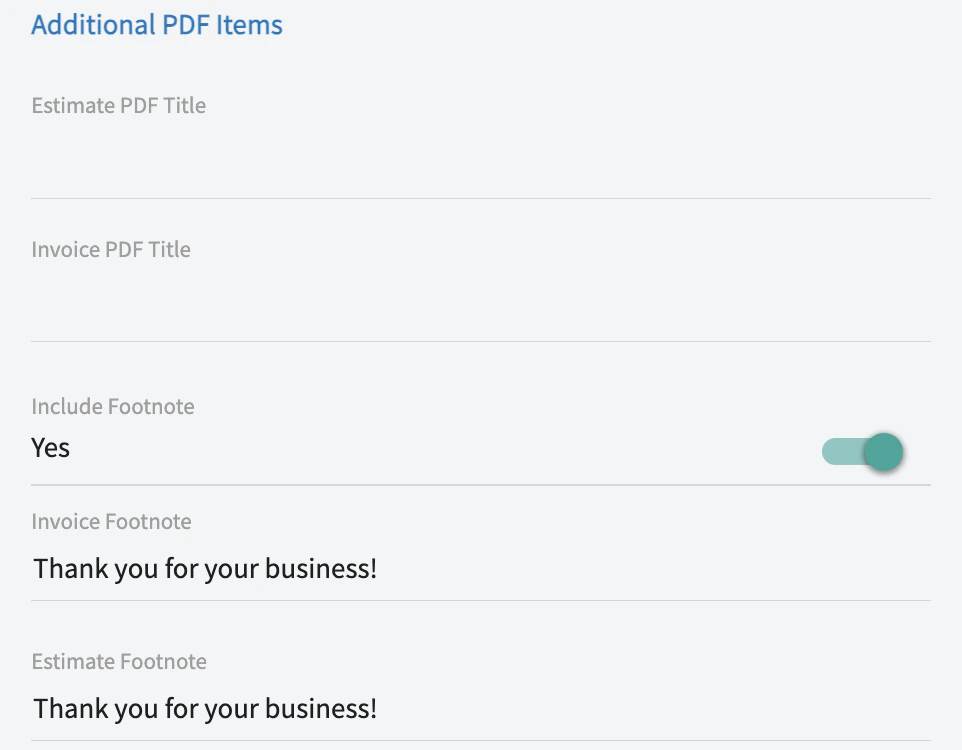
Additional Default PDF Items:
FAQs
Am I able to show both the per-item tax amount and the post-tax line total on my estimates and invoices? Yes. Go to Company Settings → Estimates & Invoices → Preview Settings and toggle on “Display Line Item Tax Amount” and “Display Line Item Total Price inclusive of tax” under the default PDF settings. You can also override these on a per-record basis from the Preview screen of any individual estimate or invoice. Can I change the term ‘Estimate’ to something else? Yes, you can change the term Estimate to instead be Proposal, Quote, or Bid to match your company’s terminology. The new term will also be displayed on your customer-facing PDFs. To change this term, click Company Settings in the lefthand menu, then Estimates & Invoices. Under the General tab, click Estimate Record Name and choose the terminology you want to use from the dropdown. After making changes, be sure to click Save.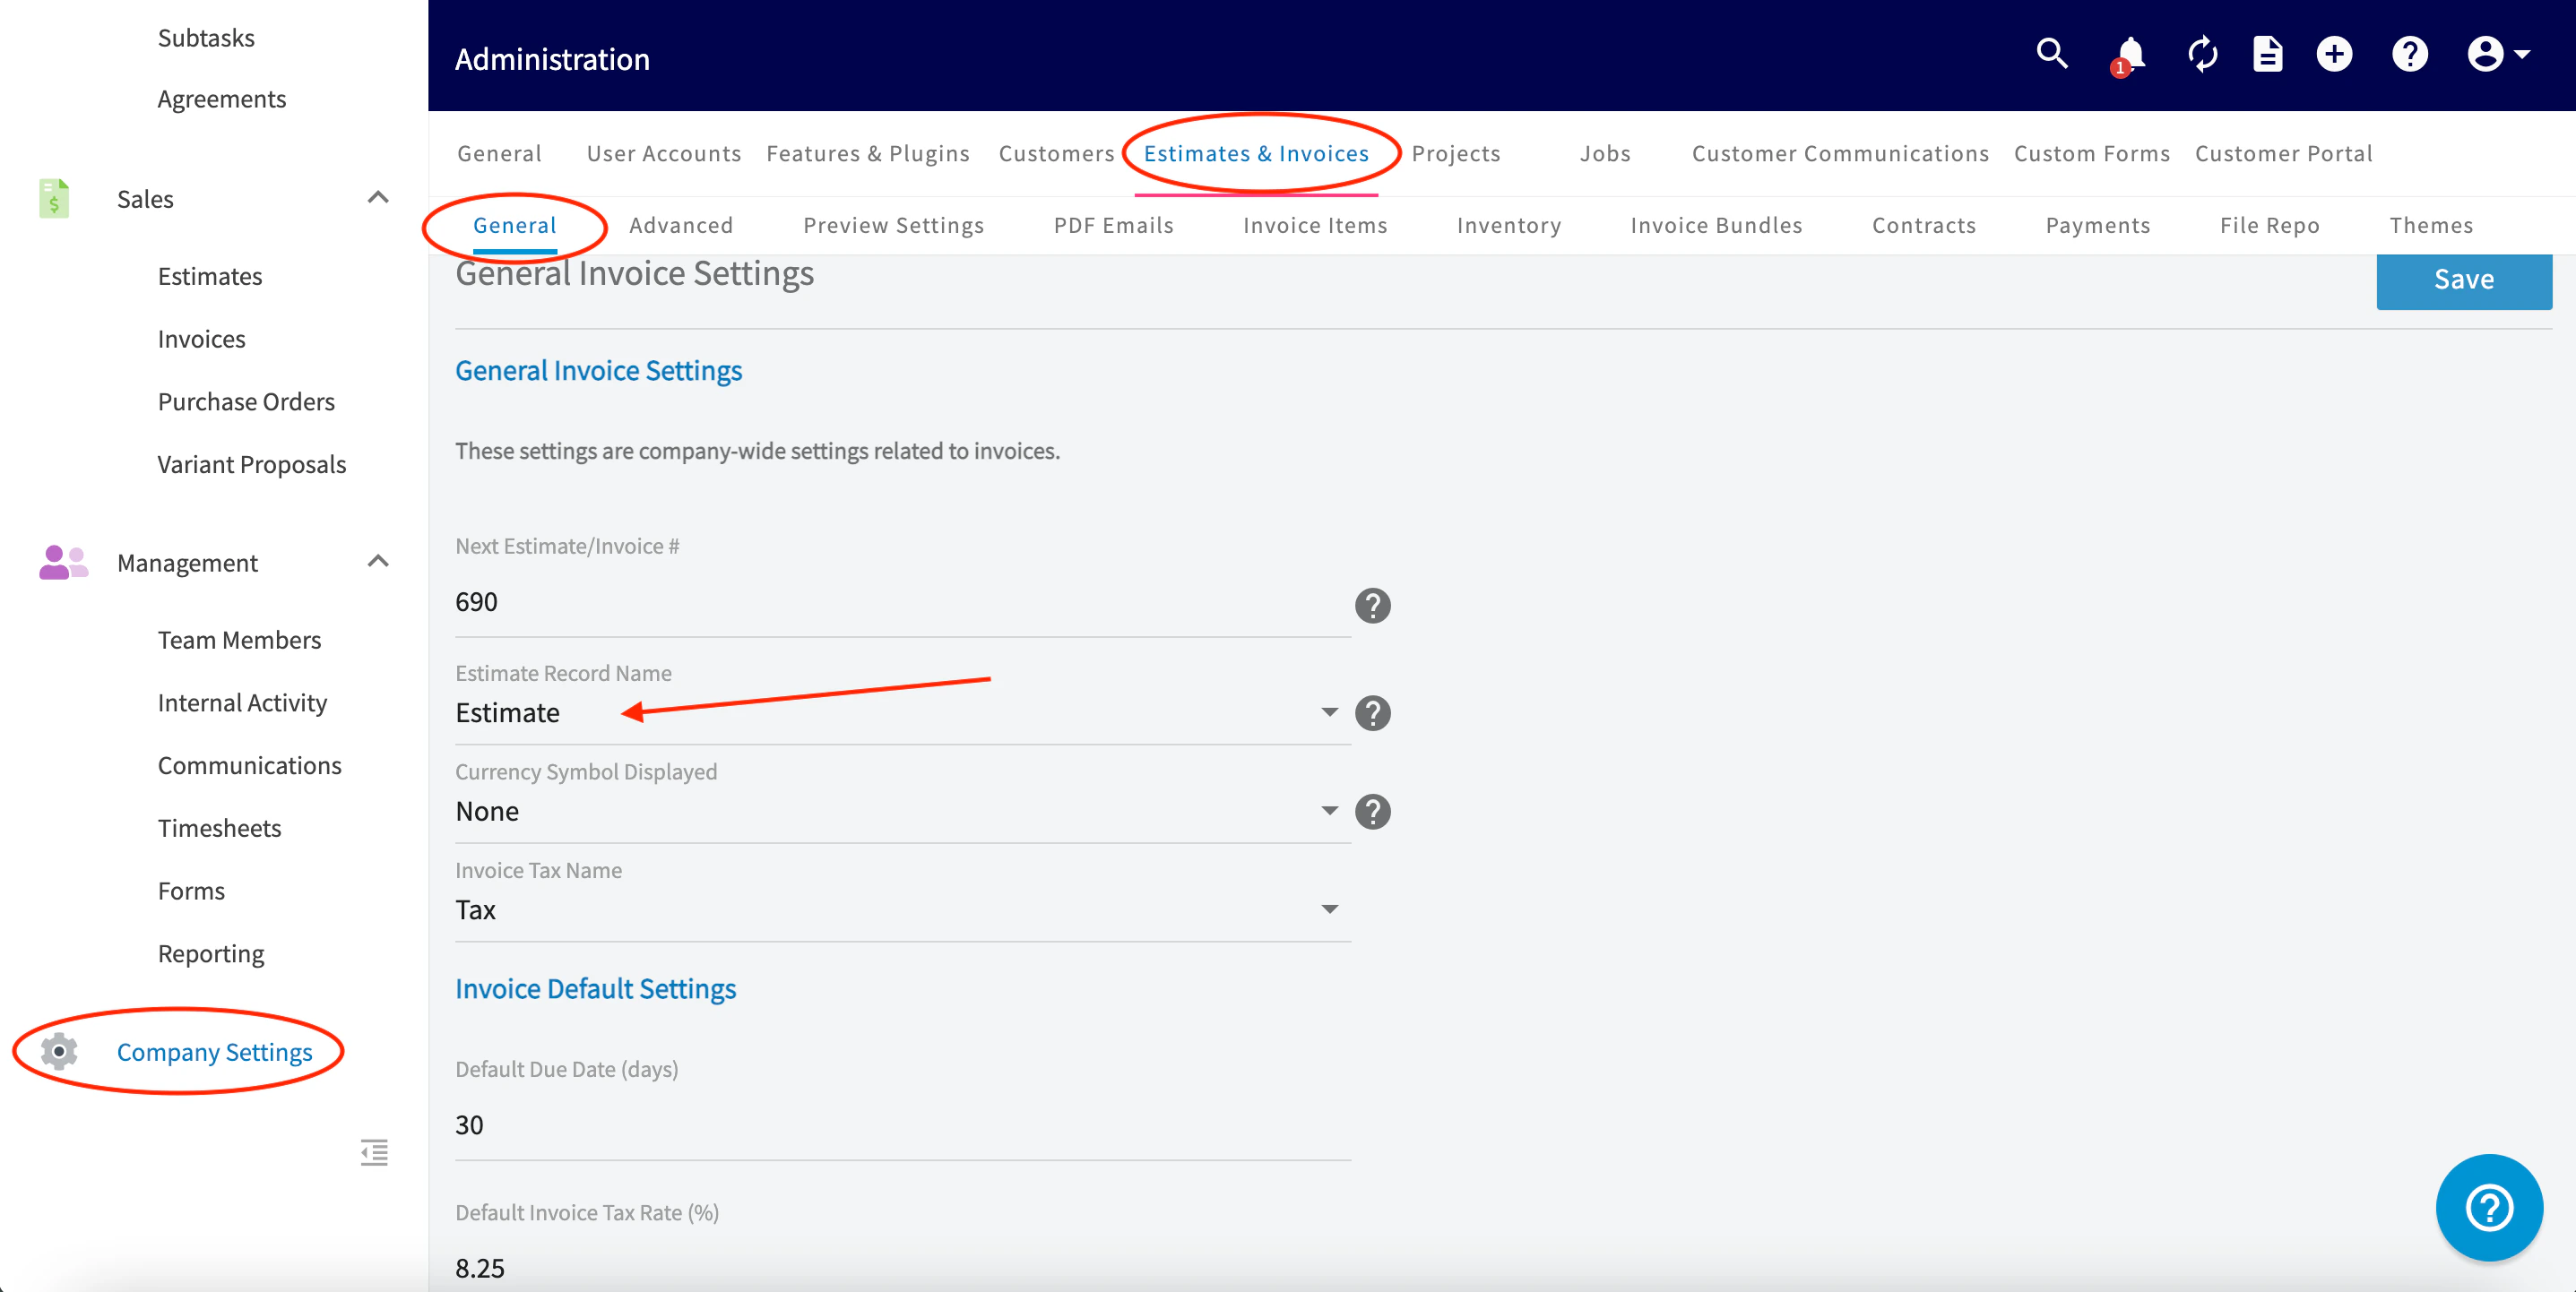
- To access this setting, go to the invoice preview screen.
- Look for the Display Line Item Quantities toggle.
- Click the toggle to turn it off.
Have additional questions? Contact us at support@fieldpulse.com or use the chat feature in the bottom right corner of your screen.